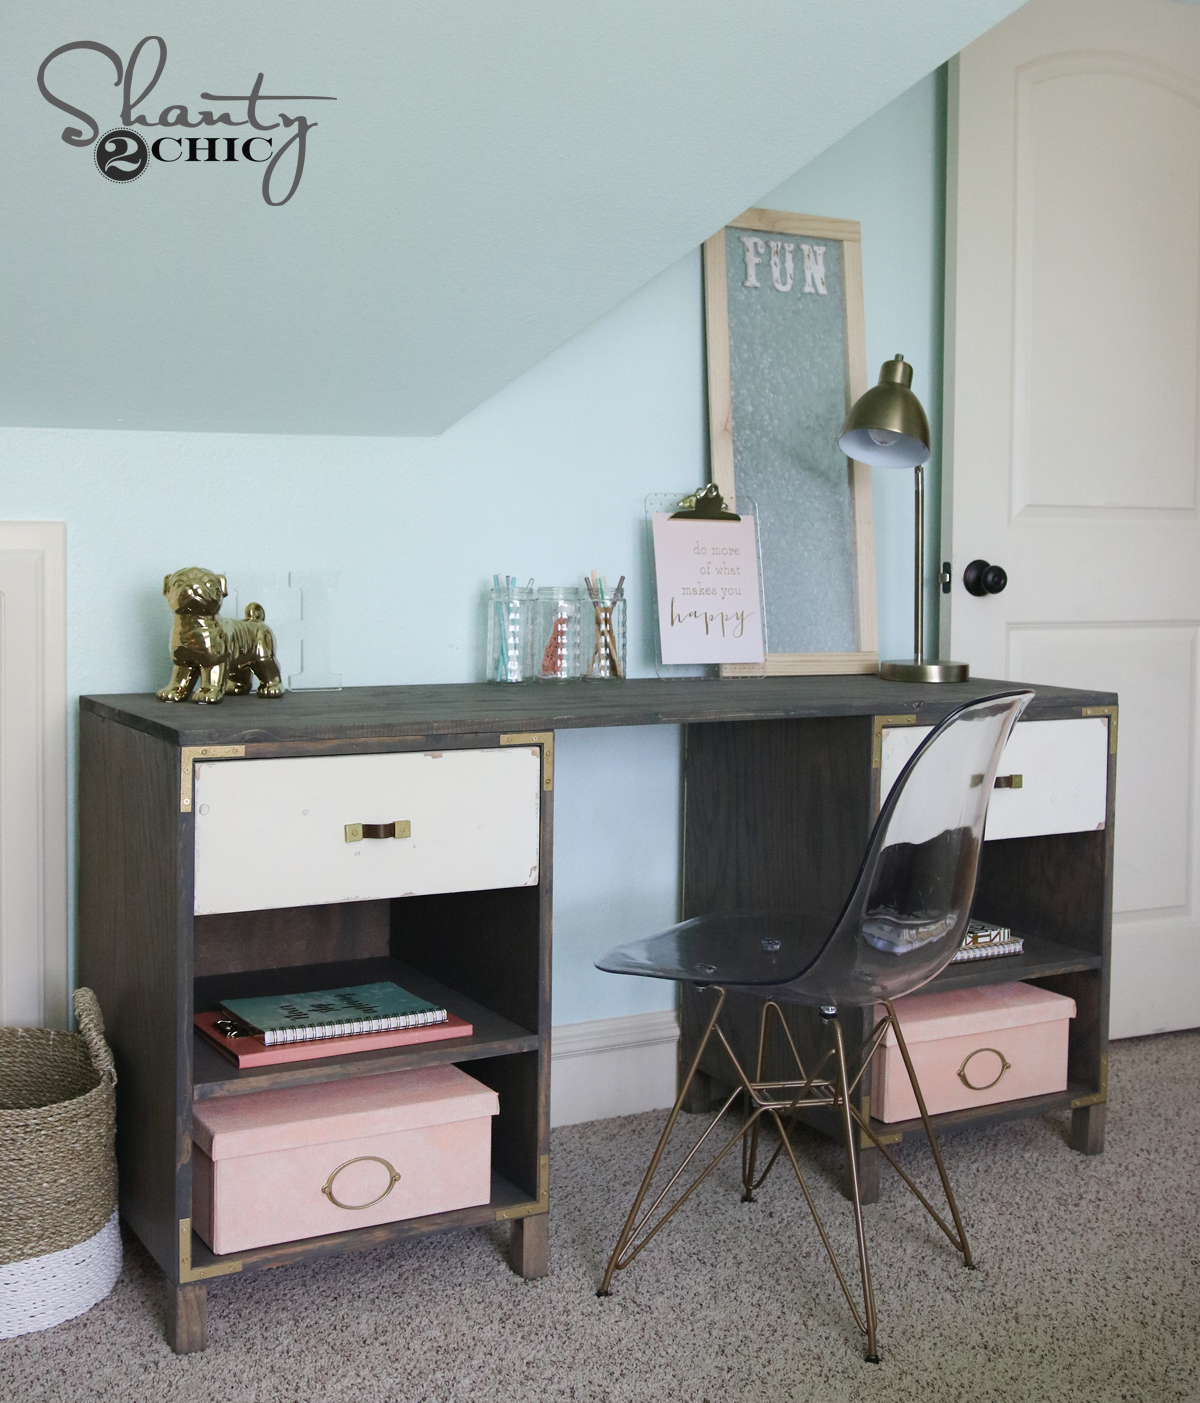
Hey friends! Be sure to catch the next two episodes of our show, Open Concept on HGTV on Sunday, June 12th at 11:00 and 11:30am CST! Ok – today we are going to be talking about this awesome DIY Cubby Storage Desk we built for our kids.
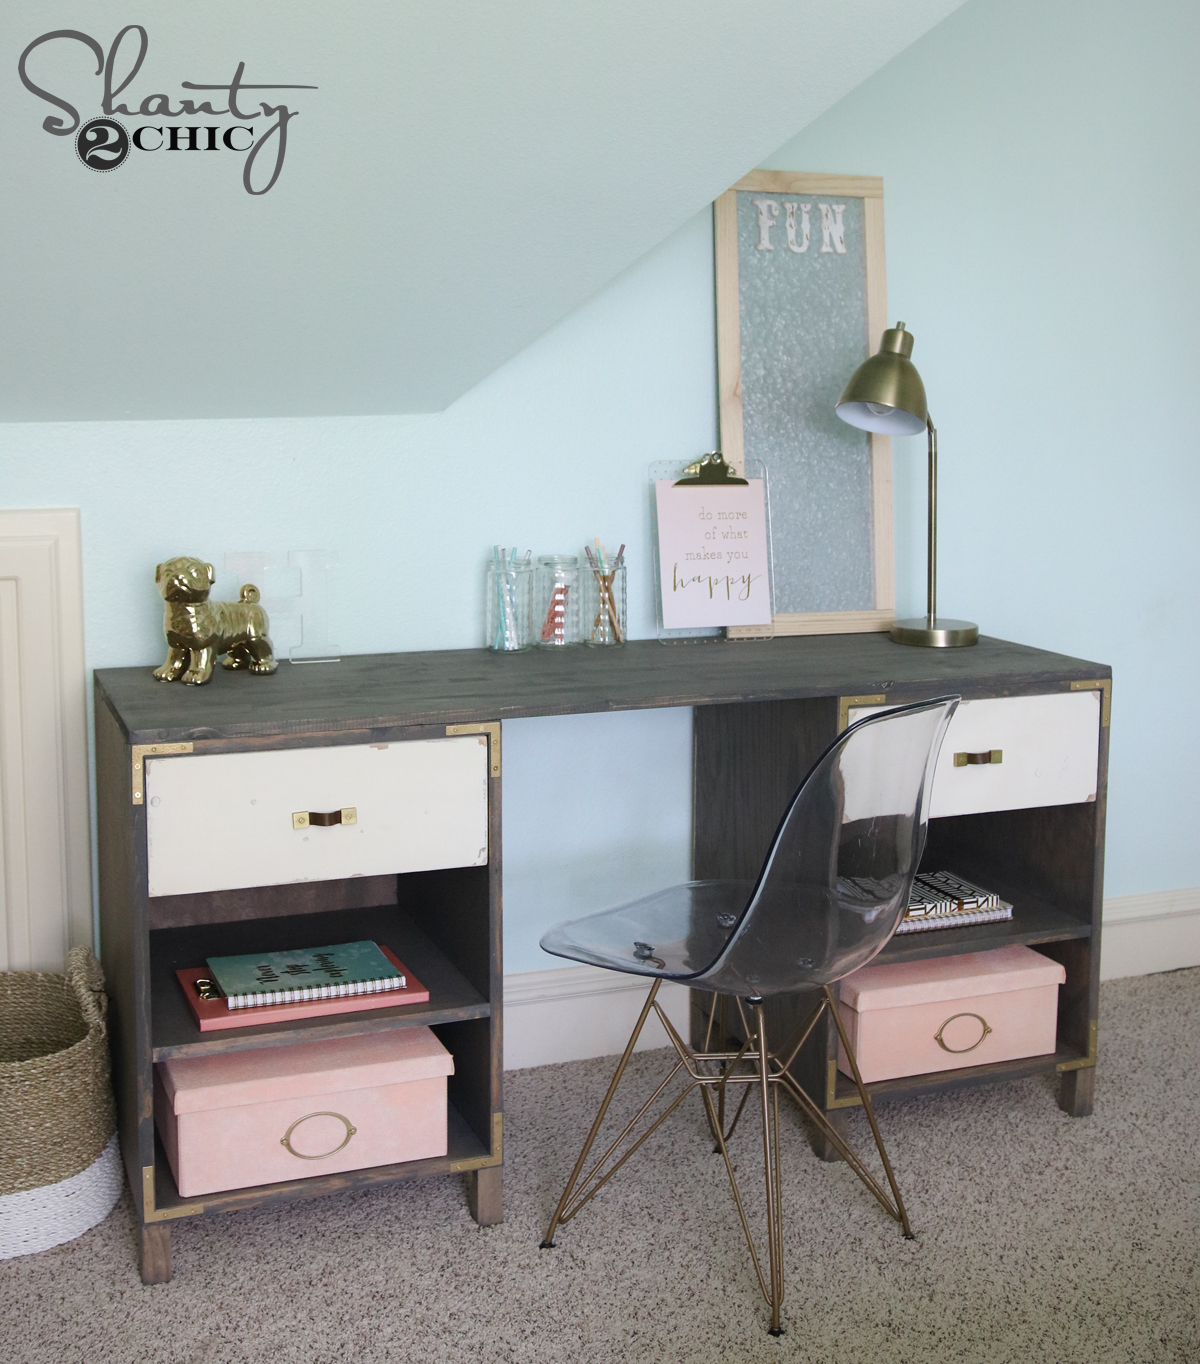
I love having teenage-ish girls. I love designing and building them pieces and decorating them pink and putting gold dogs on them… 🙂 It’s so fun! This latest build is for my second to oldest little lady. I recently built her a platform bed I shared the plans for a few weeks ago. I am in the process of revamping her room a bit, and the desk was the next item on the list. I love how it turned out! Check out her new DIY Cubby Storage Desk!
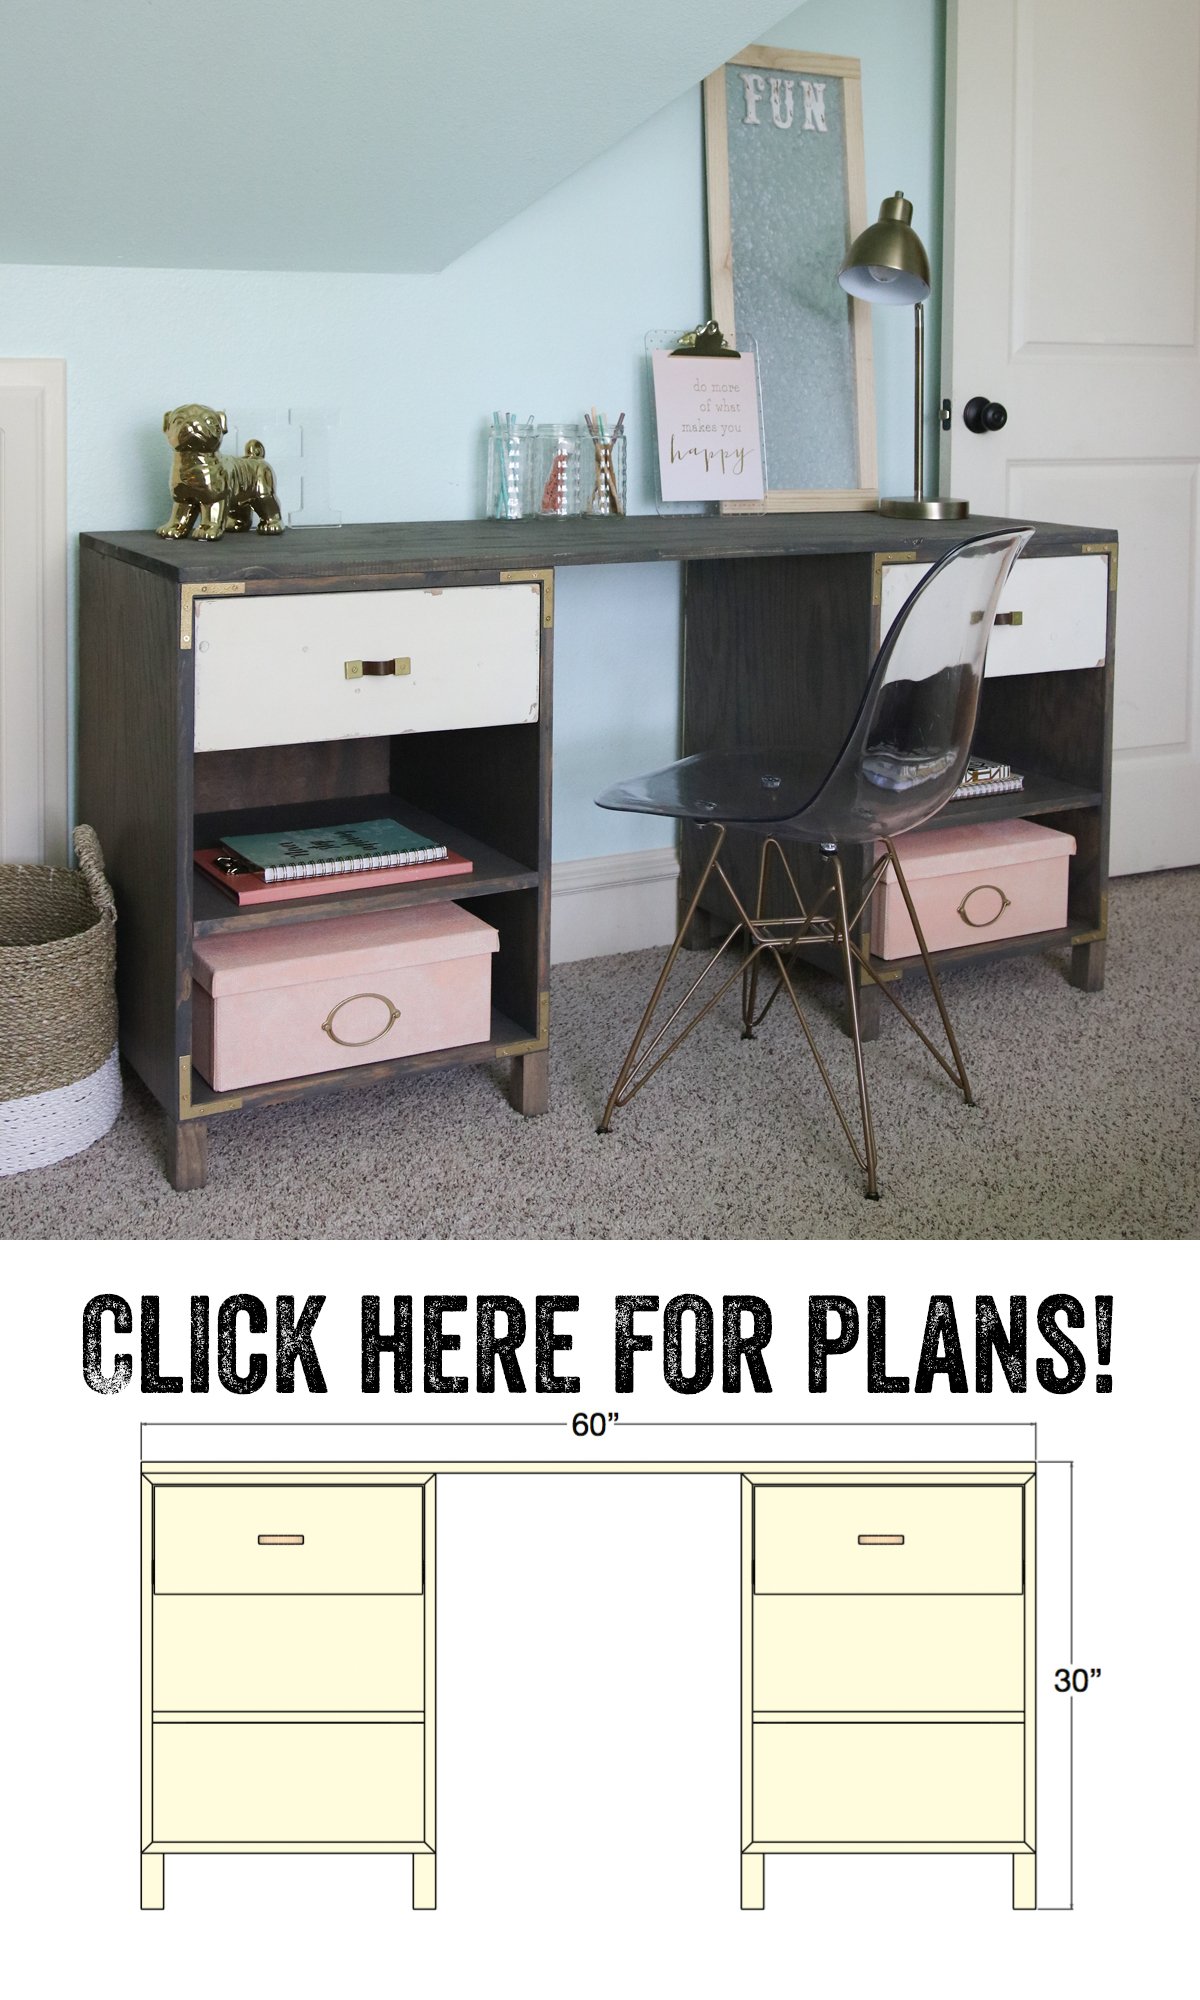
How cute is that? I think it’s style will grow with her for years (or until I get bored and build her a new one 😉 ) This is a really simple build. If you’ve never tackled drawer slides before, this is a great one to start with. I will share the entire build below, and you can also download and print the FREE PLANS by clicking HERE or the button below!
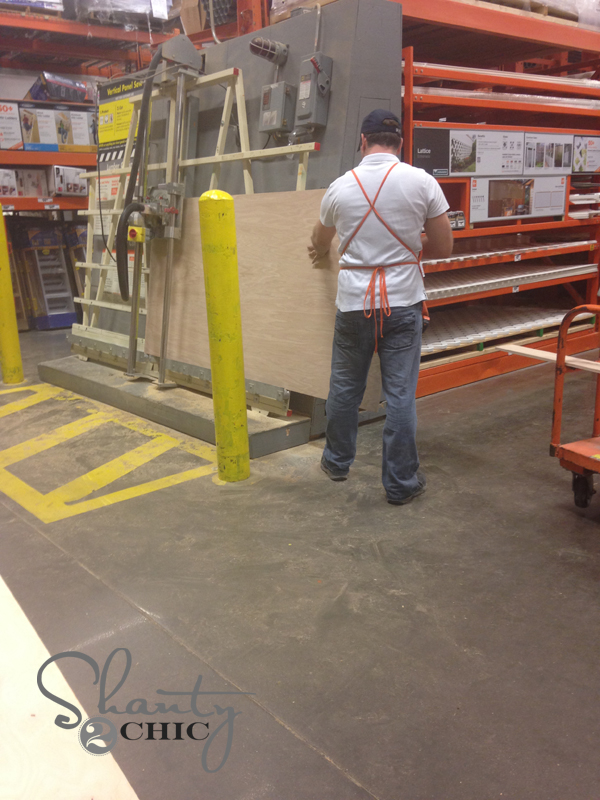
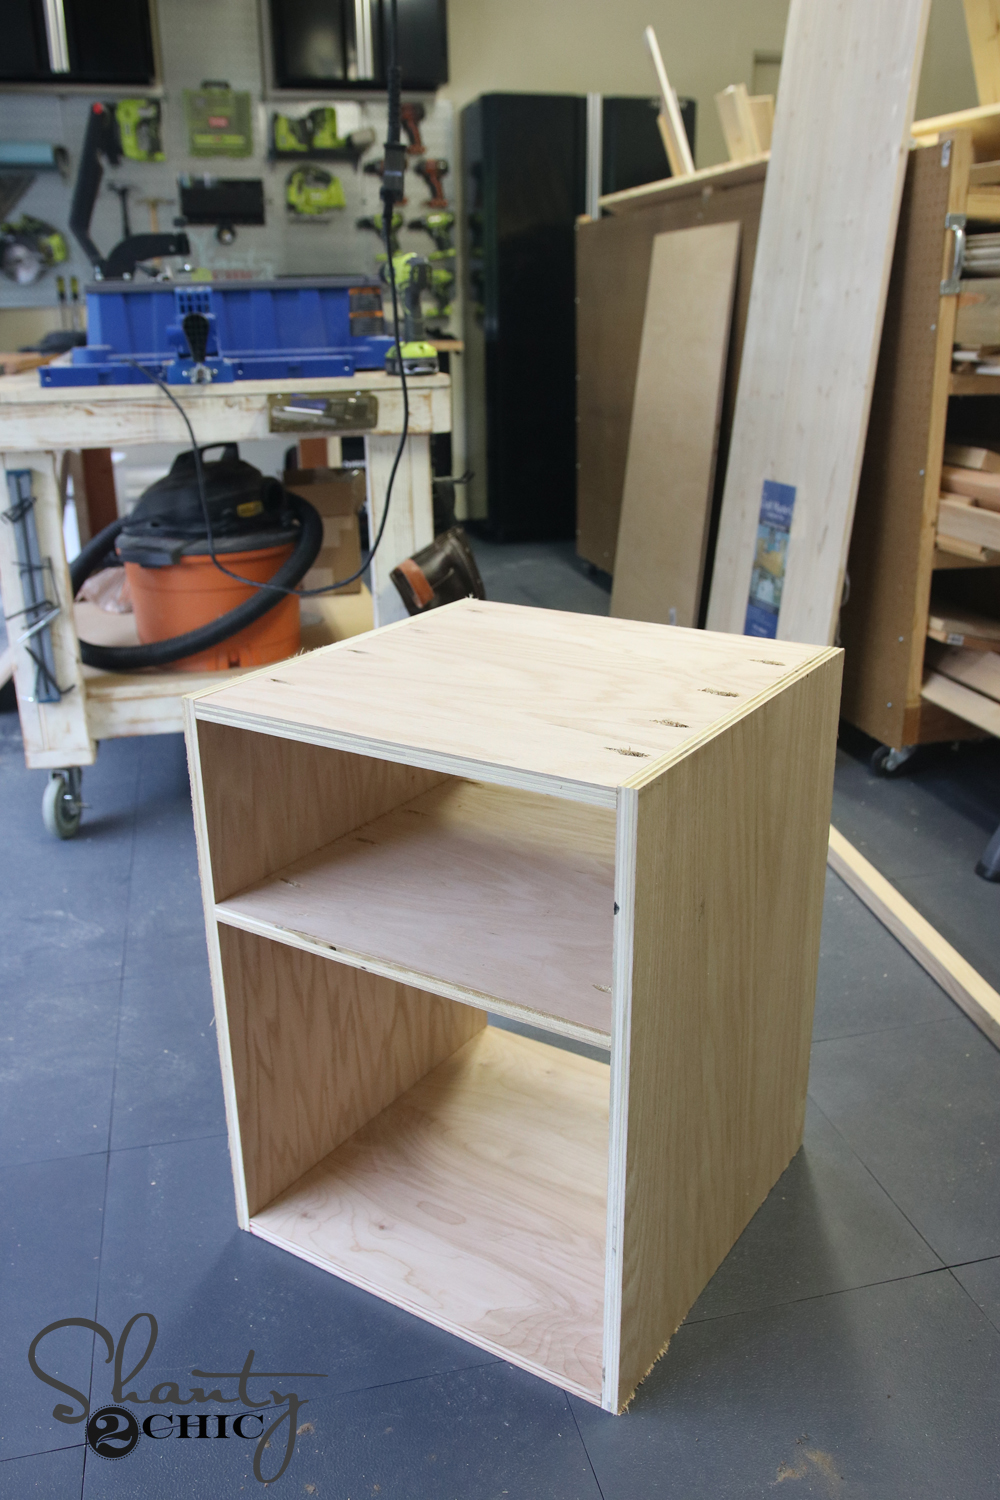
The first step of this desk is building the boxes that will form each side. These are constructed from hardwood plywood. I used Purebond Plywood from Home Depot to for mine. These come in big 4′ x 8′ sheets and we have the guys at Depot cut it down for us so we can get it home.
A little more detail… On the plans, you will see how we have shown the cuts. It looks like this…
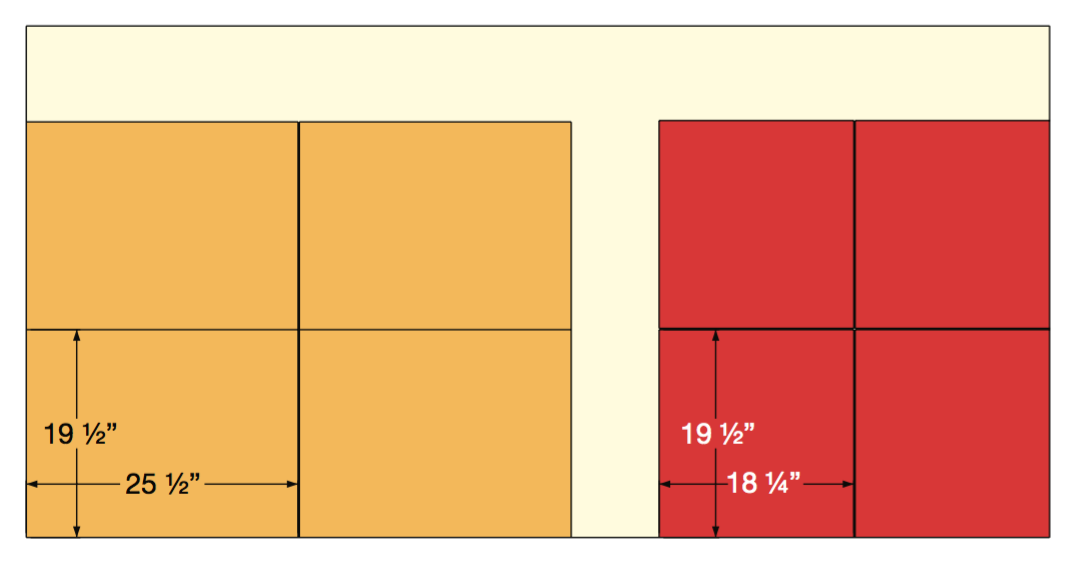
So… I had him rip (that’s a cut that go’s the length of the board and parallel with the grain of the wood) two pieces at 19.5″ each. That left me with two 19.5″ x 96″ pieces and a scrap piece as well. I took those home and made all of my smaller cross cuts on my miter saw.
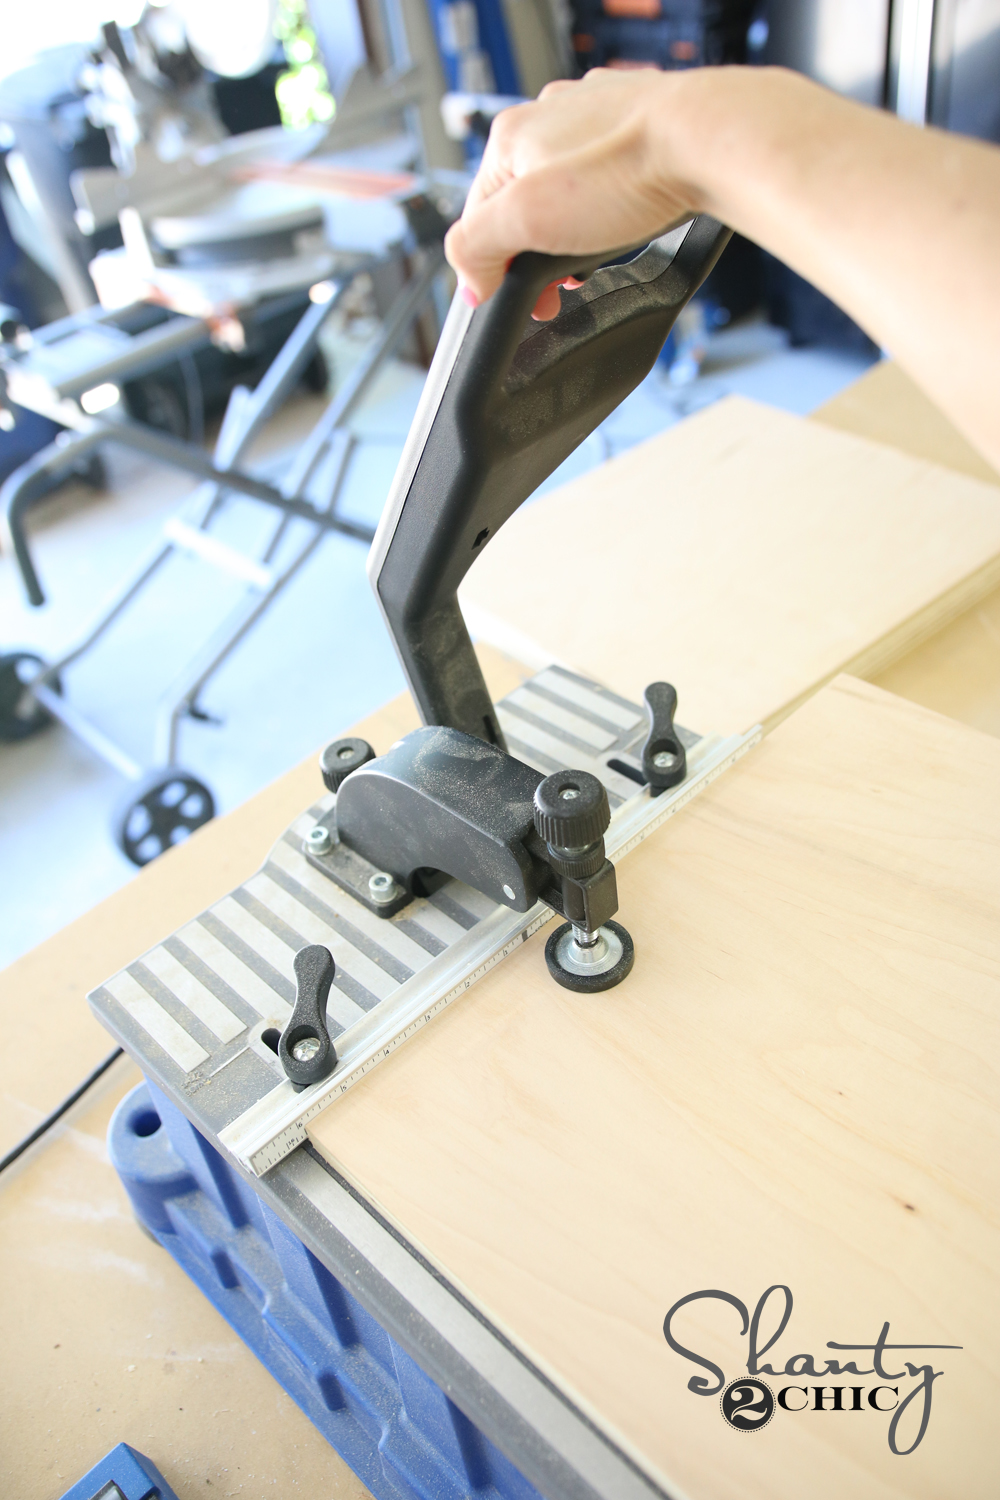
Once you have your cuts made for the boxes, it’s pocket hole time. We love our Kreg Jigs, which you may already know 🙂 It can be a little overwhelming deciding which Kreg Jig to start with. Ash and I have used all models, and you can’t go wrong with any of them. We do recommend that if you are going to build more than one piece of furniture, go ahead and get the K5. It’s legit… Super user friendly. I actually used my Kreg Foreman to make my pocket holes. This thing is the real deal. If you make lots of pocket holes and build lots of furniture, you need to add this to your “must buy right now” list.

It’s a Kreg Jig on steroids really… 🙂 It will crank out almost a pocket hole a second if you are fast. You just plug it in and pull down on the handle.
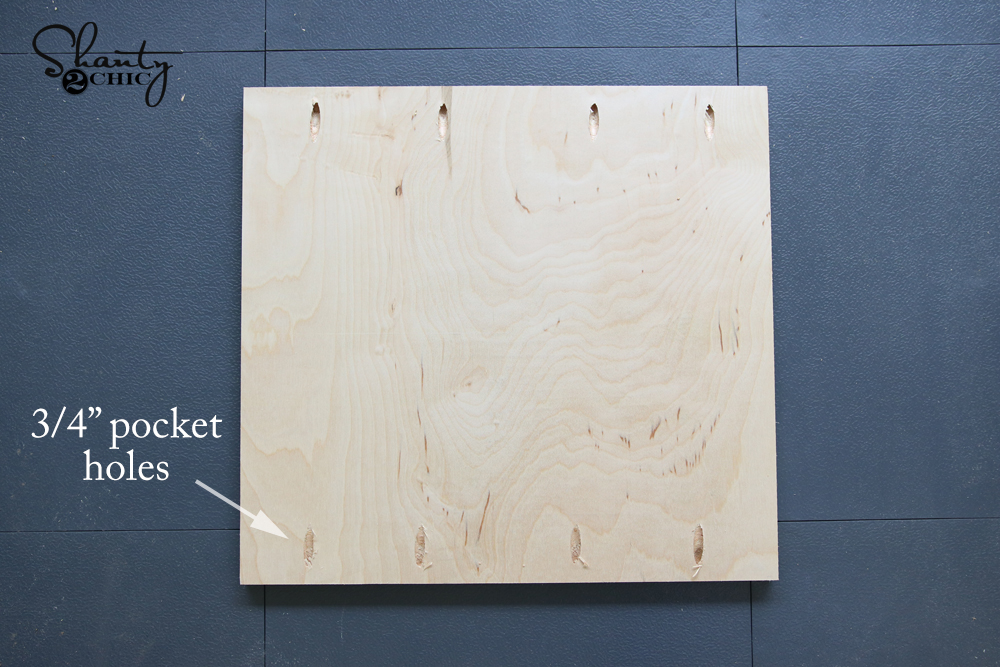
The top, bottom and shelf pieces of your boxes will look a bit like this after making your pocket holes.
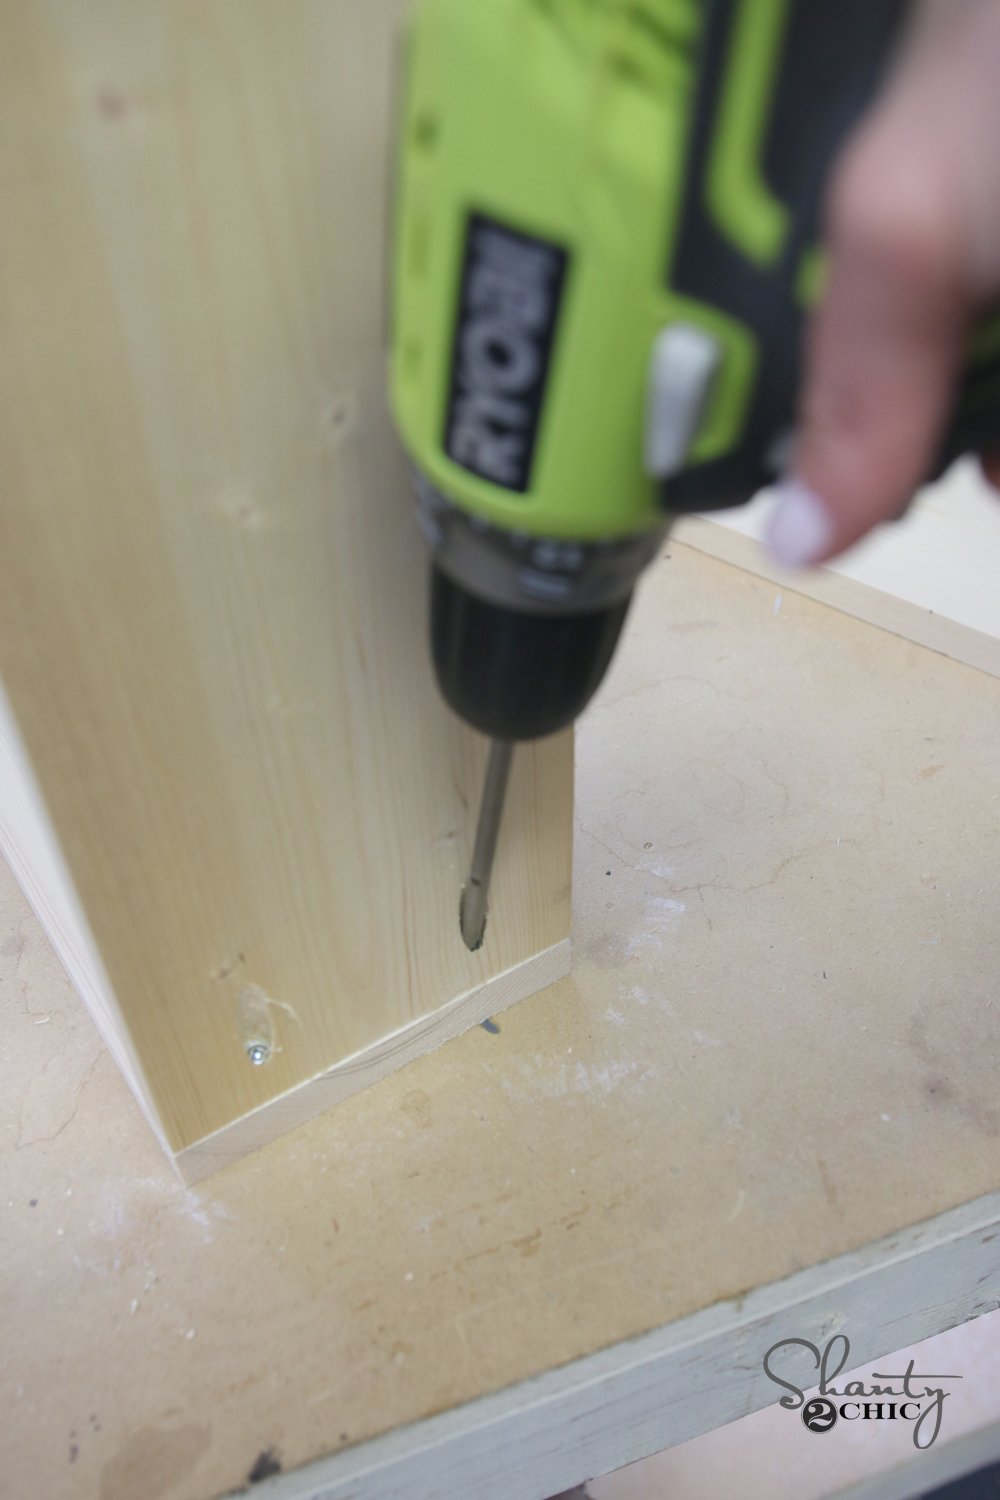
I drew out my lines on my longer side pieces using a speed square. This is the fastest way to get a square and accurate line.

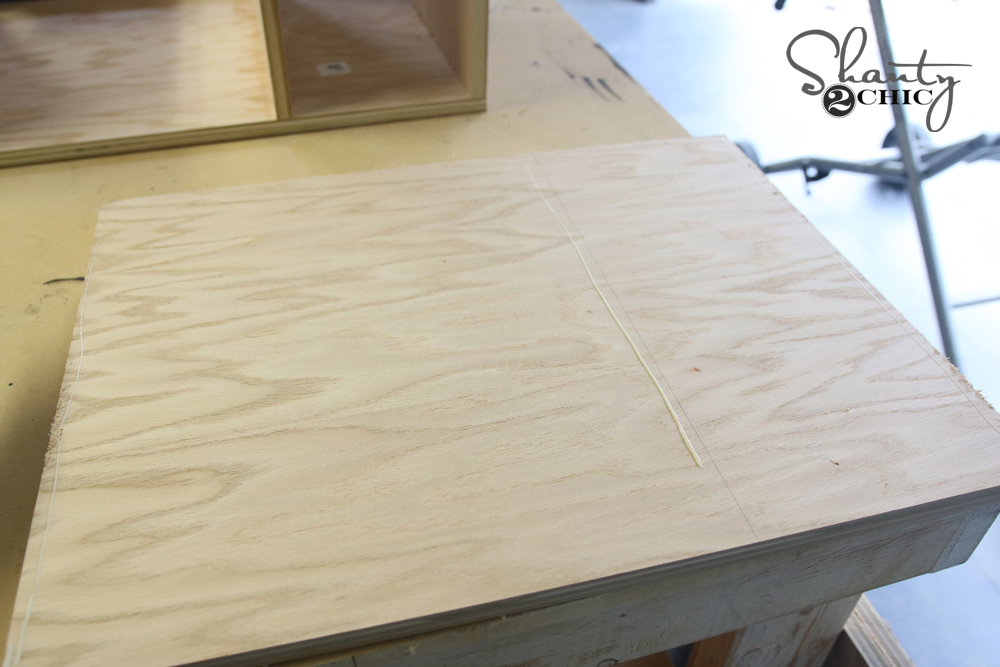
I added a line of wood glue where my shorter pieces would line up.
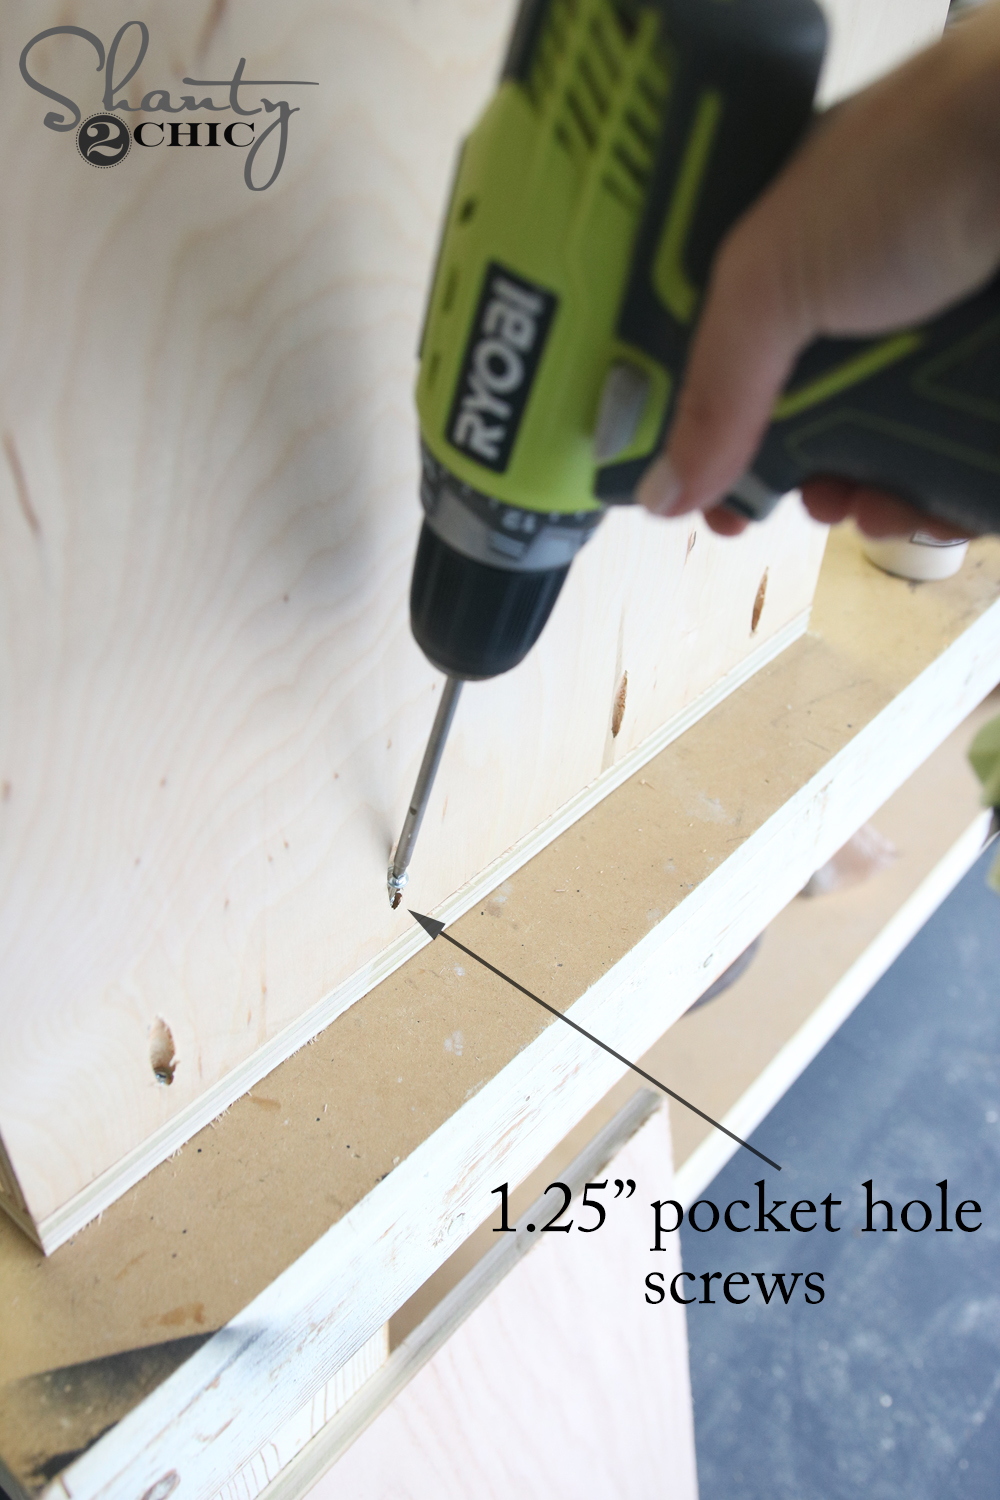
Then, I attached those pieces to the longer boards using my Ryobi 18V drill and 1.25″ pocket hole screws.
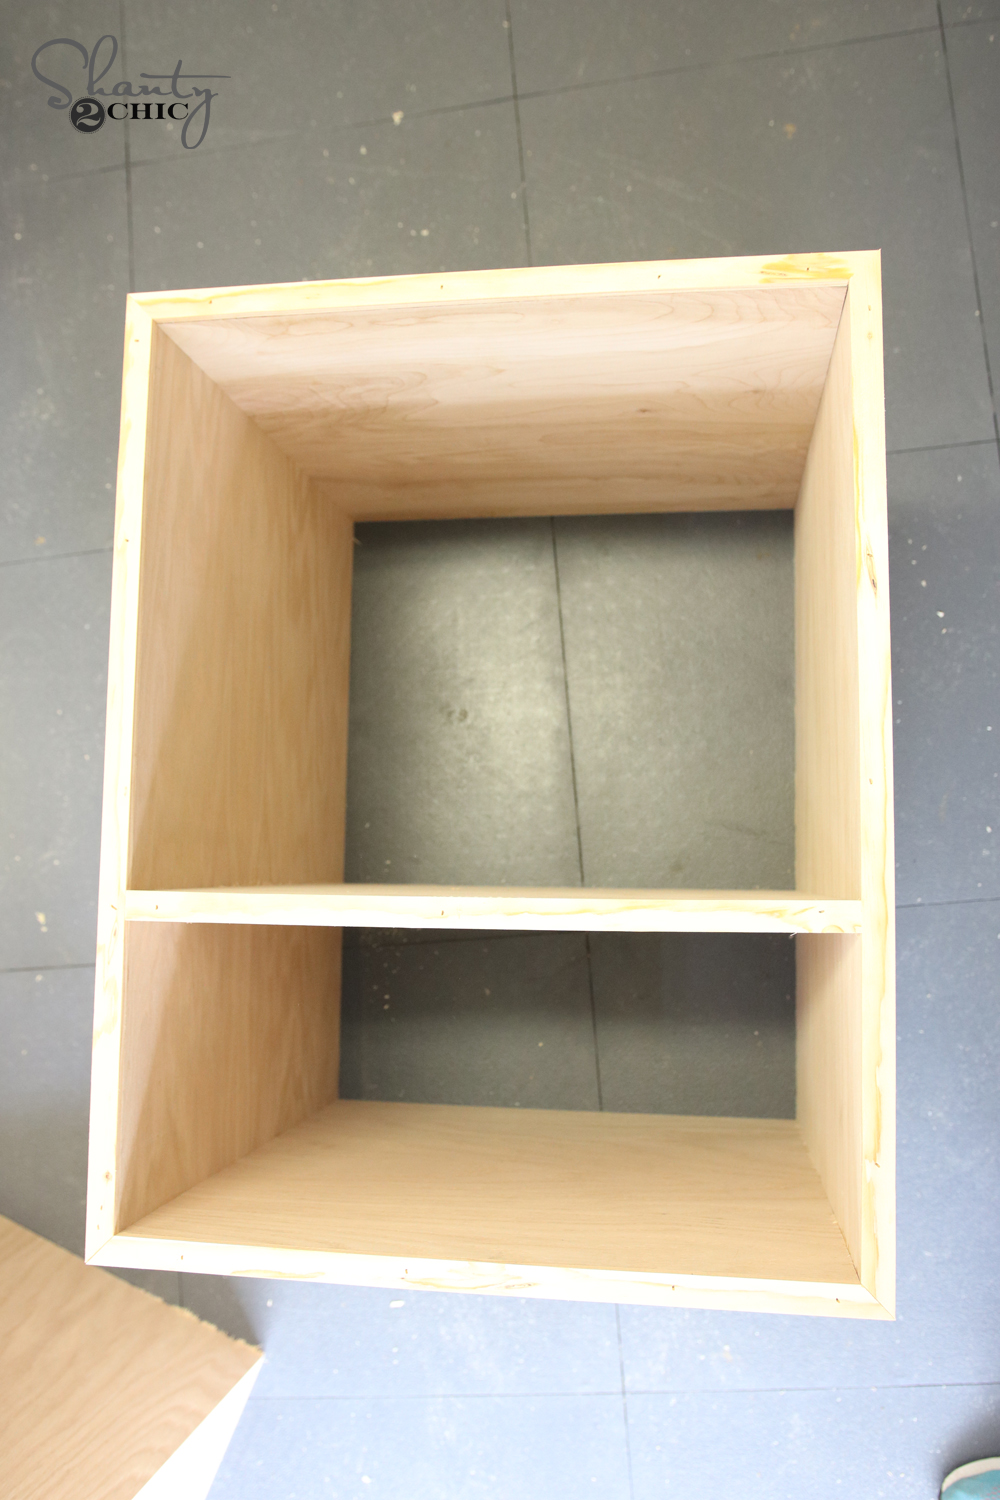
Once you have the box assembled, it will look like this.
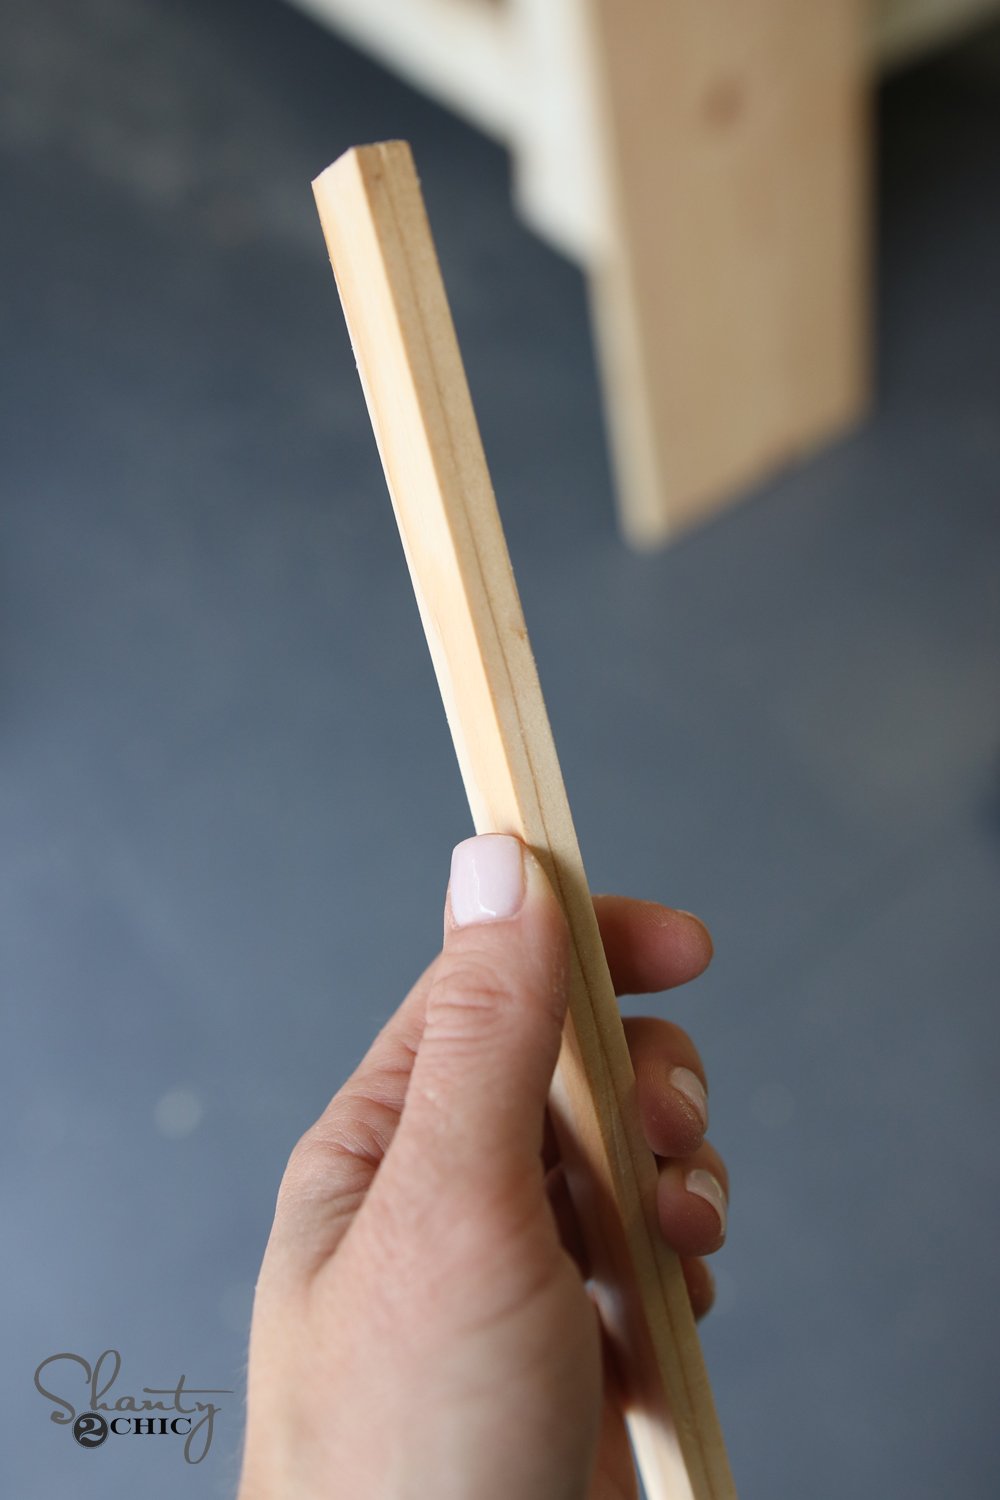
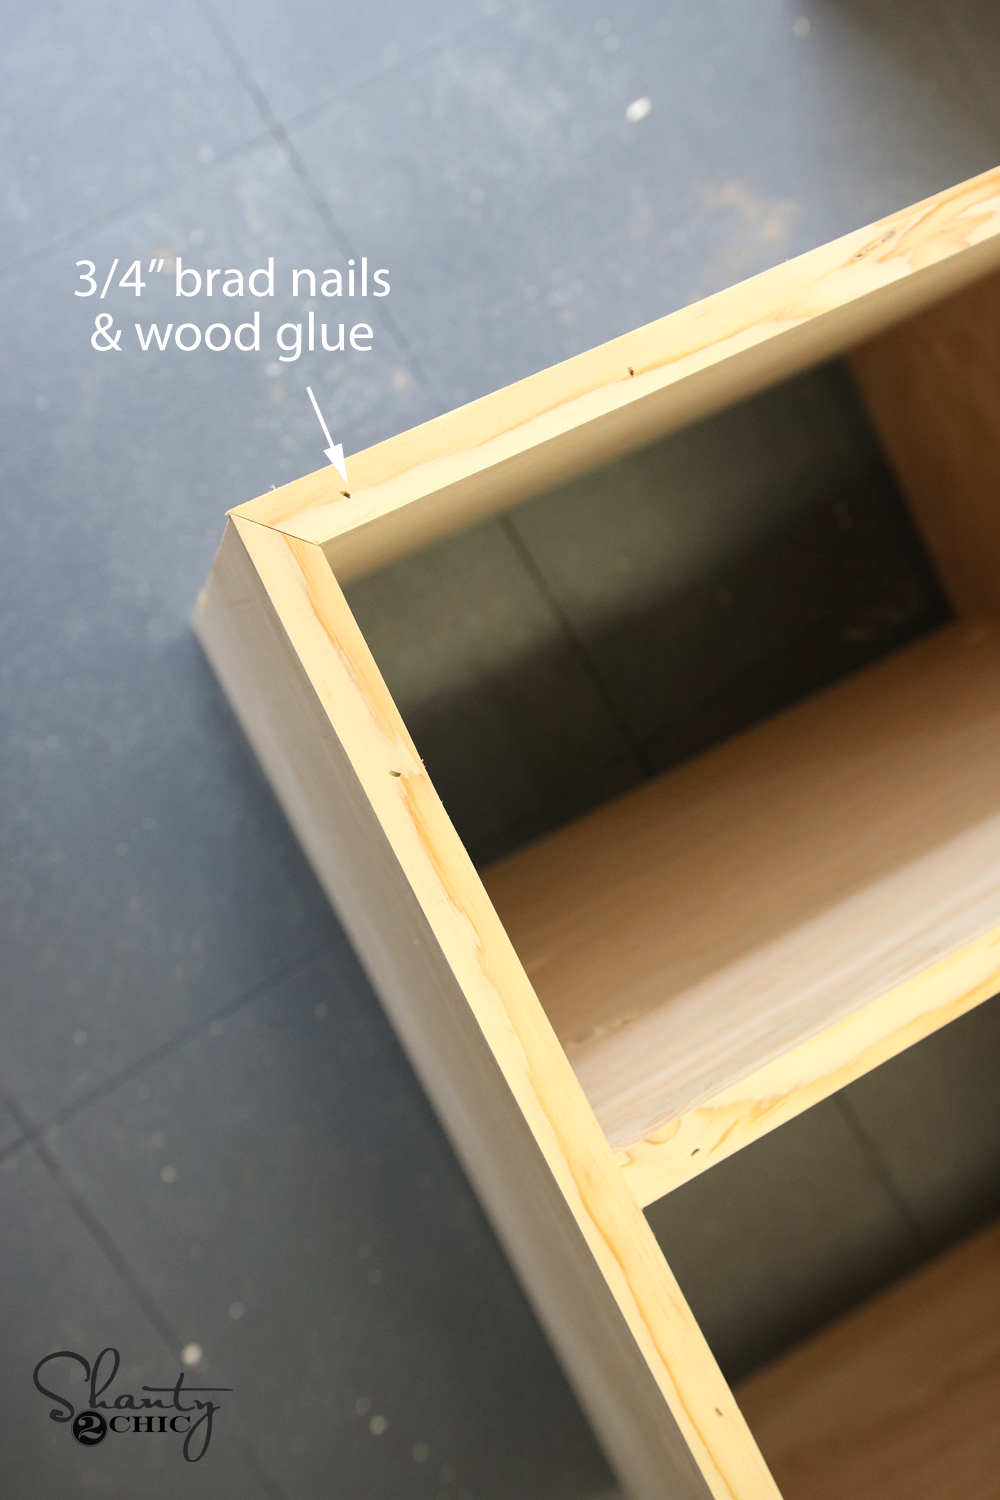
The next step is to add screen molding to the front of the side pieces. This is a thin 3/4″ wide molding that covers the raw edge of the plywood and gives a pretty,finished look. I can typically only find a screen molding that has a bit of a rounded edge to it, and I really wasn’t feeling it for this desk design, so I decided to make my own! If you have a table saw, you can do this in minutes and save money too.
I ran a 1x10x6 pine board through my table saw several times. Each time I would shave off 1/4″ of the board. These pieces became my screen molding! Easy peasy!
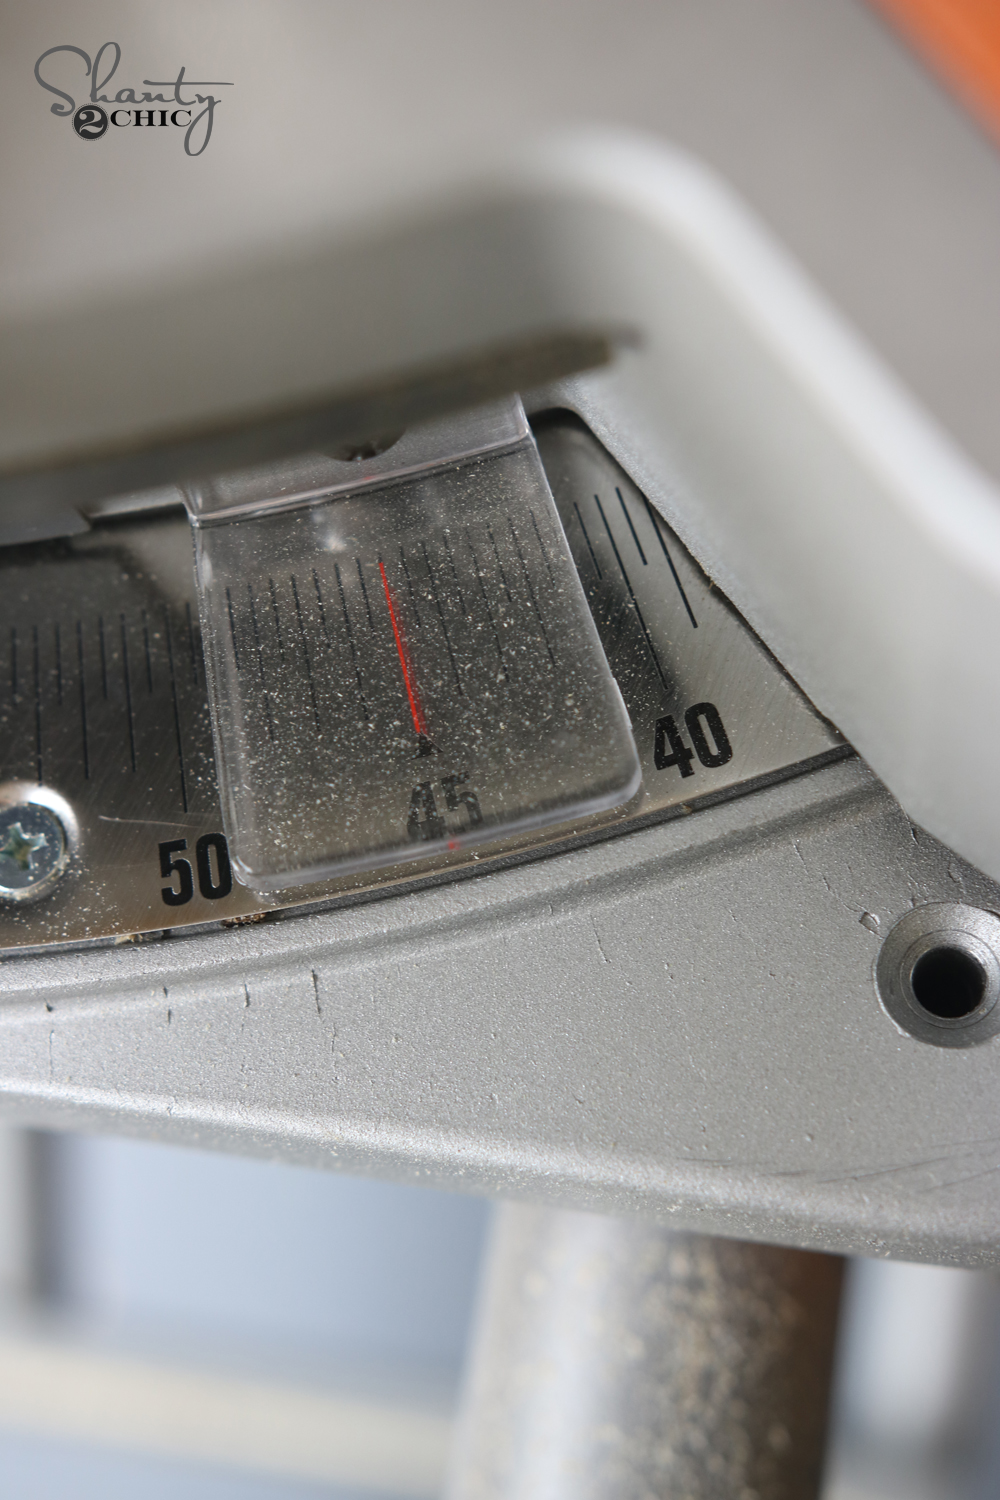
You will need to use your miter saw to cut the 45 degree angles of the top, bottom and side pieces of screen molding.

Next, add a line of glue to the front of each box.
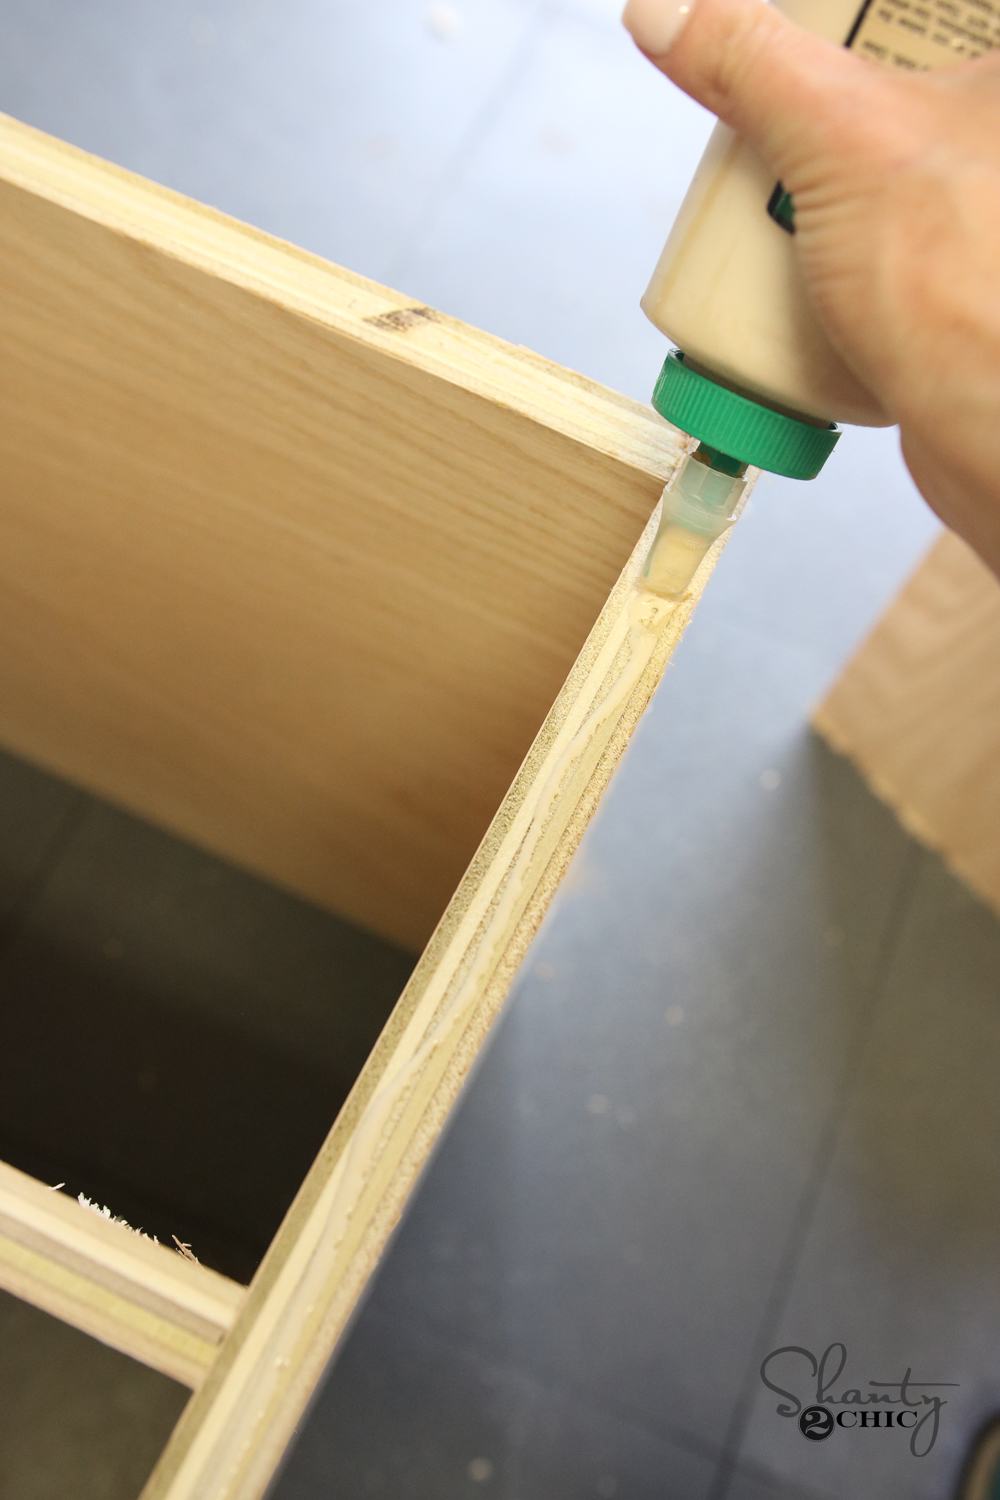
I used my Ryobi 18g brad nailer to attach my screen molding with 3/4″ brad nails.
The piece that covers the shelf will be a straight cut.
Here it is all prettied up!
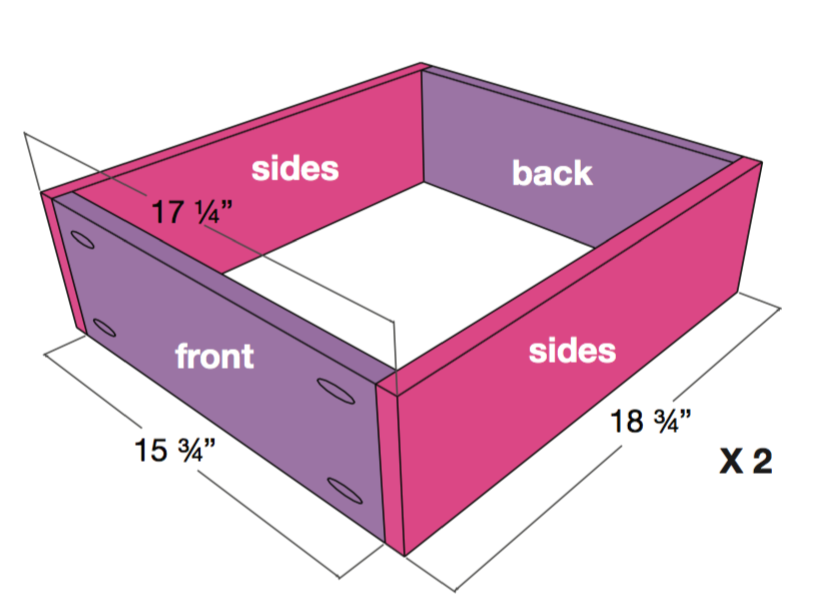
Next, I moved on to my drawers. Make sure to measure as you go on this part. You want the width of your drawer to be 1″ less than the opening for it.
You can see here… My opening is 18 1/4″ wide, so I made the box of the drawer have a total width of 17 1/4″.
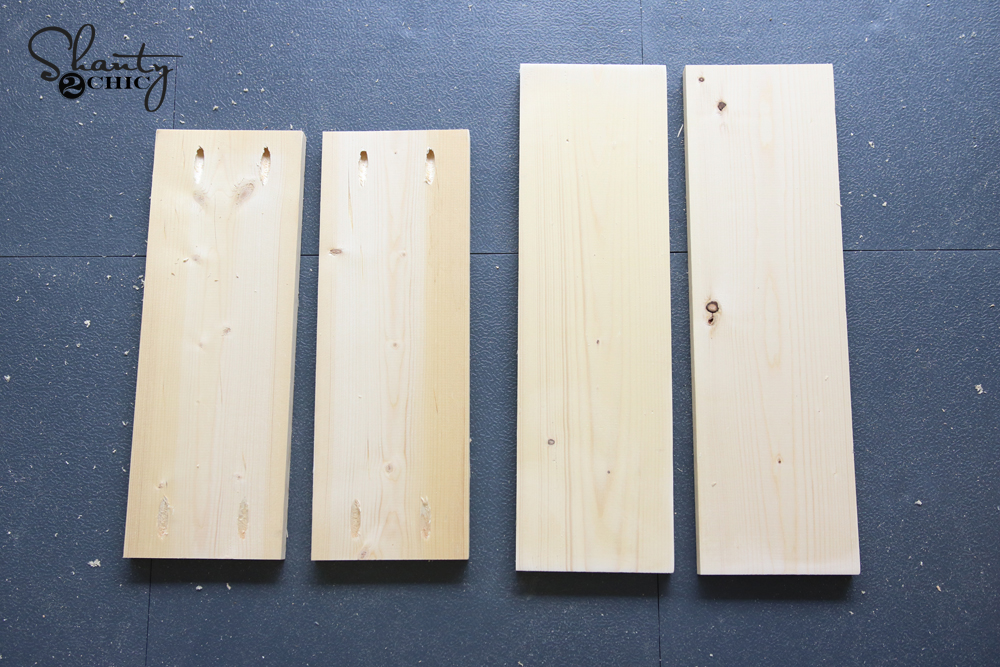
I used 1×6 pine boards to create my drawers. Be sure to find good, straight boards for this part so the drawers will work properly. I made my cuts, and then added 3/4″ pocket holes to the end of all of my short pieces.
I used a line of wood glue and 1.25″ pocket hole screws to attach the short boards to the long boards.
This formed my box!

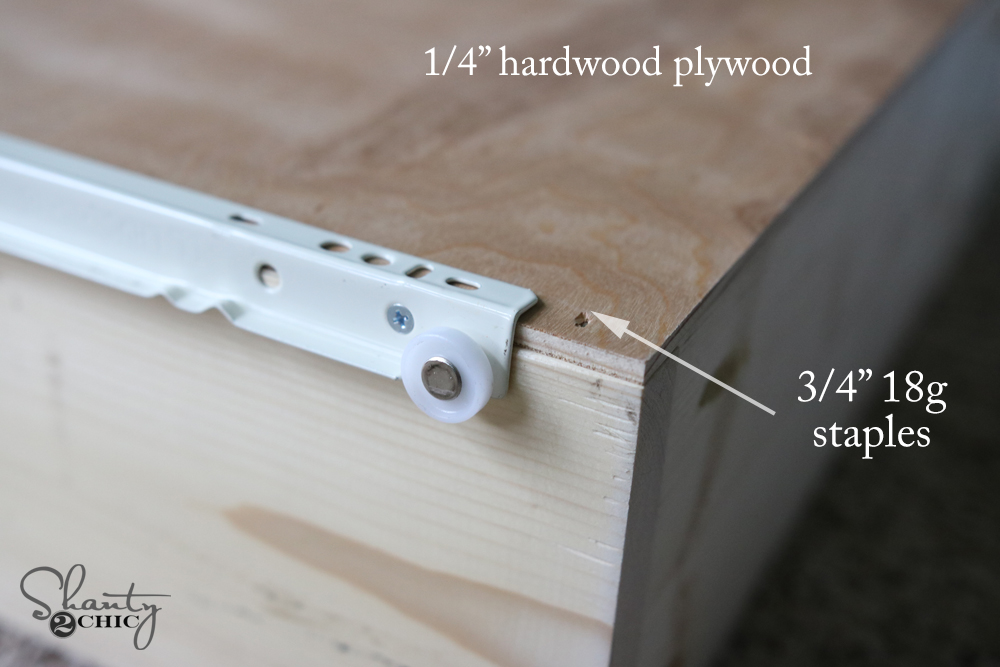
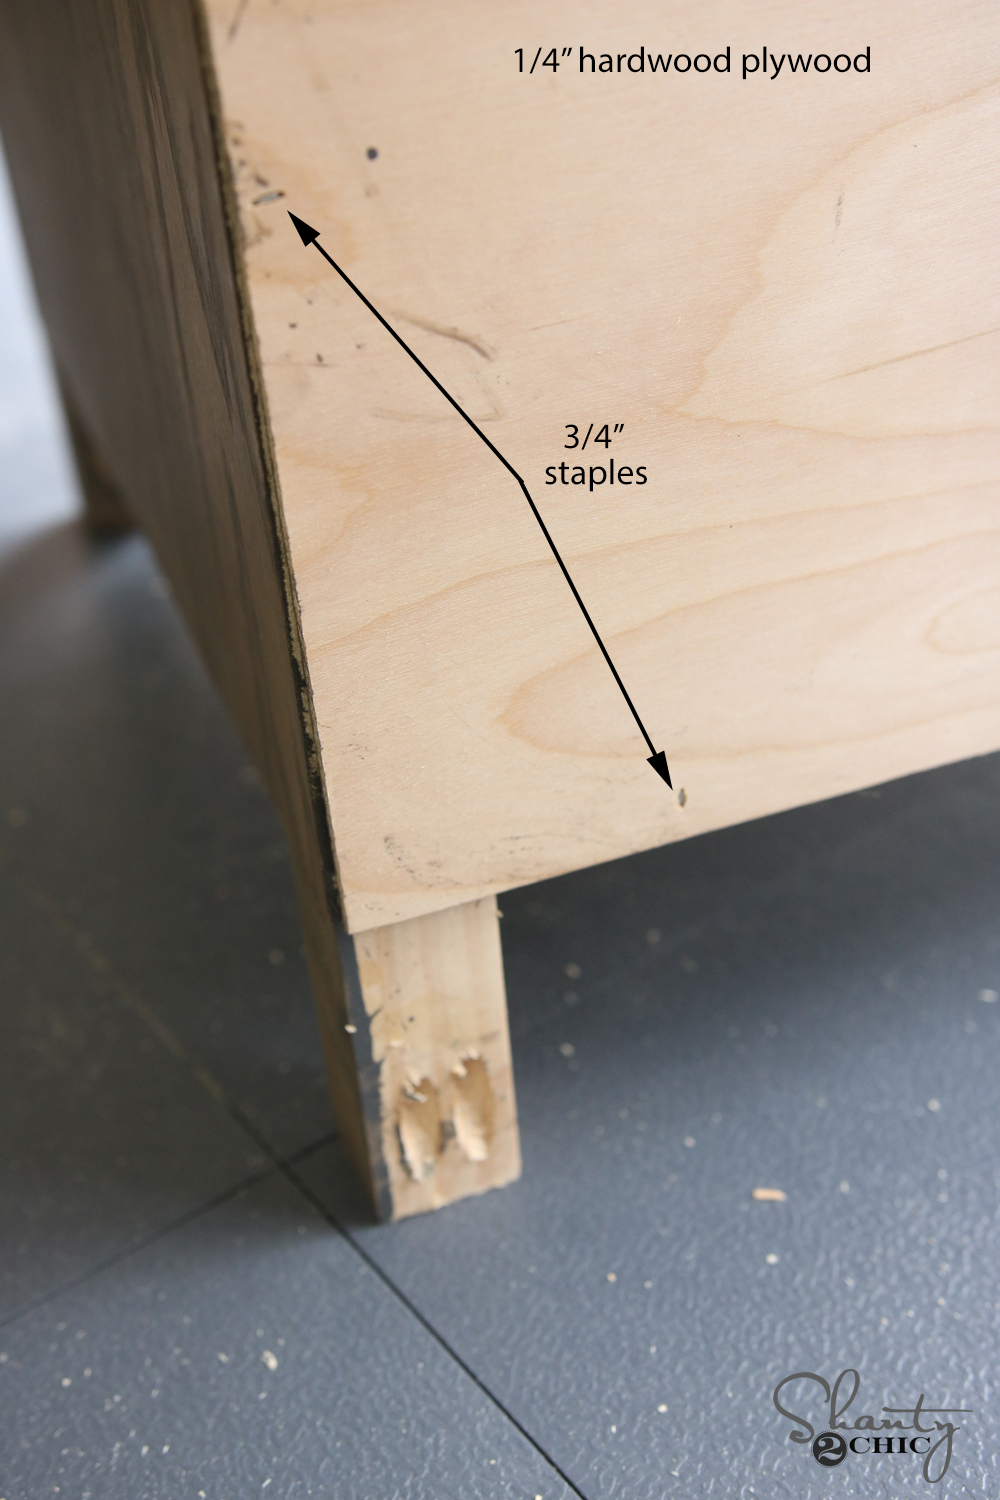
I used my Ryobi 18g stapler to attach 1/4″ hardwood plywood to the bottom of each drawer before starting on the slides.
I measured 6.5″ from the bottom of my top piece of plywood and used a speed square to draw a line on the inside of the boxes. This is where I lined up the drawer slides. I used my drill to attach these slides first.
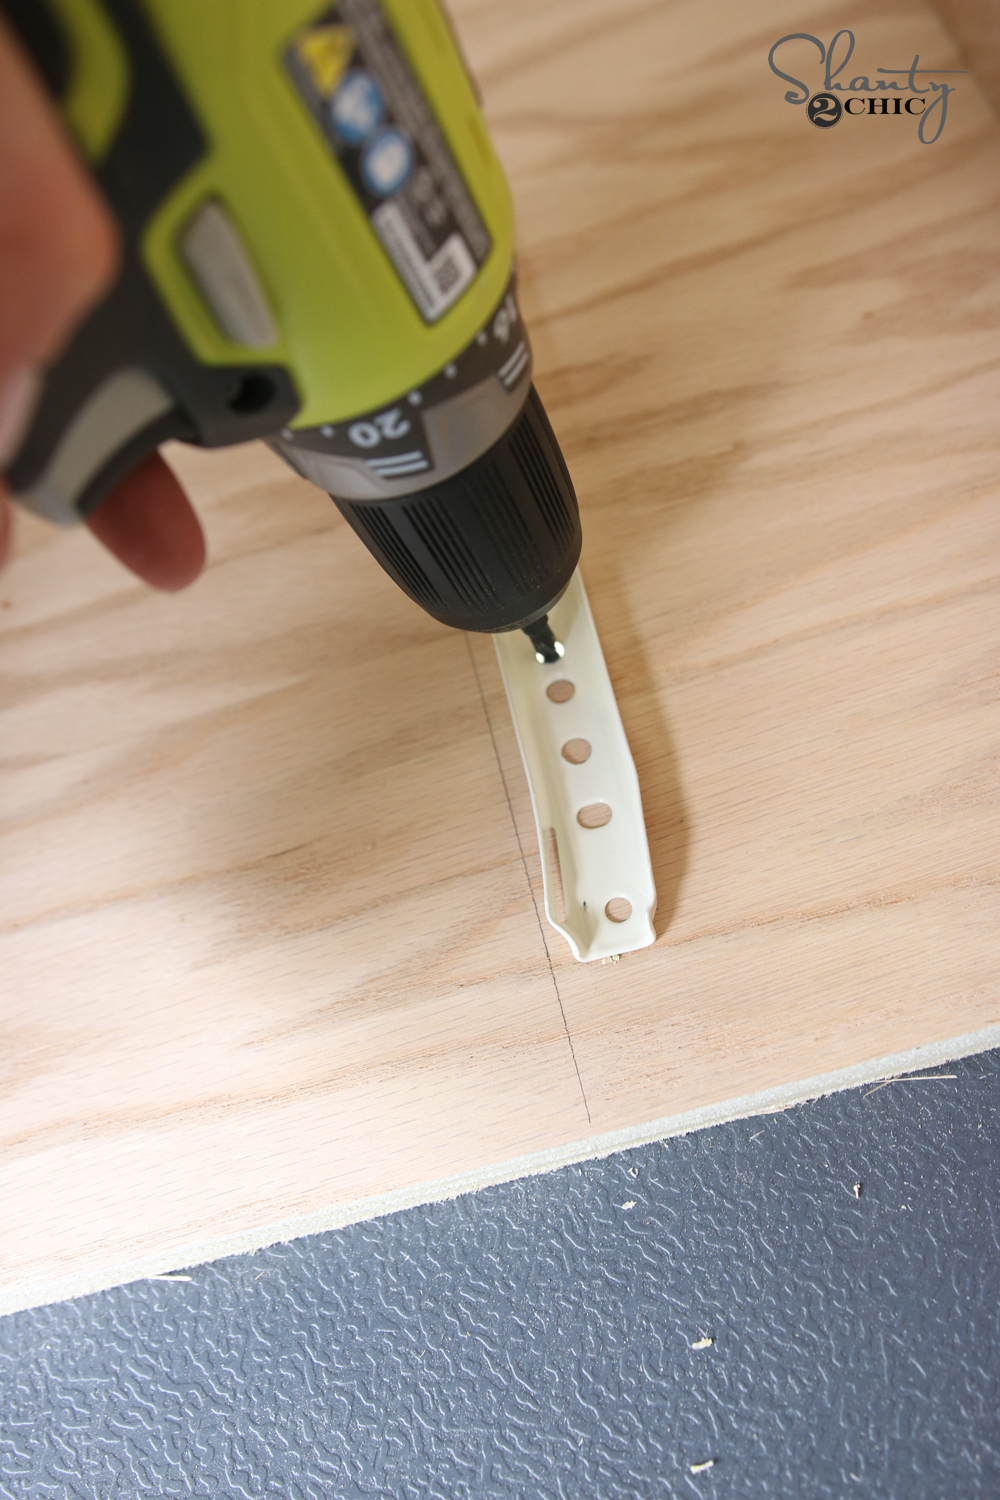
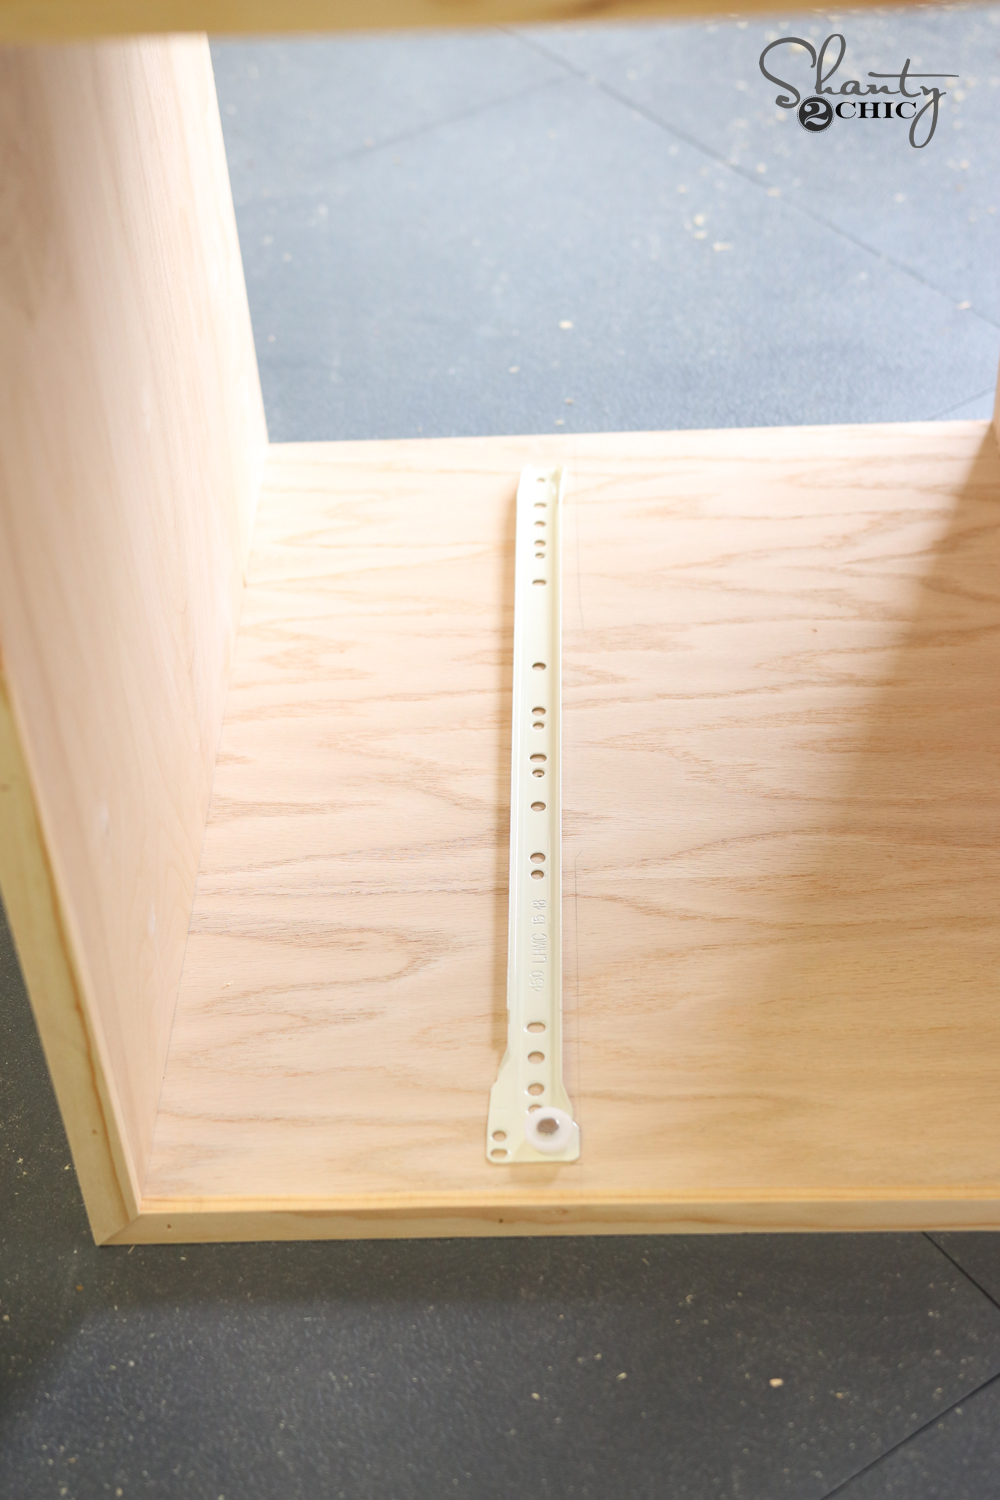
The slides that go on the drawers line up like this. I put mine directly up the edge next to where my drawer front sits.
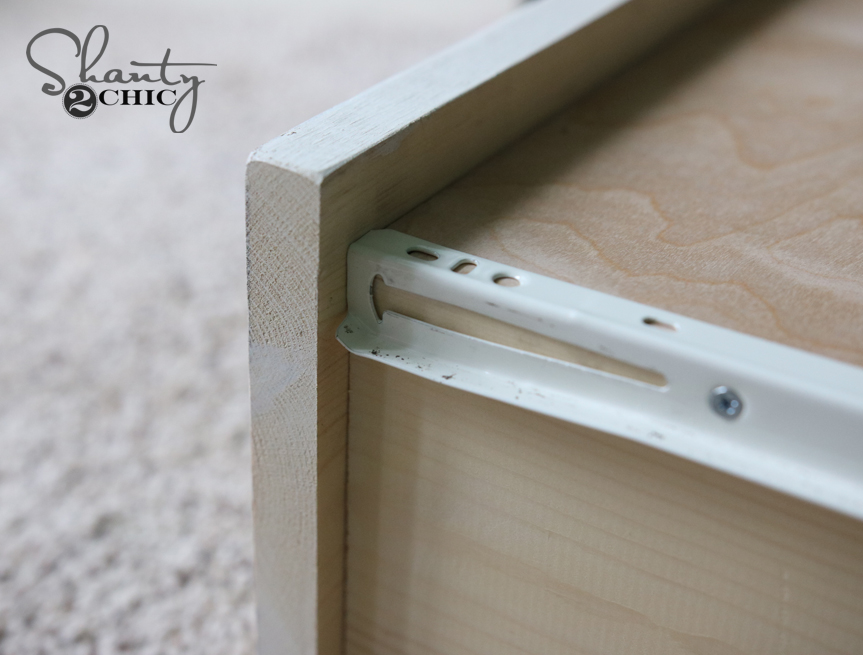
The back of the bottom of the drawer looked like this.
I added my feet next. These are just 2×2 pieces that I cut from a pine 2×2 board. I used my K5 Kreg Jig to create the pocket holes on each one. I used 3/4″ pocket holes and attached the feet with 1″ screws and wood glue under each as well. I forgot to take a picture of this step… Oops. It will look like this, only I decided to turn my back legs around so the pocket holes were hidden on the back of the desk.
Time to finish her off!
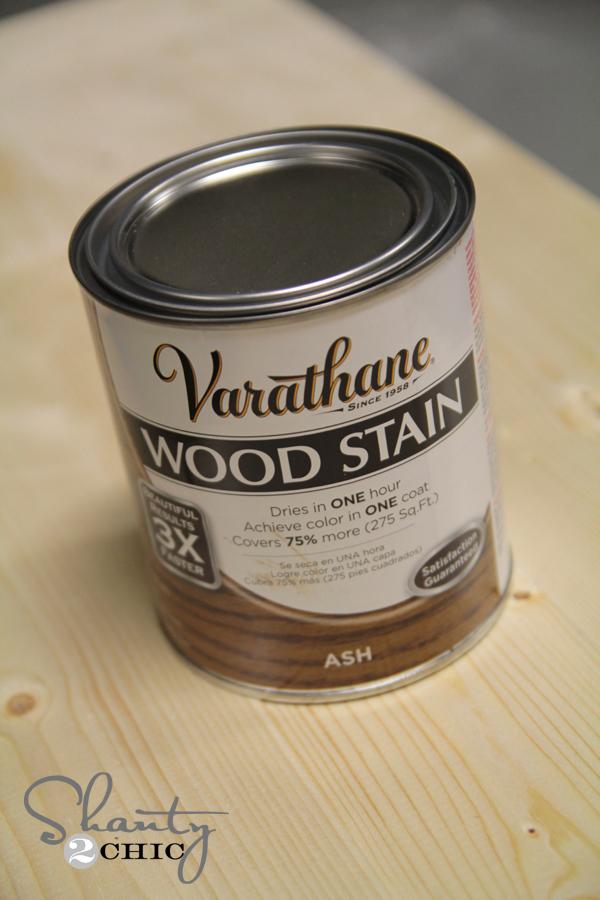
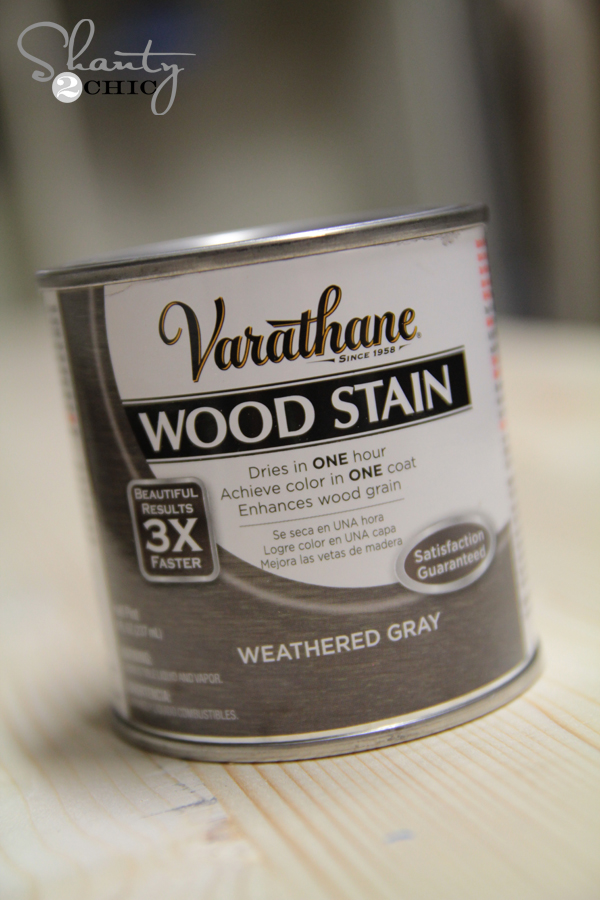
I used a fav stain combo on this baby.
I love to mix equal parts of Varathane Ash and Weathered Grey.
I mix mine in cheap plastic containers from Home Depot.

Then, just brush it on, wait a few minutes, and wipe if off!

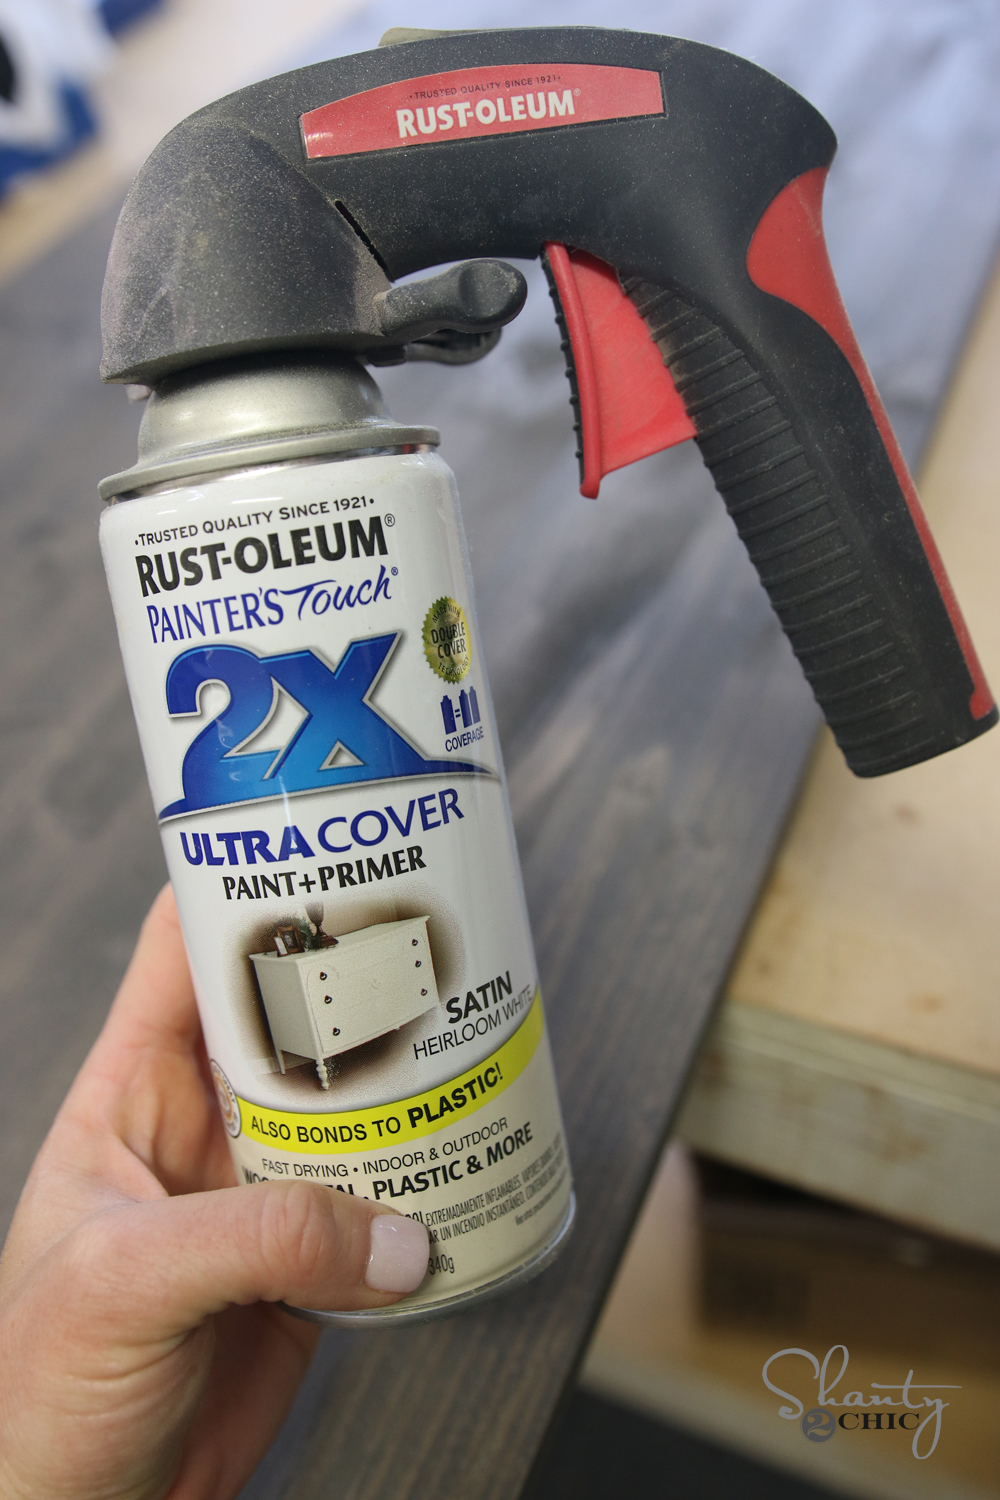
I decided to paint the drawer fronts with Rust-Oleum Heirloom White spray paint. I did our vaseline distressing tip under the paint to give it a slightly messy look.
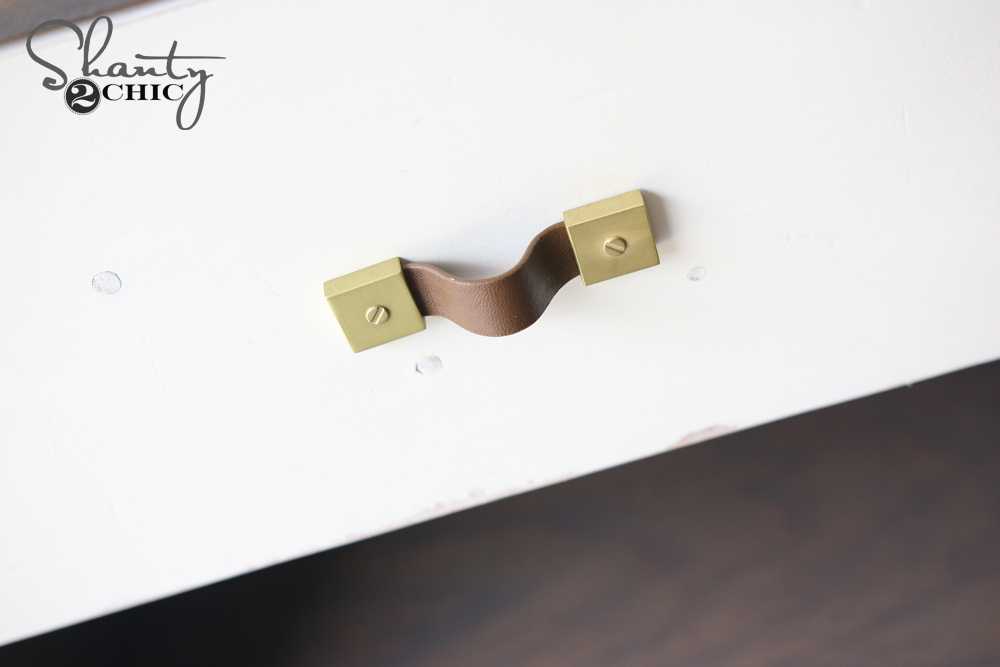
And finished it off with some ridiculously cute pulls from Target!
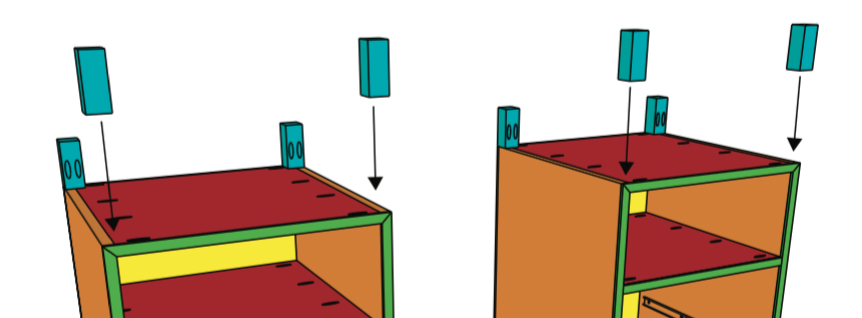
Before taking the desk upstairs to assemble it, I added the 1/4″ hardwood plywood to the back using staples as well.
I attached everything in her room to make it easy to get up the stairs. I used 1″ wood screws through the top of each side and into the top panel. I didn’t use wood glue on this part in case I decide to move it or take it down later.
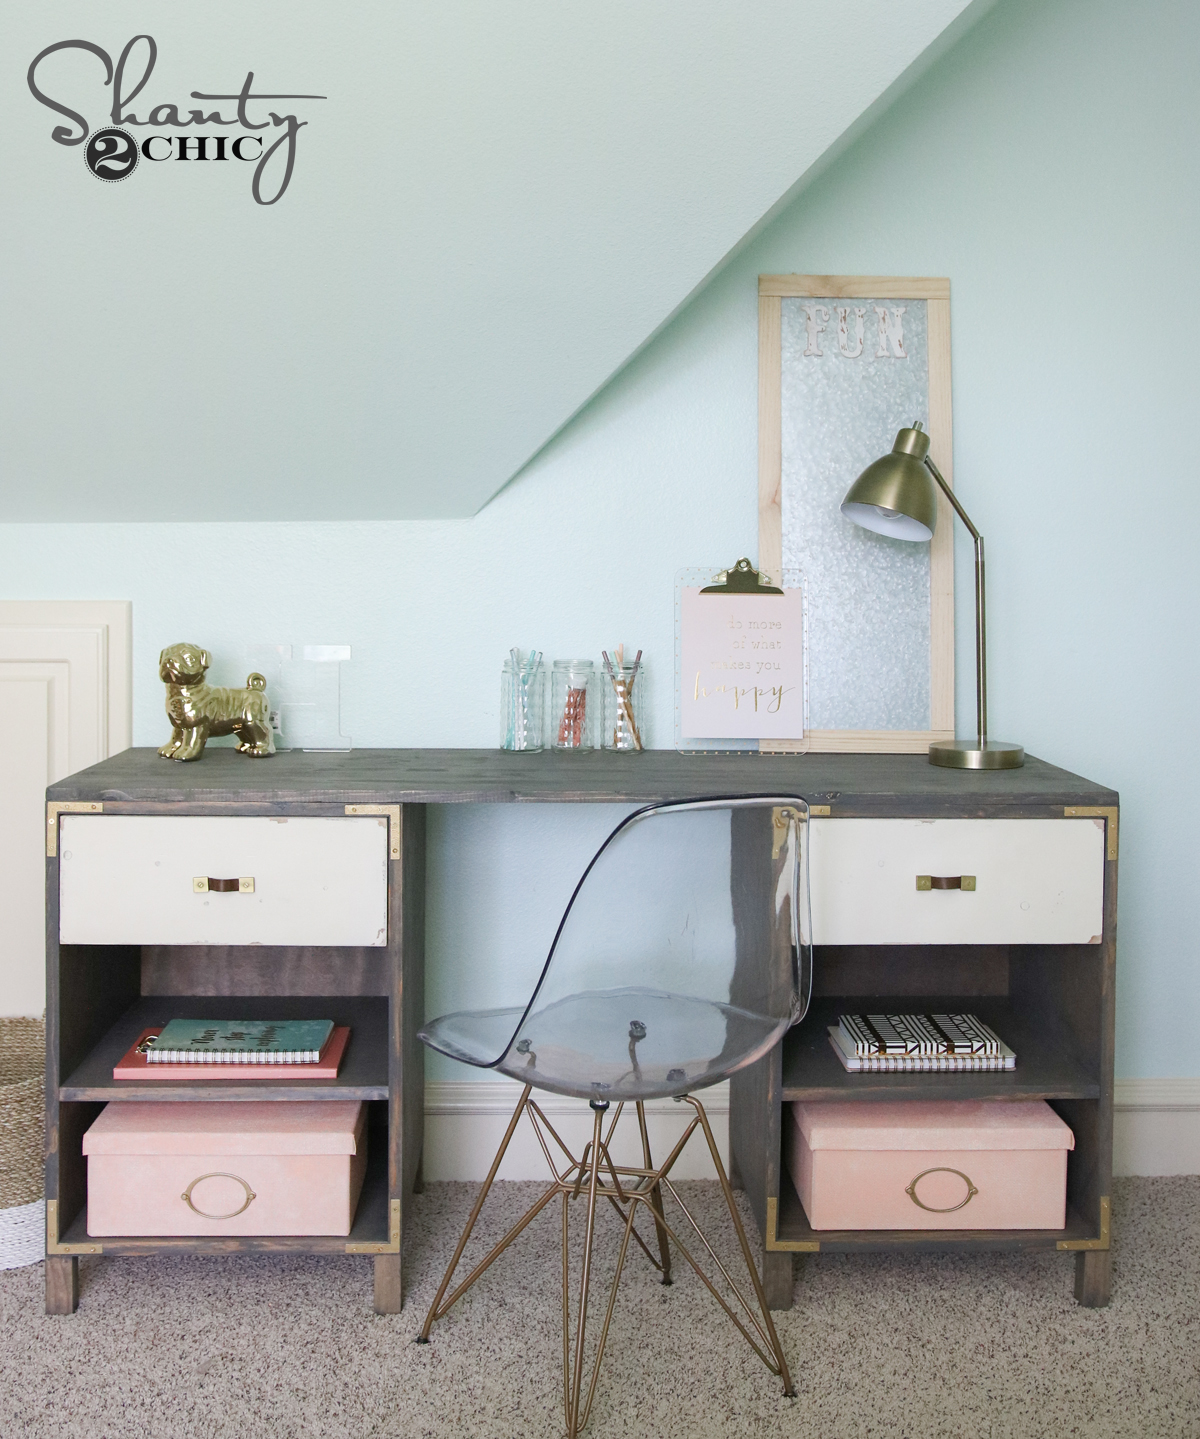
Here it is all finished up!
For the gold corners I found these at Home Depot…
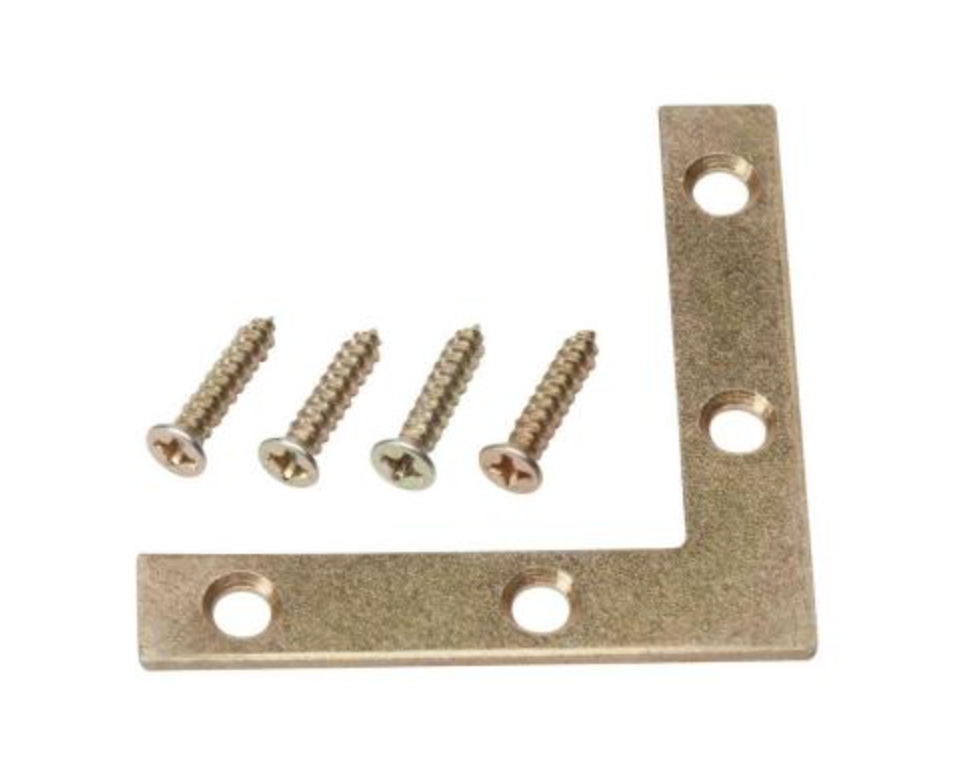
They were a little off on the finish, so I dabbed some Martha Stewart craft paint on them to match a bit better.

Her wall colors are Embellished Blue by Sherwin-Williams.
The chair is from Industry West.
The lamp is from Target. The baskets are Ikea cheapies that I used some Martha Stewart craft paint on to add some color.
That should just about cover it!
Let me know if you have any questions at all and thanks for stopping by! 🙂


What size are the boxes? I want to get something similar. Can’t wait to build this!
I’m having a hard time finding the edge glued panel in the right size. I’ve even looked online. Is this a unique size?
Your tutorials are getting better and better with the closeups of building details. Keep up the great work. The little desk is sooo cute. I’m loving the room makeovers for your daughter. Can’t wait to see the new episodes!!
Hey. This a cool little desk. Thanks so much. Thanks for putting up info about the show times. I missed the first one. Can’t wait to watch. You all do a great job. Take care.