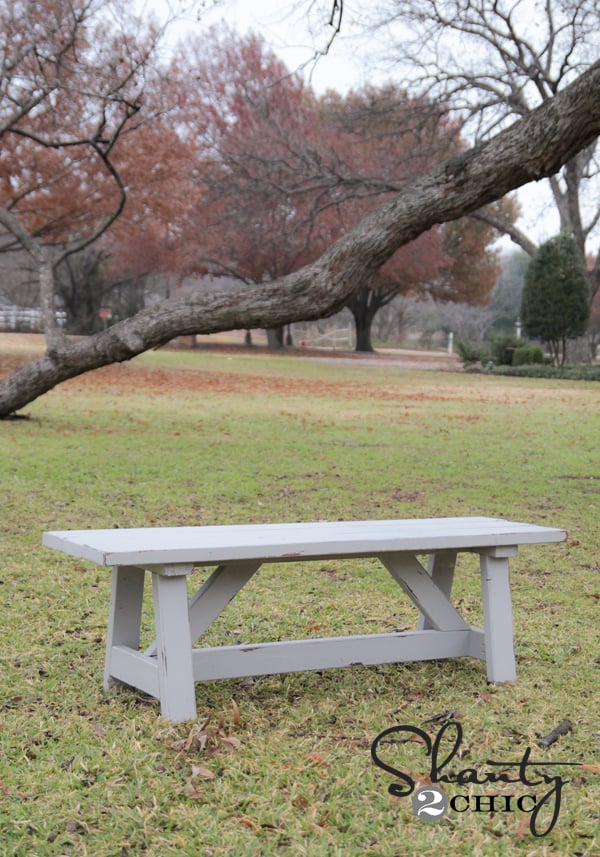
Hey there! I am SO excited that I have benches to match my new Triple Pedestal Farmhouse Table!
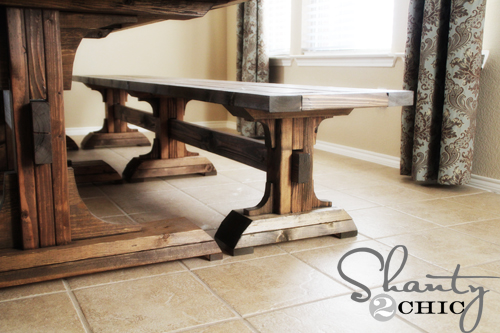
Thanks to Ana White and her awesome PLANS, I was able to build two of these 9-foot bad boys for $90 total!

So, the grand total for my Triple Pedestal Farmhouse Table and Benches is…. $215! Click HERE for the Triple Pedestal Farmhouse Table Plans!
You can get the plans for the Triple Pedestal Farmhouse Bench Plans from Ana HERE and you can follow along my build for pointers below;)
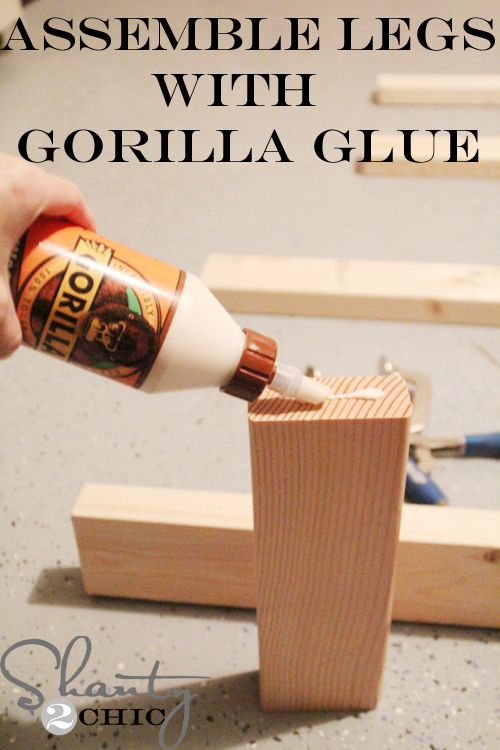
I assembled the legs with Gorilla Glue wood glue. The steps to build the legs are the exact same as the table (just smaller) so this was a piece of cake!
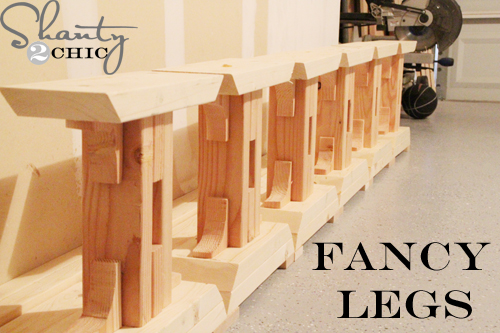
The decorative arches were a bit tedious (there are 24 for 2 benches!!!) but they were easy and they really make the whole piece!
Now for the seats:)

I couldn’t have built this with out my Kreg Jig! It is a lifesaver and makes every piece of furniture not only easier to build but super sturdy! It will more than pay for itself with this dining set!
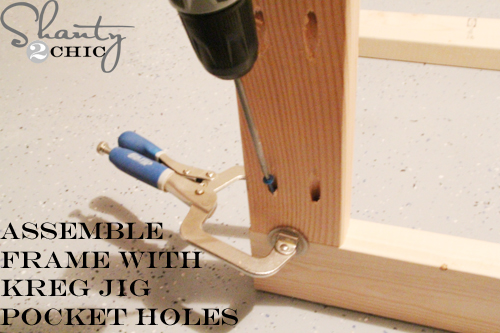
Assembling the frame with Kreg Jig pocket holes and screws.
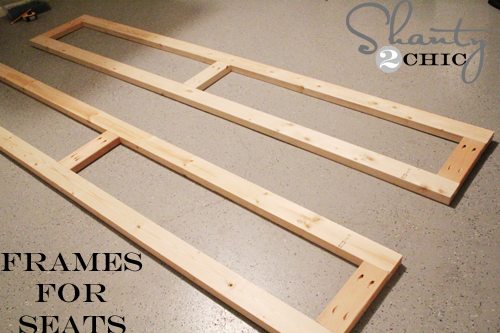
Frames done…EASY!
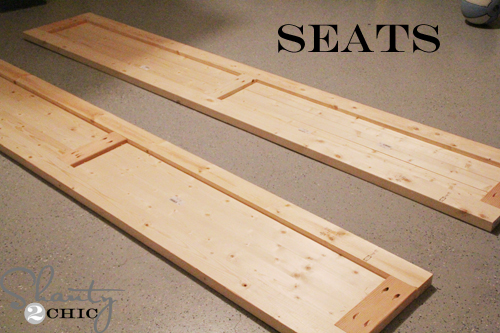 I also used my Kreg Jig to built the panels for the inside of the frames. Make sure to measure and cut as you go for the best accuracy. I also dry-fit my panels in the frames before attaching all of the boards.
I stained all of the pieces before assembling the top to the legs!
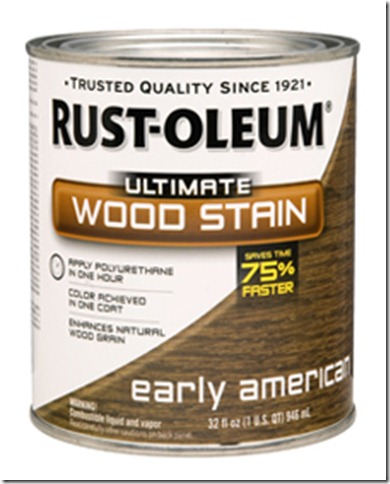
I chose one of our favorites, Rust-Oleum Early American, to stain the table and the benches! I painted it on with a bristle brush and wiped away after about 5 minutes. Temperature can vary set-time. For colder weather, wait a little longer before wiping.
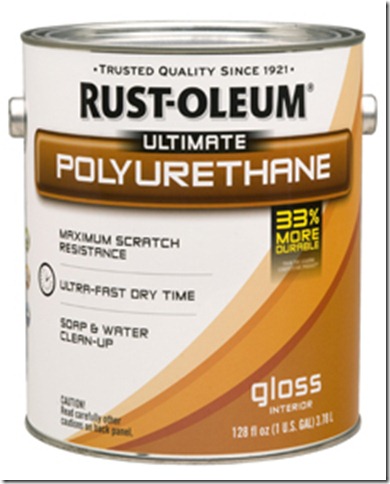
I followed with one coat of Rust-Oleum Polyurethane in satin!
After letting the pieces dry, I brought them in the house and assembled the seats to the legs!
I’m so in LOVE with my dining set! With a little elbow grease and awesome plans, I now have a gorgeous dining set for only $215! There is plenty of room for our family of 5 to sit with guests over and fit comfortably:)
My kids love to spread out and do their homework and artwork and I love that I don’t have to worry about them ruining an expensive piece of furniture! This set goes to show that you don’t need to pay expensive retail prices to have beautiful, well-built furniture in your home!
What’s on your DIY building wish list?
Thanks so much for stopping by:)
~Ashley


Can anyone verify the table dimensions? A link to the drawings shows 17.5″ wide and 18″ high but this does not seem to make sense.
I love these!!
Thank you Amy;)
Great seat for my Grand kids better then chairs. Looks great and soeasy to build. I used Oak plywood for top and white wood for legs also for band on plywood pickeled the bot and stained the top..
How has it held up over time? It seems like there’s more glue than screws. Is it strong enough?
Great! My daughter stands on the top everyday:/. Where there is glue, there is also nails. The glue is incredibly strong, I have messed up on a build before and the glue had already dried. I couldn’t get the wood apart and had to start over.
I really like these kind of furniture. it makes your home warm and liveable…
found some furniture like this at
http://www.bombaycompany.com/
This is
a fantastic idea for a craft workspace or even for a large family dinner.
It’s amazing what you can do for your home with fun D.I.Y. projects.
Love what you have created! What type of wood did you use?
Thank you Melissa. I used 2×4’s and white wood 1×4’s and 1×6’s:)
Sent from my iPad
Great table!!! What a great project.
Thank you:)
Sent from my iPad
I’m trying to understand how you made the bench tops. You said “I also used my Kreg Jig to built the panels for the inside of the frames.” but in the picture called “Seats” there are no pocket holes on the panels, just on the 2x4s making the frame. How did you connect the panels?
I was referring to seats as the entire “top” constructed. The panels are referring to the 1×4 boards that I did attach to each other with pocket holes. I drilled 3 pocket holes to attach the 1×4’s to create the panels that fit inside of the seat frames. The picture with the seats is a picture of the 1×4’s dry-fit into the frame before I drilled the pocket holes. Hope this makes sense!
Sent from my iPad
I was curious about having all the little ridges too! And about it being a smooth writing surface. It looks amazing though! My list consists of the pantry organizer for baggies and foil, a new headboard and footboard for my bedroom with matching night stands and a roll around craft center for my office! Yikes! Hope I can get up my nerve to tackle all these!
Do you think that having the boards on the top and seats like that would leave lots of room for crumbs and other gunk? I have 5 young children, 3 being one year old triplets, and we need a BIG table. But there are lots of messes and I wondered how easy it is to keep it clean. Thanks – its really stunning.
Thank you Becky. I chose to build the seats with 1×4’s for that reason. I still used 2×4’s for the frame but I have not had a crumb issue. I had a coffee table made out of 2×4’s and I just used the hose on the vacuum to get any crumbs put ofmthemcracks.
Sent from my iPad
Beautiful table! On my building wish list is a Ribbon storage holder for my scrapbook room and a island for my kitchen. Love your work.
Thank you Sharon! Sounds fun:))
Sent from my iPad
What is on my diy building wish list? Built ins with a window seat for the dining room 🙂
What a beautiful table!!!
Awesome Kathleen! Sounds fun:)
Sent from my iPad
Soooo gorgeous!! I wish I had the skill to build these! I finally got around to building the picture ledge shelves you posted…and I’m in love! Your blog is the best! 🙂
Sent from my iPad
The entire set is so lovely! Can you estimate how many people can sit at the table? Thanks for sharing your hard work and creativity with us!
Thank you Alyssa! I would say 10-12 adults comfortably:). It is HUGE:)
Sent from my iPad