Every summer I have told myself that I would build a DIY Outdoor Day bed! I always see them in magazines and they are so darn expensive – some of my favorites can run upwards of $4,000! Well, this summer I finally broke down and designed/built one! Spoiler alert – I LOVE IT! And, I was able to build one large enough to accommodate a twin mattress for about $200 (and that’s WITH the optional pergola top)!
Grab a cup of coffee and come build this DIY Outdoor Day Bed with us! You can click HERE or the box below to watch.
How fun, easy and inexpensive was that?! Make sure to download the FREE PRINTABLE PLANS HERE and you an follow along with the how-to tutorial below!
We designed and built this Day Bed to fit THIS MATTRESS.
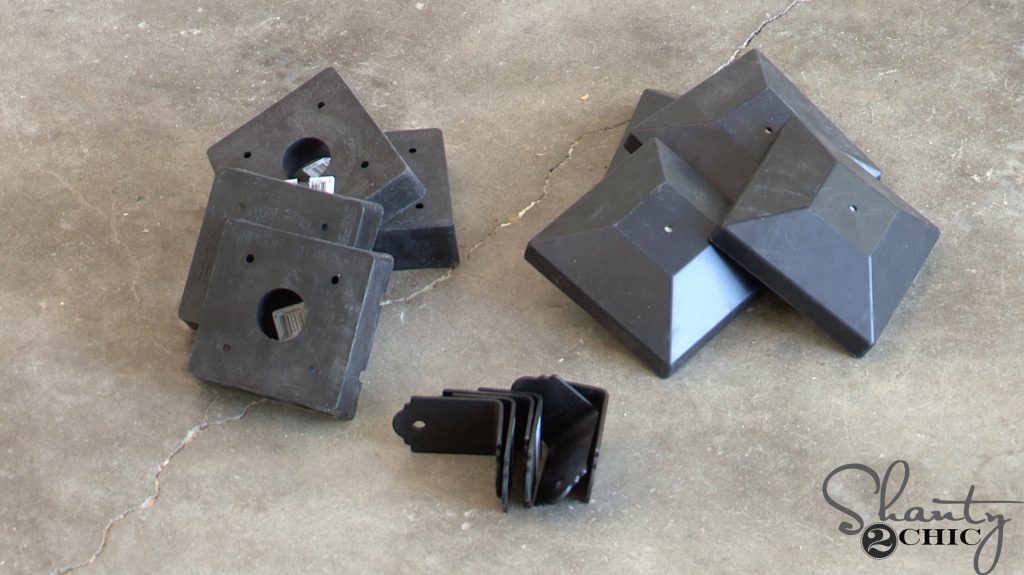
DIY Outdoor Day Bed – optional caps and bases for posts
I purchased these caps and bases for the 4×4 posts. The bases will keep the water off of the posts and the caps add a nice finished touch. This is totally optional.
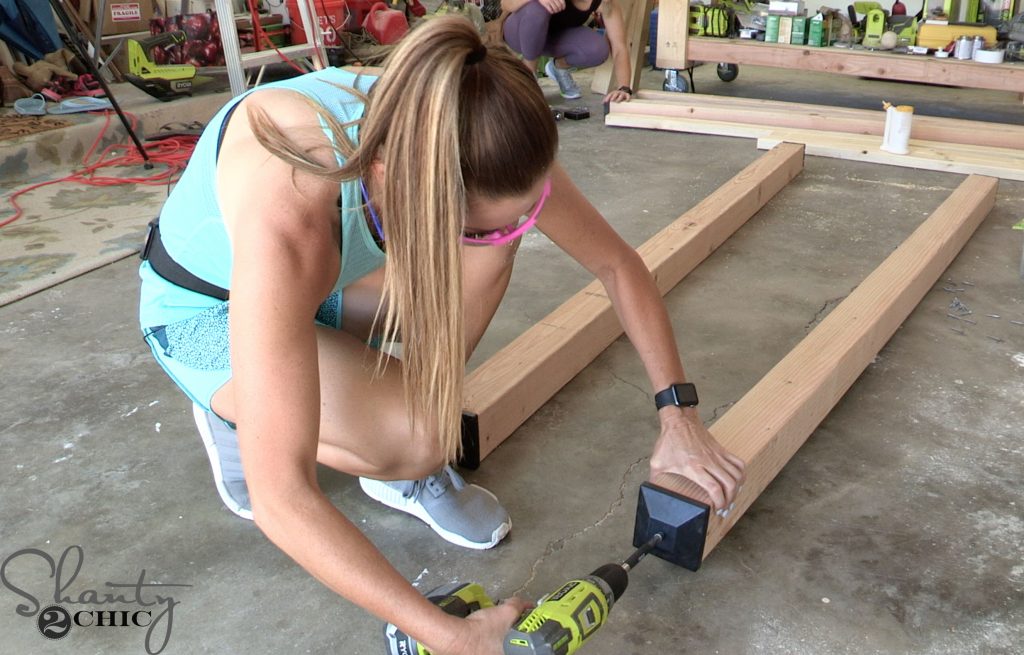
If you do buy the caps and bases, make sure to attach them to the posts after cutting the 4×4 posts and before you begin assembly!
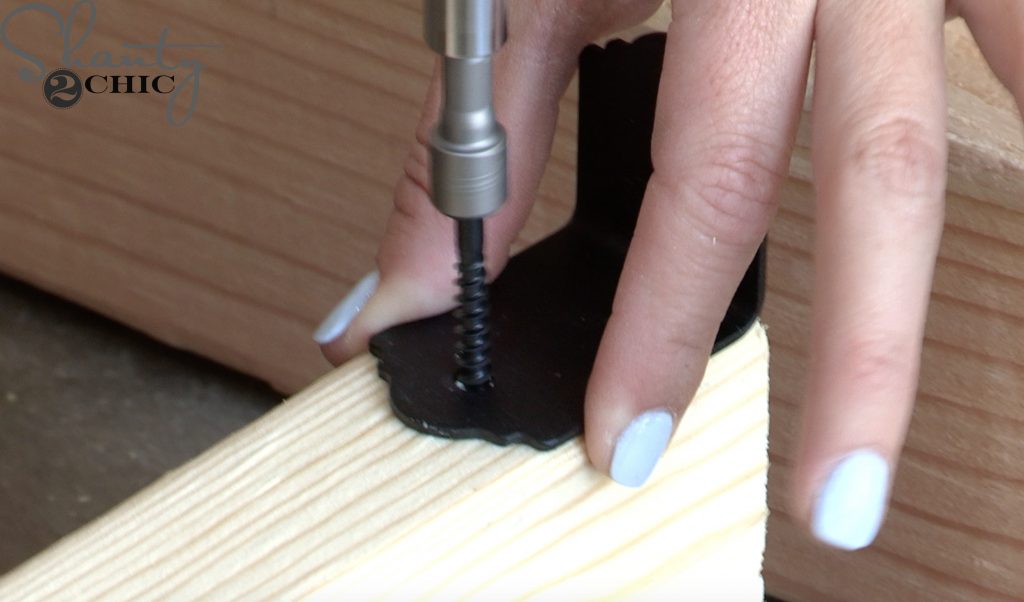
DIY Outdoor Day Bed – pocket holes made easy with kreg jig!
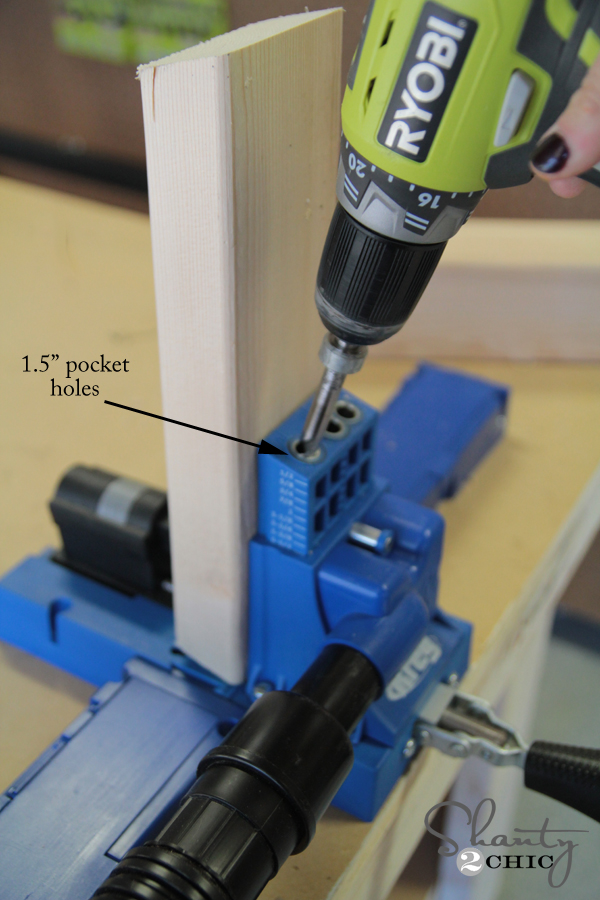
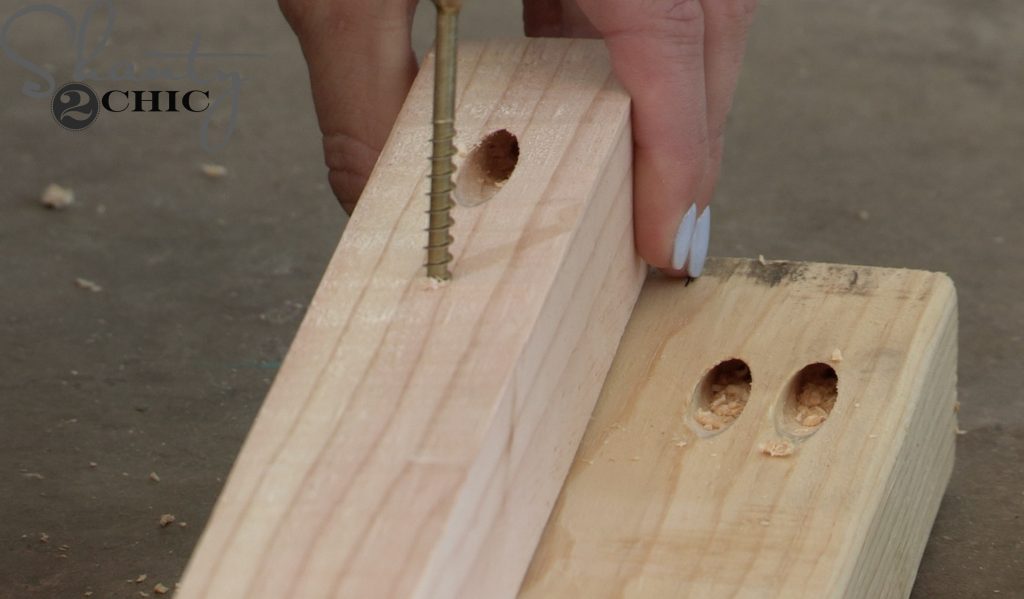
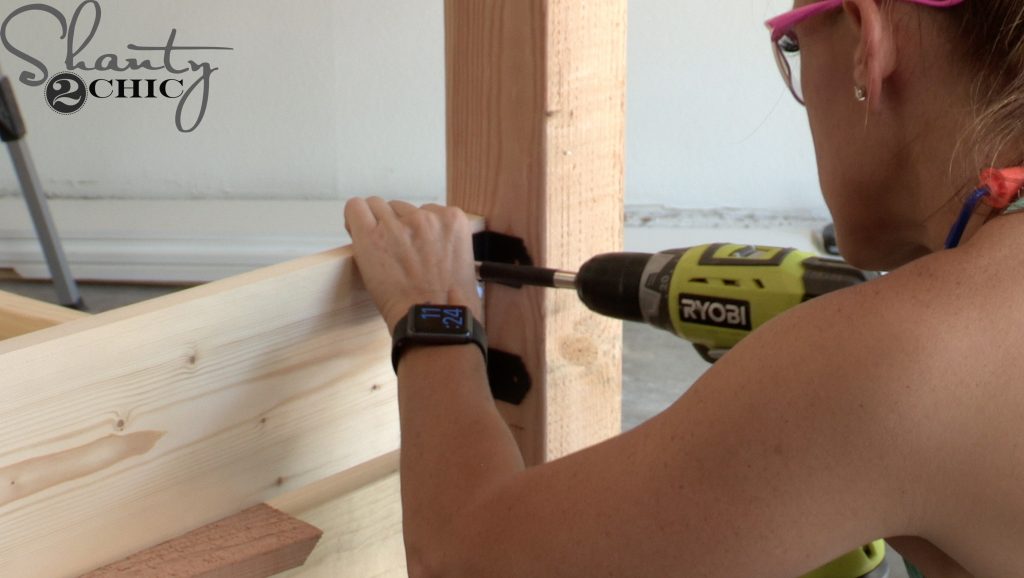
Once the post caps and bases are attached, it’s time to start assembly. We cut the side frame pieces to size and used our Kreg Jig to drill 1 1/2″ pocket holes into the ends of the bottom side frames. You can find our favorite Kreg Jig model HERE!
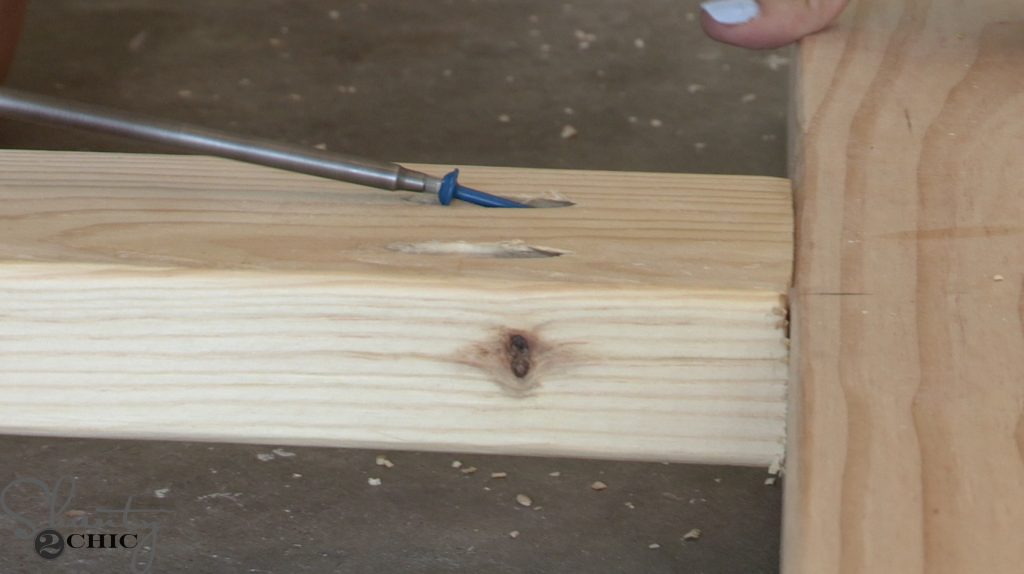
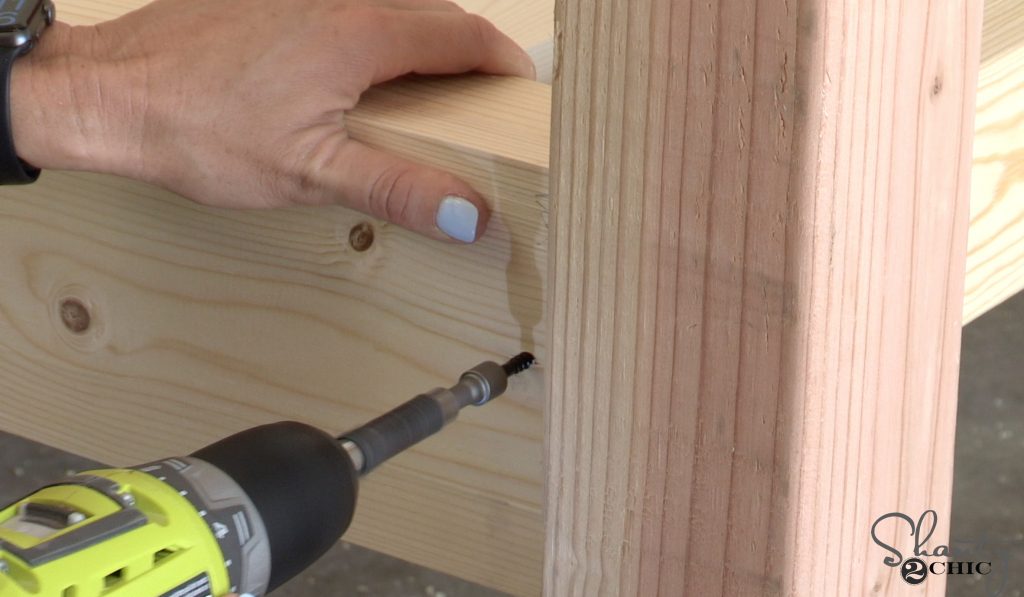
We attached them to the posts with 2 1/2″ pocket hole screws and wood glue. The pocket hole side of the aprons should be flush with the inside of the posts.
Then, we attached four metal angles to the ends of the top side frames and attach them to the top of the posts with 1 1/2″ wood screws and wood glue.
We cut the front and back frames and cleats to size. Then, we drilled 1 1/2″ pocket holes into the top half of the frames and the ends of the cleats. We attached the cleat to the frame piece with 2 1/2″ wood screws and wood glue.
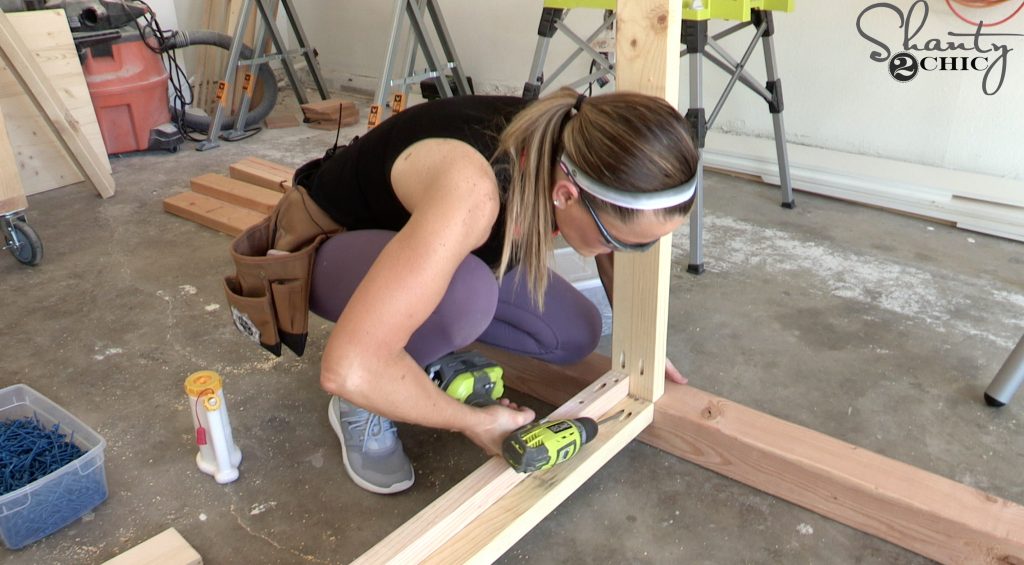
Once both cleat assemblies were built, we attached them to the post assemblies with 2 1/2″ pocket hole screws and wood glue. the inside of the front and back frames should be flush with the inside corners of the posts.
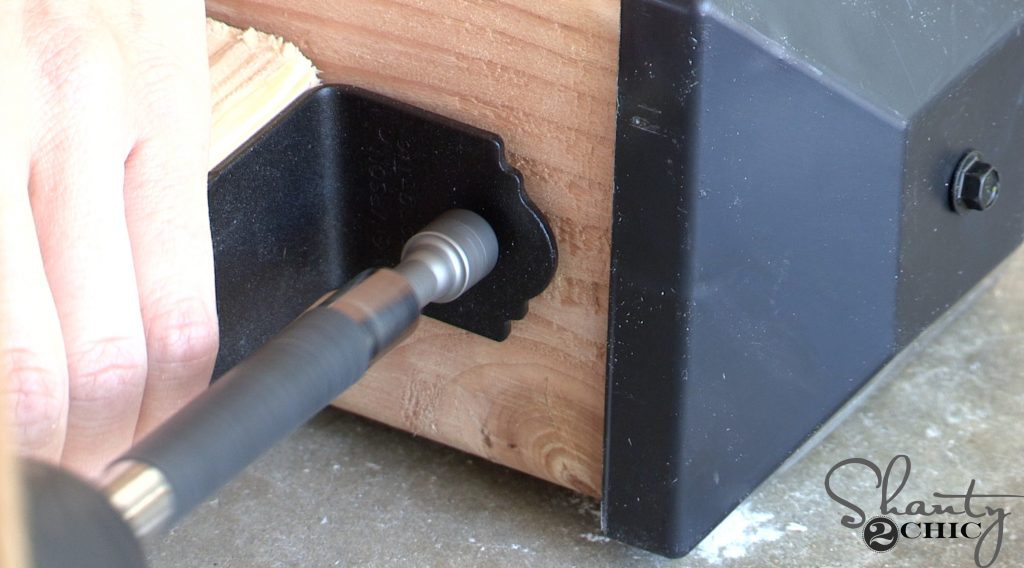
Next, we attached four metal angles to the ends of the top, back frame pieces. Then, we attached it to the top of the post assemblies with 1 1/2″ wood screws and wood glue.

With the main frame of the day bed assembled, we sat the entire piece upright. We cut the slat pieces to size, spaced them out evenly and attached them with 1″ wood screws.
We moved around to the back side of the pergola to work on the back slats. We cut the back slat pieces to size and attached four metal angles, with 1/2″ wood screws, to both ends. Then, we attached the first back slat, 3/4″ from the back frame into the inside of the posts with 1 1/2″ wood screws. We used a 3/4″ wood scrap as our spacer between the slats.
Once all three of the back slats were attached, we cut the front, back and side aprons to size. We then attached them to the frame pieces with 2 1/2″ wood screws and wood glue, making sure that the top of the aprons were flush with the top of the frames!
At this point, you can add a finish, hardware and a mattress and be done! I decided to complete the day bed with an optional pergola top! You can refer to the plans for the additional supply and cut list and steps!
DIY Outdoor Day Bed – spray stain & seal
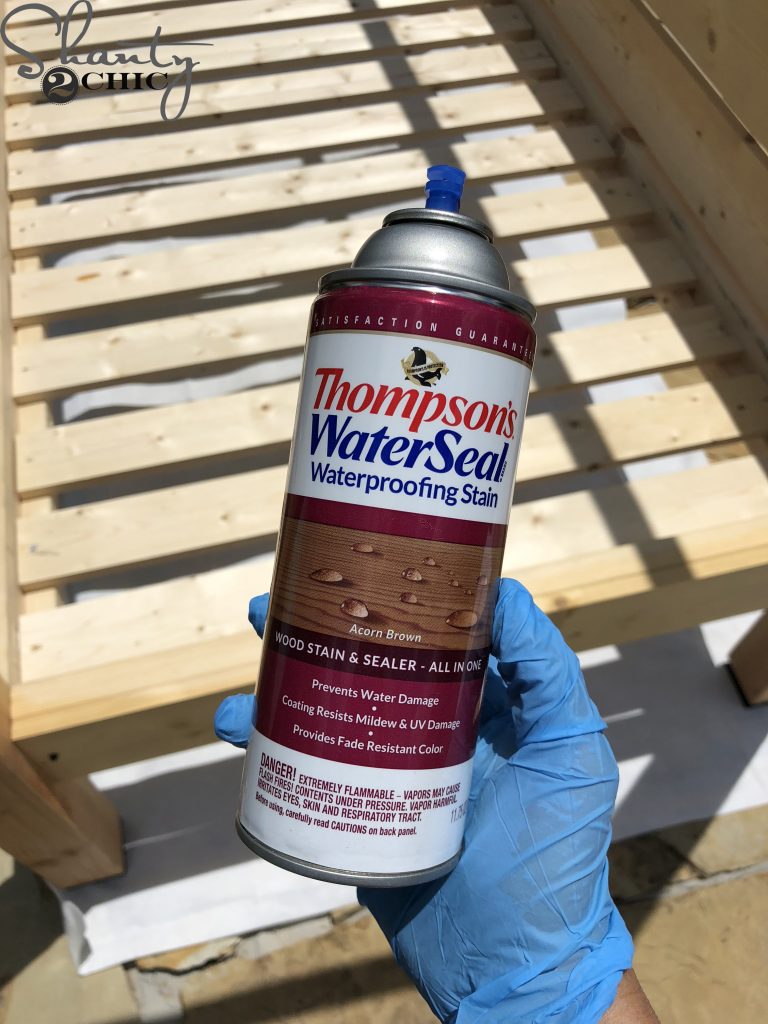
To save time and steps, I tried this new product. It is an outdoor stain/sealant spray in one! I LOVED IT! I used almost 4 cans for the entire piece and it took me about 1.5 hours. I used it on a day that wasn’t very windy and it took about two coats. You can find the spray that I used HERE!
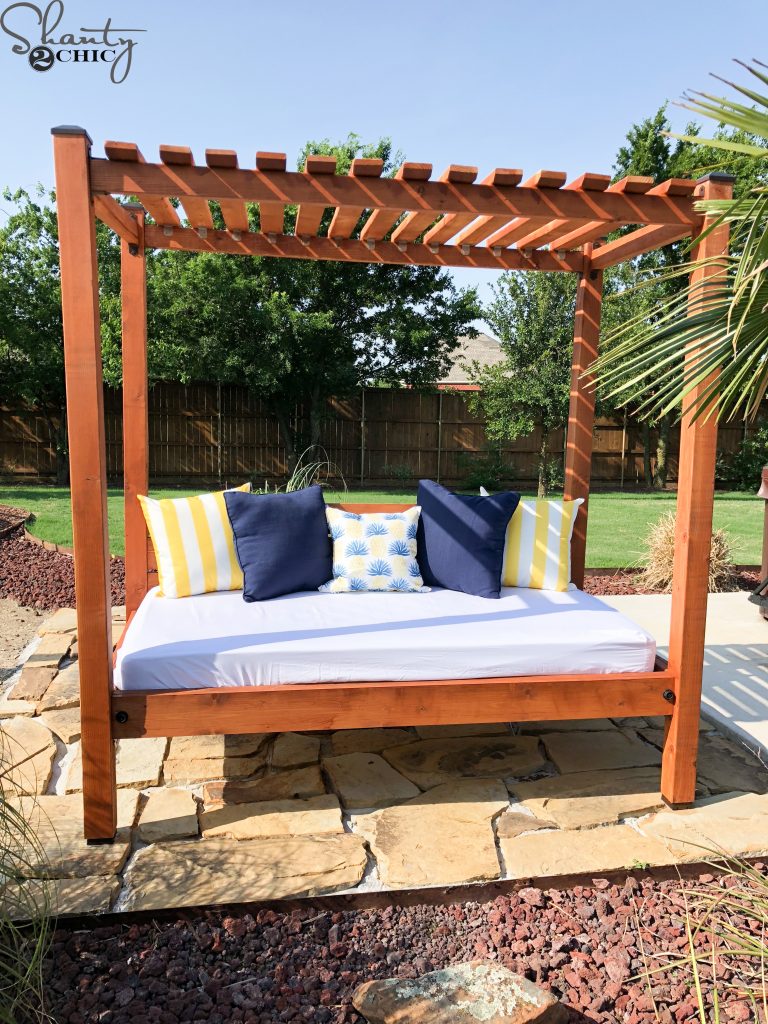
That was it! Once the stain dried, we added some fun hex bolts to the aprons, a mattress, waterproof cover and some super cute pillows! Click the links at the end of this post for all of the sources!
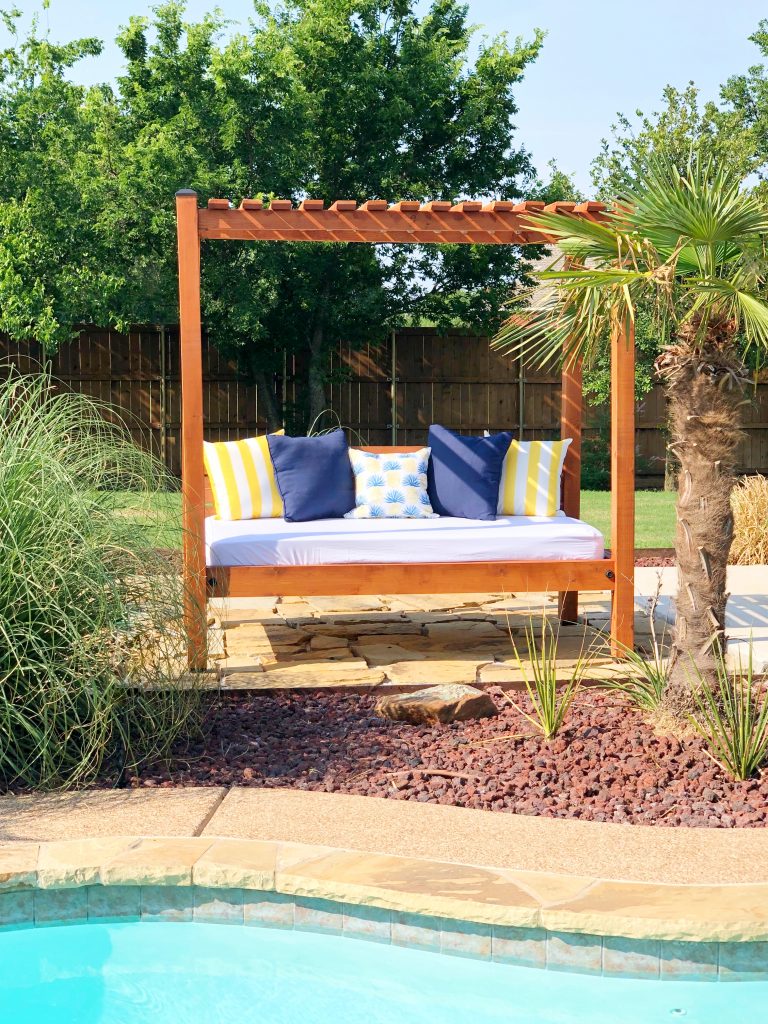
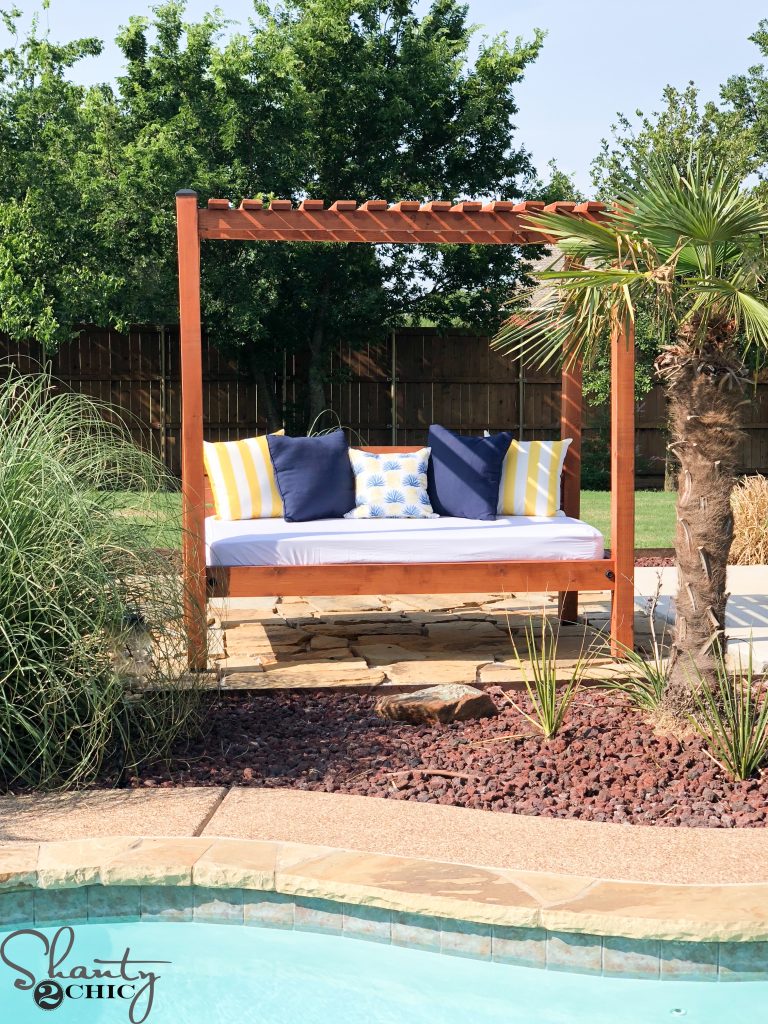
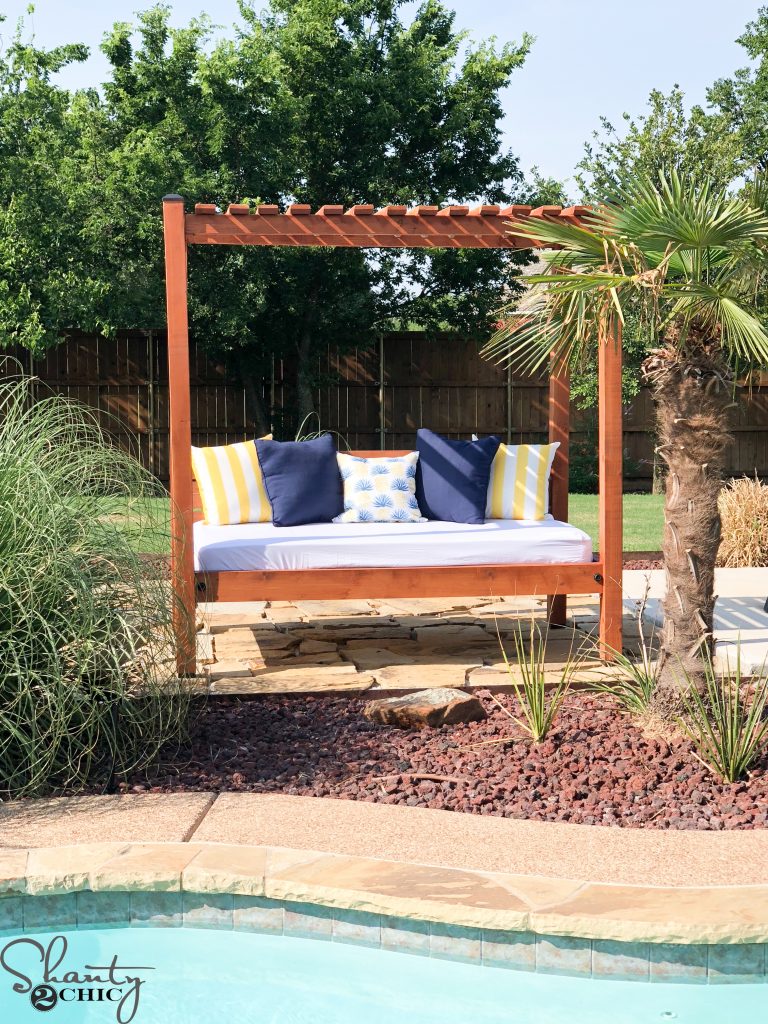
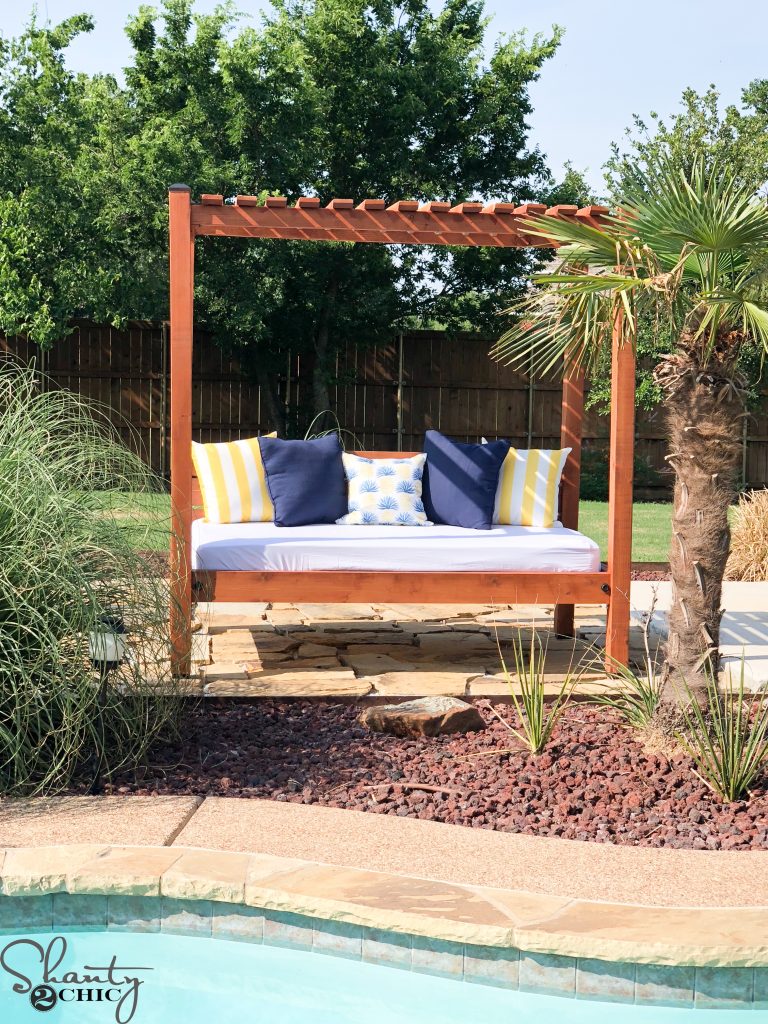
I am so happy that I finally have the Outdoor Day Bed that I’ve wanted for so long! And, at only a fraction of the cost! That left me more budget for cute pillows 😉
Speaking of cute pillows, here are the links to all of the sources!
Thanks so much for stopping by!
Happy Building!


Do you have an indoor version for a bedroom?
What type of wood did you use? Was it pressure treated?
Hi! Thank you for the tutorial. You make it so effortless. I am getting ready to build one too, but I have a question about the building plans. I noticed that 4x4s are cut to 60″ which is only 5ft. Is that right? The bed you are building clearly towers above your heads. Could you please clear it up for me? Thanks.
Love the design. Where did you get the post caps, bases, and other hardware? I couldn’t find that in the post.
Did I miss the link to the metal angles, post caps and post bases? Thank you so much for your fun videos and step by step plans… you have inspired me to try and actually build something myself instead of waiting for my husband or sister to do it for me!!!
Hi! Just starting the project and was wondering if the 4 base post in your tutorial were also cut to the 60″ stated on the cut list? The posts in your video tutorial look way taller than that. Just inquiring…. I don’t want a “short” Daybed. Thanks in advance!
I did not cut mine at 60” I cut them at 84” per the final diagram. Also I found OZCO 2” Rafter clips pks of 10 with screws for $30 each on Amazon. ( I had to order from two different suppliers and two boxes have flat screws and 1 box has hex.) So the angles needed are an additional $90.
Also the photo shows a different bolt on the bottom. Staining/sealing all the pieces took about 6 hours, which I did before assembly.
Dawn- that’s what we ended up doin too, as the 60” in the cut list would have been too short.
My other question… the cut list for the slats shows 38”. The standard twin bed they used is 39”. Were you short on the width or did the mattress fit in??
Hi I am wondering the same thing. What height should the 4x4s be since 60″ seems too short? Also are the slats at 38″ too skinny for the 39″ wide mattress?
I’ve never built anything before but I want to take this on this week and would appreciate any advice!
HI great project
Q: on the cut list, what is the 96 means?
I’ve been dying for something like this for my back yard. Even with the water proof mattress cover, won’t take the matress mold? How heavy is it? I’d have to bring it in every night.
May I ask, probably newbie question all the way from the Mediterranean, do you have to worry about wood expansion?
I leave near Houston Texas. Its to hot to do any thing right now. my garage is way to hot.