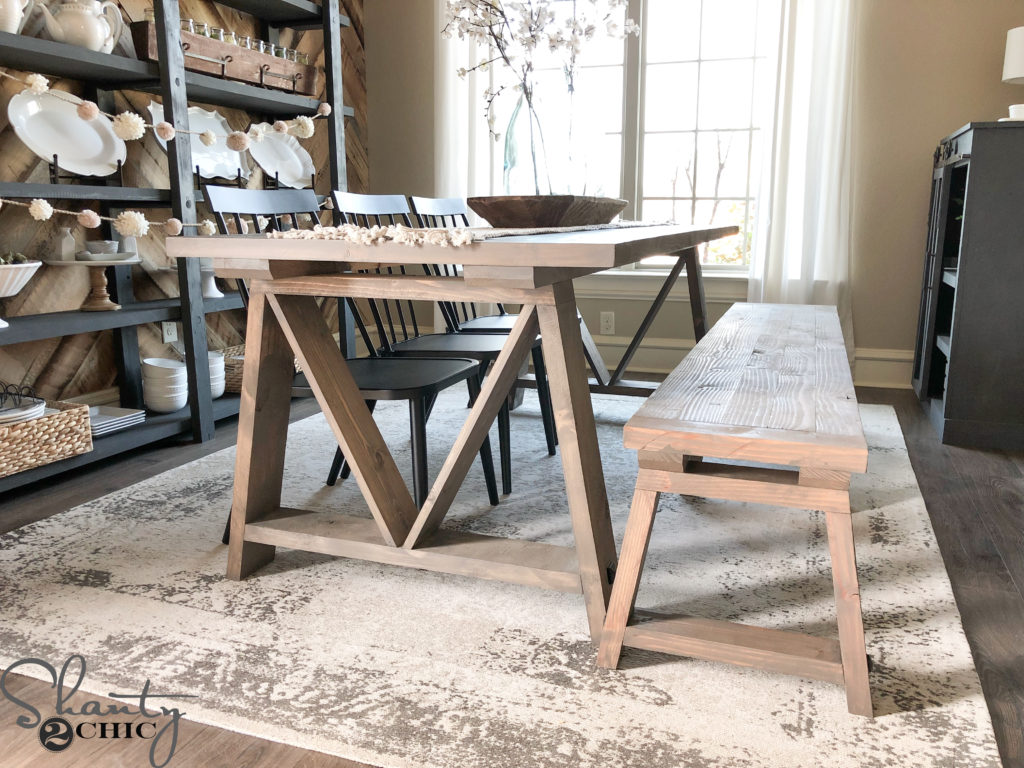
We get SO MANY questions from you guys asking us what tools we recommend to get your tool collection started! With the Holiday season upon us, we think the timing is perfect to break it all down for you, so that you can get your Christmas Wish List started! So, we’ve got our 2018 Gift Guide for you today as well as a set of Free Plans and how-to to build the DIY Fancy V Dining Bench to match the table that we already shared – free table plans can be found HERE!
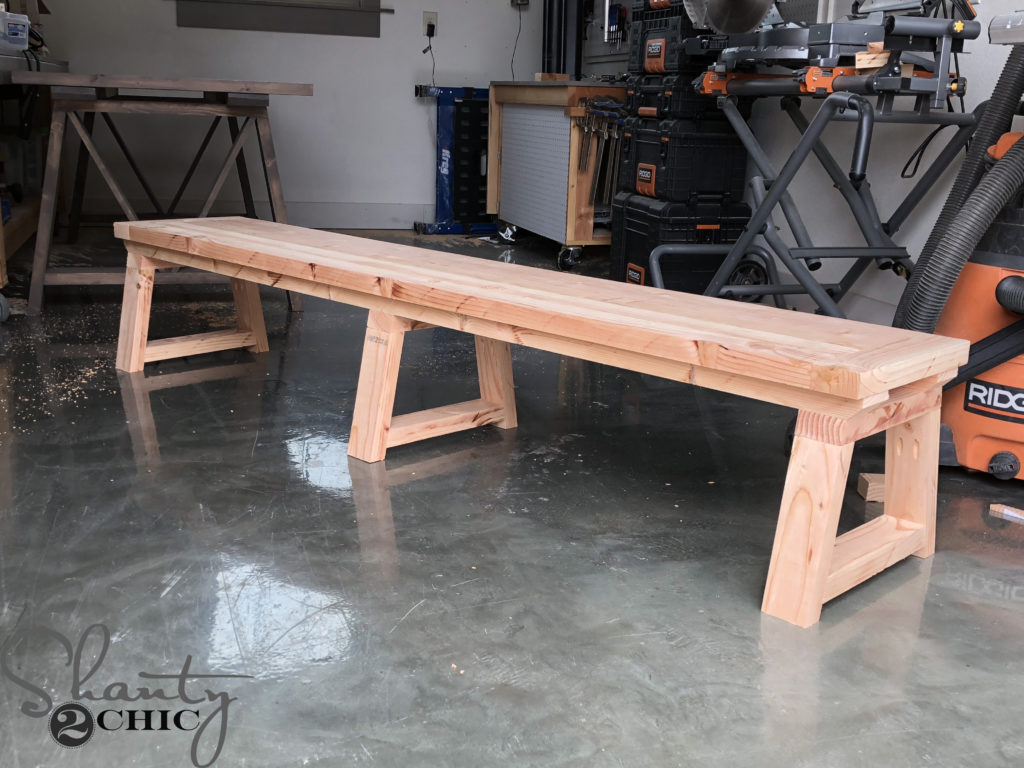
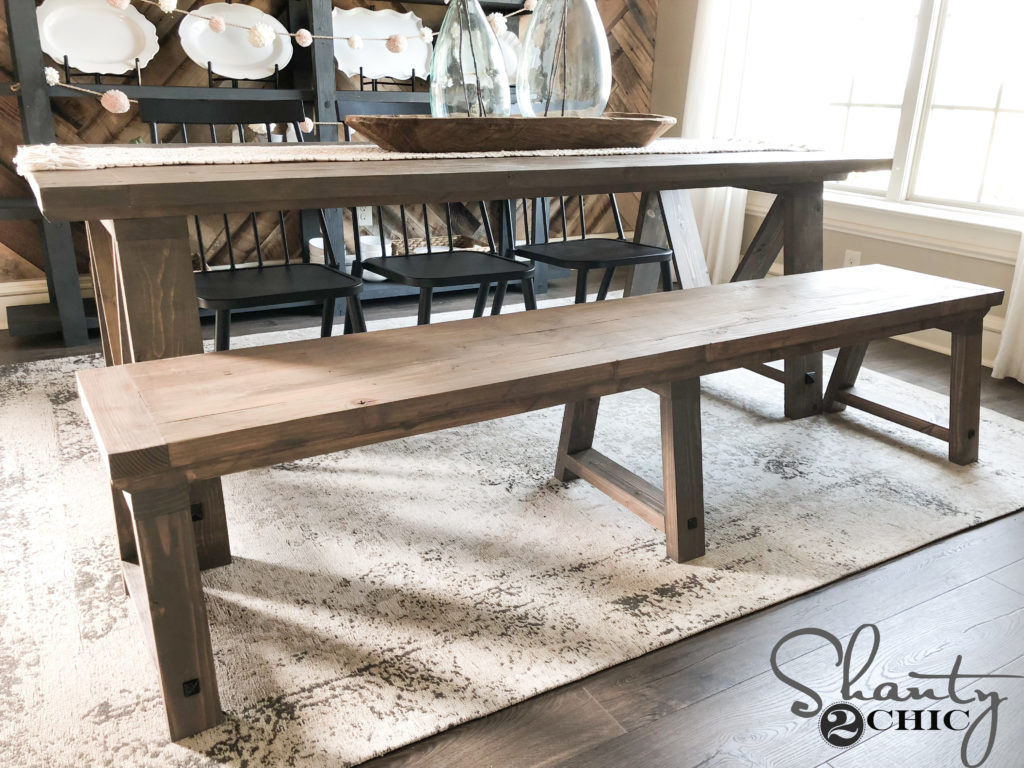
DIY Fancy V Dining Bench
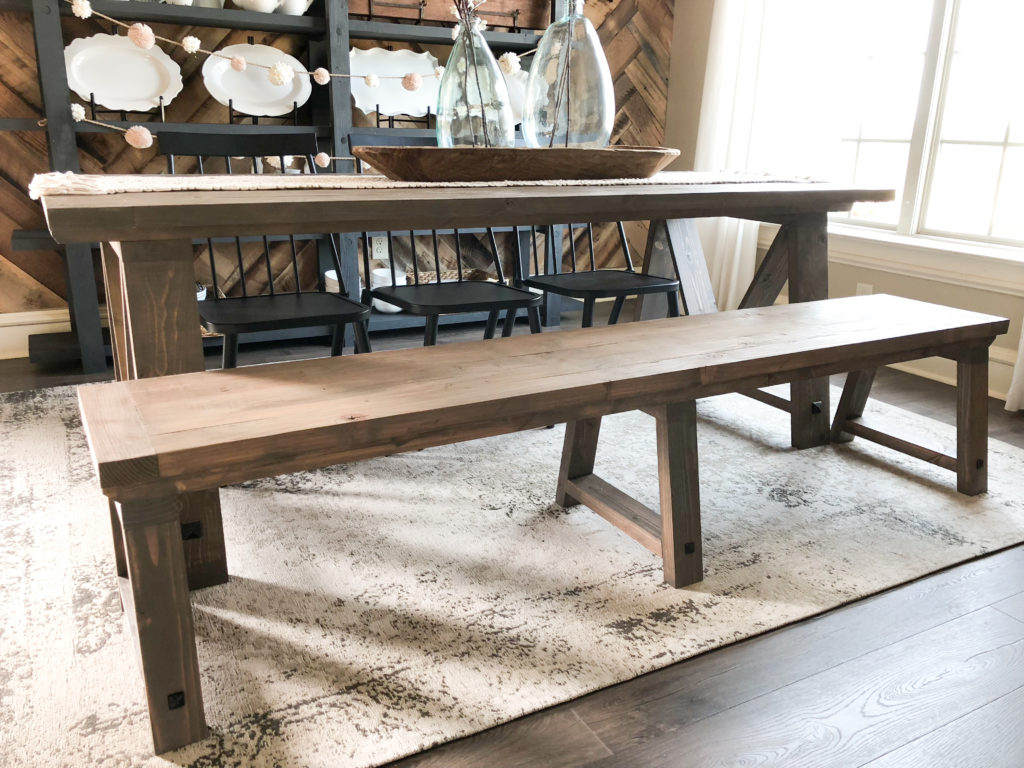
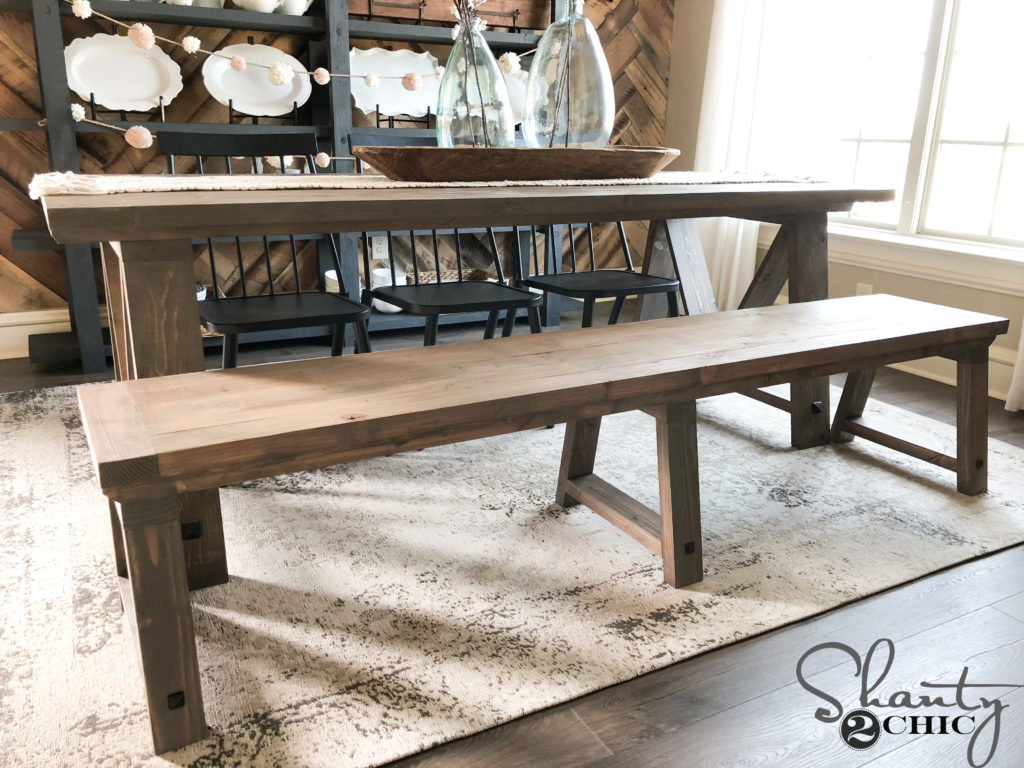
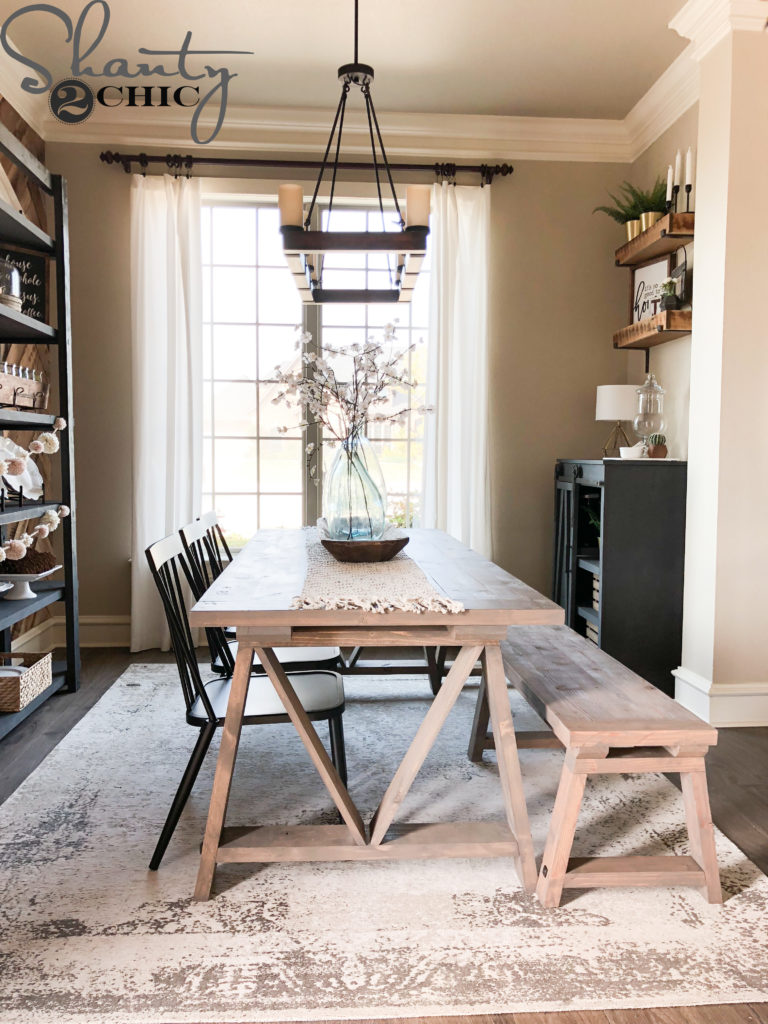
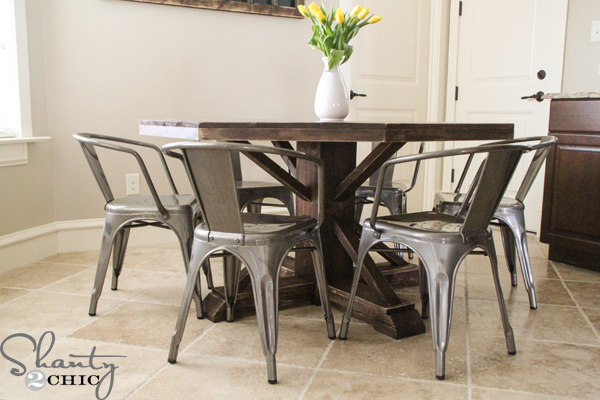
Now for the free plans! You may remember our latest dining table, the DIY Fancy “V” Farmhouse Table! Well, we can’t leave you hanging on a matching bench, any longer! So, let’s build it! Get the FREE Printable Plans HERE and follow along with the how-to below!
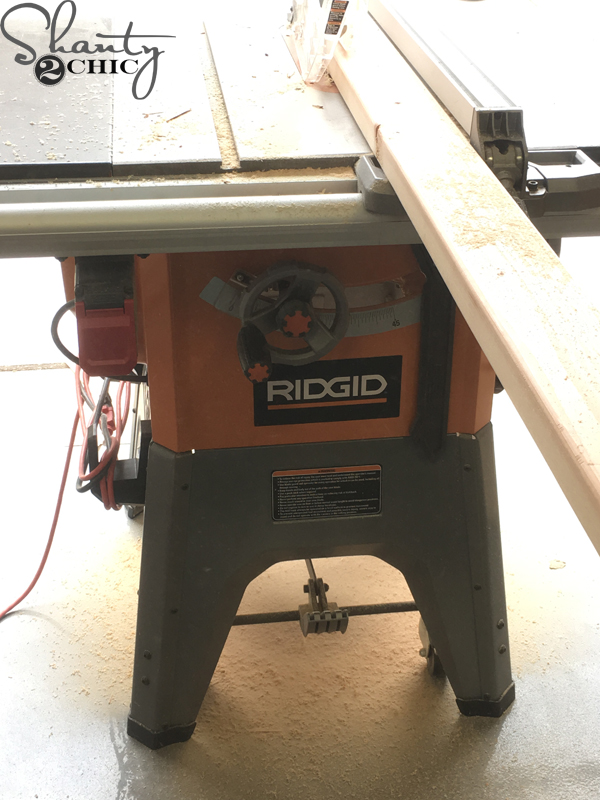
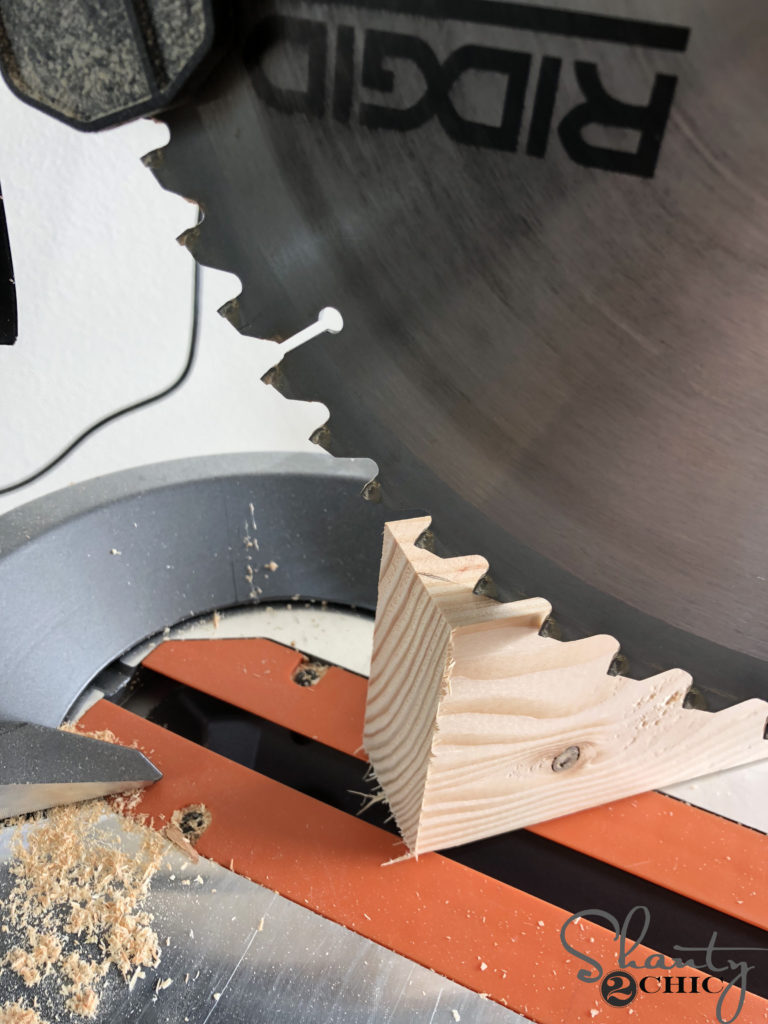
First, we used our table saw to rip all of the round edges off of the boards, to make them 3″ wide. This is not a necessary step but if you choose not to rip your edges off, make sure to adjust the plan measurements, accordingly. You can watch How we Rip our 2x boards video HERE!
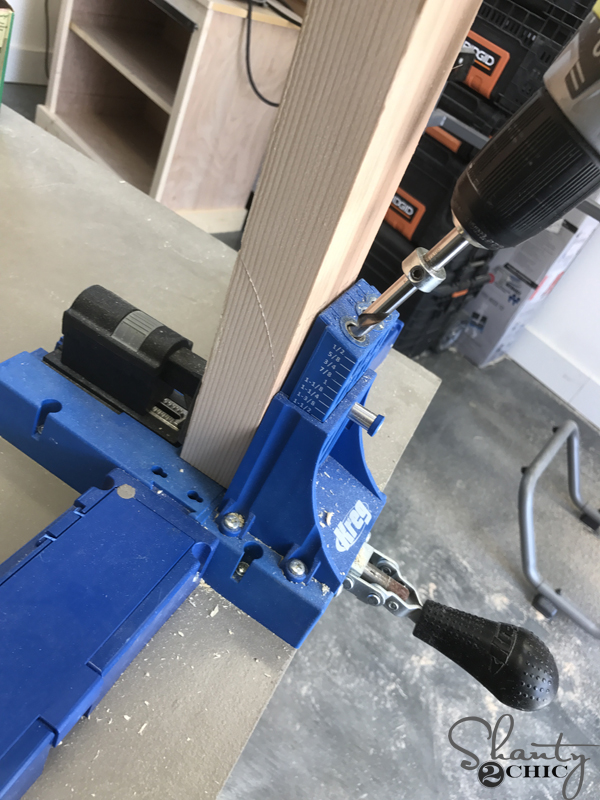
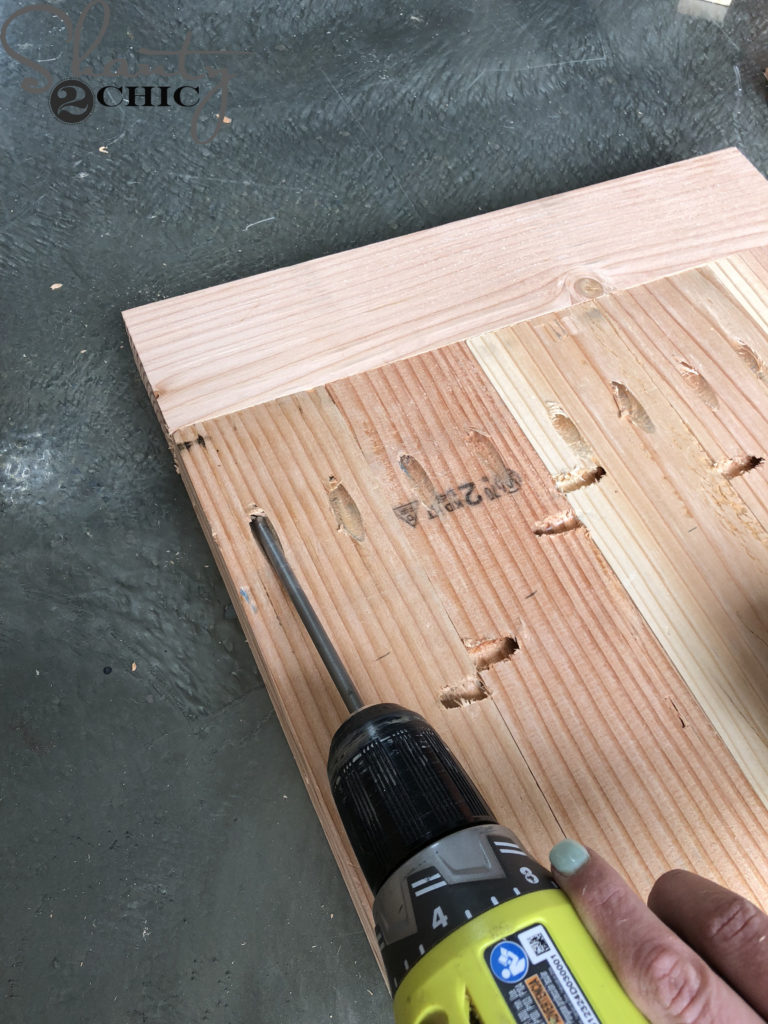
Next, we cut the plank boards to size and used our Kreg Jig to drill 1 1/2″ pocket holes at each end and across the sides of four of the planks. You can find our favorite Kreg Jig Model HERE! And, watch our How to Use a Kreg Jig Video HERE!
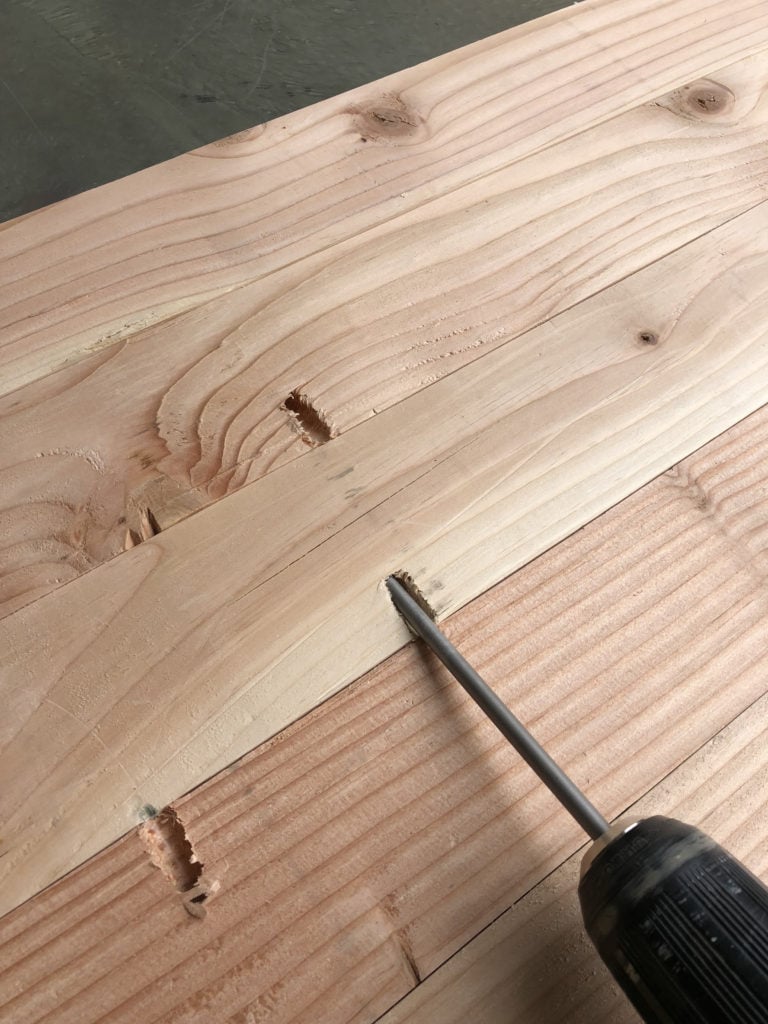
We attached the planks together with 2 1/2″ pocket hole screws.
Once the planks were attached, we measured and cut the breadboard pieces to size. We attached a breadboard to each end with 2 1/2″ pocket hole screws, through the 1 1/2″ pocket holes that we created at the ends of each bench top plank.
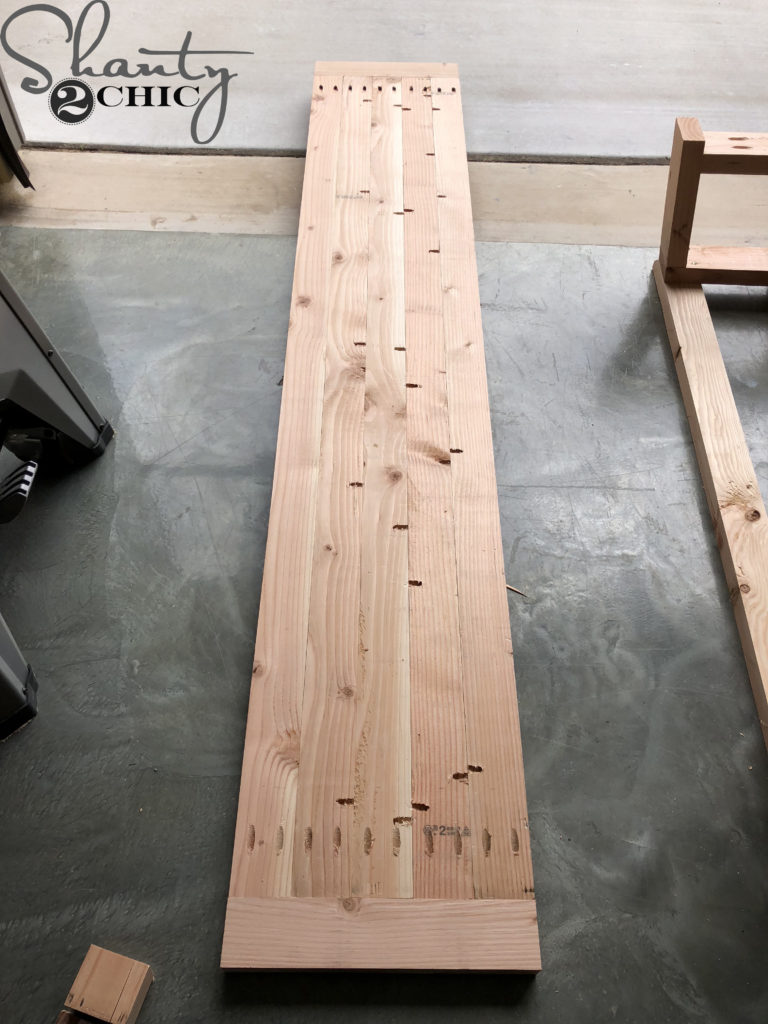
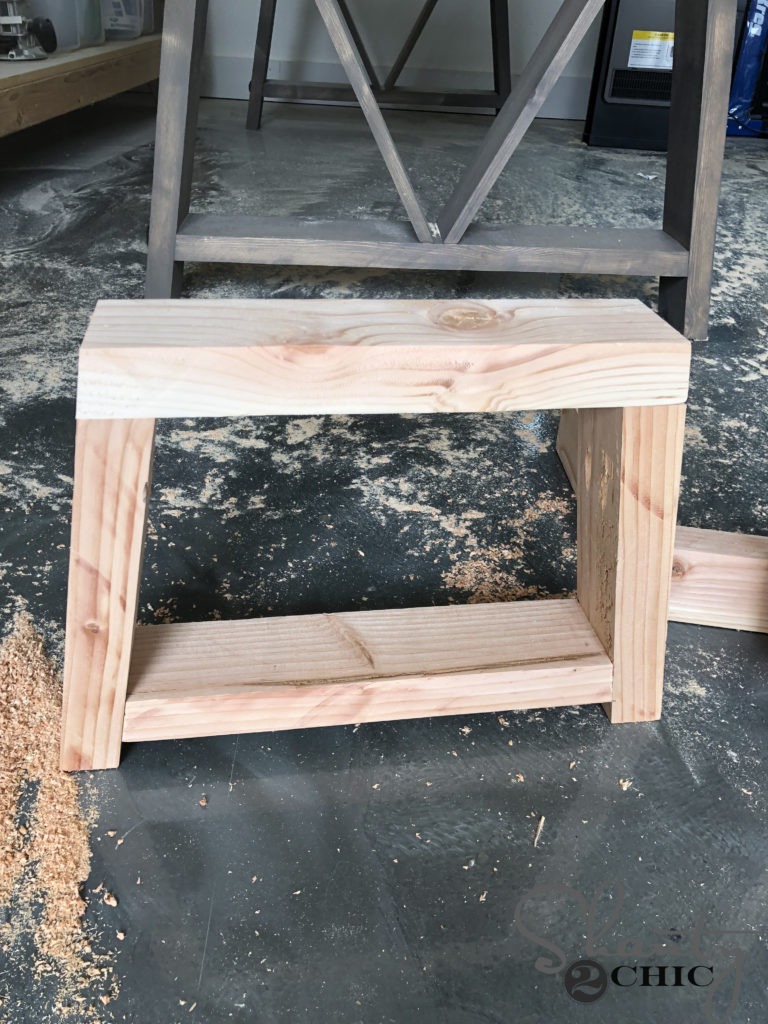
The bench top is finished! Now for the leg base!
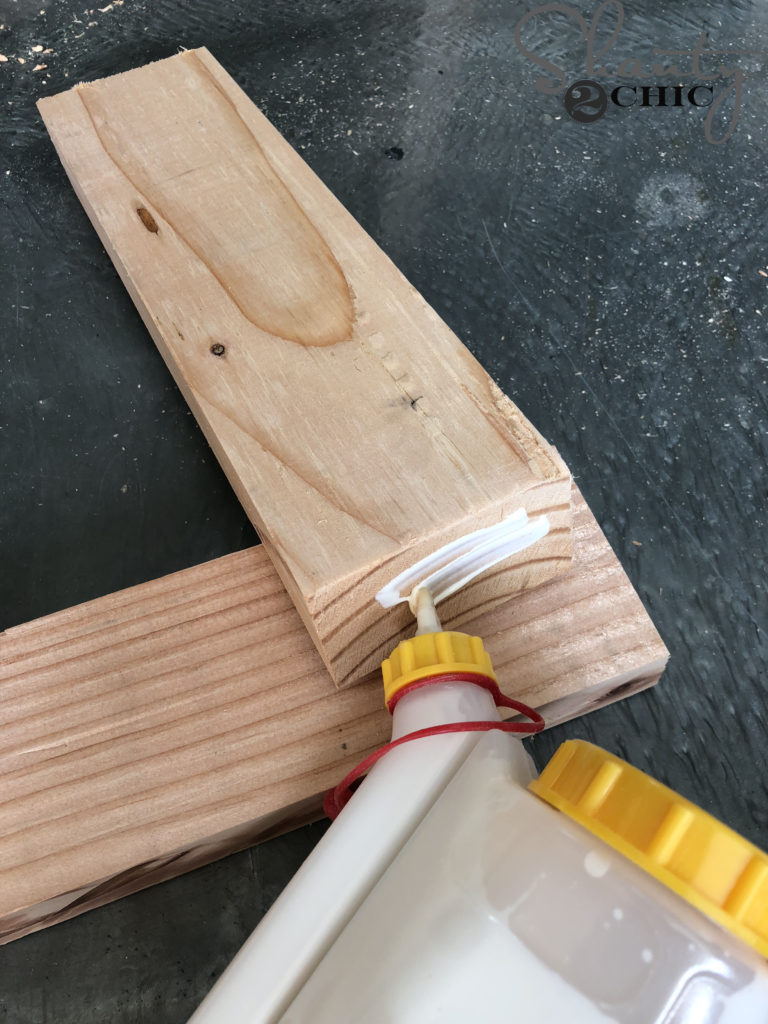
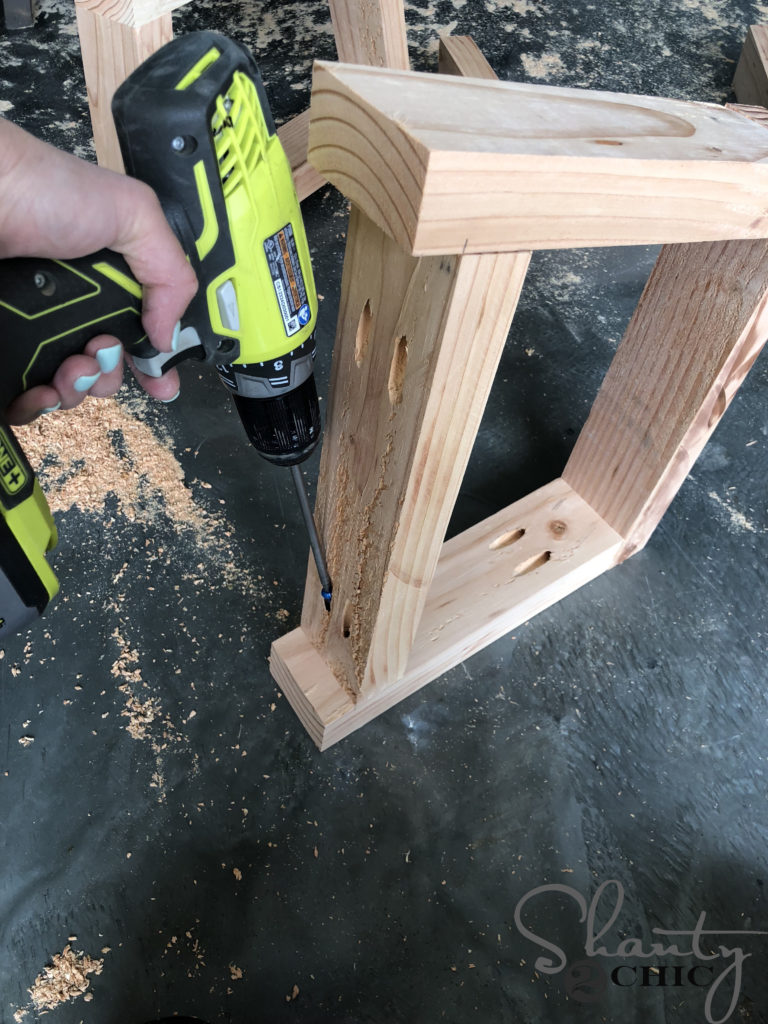
We cut the legs and the top of each base to size and drilled 1 1/2″ pocket holes into the top, inside end of each leg (refer to the plans for proper placement of these pocket holes). Then, we applied glue to the top end of each leg. You can find our favorite glue bottle HERE!
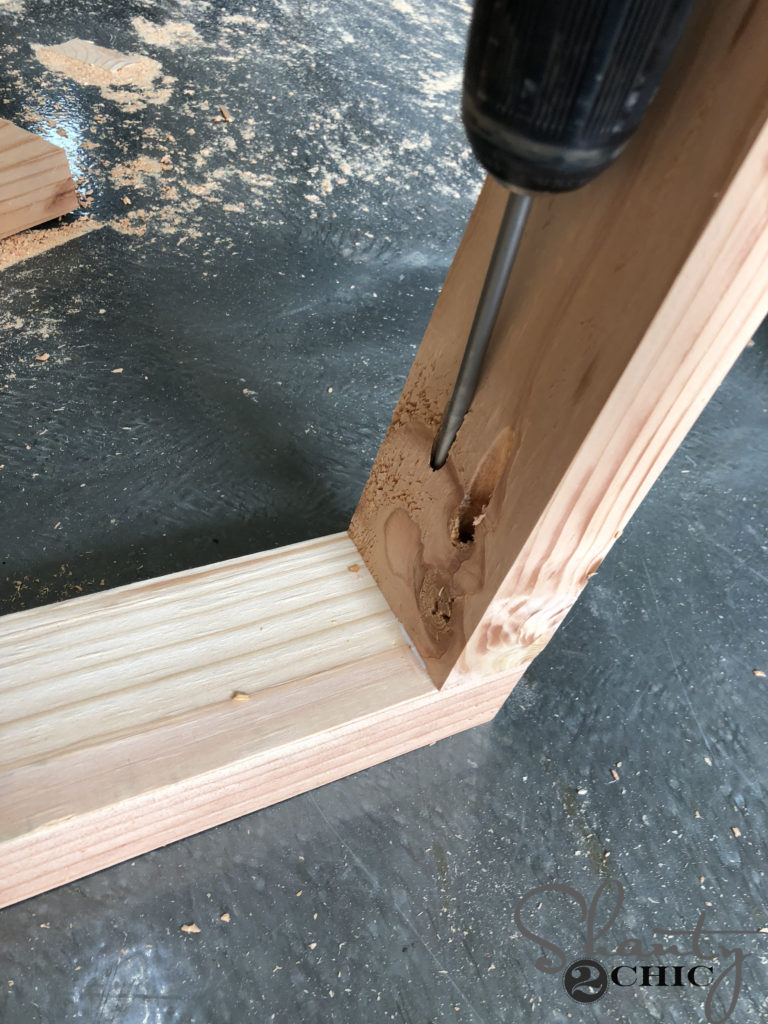
We attached the legs to the top of each base with 2 1/2″ pocket hole screws. Pocket holes should be facing in.

Here is a leg base, at this point. We built three leg base assemblies.
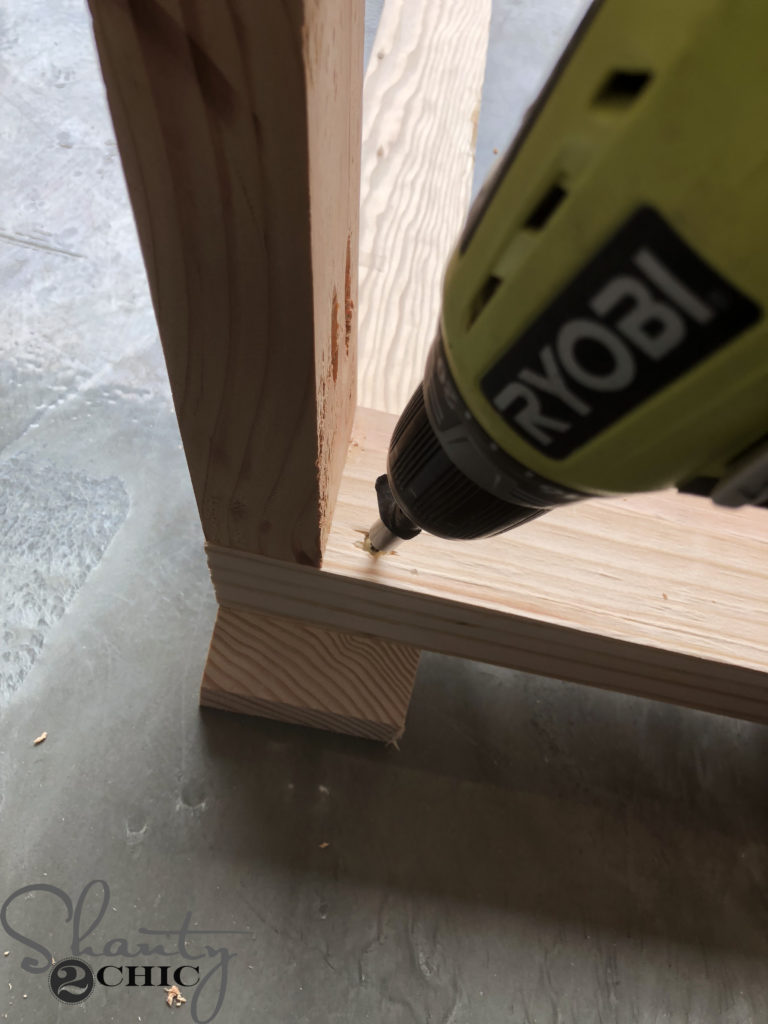
Once the legs were attached, we cut 3 leg runners to size and drilled 1 1/2″ pocket holes on the bottom ends. Then we attached them to the legs, 1″ from the bottom of the legs, with 2 1/2″ pocket hole screws and wood glue. Make sure your pocket holes are facing down (towards the floor) on this piece.
Here is a finished, leg base assembly. Now to attach them!
We cut the long runners to size.
Then, we laid them upside down and placed the leg bases on top. We attached the leg bases to the long runners with 2 1/2″ wood screws, from the leg bases and into the long runners. Refer to the plans for the placement of the leg bases, on the long runners.
Finally, we attached the planked top to the leg base assembly. We used 2 1/2″ wood screws and attached them from the long runners and into the planked top. Refer to the plans for the proper placement of the leg base assembly on the planked top.
Ready for a finish!
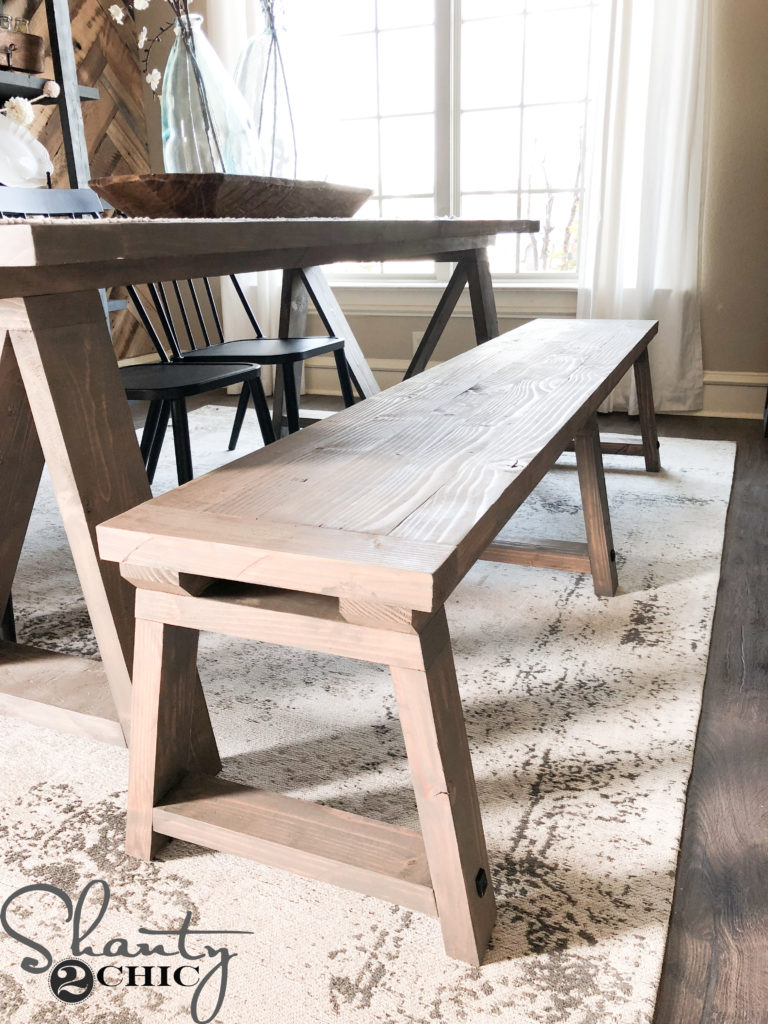
We used one coat of stain – you can find it HERE and one coat of our favorite finish! You can find the finish HERE!
We added some decorative nail heads – found at Hobby Lobby!
You can find the rug in my dining room HERE!


Fyi, if using these plans to go with table leg (green) measurements need to be 15” and not 10”. Then adjust runner length accordingly. Happy building
The bench is just 13″ tall according to the blueprints, but it appears to be more like 16″ in the photos above. A bench height of only 13 inches feels low. We’d appreciate it if you could review and give us some feedback. Many thanks!
There are 3 2×4’s on top of the bench legs which adds 4.5”. The bench dimensions on the last image of the plans shows 15” tall.
In the plans it says that the bench is 13”s tall but in the pictures above the bench seems taller. 13”s seems kind of low for a bench. Can someone please review and advise? Thank you!!
I made a pair of these benches this summer and ran into the same problem. I ultimately made the legs 14″ and used 3 2x6s for the seat, which brought the final seat height to 18″ (standard dining chair height).
Where can I download the specs
Your video for the holiday guide and best tool list is broken. Please fix it. I would love to see this list.