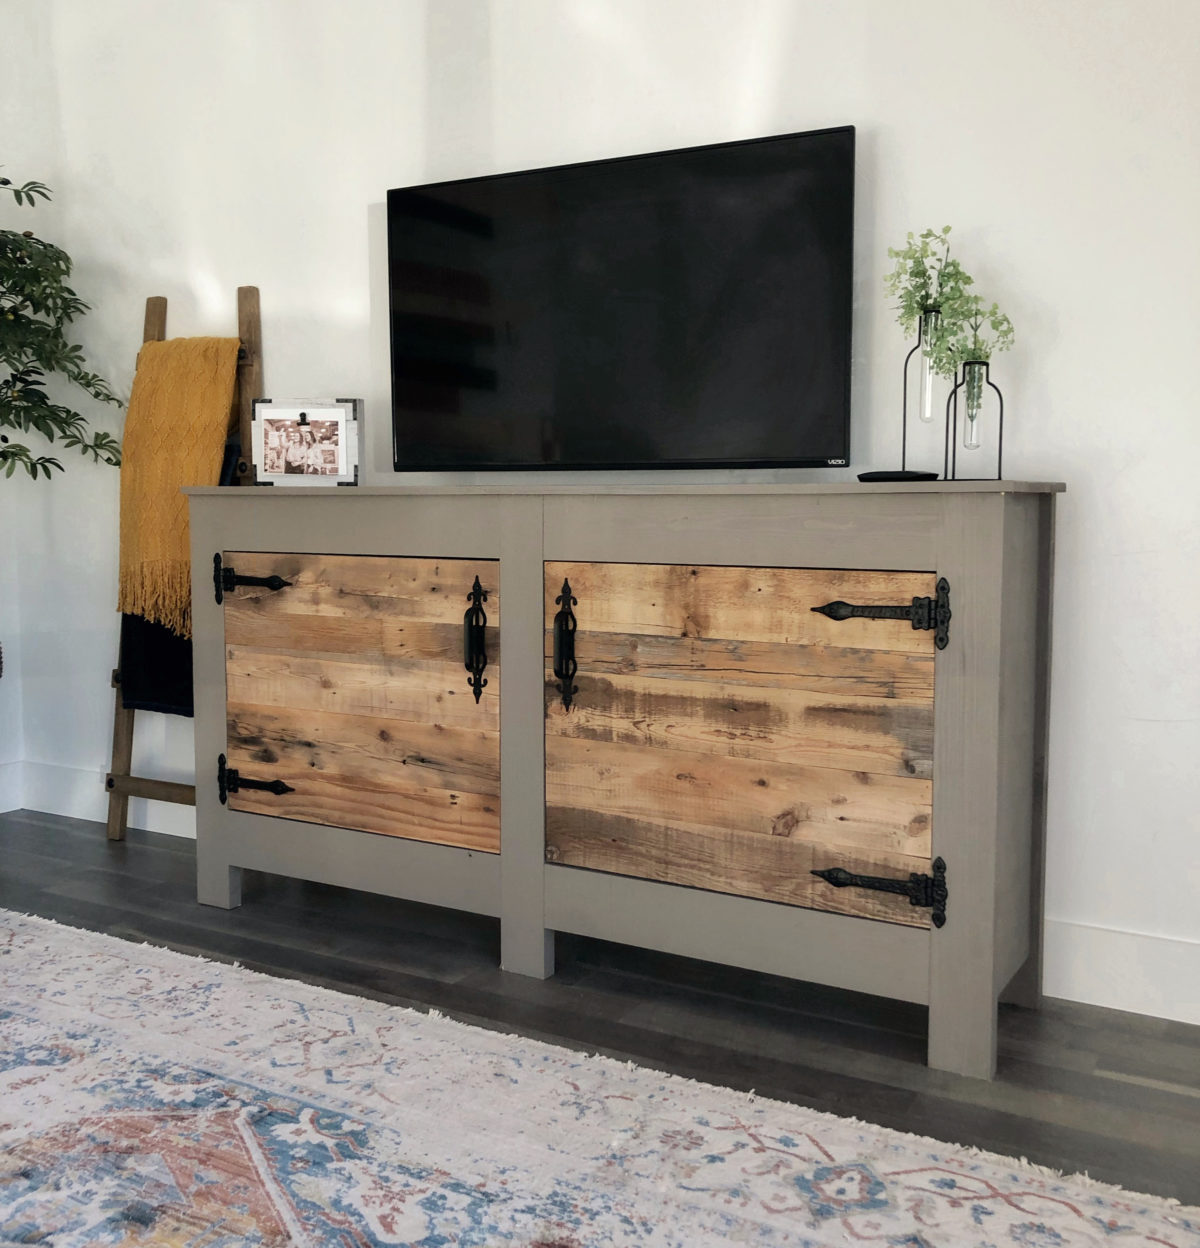
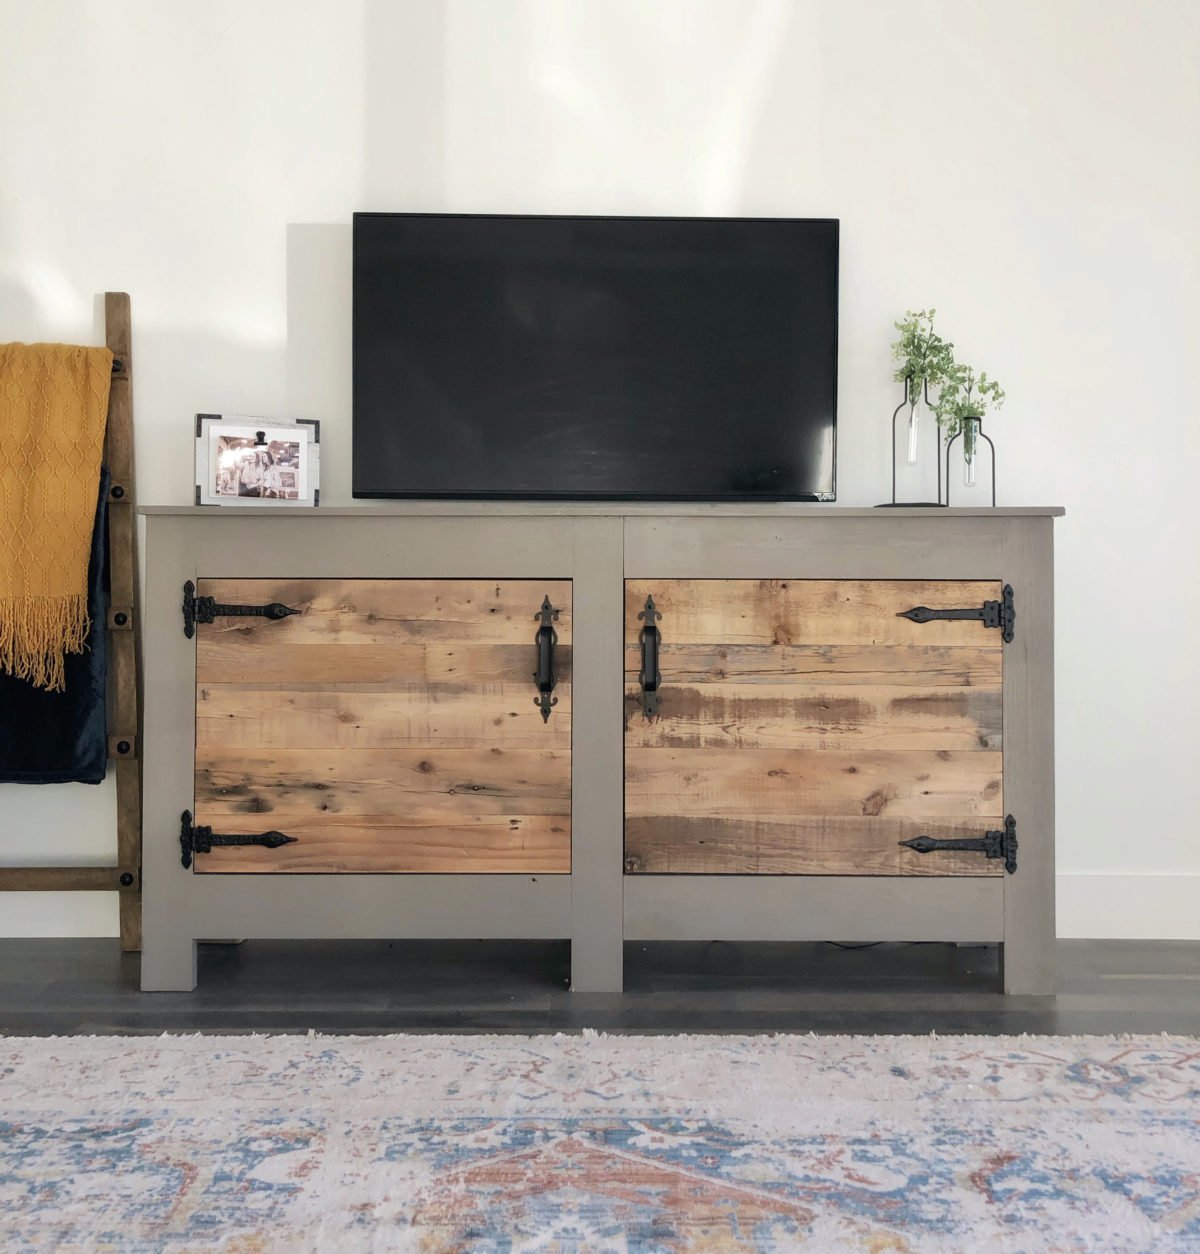
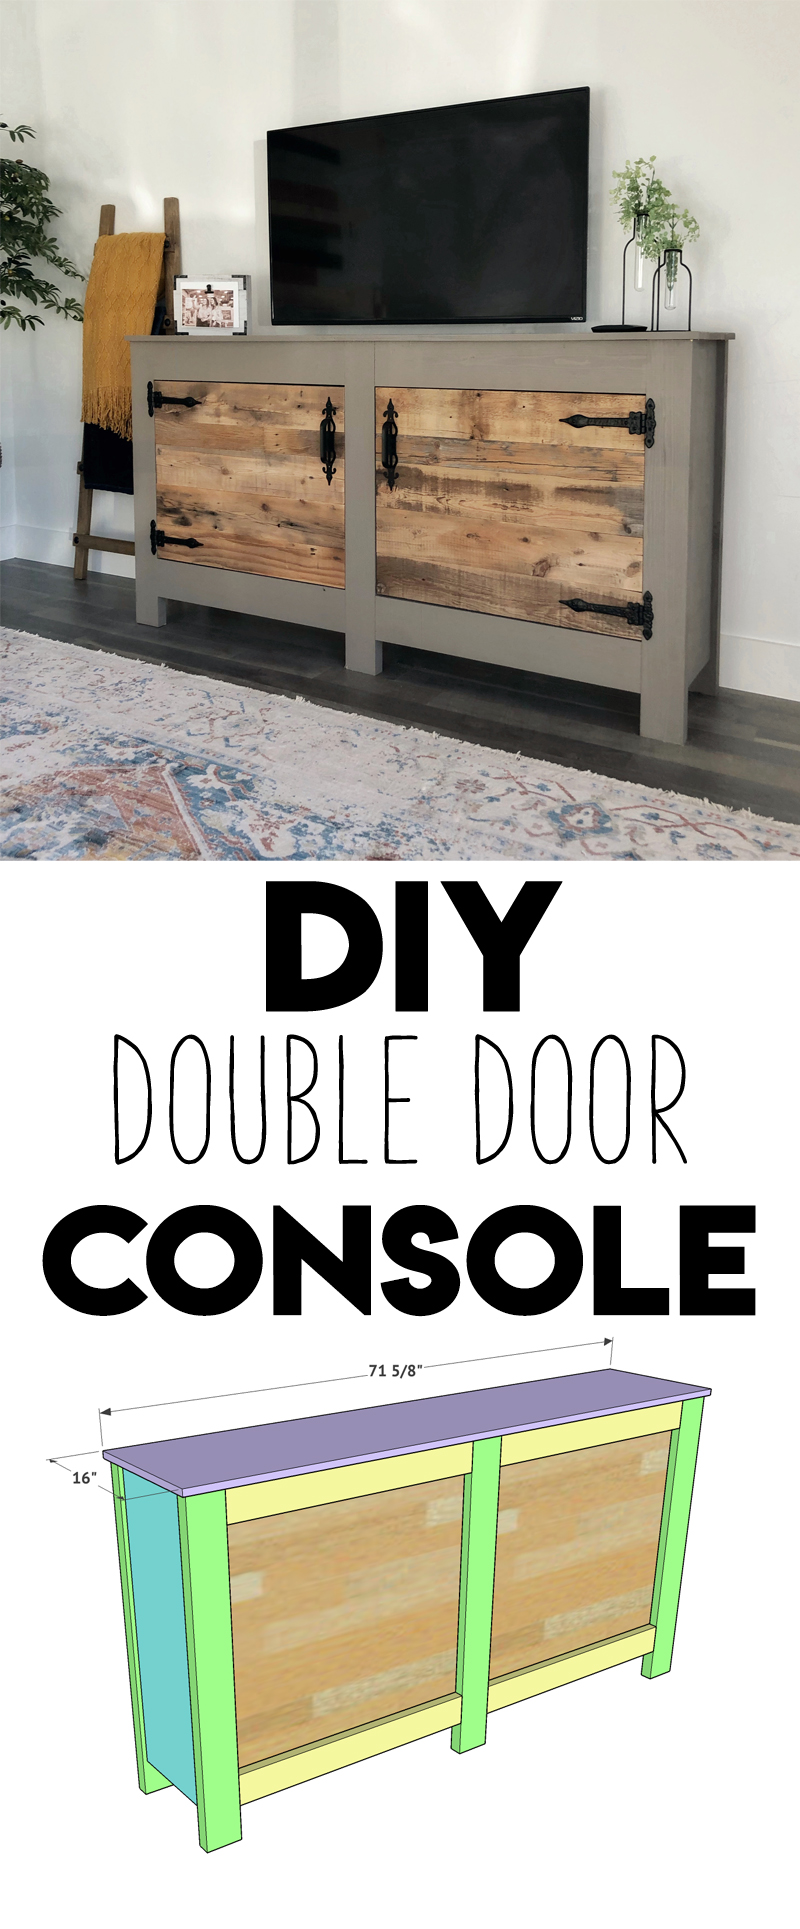
Hey guys! Ash and I needed lots of storage at the new office, and we wanted a spot for the TV, so I designed just the solution! This is really the perfect console for any room. It’s only 15″ deep so it doesn’t take up a ton of space, but still provides a ton of storage. We LOVE how it turned out! Check out this DIY Wide Double Door Console!
Before we get started, be sure to DOWNLOAD AND PRINT the free plans by CLICKING HERE!
DIY Wide Double Door Console
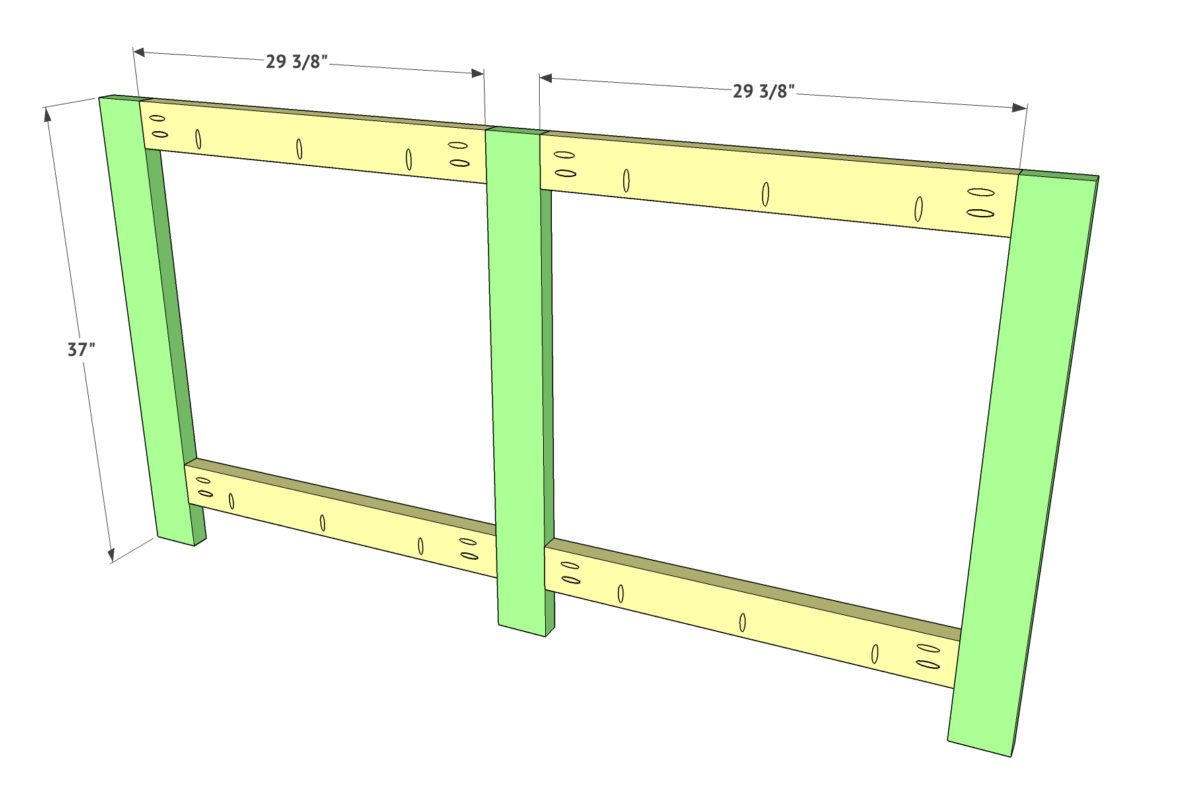
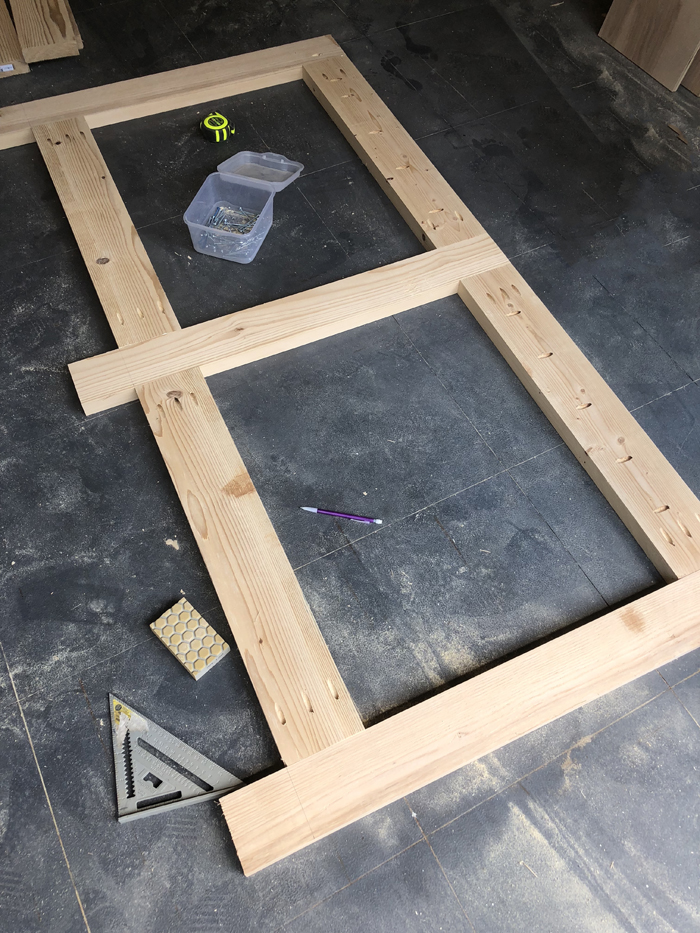
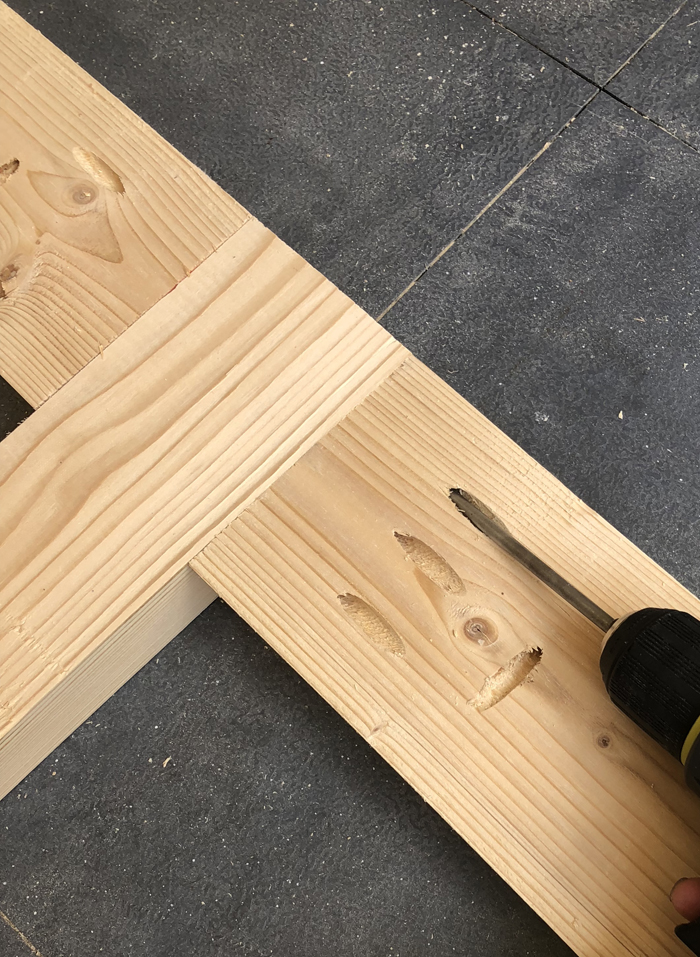
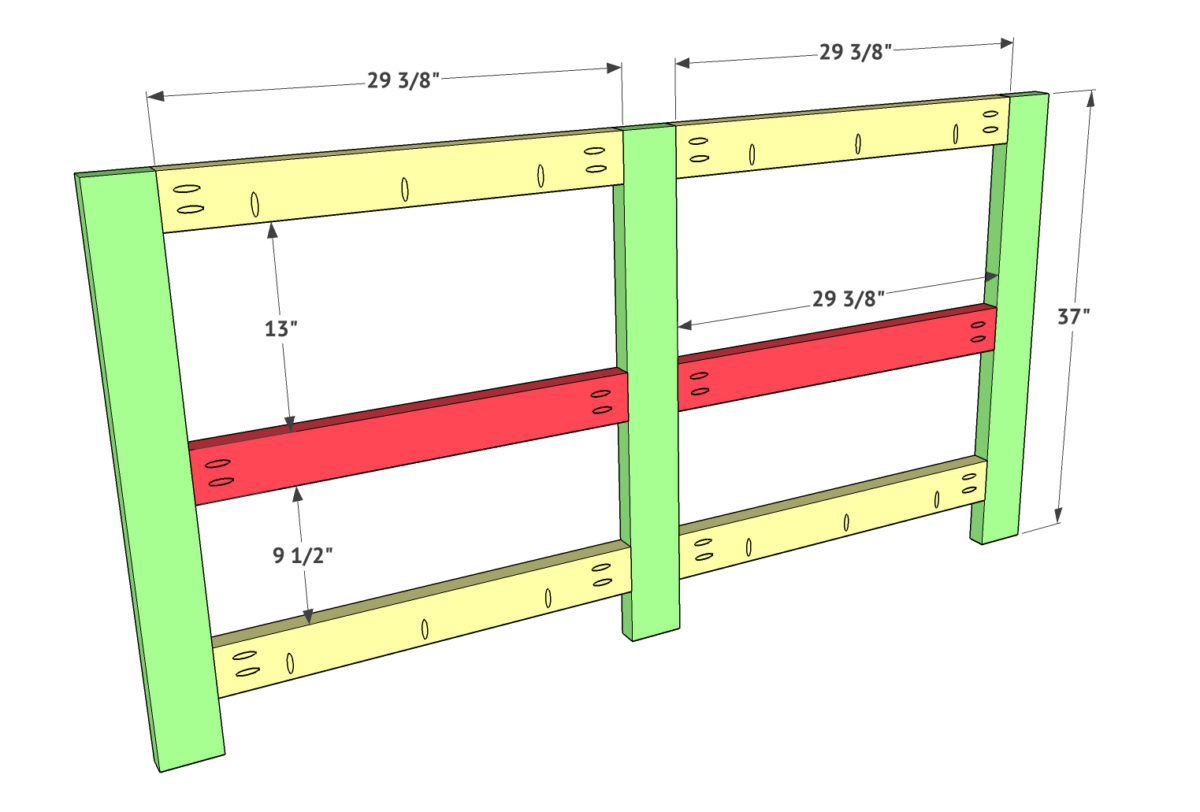
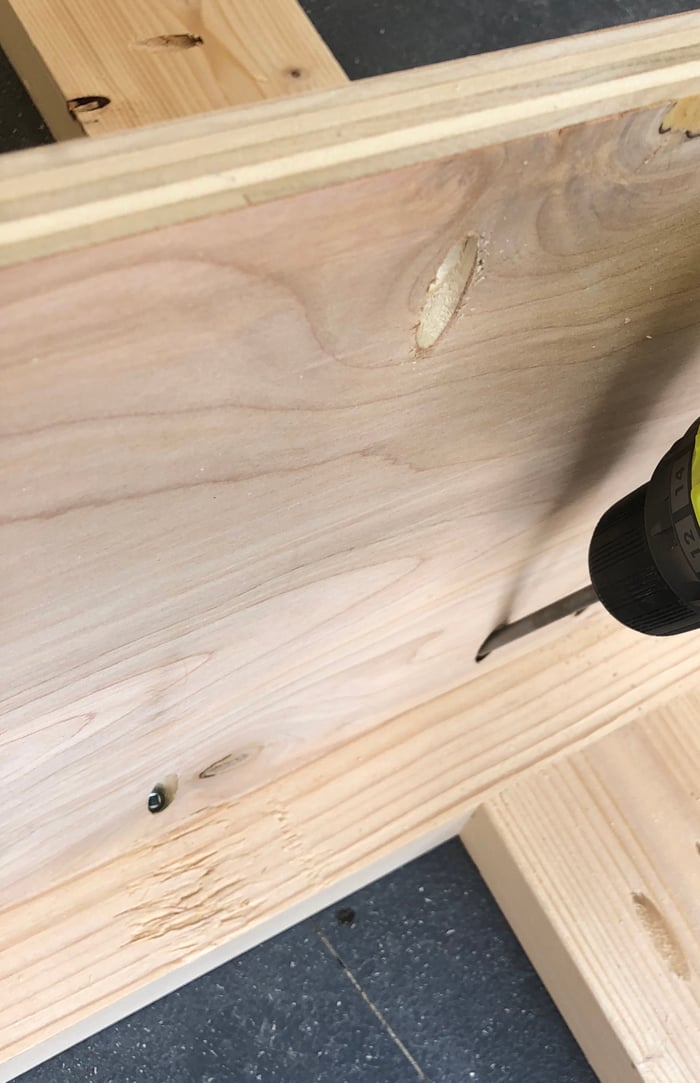
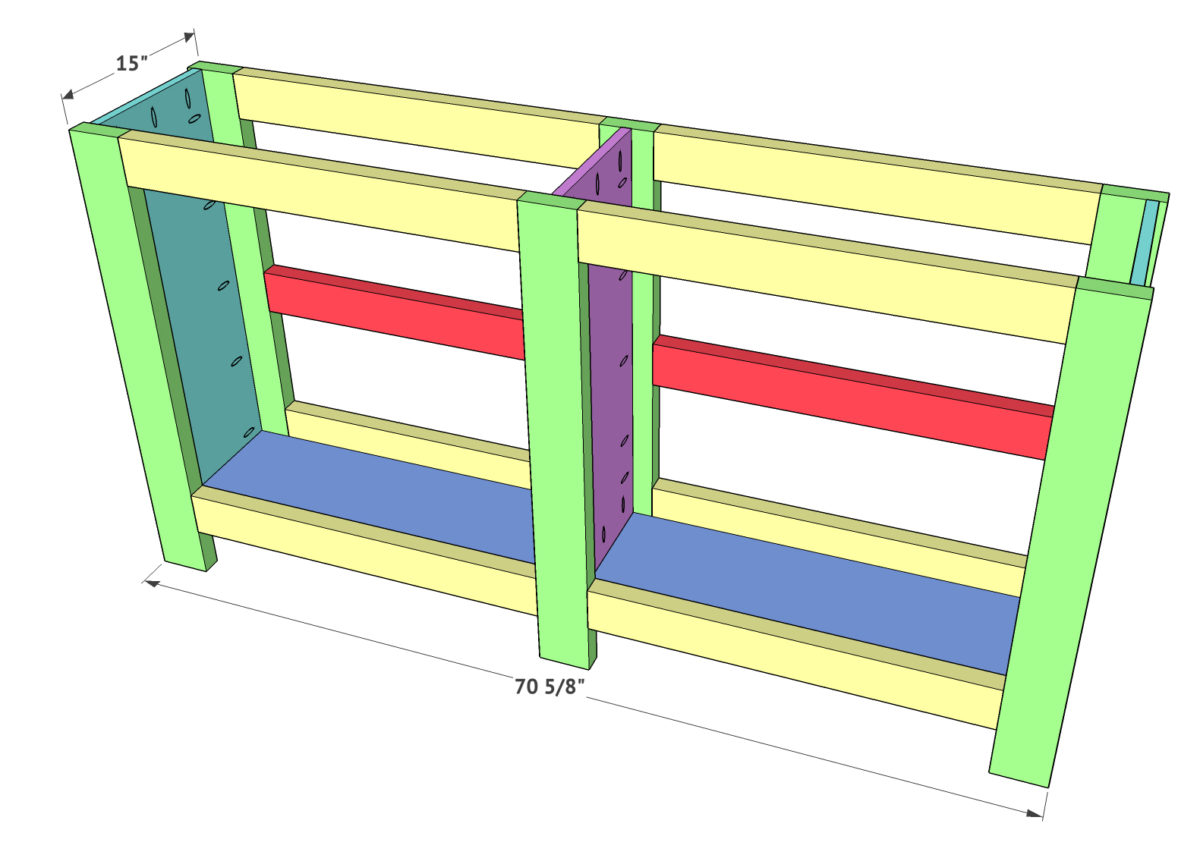
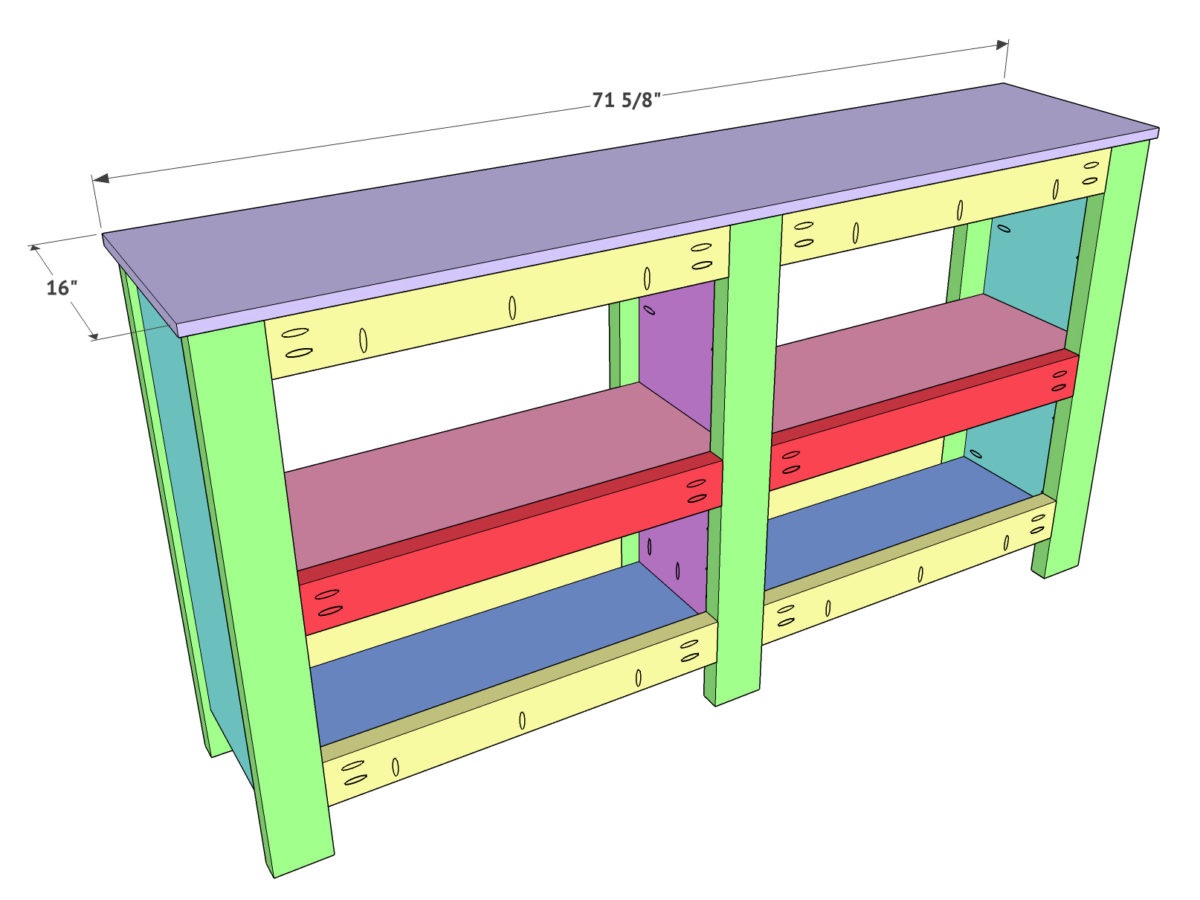
The first step is building the front frame. The legs are 2×6 boards I ripped to 4” wide, and the horizontal boards are 2×4 boards I ripped to 3.25”. I added 1.5” pocket hole screws to the ends of each horizontal board and down one end of the two top boards. Attach the boards to the leg boards using wood glue and 2.5” pocket hole screws. The top boards are flush with the tops of the legs, and the bottom boards are placed 4” from the base of the legs.
If you don’t own a Glu-bot, you NEED one! They are inexpensive and make the glue process so easy!

The back of the console will be created the same way. The only difference is that you will add 2 additional support boards. These will fill a gap and help support the shelf boards in a later step. Again, attach all boards with wood glue and 2.5” pocket hole screws.
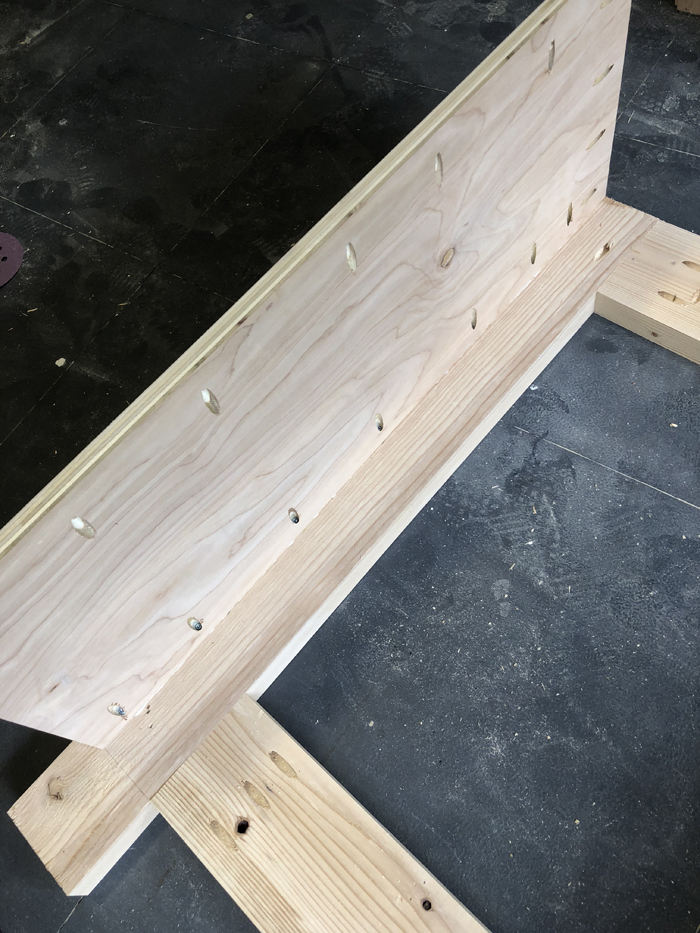
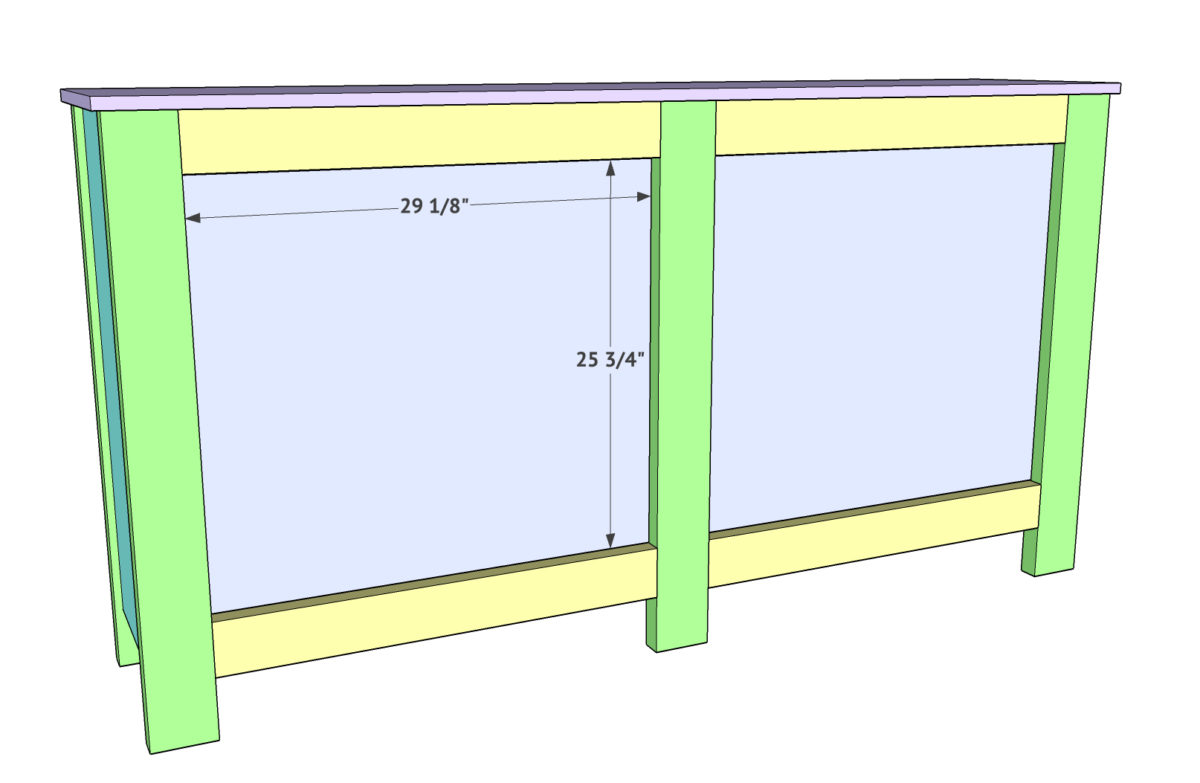
Now attach the side boards. These are 3/4” hardwood plywood boards that I had the hardware store rip to 12”. Add 3/4” pocket holes around 2 sides of both boards and along the top of both. Line the side panels up 1/2” from the edge of each side of the back face frame. They should also be flush with the top of the face frame as well. Attach the side panels using wood glue and 1.25” pocket hole screws.
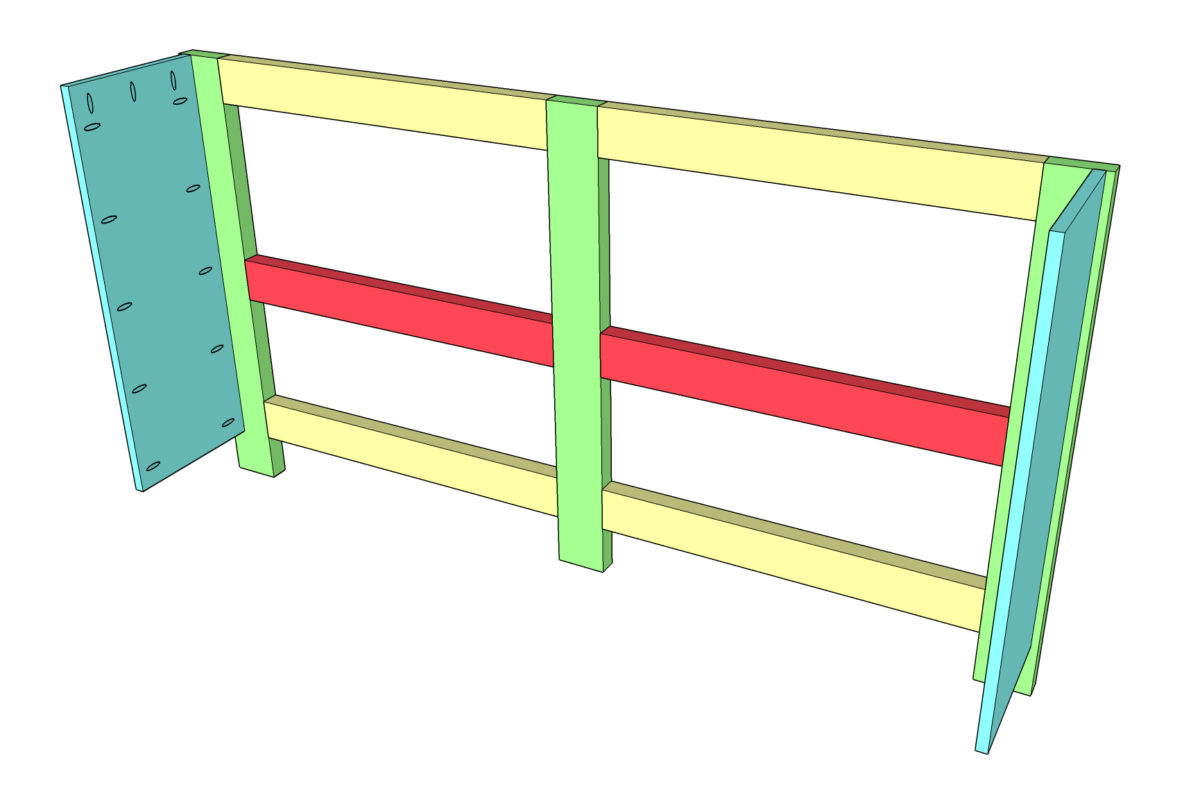
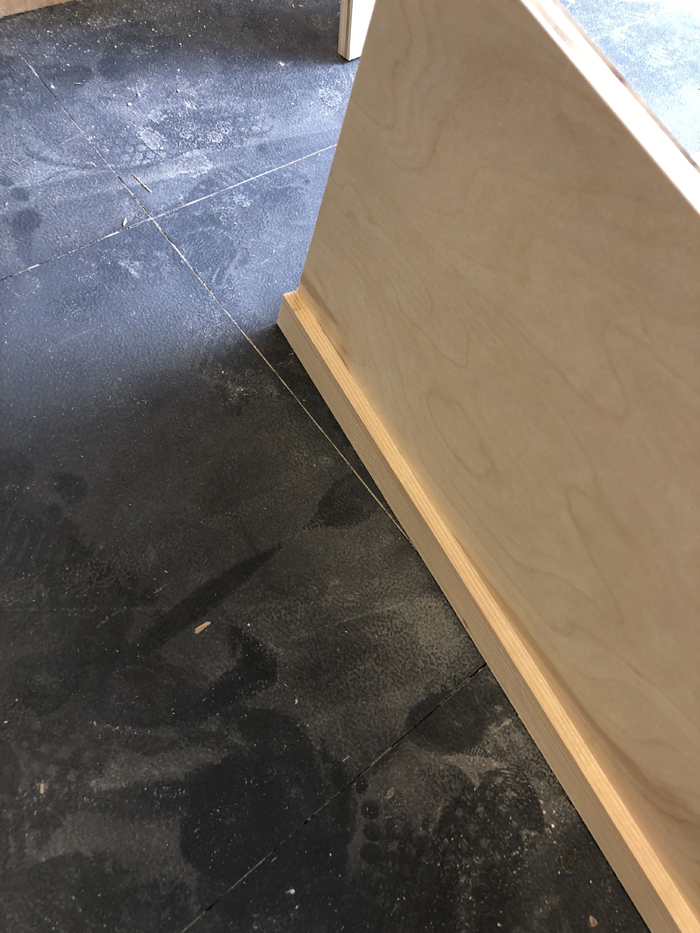
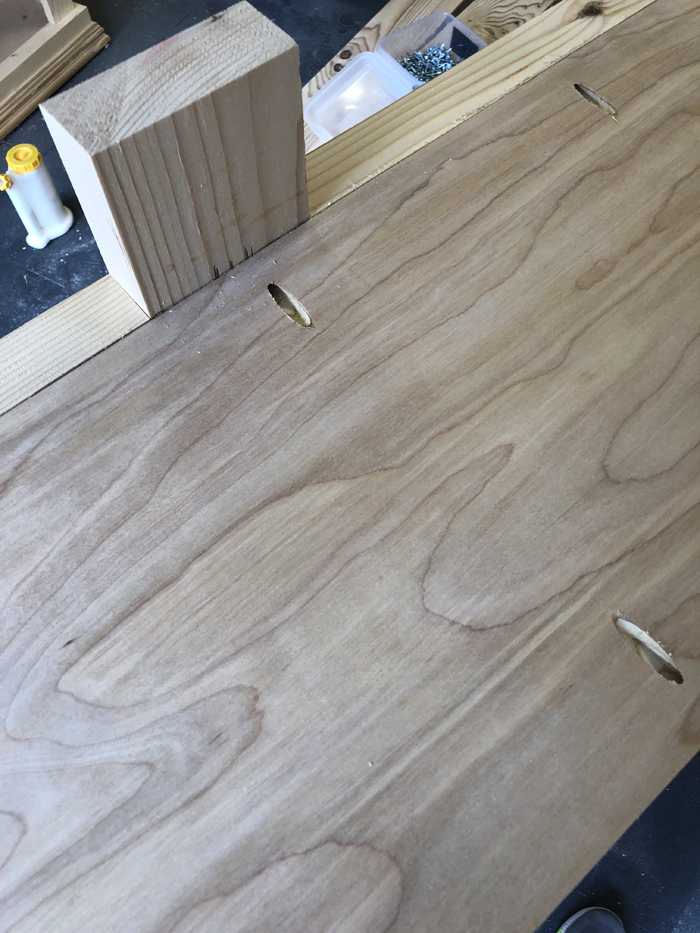
Now add the center divider. This is also 3/4” hardwood plywood ripped to 12”. Add 3/4” pocket holes around the sides and the top and bottom of the middle divider. Attach it to the center of the middle leg using wood glue and 2” pocket hole screws. It should also be flush with the top of the middle leg.


Time to add the base! This is also 3/4” hardwood plywood ripped down to 12”. Add 3/4” pocket holes around all sides of this board and attach it to the bottoms of the side boards and to the back face frame using wood glue and 1.25” pocket hole screws. You want this board flush with the bottom of the face frame.
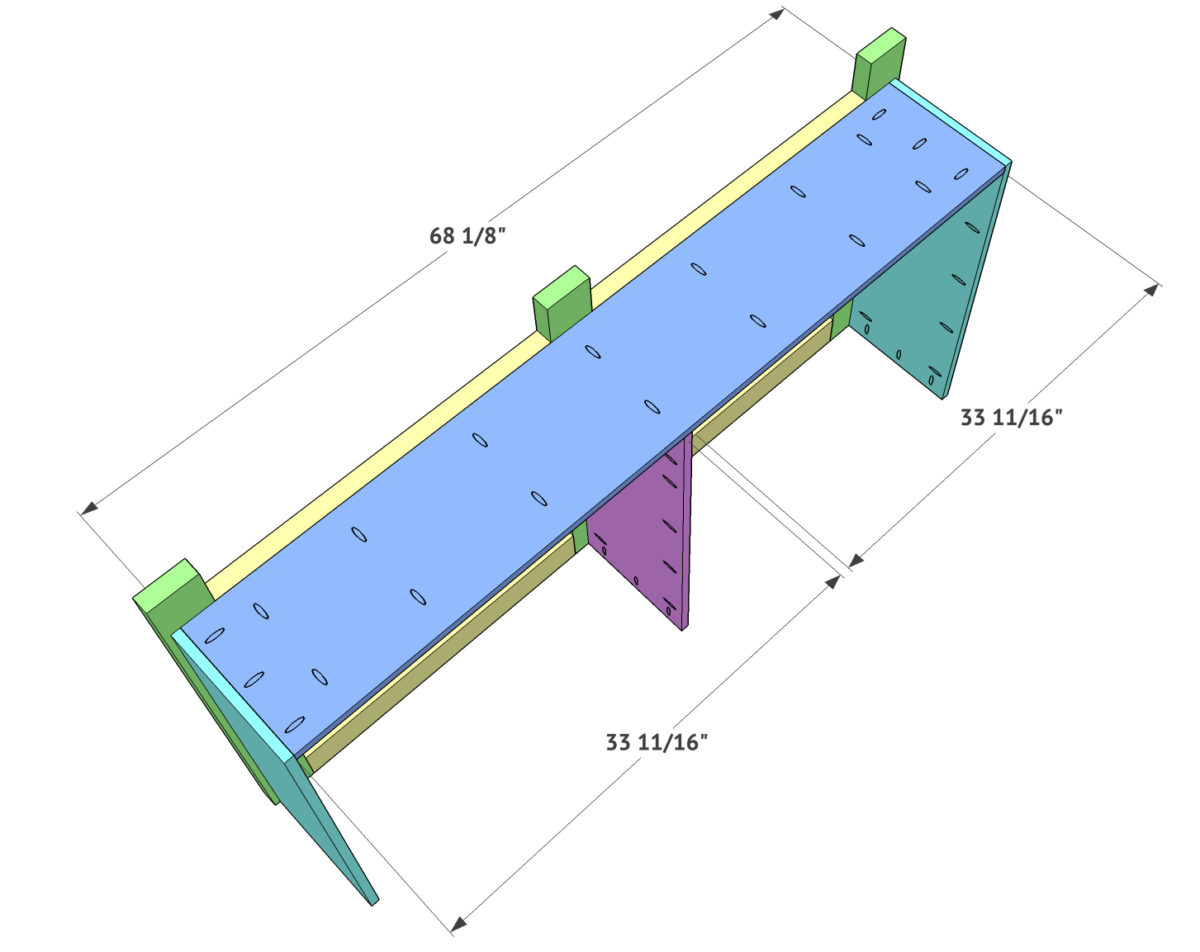
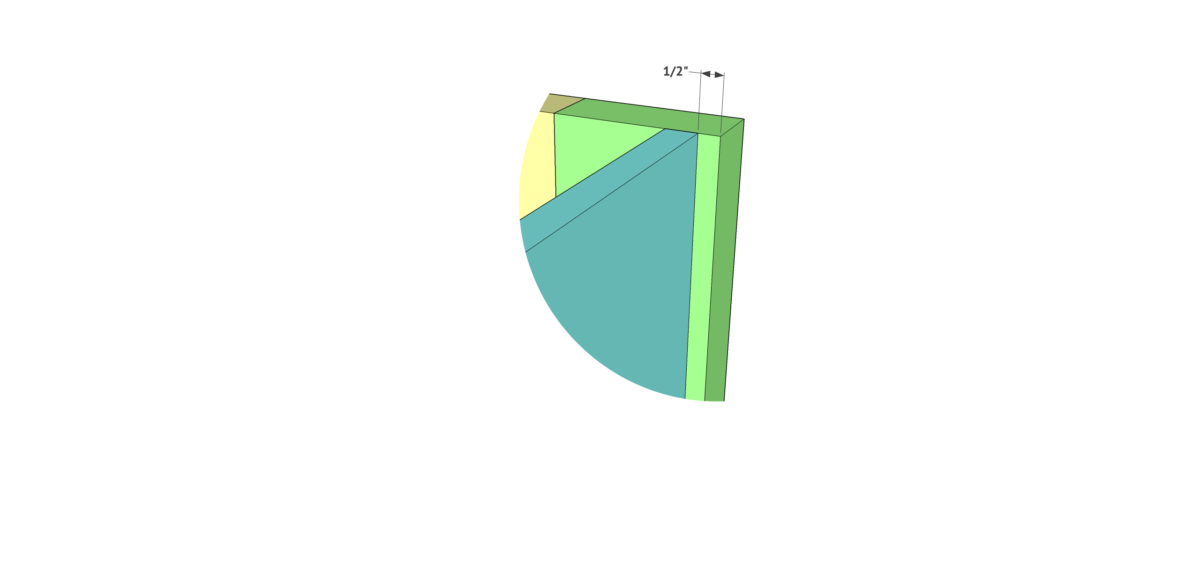
Now attach the front face frame. This will be attached the same as the back frame using wood glue and pocket hole screws. Make sure there is a 1/2” overhang on each end.
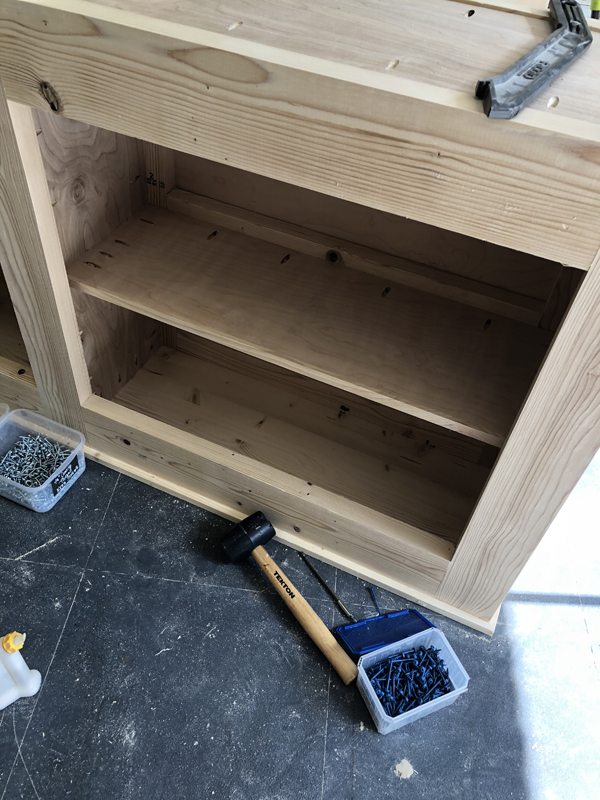
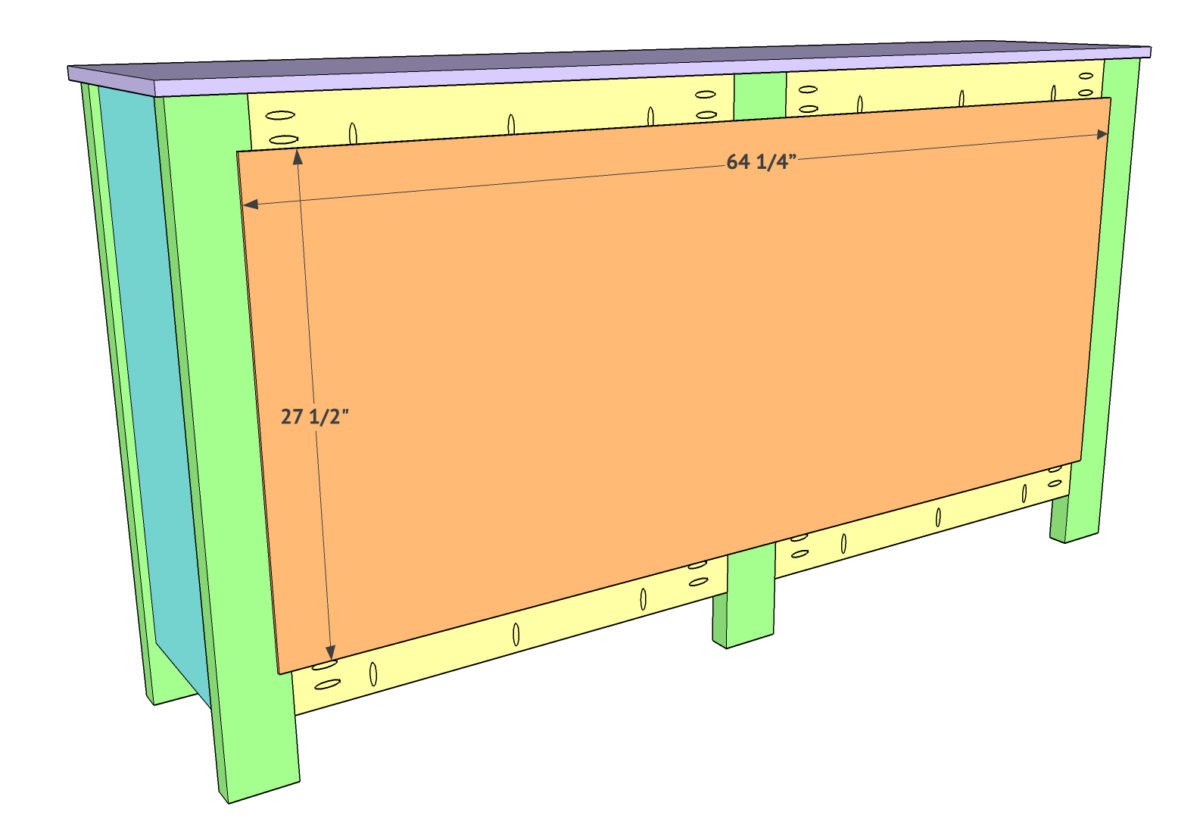
Add the shelf boards next. You want the shelf board to sit flush with the top of that back support board. Add 3/4” pocket holes around all sides of the bottom of the shelf boards and attach them to the console using wood glue and 1.25” pocket hole screws.
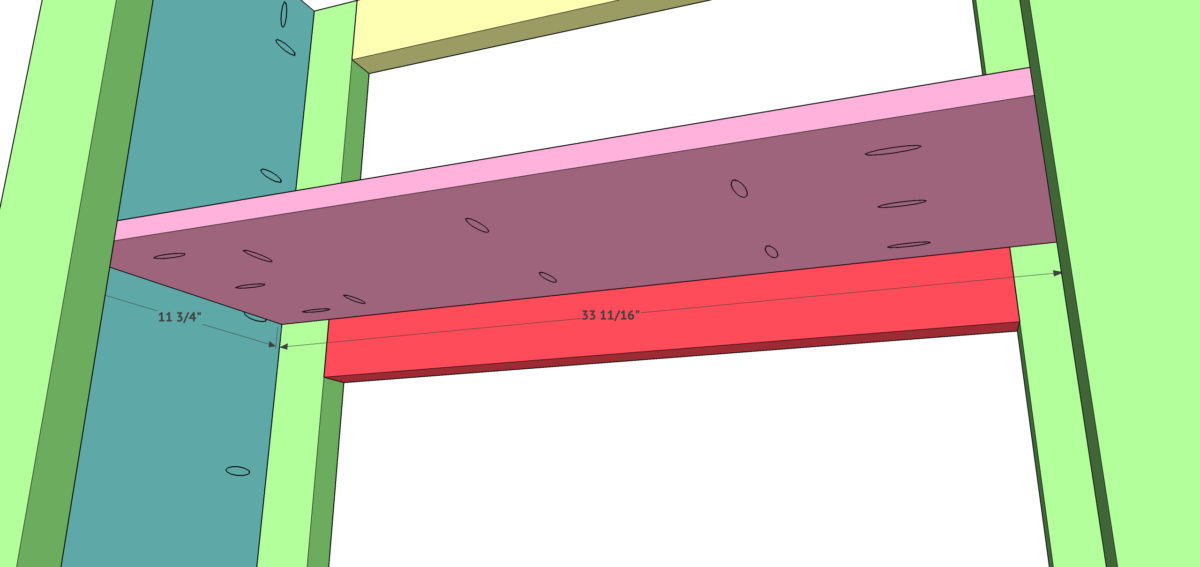
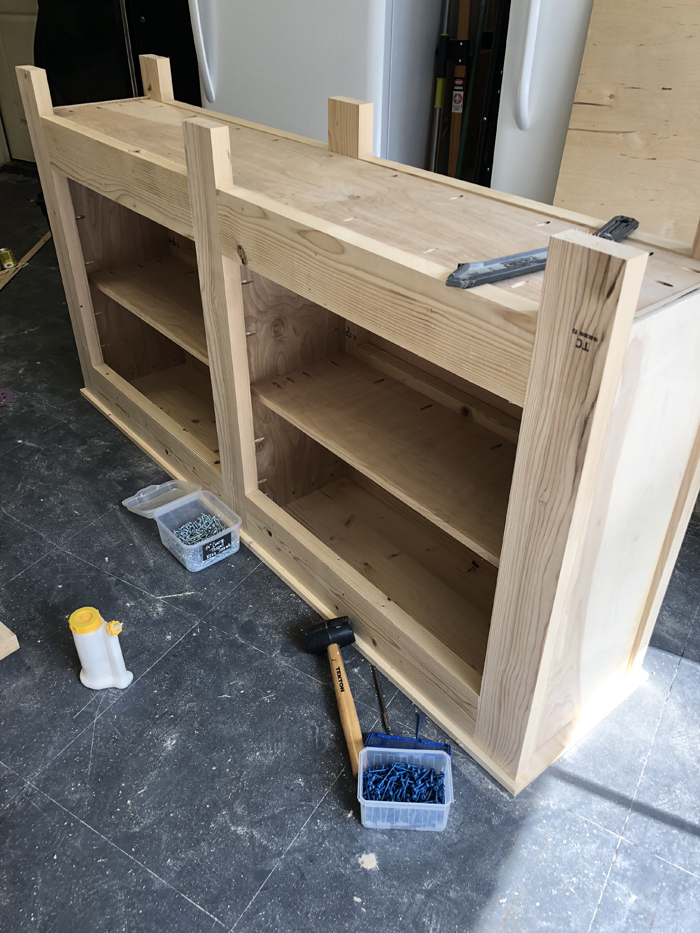
Attach the top using 1.25” pocket hole screws through all pocket holes and into the top. You can also turn the entire table upside down to make this part easier if it helps!

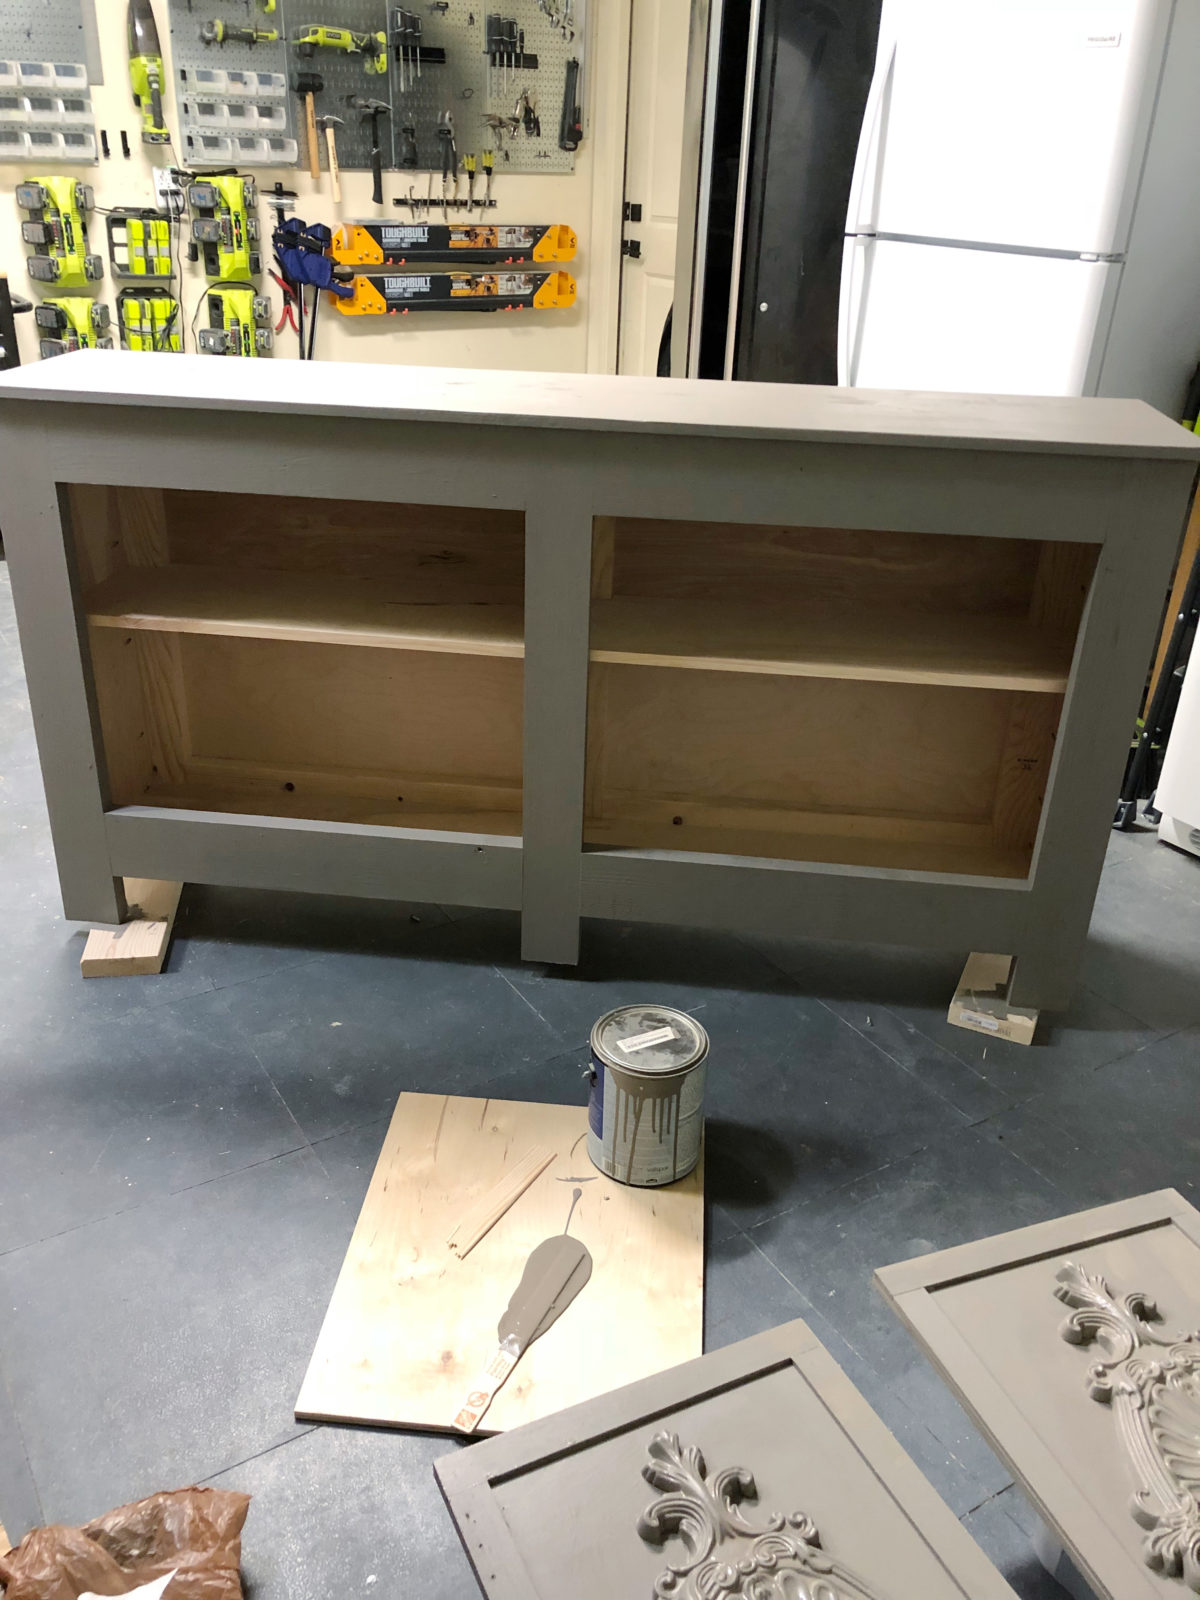
Now for the doors! The doors are 1/2” hardwood plywood cut to size. It’s best to measure these openings when you get to this step. You want 1/8” gap around the entire door for the opening. This is where you really get to have fun! You can trim these boards with anything you want to give your console a totally custom look. Check our website for details on how we finished ours!
The final step is the back. This is 1/4″ hardwood plywood cut to size. It’s best to use a stapler and wood glue to attach this because the wood is thin.
Now for the fun part! We painted this console using one of our FAV colors… Seine by Valspar!
The doors we trimmed out with some scrap wood from Reclaimed Designworks… SERIOUSLY can’t say how much we love this stuff! It’s thin, and clean and easy to work with. And, it’s so darn pretty! You can find the specific wood we used HERE!
All I did was cut the wood to the width of the door and glue and nail it into place. The bottom board on each door was a little wide, so I trimmed it down with the table saw.

I replaced the hinges in the picture above with some larger ones I found at Hobby Lobby. You can see find them HERE!
The pulls I used on the doors are SO CUTE! You can find them HERE!
And here she is again all finished up!

I really want to make this console. It’s absolutely beautiful, but the plans don’t match the picture. The picture shows the 2×6 boards going horizontal and the 2×4 boards as the legs. But in the plans the 2x6s are the legs and the 2x4s are horizontal. Which totally messes up all the measurements including the top, bottom and size of the doors. I like the look of the picture where the 2x6s are horizontal and the doors are longer. And also in the picture the inside shelves are closer to the top and in the plans they are closer to the bottom. Again, I like the actual picture of the console best. Any chance you can change the plans to match the way the picture is laid out?
I’m ting ready to do the console table with a twist. I’m using pine for the top and shelf. I can’t wait to see how it looks. I’m staining it with walnut. I love the size. I might put a barn door on it since the 1x6x8 is 10.00 a piece and it took two for one door. Therefore I still need 6 for the top and shelf maybe more if I do the sides with pine. I could rip the 2x4s in half and make the sides out of them. I have a problem with sawdust getting in my eyes. I own an old table saw. I’ll try to hook the vacuum up to it. I already have sanded 3/4″ plywood so I just might end up using it. Its just so hard for me to cut down to size. I’m 70 and lifting isn’t so easy anymore. I used to be like a packhorse.
The top is missing from the cut list.
Would this work as shoe storage in an entryway?!
I don’t see the top in the cut list or materials list. Can you please advise?
The downloadable plans include the step for installing the top but don’t include the top in the lumber cut list. Can you tell me what the top is made of?
Love this! It will be perfect for my small living space! Where are those test tube planters from?!
What are the measurements of the reclaimed wood? Just wondering how thick it is if I did something with non-reclaimed wood if that makes sense?
How much did this cost to make?
Harware alone was $40 so i’d guess anywhere from $60 to $80
More if you use pine. The barn door is compliments of Ana White. I couldn’t afford to buy the barn door hardware.
This would match the Twin Platform Chevron bed if you do the chevron pattern on the console doors and stain it the same color. It’s beautiful!
Very nice. Now if I only had a table saw!