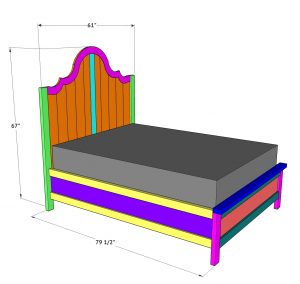
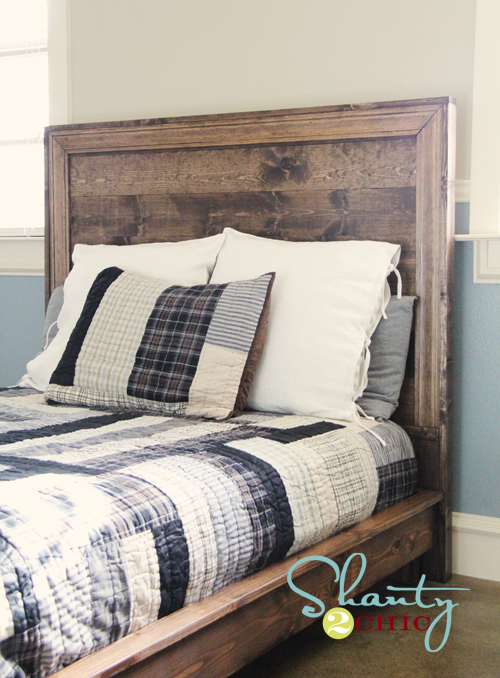
Learn how to build this DIY Fancy Full Bed with free plans and a how-to video by Shanty2Chic!
I am back with a really fun project and one that I’ve never tried before! My friend has been a long time builder and her daughter asked her to build a fancy headboard and bed for her room. She was intimidated to build it alone so I told her to come over and I would give her a hand. I designed and build this DIY Fancy Full Bed for about $230 in lumber! So let’s get to building!
Click here to jump to the free plans!You can watch the full build in the box below!
Table of Contents
How to build a DIY Fancy Full Bed
Tools
Supplies
- 10 1x6x6 Common Boards or Pine
- 13 1x4x6 Common Boards or Pine
- 9 2x4x8 Framing Lumber
- 3 2x2x8 Framing Lumber or Pine
- 2 1x8x8 Common Boards or Pine
- 1 1x8x6 Common Boards or Pine
- 1 1/4″x48″x96″ Hardwood Plywood (Birch)
- 1 1/4″ Pocket Hole Screws
- 2 1/2″ Pocket Hole Screws
- 2 1/2″ Wood Screws
- 1 1/4″ Wood screws
- 5/8″ Brad Nails
- 1″ Brad Nails
- Wood Glue
How to Build a DIY Fancy Full Bed
Assembling the Headboard
Step 1
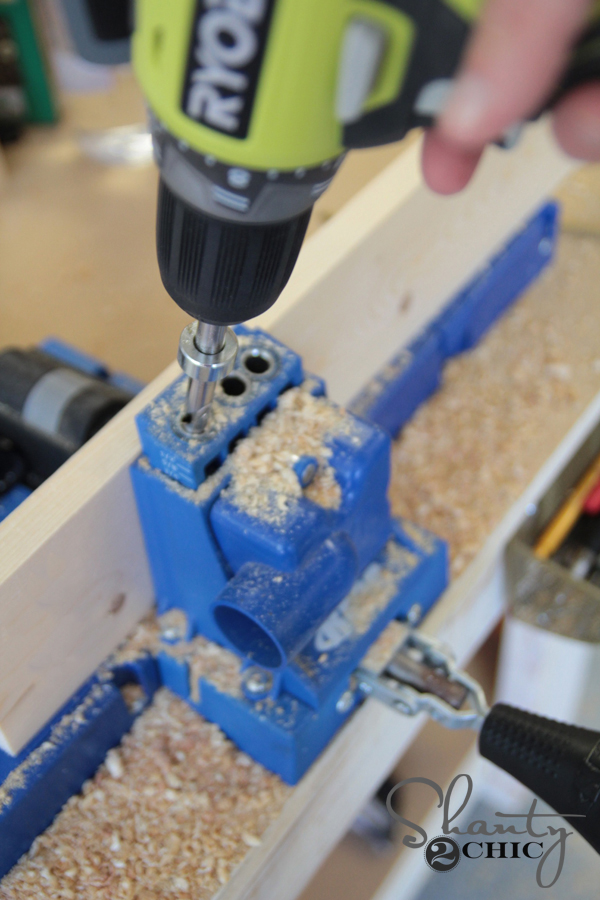
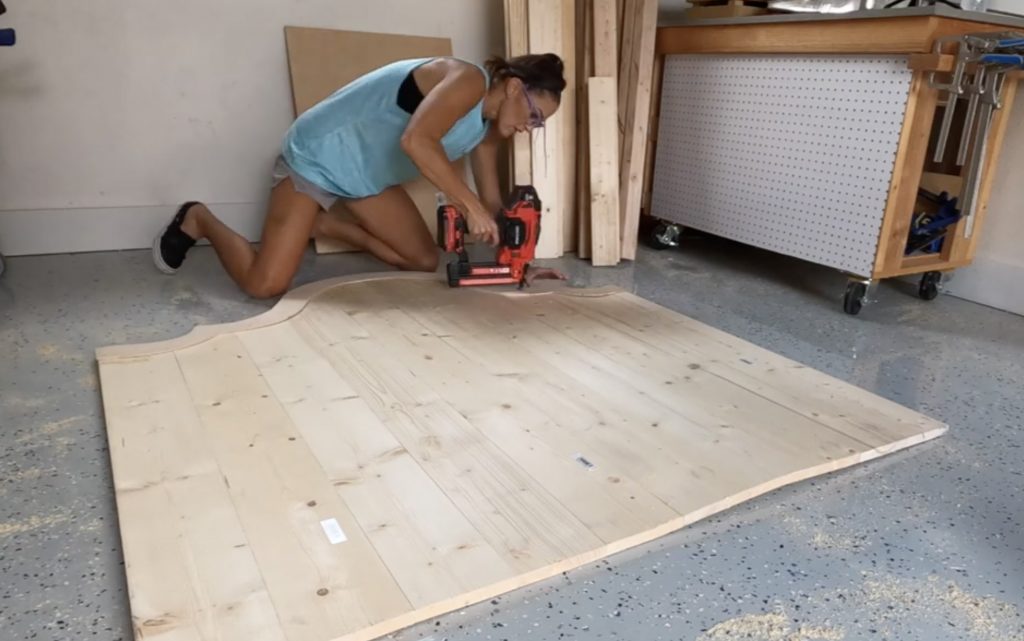
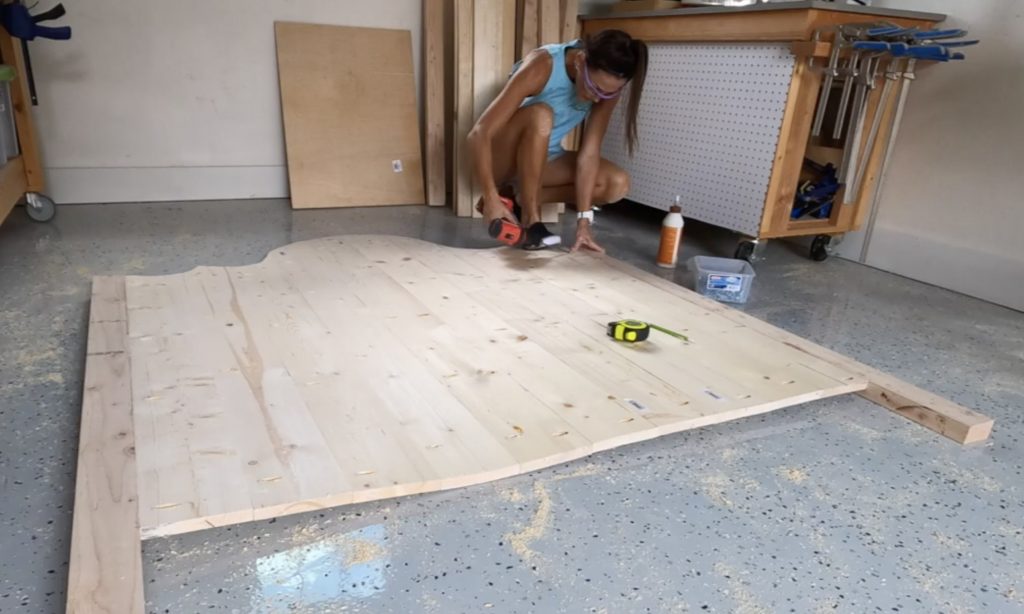
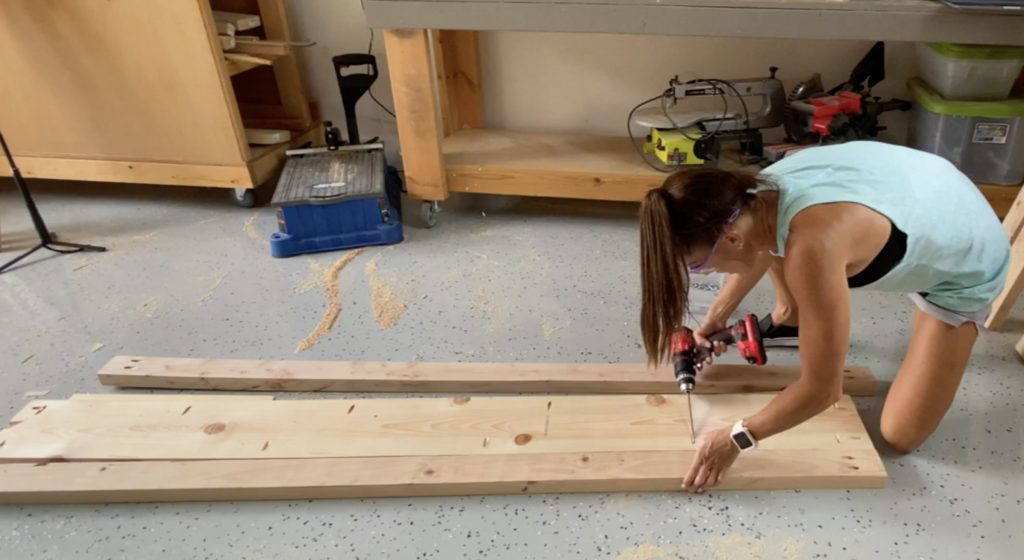
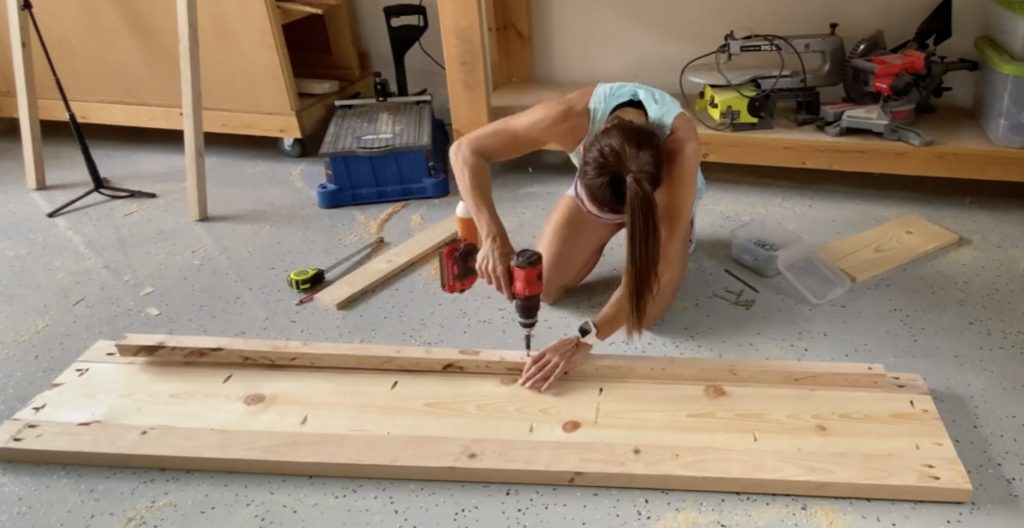
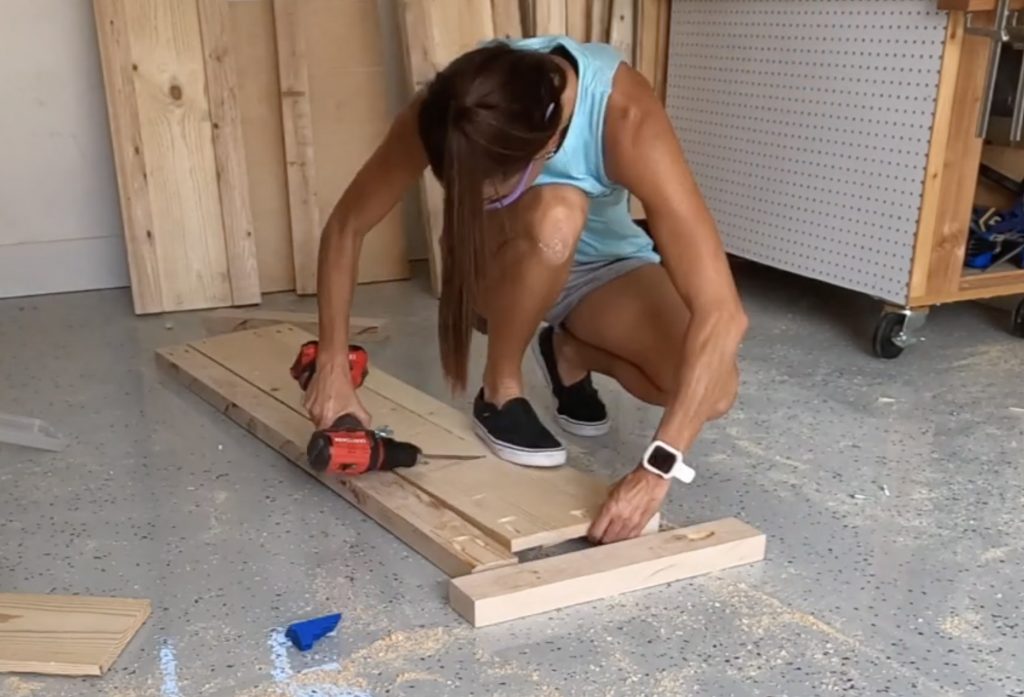
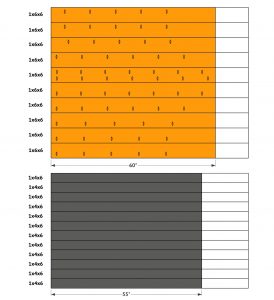
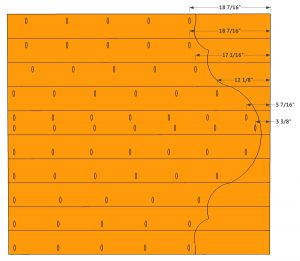
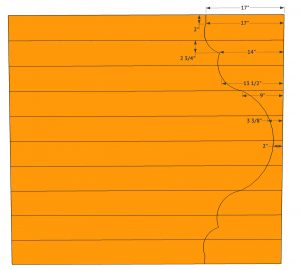
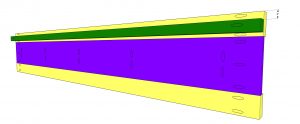
Cut the headboard planks to size and use a Kreg Jig to drill 3/4″ pocket holes along the edges according to the picture below.
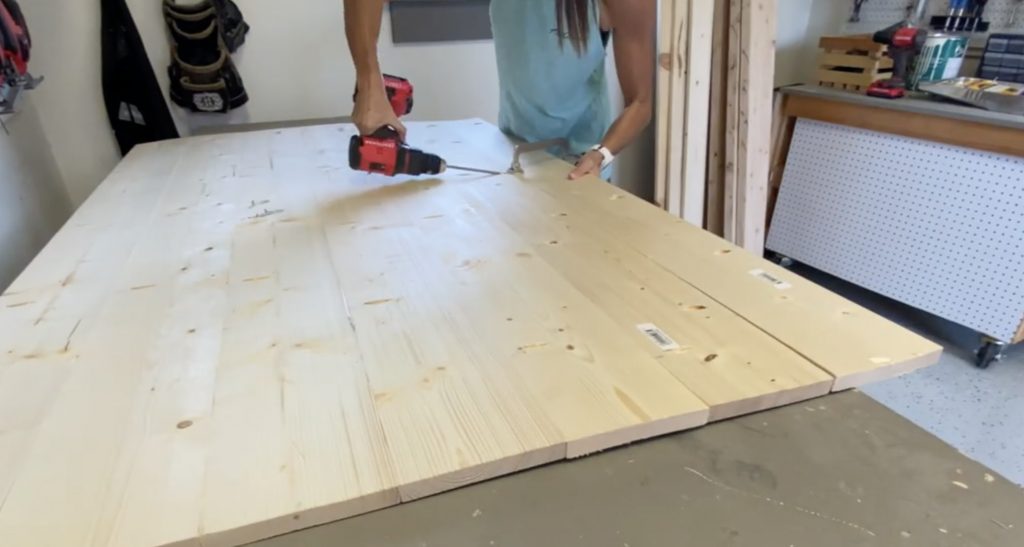
Attach the planks together with 1 1/4″ pocket hole screws.
Step 2
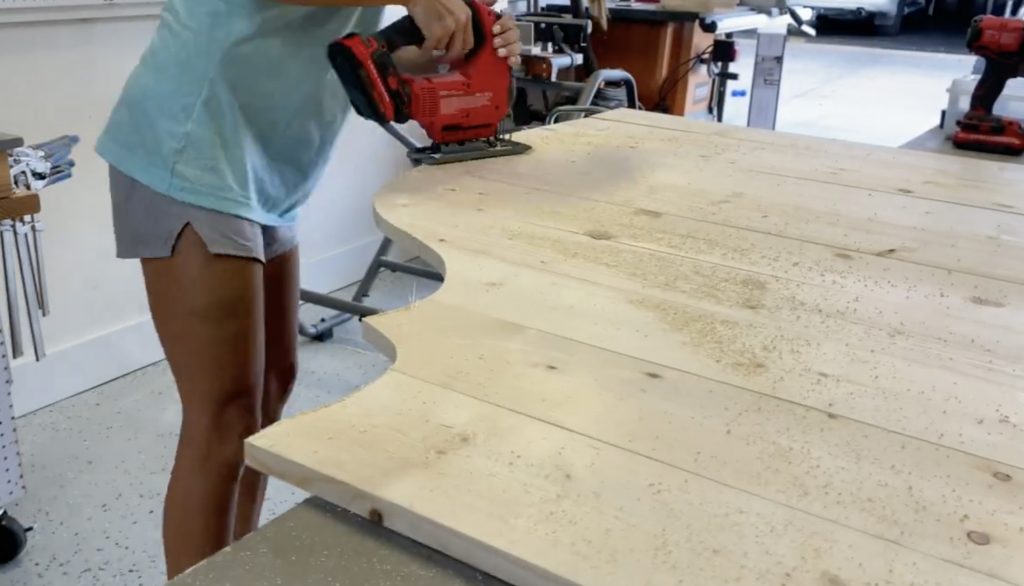
Mark for the headboard design, with a projector, trace a line with a pencil and use a jigsaw to cut the headboard design.
Step 3
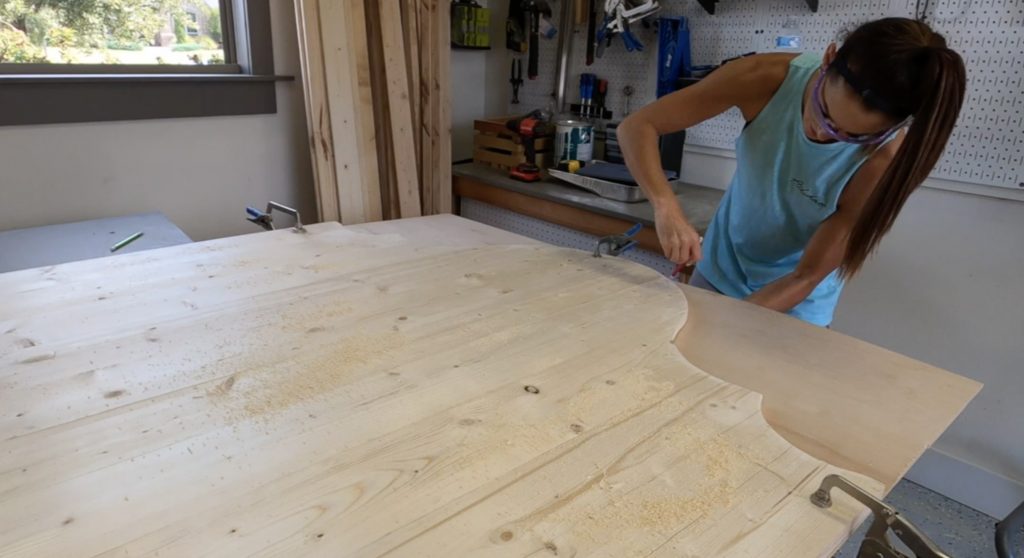
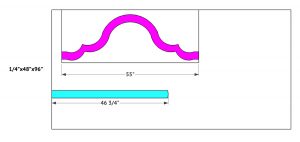
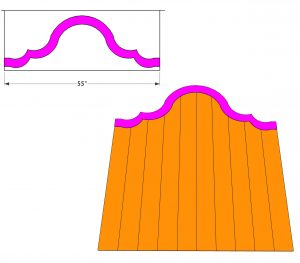
Trace the top of the headboard on the 1/4″ plywood for the headboard trim and cut it using a jigsaw
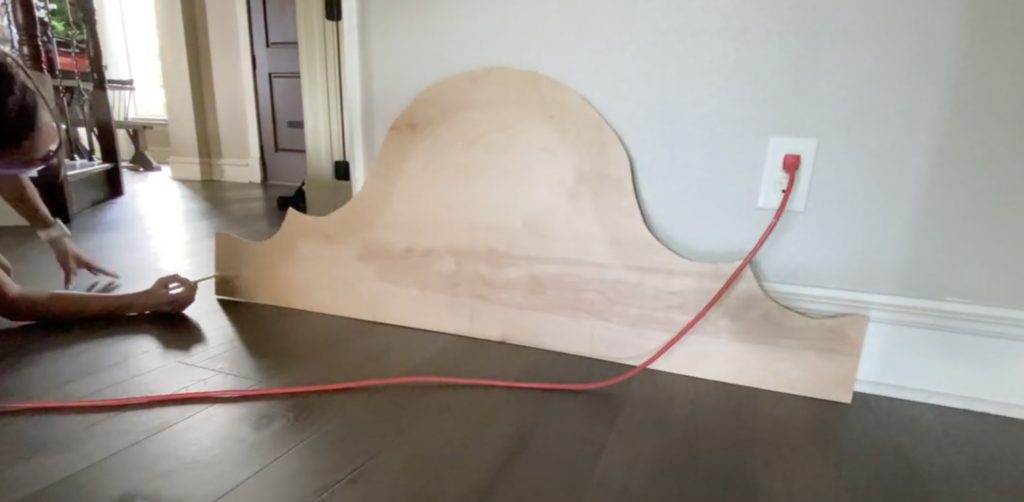
Using a projector, trace the bottom design
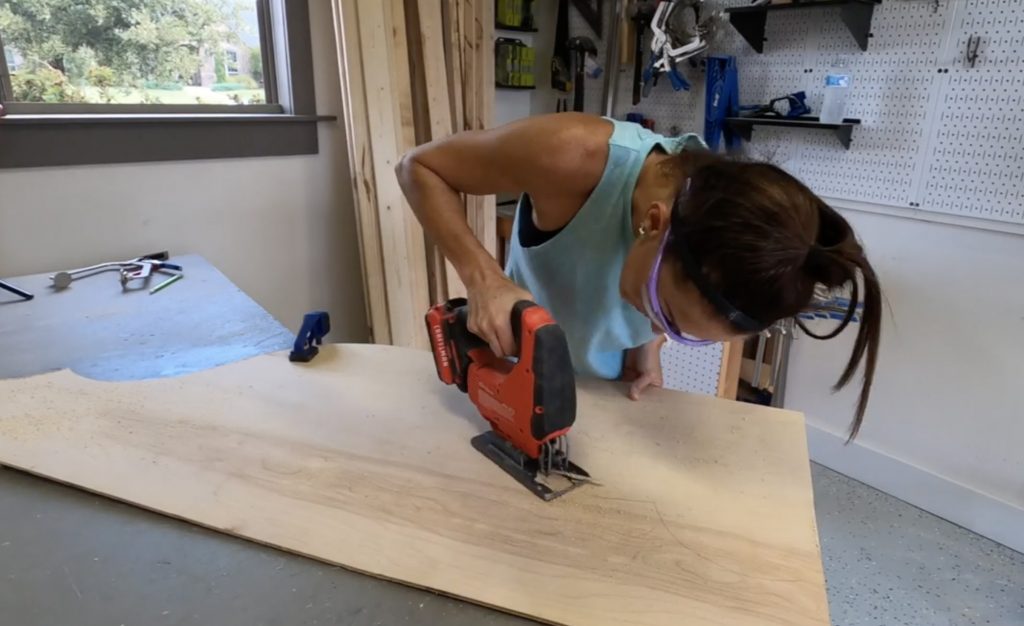
and cut it with a jigsaw.
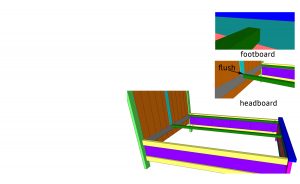
Attach the trim to the headboard with 5/8″ brad nails and wood glue.
Step 4
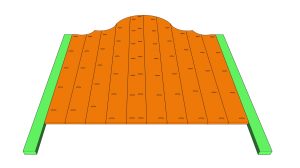
Cut the posts to size and attach them to the headboard with 1 1/4″ pocket hole screws and wood glue. The top of the posts should be flush with the ends of the headboard.
Step 5

Cut the middle trim and bottom trim to size. Center the middle trim on the headboard. Use 5/8″ brad nails and wood glue to attach it to the headboard.
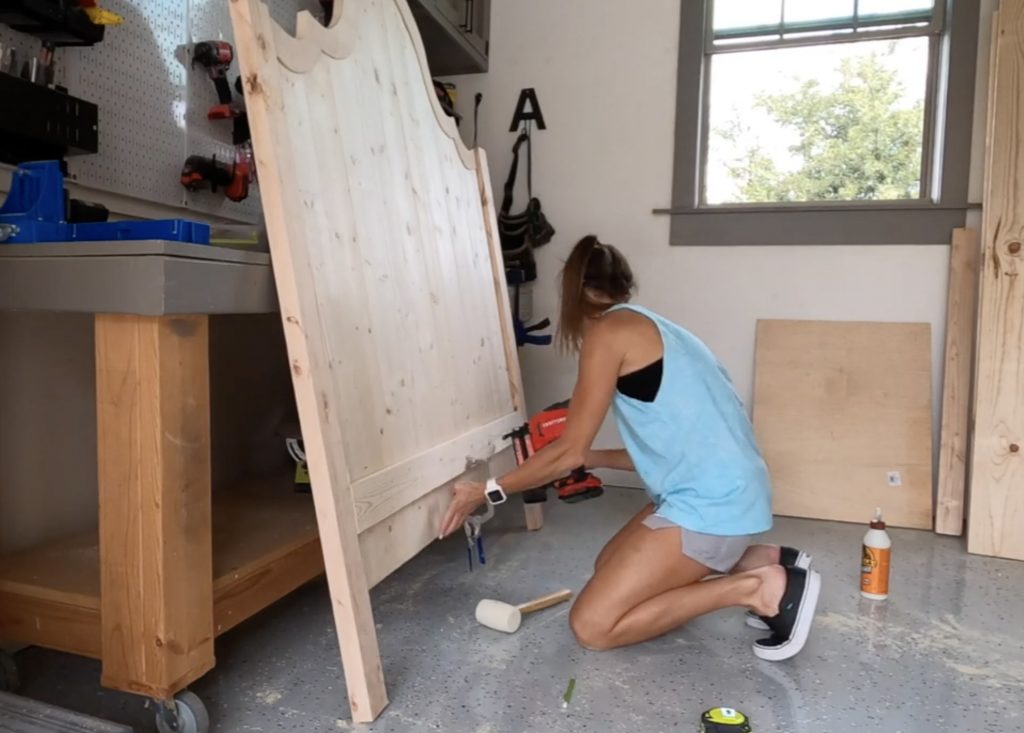
Place the bottom trim 4 3/4″ from the bottom of the headboard. Use 1″ brad nails and wood glue to attach it to the headboard.
Assembling the Side Rails and Footboard
Step 1
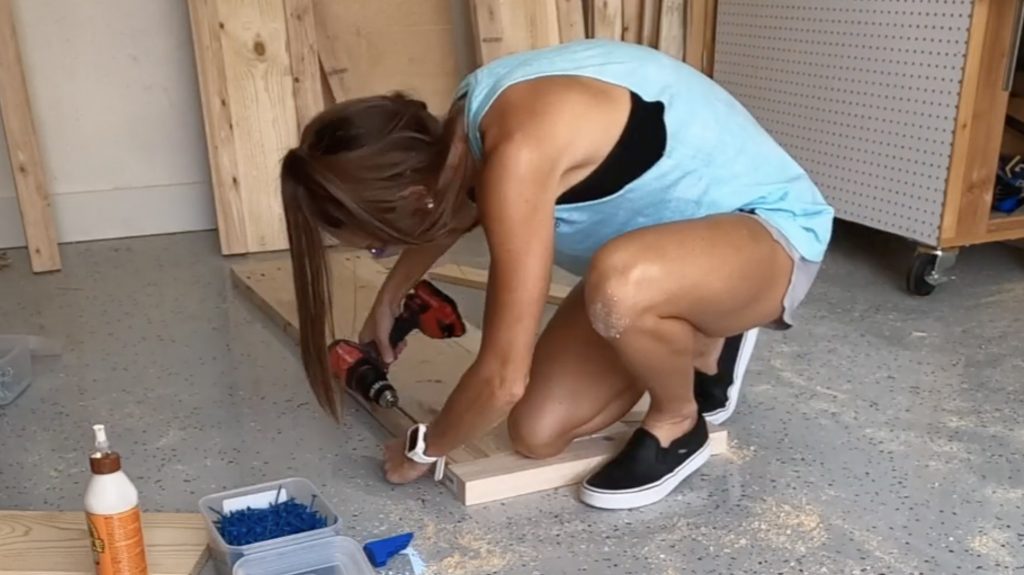
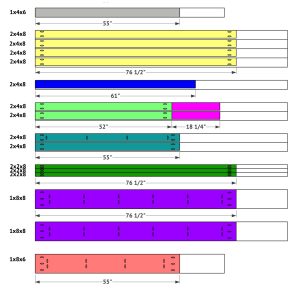
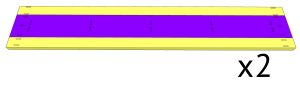
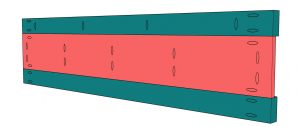
Cut the side panel pieces to size and drill 1 1/2″ pocket holes according to the plans. Attach the top and bottom runners to the big panel with 2 1/2″ pocket hole screws and wood glue. Build two of these assemblies.
Step 2
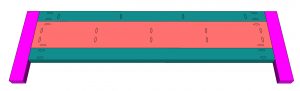
Cut the cleats to size and drill 1 1/2″ pocket holes at each end. Attach them to each side panel with 2 1/2″ wood screws and wood glue.
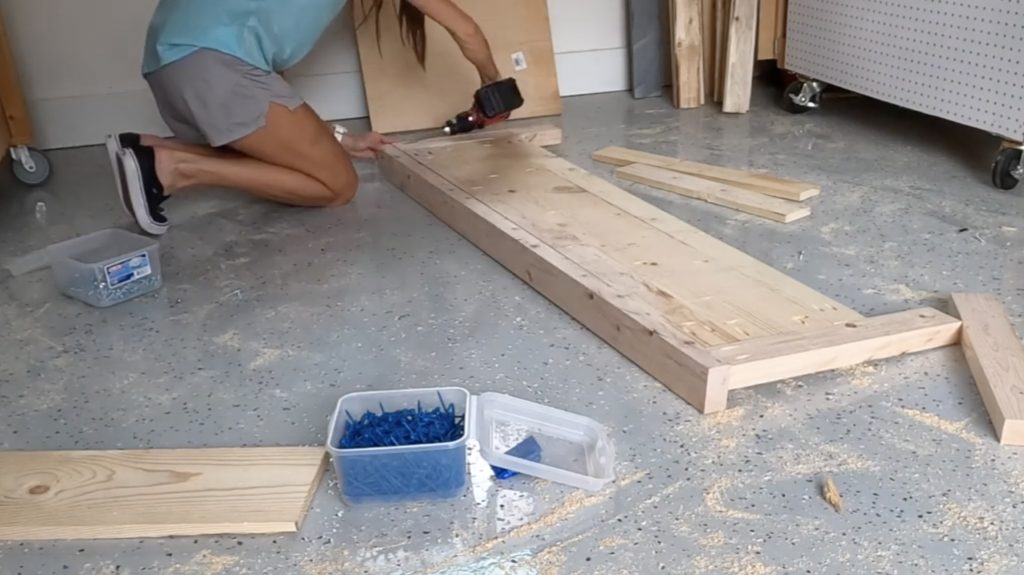
Cut the footboard pieces to size and drill 3/4″ and 1 1/2″ pocket holes according to the plans. Attach the top and bottom runners to the panel with 1 1/4″ and 2 1/2″ poket hole screws and wood glue.
Step 4
Cut the legs to size and attach them to the side of the footboard panel with 2 1/2″ pocket hole screws and wood glue.
Step 5
Cut the footboard trim to size. Attach it to the top of the footboard with 1 1/4″ pocket hole screws and wood glue.
Assembling the Bed
Step 1
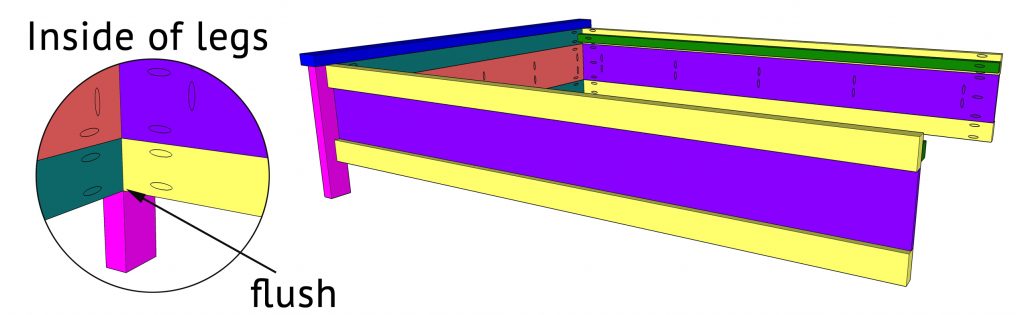
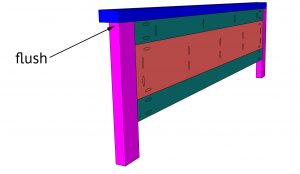
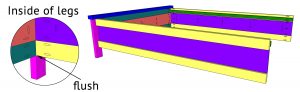
Attach the side panels to the headboard with 2 1/2″ pocket hole screws. The inside of the side runners should be flush with the inside of the legs.
Step 2

Center and attach the middle cleat to the headboard and footboard with 2 1/2″ pocket hole screws and wood glue.
Step 3
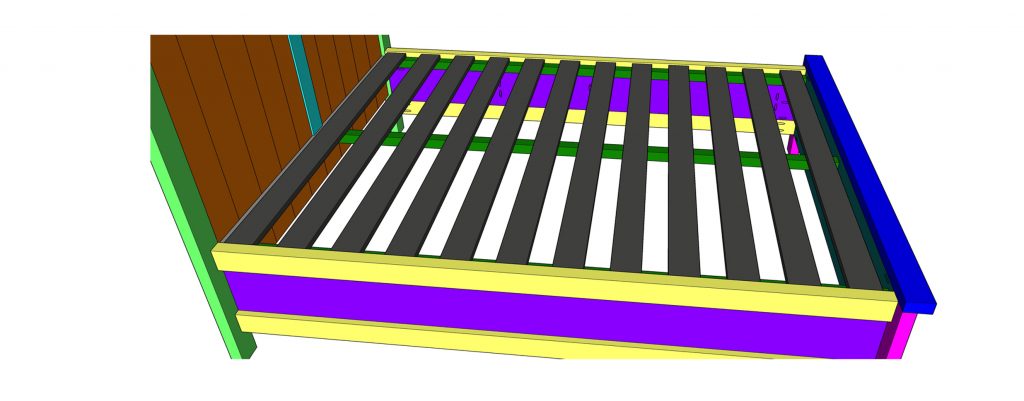
Cut the slats to size and spread them out evenly over the cleats. Attach them to the bed wth 1 1/4″ wood screws.
Step 4
Now just fill your screw holes, sand it own and give it a finish! Make sure to shar your builds with us on social media and use #shanty2chic so we can share them too!
Happy Building!

DIY Fancy Full Bed
Tools
- Miter Saw
- Drill
- Kreg Jig
- Table Saw (optional)
- Brad Nailer
- Sander
- Jigsaw
Supply List
- 10 1x6x6 Common Boards or Pine
- 13 1x4x6 Common Boards or Pine
- 9 2x4x8 Framing Lumber
- 3 2x2x8 Framing Lumber or Pine
- 2 1x8x8 Common Boards or Pine
- 1 1x8x6
- 1 1/4"x48"x96" Hardwood Plywood (Birch)
- 1 1/4" Pocket Hole Screws
- 2 1/2" Pocket Hole Screws
- 2 1/2" Wood Screws
- 1 1/4" Wood screws
- 5/8" Brad Nails
- 1" Brad Nails
- Wood Glue
Instructions
Cut List
- Cut List 1

- Cut List 2

- Cut List 3

Assembling the Headboard
- Cut the headboard planks to size and drill 3/4" pocket holes along the edges according to the picture below. Attach the planks together with 1 1/4" pocket hole screws.

- Mark for the headboard design, trace a line with a pencil and use a jigsaw to cut the headboard design.

- Trace the top of the headboard on the 1/4" plywood for the headboard trim and cut it using a jigsaw. Using a projector, trace the bottom design and cut it with a jigsaw. Attach the trim to the headboard with 5/8" brad nails and wood glue.

- Cut the posts to size and attach them to the headboard with 1 1/4" pocket hole screws and wood glue. The top of the posts should be flush with the ends of the headboard.

- Cut the middle trim and bottom trim to size. Center the middle trim and place the bottom trim 4 3/4" from the bottom of the headboard. Use 5/8" brad nails and wood glue to attach the center trim and 1" brad nails and wood glue to attach the bottom trim.


Assembling the Side Rails and Foot Board
- Cut the side panel pieces to size and drill 1 1/2" pocket holes according to the plans. Attach the top and bottom runners to the big panel with 2 1/2" pocket hole screws and wood glue. Build two of these assemblies.

- Cut the cleats to size and drill 1 1/2" pocket holes at each end. Attach them to each side panel with 2 1/2" wood screws and wood glue.

- Cut the footboard pieces to size and drill 3/4" and 1 1/2" pocket holes according to the plans. Attach the top and bottom runners to the panel with 1 1/4" and 2 1/2" poket hole screws and wood glue.

- Cut the legs to size and attach them to the side of the footboard panel with 2 1/2" pocket hole screws and wood glue.

- Cut the footboard trim to size. Attach it to the top of the footboard with 1 1/4" pocket hole screws and wood glue.

Assembling the Bed
- Attach the side panels to the headboard with 2 1/2" pocket hole screws. The inside of the side runners should be flush with the inside of the legs.

- Center and attach the middle cleat to the headboard and footboard with 2 1/2" pocket hole screws and wood glue.

- Cut the slats to size and spread them out evenly over the cleats. Attach them to the bed wth 1 1/4" wood screws.

- Now just fill your screw holes, sand it own and give it a finish!Make sure to shar your builds with us on social media and use #shanty2chic so we can share them too!Happy Building!


I definitely need these plans for my
daughter’s bed but just a queen size head board with this exact design. Can you help?
Is there king bed measurements for this bed??
Am really wanting to do this in King Size!! Are there plans for different sizes???????
I would love this in a king size. Do you have measurements for that?
Is there plans for a king size bed?
Wonderful beat ! I wish to apprentice while you amend your web site,
how could i subscribe for a blog site? The account helped
me a acceptable deal. I had been a little bit
acquainted of this your broadcast provided bright clear idea