Table of Contents
How to Build a DIY Flower Post with House Numbers
Looking for a quick weekend project that adds charm and curb appeal? This DIY flower post is the perfect solution! Made from a single 4×4 wood post, this easy outdoor build doubles as a decorative plant hanger and a place to display your house numbers. It’s functional, beautiful, and budget-friendly—plus, it makes a great gift or neighborly DIY idea. Whether you’re sprucing up your front yard or adding a touch of personality to your landscaping, this custom flower post is a fun project that anyone can tackle!
Customize It Your Way
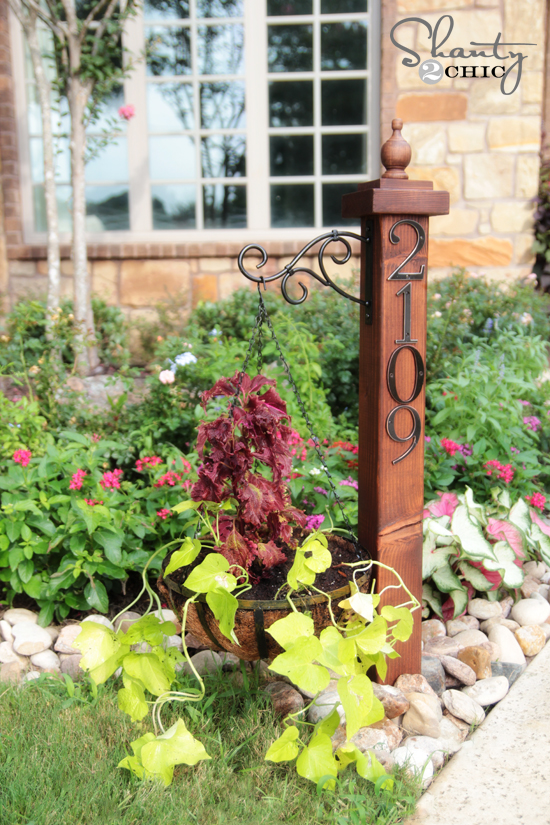
I’ve actually built this DIY flower post twice—each one slightly different—and I love how both turned out! One features a lighter stain with a simple finial, and the other has a deeper, richer finish with a more decorative hook. The best part about this project is how easy it is to customize! You can switch up the stain color, choose different styles of house numbers, or even swap out the finial and hook to match your home’s style. It’s a simple build that’s totally flexible—and no two have to look the same!
DIY Wood Flower Post – Easy and Affordable!
How fun is this little project?? It’s super simple to make and budget-friendly too! I grabbed everything I needed—including the flowers—at Lowe’s. 🙌🏼
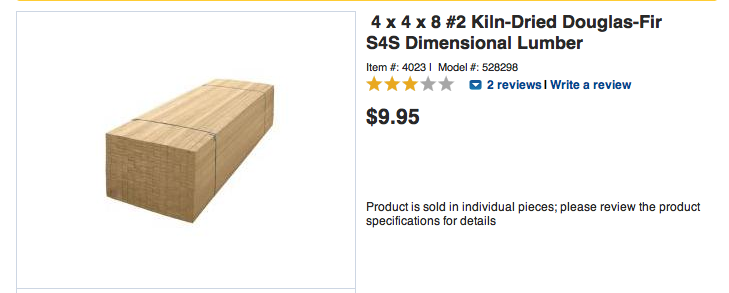
To start, you’ll need a 4x4x8 piece of wood. These are around $10 each, and I often ask the team at the hardware store to cut mine in half—makes it easier to haul home and saves me a step! My post is cut to 48″ long, but you can also cut it yourself with a small handsaw and a bit of elbow grease. 💪🏼 Bonus: one 8-foot post makes two of these flower posts—so consider making a second one as a gift, or turn it into a fun hose holder for the backyard!
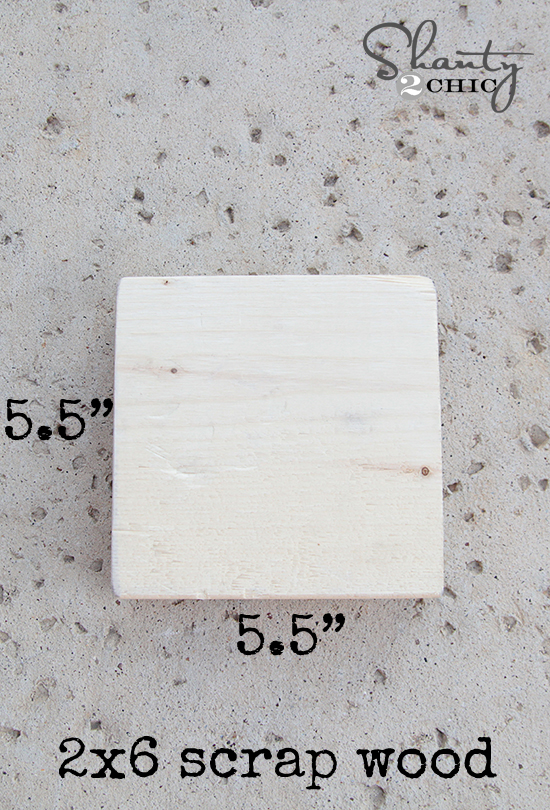
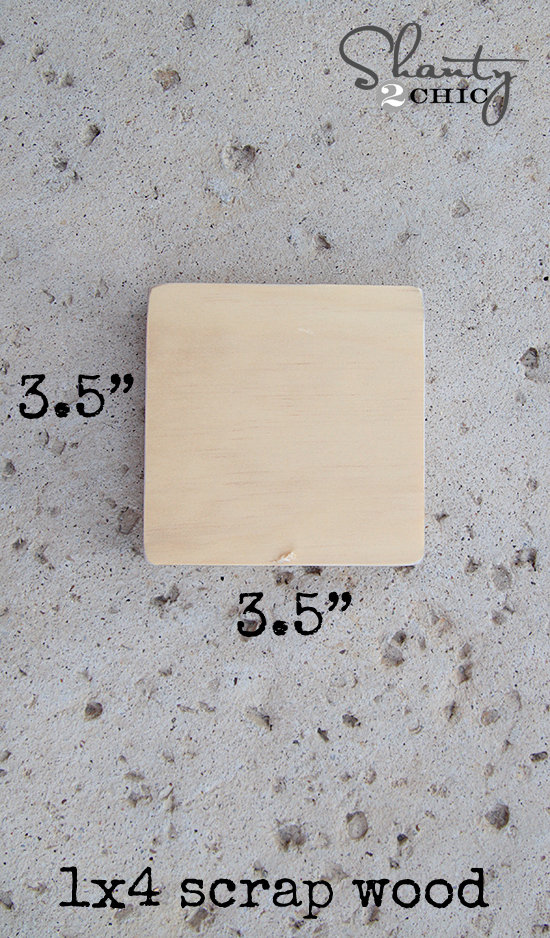
Grab a Few Scrap Pieces for the Top
In addition to the main post, you’ll need two smaller pieces of wood to create the top detail. I used scrap wood I had on hand, which made this project even more affordable. If you don’t have scraps lying around, you can easily pick up a small board at the hardware store or check the discount bin!
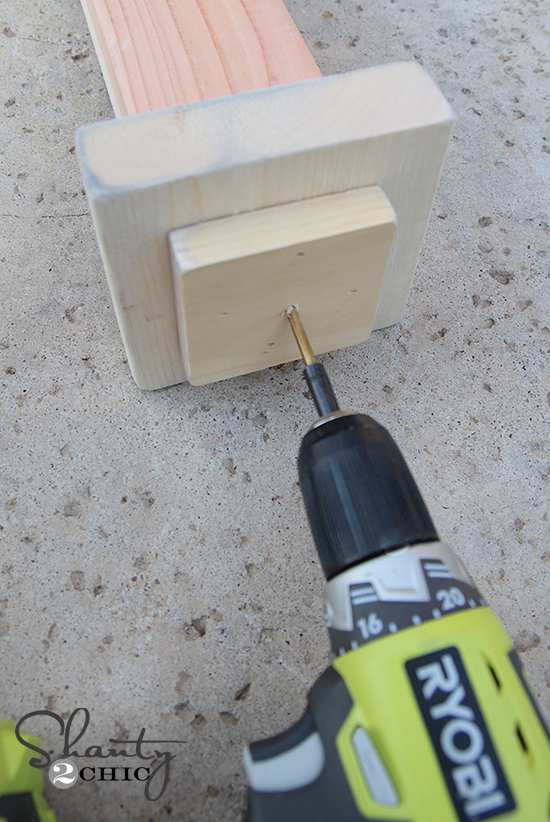
Attach the Top Pieces with Screws and Wood Glue
To secure the top detail, I used my drill to drive a screw through both wood pieces and directly into the top of the post. For extra strength and a long-lasting hold, I added Gorilla Wood Glue between each layer before screwing them together. This combo makes everything nice and sturdy!
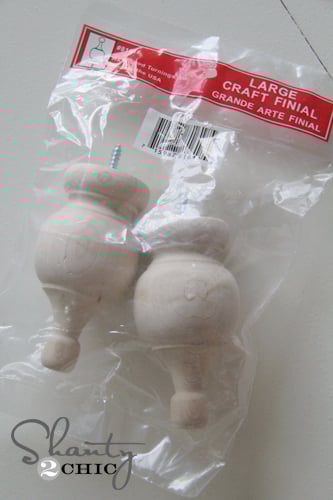
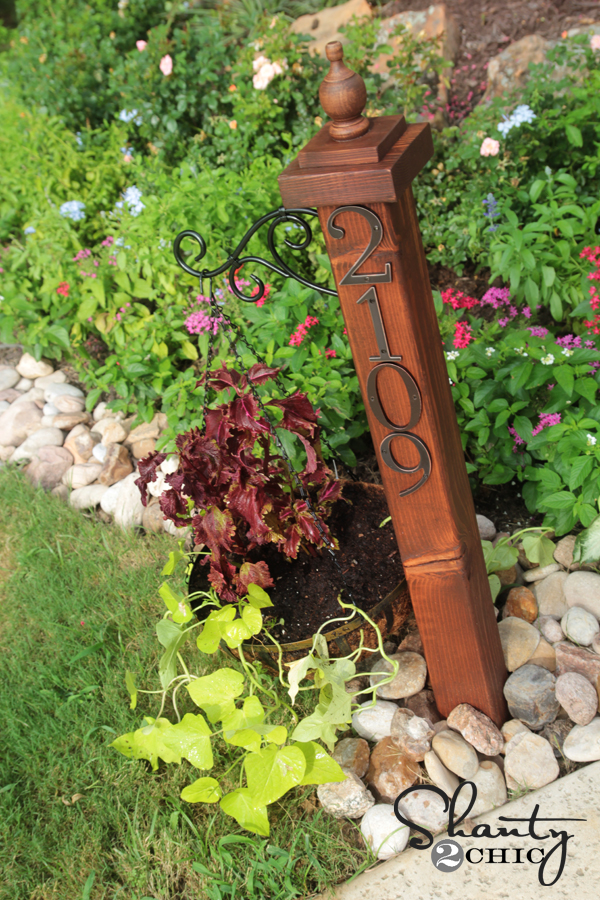
Add a Decorative Finial
Time for the finishing touch! I used a wooden finial to top off the post and give it a polished look. You can find these in the wood trim aisle at Lowe’s, usually near the dowels. They come in different styles, so grab one that fits your vibe!
Drill a Pilot Hole and Attach the Finial
To attach the finial, simply drill a small pilot hole in the center of your top piece. Then, screw the finial into place—it’s that easy! This simple step instantly adds a custom, finished feel to your flower post.

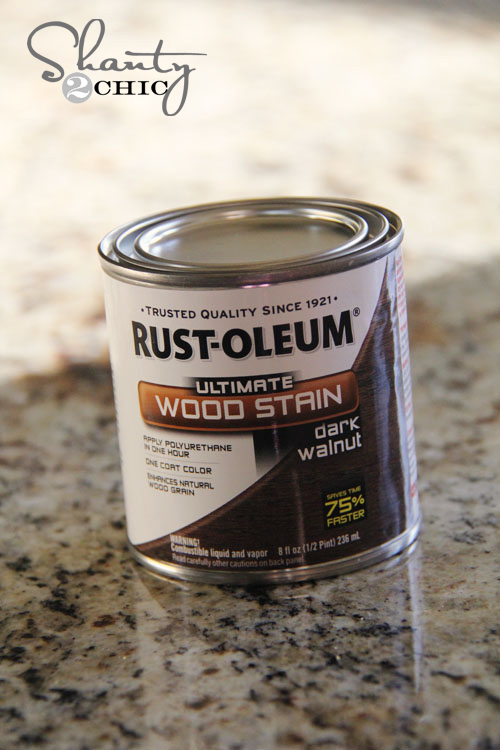
Stain It for a Rich, Finished Look
Once everything was assembled, I gave the entire piece a coat of my go-to stain—Rust-Oleum Ultimate Wood Stain in Dark Walnut. It’s my favorite for a reason! The rich color adds warmth and brings out the natural wood grain beautifully. One coat goes a long way and gives this simple build a more polished, high-end feel.
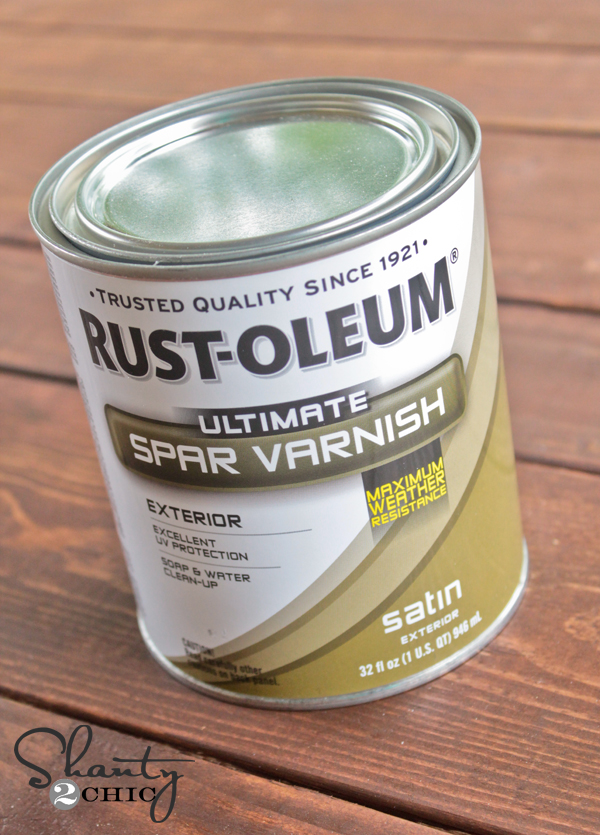
Seal It with Spar Varnish for Outdoor Protection
After the stain dried completely, I added two coats of Rust-Oleum Spar Varnish to seal and protect the wood. This step is especially important if your flower post will be outdoors—it helps prevent weather damage and keeps the finish looking fresh for seasons to come!
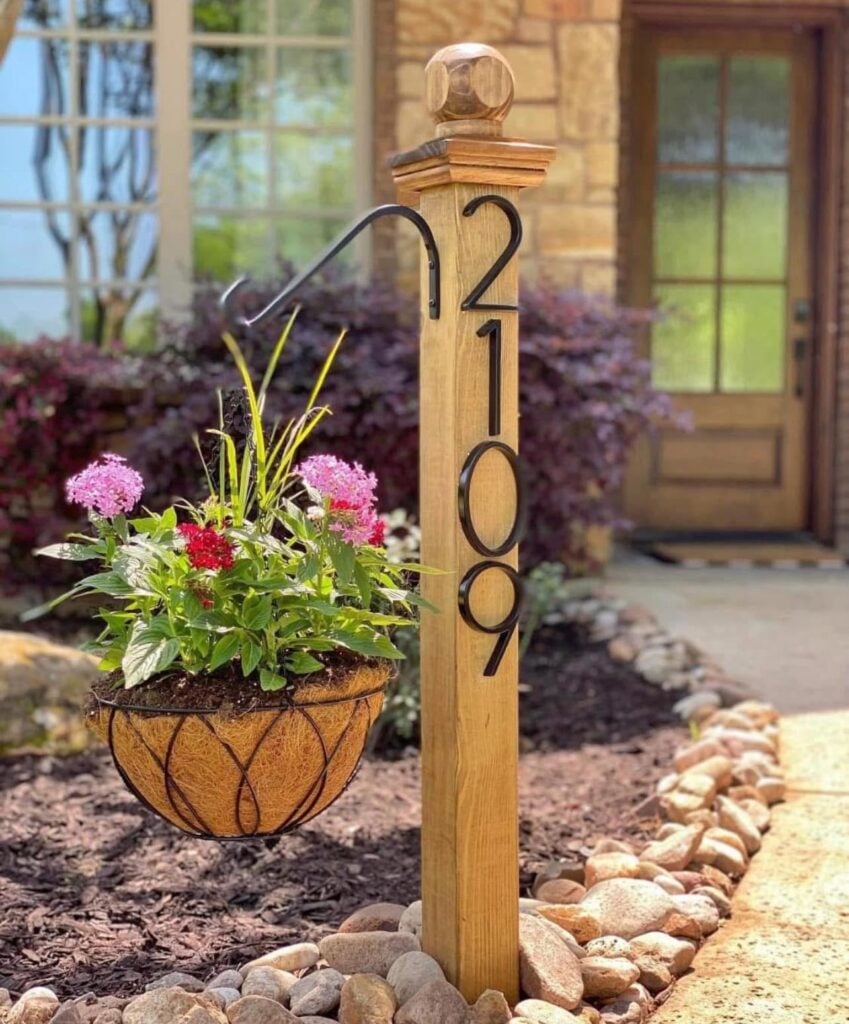
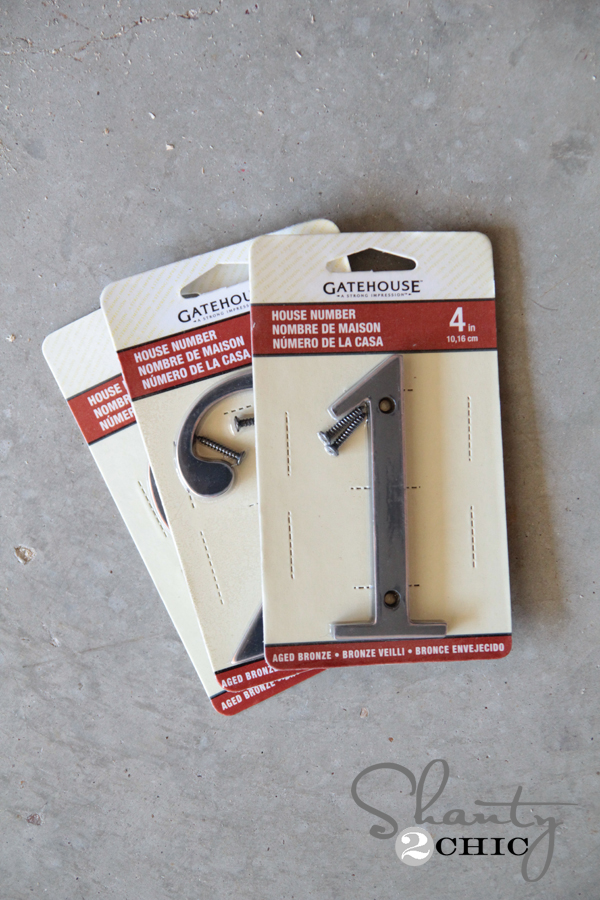
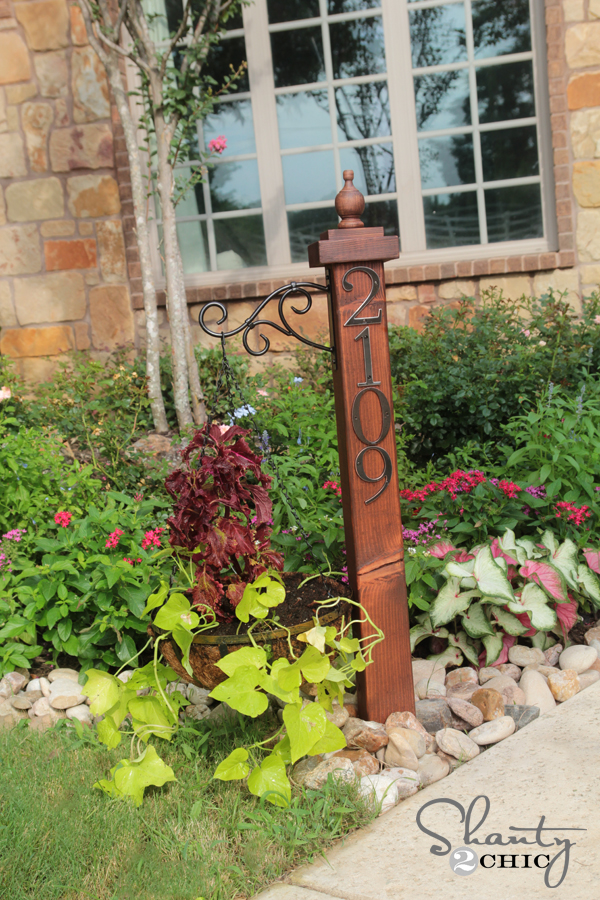
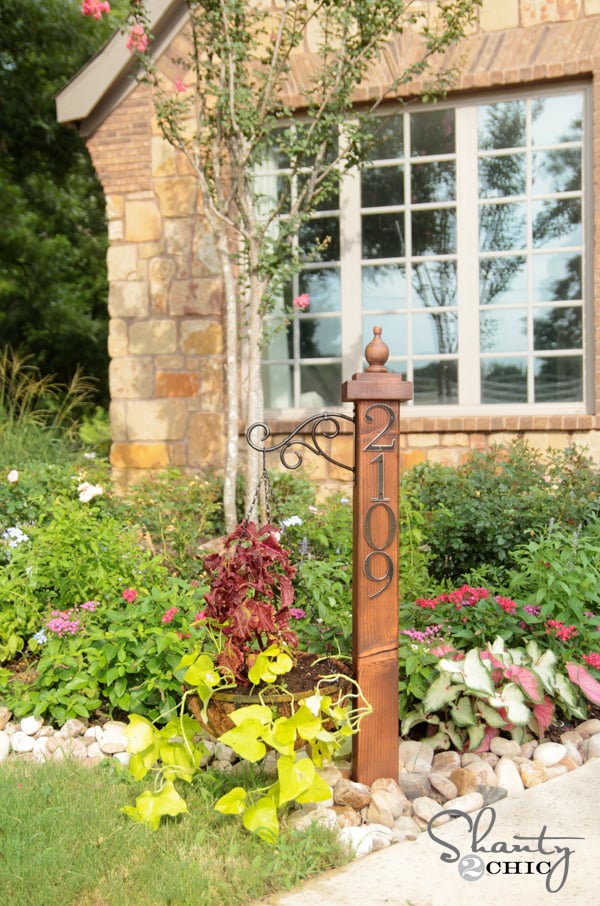
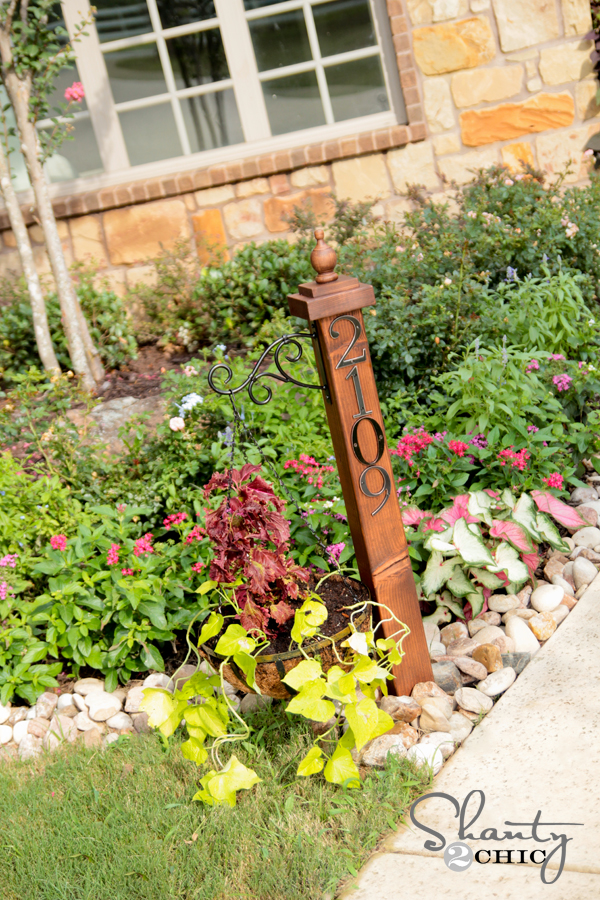
Add House Numbers and a Plant Hook
The final step is where it all comes together! I added black metal house numbers to the front of the post—just $4 each at Lowe’s. They also come in other finishes if you want to match your home’s style. I grabbed the plant hook from the garden section for about $5. It’s perfect for hanging a seasonal flower basket or even a lantern. Woohoo for budget-friendly finishing touches!
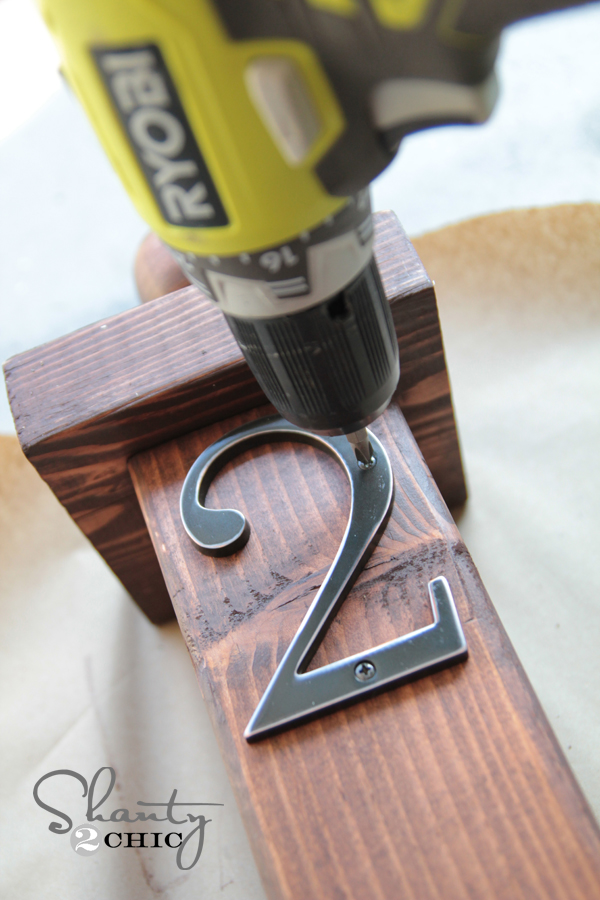
Attach the Numbers—Easy Peasy!
To finish it off, I simply lined up the house numbers on the front of the post and attached them using the screws that came in the package. That’s it! A quick and easy step that makes a big impact. Your flower post is officially ready to show off!
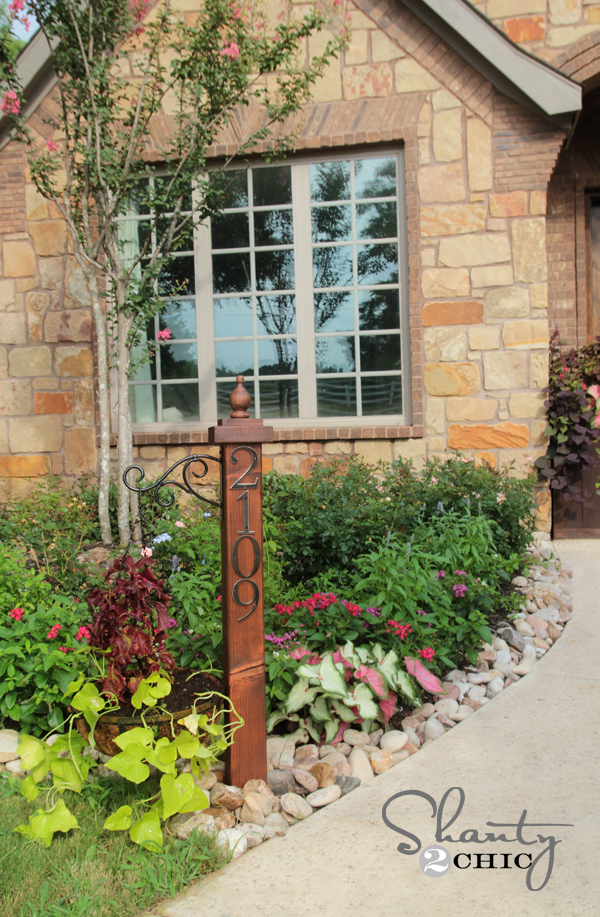
Plant It and Add a Pop of Color 🌿🌸
To install the post, I dug an 18″ hole in the ground and set it firmly in place. Then I added a cute black planter from Lowe’s right at the base for a little extra charm. I filled mine with vibrant Sun Coleus and sweet potato vine—such a gorgeous combo! 💛
And here’s the finished look… I couldn’t love it more!
Ready to Build Your Own?
This DIY flower post is such a simple way to add charm and curb appeal to your yard—and it’s totally beginner-friendly! Whether you’re dressing up your entryway or adding a personal touch to your garden, this project is a quick win. Be sure to tag me if you build one—I’d love to see how yours turns out! And don’t forget to check out more outdoor DIY ideas and free plans right here on the blog!


Do you recall what size hook AND basket you used? It seems like the most common sizes for hooks are 6″, 9″, and 12″ I love how the dimensions of yours “fits” well and was wondering the length. Corresponding with that, what size of basket did you purchase? 12″ or 14″? Thank you for your post and for your time!
Love this idea!! I’m going to use the full length of the post & hang a hummingbird feeder from the plant hanger. A taller post will be more visible in the area I need to put it.
I LOVE this!
Did you mount in concrete?
Nope! Just dirt… But I am in Texas with tough clay dirt. You may find concrete a better option 😉
What length did you have them cut the post?
I may need to open a Home Depot CC… Your projects are so inspiring! I’ve only been lucky enough to try the $20 shelves but I’m hoping to try this one next, or next to next…
OMG, I Love this and can’t wait to do one of my own!!!! Thank you for sharing this post!
How much did you have to sink into the ground?
Okay, now that is three projects I HAVE to do this weekend, curtains, spice rack, and address post!! I LOVE IT!! I live in the country and the number one complaint is no one can see my address. Problem solved! Thank you!
Very nice. Pinned it!
Love it! Pined it! Will be making this as a house warming gift for my aunt and sister and one for myself! Thanks for the share!
Love it! I’ll be making my own soon!
Love this idea! Gave me some ideas for my own house to go with the outside style decor I have going on.
omgravy! i absolutely love this!!! off to lowe’s first thing tomorrow! tfs!
Beautiful! 1 quick question. Did you screw the wood together off center? Otherwise the finial would not be able to be centered, right? The previous screw would be in the way? Thanks!!
I know I’m not Whitney, but if you look at the picture closely, you can see four small nails holding the top on. I’m sure there are four more under that piece. That leaves room for the finial to be added in the center. Hope that helps!