Happy New Year friends!
I am SOOO excited to share this latest build with you! I decided to build a little something for myself this go around. I figured it was time to get a lot of my projects off the garage floor and onto a workable space. Check out my simple DIY workbench!
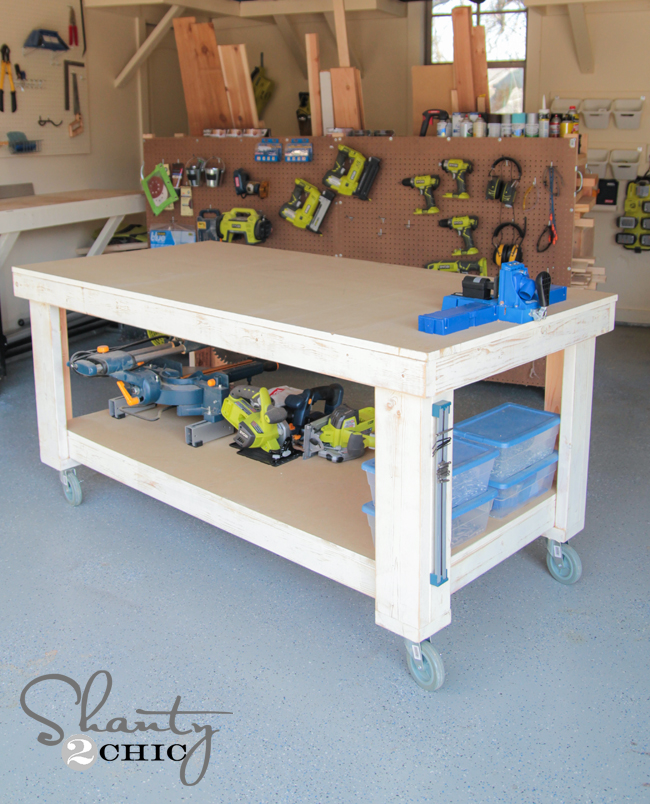

Ahhh… Isn’t it perfect?? I love everything about it! Ashley and I have been working with our friends at Ryobi Power Tools to create fun DIY videos for you guys. They always have the BEST workbenches for our shoots, and I come home feeling super inspired to build one for myself. Well… I finally did. This is a large workbench, but it really is a very simple build! I tried my best to break it down for you, but feel free to ask me anything!
CLICK HERE TO DOWNLOAD THE FREE PRINTABLE PLANS!!!!!
Here we go!
New Workbench Supply List
2 – 2x6x8
7 – 2x4x8
2 4×8 sheets of 3/4″ MDF
4 5″ locking rubber casters
2.5″ wood screws
Kreg Jig
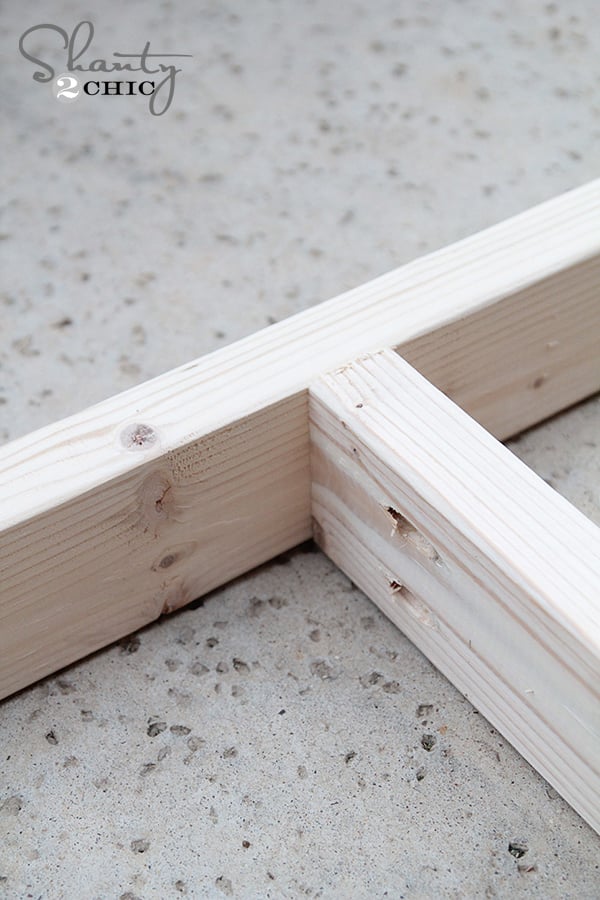
I started by building my frames. This workbench has two frames… A top frame, and a bottom shelf frame. Here are the measurements of both.
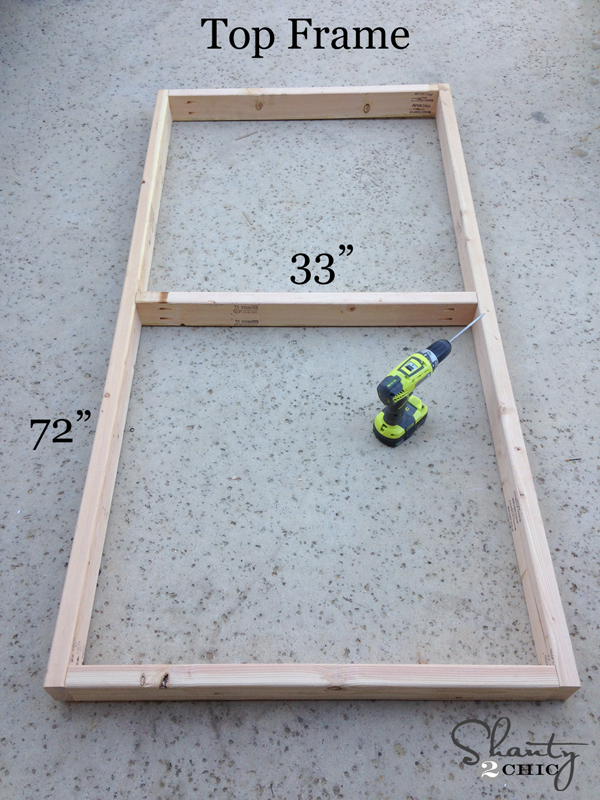
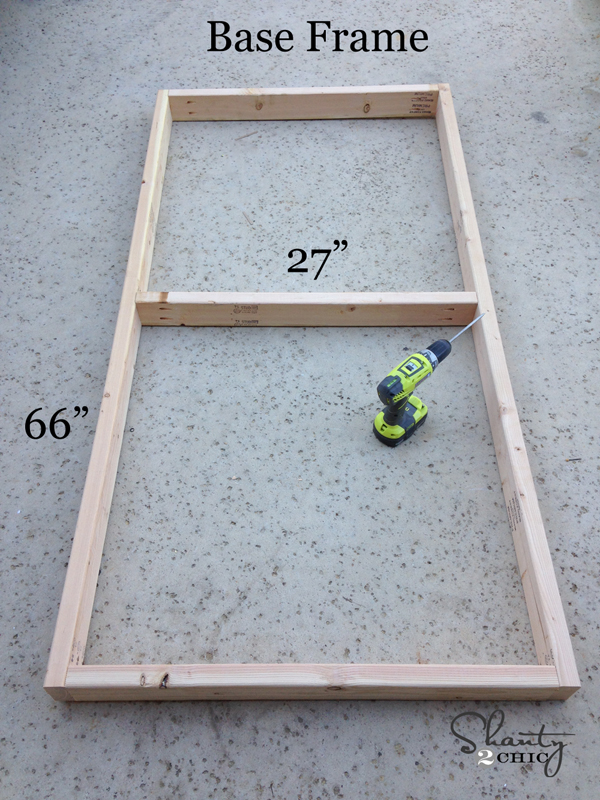
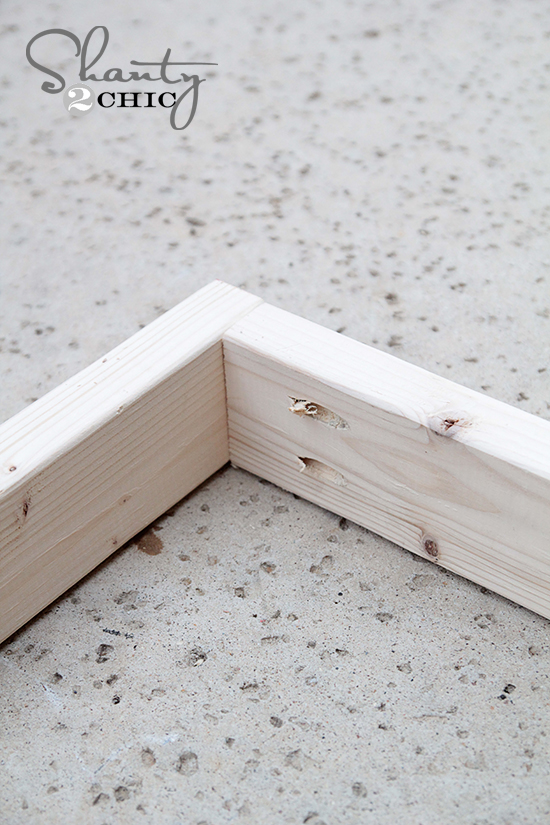
I used 2×4’s for both frames. I also used my crazy awesome Kreg Jig to put the whole thing together. If you don’t have a Kreg Jig, you can also predrill and attach all the pieces with 2.5″ wood screws. But, I totally suggest the Kreg Jig! Makes this part a breeze and you won’t have screws showing on the outside.
I used 1 1/2″ pocket holes and 2 1/2″ pocket hole screws to attach all my pieces. I did this because the width of the wood is 1.5″.
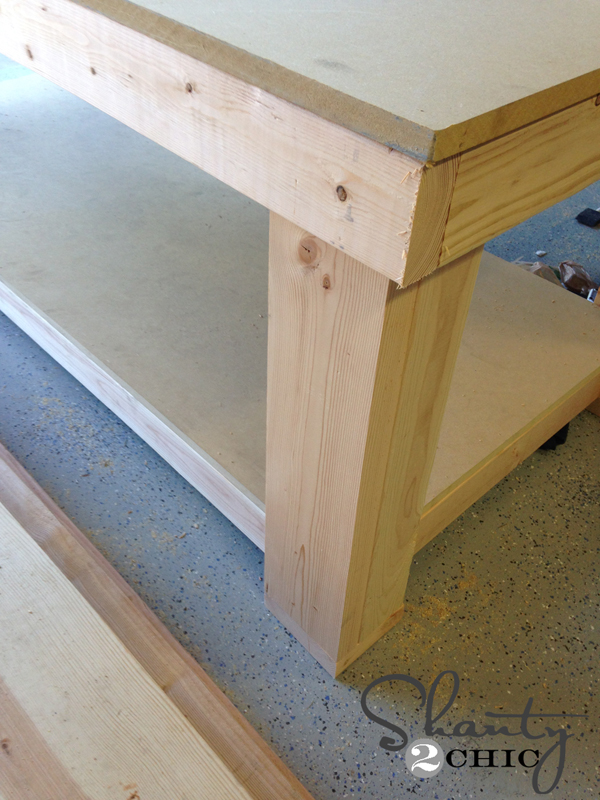
Now for the legs! Each leg is made from one 2×4 and one 2×6 piece. These measure 26.5″ long each. I attached the legs together first using my Kreg Jig. You can see where I put my pocket holes into my 2×4 pieces. I did 3 on each 2×4 piece. Then, I used Gorilla Wood Glue and 2.5″ screws to attach the legs together.
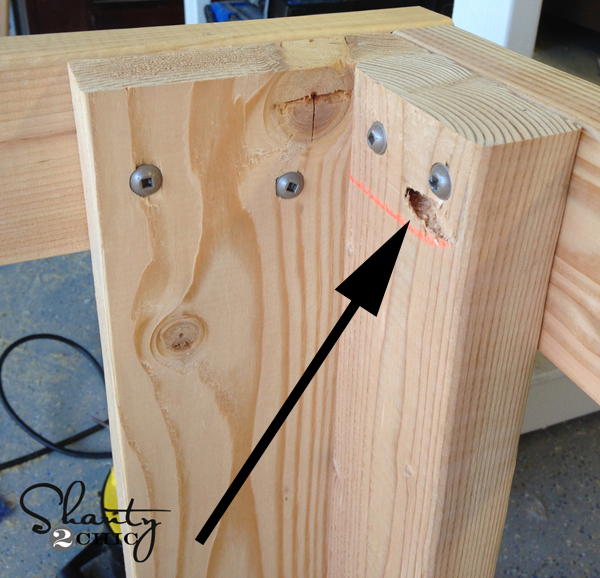
Here is another shot of the legs…
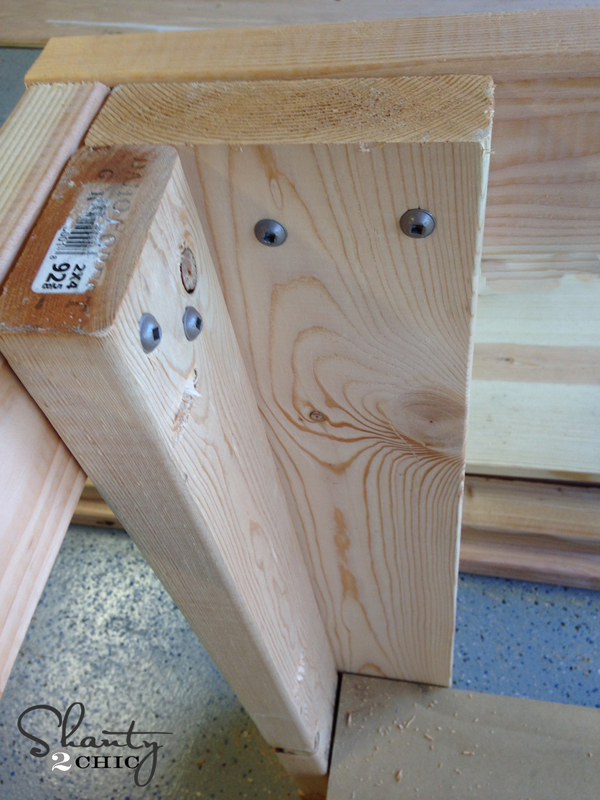
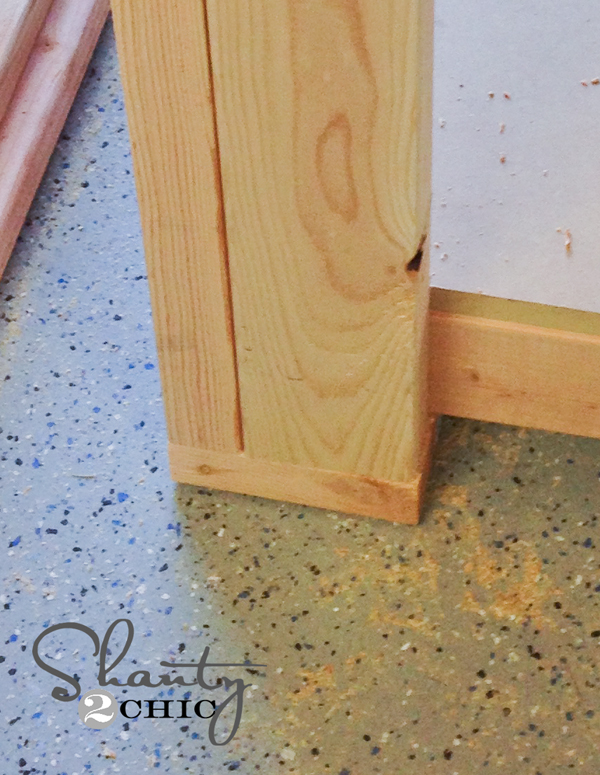
Each leg will also have a 5″ 2×6 piece on the bottom of each leg. These will hold the bottom shelf in place and hold the casters once it is all built. I used wood glue and 2 1/2″ wood screws to attach these to the bottom of each leg. Here it is after I attached the frames to it…
Once I had all the legs built, I attached them to my frames. The legs will line up on the outside of the bottom shelf frame, and on the inside of the top frame. I used heavy duty 2.5″ torx screws on this part. You can see them on the inside of my top frame. I also used my drill to pre drill before attaching.
Now for the shelves! This is the heavy part…So I got my hubby to help me lift them up. I used 3/4″ MDF for each shelf. I had the nice guys at Home Depot cut it down for me.
Here are those measurements…
Bottom Shelf – 30″ x 66″
Top Piece – 36″ x 72″
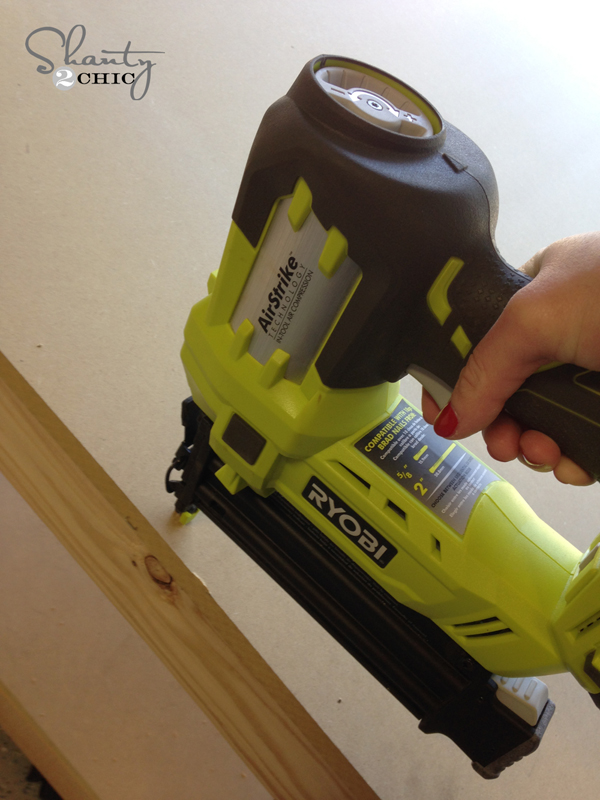
I used my Ryobi Airstrike Nailer to attach both pieces of MDF. I didn’t use glue on this part, because I want to be able to easily change out these pieces when they get too worn.
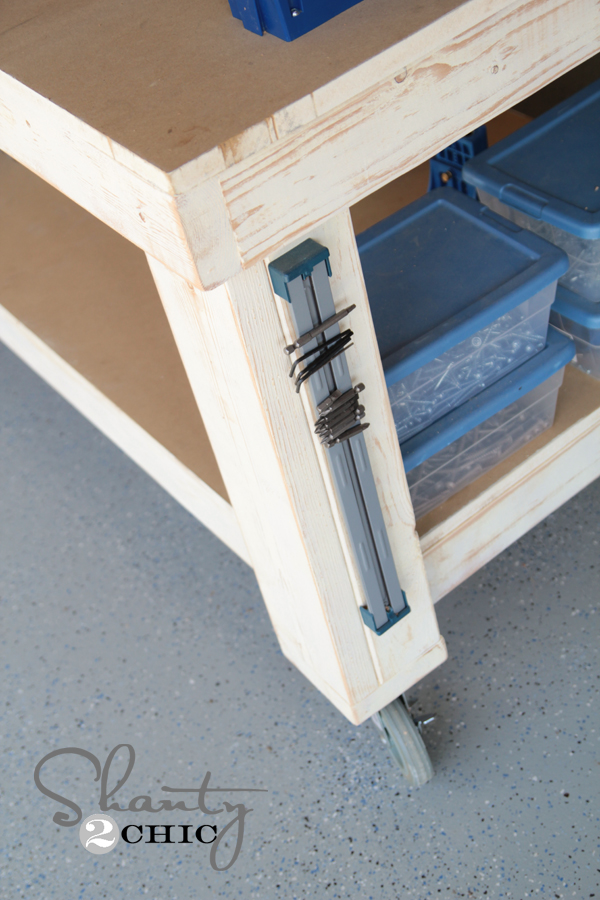
That’s it! My final step was adding the casters which I found at Northern Tool. These are 5″ rubber locking casters. I also gave the my frames and legs one fast coat of white paint and used my Corner Cat sander to distress them a bit… Every good workbench should be cute too, right??
Here’s the New Workbench all finished up!

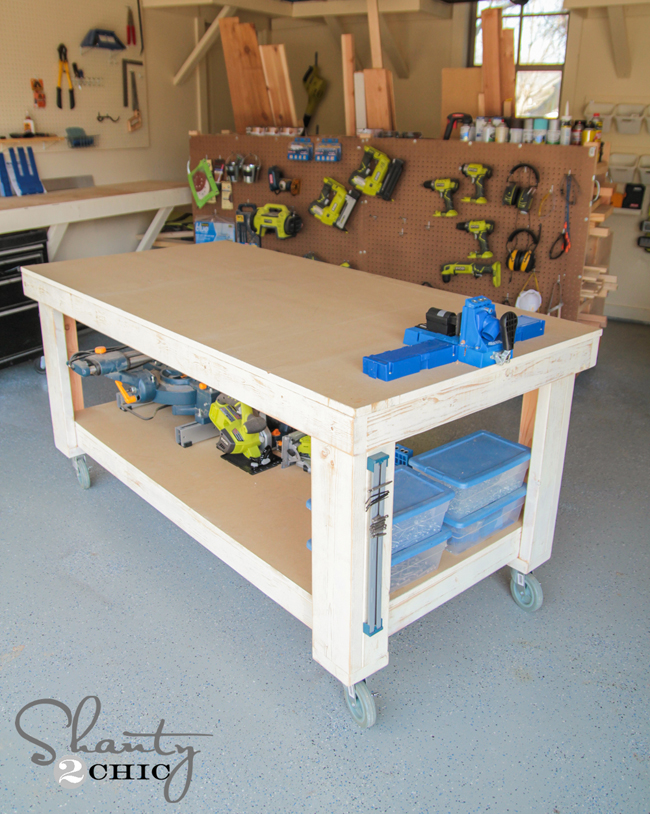
Did I mention I totally love it?? Just checking! I built the whole thing for under $130.
Thanks so much for stopping by! I would LOVE for you to pin and share my new workbench with all your friends! Let me know if you have any questions at all!
~Whitney


Thank you for these plans. I just finished the bench and I love it. My only question is did you do anything to finish/seal the top of the MDF. This is my first time using MDF. Thank you in advance.
Great plans. I’ll give it a shot. Thanks for sharing.
I am not familiar with a Kreg Jig. Which type/model should I get? I think Home Depot has them.
I just thought of a great upgrade…..modify top to be melamine or msple.plywood…..here it comes….. add 3\4″ width of mahogany (waxed or with poly)….now that will pop!
A big thank you for the plans.
This was my first real woodworking project and it turned out great!
Hi – do you have the plans for this in metric measurements? Thanks!
Great bench just made it, but needed to adjust the leg height. The height with 26 1/2″ leg cutouts and footpads makes this bench 28″ high with no casters. The plans are not accurate at the end. It shows 34″ with no casters.
Great plan, description and instructions. The color coded cut list and layout are awesome. I built this today and then thought to add a slide out shelf made of 3/4″ plywood to put my miter saw or Makita router table on. Cool, easy and fun to build. Thanks!
do you think you could put the entire 4×8 sheet of MDF on the size frame you have built so that it will have a bit of overhang?
I’m building these for a classroom and people will have the option to stand or sit at counter height stools. I wasn’t sure if the MDF board would be strong enough to hang over an entire foot to 8in, but I want to keep the full size of the board if possible and want to have some overhang so it’s comfortable to sit under.
Thanks for the great plans!
I built a version of this over the weekend for my garage and absolutely love it. I added MDF to the sides and back and used 5″ lockable casters, worked out awesome.
Page needs way more pop-ups and ads, I almost found what I was looking for…..
Your downloadable instructions differ from the website on the legs section (2), where in the document you say to drill 1 1/2″ pocket holes into the 2×6 pieces and attach to the 2×4 pieces, but in your images on the site you said drill them into the 2×4 pieces.
Just finished building this yesterday. Took me the afternoon. I’m a real beginner and it was easy enough. My only comment would be the ze as above, I think I should’ve made the mdf a little bigger to have it be easier to clamp stuff on.
I know this post is like 5 years old, but I am making this bench from the printable instructions and there is a misprint. on Page 4 when It talks about drilling the pocket holes to make the legs, the instructions say to “drill the pocket holes into the 2×6 legs and attach them to the 2×4’s”, but according to the drawing and the video, the pocket holes need to be drilled into the 2×4’s and attached to the 2×6’s. Could you update the printable PDF so no one else makes this mistake?
Heh — I just came across this project and its PDF instructions, and the answer to your question after two years, four months is: no, they can’t update it. But at least there’s this comment section for user updates!
Ladies, thank you for the bench plans! I built it yesterday and the plans were great. I did have some trouble with the bottom shelf though. I took out the top frame brace so it would go in more easily!
I think “more easily” should be “at all.” I don’t see any way to insert the bottom shelf in the way that the PDF plan indicates at the last step (step 7). This implies that the plan document was an afterthought based on inaccurate memory. So we have to go over it carefully to fix the errors and avoid problems.
Great build and plans!
I just made this for myself, but of course made a few tweaks to make it my own.
1) exact height of my table saw to act as an outfeed table
2) incorporated a middle shelf and cut away part of top workbench to House my router table
3) drop down casters for secureness when working but still able to be mobile
4) left a 2” lip all around for clamping
5) went with 3/4” birch instead of MDF
Would like to add pic, but not sure how.
Still have some more customizing to do, maybe a drawe/cabinet beneath router station for storage of router and accessories, mounting dust collection below, and maybe a drawer or two underneath the table top?
Anyway, thanks again for a great project and great starting point for some additional customization!!!