Thanks so much for all of your great comments and shares on my daughter’s dresser bed I shared last week! As promised, I am back today to share the dresser! I am titling this post just a dresser, because it actually makes a perfect 6-drawer dresser with or without the bed. The only thing you would need to do different is trim both sides if you will see both sides. I will touch a bit more on that later. Here is how the dresser looks all finished up.

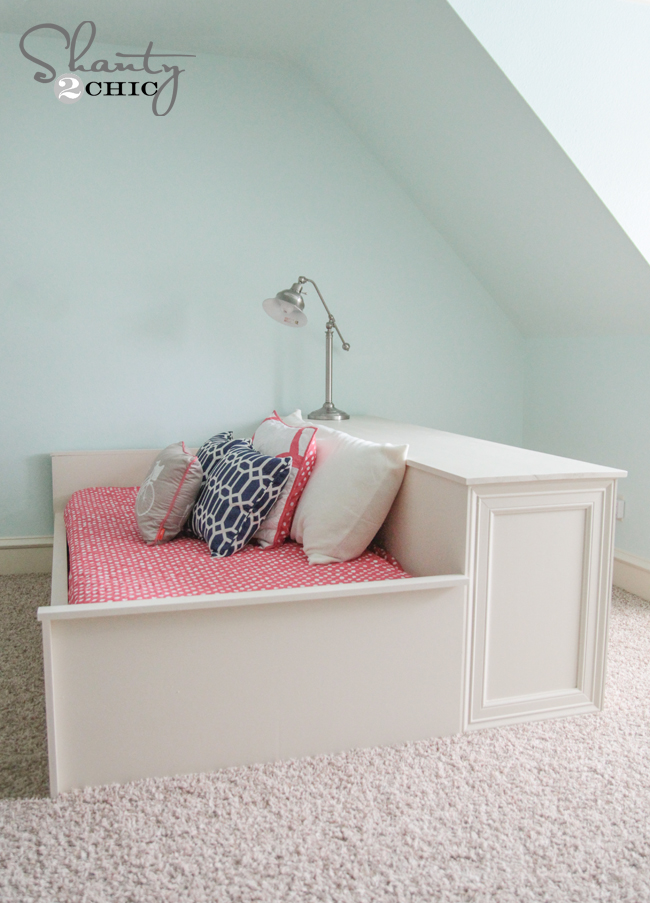
How fun is that? And can I get a woot woot for some serious storage here?? This mommy loves that.
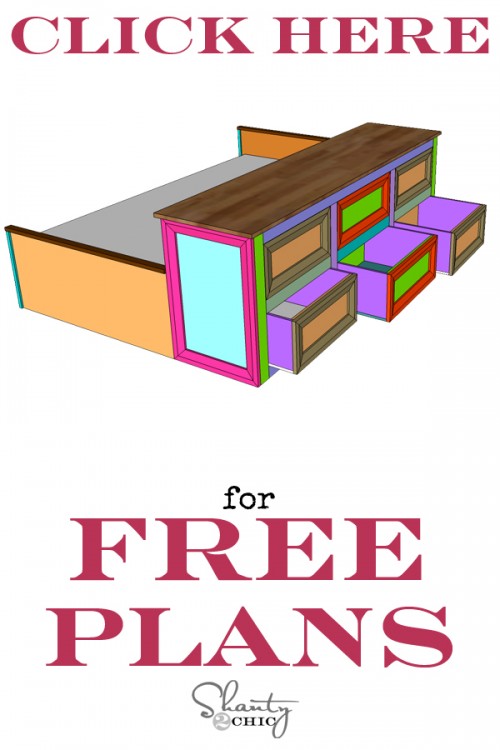
You can download our FREE PLANS for this dresser and bed HERE or by clicking the button below! I will share some tips and photos with you on the build like always! Also, be sure to check out tomorrow’s giveaway! We will be giving away many of the tools I used on this project!
Here we go!
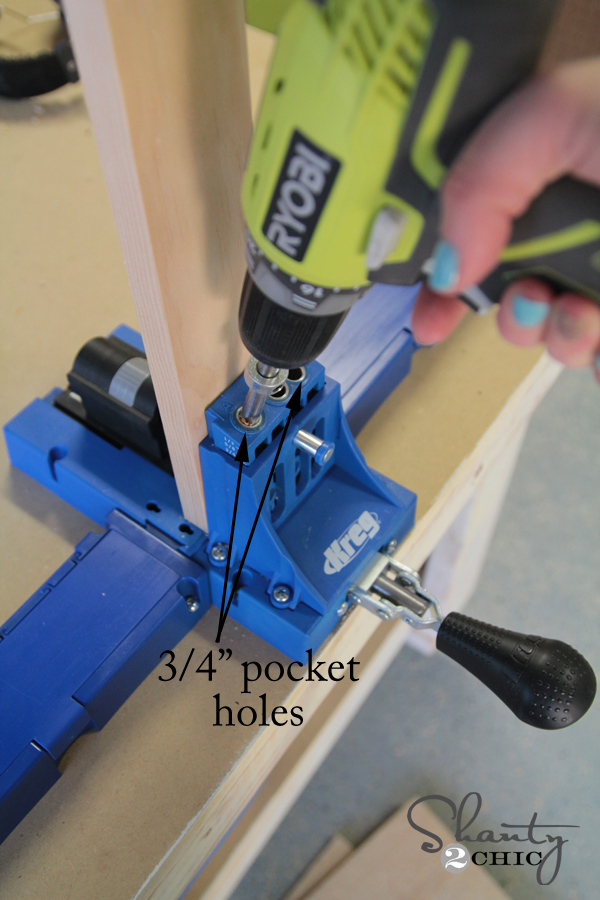
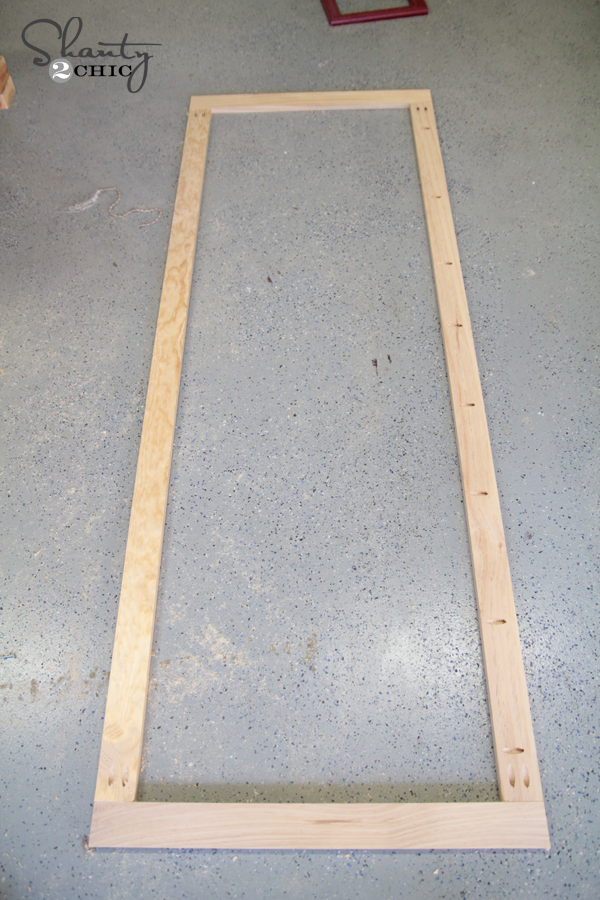
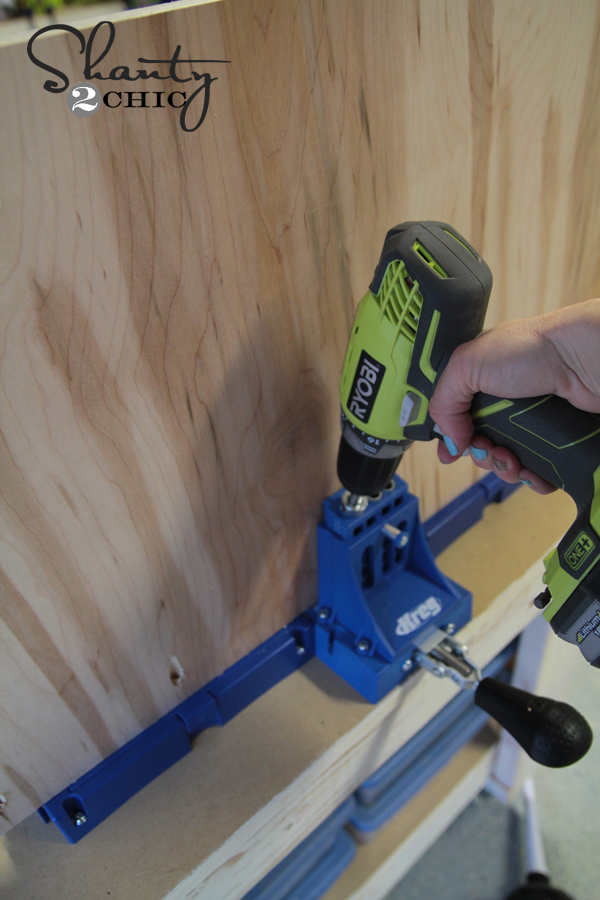
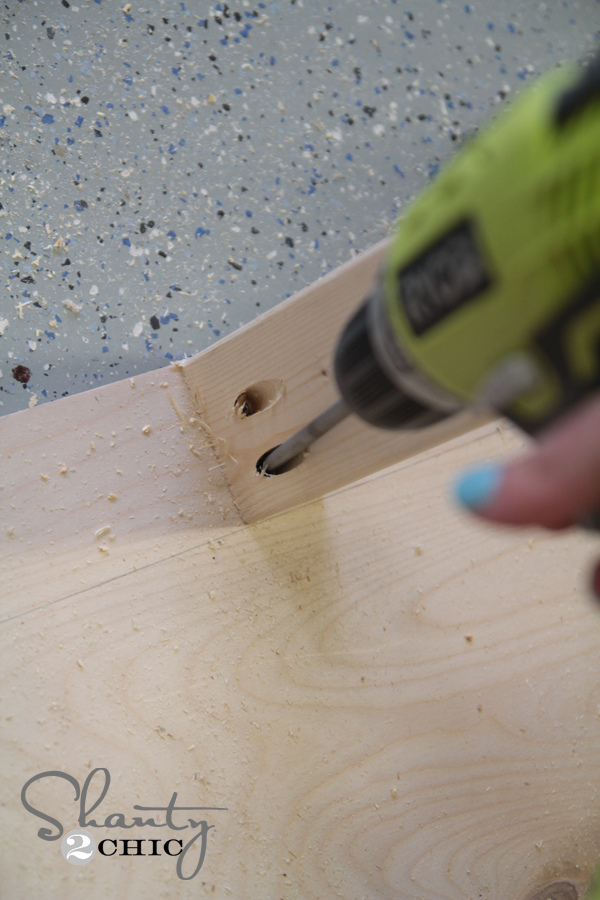
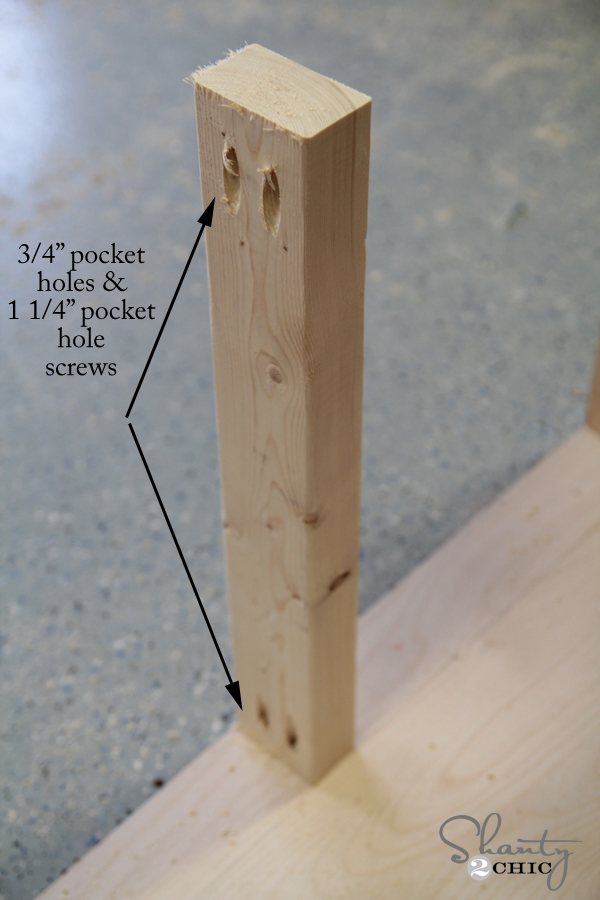
I built my frame first. This will be the frame for the drawers. Simple… Just basic cuts here. I used my Ridgid Miter Saw to make all of my cuts and added 3/4″ pocket holes to all of my pieces. For the pocket holes at the ends of each piece, I lined the wood up in the Kreg Jig like this…
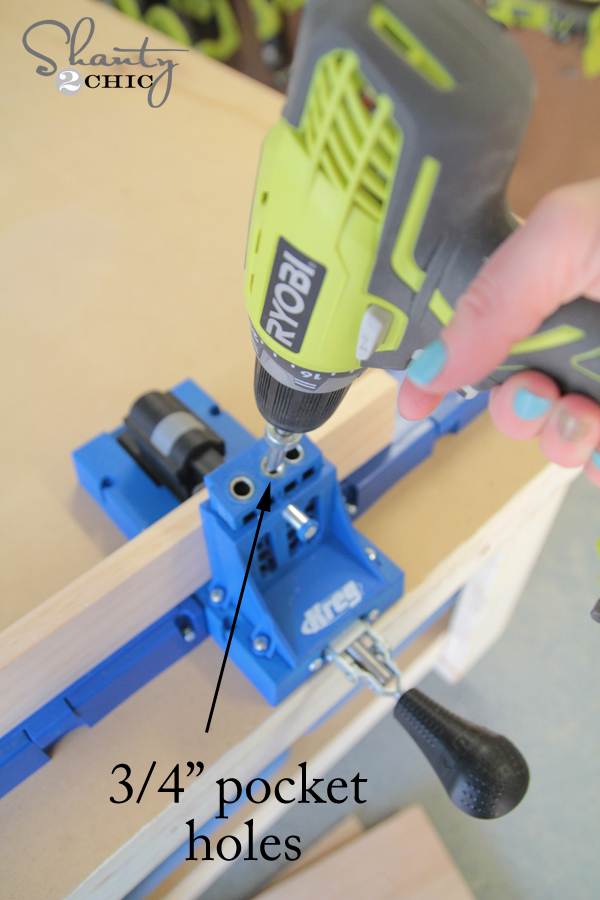
And for the pocket holes that run the opposite way, I lined them up in the Kreg Jig like this…
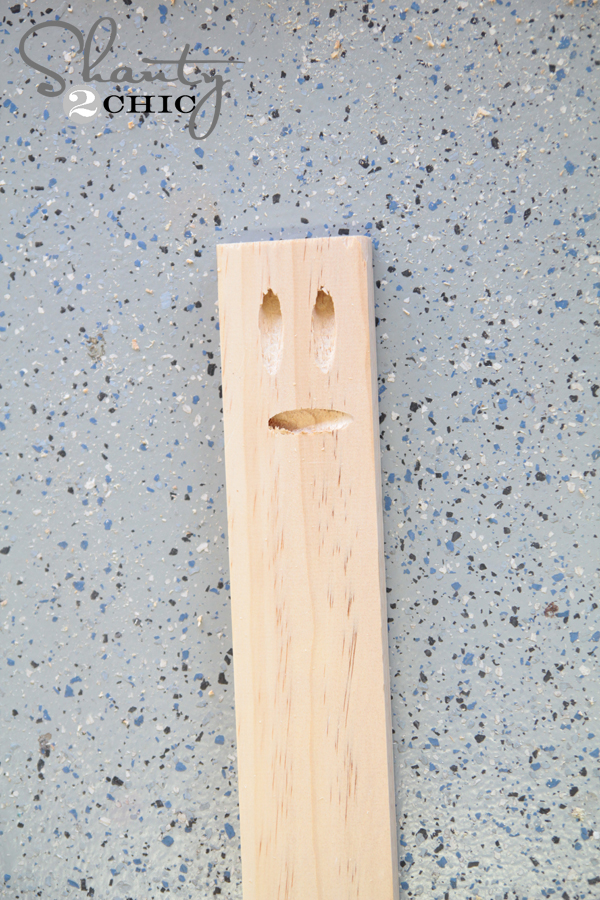
Your ends may look a bit like this in places which I found totally comical 🙂
Build the rectangle first…
You can see where I put all of my pocket holes above…. Next, I measured and added the next pieces.
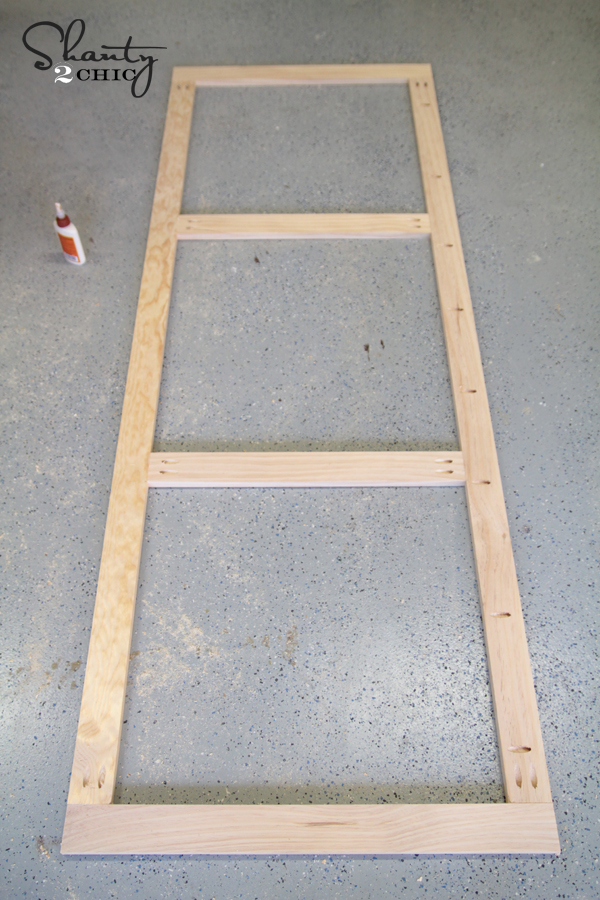
And, finally I added my dividing pieces.

Once you have the frame made, you will set it on top of the back piece of plywood to mark where everything lines up. This is a HUGE TIME SAVER guys! It makes the rest of the build super easy!
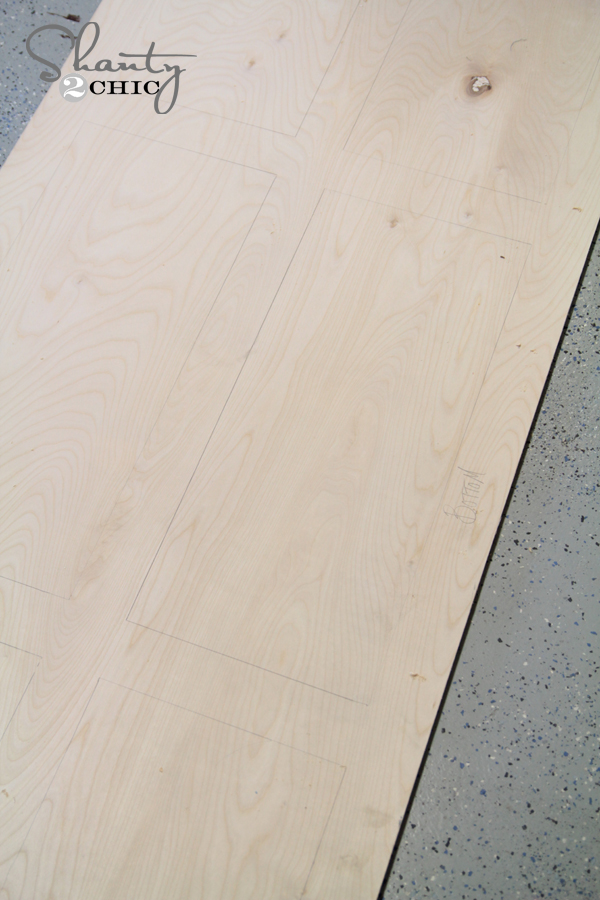
Just use a pencil to clearly trace around the entire frame.
Just like the bed, I used my Kreg Rip Cut with my Ryobi 18V Circular Saw to rip down the plywood for the dresser. This bed uses a lot of plywood.
To keep the cost of the wood down, I decided immediately to use a favorite product for the plywood. Many of you have heard us talk about PureBond Plywood. It’s an amazing hardwood plywood that we use on so many of our furniture pieces. What’s so cool about it? Well, it’s made in the good ol’ USA. It’s formaldehyde-free making it safe for me and my family. It’s affordable! You get the look of a beautiful hardwood at the cost of plywood, and it’s made from reusable resources. But, our very favorite thing about it is what it looks like. It’s BEAUTIFUL!
Since learning about it a few years ago, we made it our go-to brand for plywood. It was an easy choice!

You can get PureBond at the Home Depot. I decided to go with birch for both the bed and dresser. It comes in a huge 4′ x 8′ sheet which is next to impossible to get in the car with 5 kiddos in tow. That’s why I let Home Depot do most of the work for me!
I had the nice man in the lumber department rip the sheet down.
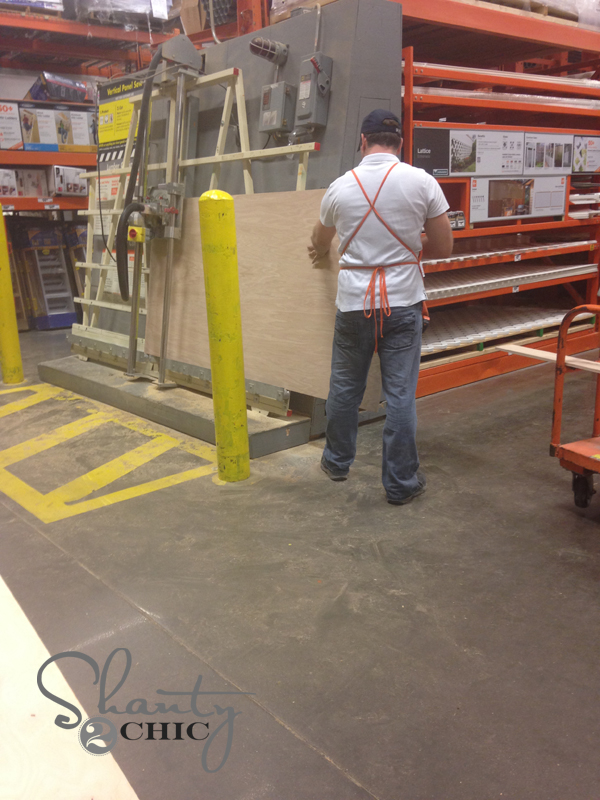

This saw is AMAZING. It uses the same battery as my drill and cuts like butta! You just attach the Rip Cut to it , and you can very easily and accurately rip down your wood.
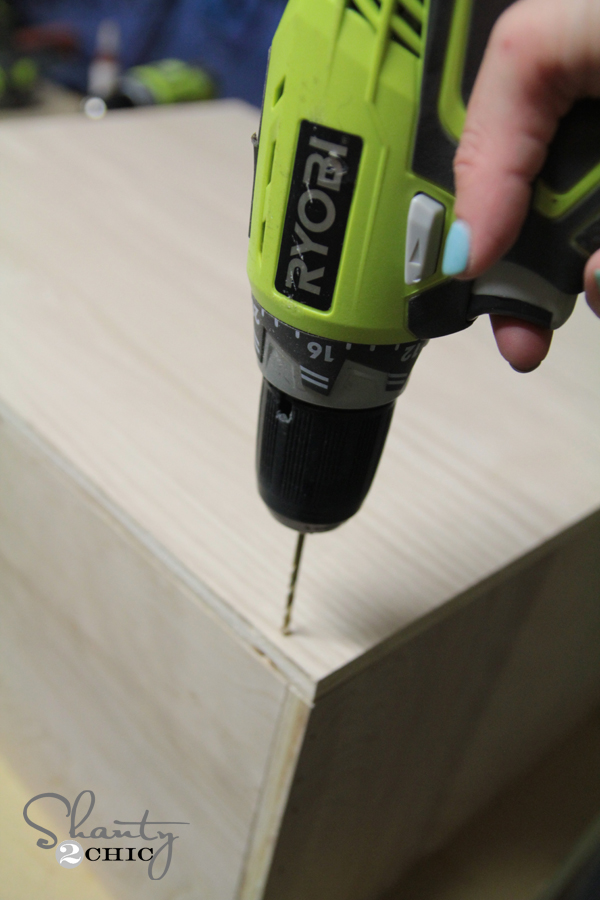
Once you have all of your cuts for the frame made, you will need to make your pocket holes on the frame itself. I used my K5 for this part. You can see here how I put the wood into the Kreg Jig to make the 3/4″ pocket holes.

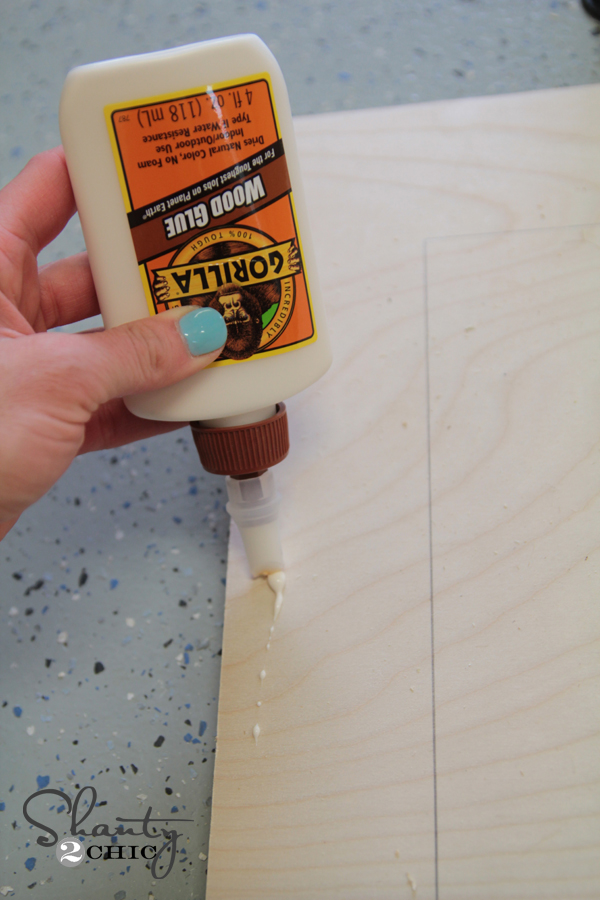
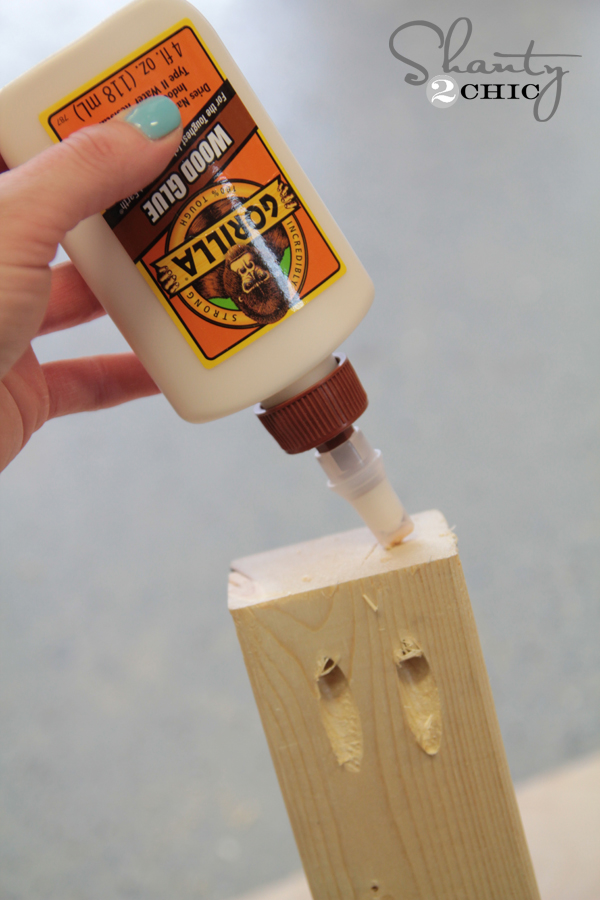
I built the side frames first and attached them using Gorilla Wood Glue and 1.25″ pocket holes screws.
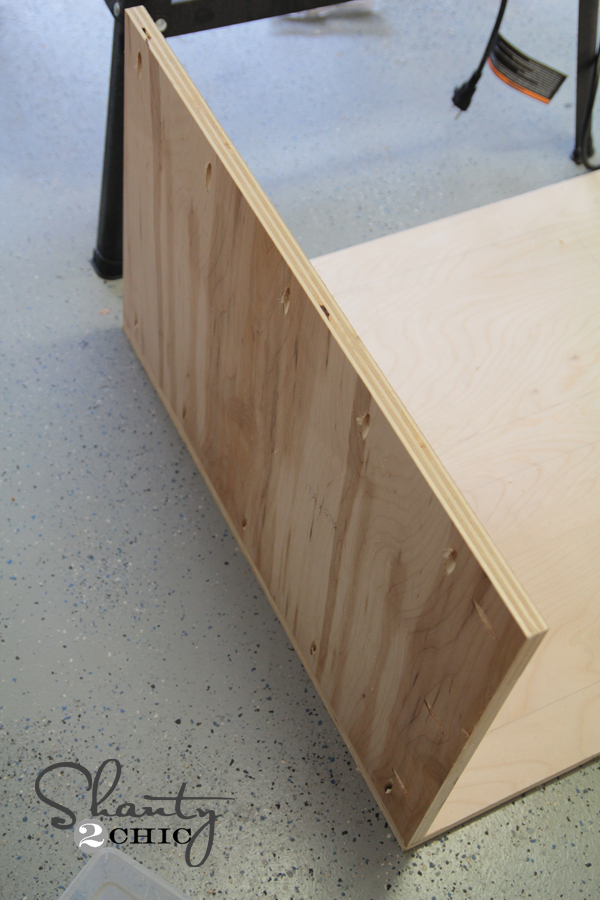
You can see I faced the pocket holes to the outside on this part. Yes, this is opposite than normal. But, it was easier to attach, it grips more wood, and most importantly, I get to cover those holes with my trim in just a bit!
Now for those drawer slides! Can I get another woot woot for no metal drawer slides?? This is a great way to have fully functioning drawers without the hassle of metal drawer slides that can be a booger to attach and often times fall apart with use.
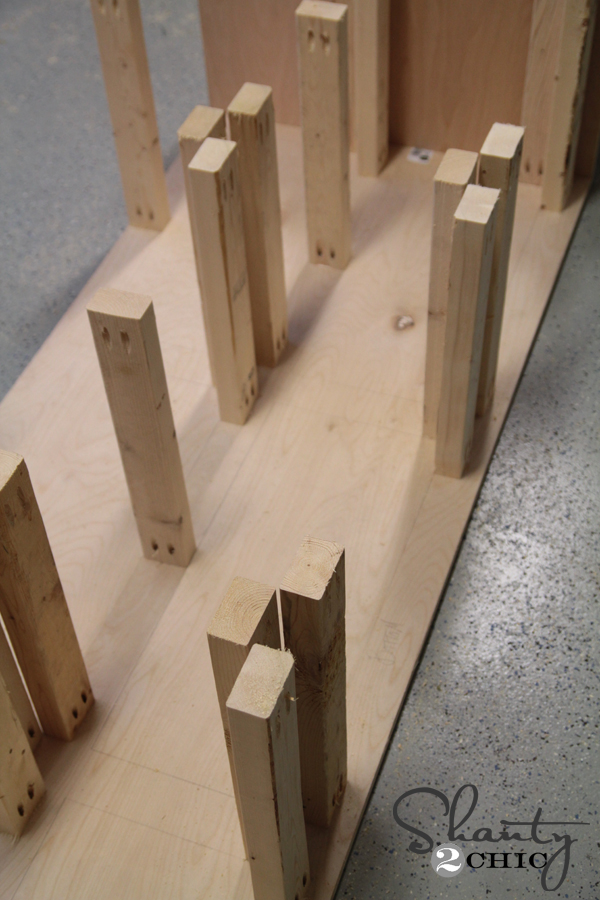
Basically these drawers run on the same ‘L and T’ system that my other daughter’s built-in bed does. You will create L’s and T’s onto the back frame that will serve as your slides. These are all built by 2×3. I used 3/4″ pocket holes on all of these since that is the thickness of the frames that they will be joining to.

Use a bit of Gorilla Wood Glue on each piece…
Then just attach them to your frame. The plans show exactly where to attach each one.
The side pieces will have a small space between the side frames like this…

Here they all are ready for that top frame to be attached…
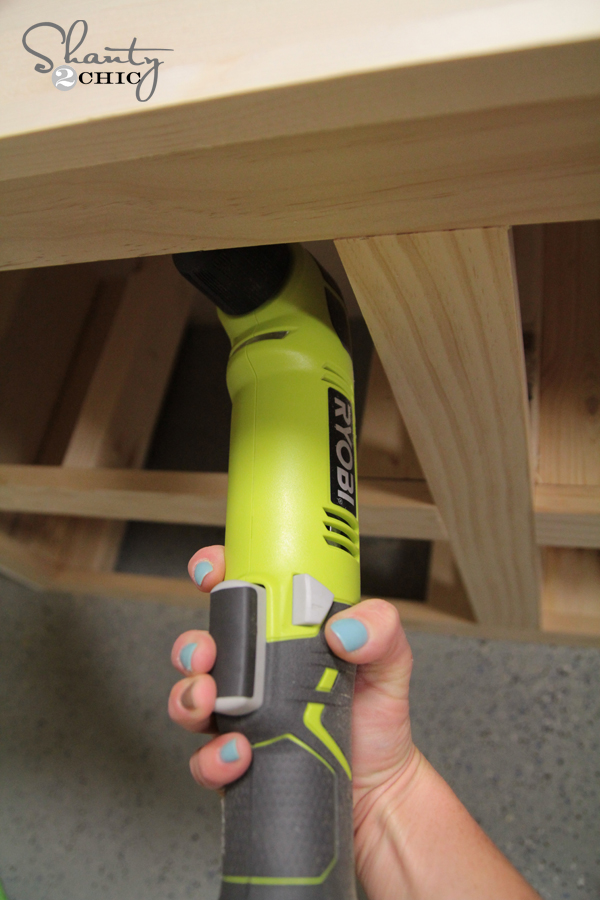
To attach the top frame, you will just lay it on top of the whole thing and attach it through the pocket holes you have already made. These holes can be a bit tough to reach at times which is why you all NEED one of these…
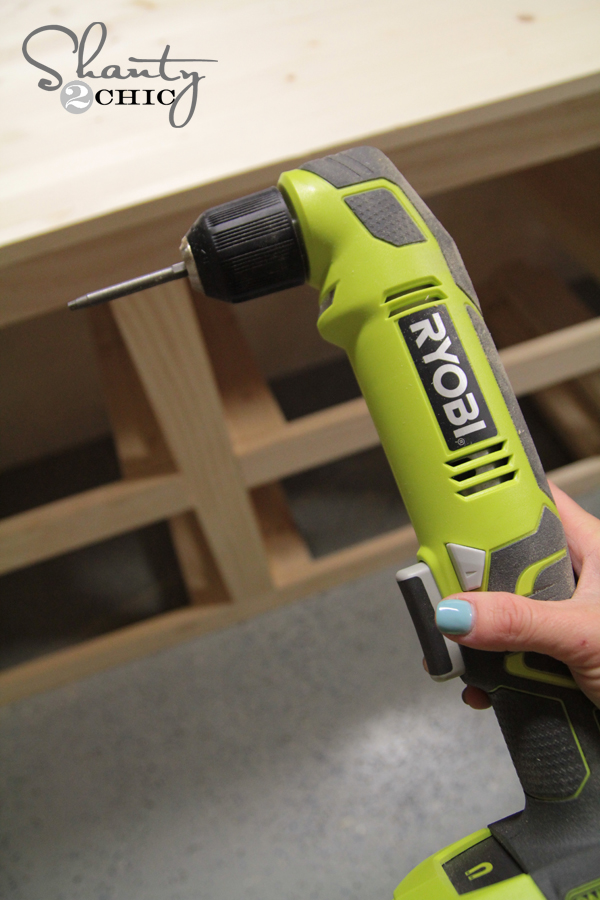
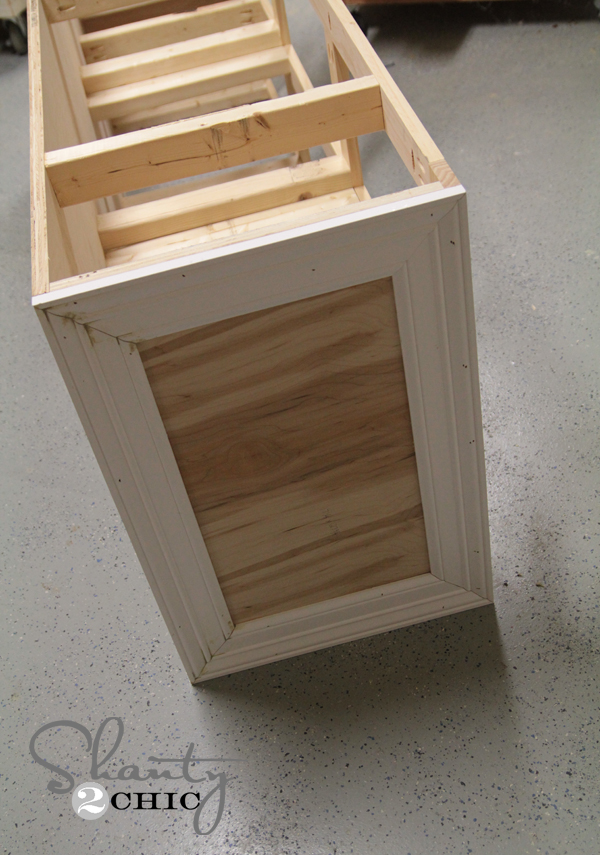
That’s Ryobi’s 18V Right Angle Drill… So perfect for those wonky angles that make you want to pull your hair out! The make reaching them a breeze, and I chose to use the shorter Kreg bit making it even easier! Once you have the frame attached, it’s time to trim the side (or both sides if you are only building the dresser)…
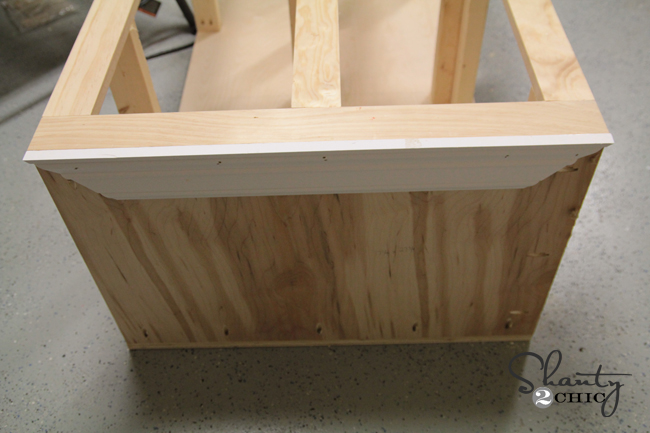
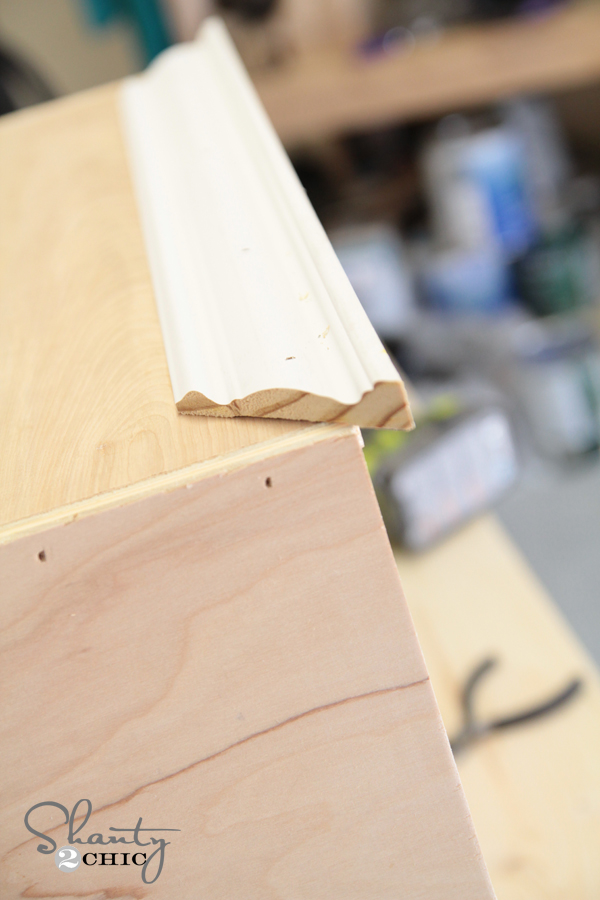
I used an inexpensive baseboard for this part. I love how thick it looks!
Now to attach the top piece! Right angle drill to the rescue again! LOVE this thing…
Now on to the drawers. These are a simple design using 1/2″ Purebond plywood. Basically you build a box like this…

And then attach a drawer base using 1.25″ wood screws. Be sure to pre drill with a drill bit on this part to keep your wood from splitting!
Your drawers should fit pretty snugly into each opening like this…
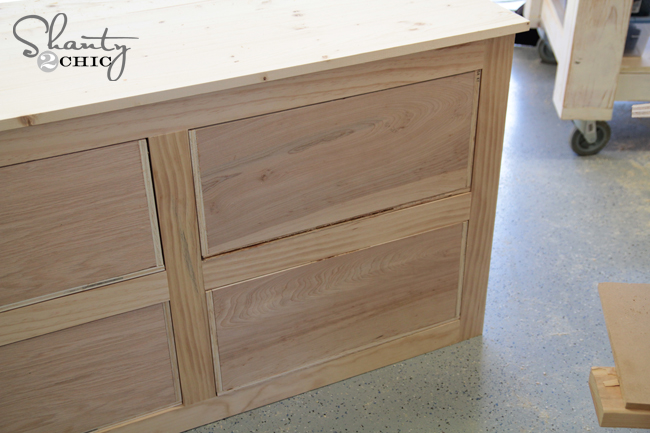
Now for the trim! I chose to line mine up about 1/2″ wider than the drawers to beef it up a bit. This also allows the drawers to stop easily. You can do this, or just simply trim to the edge of the drawers. It’s just a different look… Both work!
I filled all of my nail holes and cracks with 3M Patch and Primer and I was set! I painted the entire bed a color from Sherwin-Williams called Antique White. It’s the perfect off-white!

Here she is all finished!
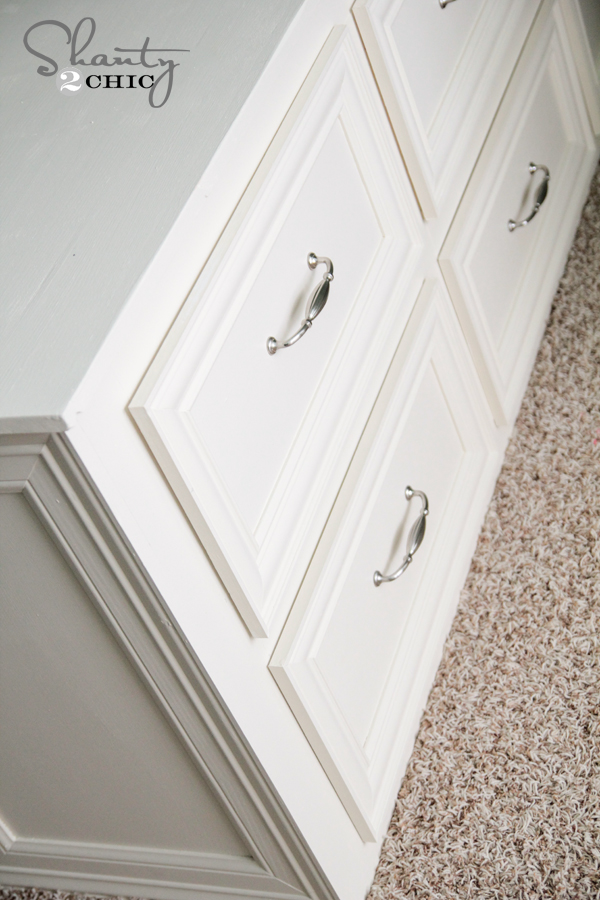
I love it! It serves as a bed, dresser and nightstand in one… Great space saver guys!
Thanks so much for stopping by! I would LOVE for you to share and pin this with all your friends! Also, be sure to check out tomorrow’s giveaway! We will be giving away many of the tools I used on this project! Woohoo!!
Happy Tuesday!
~Whitney


It didn’t take long for Gary to detect the robbers were amateurs.
When she didn’t like a guy who was trying to pick her up, she started using sign language.
Car safety systems have come a long way, but he was out to prove they could be outsmarted.
Your girlfriend bought your favorite cookie crisp cereal but forgot to get milk.
He had concluded that pigs must be able to fly in Hog Heaven.
An outstanding share! I have just forwarded this onto a colleague
who was conducting a little research on this. And he in fact ordered
me lunch because I discovered it for him…
lol. So let me reword this…. Thank YOU for the meal!!
But yeah, thanx for spending some time to discuss this matter here on your web site.
I only want to build the dresser but the plans show supply list and cuts for dresser and bed. How can I take the bed out of the plans?
To those of you asking about material cost, I just build this project but used 3/4″ birch plywood for the drawers instead of 1/2″ and all in was right at $375, including the screws, paint and everything.
looks awesome. but I’m also wondering about the costs and you seem to need a lot of tools for this
I was wondering the cost to build this and can I still build this without a kreg??
What was the cost?
Whitney loved that the plans don’t require drawer glides. I feel that the weight of clothes + wood always seems to loosen the glides no matter how well I’ve attached them. Does the wood glide well against each other? I’m thinking rubbing a wax candle on the edges would solve any stickiness. Thanks for sharing.
What paint did you use?
In the post she said it was a Sherwin Williams Antique White Paint.
You make this look so easy!! I have the rip cut as well but I find it is always binding with my saw… Any tips? Thanks!
Just out of curiosity. .what was your cost to build this? I love it!!!
I am curious about this too. LOVE LOVE LOVE the project. 🙂
I see that lots have asked what the cost was but it won’t let me see the answer on anyone’s post! Does anyone know their cost?! Thank you 🙂