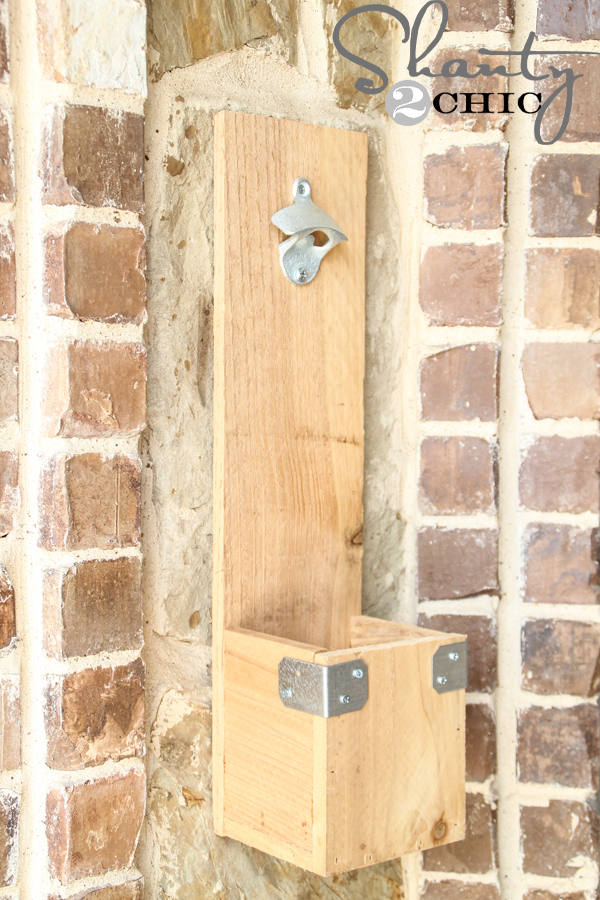
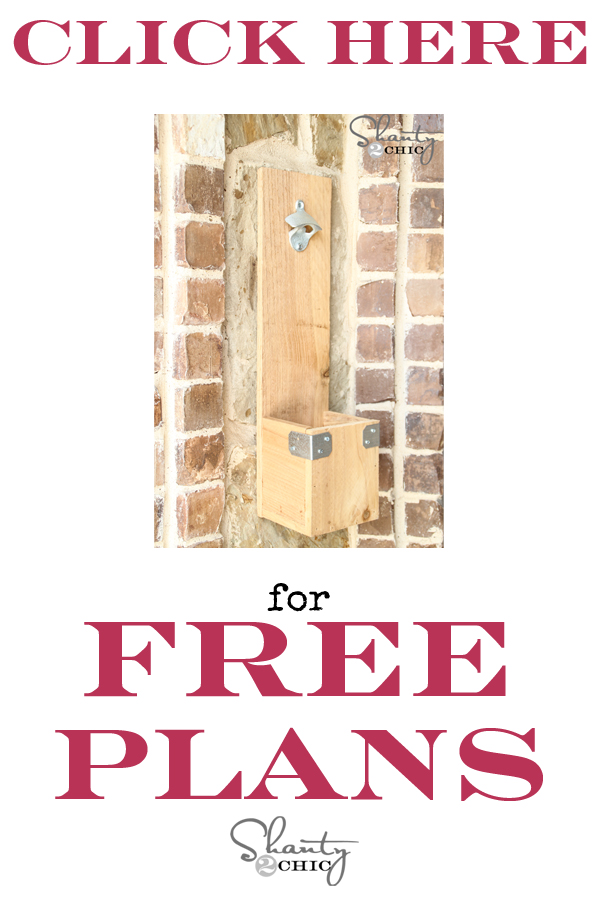
Hey guys! I have a quick and easy project for you, today, that would make a great Father’s Day gift and it’s easy enough that the kids could help! A DIY Bottle Opener!
 I was able to use my cedar fence plank scraps from my DIY Planters so my cost was only in the metal hardware and the bottle opener!
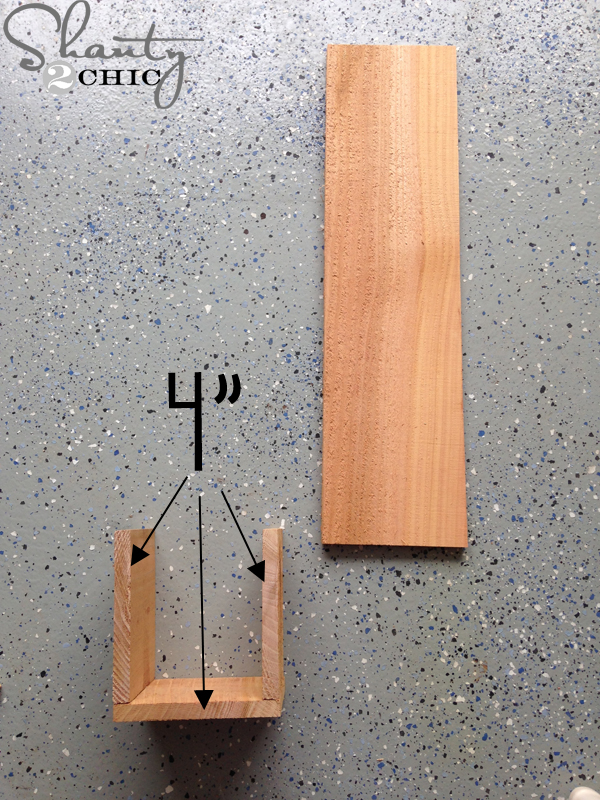
 If you don’t have cedar fence plank scraps, you can purchase a 1x6x6 from Home Depot for about $3. I cut 3 pieces at 4″, one piece at 6″ and one piece at 21″. A simple hand saw (link to purchase in the box below) will work great if you don’t have a saw!
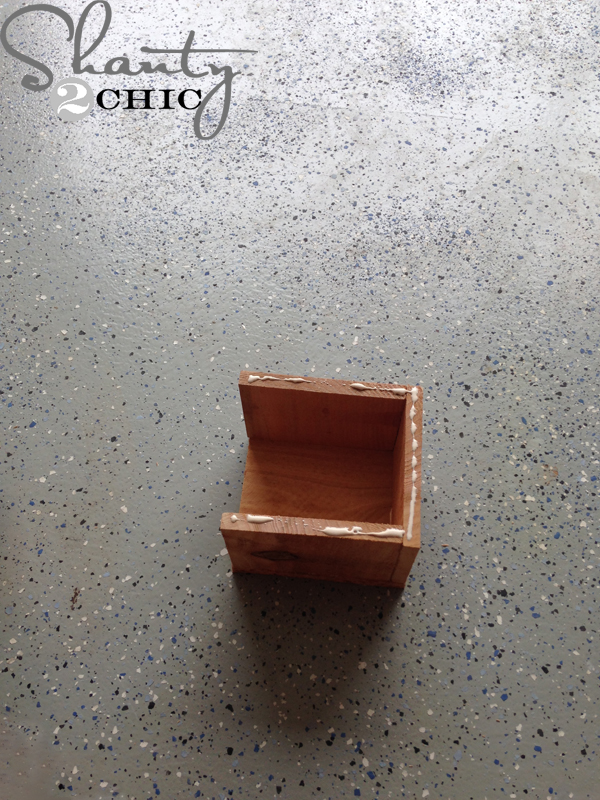
 Next, attach the 4″ pieces like this with wood glue and finishing nails. I used my Ryobi Airstrike Nailer but if you don’t have one, a hammer and finishing nails will work great!
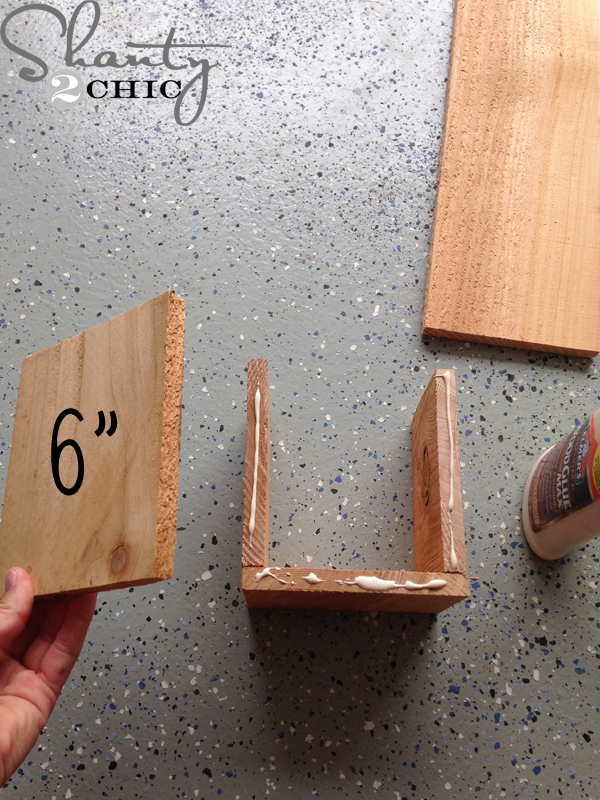 Using wood glue and finishing nails, attach the 6″ piece to the front of the 4″ pieces.
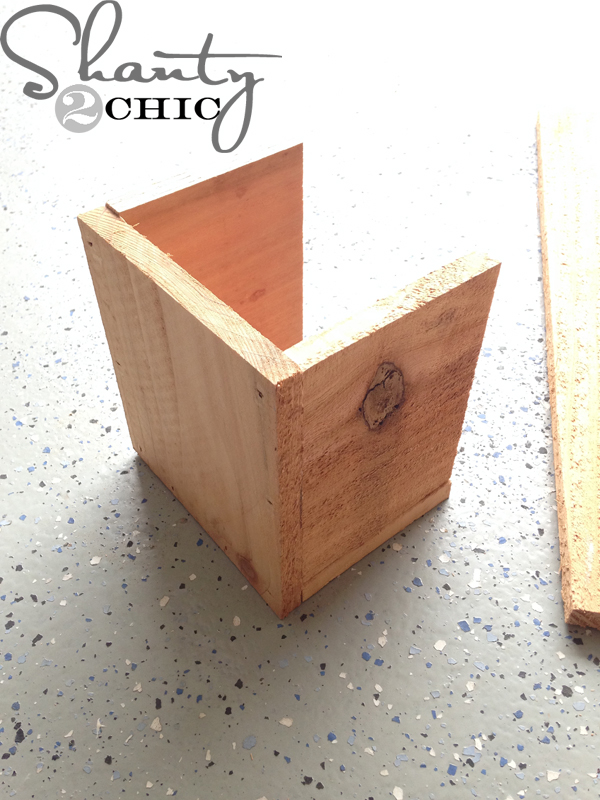 It will look like this now 🙂 This is the box that will catch our bottle caps!
 Add wood glue to the back of the bottle cap catcher
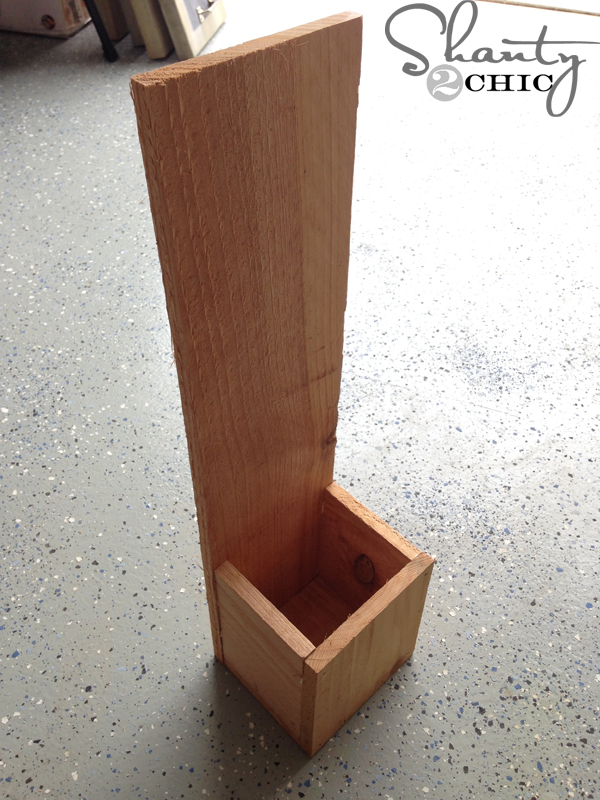 and attach it to the 21″ board with finishing nails (from the back of the 21″ board into the bottle cap catcher).
 I purchased the same zinc bottle opener from Amazon (link to purchase below) that I used on my DIY Cooler!
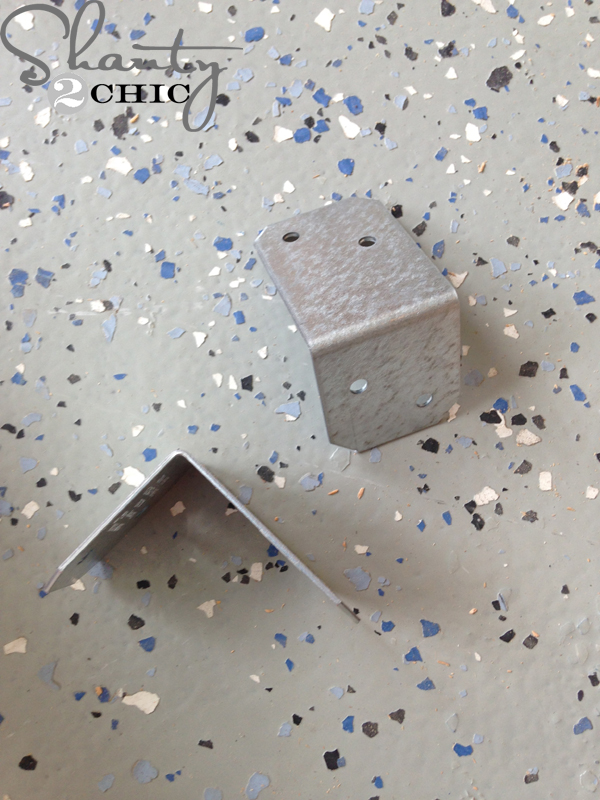 To finish it off, I purchased these metal brackets from Home Depot for less than $1 each!
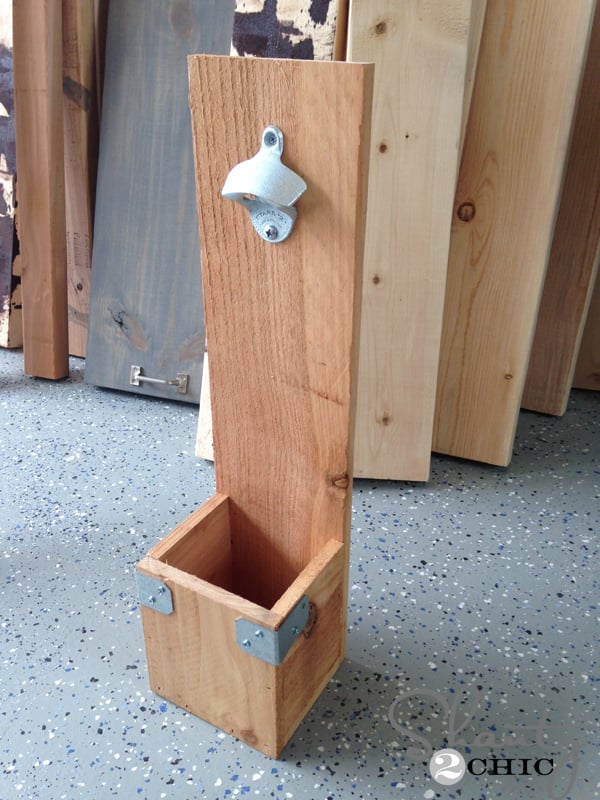 And attached them to the corners with small screws 🙂
That was it! If you would like to print these plans for FREE click HERE or the image below 🙂
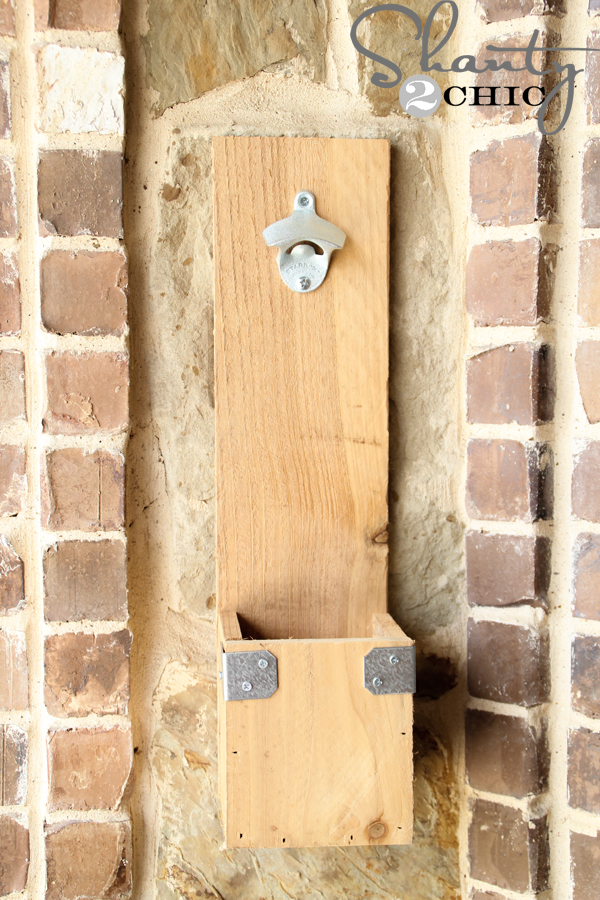 I attached it to the wall on our back patio! Make sure to follow instructions and use correct hardware depending on where you hang this at your house!
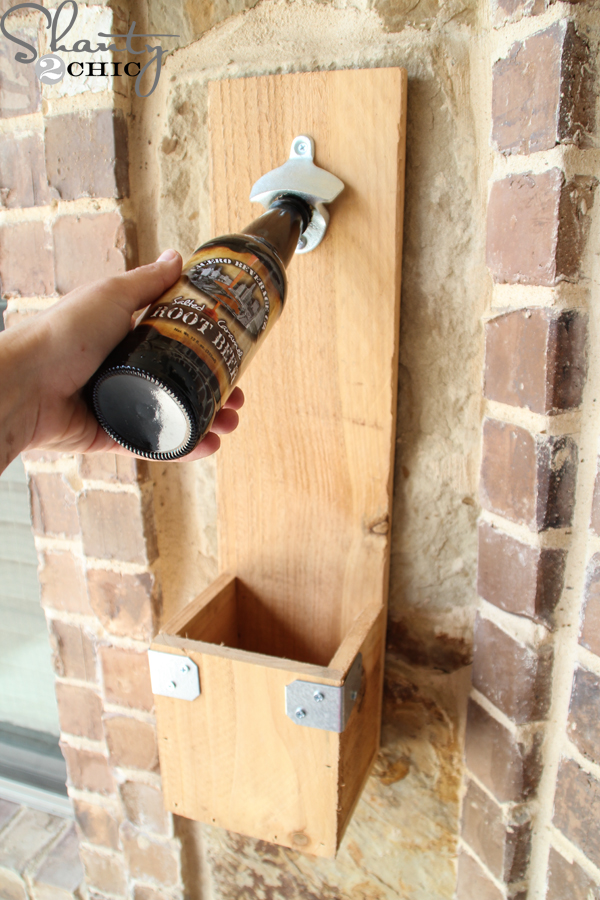 How fun is this!!!
You can make this in about 10 minutes for about $10!!! The hubs loves our DIY Bottle Opener 🙂
Thanks so much for stopping by! To see more of our DIY and budget-friendly projects you can click HERE!
~Ashley


Thank you for sharing it with us!
My husband and I make these frequently. Every time we make them the measurements are off and I cannot figure it out for the life of me. We always have to cut off about a quarter inch on the sides so that they are the exact height of the front piece, what are we doing wrong?? They are not the same height… every single time we have to cut some off
Great plans…here is my version…
Any reason this has to be 21″ high? I’ve seen others at 12 – 15″, just checking in case there’s an advantage to a higher one before I make this.
No. I just like the shape when it’s taller. Thanks!
What did you use to hang it? Does it stay secure on the wall when you use it to remove the bottle cap?
I made this for Christmas for my husband. I was short on time (stupid flu ruining all my plans) so I asked the guys at Home Depot to make my cuts for me. I think they messed up my measurements but it still turned out ok I think! I added some burned Buffalo Bills logos. It was my first time using my wood burner. I’m excited to see the hubby’s reaction inn he morning! Thanks for sharing! Love your blog! This is the third or fourth project I’ve worked on from you! 😀
Ill be making at least 2 of these this weekend. First problem I forsee, and will remedy. Make the bottom a trap door with a hinge so you can empty the box easier. Having the pick out all the caps will get old fast.
how did you mount it to the wall?
Add a sawtooth picture hanger….
Hi there! I wanted to use the same strapping that you used on the corners, but I can’t find any that size at a hardware store. Where did you get yours? I’ve tried Lowe’s, Home Depot, and a local, smaller hardware store. Thanks for your help!
Home Depot you have to go to where the constructions straps are. Not where the L-Brackets, hinges etc are located. Just ask the salesperson where the Simpson ties are located. They are in that section.
The Boy-Child and I made 3 bottle openers for Father’s Day! Very easy.
Thanks for the great gift idea, here is mine made from your plans
We love it Mindy!!!! Thanks for sharing 🙂
Sweet!!! Where did you get the stickers from? or are those just from the labels from the bottles?
Super cute! You could also make a “door” on the front or side of the box to make emptying the bottlecaps a little easier.
I was thinking the same thing. A hinge!
Yes! So fun!
Cute idea Rachel :))
These are fantastic in any kitchen, party room or backyard. I’ve always wanted one and now I can make one! I think it would be fun to paint it as well, depending upon which look you are going for.
Good points Samantha!! Thank you 🙂
Nice work! How did you decide to mount your bottle opener project to your stone wall?
Thank you! I drilled a pilot hole with a masonry bit, added an anchor and used a masonry screw. I attached a sawtooth hanger to the bottle opener and hung it from the screw 🙂