
I’m so excited to share this new coffee table with you guys! I had been putting this build off because lumber prices were so high, but when I saw 2×6 boards drop under $8, I decided it was finally time.
I was able to build this entire DIY coffee table with only seven 2×6 boards, bringing the total lumber cost to around $60. I love how it turned out, and I’m sharing the free plans so you can build one too!

Table of Contents
Why I Love This DIY Coffee Table
This design gave me the chunky look I wanted without using a long list of different lumber sizes.
- The free printable plans include the full cut list and measurements.
- The entire coffee table is built from just seven 2×6 boards.
- My lumber cost was around $60 at the time I built it.
- The bottom shelf adds plenty of space for baskets, books, or decor.
- Ripping the 2×6 boards lets you create several different board widths from the same lumber.
- You can completely change the look with a different stain or paint color.
Key Tools and Supplies
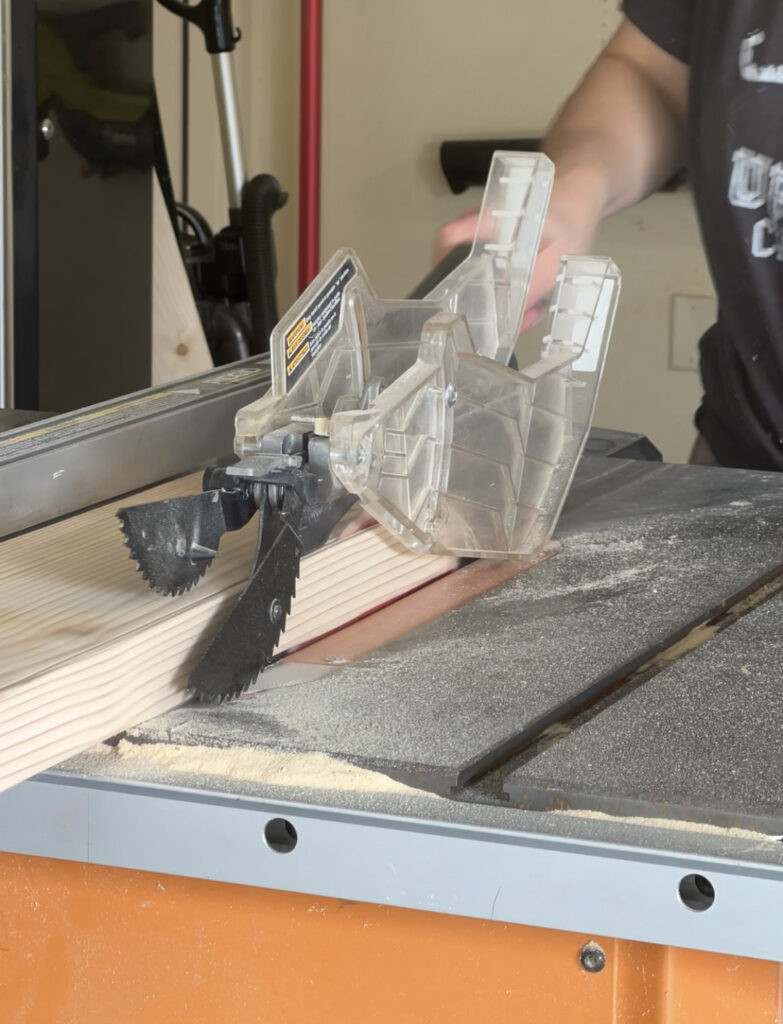
2×6 Lumber: One of our favorite tricks when working with dimensional lumber is ripping the rounded edges off with a table saw. It gives the boards a much more custom, finished look and lets us create different widths from the same inexpensive lumber. For this coffee table, I ripped the 2×6 boards to 5 inches, 4 3/8 inches, and 2 inches depending on where they were being used.
Table Saw: A table saw is an important tool for this particular build because several of the boards need to be ripped to specific widths. I like to make my crosscuts first so I’m working with shorter boards when I run them through the table saw. That’s just my personal preference, but those full-length 2×6 boards can get heavy and awkward to manage.
Kreg Jig: This plan uses quite a few pocket holes. When I’m building something with this many, I love using my Kreg Foreman because it saves me so much time. You can also use a Kreg 720PRO, K5, or another Kreg Jig model you already have. Every pocket hole on this coffee table is made for 1 1/2-inch material, and the pieces are assembled with 2 1/2-inch pocket hole screws where noted in the plans.
Kreg QuickFlip: I used my Kreg QuickFlip when attaching the apron frames to the breadboards. It made it much easier to drill and drive the screws from underneath.
Wood Glue: I use wood glue along with the screws throughout the main assembly. The screws hold everything together while the glue adds strength to the joints.
Brad or Pin Nailer: The small decorative pieces on the legs are attached with wood glue and 1 1/4-inch brad or pin nails.
How to Build a DIY Coffee Table
You can find the complete free plans and cut list below, but I’ll walk you through how I assembled the coffee table first.
Before You Start: Rip the Lumber
Start by making the cuts shown in the plans and ripping the 2×6 lumber to the required widths.
I ripped different pieces to 5 inches, 4 3/8 inches, and 2 inches. This lets you build the entire table from seven 2×6 boards while still getting the different dimensions needed for the design.
I prefer to make my crosscuts first and then rip the shorter pieces on the table saw. They’re much easier for me to handle that way.
Once all of the pieces are cut, create the pocket holes shown in the plans. Every pocket hole on this build is for 1 1/2-inch material.
Kreg Jig Pocket Holes
This plan uses several pocket holes. Whenever I am creating a piece with a lot of pocket holes, I use my Kreg Foreman. This thing is amazing! You can see the reel I shared about my Foreman below! This thing is such a timesaver and so easy to use. You can see it here on Amazon! Every pocket hole on this table is 1 1/2”. You can also use your 720PRO, K5 or any other Kreg Jig model you have to create your pocket holes.
Build the Leg Assemblies
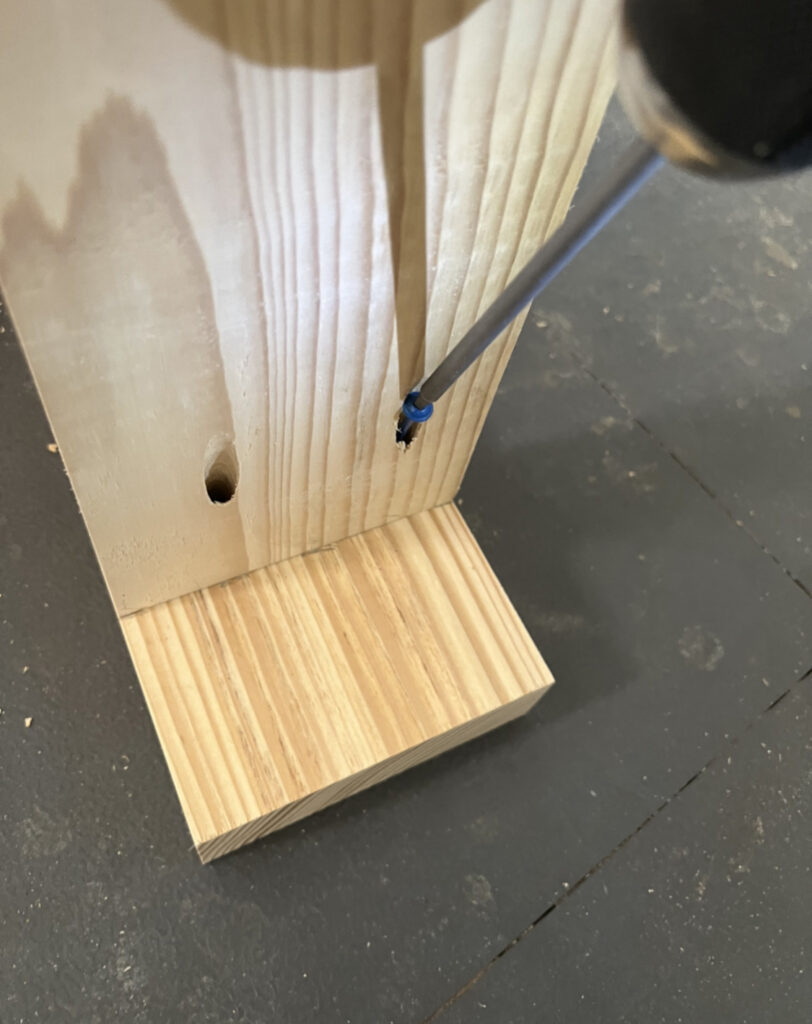
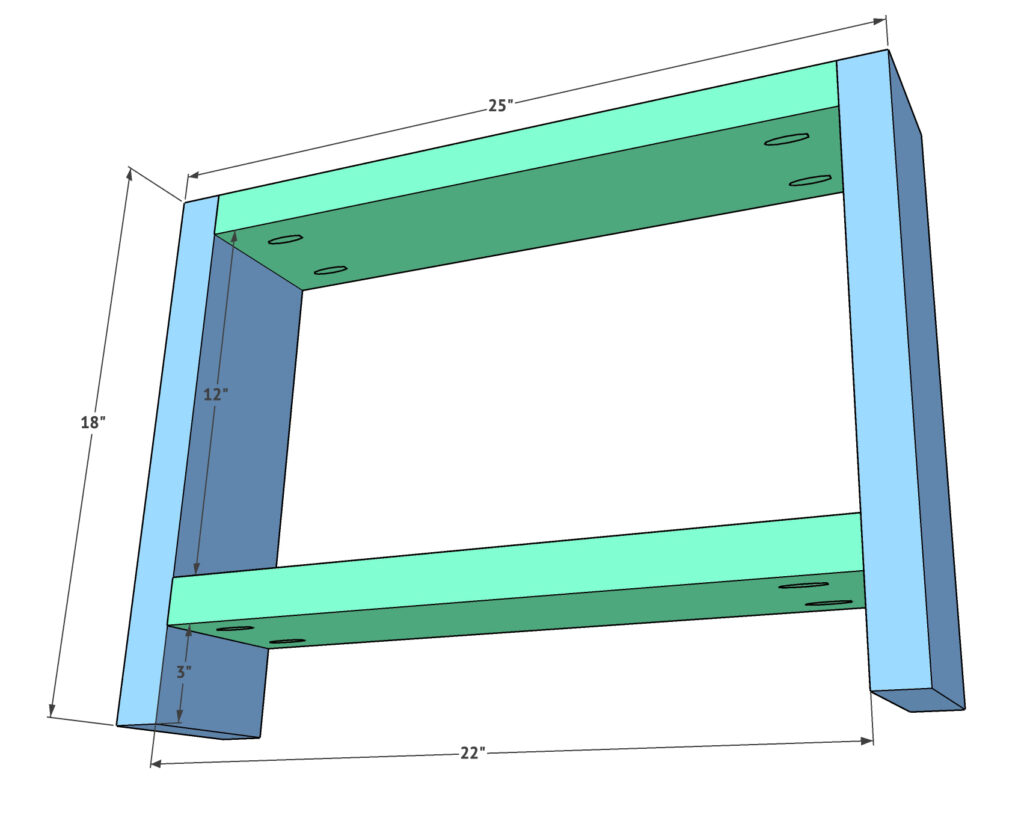
Start by attaching the breadboards to the leg pieces with wood glue and 2 1/2-inch pocket hole screws.
The top breadboard should sit flush with the top of the leg pieces.
Position the bottom breadboard so that its bottom edge starts 3 inches from the bottom of the legs.
Build two identical leg assemblies.
Build the Apron Frames
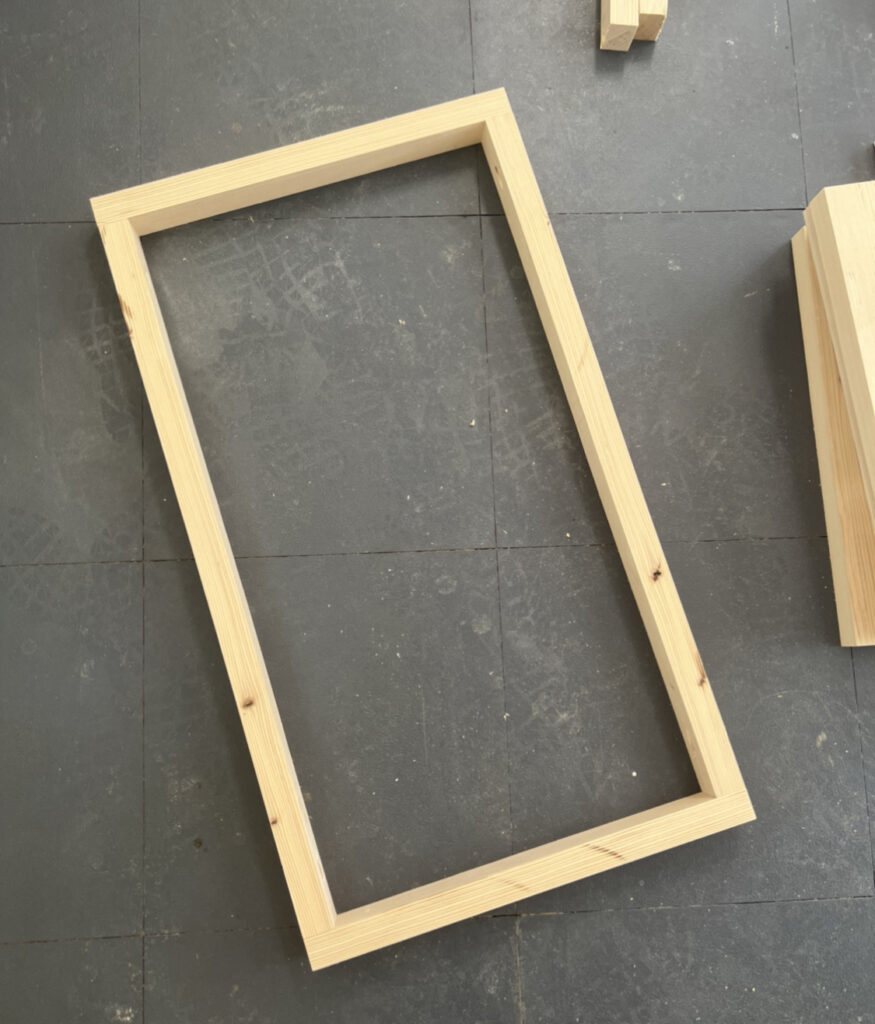
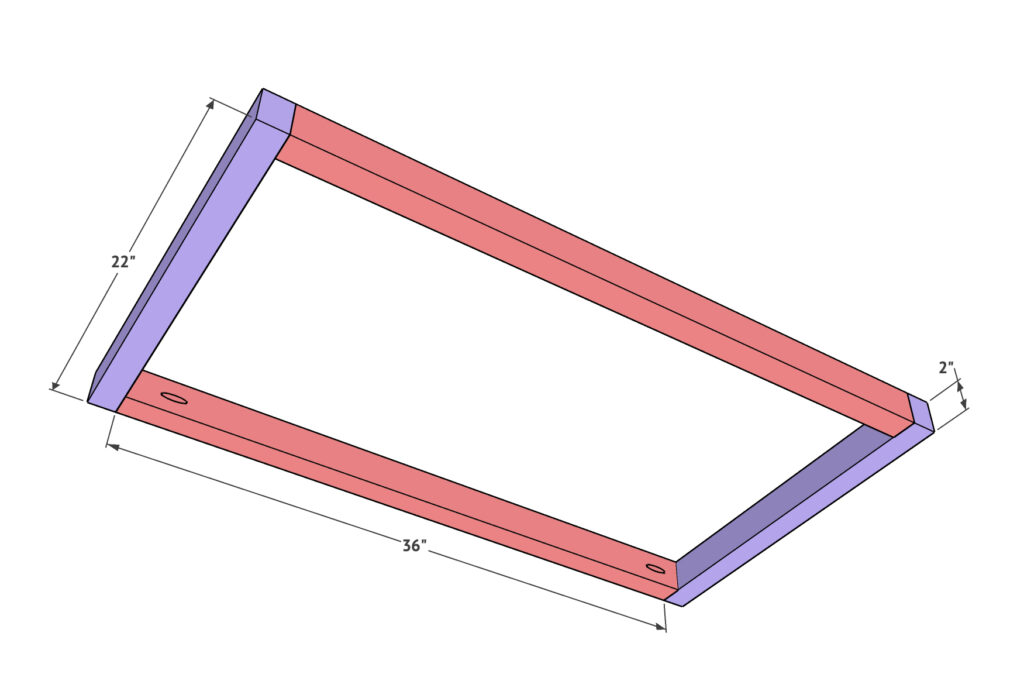
Next, build the two apron frames using the boards that were ripped to 2 inches wide.
Attach the longer apron boards to the shorter boards with wood glue and 2 1/2-inch pocket hole screws.
You should now have two rectangular apron frames.
Attach the Apron Frames
Now you can connect the two leg assemblies and create the body of the coffee table.
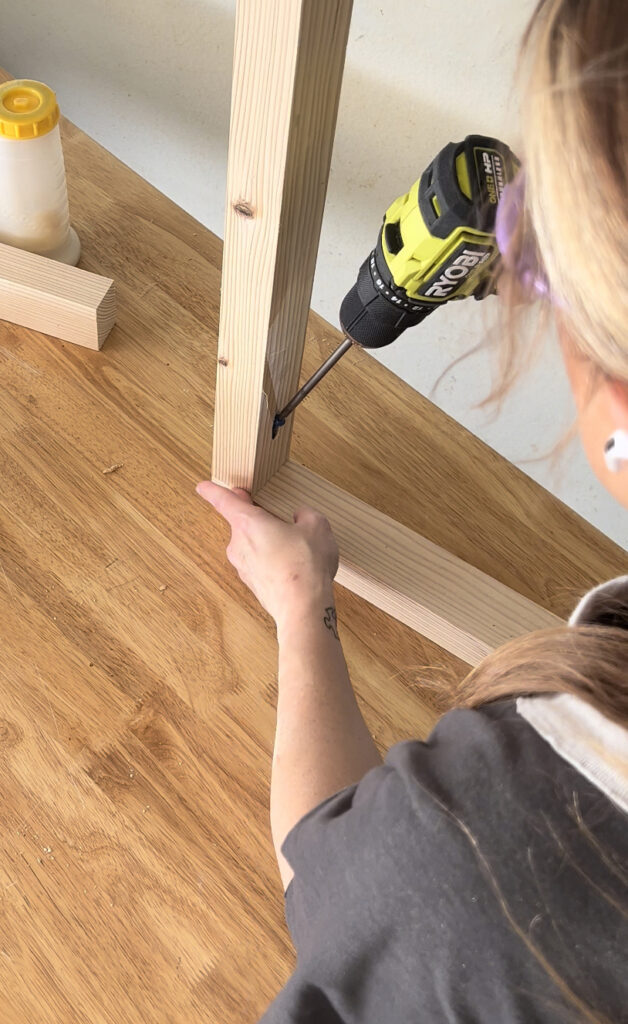
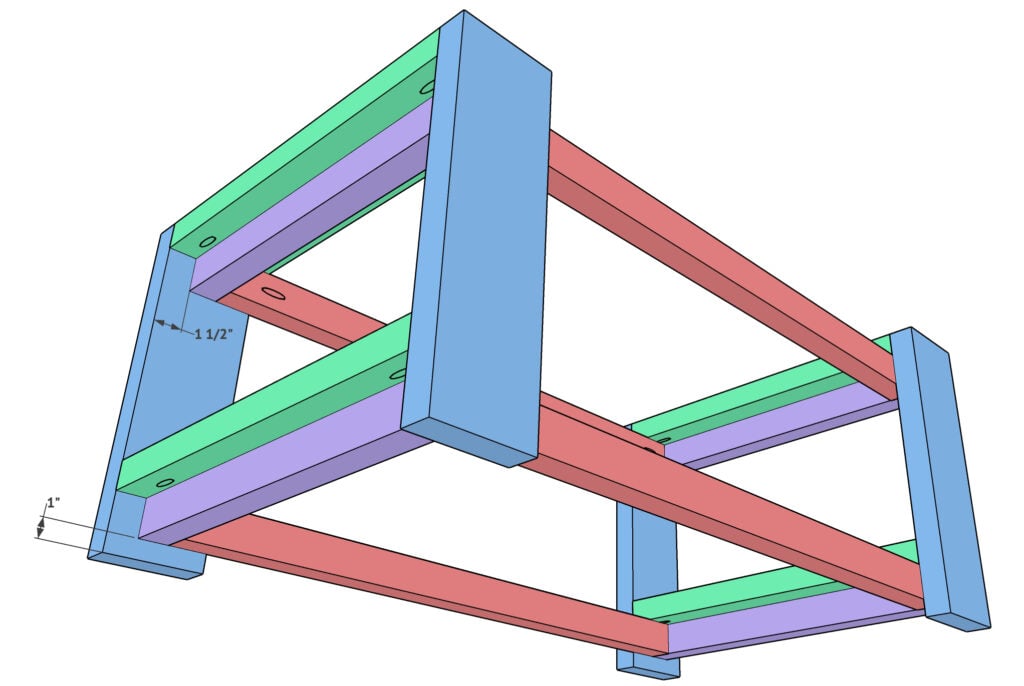
Start with the bottom apron frame. Attach it to the bottom breadboards with wood glue and 2 1/2-inch screws, driving the screws through the bottom of the apron frame and into the breadboards.
I used my Kreg QuickFlip for this part, and it made the process really simple.
Also drive a screw through the inside of the apron frame and into each leg piece.
Attach the top apron frame to the top breadboards and legs the same way. Pay attention to the placement shown in the plans and photos before adding all of your screws.
Build the Coffee Table Top
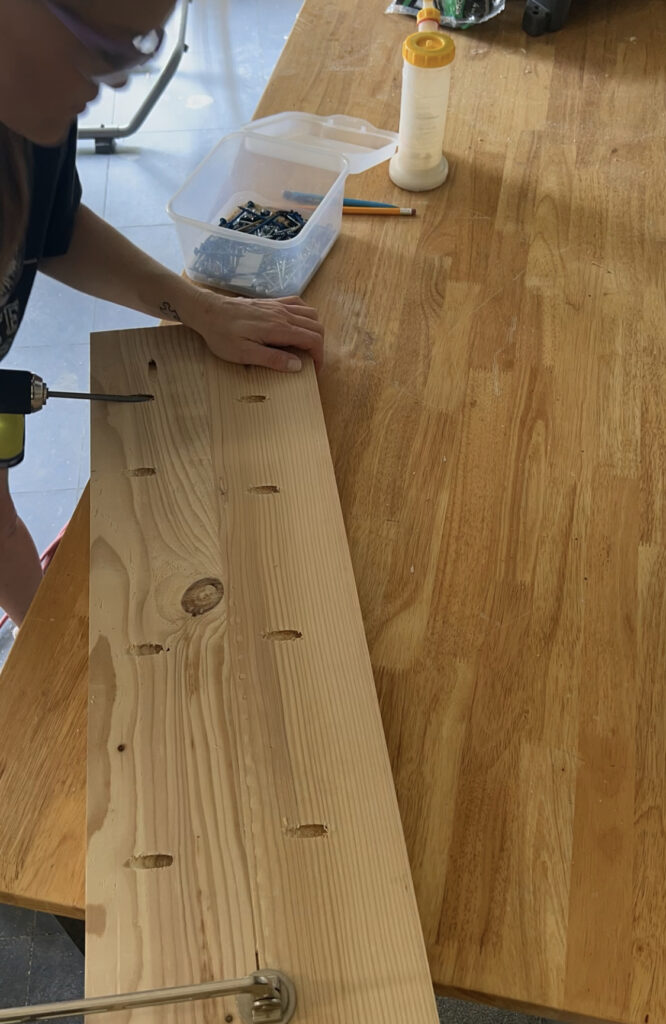
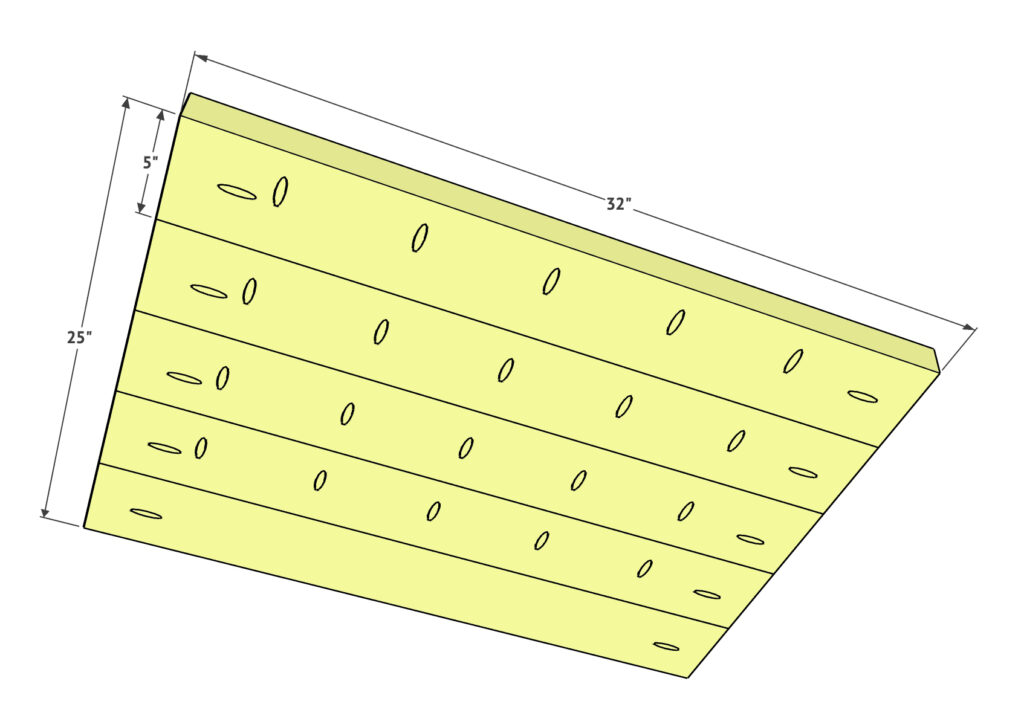
Next, plank the top of the coffee table.
The boards for the top are ripped to 5 inches wide.
Join the boards together with 2 1/2-inch pocket hole screws to create one solid tabletop panel.
Build the Bottom Shelf
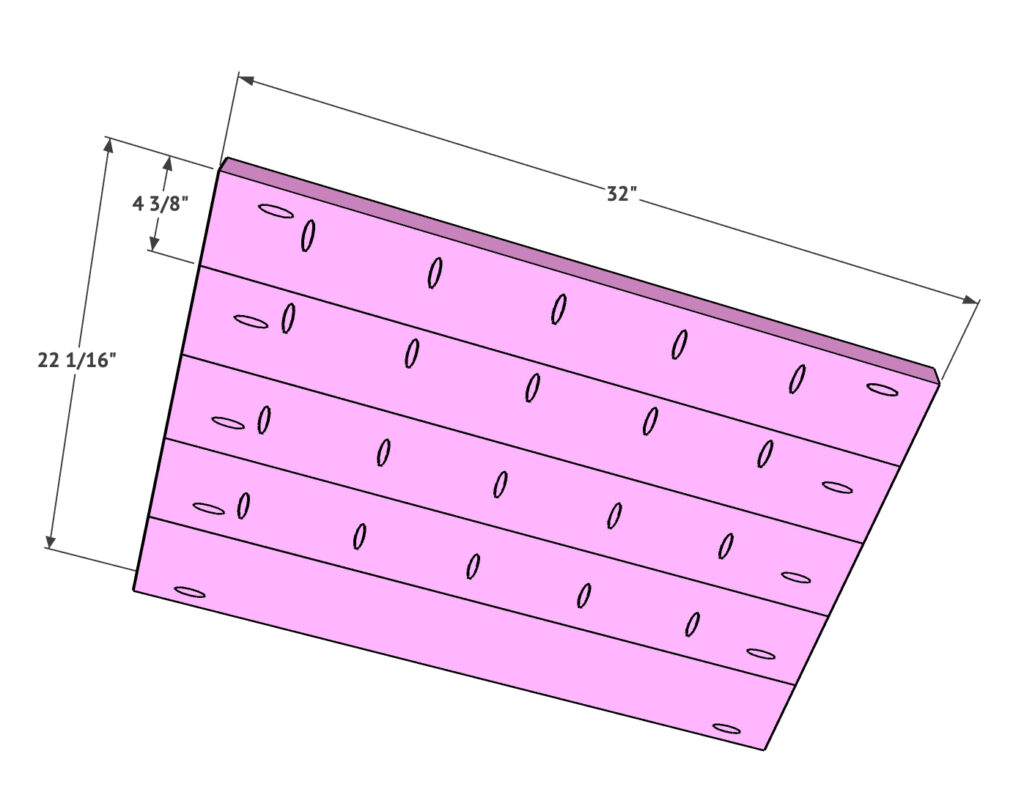
Build the bottom shelf the same way.
These planks are ripped slightly narrower so they fit evenly inside the base of the coffee table.
Attach the shelf boards to each other with 2 1/2-inch pocket hole screws.
Attach the Top and Bottom Shelf
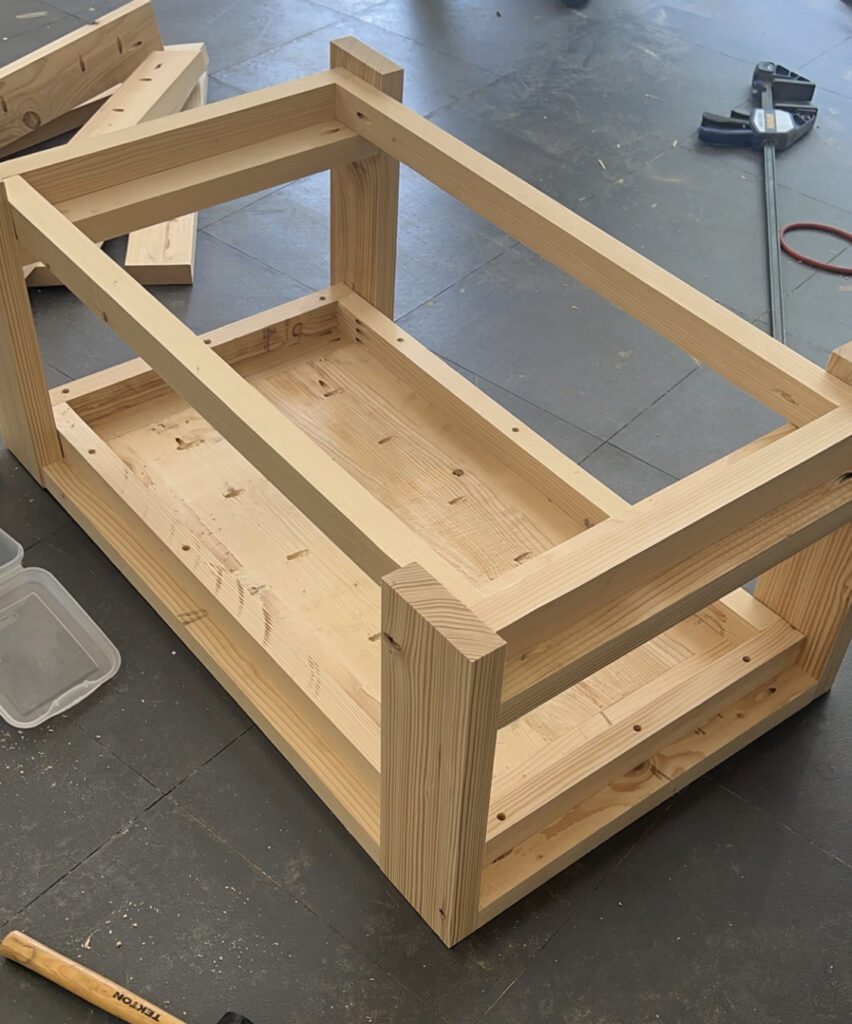
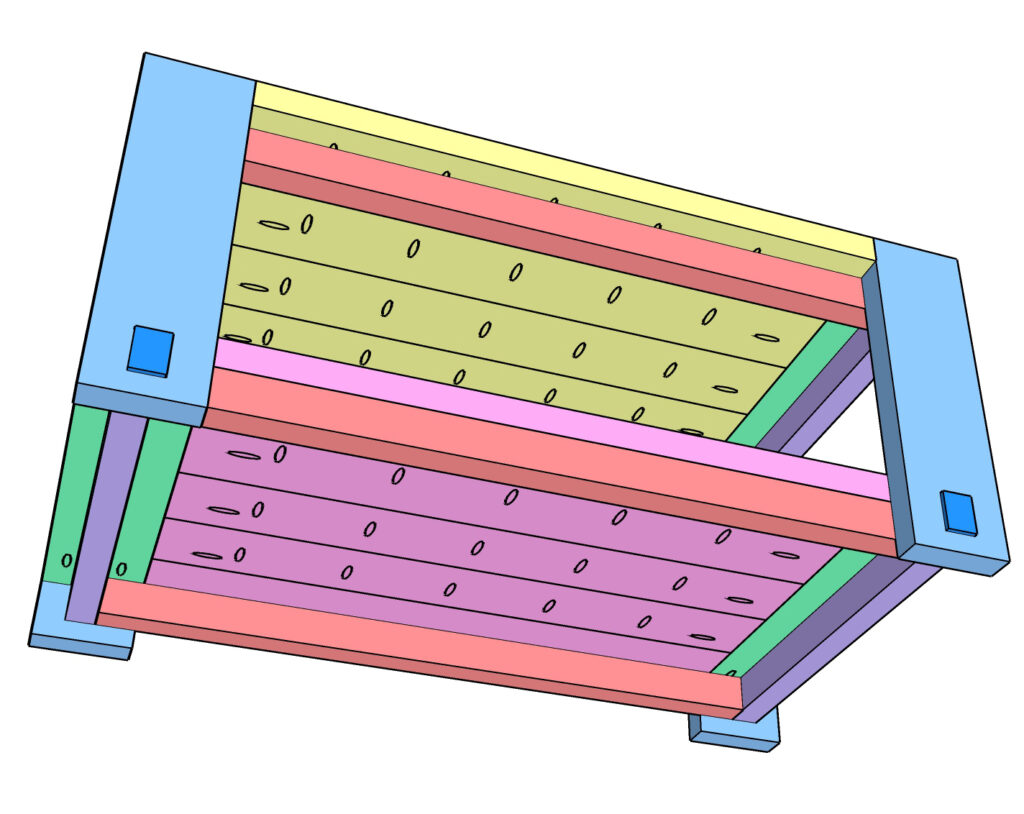
Now attach both planked panels to the body of the coffee table.
Attach the tabletop planks to each breadboard with 2 1/2-inch pocket hole screws. Then drive 2 1/2-inch screws through the apron frames and into the bottom of the planks.
Attach the bottom shelf the same way.
The bottom planks were a little trickier for me to hold in position, so I used a clamp to keep everything in place while I drove the screws.
Add the Decorative Leg Pieces
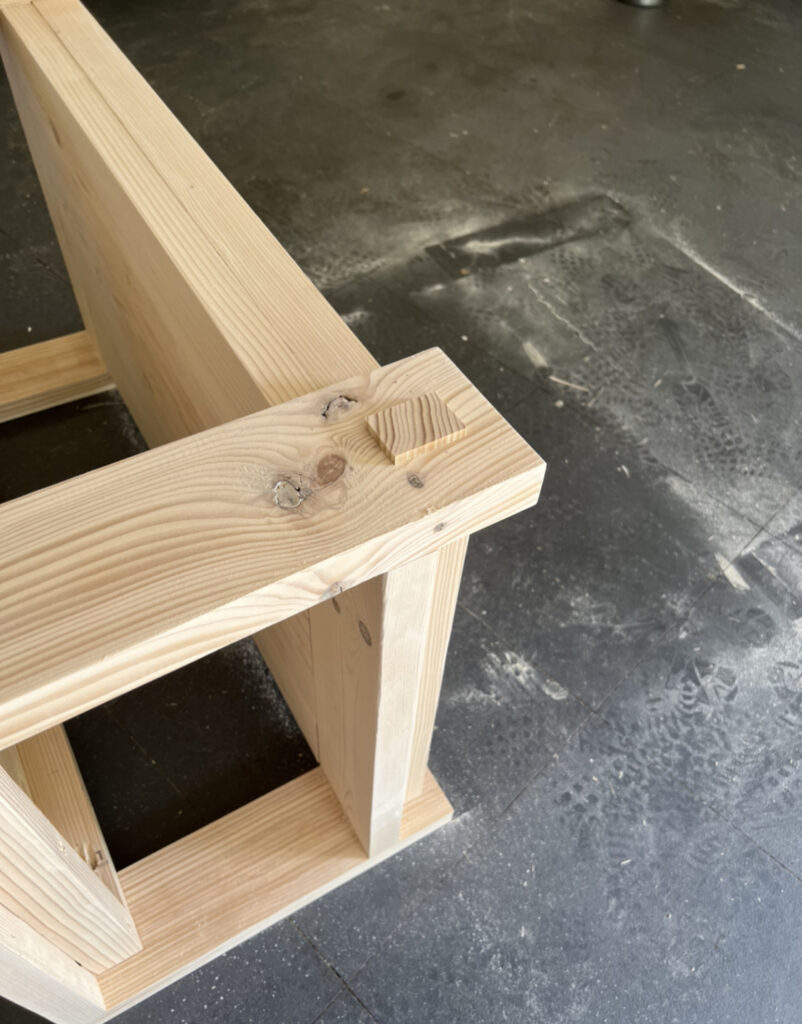
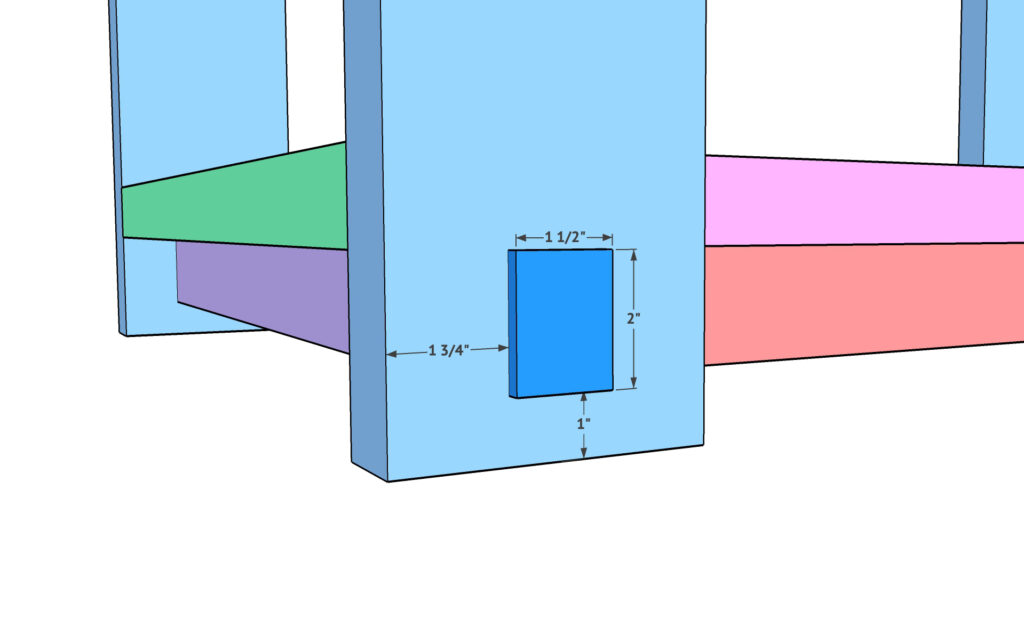
The last assembly step is adding the small decorative pieces to each leg.
These are 1/4-inch-thick pieces cut from the 2-inch boards, and each piece measures 1 1/2 inches x 2 inches.
Attach each piece to the legs with wood glue and 1 1/4-inch brad or pin nails.
And that finishes the build!
Staining the Coffee Table
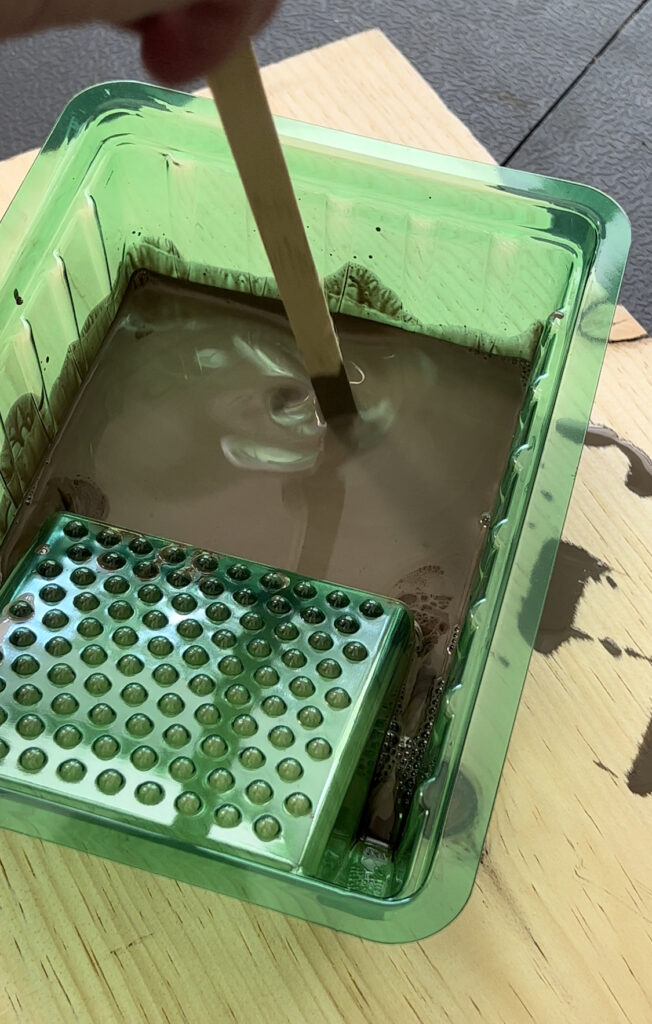
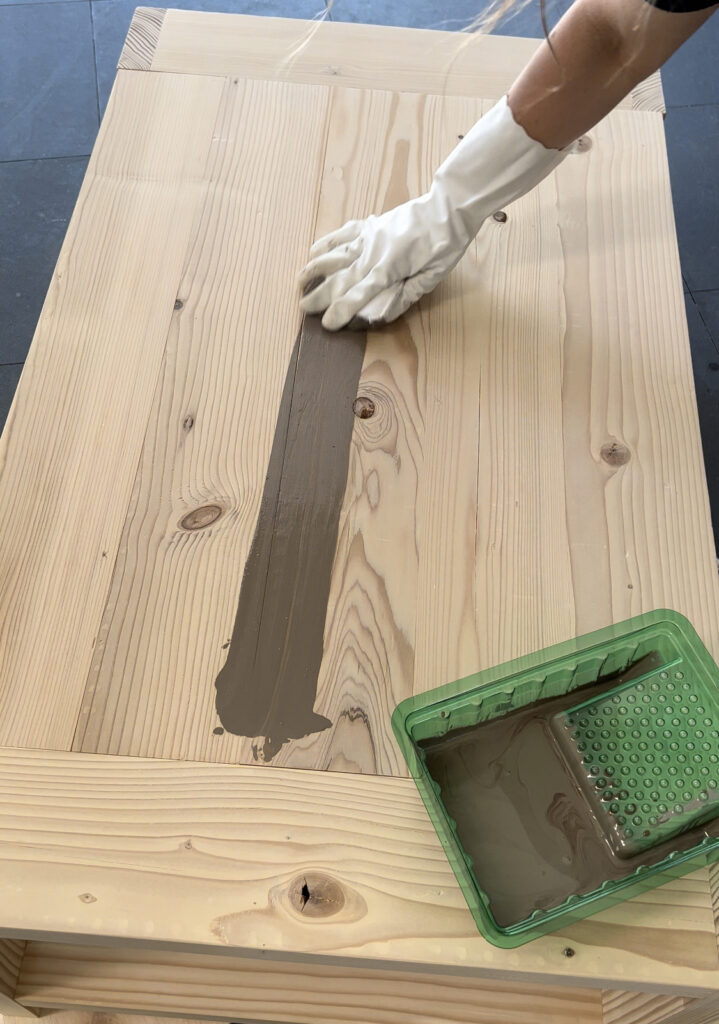
For the finish, I mixed two stain colors to create a custom shade.
I used Willow Gray by Varathane mixed with Early American by Rust-Oleum.
One of my favorite things about stain is mixing colors until I get exactly what I want for a project. I simply poured the two stains together and mixed them thoroughly until the color was blended.
I didn’t use a specific mixing ratio for this project, so if you want a similar finish, I would start with a small test batch and adjust the colors until you like what you see.
Always test your stain on a scrap from the same lumber before staining the finished coffee table.
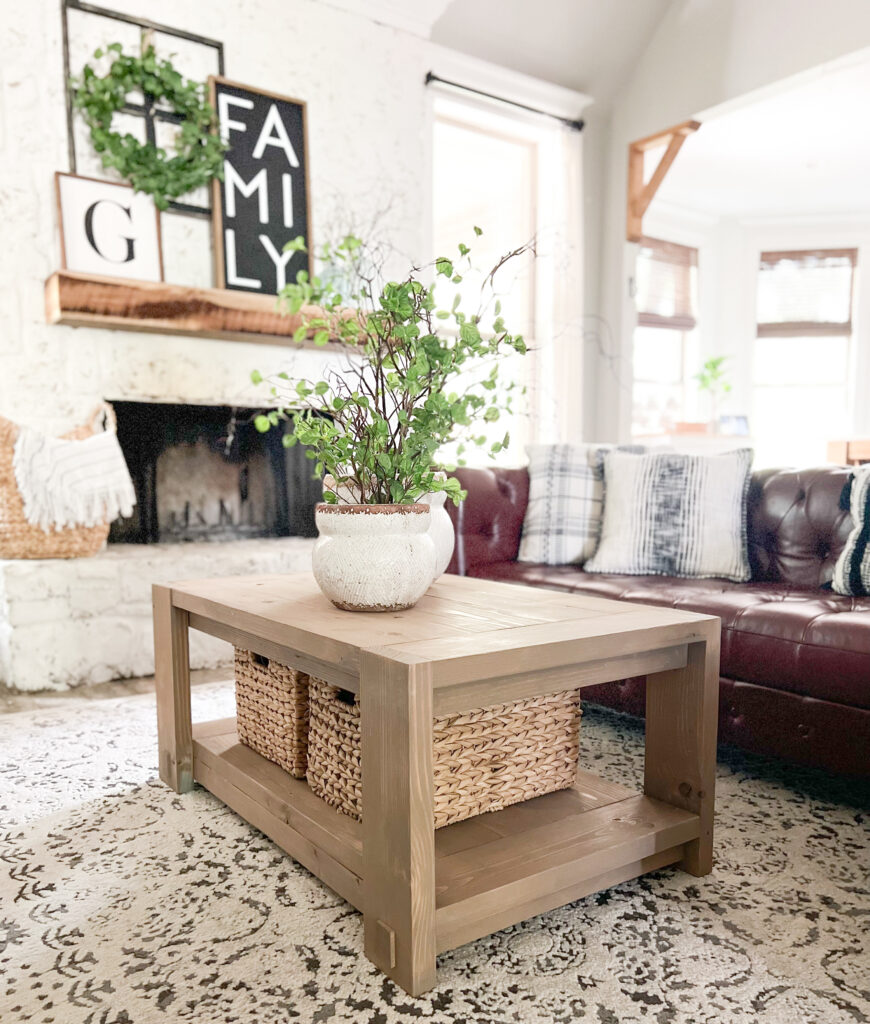
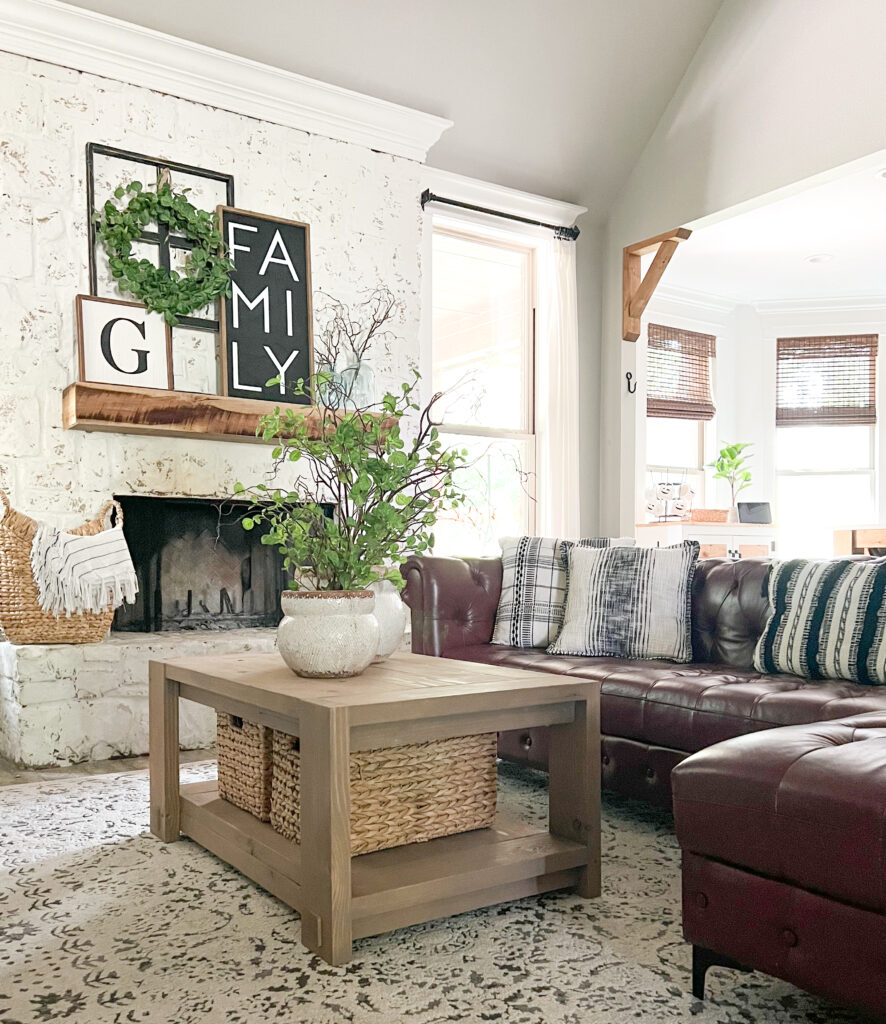
Look how cute she turned out!
Expert Tips
A few things made this coffee table come together much more smoothly.
- Make the crosscuts before ripping if long 2×6 boards are difficult for you to handle. This was much easier for me than pushing full-length boards across the table saw.
- Keep track of the ripped widths. This build uses 5-inch, 4 3/8-inch, and 2-inch pieces, so label them as you cut if that helps.
- Check the apron placement before adding all the screws. The upper and lower frames need to sit in the correct position between the leg assemblies.
- Use a clamp on the lower shelf. Mine was harder to hold in place while driving the screws, and the clamp made a big difference.
- Test your stain mixture first. Because I mixed two stain colors rather than following a set ratio, a scrap piece is the easiest way to dial in the color before committing to the finished table.
Ways to Customize Your Coffee Table
You can give this same coffee table a completely different look without changing the basic build.
Change the finish. Use another stain combination, a single stain color, or paint the table to work with your room.
Try a different wood species. Just keep in mind that lumber cost and the finished appearance can change quite a bit depending on the wood you choose.
Skip the mixed stain. There’s no reason you have to mix colors. One stain color can work just as well if you already have one you love.
If you want to change the actual length, width, or height of the coffee table, remember that the cut list and several connecting pieces will need to change too.

Frequently Asked Questions
For this version, yes. The design depends on ripping 2×6 lumber into several specific widths, including 5 inches, 4 3/8 inches, and 2 inches.
No. I used my Kreg Foreman because there are a lot of pocket holes in this build and it makes the job faster, but you can use a Kreg 720PRO, K5, or another Kreg Jig that works with 1 1/2-inch material.
Absolutely. The stain is just the finish I chose for mine. You can paint the finished table instead if that works better with your space.
I mixed Varathane Willow Gray with Rust-Oleum Early American. I didn’t document an exact ratio, so I recommend mixing a small amount and testing it on scrap wood until you get a color you like.
More DIY Coffee Table Plans
If you’re thinking about building another coffee table, we have lots of free plans in different styles and sizes. For another chunky build using dimensional lumber, check out our DIY 8-Board Farmhouse Coffee Table, or go with the DIY Modern Wood Coffee Table for a cleaner, more modern look. If you want to change up the shape completely, our DIY Round Coffee Table is another fun option, and the DIY Storage Coffee Table adds hidden storage for a little extra function. You can also browse our complete collection of DIY coffee table plans to find the one that works best for your space.
DIY Coffee Table Free Plans
Ready to build it? You can download and print the FREE DIY coffee table plans here for the complete measurements, cut list, and diagrams.
I couldn’t be happier with how this coffee table turned out, especially knowing I built the whole thing from only seven 2×6 boards. I love the chunky design, the extra shelf underneath, and that I was able to build it for around $60 in lumber at the time.
If you build one, we would love to see it! Share your finished project and tag @Shanty2Chic on Instagram or use #shanty2chic so we can check it out.
And if you have any questions about the build, leave them below.
🛠️ Printable Tutorial
DIY Coffee Table with Seven Boards
Tools
- Table Saw
- Miter Saw
- Kreg Jig, Kreg Foreman, 720PRO, K5, or similar pocket-hole jig
- – Drill/driver
- Kreg QuickFlip, optional
- Brad or pin nailer
- Clamp
- Sander
Supplies
- Seven 2×6 boards
- Wood glue
- 2 1/2- inch pocket-hole screws
- 2 1/2- inch wood screws
- 1 1/4- inch brad or pin nails
- Varathane Willow Gray Wood Stain
- Rust-Oleum Early American Wood Stain
- Sandpaper
Instructions
- Make the cuts according to the free plans. Rip the 2×6 boards to the required 5-inch, 4 3/8-inch, and 2-inch widths, then drill the pocket holes for 1 1/2-inch material.
- Build two leg assemblies. Attach the breadboards to the legs with wood glue and 2 1/2-inch pocket-hole screws. Keep the top breadboard flush with the tops of the legs and position the bottom breadboard 3 inches from the bottom.
- Build two apron frames from the 2-inch-wide boards using wood glue and 2 1/2-inch pocket-hole screws.
- Attach the upper and lower apron frames between the leg assemblies with wood glue and 2 1/2-inch screws. Add a screw through each apron frame into the adjoining legs.
- Build the tabletop by joining the 5-inch-wide planks with 2 1/2-inch pocket-hole screws.
- Build the bottom shelf the same way using the narrower shelf planks shown in the plans.
- Attach the tabletop and bottom shelf to the breadboards with 2 1/2-inch pocket-hole screws. Drive additional 2 1/2-inch screws through the apron frames and into the underside of the planks.
- Cut the decorative leg pieces to 1/4 inch thick by 1 1/2 inches x 2 inches. Attach them with wood glue and 1 1/4-inch brad or pin nails.
- Sand the finished table and remove the dust.
- Mix Varathane Willow Gray and Rust-Oleum Early American stain to the desired color, test it on scrap wood, and apply it to the coffee table. Allow the finish to dry according to the stain manufacturer’s directions.
Notes
- Making the crosscuts before ripping the boards can make the shorter 2×6 pieces easier to handle on the table saw.
- Label the ripped pieces so you can easily keep the 5-inch, 4 3/8-inch, and 2-inch boards organized.
- Use a clamp to hold the lower shelf in position while attaching it.
- There was no documented ratio for the two stain colors, so mix a small test batch first.
- Use the free plans for the complete cut list, dimensions, pocket-hole placement, and assembly diagrams.
- For the additional time, I’d use it for sanding, staining, and general finishing time.
