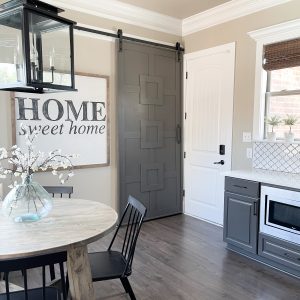
I am so excited about today’s project! This DIY Custom Barn Door has been on my list of to-do’s since I moved in. I always thought it would look beautiful in place of my laundry room door and I’ve also wanted it for function. My laundry room is long and narrow so I’ve utilized the side wall for hanging bags and backpacks. When there are bags hanging on the wall it won’t allow the laundry room door to open all the way so my plan has always been to replace it with a Barn Door.
I finally got the itch to build it and I couldn’t be happier! I wish I did it years ago! As always we have the how-to video and the free printable plans for you to build your own!
You can watch how easy this was to build, below!
Table of Contents
How to Build a DIY Custom Barn Door
Tools:
- Miter Saw
- Drill
- Kreg Jig
- Brad Nailer
- Stapler (optional)
- Pin Nailer (optional)
- Table Saw (optional)
- Face Clamp (optional)
- Circular Saw (optional)
Supplies:
- 1 – 1x6x10 Common Board
- 1 – 1x6x8 Common Board
- 3 – 1x4x8 Common Board
- 5 – 1/4″x4x8 Bender Board
- 4 – 1/2″x4x4 Poplar
- 2 – 1/4″x48″x96″ Hardwood Plywood
- 1 1/4″ Pocket Hole Screws
- 1 1/4″ Brad Nails
- 5/8″ Pin Nails
- 5/8″ Staples
- Wood Glue
- Glue Bot
- Barn Door Hardware
- Barn Door Pull
- Floor Guide
Building the Frame
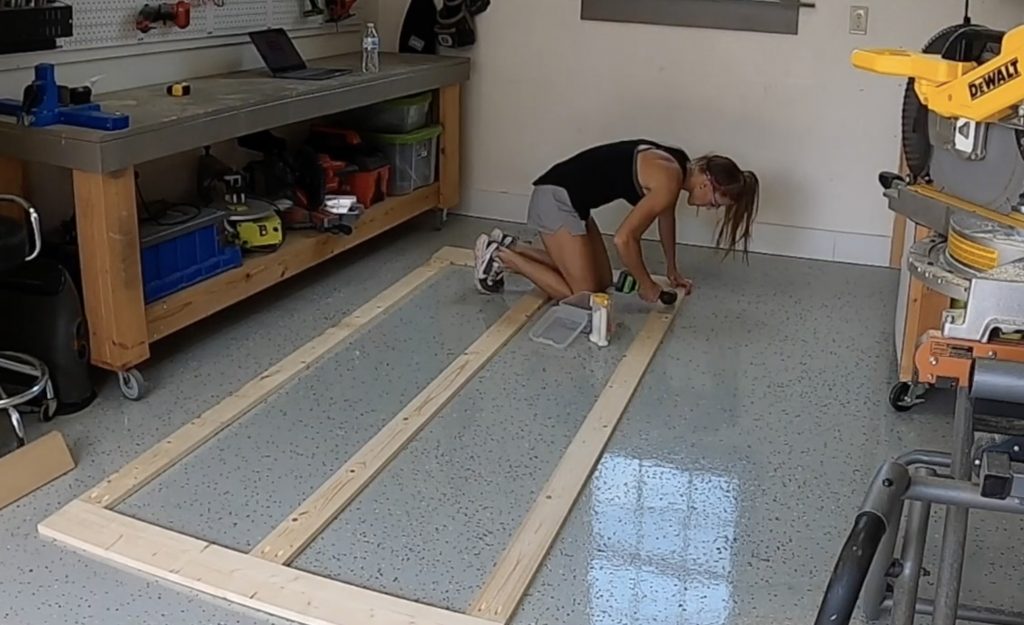
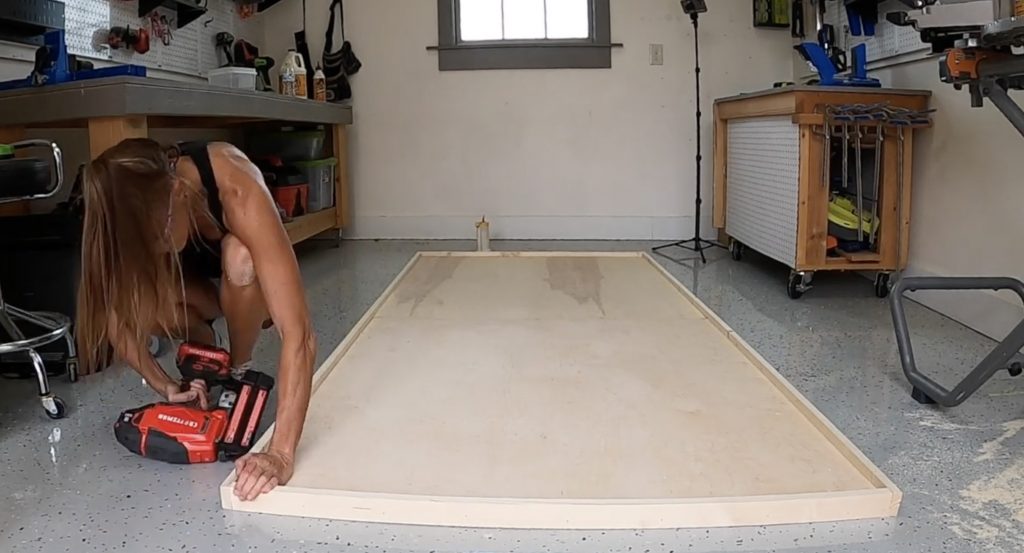
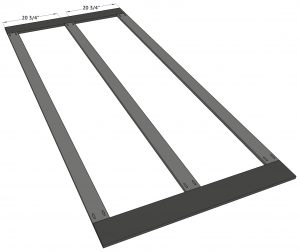
Step 1: I cut the frame pieces to size and used my Kreg Jig to drill 3/4″ pocket holes at each end of the long boards.
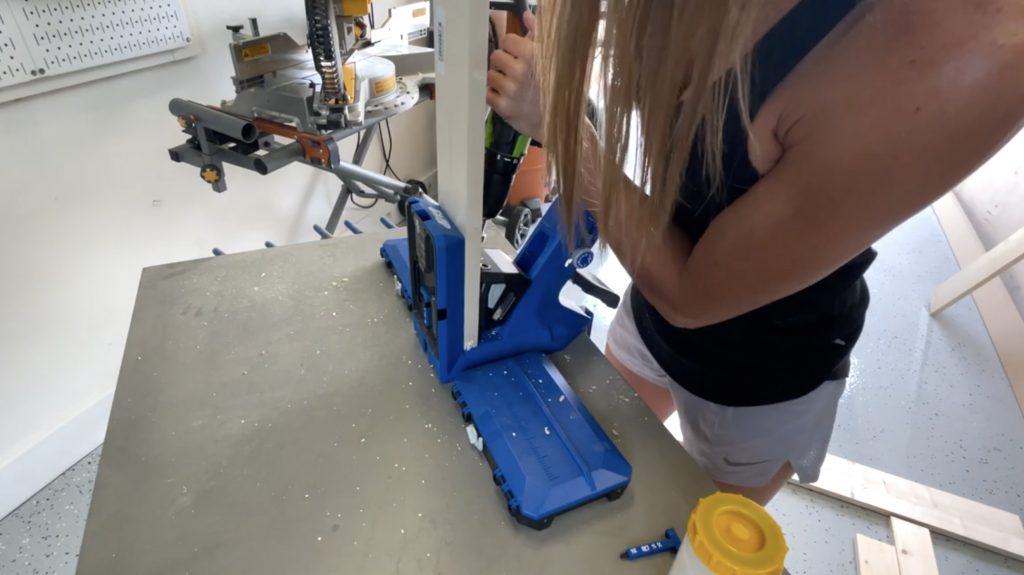
Attach them to the short boards with 1 1/4″ pocket hole screws and wood glue.
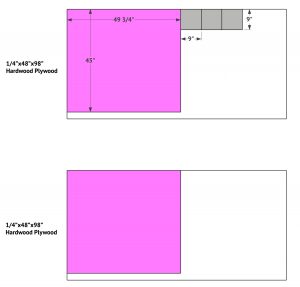
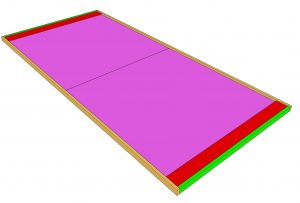
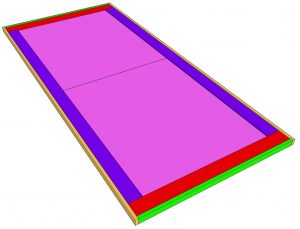
Step 2: Cut the plywood sheets to size and attach them to the frame with 5/8″ staples and wood glue.
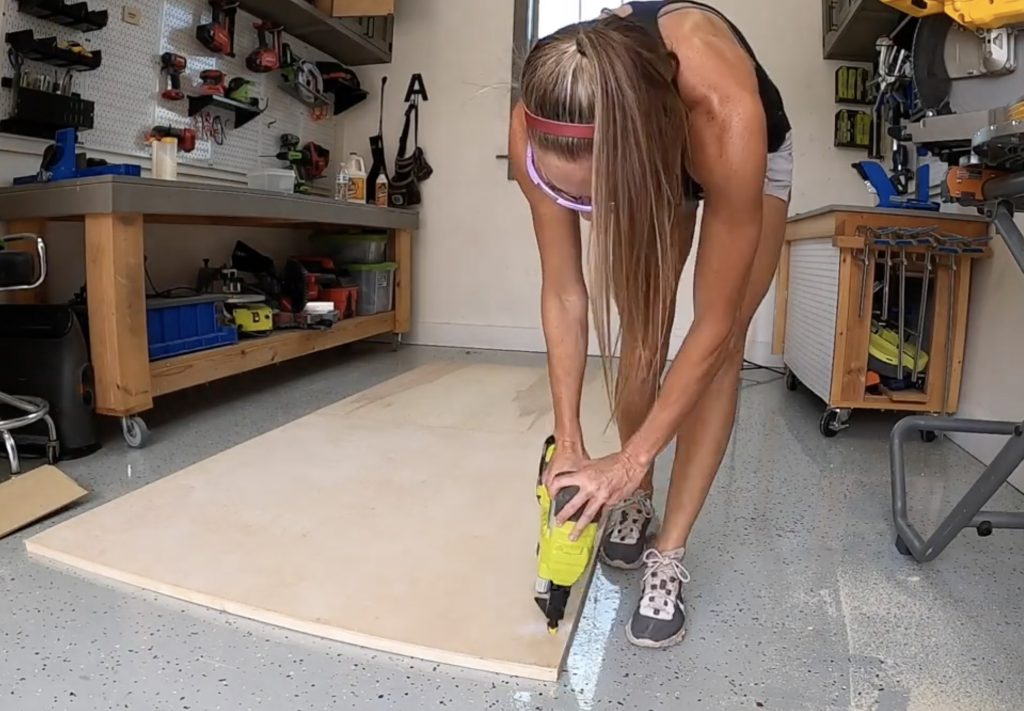
Step 3: Cut the top and bottom trim pieces to size. Attach them to the top and bottom of the barn door frame with 1 1/4″ brad nails. The bottom of the trim should be flush with the bottom of the frame.
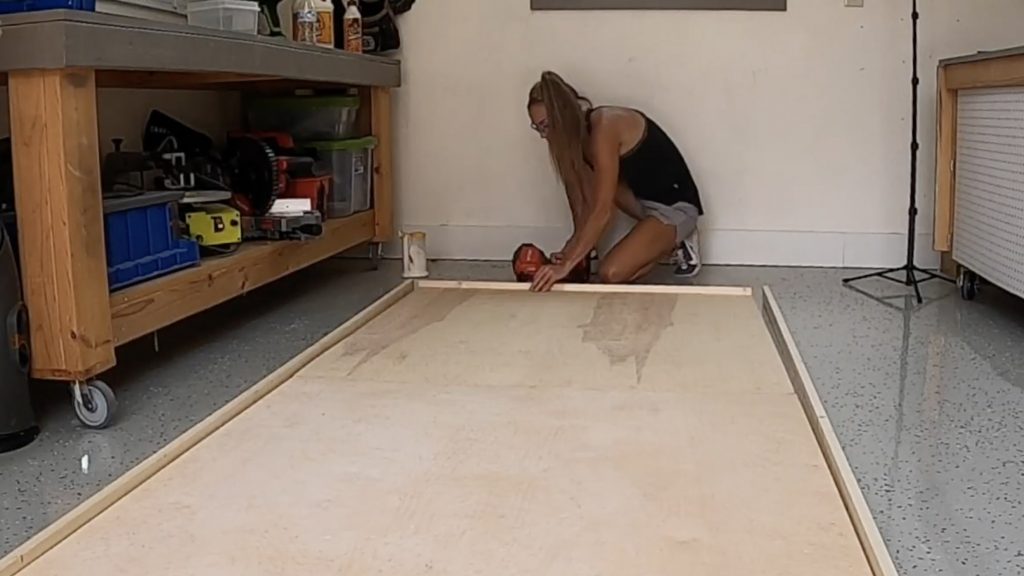
Step 4: Cut the side trim pieces to to size and attach them to the sides of the barn door with 1 1/4″ brad nails and wood glue.
Adding the Trim
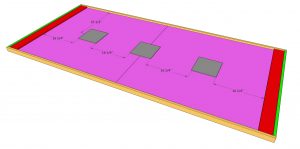
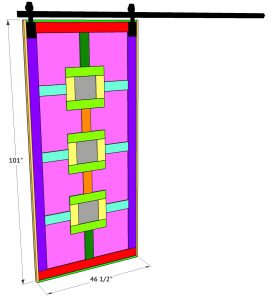
Step 1: Cut the top and bottom, front trim. Attach it to the top and bottom of the plywood with 5/8″ pin nails and wood glue.
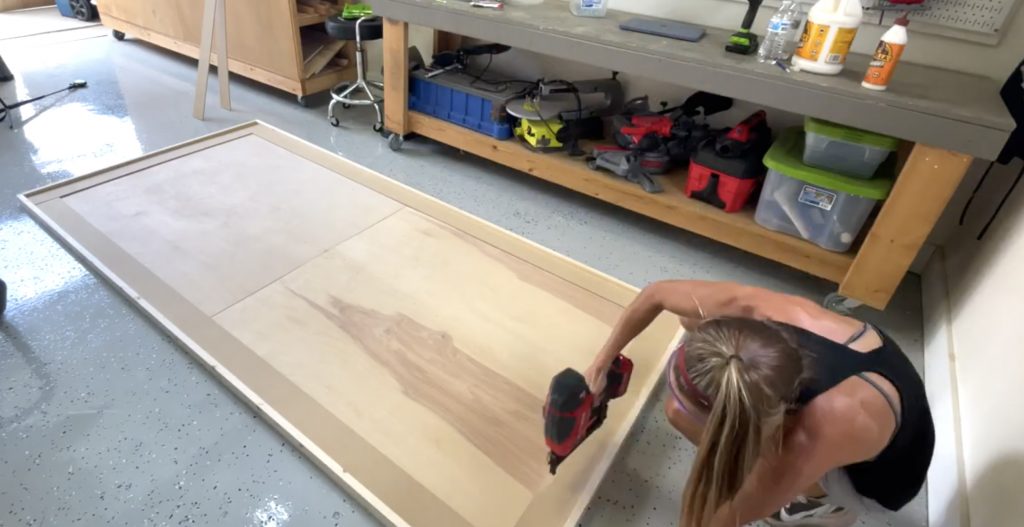
Step 2: Cut the vertical bender boards to size. Attach them to the sides of the plywood with 5/8″ pin nails and wood glue.

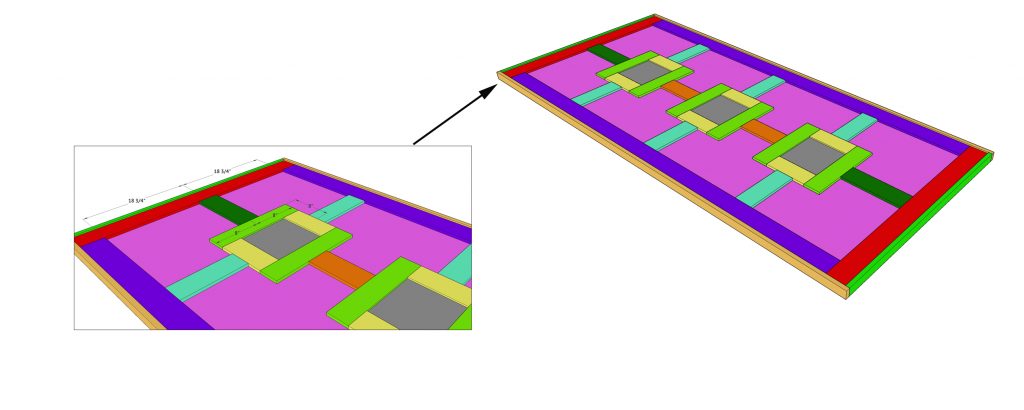
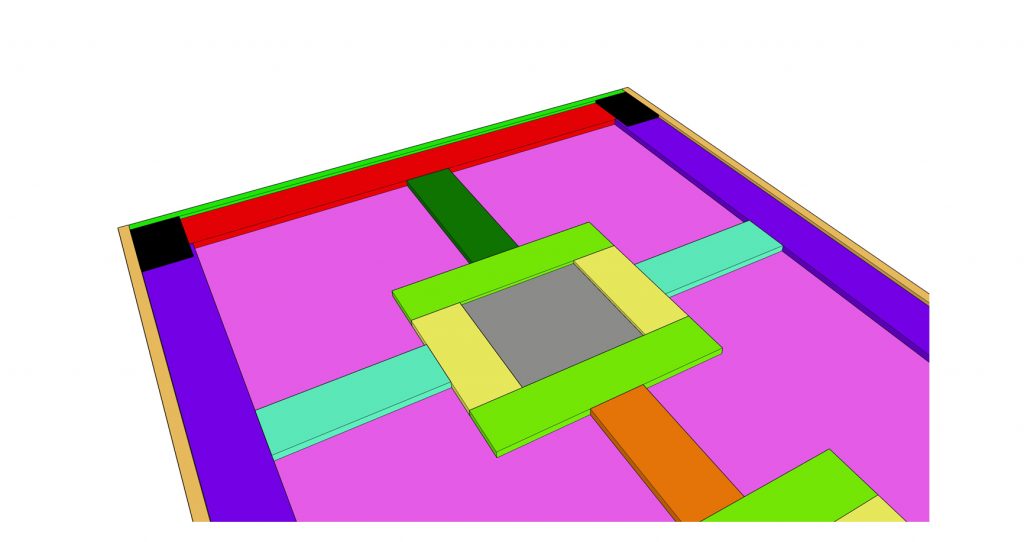
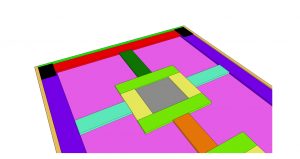
Step 3: Cut the squares to size, center them on the plywood according to the sketch and attach them to the plywood with 5/8″ pin nails and wood glue.
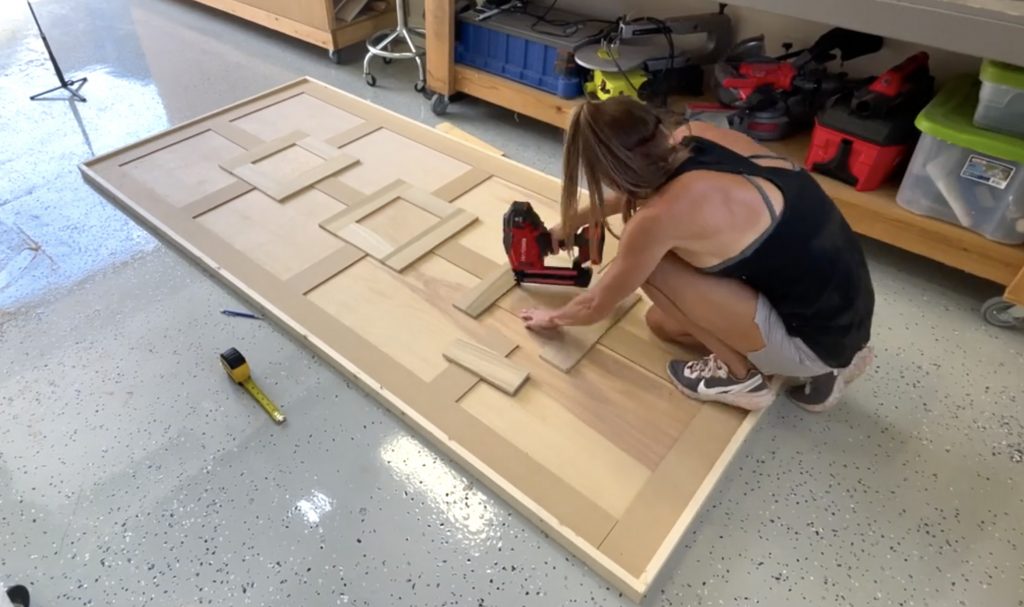
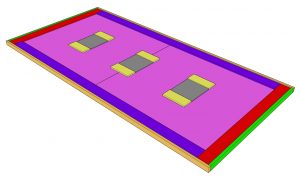
Step 4: Cut the side trim pieces for the squares. Attach them on the outside of the squares with 5/8″ pin nails and wood glue.

Step 5: Cut the top and bottom trim pieces to size and attach them the same way.
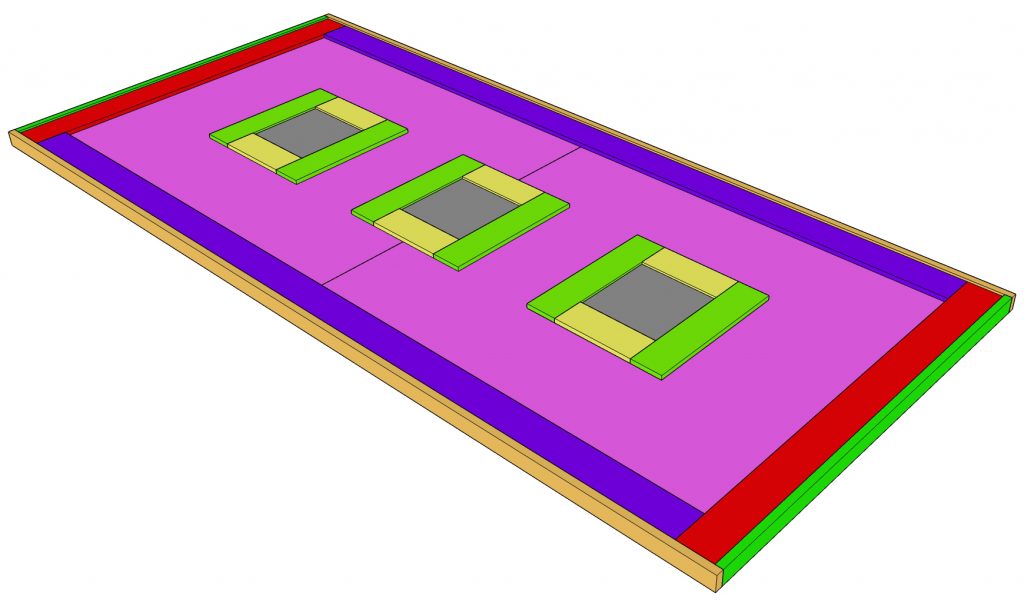
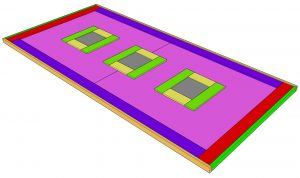
Step 6: Cut the final trim pieces to size. Center them on the squares according to the sketch and attach them the same way.
Step 7: Cut the wheel blocks to size and attach them to the top corners of the barn door with 1 1/4″ brad nails and wood glue.
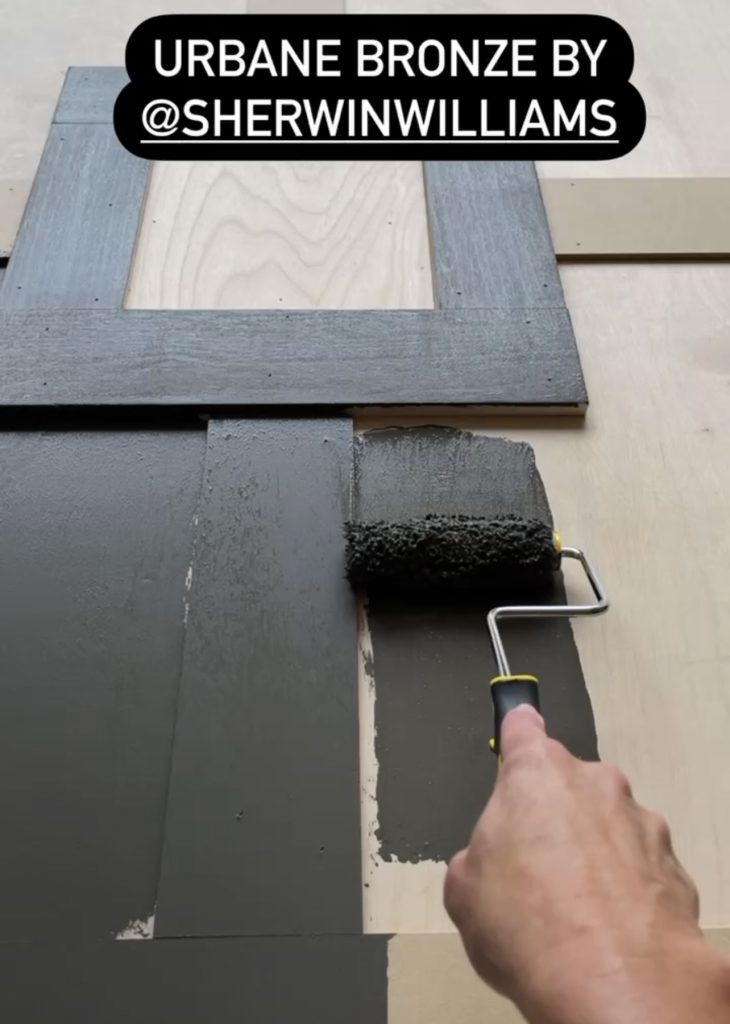
Step 8: Before hanging the barn door, I filled my nail holes sanded it down and added a finish. I chose Urbane Bronze by Sherwin Williams for the finish.
Hanging the Barn Door
Step 9: I took my laundry door off the hinges and attach a pre-primed 1×6 over the door. This will give your barn door track a solid piece to attach to. I used my level to mark where to attach the track.
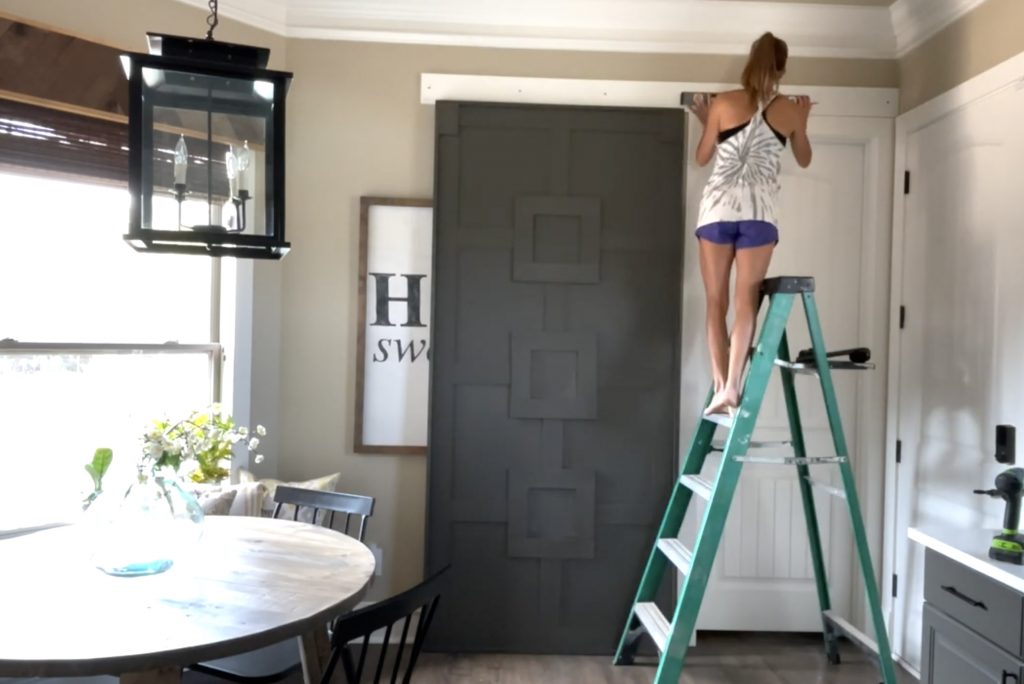
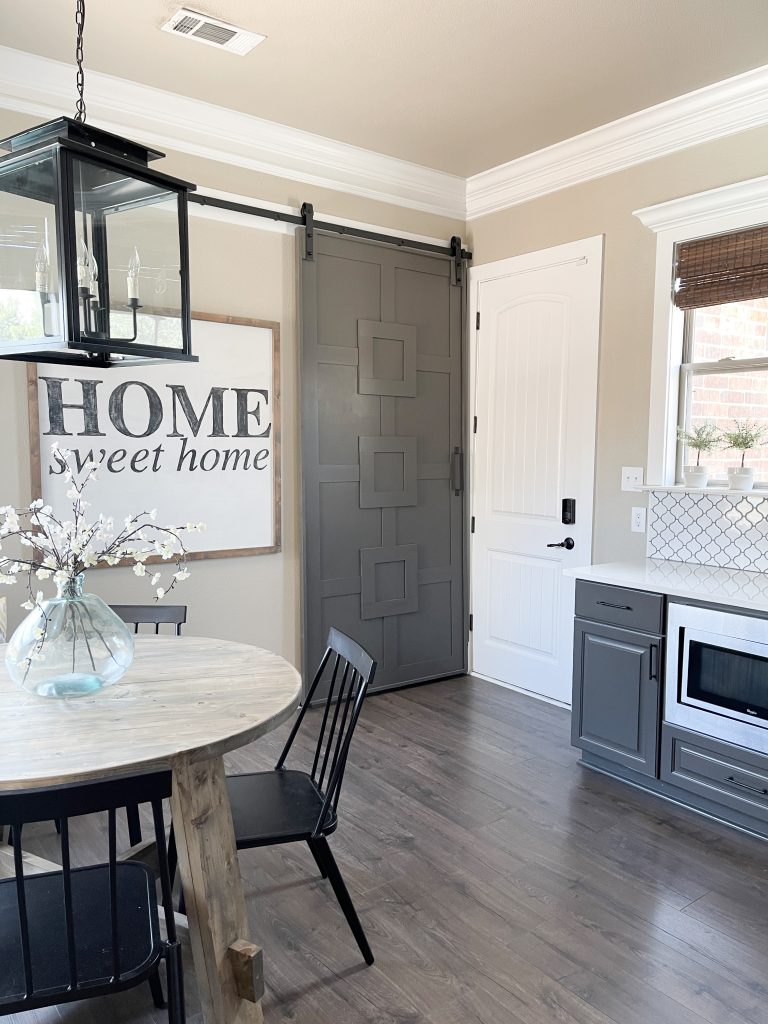
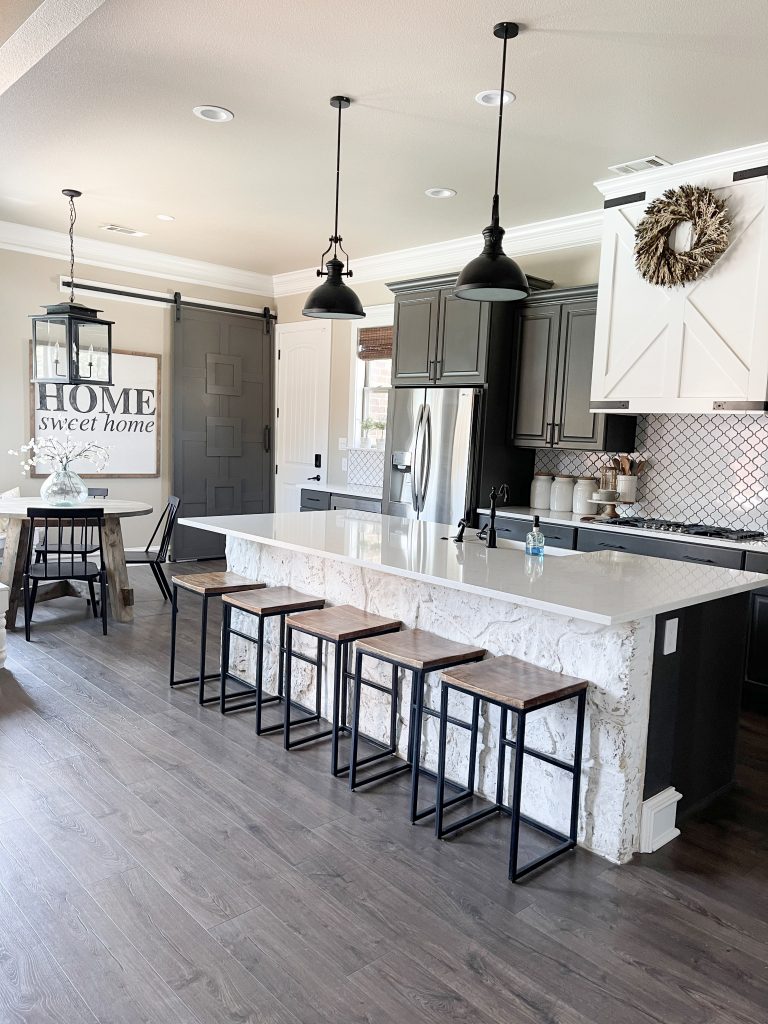
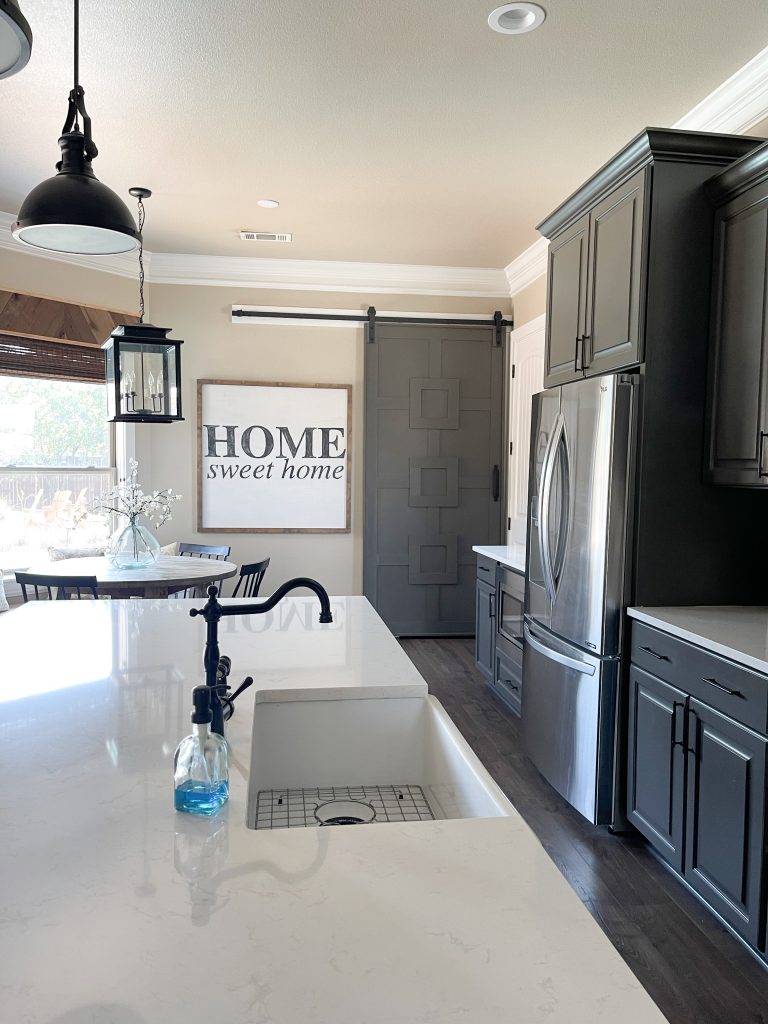
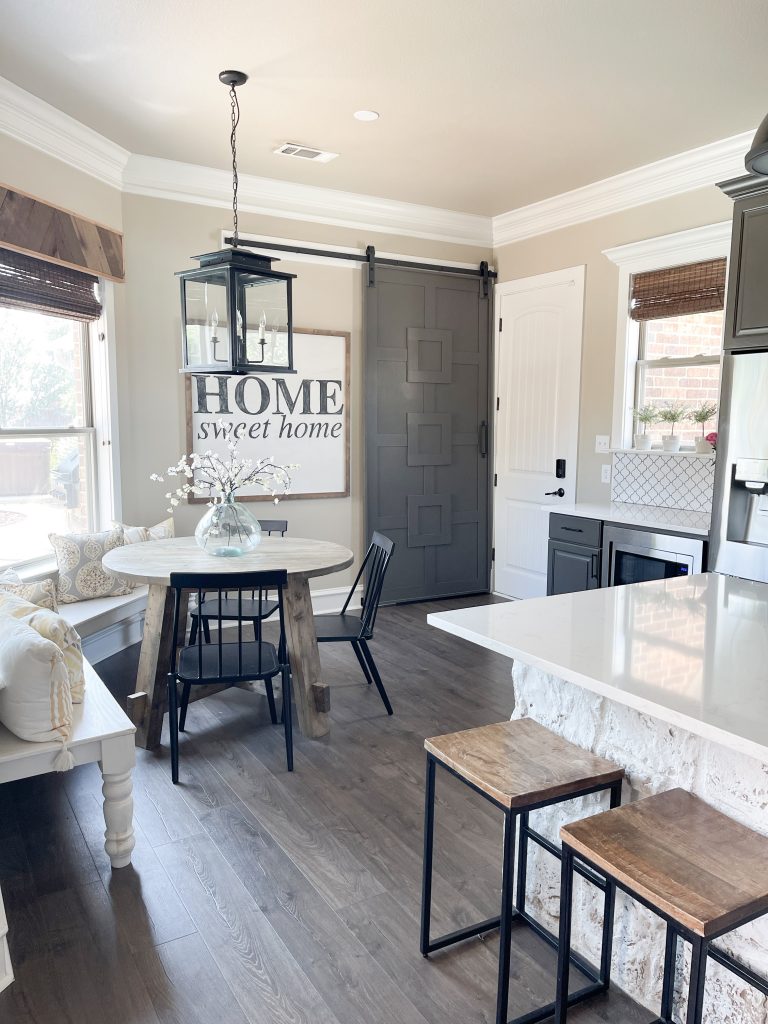
I’m so happy with the way my barn door turned out. It was so simple, inexpensive and it’s the most perfect combination of form and function! It completely transformed my kitchen and gave it a unique update!
Make sure to share your builds with us on social media and use #shanty2chic so we can share them too!
Happy Building!
DIY Custom Barn Door
Tools
- Miter Saw
- Drill
- Kreg Jig
- Brad Nailer
- Stapler (optional)
- Pin Nailer (optional)
- Table Saw (optional)
Supplies
- 1 1x6x10 Common Board
- 1 1x6x8 Common Board
- 3 1x4x8 Common Board
- 5 1/4"x4x8 Bender Board
- 4 1/2"x4x4 Poplar
- 2 1/4"x48"x96" Hardwood Plywood
- 1 1/4" Pocket Hole Screws
- 1 1/4" Brad Nails
- 5/8" Pin Nails
- 5/8" Staples
- Wood Glue
- Barn Door Hardware
- Barn Door Pull
Instructions
Cut List
- Cut List 1

- Cut List 2


Building the Frame
- Cut the frame pieces to size. Drill 3/4" pocket holes at the end of each of the long boards. Attach them to the short boards with 1 1/4" pocket hole screws and wood glue.

- Cut the plywood sheets to size and attach them to the frame with 5/8" staples and wood glue.

- Cut the top and bottom trim pieces to size. Attach them to the top and bottom of the barn door frame with 1 1/4" brad nails. The bottom of the trim should be flush with the bottom of the frame.

- Cut the side trim pieces to size and attach them to the sides of the barn door with 1 1/4" brad nails and wood glue.


Adding the Trim
- Cut the top and bottom, front trim. Attach it to the top and bottom of the plywood with 5/8" pin nails and wood glue.

- Cut the vertical bender boards to size. Attach them to the sides of the plywood with 5/8" pin nails and wood glue.

- Cut the squares to size, center them on the plywood according to the sketch and attach them to the plywood with 5/8" pin nails and wood glue.

- Cut the side trim pieces for the squares. Attach them on the outside of the squares with 5/8" pin nails and wood glue.

- Cut the top and bottom trim pieces to size and attach them the same way.
- Cut the final trim pieces to size. Center them on the squares according to the sketch and attach them the same way.

- Cut the wheel blocks to size and attach them to the top corners of the barn door with 1 1/4" brad nails and wood glue.

- Fill your nail holes, sand it down and add a finish! This is a great project to customize with the trim. Get creative with it and make it your own!Make sure to share your builds with us on social media and use #shanty2chic so we can share them too!Happy Building!


This is a fantastic and practical project. A custom barn door can completely transform a space by adding character while also saving floor area compared to traditional swing doors. I appreciate how the design balances functionality with a strong visual statement. It’s always inspiring to see door and space-planning ideas alongside broader interior and material trends here: https://plywoodbazar.com/ A stylish and well-executed DIY build.
This is such a beautiful DIY barn door project! I love how barn doors add both character and functionality to a space, especially in modern farmhouse or rustic interiors. Projects like this show how creative woodworking can completely transform a room without a full renovation. Along with stylish interior doors, upgrading exterior doors and windows can also make a big difference in the overall look and natural light of a home. I’ve seen some great examples of this with installations from Design A View[https://www.designaview.co.uk/] Windows & Doors where modern doors and windows really complement home design upgrades.
These are great ideas for build diffrent frame.
I want to try some of these when I can ever get my craft room together. I need to learn how to use a mitre saw and a kreg jig.
Does the door need to be sealed with a topcoat?
Link for the overhead barn door hardware you used? Thanks bunches! It looks amazing (as all your creations do)!
Can you please tell me what your wall paint color is??? I love it!
Soft Stones by Valspar – it’s on her kitchen blog