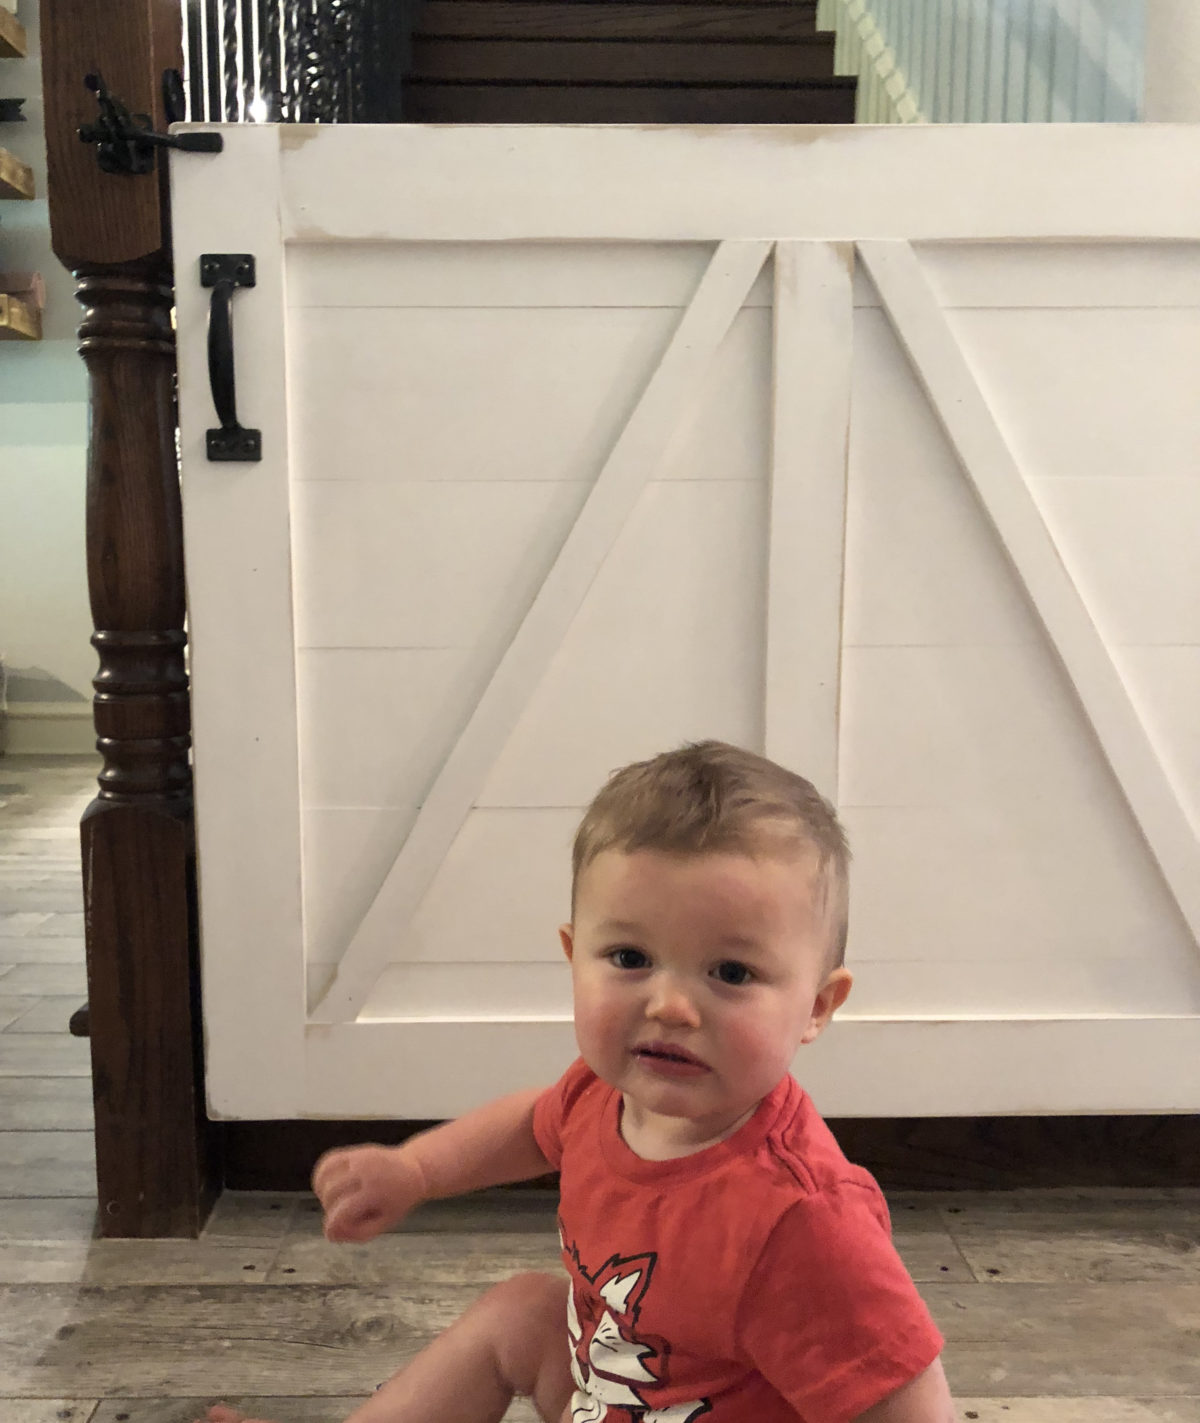
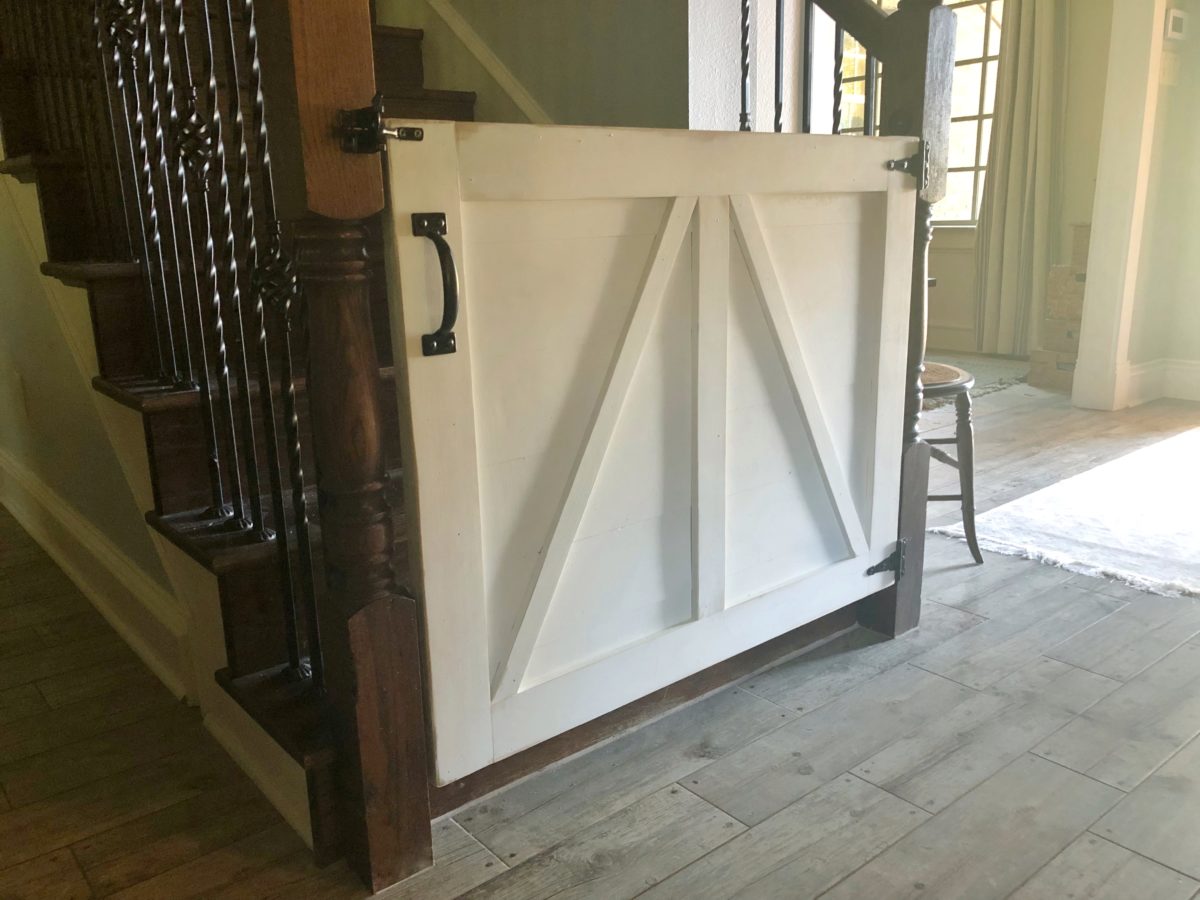
Hey guys! We are so excited to share today’s project with you… But, the baby is not excited about it! I win! Jed was starting to crawl, and I knew I needed to find a way to keep him from getting on our stairs. I have used store bought baby gates in the past with my other kiddos, but there were always things about them that I didn’t like. They usually aren’t very pretty on the eyes, and the openings fro the doors were always really small making it hard to carry laundry baskets through and stuff. So, I came up with my own! I may have to add a deadbolt to this one soon… You would understand if you met my son! Before we get started, be sure to check out our YouTube video on this build HERE or below!
First, y’all should see how happy Jed is about this project… haha! Mom for the W!
Before we get started, be sure to download and print the FREE PLANS HERE!
Cut all the 1×6 boards to size first. These measurements are for my stairs, so it probably won’t fit your opening. Whatever your opening is, cut these boards 1/4” smaller than your opening. Add a pocket hole 1” from each end of 5 of the 6 boards, and make one at the center of each board as well.

Now cut and attach your vertical side trim pieces. These are 1/2” x 4” pine craft boards. Add a line of glue and attach the craft boards using 3/4” brad nails. Be sure to line up the craft boards flush with each end of the 1×6 boards.

Measure and cut for the top horizontal trim. These are also 1/2” x 4” craft boards. Attach each board flush with the top and bottom of the 1×6 boards with wood glue and 3/4” brad nails.

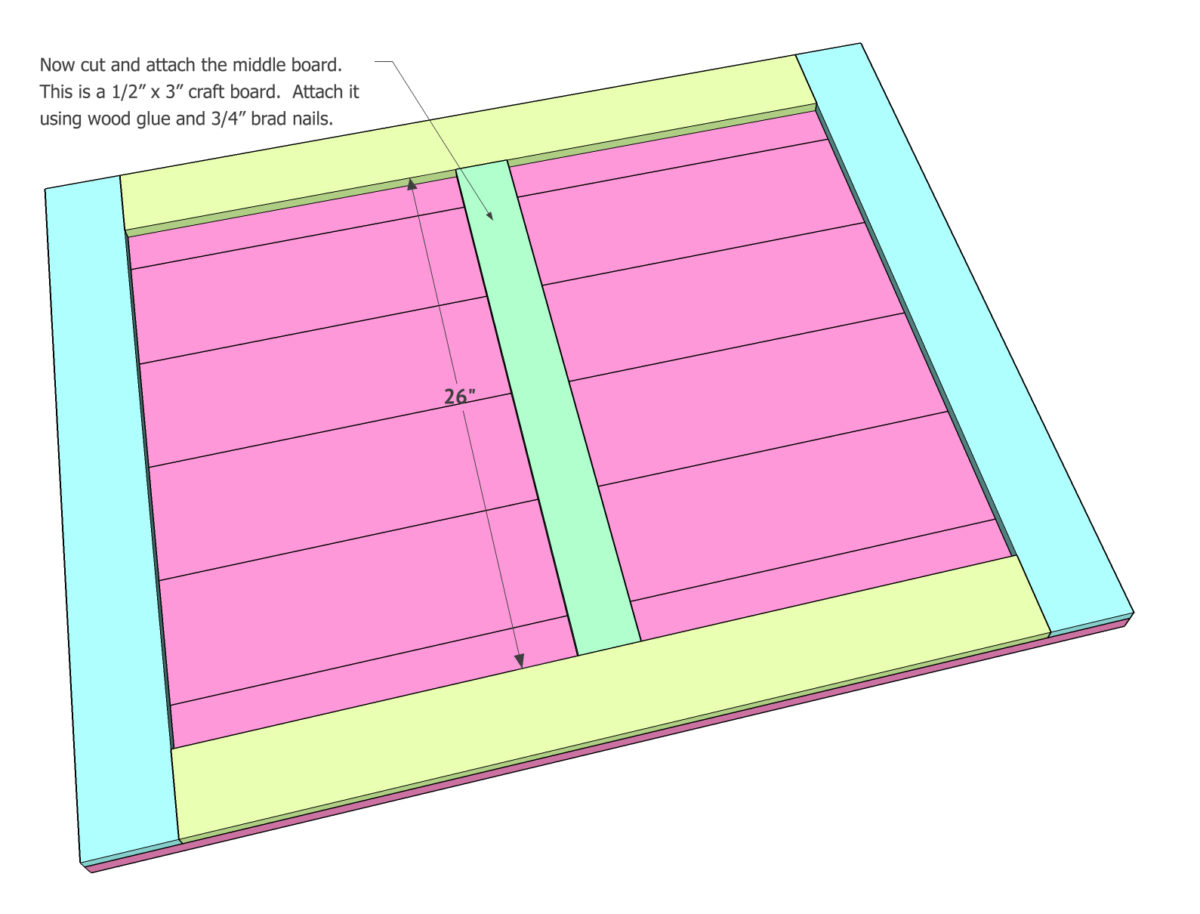
Now it’s time for the middle trim board. This is a 1/2”x 3” craft board. LIne it up in the center of the 1×6 boards which will cover the pocket holes you made down the center of the boards. Attach this board using wood glue and 3/4” brad nails.
The final step is to make the diagonal cuts. These are 1/2”x2” craft boards. I did add cut lengths and angles, but the very best way to get these measurements is to hold these boards in place and mark for your cuts. Attach each board using wood glue and 3/4” brad nails. Now you are ready for paint or stain!

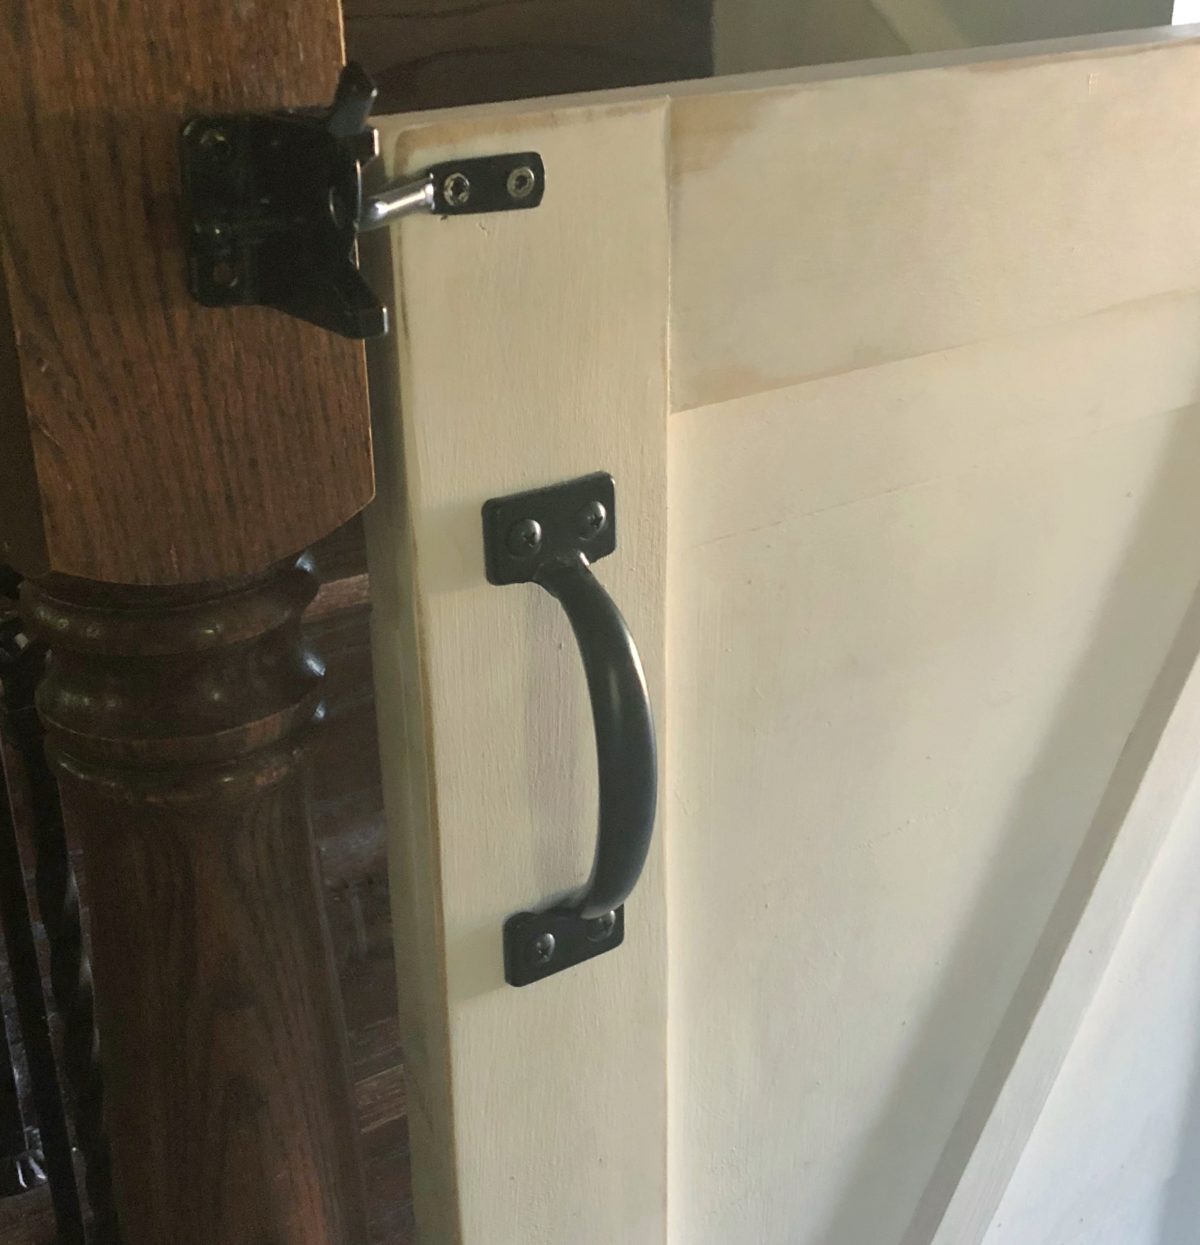
Once it dries, you can attach your hardware. Check out our website to see what hardware we chose to use!


I had a hard time locating 1/2 inch boards so I went ahead and used 1×4 and 1×3 for the front braces. Looks amazing and I was able to use 1 inch finishing nails because again 3/4in weren’t available in my store. Super excited to see it painted and hung.
(Note: I have a Rigid 16 gauge finish nailer not a Brad nailer thus the finishing nails).
Hi! I was wondering are the brad nails very visible on the front? If I just used a simple stain would they be visible or do you have to paint?
You can always use wood filler to be extra sure and just wait for it to set before painting or staining over it.
I lowered the depth of my nailer to be sure it was under the surface of the board. Doing that allows you to putty and then paint over the holes. They are pretty small but I don’t like to see them on the finished product.
Where do you purchase your pine craft boards? Love your work btw! Thank you 🙂
This is wonderful! What hardware did you use?