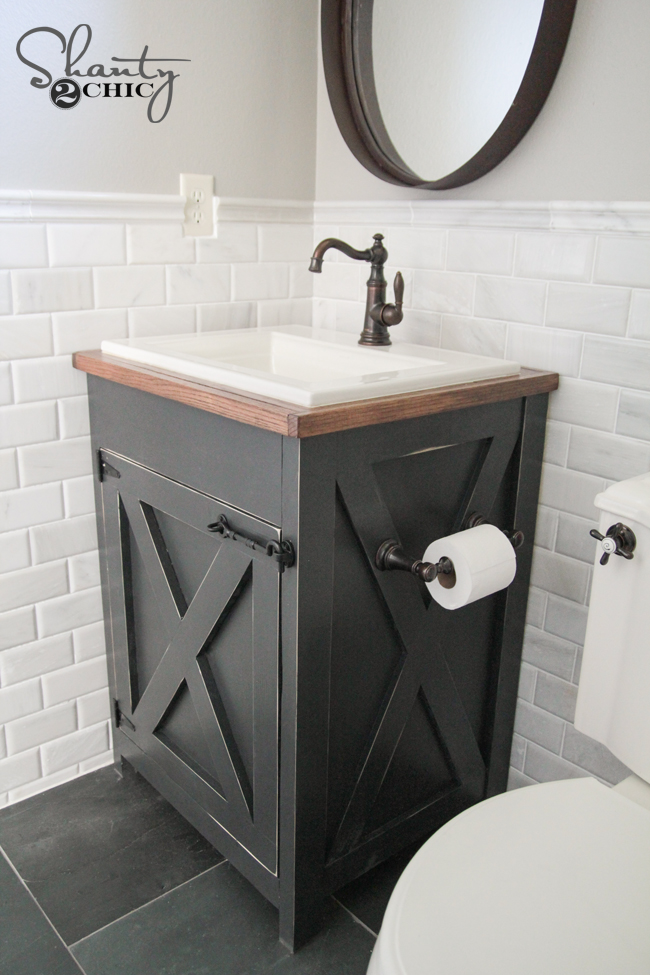
Learn how to build this DIY Farmhouse Bathroom Vanity with free plans by Shanty2Chic! This is an easy build that only requires a few tools!
This room has been in the works longer than I care to admit, but I finally got around to finishing it and I LOVE THE RESULTS! Check out my oldest son’s new bathroom and his new farmhouse bathroom vanity!
As always, I will share the entire build with you here, and you can download and print our free plans by clicking HERE!
Now to build the vanity! This really isn’t a difficult build…. If you can get the angle cuts down, the rest is very basic.
DIY Farmhouse Bathroom Vanity
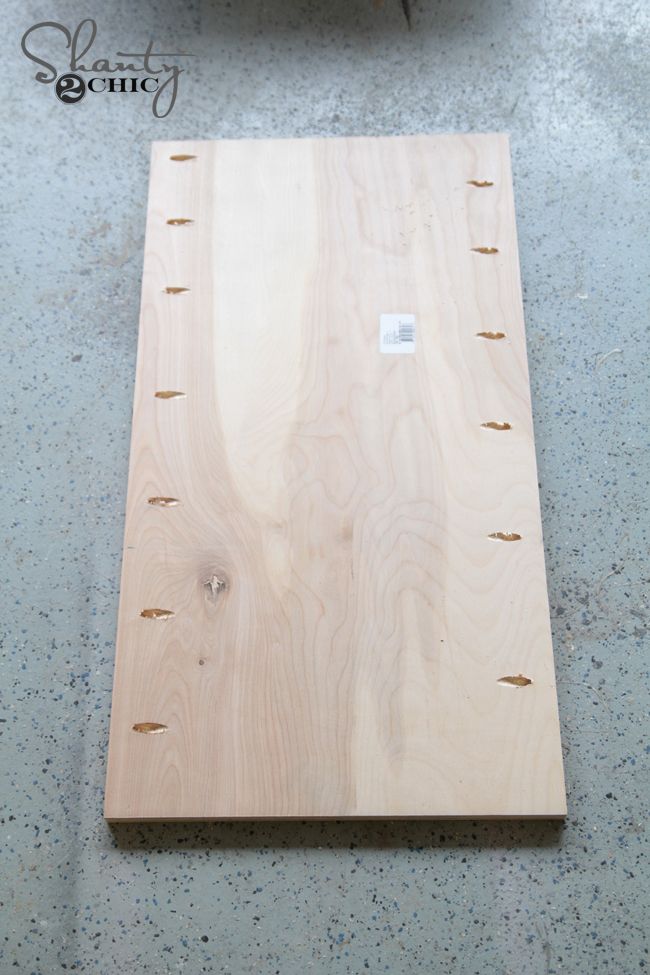
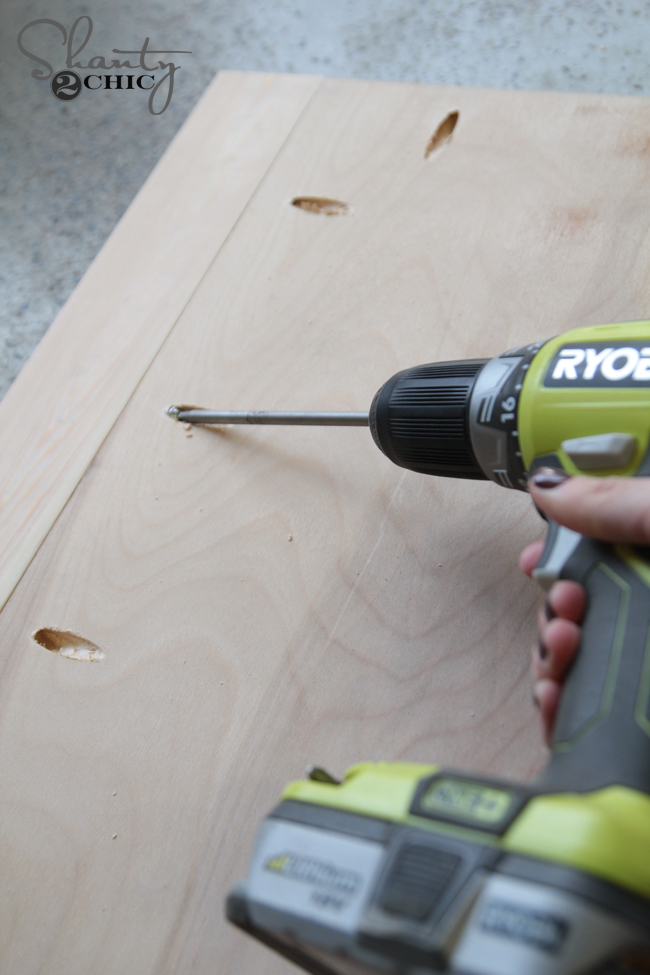
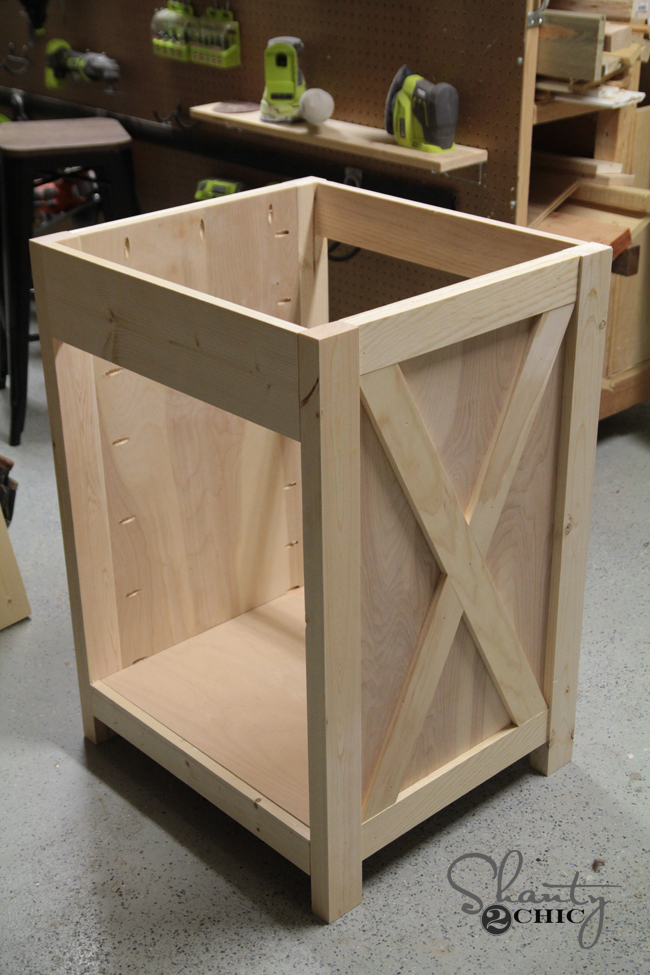
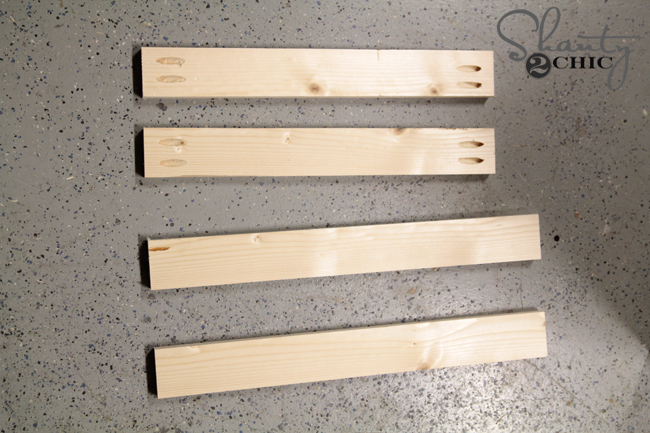
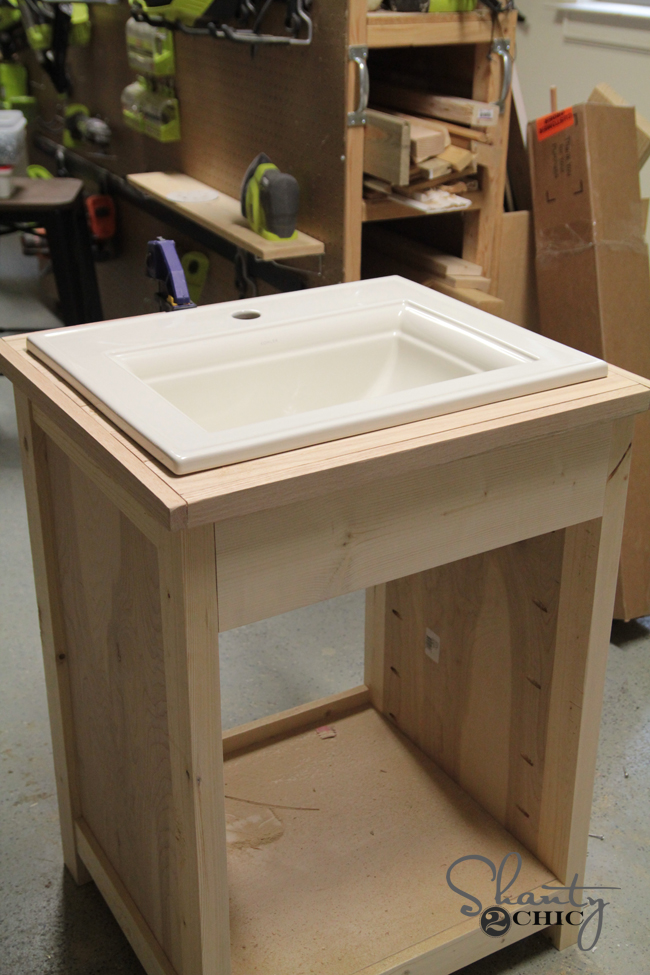
I started by building two sides. These are constructed out of 3/4″ Purebond Plywood. This type of plywood is sold in big 4’x8′ sheets, and we have the guys at Home Depot rip it down into smaller boards to fit in the car. Then, we cut those boards to exact size using our miter saws or table saws. I cut mine to size and then added 3/4″ pocket holes down the sides and top. The top pocket holes will be used attach the wood countertop. If you are doing just a drop in sink top/countertop with no wood below it, you can skip those pocket holes.
Next, I cut and attached the legs. These are made of 2×3 boards. Rather than just purchasing 2×3, we like to purchase 2×4 and cut the rounded edges off to make it a very square 2×3. You do this by running each end through a table saw. I love the look!
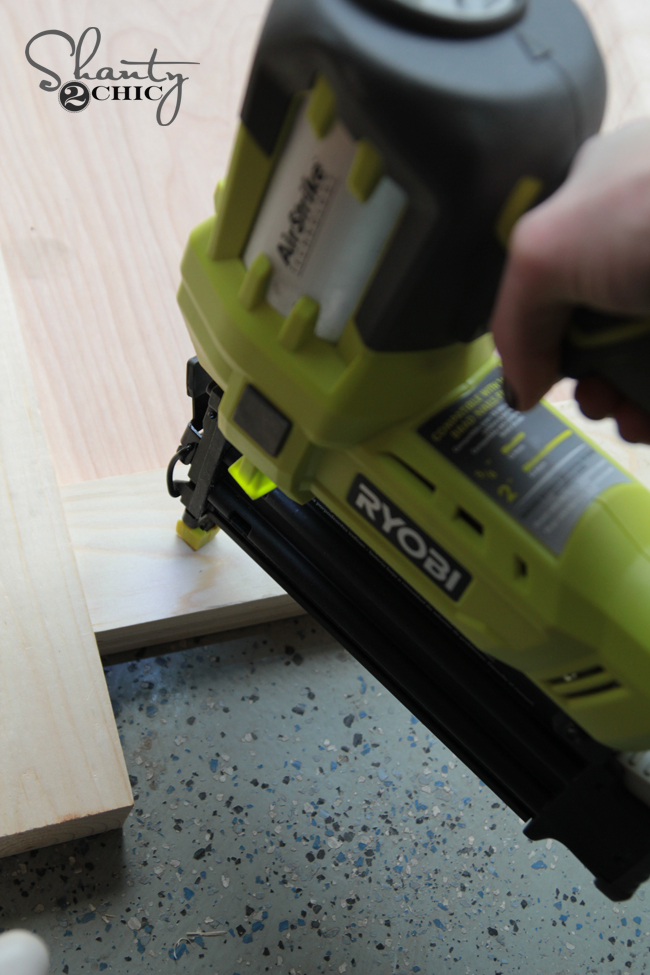
After attaching both legs, I added the X trim pieces. I used 1/2″ craft boards for this part. They can usually be found by the 1x pine boards at the hardware store. I used pine for this part as well. I found the easiest way to get these angles was by laying the board down on the side of the vanity and drawing where my cuts should go.
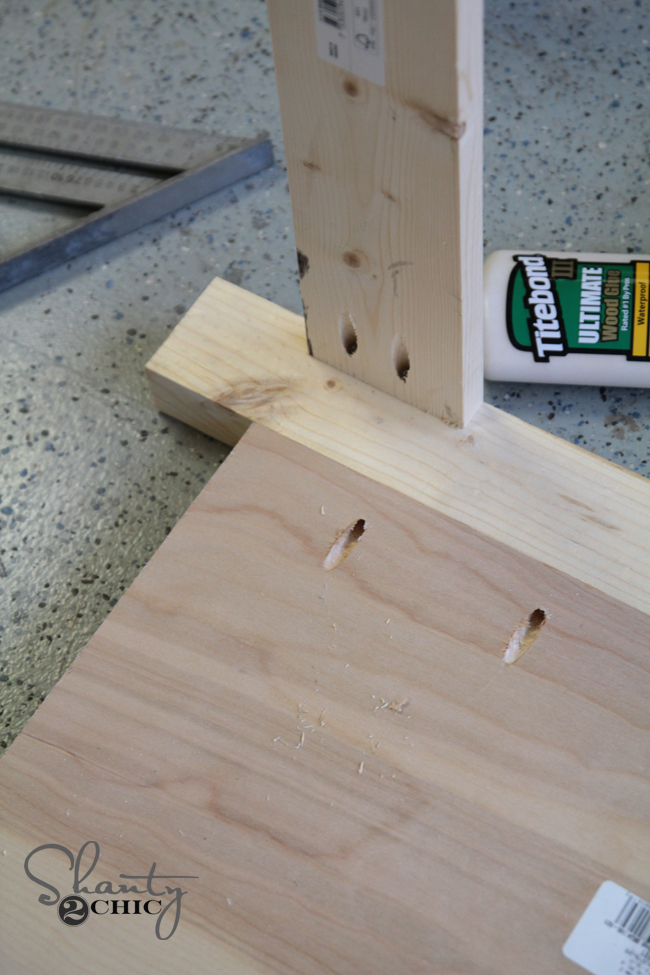
I attached each board using my Ryobi 18v brad nailer with 3/4″ nails and wood glue beneath each board.
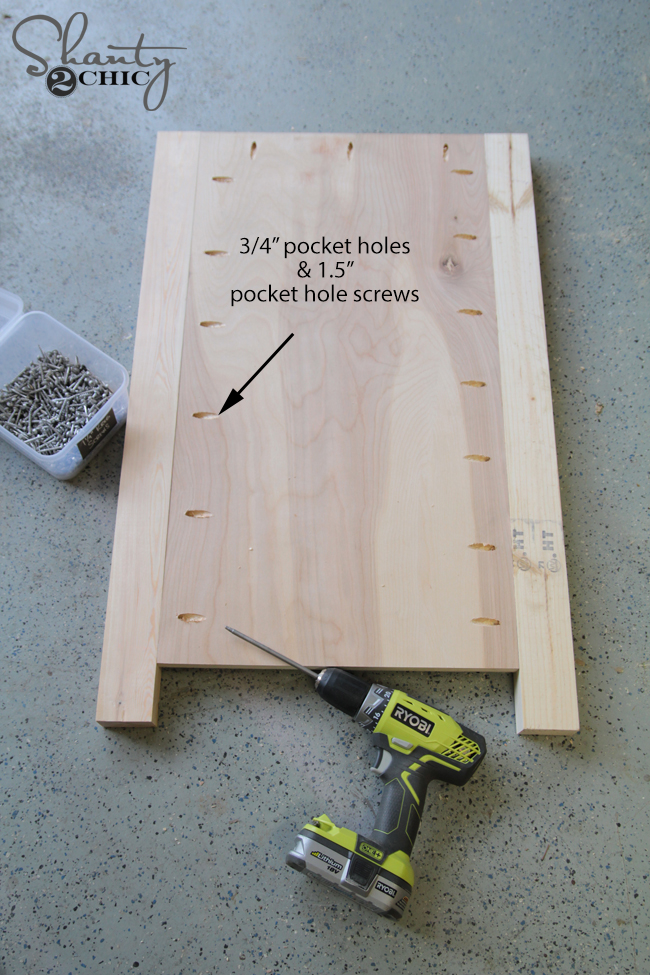
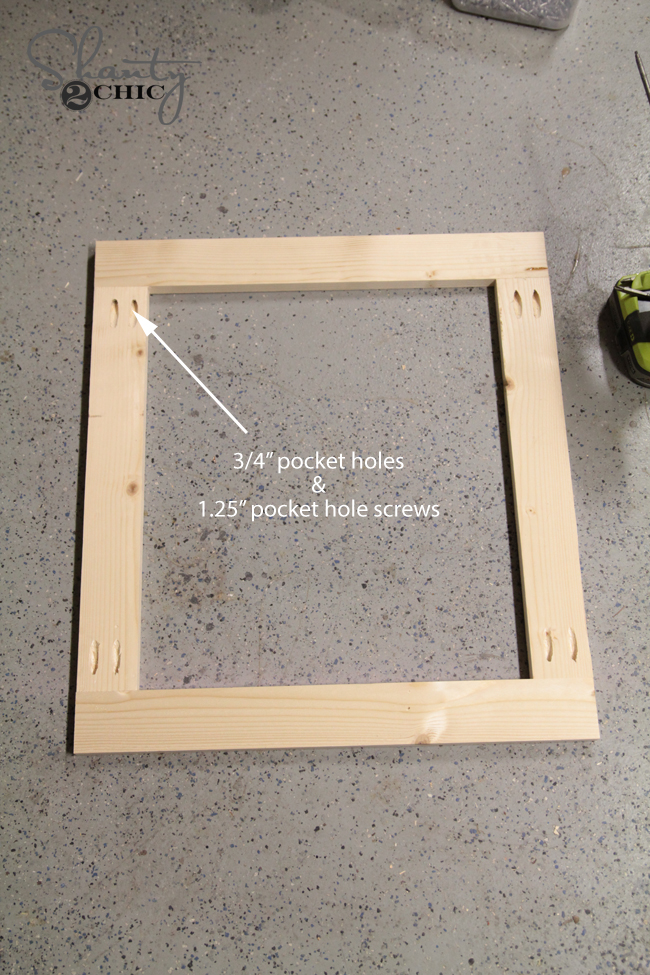
After building both sides, I attached them with the front and back frame pieces. These will also be attached using 3/4″ pocket holes and 1.25″ pocket hole screws.
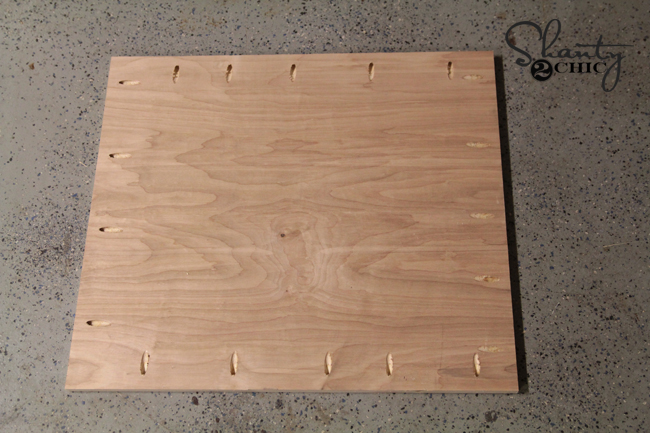
The base of the vanity is also Purebond. I added 3/4″ pocket holes around the base of the whole thing before attaching to the inside of the cabinet.
Here she is ready for her door!
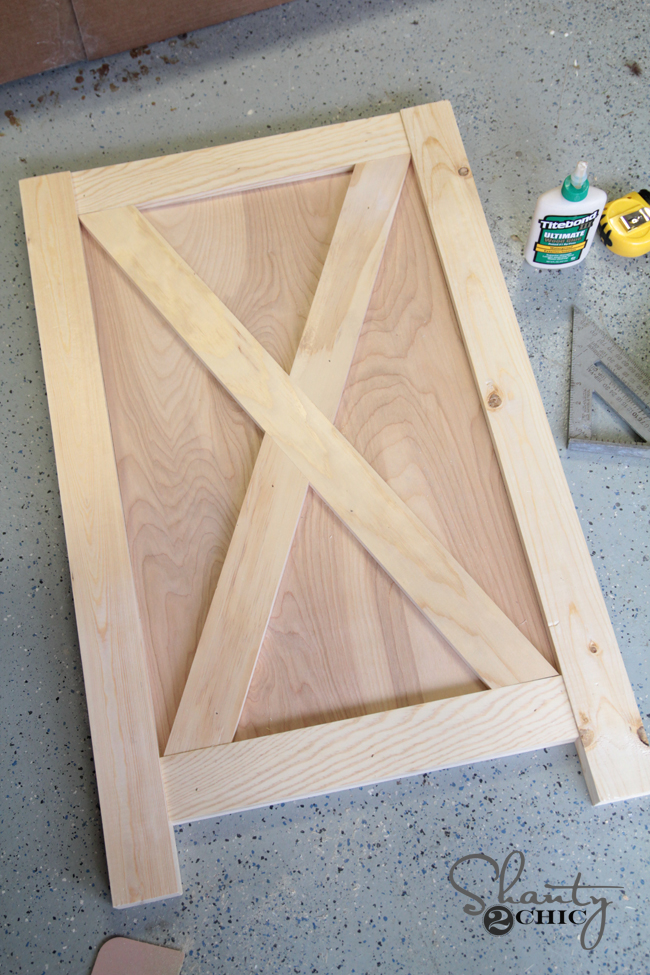
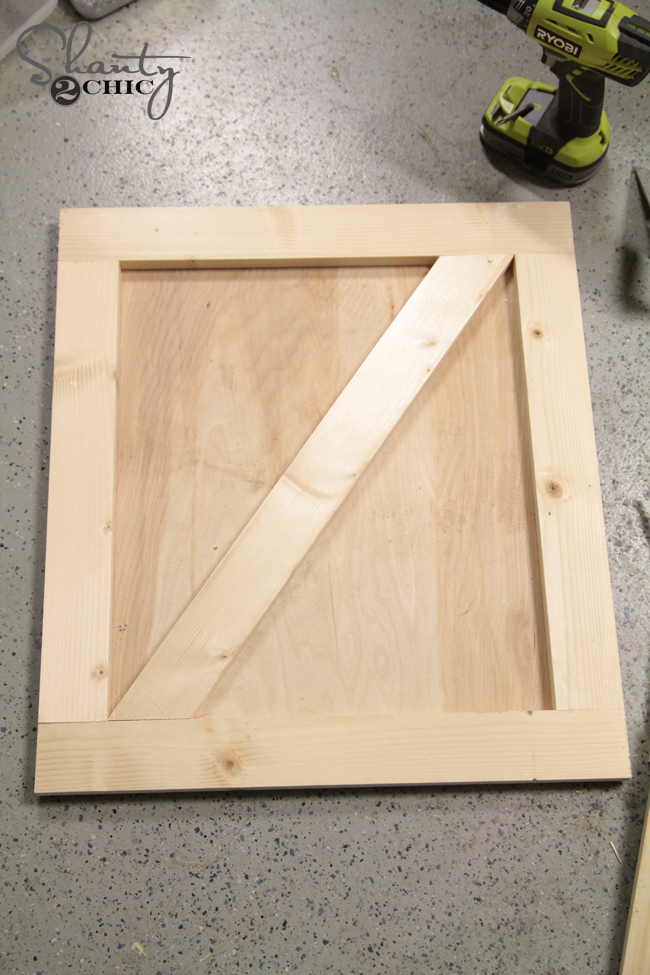
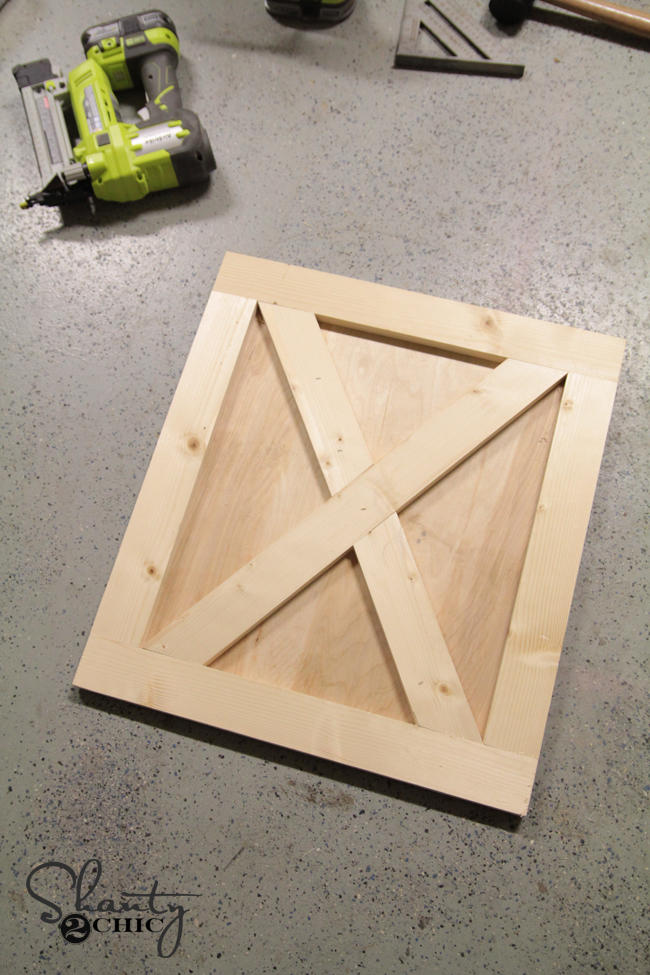
I cut the door pieces to size on this part, and then added 3/4″ pocket holes to both ends of each shorter board.
Then, I made a frame with those 4 boards using 1.25″ pocket hole screws.
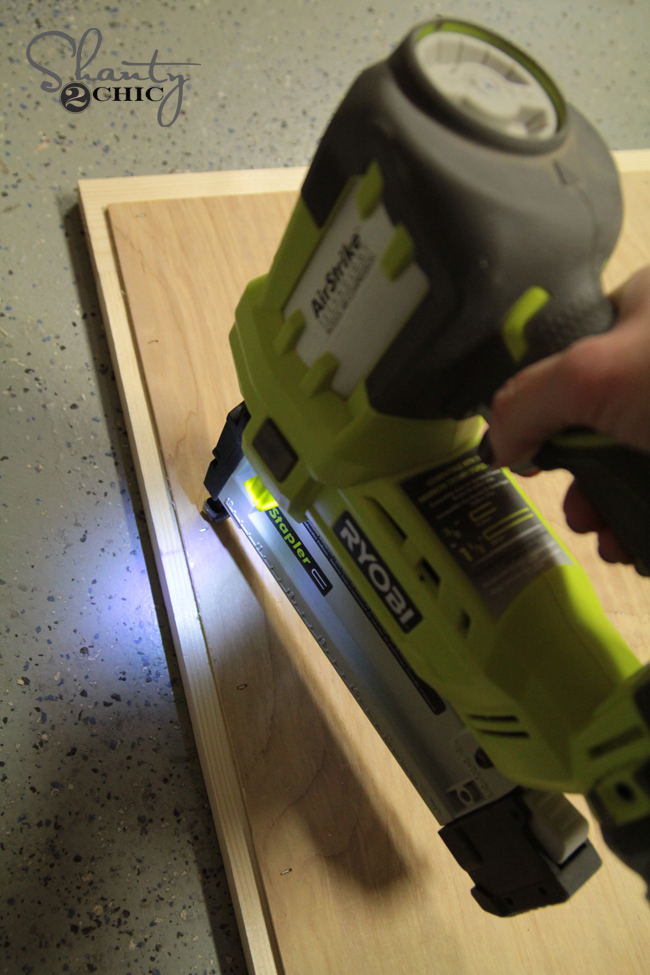
The backing is 1/4″ Purebond plywood. I attached this using wood glue and 3/4″ staples with my Ryobi 18g stapler.
Next, I added the X detail using the same method I did on the sides by marking where my cuts would be.
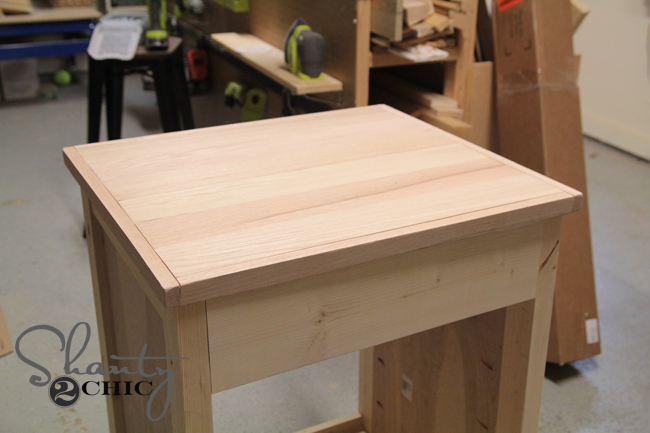
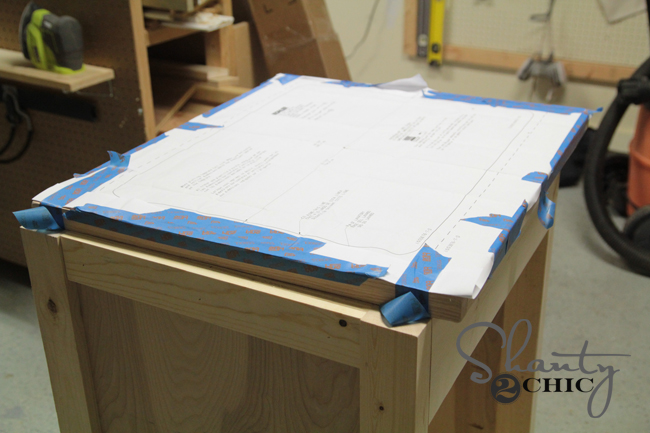
Now for the top! Again, yours may just be a drop in top similar to what I used on my last vanity. If so, you won’t need the wood top I am about to show you. I built mine by starting with a piece of 3/4″ Purebond plywood cut the size of the countertop I wanted minus 1.25″ all around.
Then, I planked the top with 1/2″x 4″ oak boards. I used wood glue and nails to hold these in place.
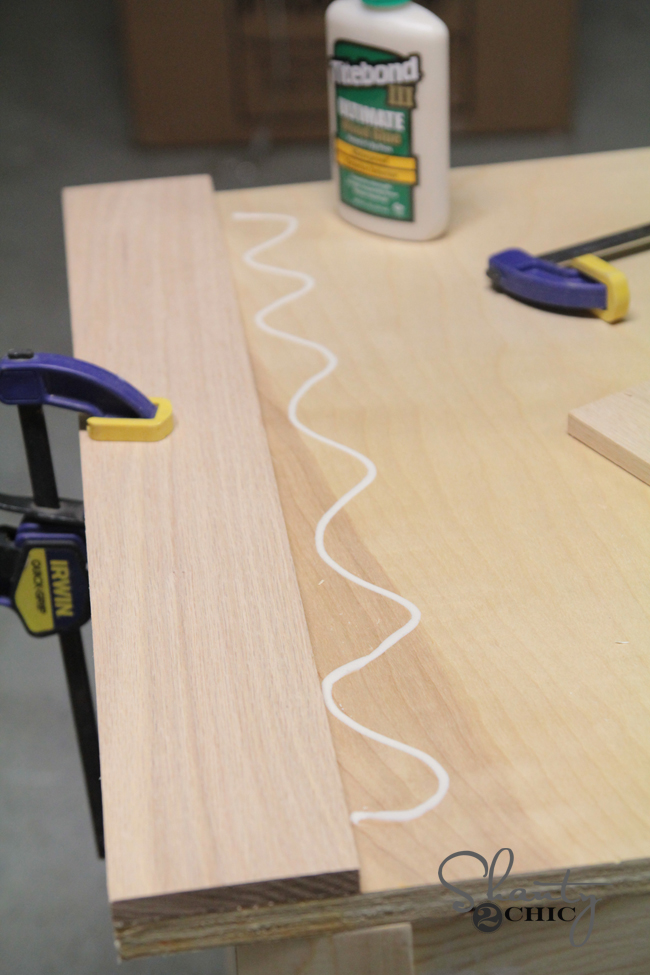
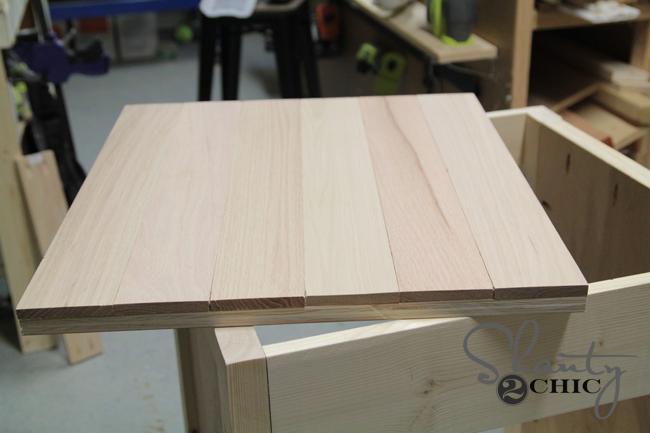
I trimmed the outside of the countertop with 1×2 oak boards.
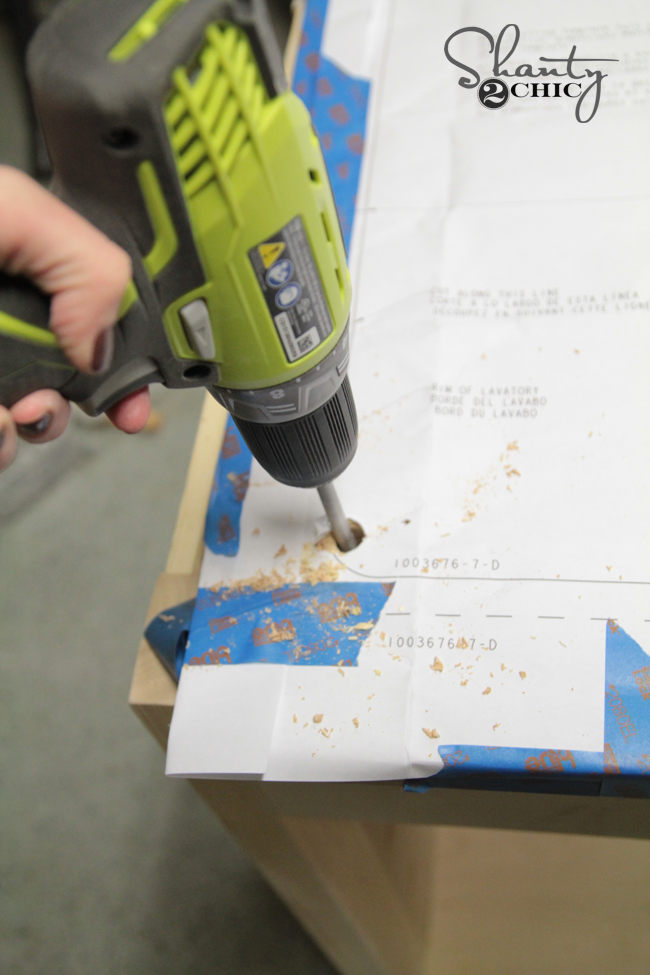
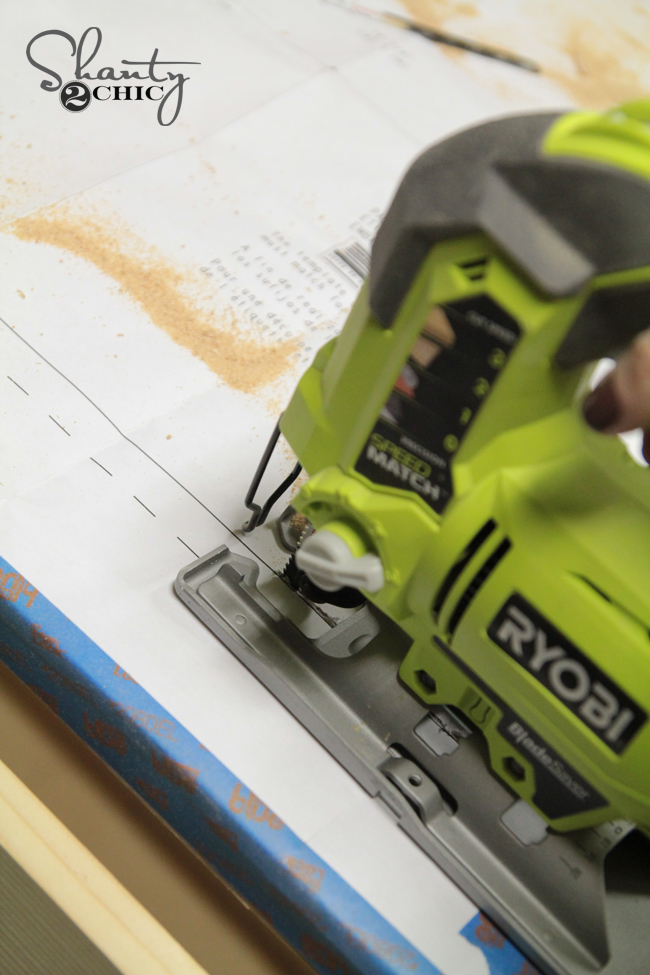
Next, I laid my sink template on top and used my Ryobi jigsaw to cut along the line for the sink.
To do this, I started by making a pilot hole with my drill. This will allow me to drop my jigsaw blade into it to start my cut.
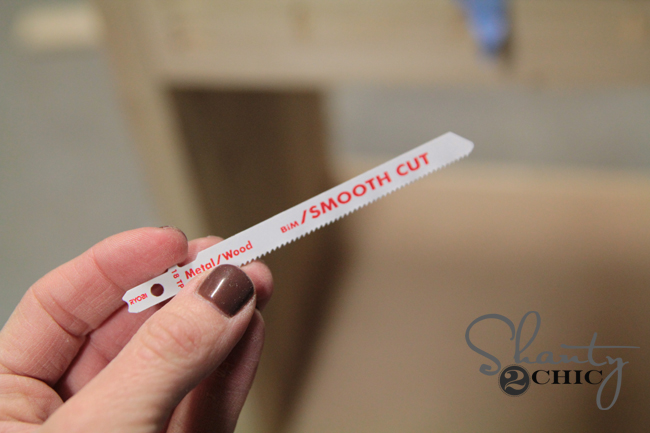
This is the blade I used…
Then, I just cut around the line.
Then, I made sure it fit!
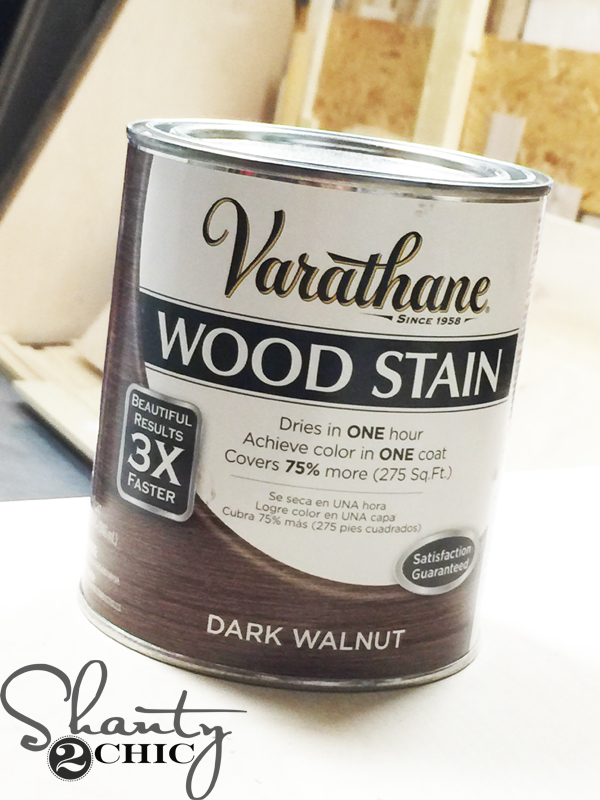
I stained the countertop with Varathane Dark Walnut stain.
After it dried, I added two coats of Varathane Triple Thick Poly.
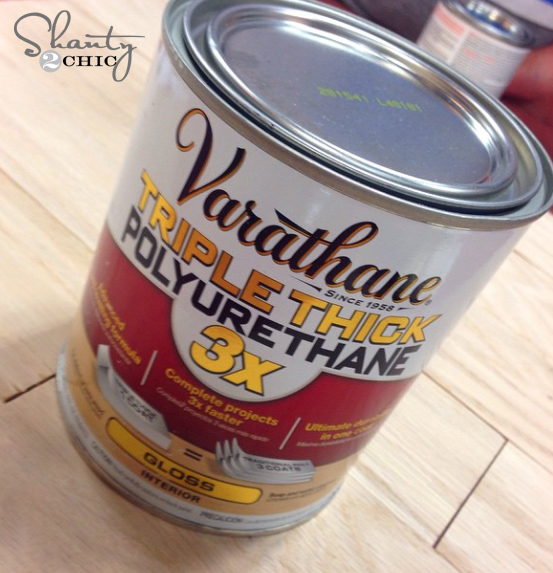
This says GLOSS BUT I used Satin!
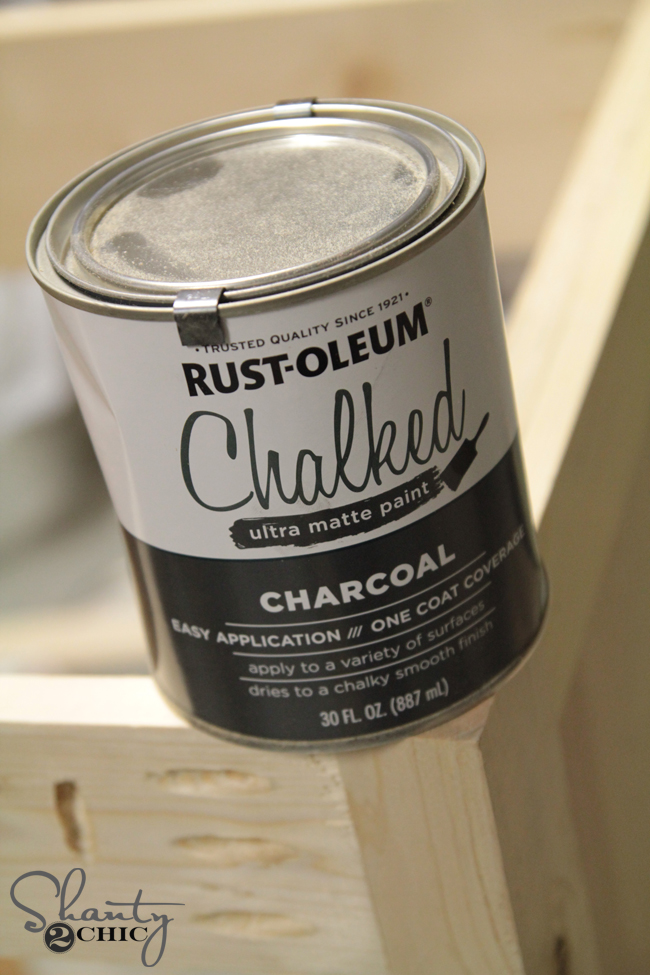
I painted the entire cabinet with Varathane Chalked paint in Charcoal and then lightly sanded my edges to distress it a bit. I also added one coat of Triple Thick to the cabinet base.
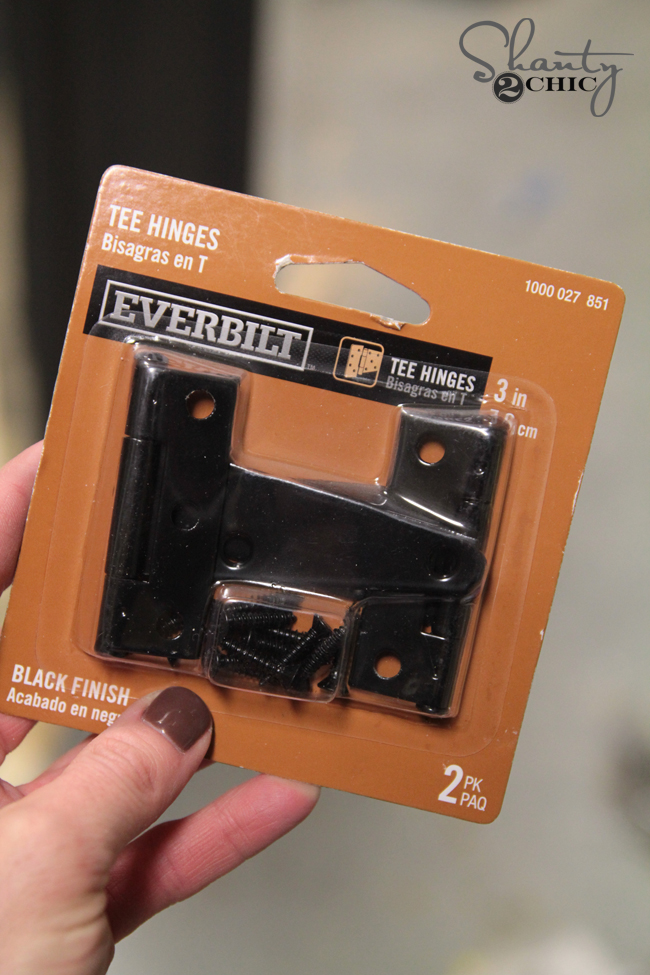
These are the hinges I used to attach the door. They are from Home Depot.
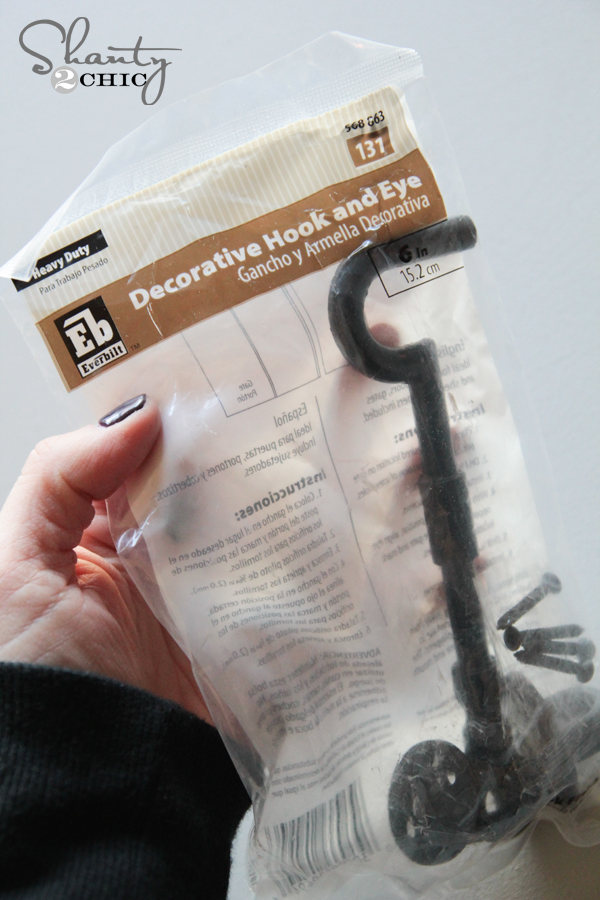
And this is what I used for the door latch, also from Depot!
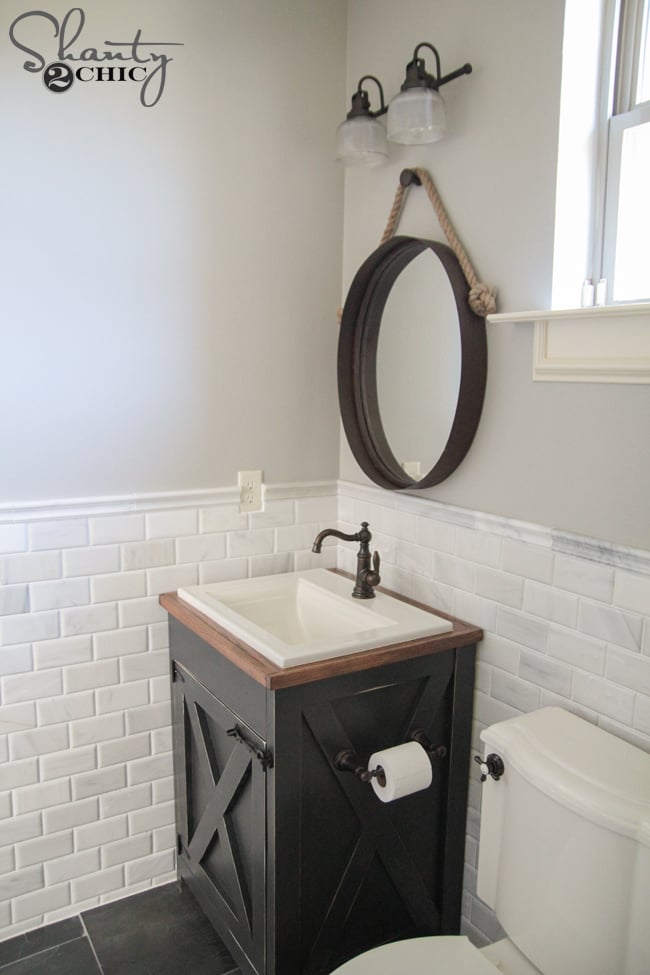
Here it is all finished up!
How pretty is the faucet guys? I worked with Moen on the finish out of this space. The faucet is a Weymouth Oil Rubbed Bronze one-handle bathroom faucet.
I’ve also had a ton of questions about the tank lever. It is also a Moen Weymouth tank lever in oil rubbed bronze.
And the Weymouth paper holder has become a game changer in my house. This design is amazing! It makes changing the toilet paper roll so much easier… It’s the little things 😉
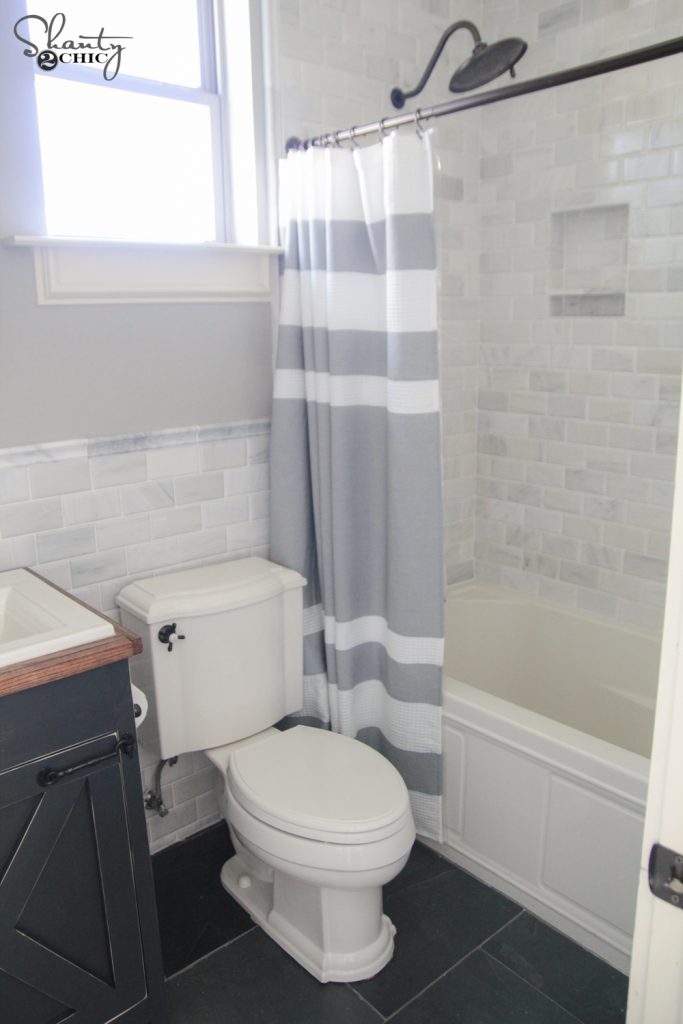
I worked with one of our favorite brands for this part. I found all of the tile for the bathroom at The Tile Shop! Below I will link to each tile so you can find it on their site.
Adoni Black Slate Floor TileParagraph
And now for the rest of the goodies! This vanity is designed to fit a drop-in sink. I found mine on Wayfair. I wanted something that covered most of the countertop to keep my son from getting too much water on the wood. HERE is the drop-in sink I found.
The amazing mirror and light are also from Wayfair.
The shower faucet is also from the Weymouth collection.
LOVE the light and it’s price tag!
Progress Lighting Archie Light
I also found his shower curtain and curtain rod on Wayfair!
Whew. That was a mouthful. 🙂 Hope you like it as much as we do!
Let me know if you have any questions at all!

Blackout curtains decorative and blackout window treatments have always been popular decorative items. There is a wide array of styles, materials, and colors to enhance the elegance of any home.
Good job! Personally i really appreciate of your work. Good luck!
keep up the good work. Well done.
Perfect post. I like a post you are the most valuable information and This is really great work.
I like how you make a bathroom vanity yourself. Inspiring
can’t wait to try it
Amazing bathroom I love your natural Stone tiles
I Have a Question that In Recording the Video Voice Recording Issue Comes. Then We Use Separate Microphones Like Best Shot Gun Mic So Here are Some Blogs Visit Please:
Would you want A Kitchen Related Site If Yes then Visit My Name.
Thanks For the Information I Love your Blog That’s have a lot of Beneficial Information. On the Road the Traffic and Drivers are on Very Speedy way. So, I have a site like a Best Dash Cameras. Visit the Site and Tell Me How This is Thanks :>
Thanks for sharing this great information, I’m impressed by the information that you have on this blog, Same as your blog I Have a little one Site name as Hoverboard Guide website. I Really want that please visit my Site:
Thanks for sharing this great information, I’m impressed by the information that you have on this blog, same as your blog another one Hoverboard Guide website. Actually, I’m looking for the same information on the internet for Hover board I read reviews of customers on this site, such an amazing, customer gives positive reviews and more says, this site provides high-quality products with a warranty. I recommend you to visit this website.
If I were to want to use a solid sink top, what size would I get to fit your specifications on the build?
Toilet handle is a faucet knob! Where did you get it? I have an old one. Can I use it? I’m making the vanity now!
sorry if this was stated but I did not see completed overall measurements?
If I were to want to use a solid sink top, what size would I get to fit your specifications on the build?