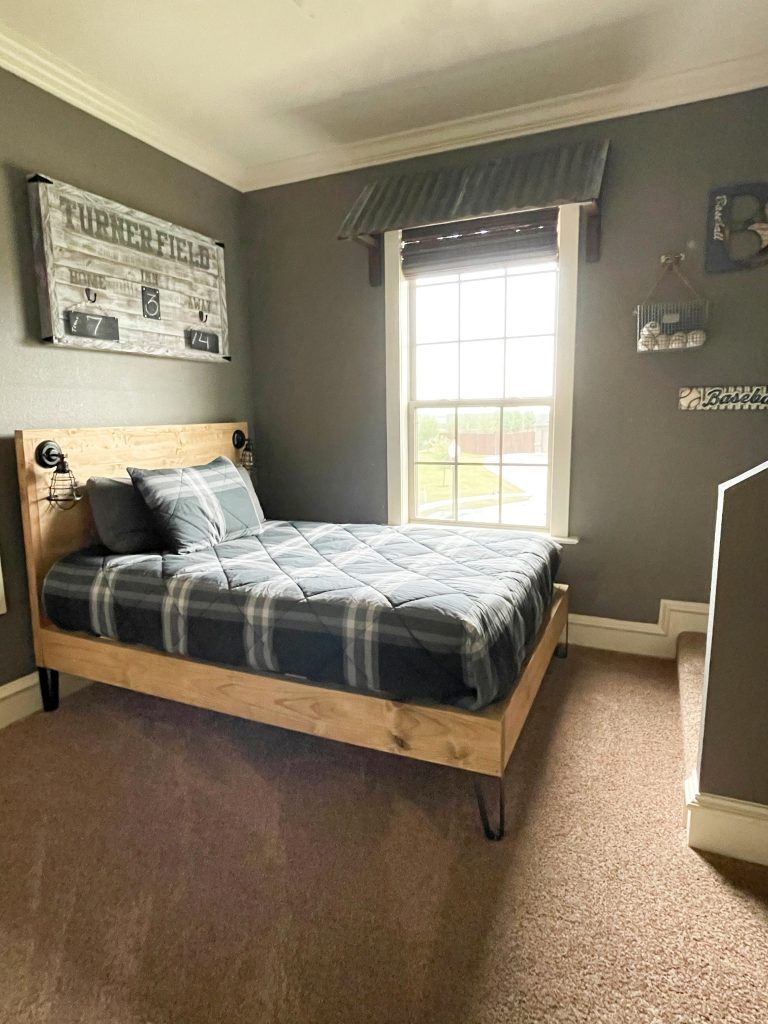
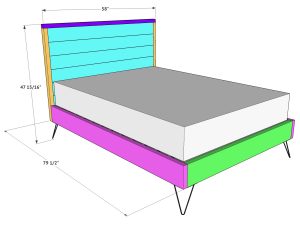
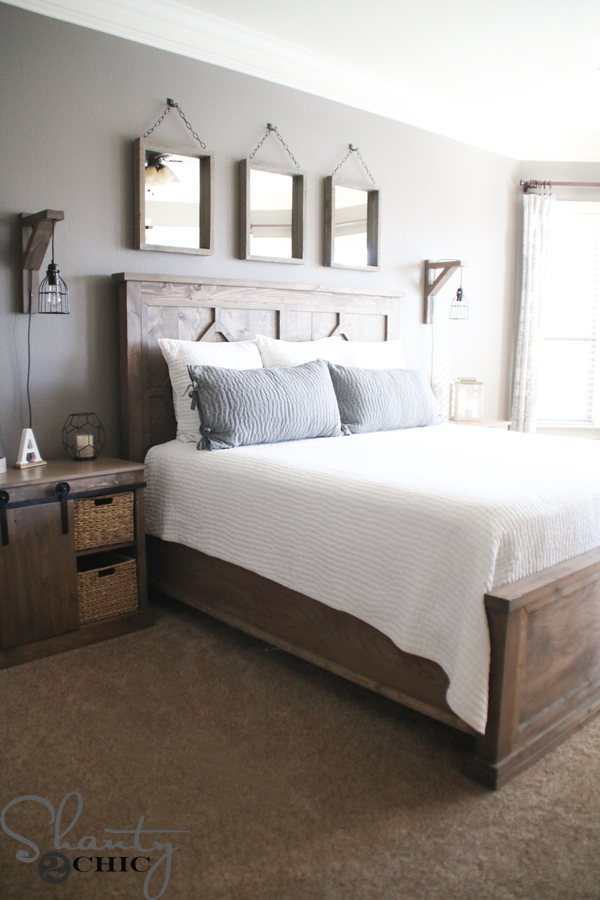
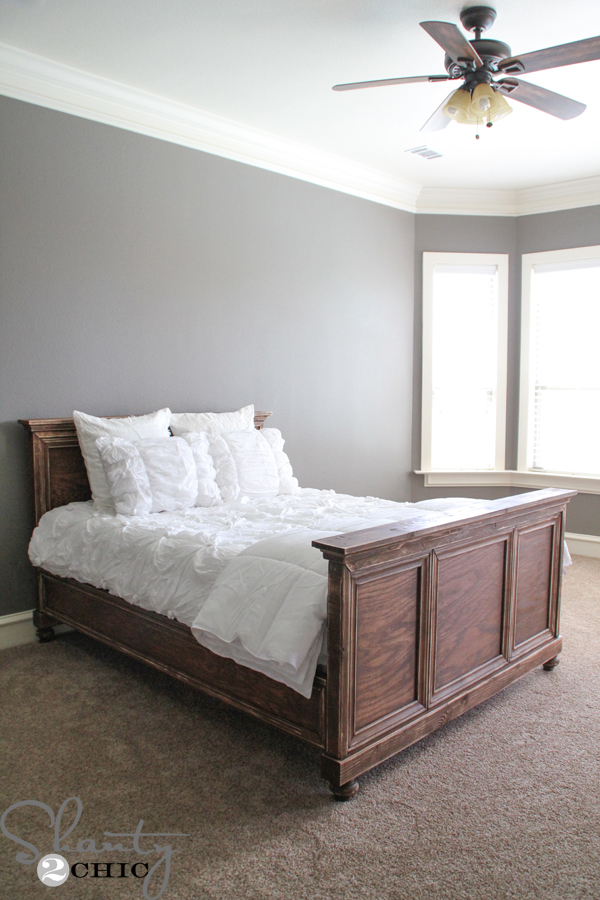
DIY Modern Full Sized Bed with free plans and a how-to video by Shanty2Chic! This is an easy build, great for beginners and it’s easy to modify if you need a twin, queen or king!
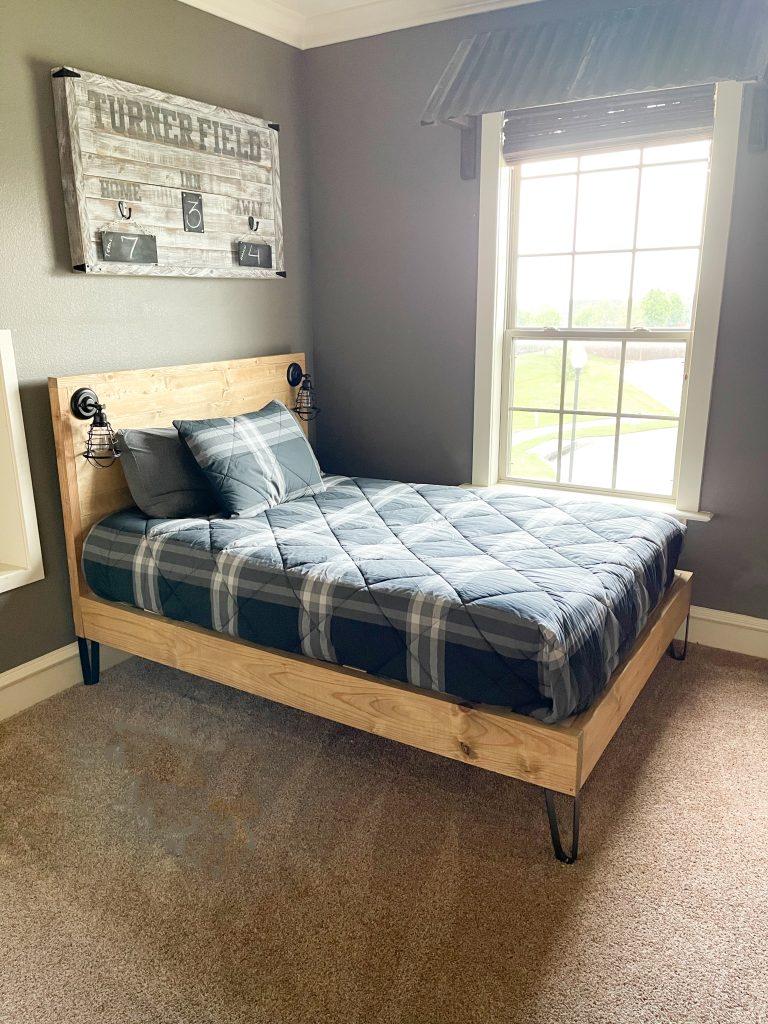
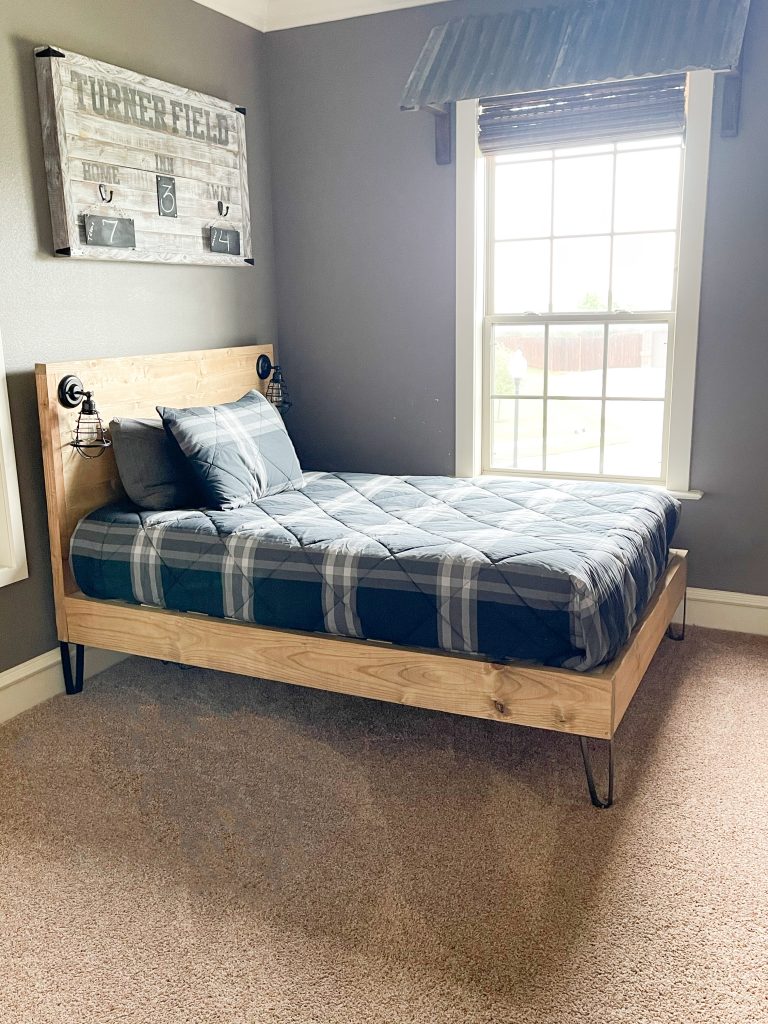
My son has been due a new bed for some time! I’ve built my daughter several (because she is always asking for a new one) and he just doesn’t care as much about his room. When he asked me to bulid him a new one I dropped everyting and got busy designing! His last bed was a platform design and there was no space under the bed. I thought it would make his room feel larger if I gave him a little space under the bed and I love how it turned out!
Check out the video below to watch how easy it is to build!
So quick and easy! Now, let’s get to the how-to!
Click here to jump down to the free printable plans!Table of Contents
Supplies
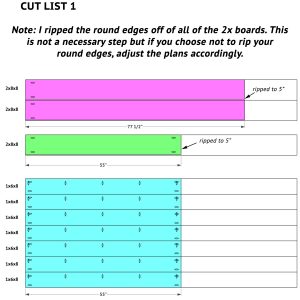
- 3 – 2x8x8 Framing Lumber
- 7 – 1x6x8 Common Board
- 12 – 1x4x8 Common Board
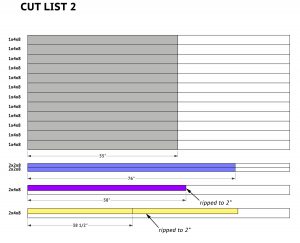
- 2 – 2x2x8 Framing Lumber
- 2 – 2x4x8 Framing Lumber
- 1 1/4″ Pocket Hole Screws
- 2 1/2″ Pocket Hole Screws
- 1 1/4″ Wood Screws
- 2 1/2″ Wood Screws
- Wood Glue
- Feet
- Cage Lights
Tools
- Miter Saw
- Drill
- Kreg Jig
- Table Saw (optional)
- Face Clamp (optional)
How to Build a DIY Modern Full Sized Bed
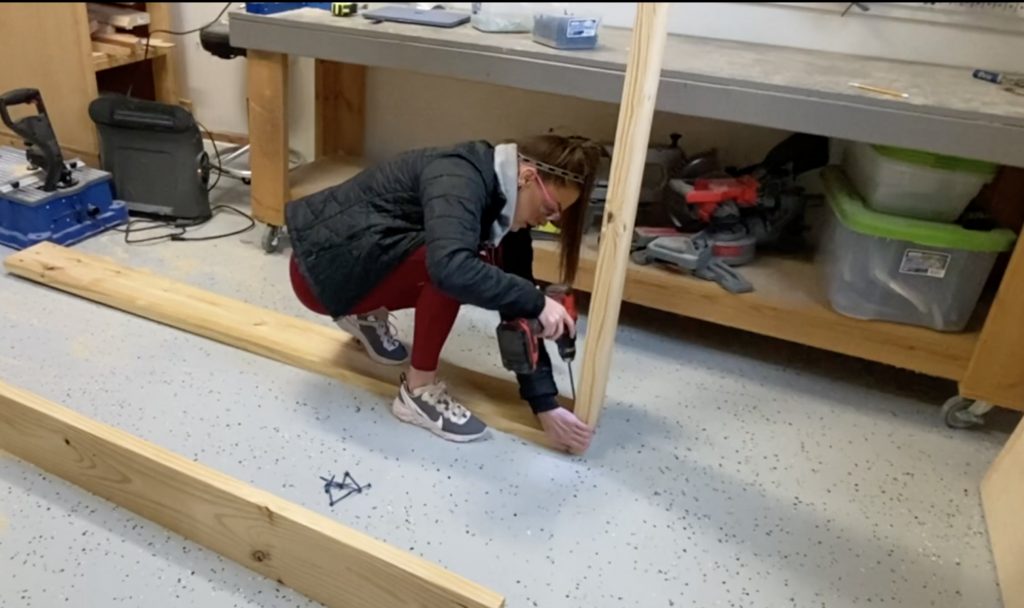
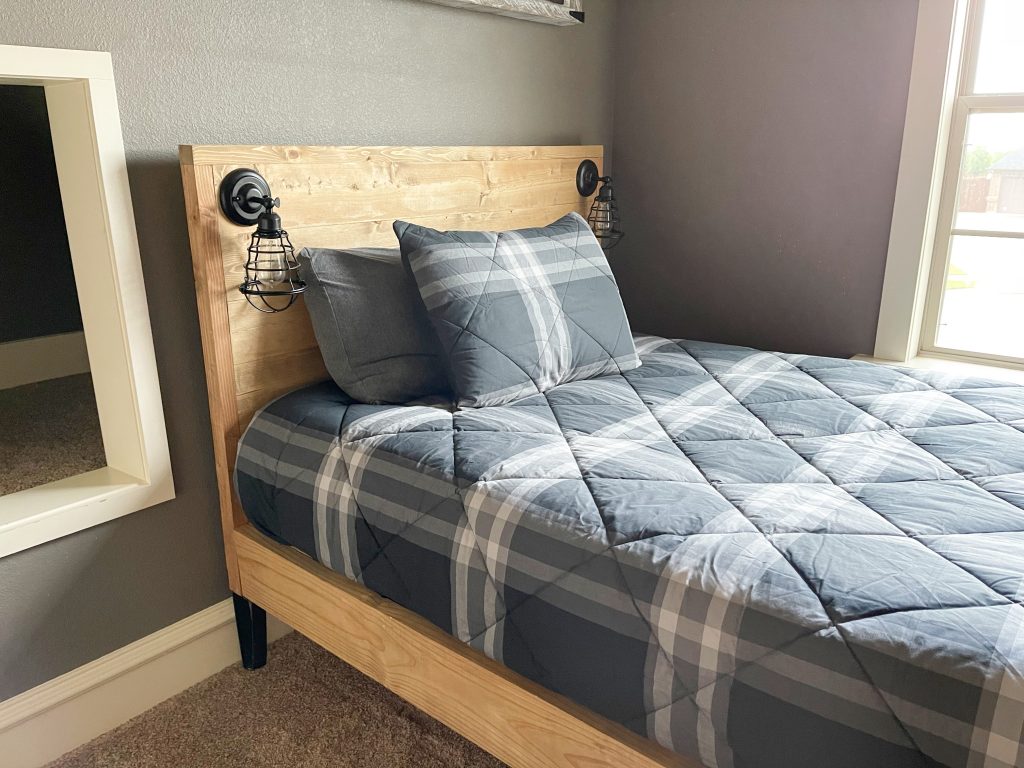
Building the Headboard – DIY Full Sized Bed
Step 1 – Planks
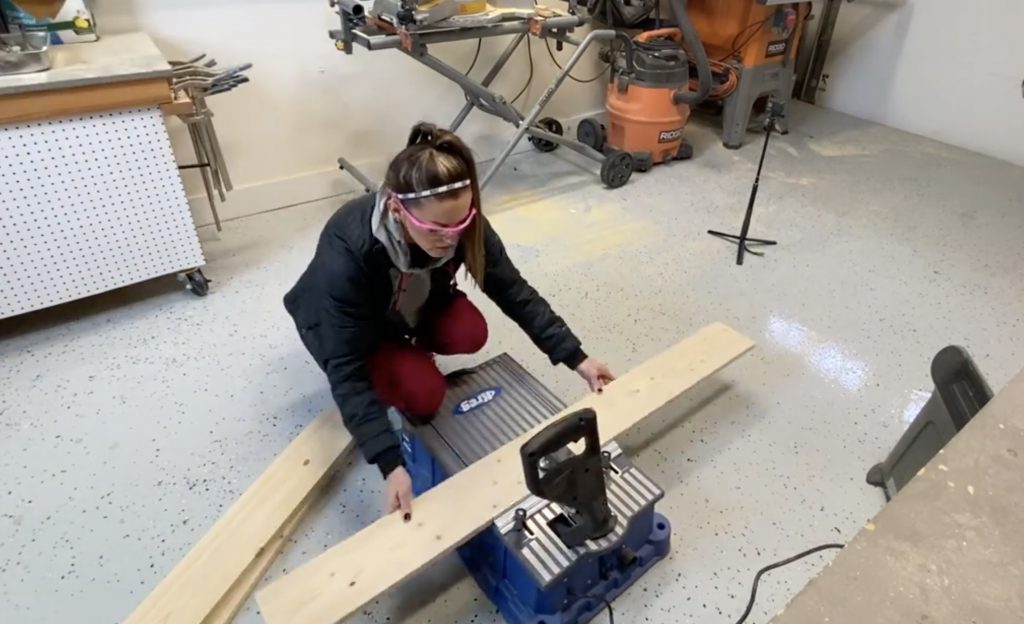
Cut the headboard slats to size and drill 3/4″ pocket holes on one edge and both ends of each of the planks.
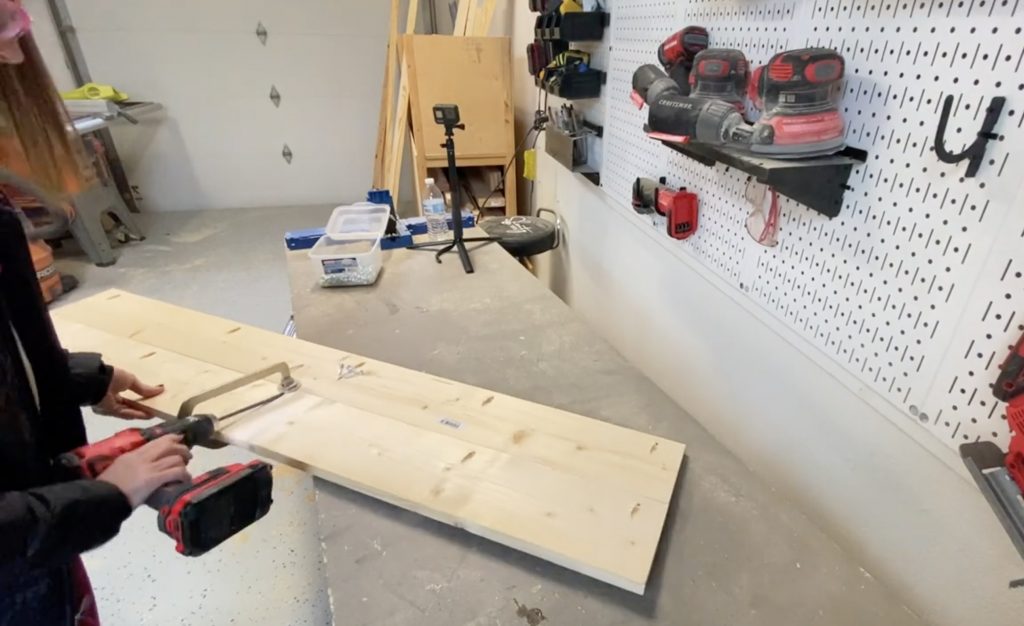
Attach them together with with 1 1/4″ pocket hole screws.
Step 2 – Side Trim
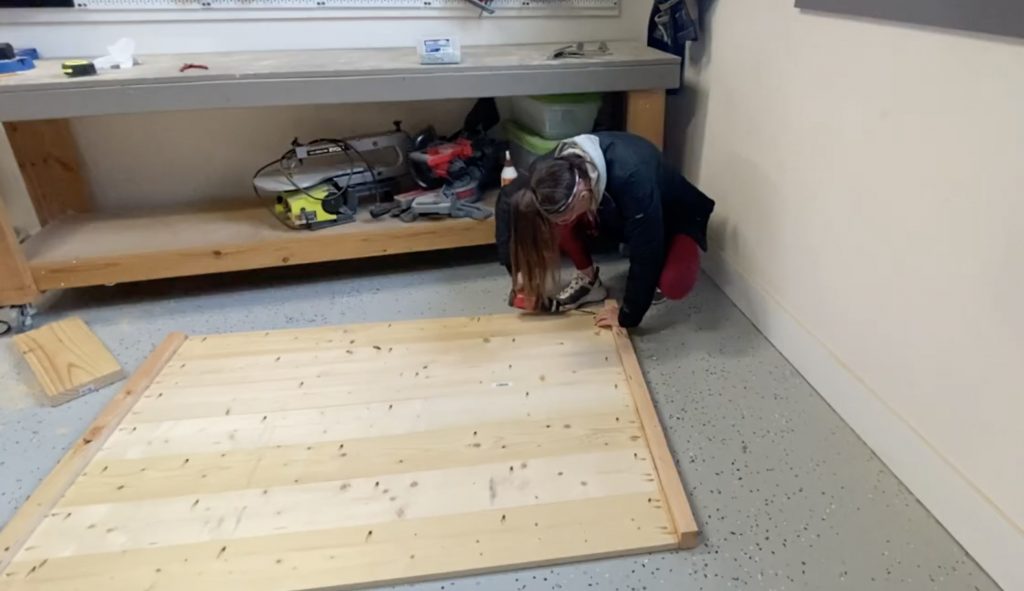
Cut the side trim to size and attach it to the sides of the planks with 1 1/4″ pocket hole screws and wood glue. The front of the trim should be flush with the front of the planks.
Step 3 – Top Trim
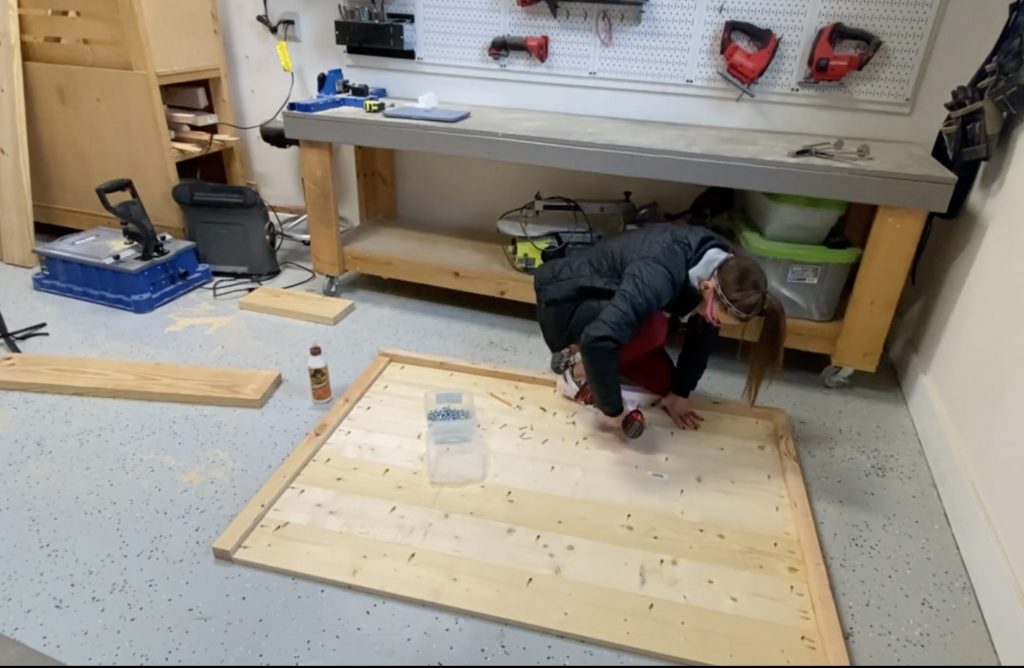
Cut the top trim to size and attach it to the top of the headboard with 1 1/4″ pocket hole screws and wood glue. It should be flush with the planks and side trim.
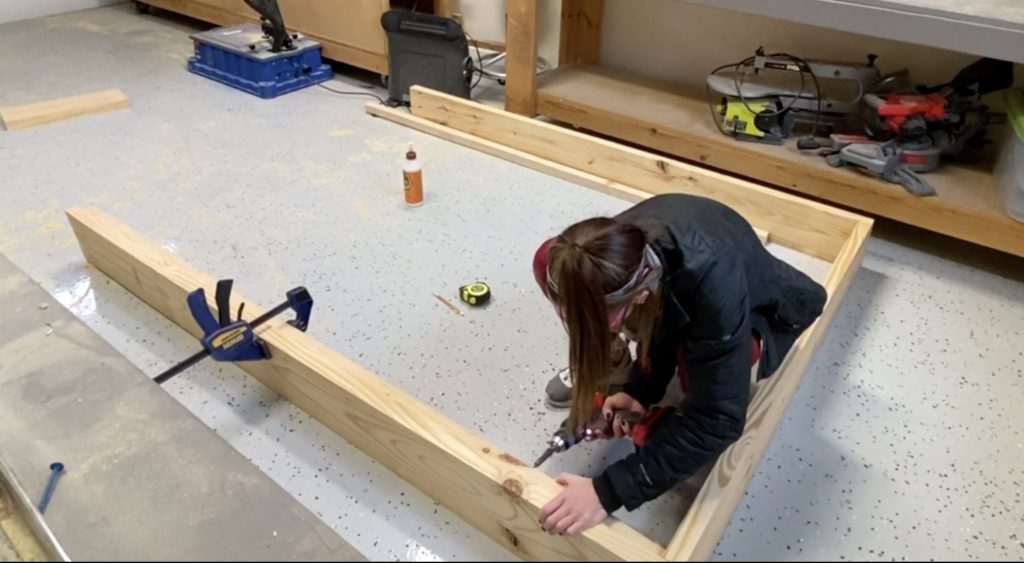
Building the Mattress Frame
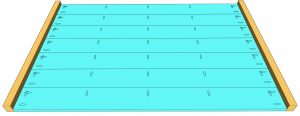
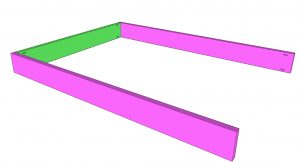
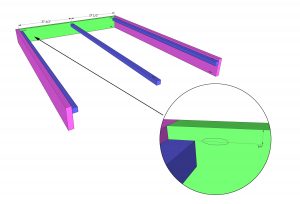
Step 1 – Rails
Cut the side rails and footboard to size. Drill 1 1/2″ pocket holes at both ends of the footboard piece and one end of each side rail. Attach the side rails to the footboard with 2 1/2″ pocket hole screws and wood glue.
Step 2 – Cleats
Cut the cleats to size and drill 1 1/2″ pocket holes on each end. Attach one cleat to the inside of each side rail with 2 1/2″ wood screws and wood glue. Attach one end to the footboard with 2 1/2″ pocket hole screws. Center the final cleat on the footboard and attach it with 2 1/2″ pocket hole screws and wood glue. The cleats should sit 3/4″ down from the top of the bed frame.
Bed Assembly
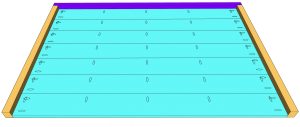
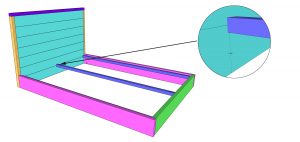
Step 1 – Attaching the Headboard to the Rails

Attach the bed frame to the headboard with 2 1/2″ pocket hole screws. The side rails should be flush with the side trim on the headboard. Note the placement of the middle cleat on the headboard.
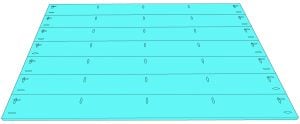
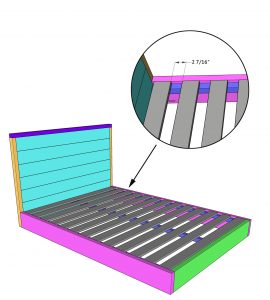
Step 2 – Slats
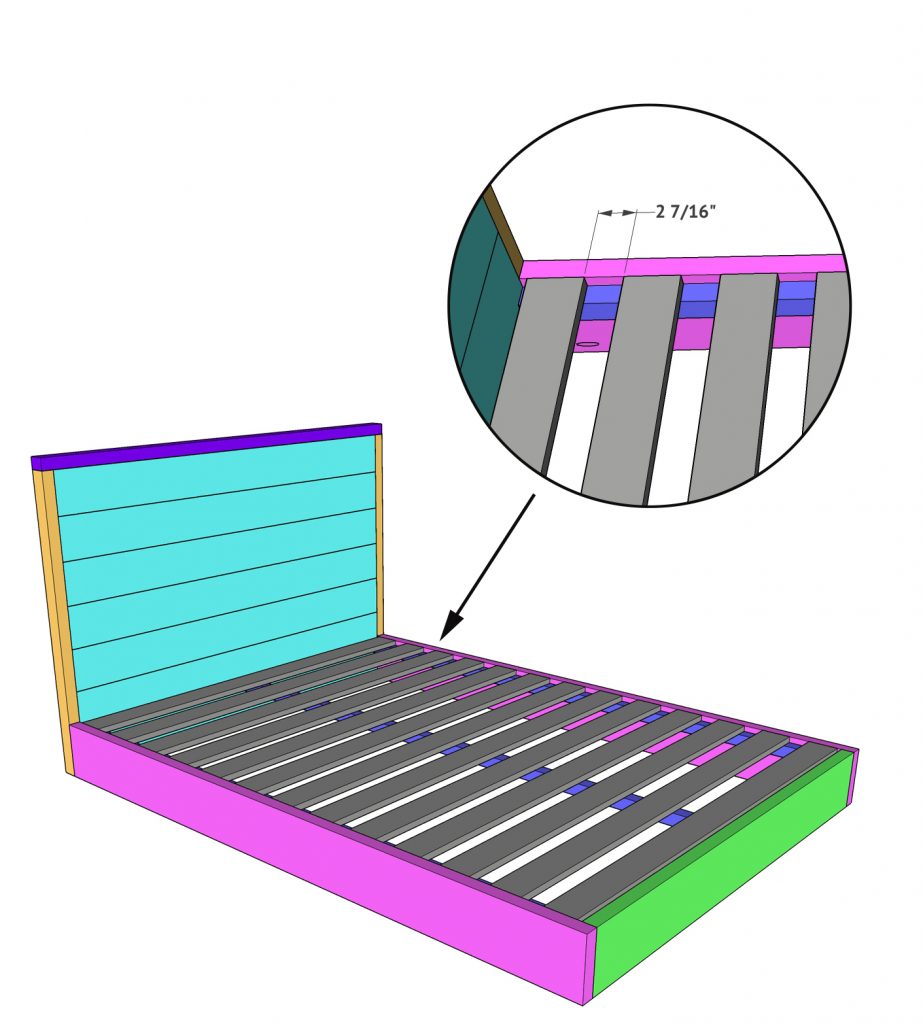
Cut the mattress slats to size and attach them to the cleats with 1 1/4″ wood screws.
Step 3 – The Finish
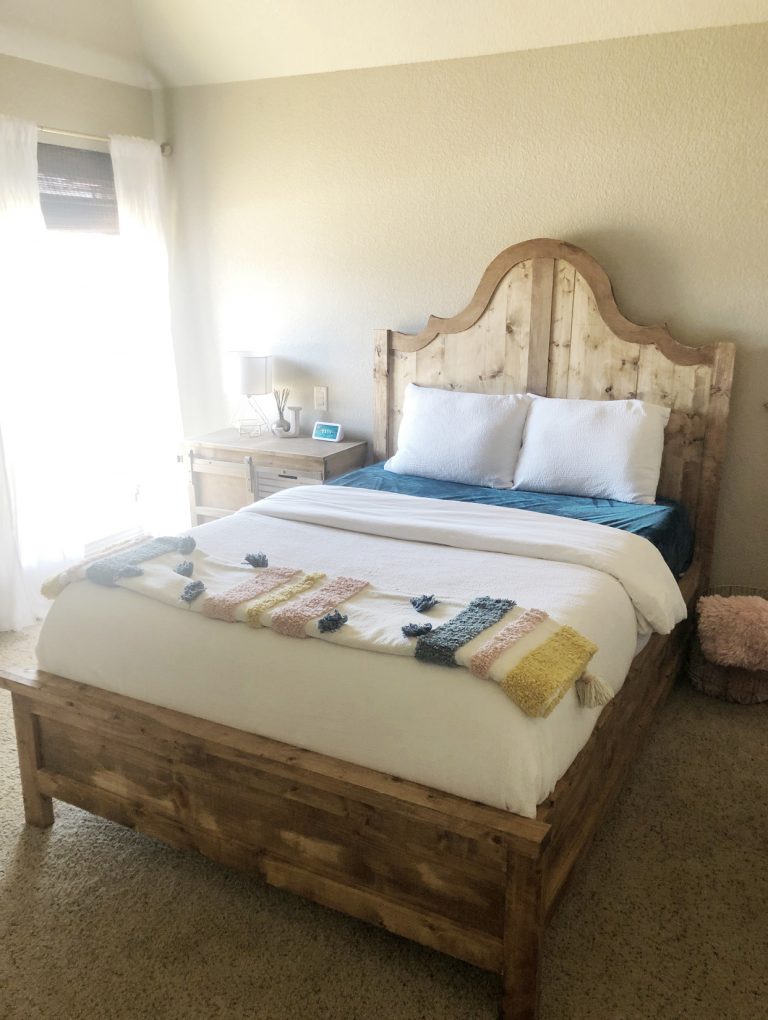
Add a finish and attach the feet and you’re done!

For the finish I I mixed 2 parts Golden Oak and 1 part Classic Gray together in a bowl and gave the entire bed one coat of stain!
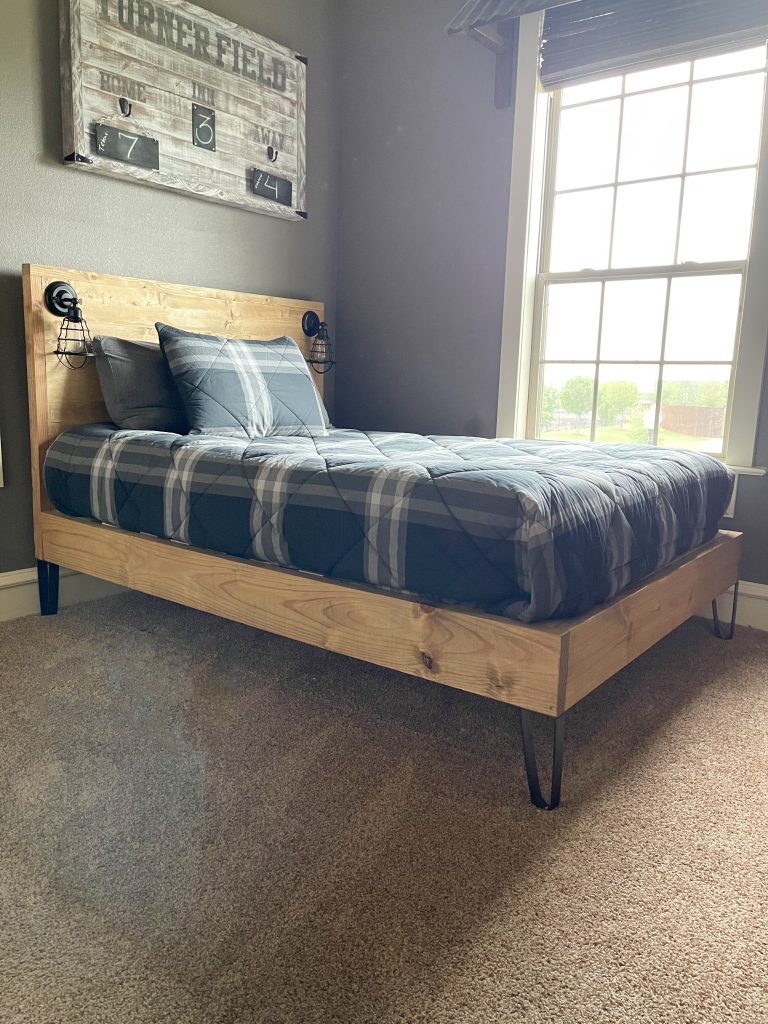
This is a great build to get creative on and make it your own! Happy Building!
You can find the bedding HERE!

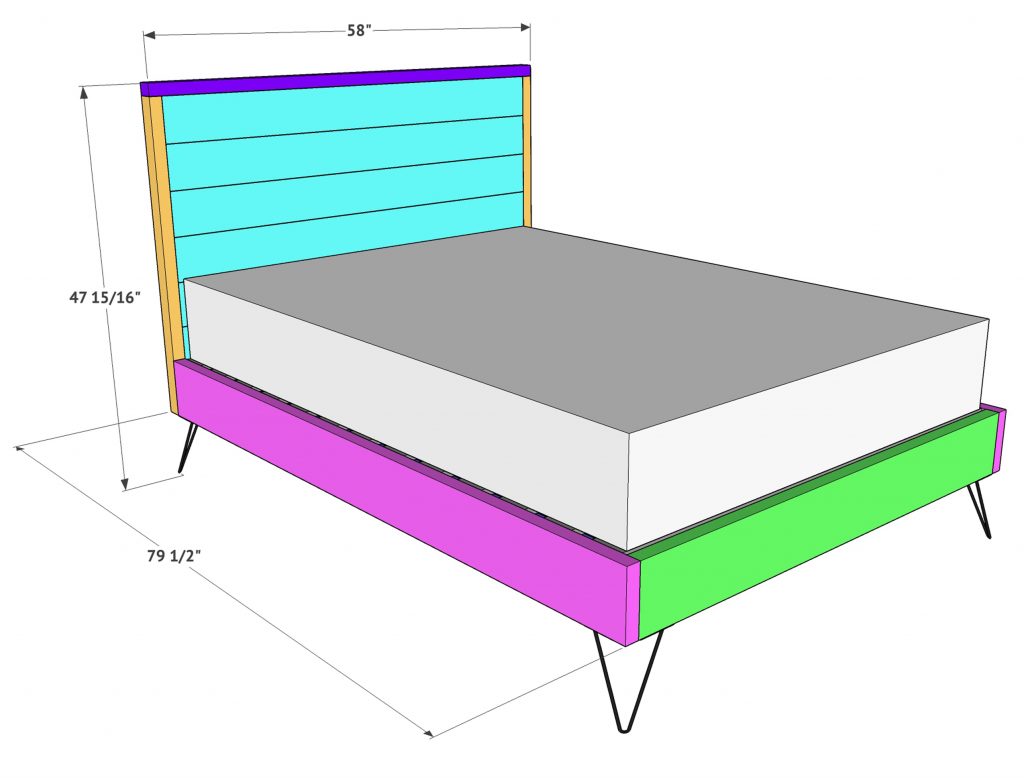
DIY Modern Full Sized Bed
Tools
- Miter Saw
- Drill
- Kreg Jig
- Table Saw (optional)
Supply List
- 3 2x8x8 Framing Lumber
- 7 1x6x8 Common Board
- 12 1x4x8 Common Board
- 2 2x2x8 Framing Lumber
- 2 2x4x8 Framing Lumber
- 1 1/4" Pocket Hole Screws
- 2 1/2" Pocket Hole Screws
- 1 1/4" Wood Screws
- 2 1/2" Wood Screws
- Wood Glue
- 4 Feet
Instructions
Cut List
- Cut List 1

- Cut List 2

Building the Headboard
- Cut the headboard slats to size and drill 3/4" pocket holes on one edge and both ends of each of the planks. Attach them together with 1 1/4" pocket hole screws.

- Cut the side trim to size and attach it to the sides of the planks with 1 1/4" pocket hole screws and wood glue. The front of the trim should be flush with the front of the planks.

- Cut the top trim to size and attach it to the top of the headboard with 1 1/4" pocket hole screws and wood glue. It should be flush with the planks and side trim.

Building the Mattress Frame
- Cut the side rails and footboard to size. Drill 1 1/2" pocket holes at both ends of the footboard piece and one end of each side rail. Attach the side rails to the footboard with 2 1/2" pocket hole screws and wood glue.

- Cut the cleats to size and drill 1 1/2" pocket holes on each end. Attach one cleat to the inside of each side rail with 2 1/2" wood screws and wood glue. Attach one end to the footboard with 2 1/2" pocket hole screws. Center the final cleat on the footboard and attach it with 2 1/2" pocket hole screws and wood glue. The cleats should sit 3/4" down from the top of the bed frame.

Attaching the Headboard to the Mattress Frame
- Attach the bed frame to the headboard with 2 1/2" pocket hole screws. The side rails should be flush with the side trim on the headboard. Note the placement of the middle cleat on the headboard.

- Cut the mattress slats to size and attach them to the cleats with 1 1/4" wood screws.

- Add a finish and attach the feet and you're done! This is a great build to get creative on and make it your own! Make sure to share your builds with us on social media and use #shanty2chic so we can share them too!Happy Building!


This modern full-sized bed design looks both sturdy and visually appealing. The clean lines and balanced proportions give it a contemporary look while still maintaining the warmth that wooden furniture naturally brings to a bedroom. The step-by-step approach also makes the build process easy to understand for anyone interested in creating custom furniture.
From an interior industry perspective, modern wooden bed frames like this are increasingly popular in residential interiors because they combine durability, minimal design, and long-term usability. Projects like this highlight how thoughtful woodworking and material selection can create furniture pieces that fit seamlessly into modern living spaces. We’ve also been following similar furniture and interior material trends across the industry here: https://plywoodbazar.com/
thanks for sharing
Hello- when you ripped your 2x4s to 2x2s did you actually make then 2” or did you make them 1 1/2”? Thank you!
Hi, Michelle, I have discovered that no one follows up on questions that are asked. So, when I built this bed, I discovered that they have you cut the 2x8x8 down to 5 in. I just used three of those scraps for the 2×2’s (no need to have all sides squared up they are not going to be visible), and they worked fine. If you need more strength in the center, you could use a 2×4 and put a support leg or two if needed (which is what I did since I was making a queen sized for a married couple). Good luck and happy building.
what inch feet did you order for feet
If you haven’t found the lamps tap on “lamp” in the materials list and it will direct you to Amazon.
Do you also make /build to sell if order??
Hi! I am super interested in making this, however I am wanting to make it for a queen bed, not a full size, and was wondering if you would be able to tell me the measurements I would need for the cuts to fit a queen sized mattress. Thank you!
Queen: 60” x 80”. I’m just adjusting from 55” to 60” & 77 1/2” to 80”. Should be easy enough.
I would love to know how this turned out with the adjustments.
Queen: 60” x 80”. I’m just adjusting from 55” to 60” & 77 1/2” to 80”. Should be easy enough.
I think the plans are missing one cleat in the cuts list. Also, it says the 2×8 side rails are ripped to 5″, but in the diagram, it looks like it should be more like 7″. If ripping down to 5″, why not use 2x6s?
Can you please give the source for the metal legs for this bed and also instructions and source for the sconces/lamps on the bed? Thank you!
Please tell, where did you find semi-industrial looking pin legs????
If you didn’t find the legs. Tap on “legs” in the materials list and it will direct you to Amazon. Same with the lamps.
How did you attached the lights?
Where did you get the bed lamps?