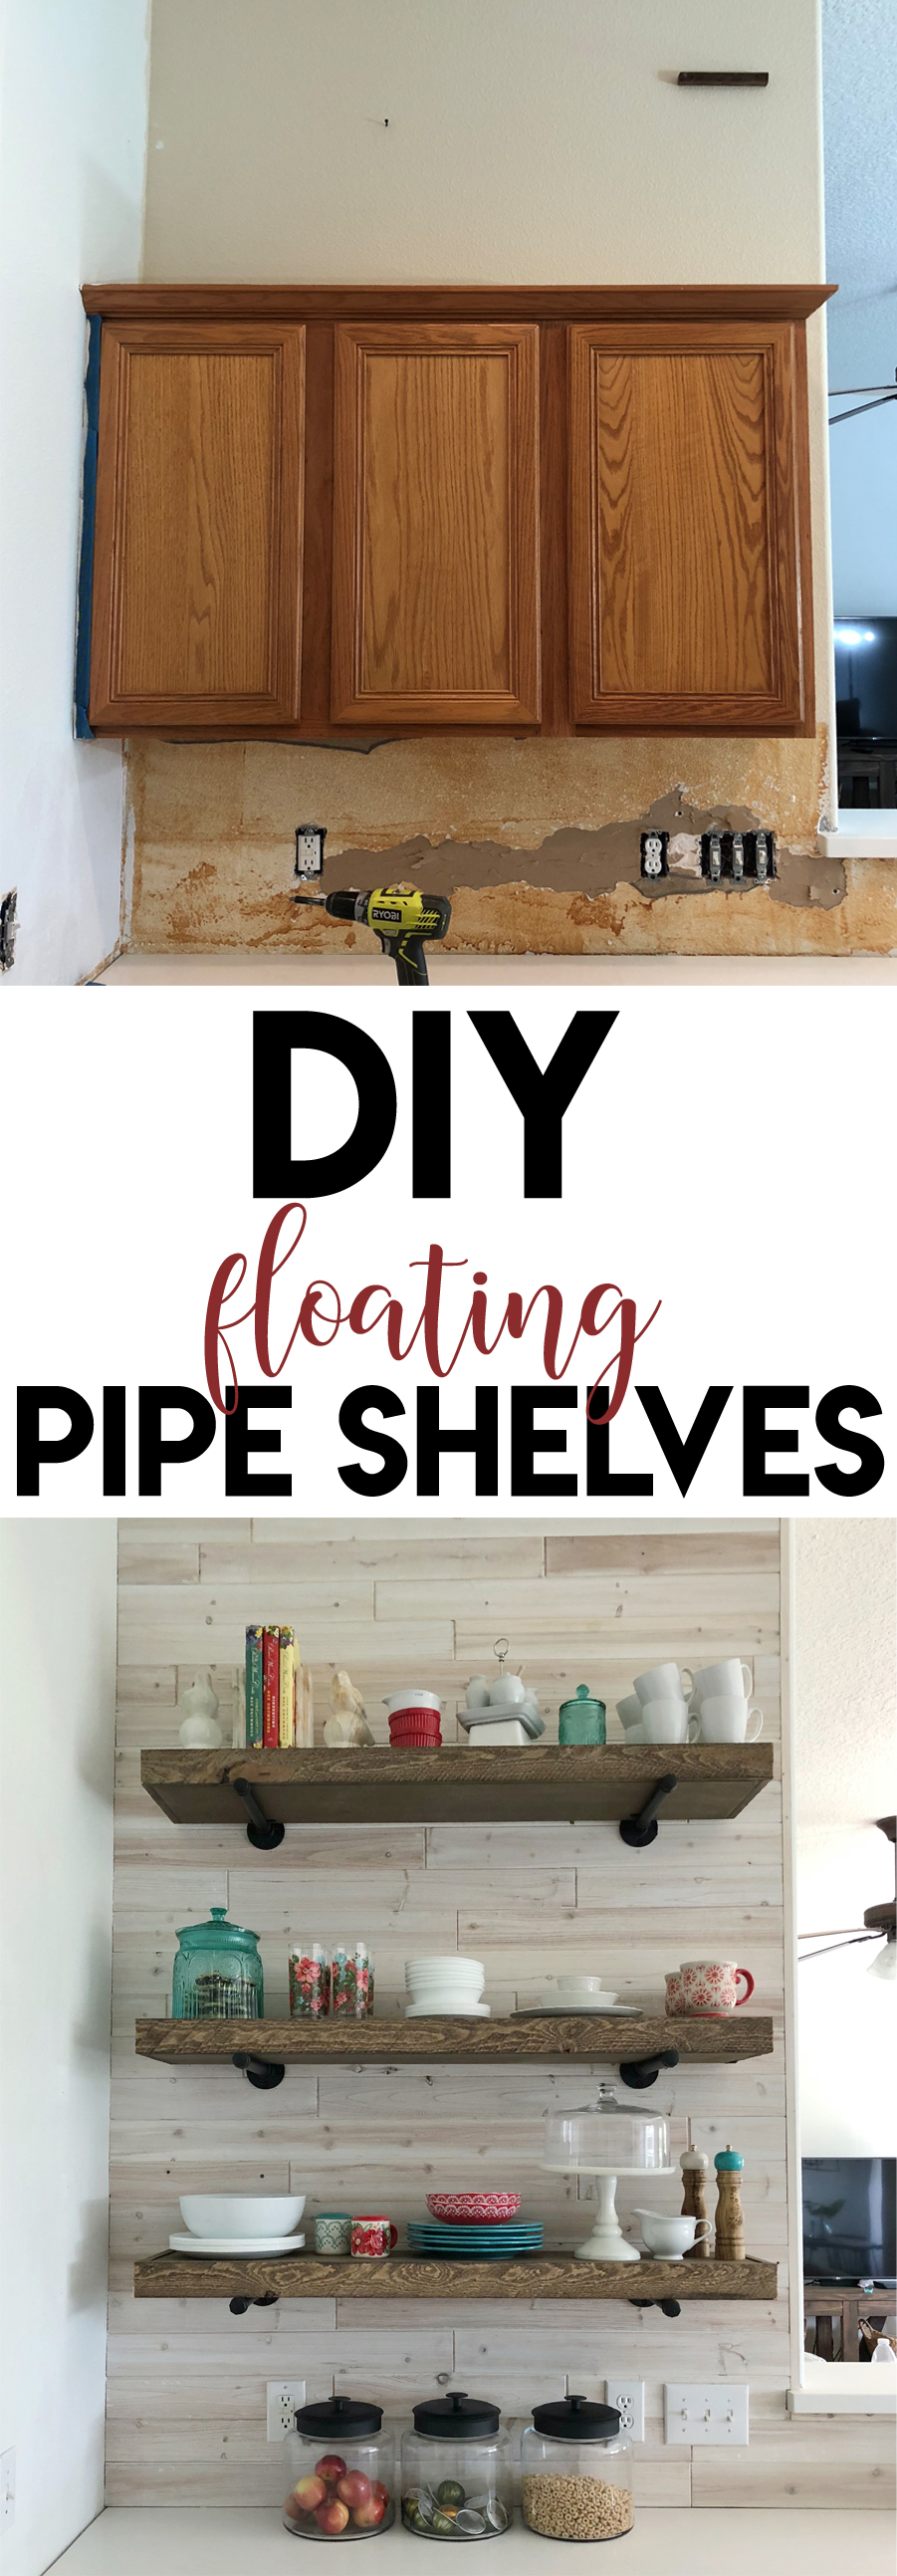
You can build these DIY Floating Shelves with pipes with the free plans and a how-to video tutorial from www.shanty-2-chic.com! We are here with another project in our sister’s shanty house crash project! As many of you remember, we recently drove to our sister’s new house in the Houston area and fixed it up for her. We spent two days knocking out several projects to make this house feel more like a home! Today we are sharing these awesome DIY floating pipe shelves we built for her kitchen. These are SO easy to build! They make a perfect beginner project! Before we get started here, be sure to check out the DIY video tutorial below! Just push the Play Button to watch!

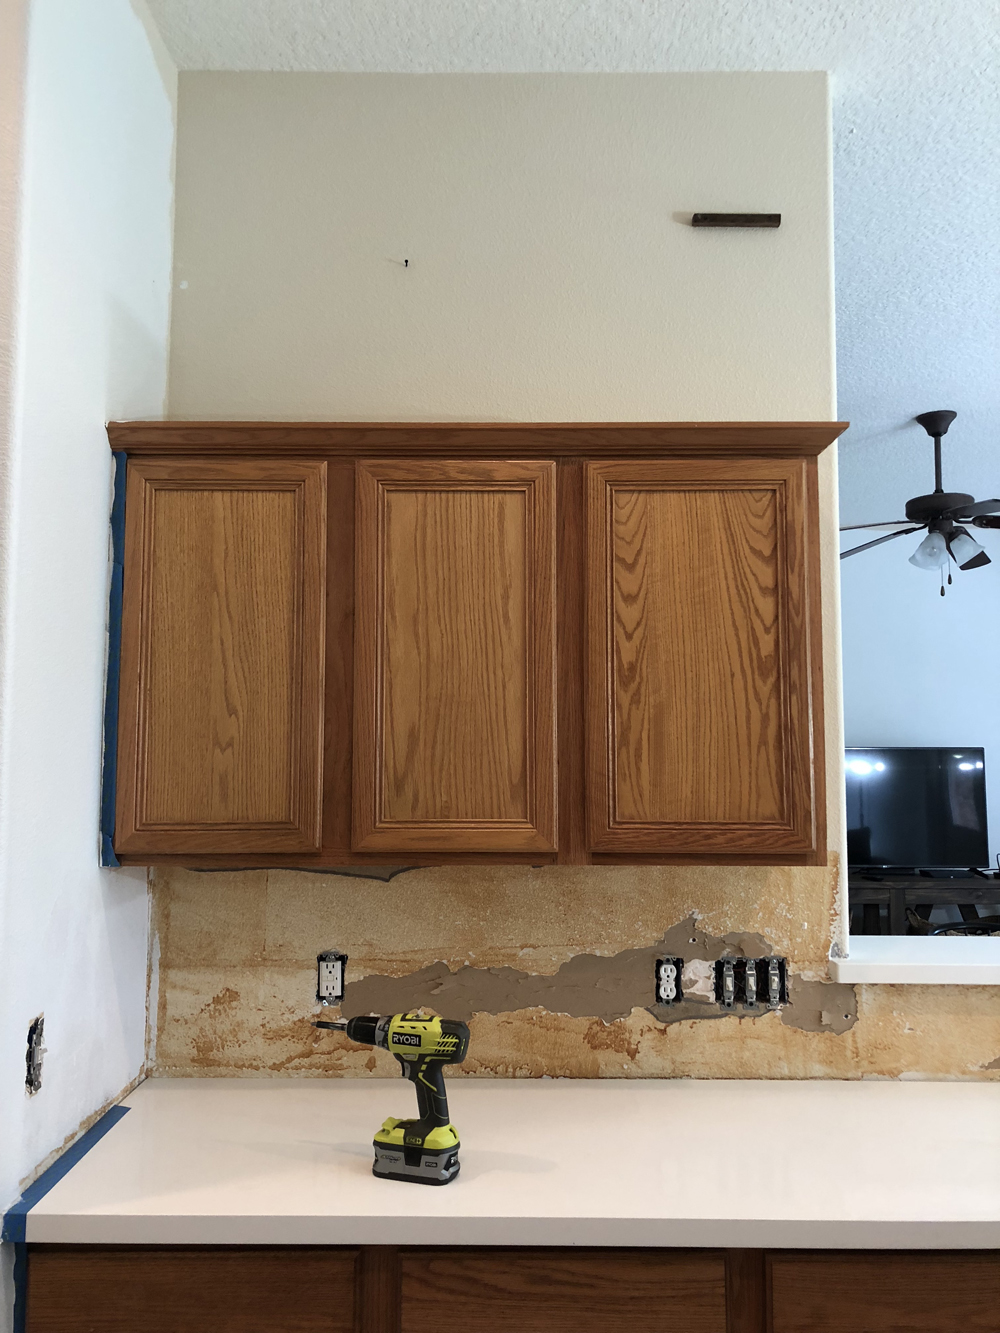
Here is how this side of the kitchen was before!
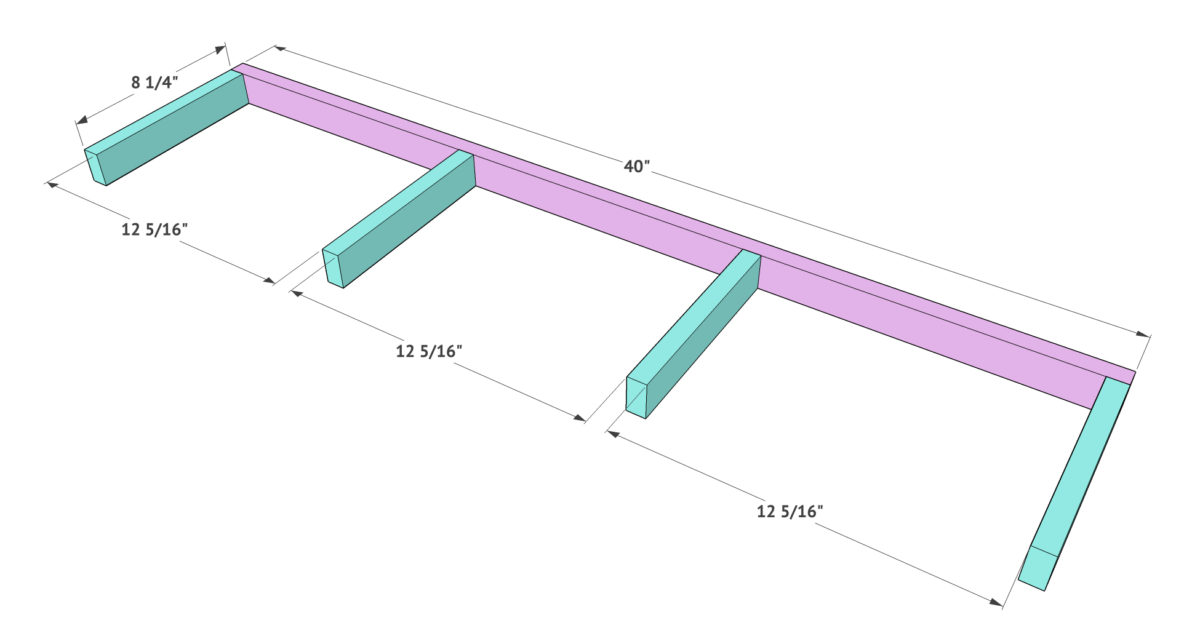
CLICK HERE TO JUMP TO THE FREE PRINTABLE PLANSAfter cutting the 1×2 to size, attach the 4 smaller pieces to one of the longer boards using wood glue and 1.25” brad nails through the long board and into the short boards. Make sure the boards on each end are flush with the ends of the longer board, and evenly space the other two boards.

HERE is a link to the Ryobi 18G nailer we used to build the shelves! We LOVE this thing. We use ours on almost every build.

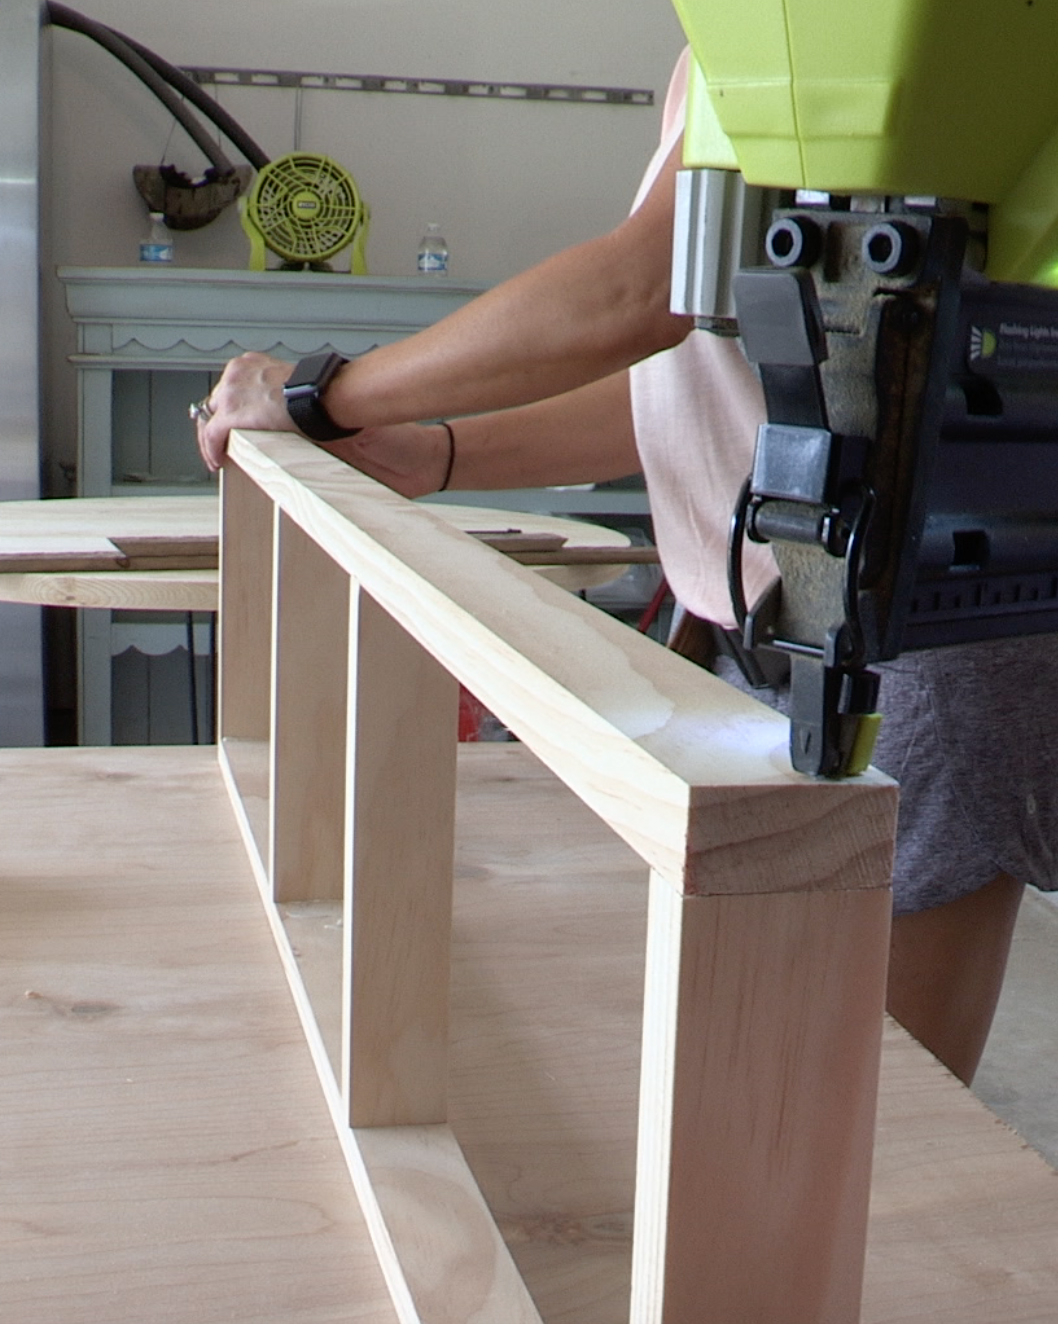
Next, attach the other long board to the opposite ends of the shorter boards using wood glue and 1.25” brad nails through the long board and into each shorter board. At this point, you should have a rectangle frame just like this.

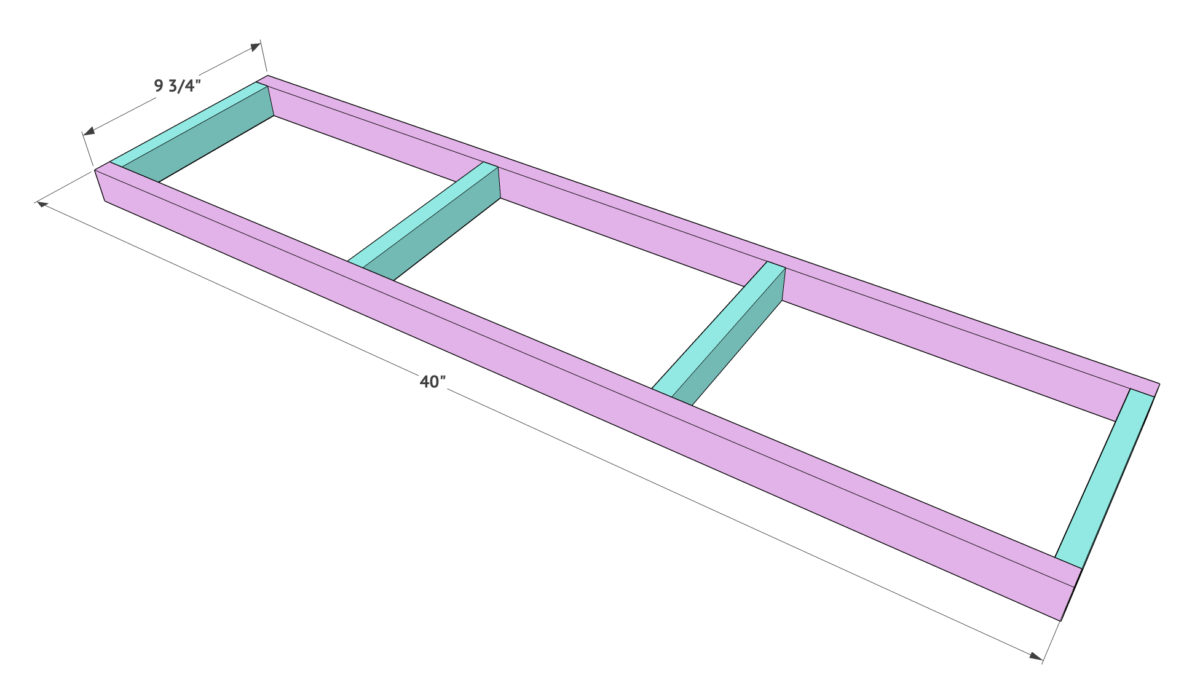
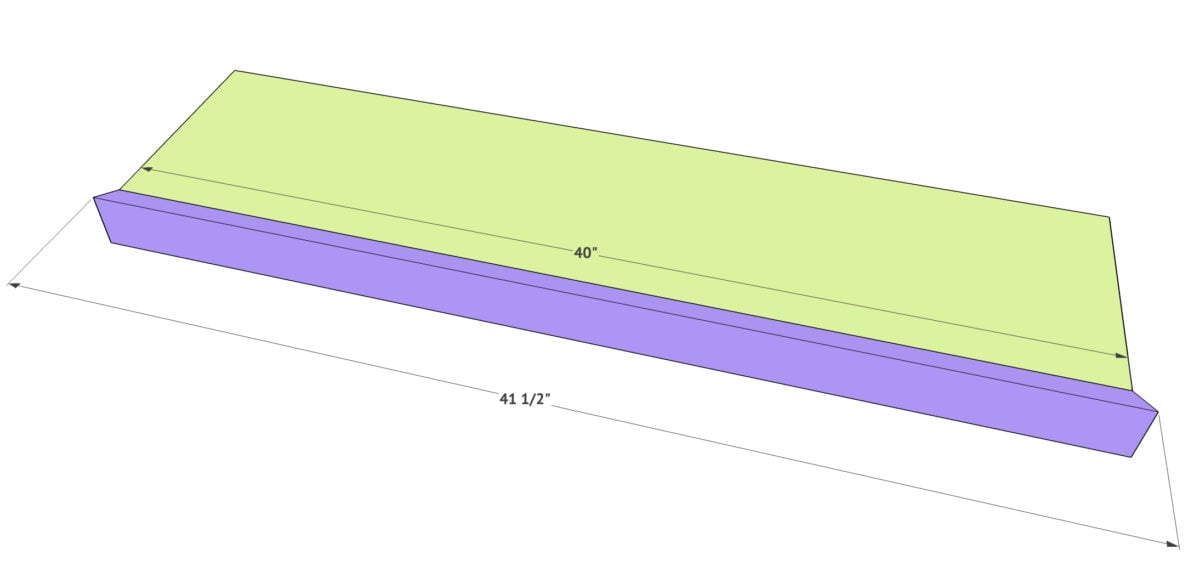
Now to add the top and bottom pieces! These are 1/2” hardwood plywood boards. We ripped each one down to 9.75” wide each. You can also have the hardware store do this for you. After cutting those to the correct length, attach them to the top and bottom of the shelf frame using wood glue and 1.25” brad nails through the plywood and into the frame.
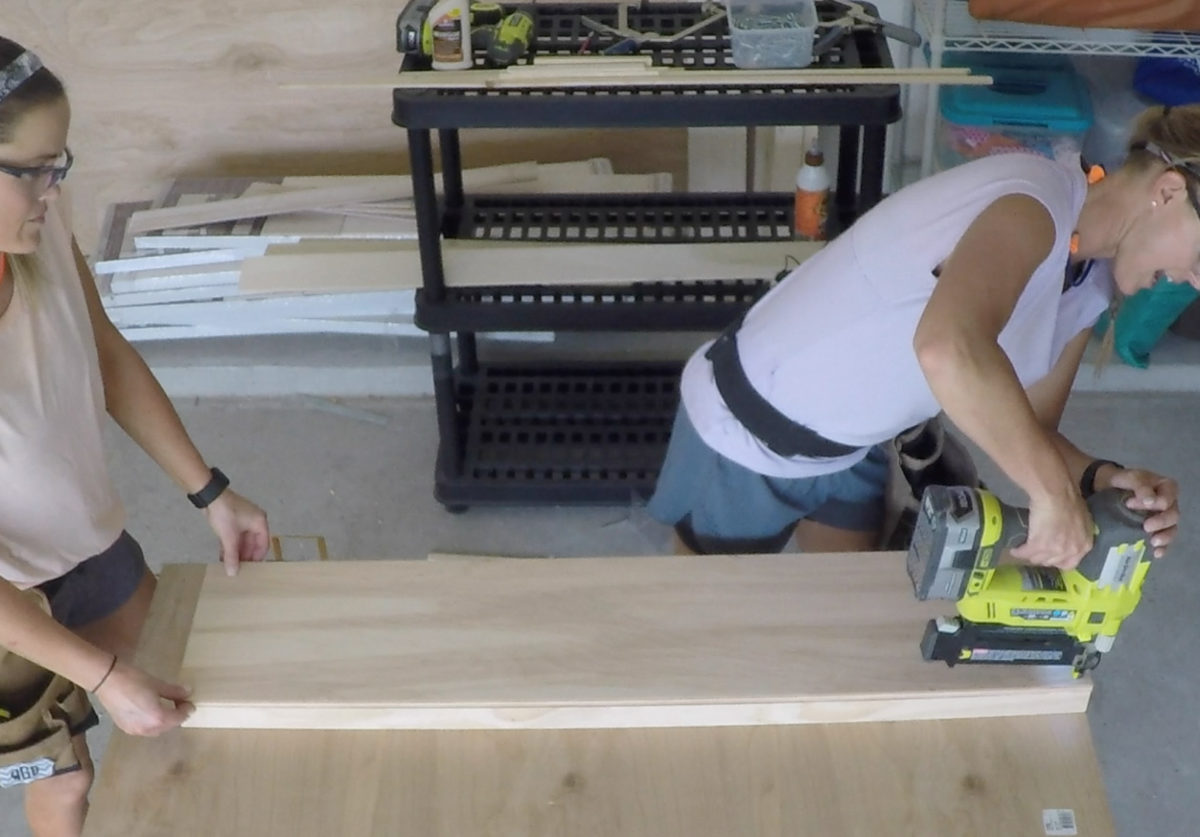

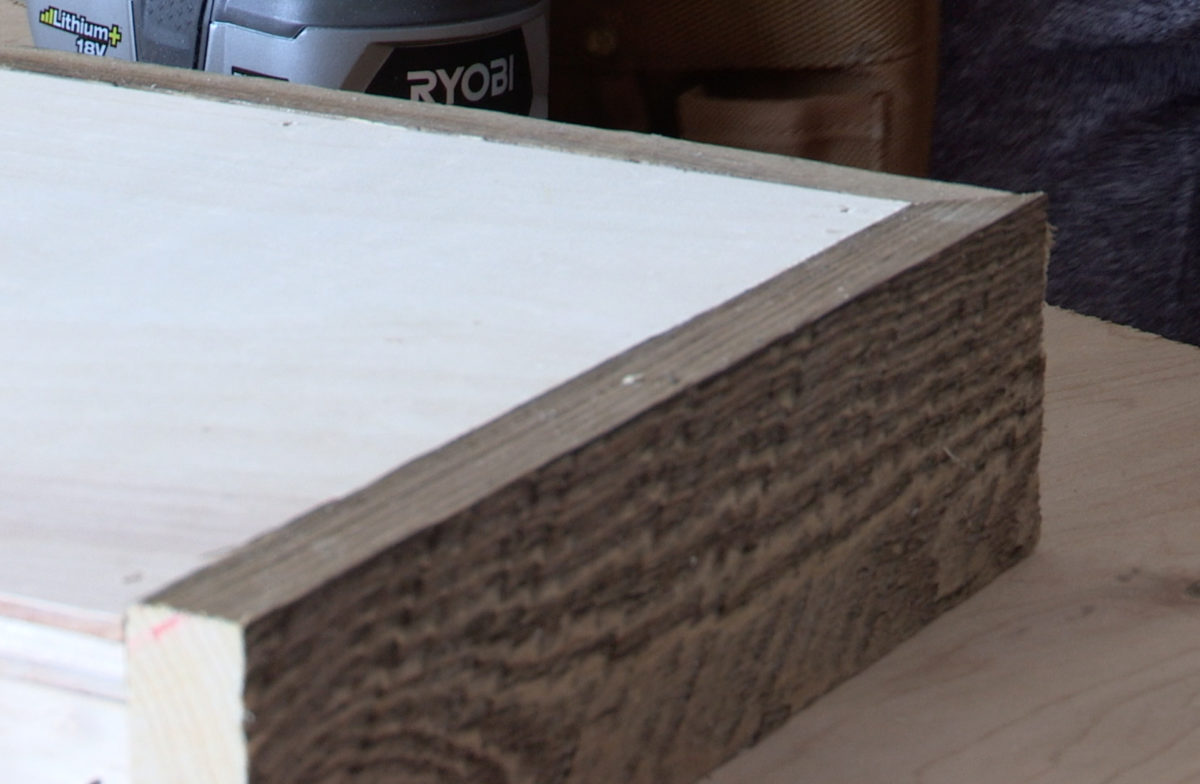
Now to add the trim. We ripped barnwood down to 2.5” each. You can buy the same barn wood we used! HERE is a link to it! You can also use a 1×3 board and you won’t have to rip yours down. Cut the first piece to size. We cut each end at a 45˚ angle. The short point of each angle will be flush with the length of the shelf you have built so far. Attach the trim piece using wood glue and 1.25” brad nails through the trim and into the shelf.
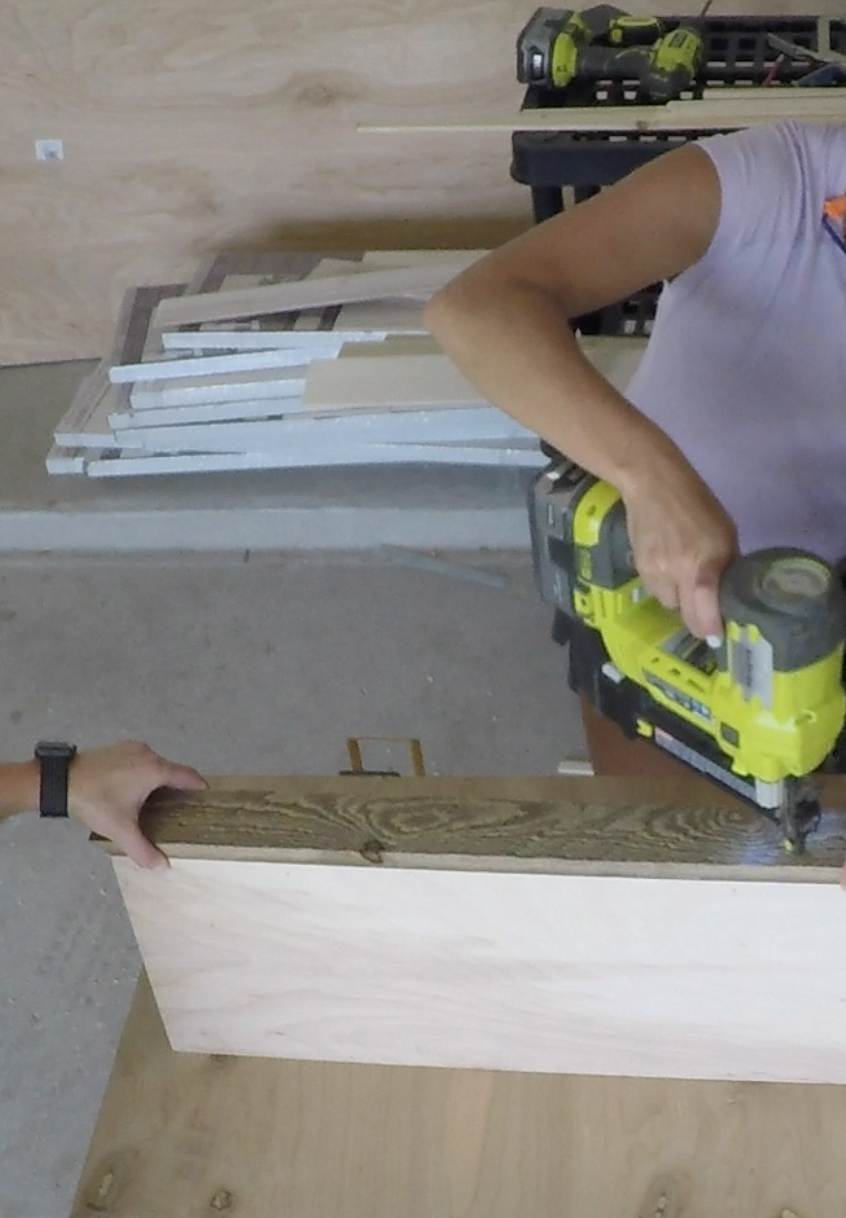
Cut each side piece next. The front of these boards is cut at a 45˚ angle, and the back is cut straight and flush with the back of the shelf. Attach these boards using wood glue and 1.25” brad nails.

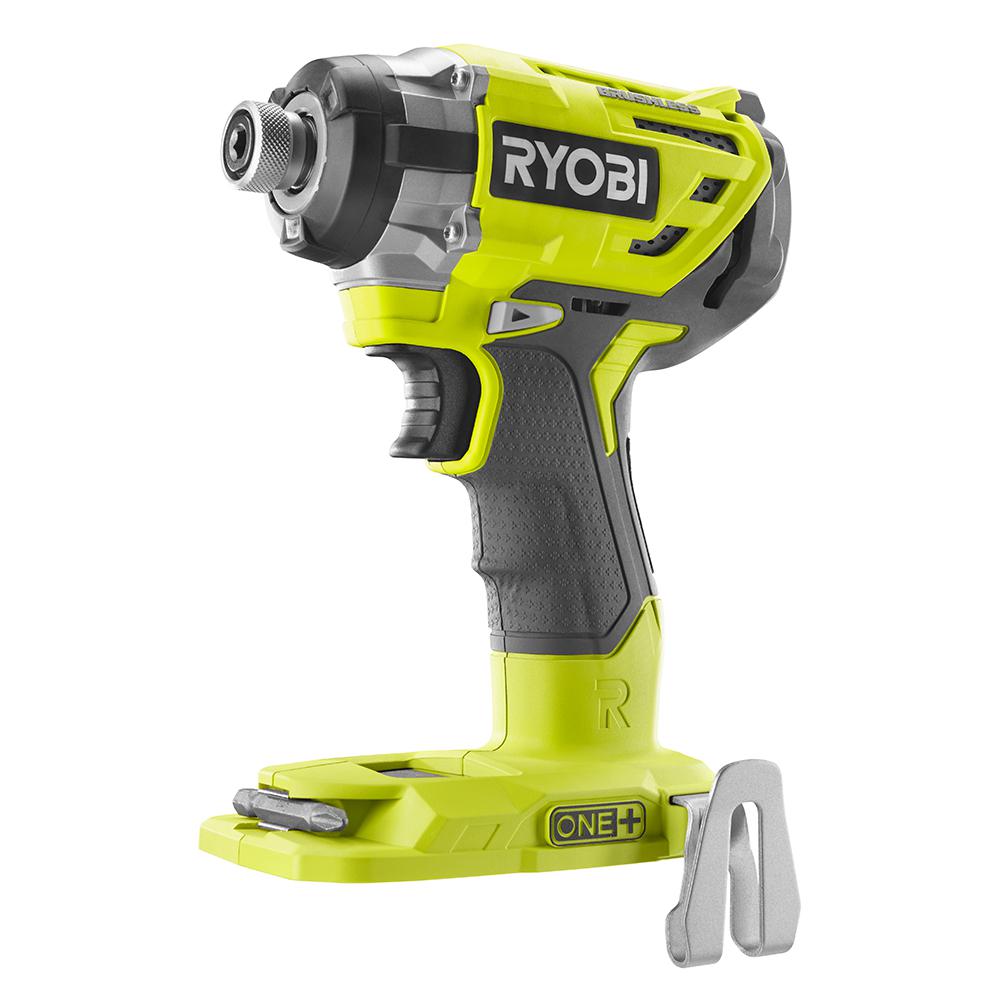
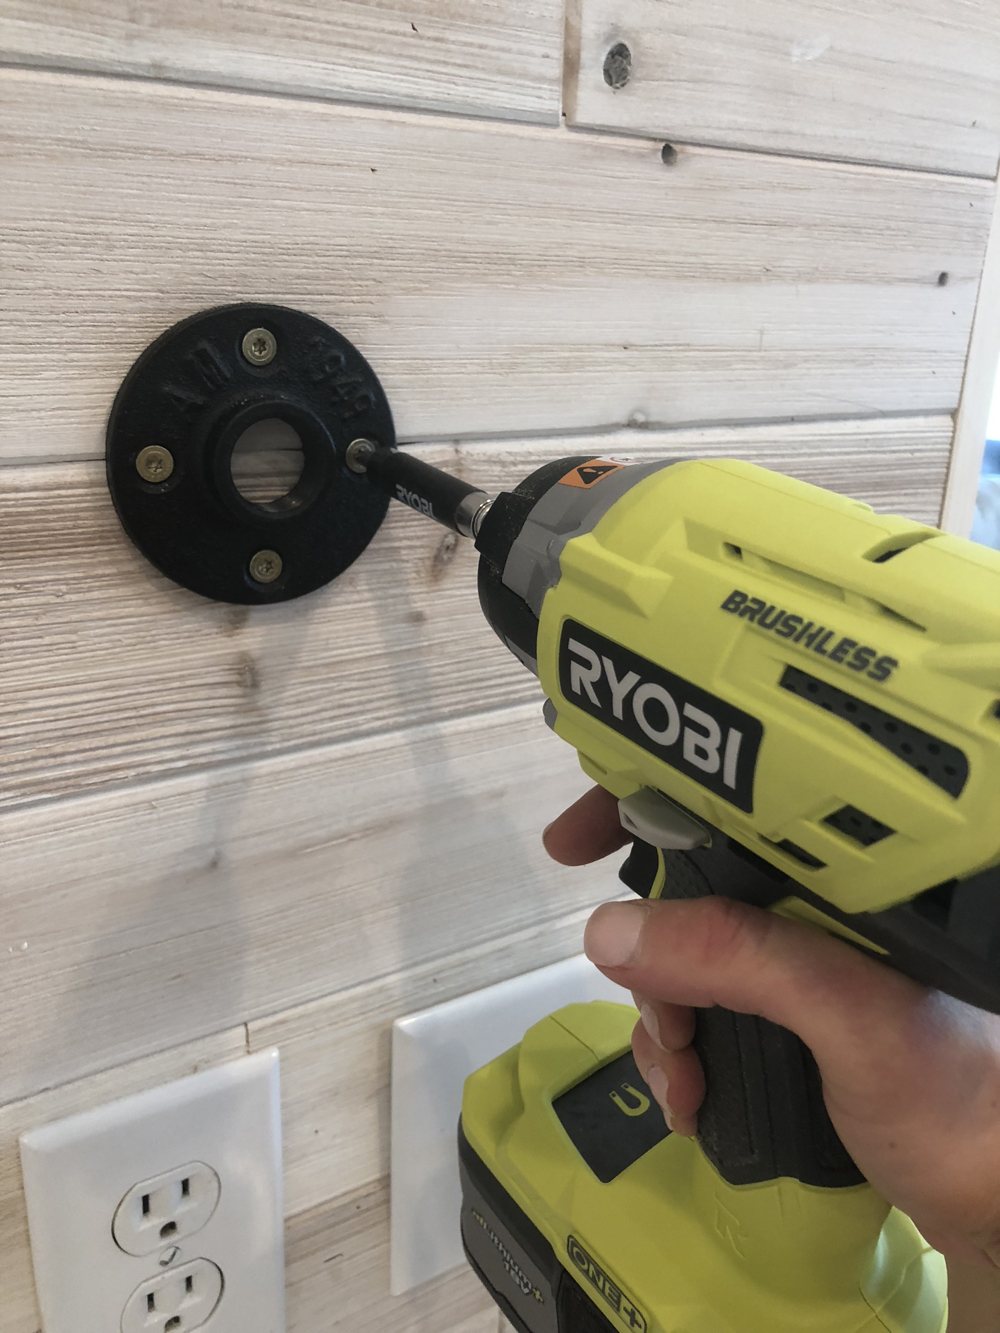
All finished! Before hanging your pipe brackets, stain or paint your shelves and let them dry. Be sure to check out our video to see how we attach the brackets! It’s super simple! To make this even easier, I used my Ryobi Brushless Driver to attach the pipes to the wall. This thing is the BEST! Click HERE for the link!
You can find the link to the pipes we used HERE!


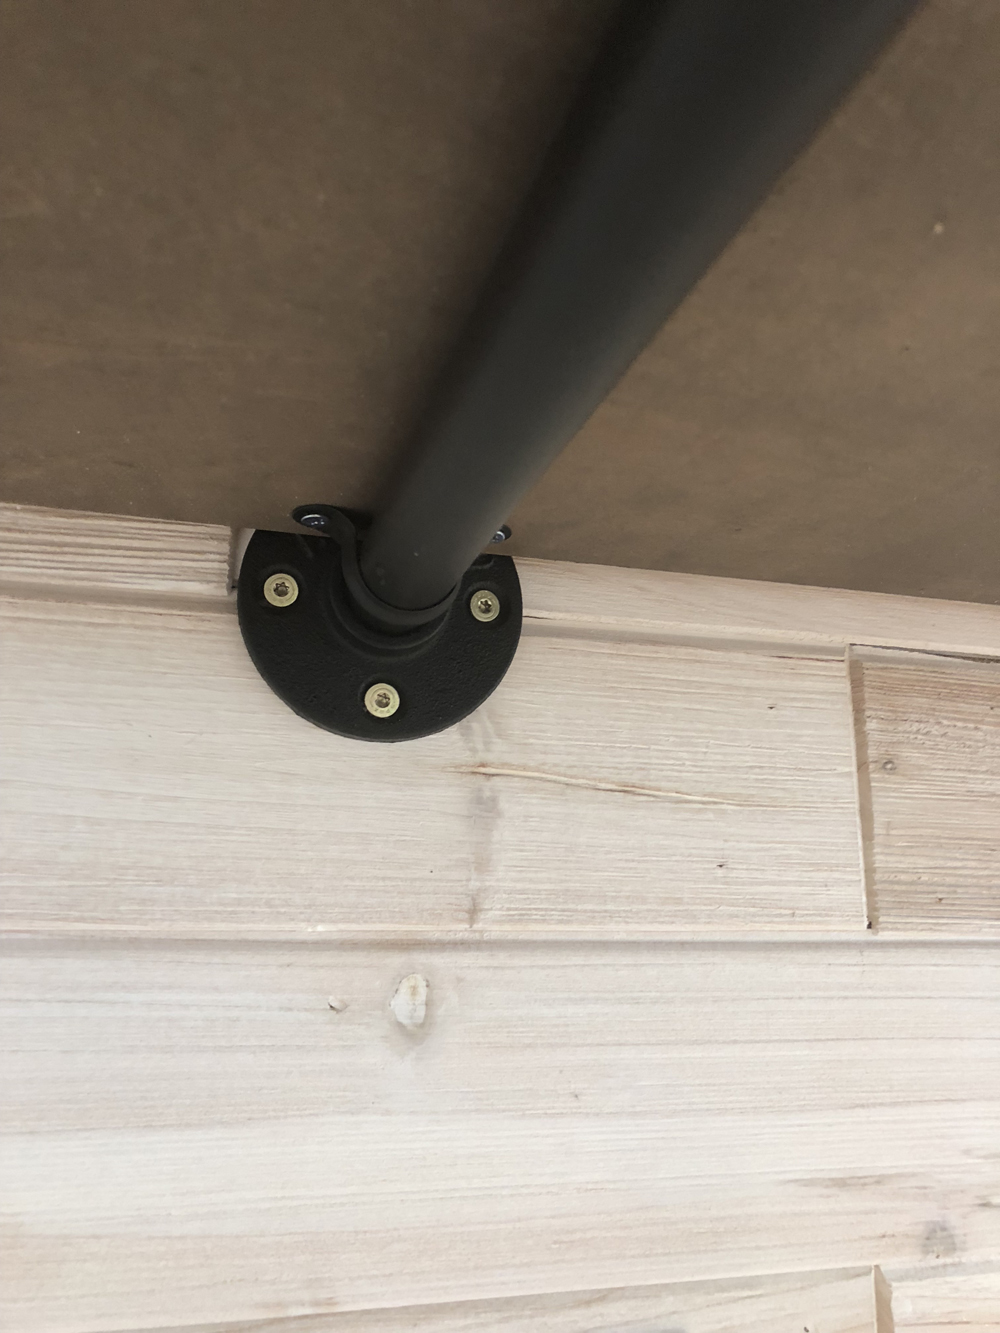
After we attached all of the pipes, we set the shelves on top, and locked them in place with the brackets that come with the pipes!
Floating Pipe Shelves
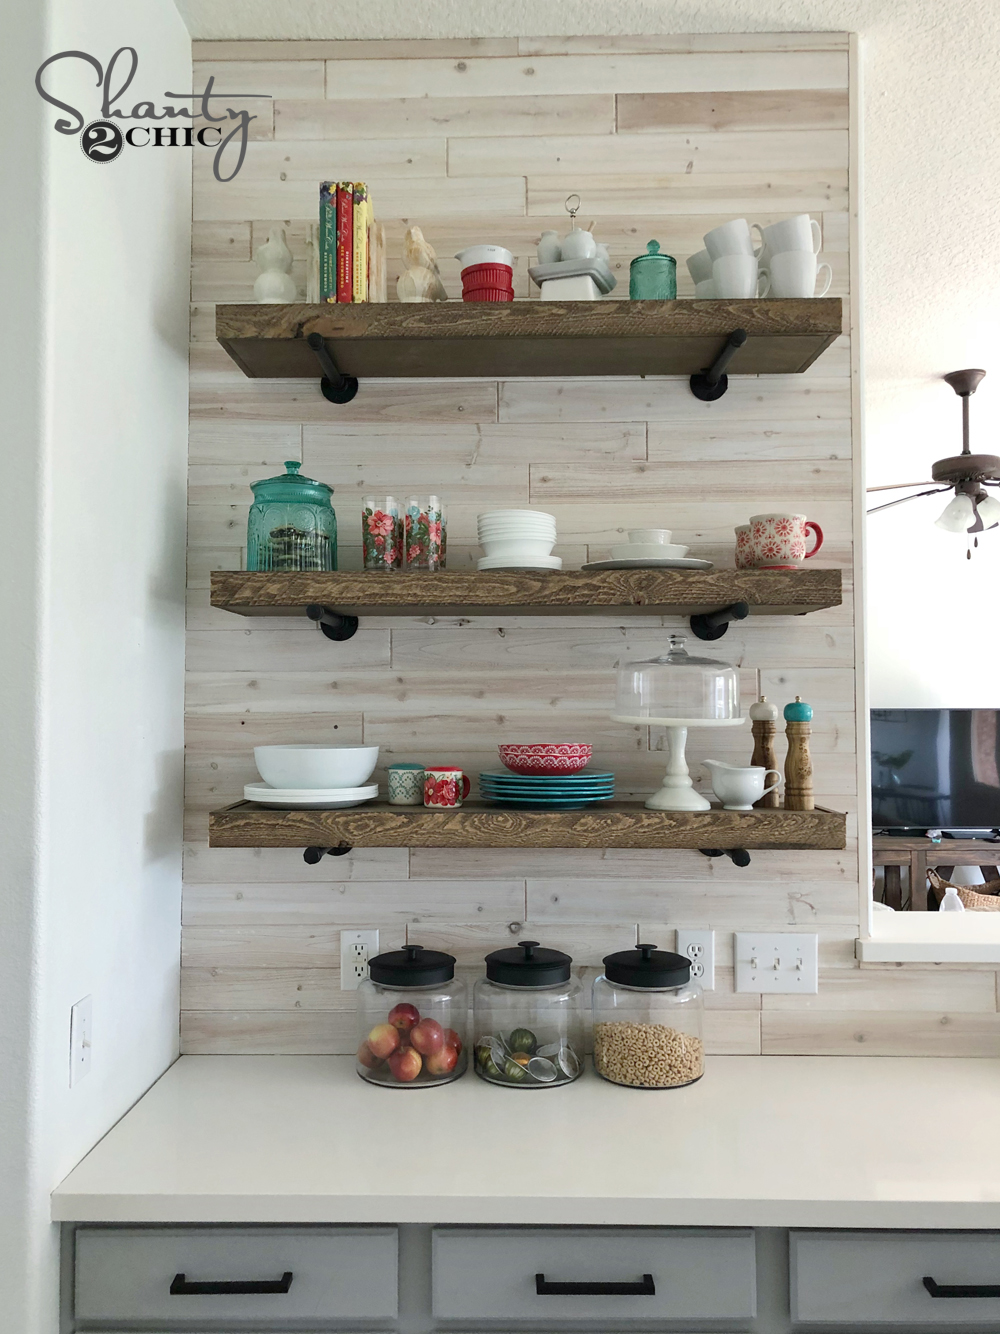
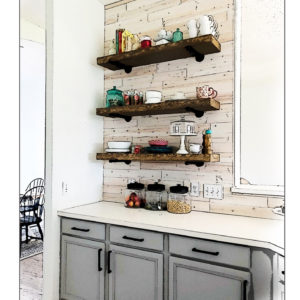
Here they are all set in place…

We were happy about it…
We used THIS STAIN to match the wood we used on the trim!
Also, be sure to share your shelves that you build and use #shanty2chic so that we can see them and share them with our readers! Let’s look at how cute these turned out again! Remember the before…
Now look at the after!


And… Here are links to ALL the cute stuff we decorated this kitchen with!
DIY Floating Shelves
Supplies
- 2 1x2x8 Pine or Whitewood
- 1 1/2″x24″x48″ Hardwood Plywood
- 1 2.5″ barnwood trim
- 2 Metal Pipe Shelf Brackets
- Wood Glue
- 1 1/4″ brad nails
Instructions
- Cut List

- After cutting the 1x2x8 to size, attach the 4 smaller pieces to one of the longer boards using wood glue and 1 1/4″ brad nails, though the long board and into the short boards. Make sure the boards on each end are flush with the ends of the longer board and evenly space the other two boards.

- Next, attach the other long board to the opposite ends of the shorter boards using wood glue and 1 1/4″ brad nails, through the long board and into each shorter board. At this point, you should have a rectangle frame just like this.

- Now, to add the top and bottom pieces! These are 1/2″ hardwood plywood boards. We ripped each one down to 9 3/4″ wide each. You can also have the hardware store do this for you. After cutting those to the correct length, attach them to the top and bottom of the shelf frame using wood glue and 1 1/4″ brad nails, through the plywood and into the frame.

- Now to add the trim. We ripped barn wood down to 2 1/2″ each. You can also use a 1×3 board and you won’t have to rip yours down. Cut the first piece to size. We cut each end at a 45° angle. The short point of each angle will be flush with the length of the shelf you have built so far. Attach the trim piece using wood glue and 1 1/4″ brad nails, through the trim and into the shelf.

- Cut each side piece next. The front of these boards is cut at a 45° angle, and the back is cut straight and flush with the back of the shelf. Attach these boards using wood glue and 1 1/4″ brad nails.

- All finished! Before hanging your pipe brackets, stain or paint your shelves and let the dry. Be sure to check out our video to see how we attach the brackets! It’s super simple! Also, be sure to share your shelves that you build on social media and use #shanty2chic so that we can share them too!


I love the floating shelves!!!!! Thanks for sharing 🙂
Like the shelves..how about the wall, is that tile or wood? Would like to see that video.
I finished building the shelves to spec, and found that the recommended support pipes are too short to fit the shelves snugly between the brackets. I can make them fit, but they don’t rest flat on the pipes. But sure what happened here as yours seem to fit perfectly.
the stain above that you used, link is not working. could you please repost what stain you used?
I also love the backsplash – how is it done?
I love these shelves, and I’m hoping to do them over my new buffet in my dining room! Would it be okay if I made the shelves 48 inches wide? Would I need another bracket in the middle? I might just make them 44 inches wide if the 48 is too much. TIA!
What material/product is the wood backsplash?
Hello there. Definitely a do-it-yourself project. Thank you for sharing.
What did you use on the cabinets before you painted them with the dorian grey color? I would like to do the same color on my kitchen cabinets but not sure what I need to use prior to painting.
Love the look of these… They really aren’t going shelves done you clearly see where they rest on the pipes.