I have been in serious Spring cleaning/nesting mode over the last few weeks! I recently took the plunge and painted all of my trim and doors downstairs white. When we built the house in 2008, I went with a very creamy beige. I was ready to freshen and brighten everything up! I had the walls painted about a year ago. They are a very light grey called Dolphin Fin by Behr. I kept my trim the same color at that point to save money, but the yellow tone of the trim made my walls look blue. It’s crazy how colors can play tricks on your eyes! Now it’s all fixed! I went with Pure White by Sherwin-Williams for all of my doors and trim and I was happy! Well, almost happy! We have a huge stone fireplace in our living room. It really is the first thing you see when you walk in the door, and it’s the focal point of the inside of the house. It’s the same stone I have on the exterior, and I do love it, but crave change. I have considered lots of different options, from covering it with tile or even removing it altogether, but nothing fit my budget or felt right. Then, I ran across a picture of a fireplace on Pinterest. It appeared they had used some kind of white plaster to cover it. That’s all it took! The photo didn’t have details, but gave me the courage to give it a shot. I decided to do a German schmear on the stone. I have seen it done on brick a bazillion times and absolutely love it, but I questioned what it would look like on stone. Well… Here is how it turned out!
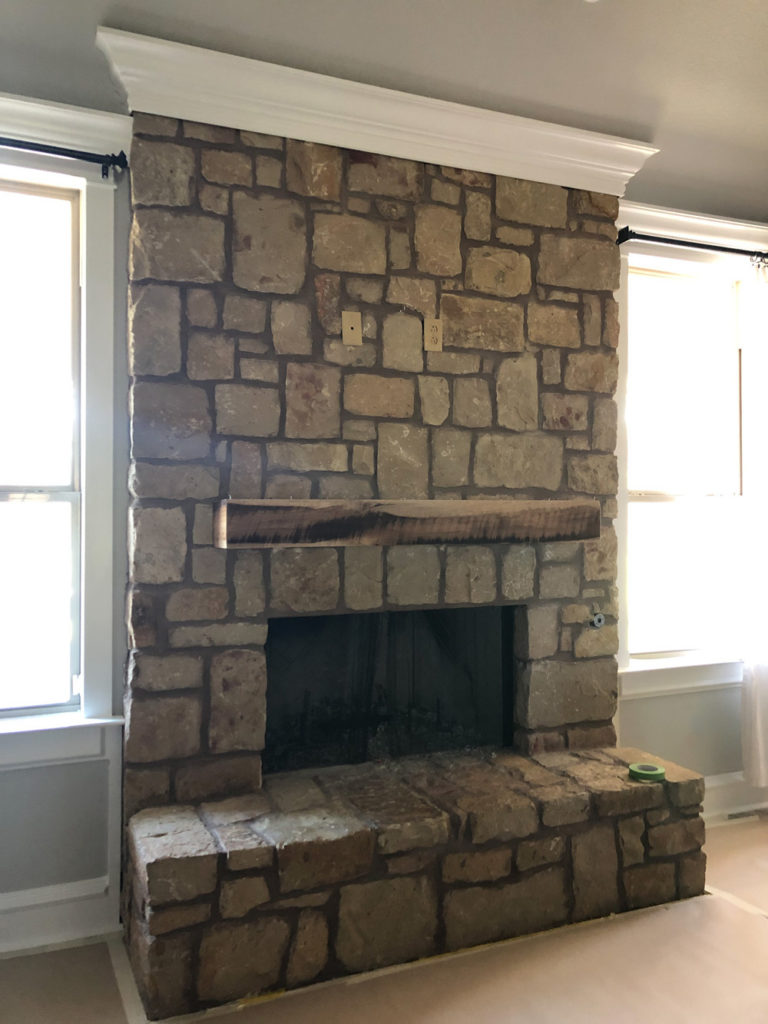
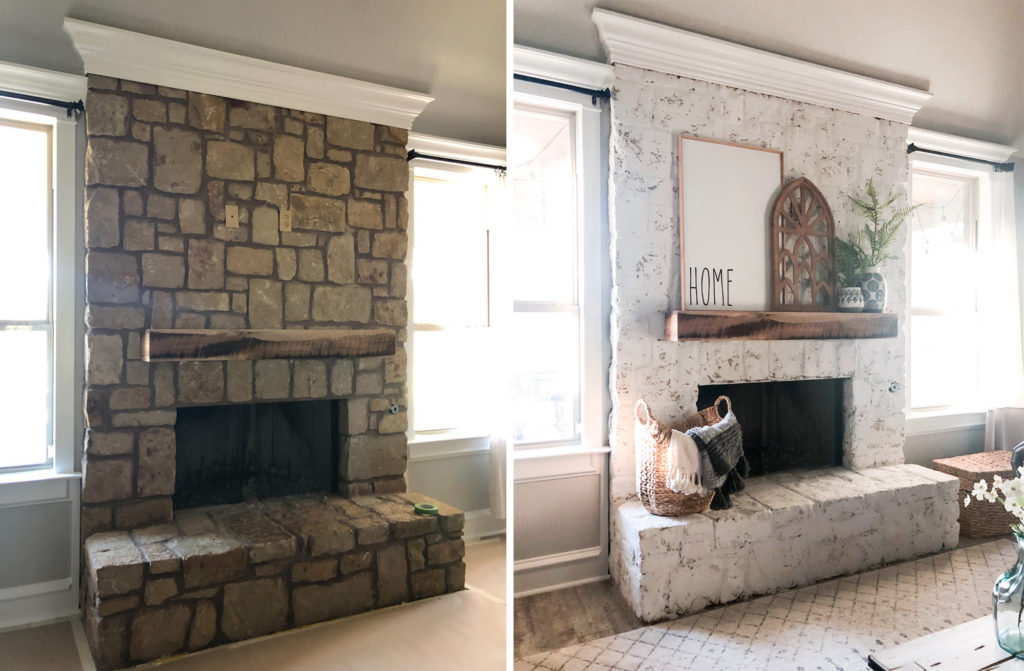
This is my fireplace before…
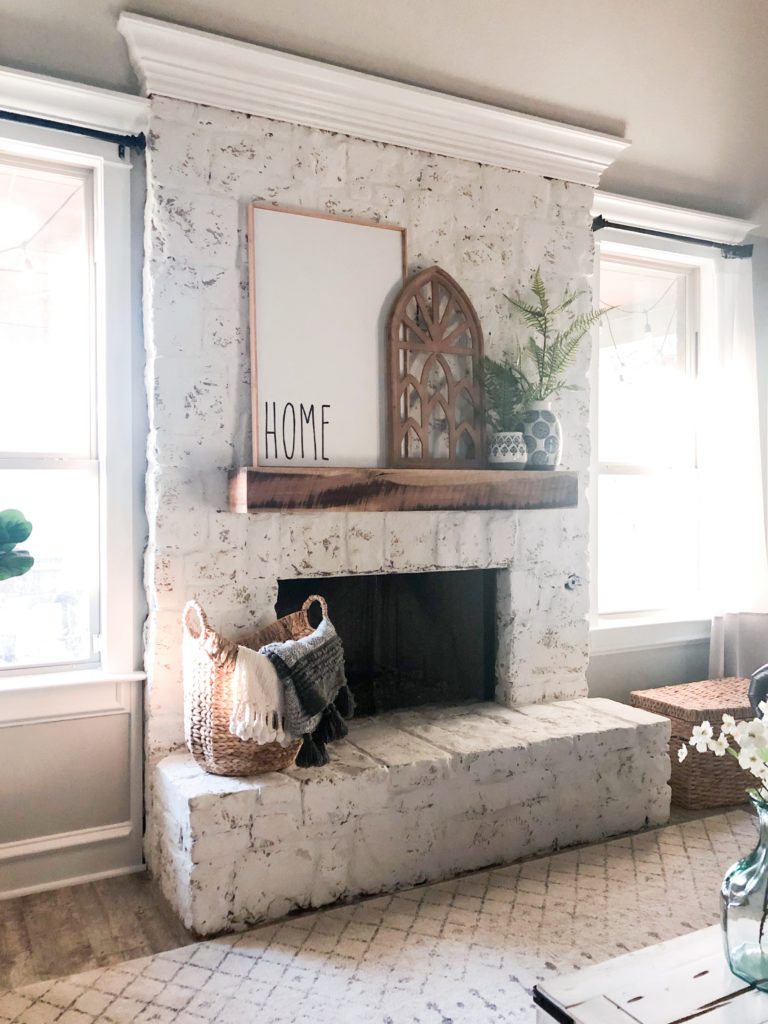
And here she is now!
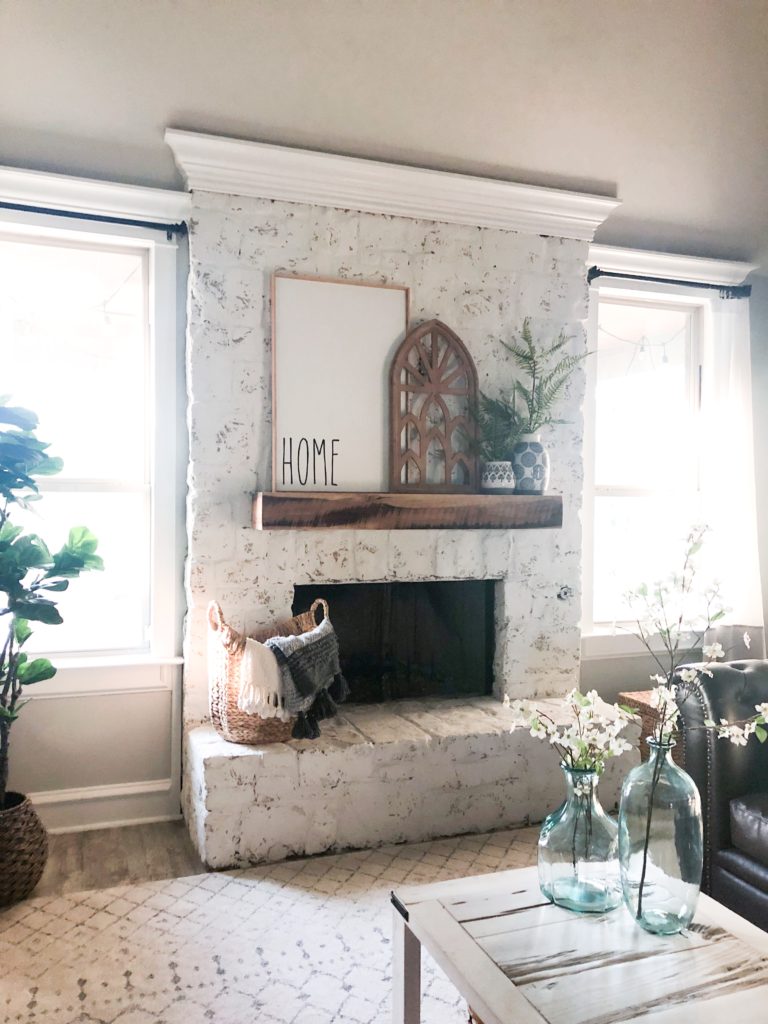
Table of Contents
Watch the video progress…
Many of you may have seen me tackle this project on Instagram stories a few weeks ago! If you missed those you can check them out by clicking the play button below. I threw them all in a video for you to make it easy!
Supplies
The best part of this project is that I spent $63 in supplies to achieve it, and that includes the roll of paper on the ground! Here is what I used for this project…
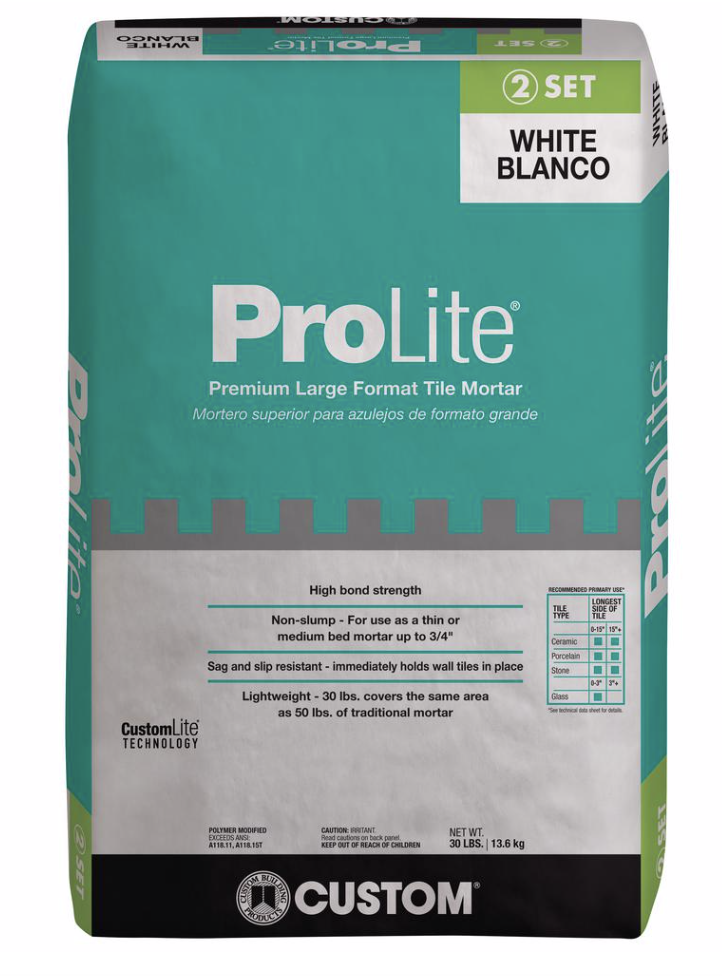
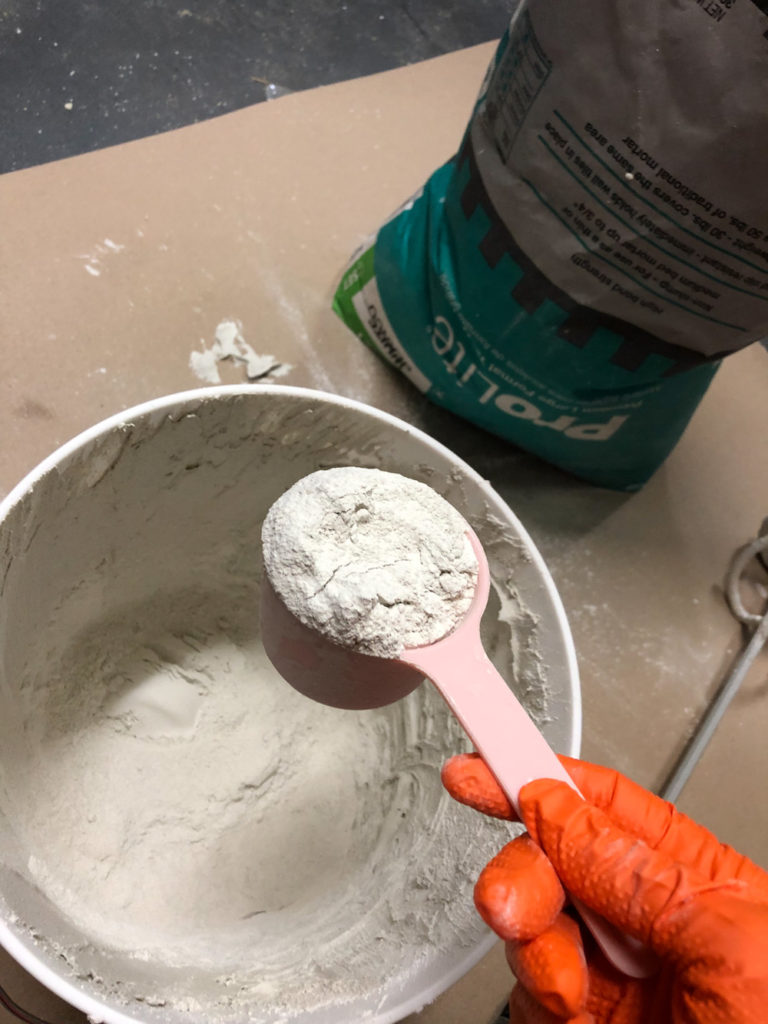
The first thing you will need is WHITE tile mortar. These are sold at the hardware store in bags of powder and premixed tubs. I debated using the premixed over the powder, but chose to go with the powder because it saved money, and I was able to control the consistency of my mortar. It’s super easy to mix! You can see the mortar I used HERE.
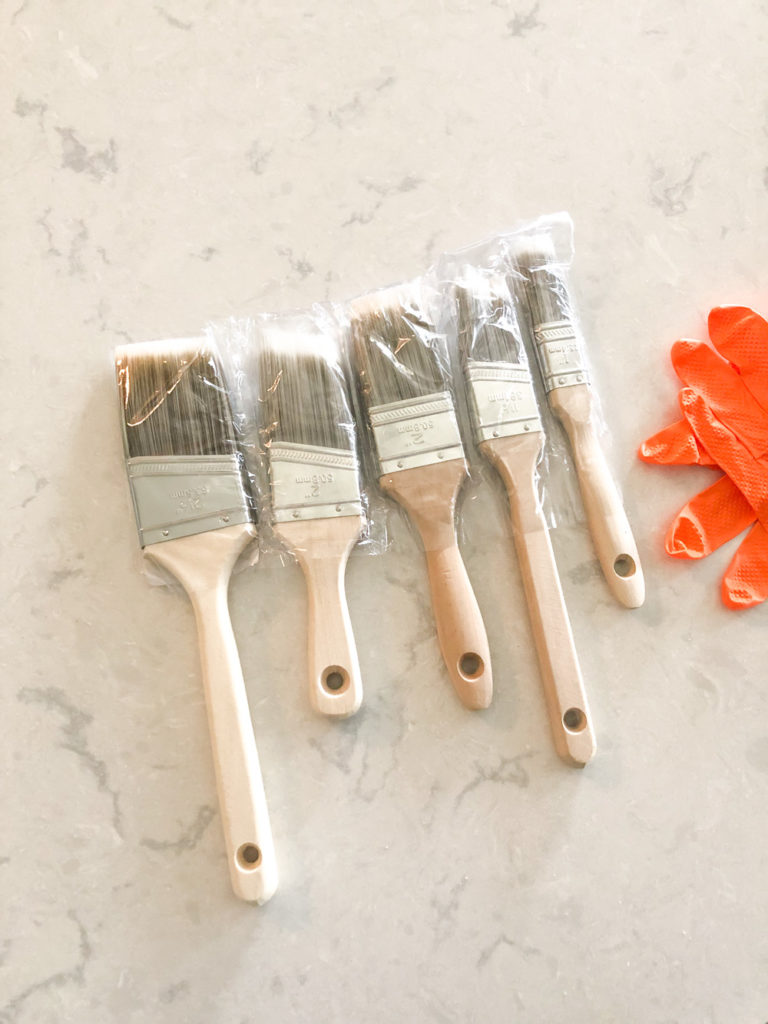
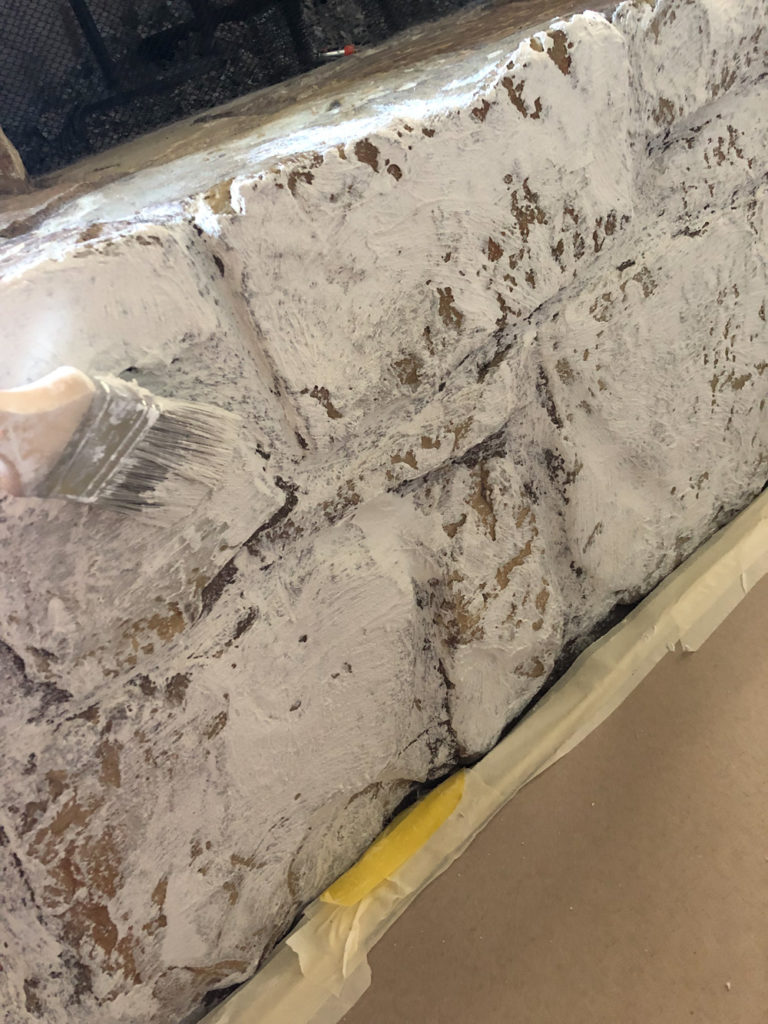
I decided to brush my mortar on. I felt that I would be able to achieve the look I was going for more easily with a brush, and I knew it would be less messy than using a trowel or sponge to apply it. I found a great set of brushes on Amazon when I was painting my trim. They are perfect for this project! You can see them HERE!
You will want to use a drill to mix the mortar. It’s the easiest way to get it mixed and even. I used a mixing attachment for this part and a $3 bucket from the paint section. My favorite mixing attachment can be found HERE on Amazon.

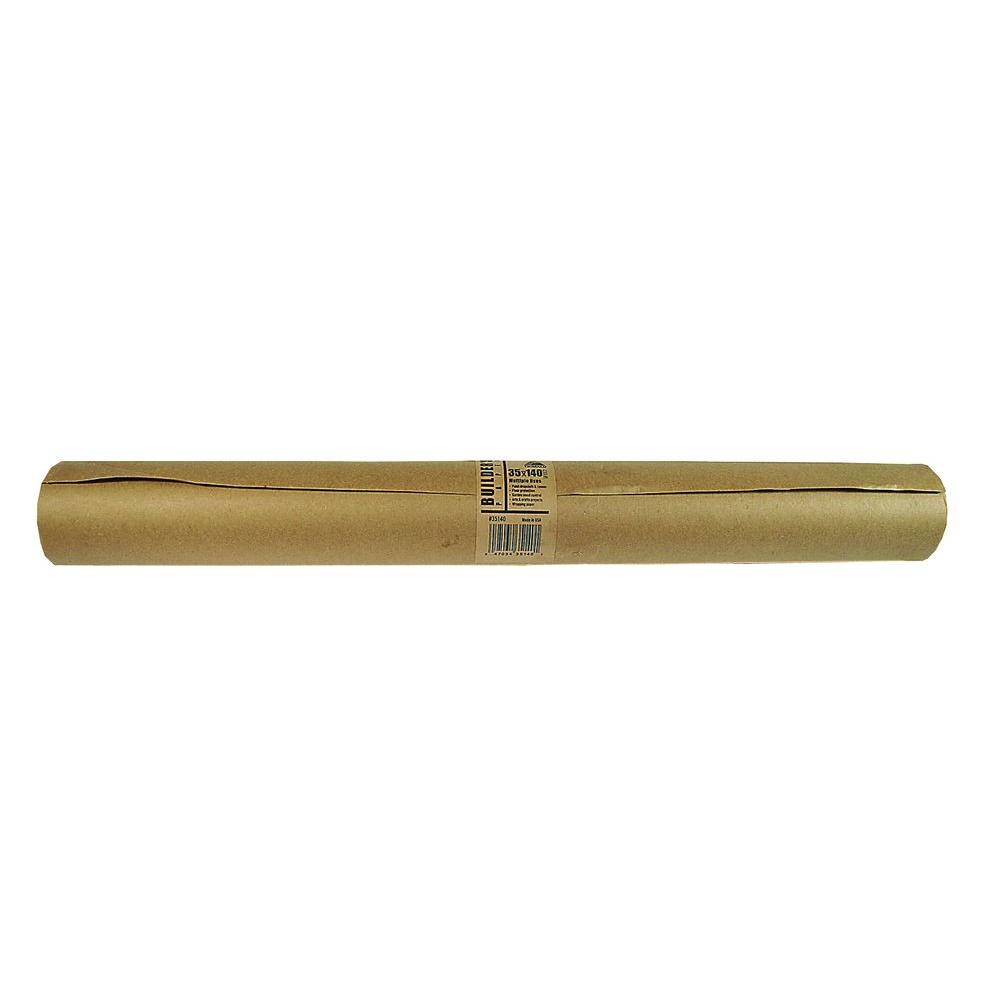
I used contractor’s paper to cover the floor around the fireplace. This stuff is inexpensive and I love to keep a roll in the garage for lots of different things! You can find it HERE!
You can also find it HERE at Home Depot.
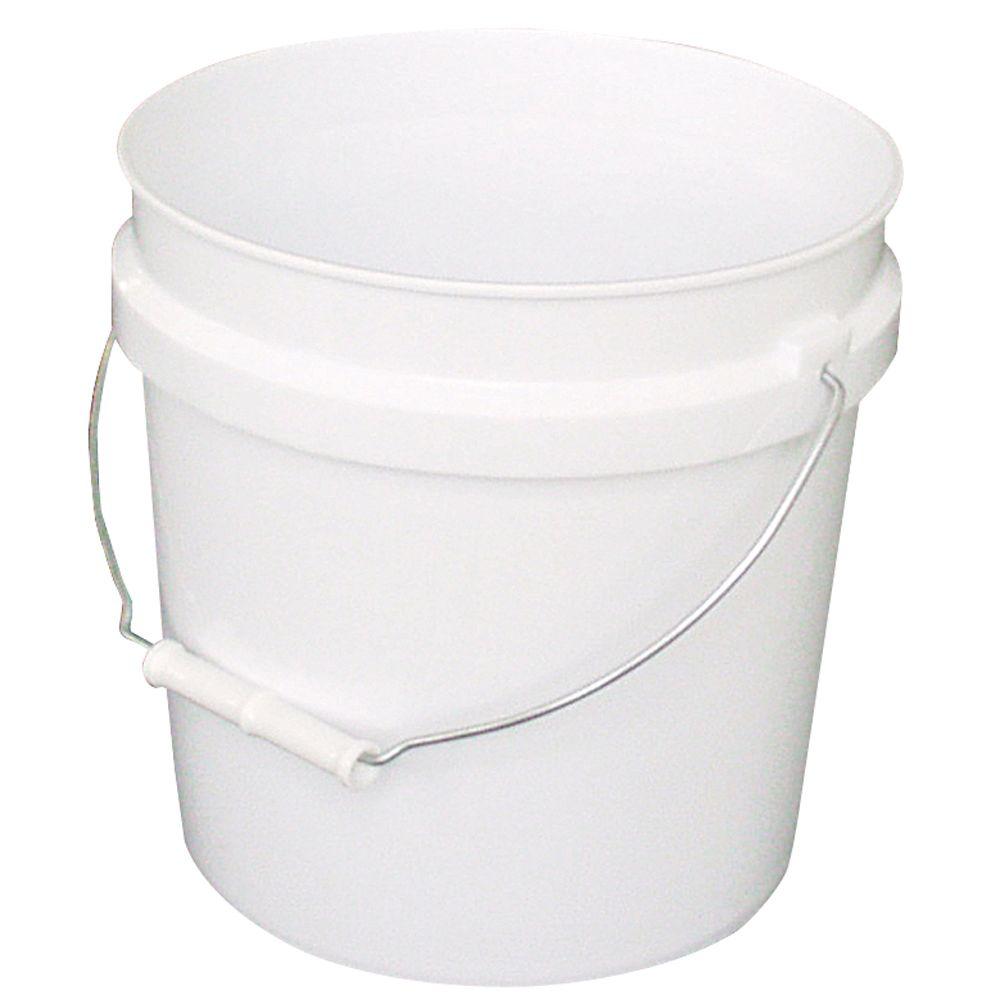
Finally, you need a bucket to mix it in. I decided to mix small portions at a time. This stuff can get heavy and I knew I would be going up and down the ladder. I bought THIS BUCKET from HD. Super cheap and did the job!
DIY $65 Fireplace Transformation Steps:
Now for the fun part! Let me show you how I did it!
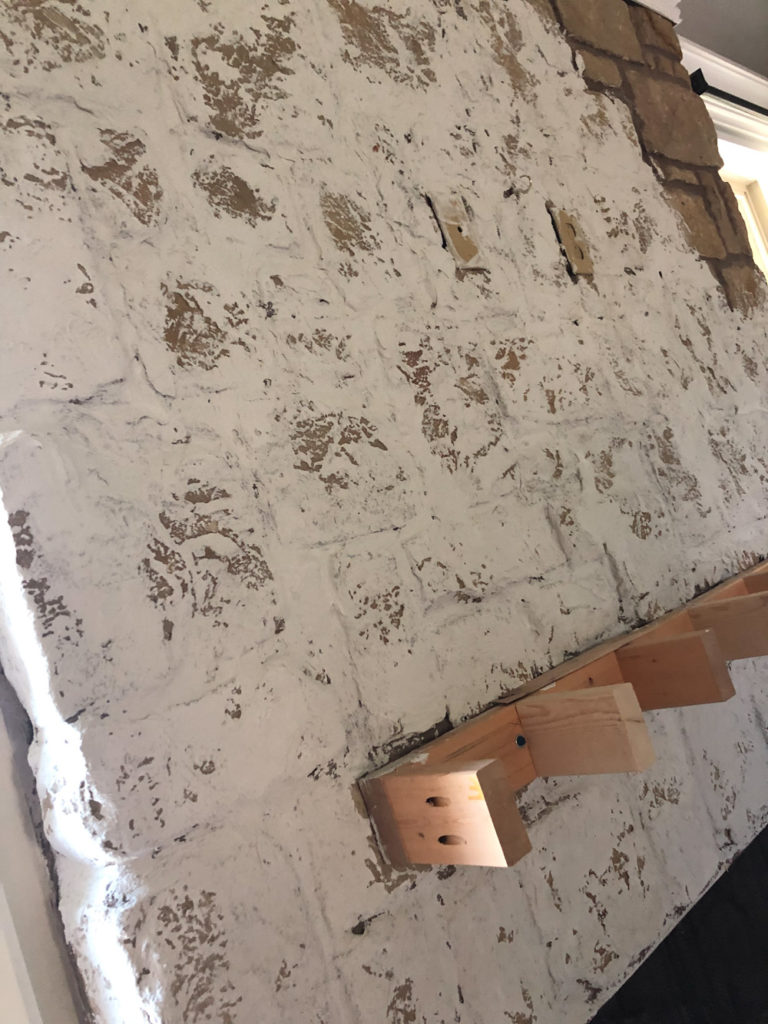
I decided to take my mantel off just to avoid having to tape it off. If you can’t remove yours, I would just cover it with a plastic drop cloth and tope to keep it clean! After putting down paper and taping around the edge of the fireplace to protect my walls and paint, I mixed my first batch of mortar. I took a measuring cup from my kitchen (about a cup) and added 3 scoops of mortar to my bucket. I then added about 2 cups of water to that. You don’t need to measure this out exact AT ALL.
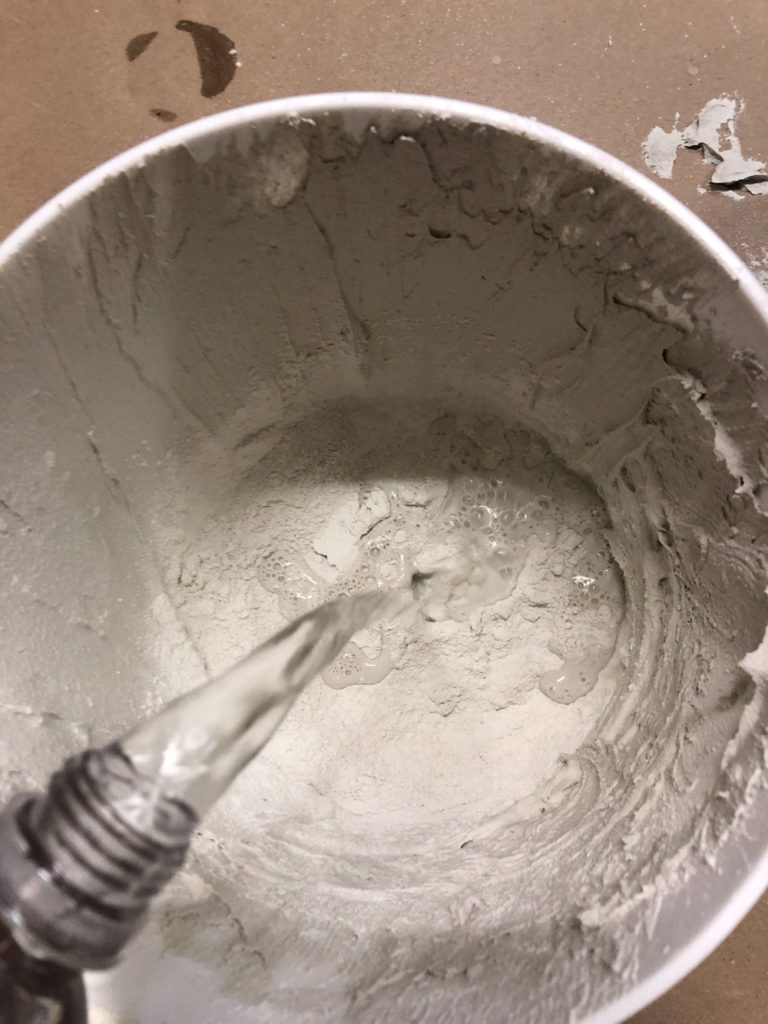
Start by mixing this amount, and then check your consistency. You want to be able to brush it on, so I found that getting the consistency to the texture of peanut butter or a thicker icing was perfect for this application.

You will notice that the WHITE mortar you purchase will look grey when mixed. This is totally normal, and the mixture will dry white. As my fireplace was drying, it kept getting more white.
I decided to start over on the side of the hearth. This is an area that nobody really sees, so I figured I could “practice” over there and get a good idea of what I was doing before moving to the other parts. I literally just brushed it right on.
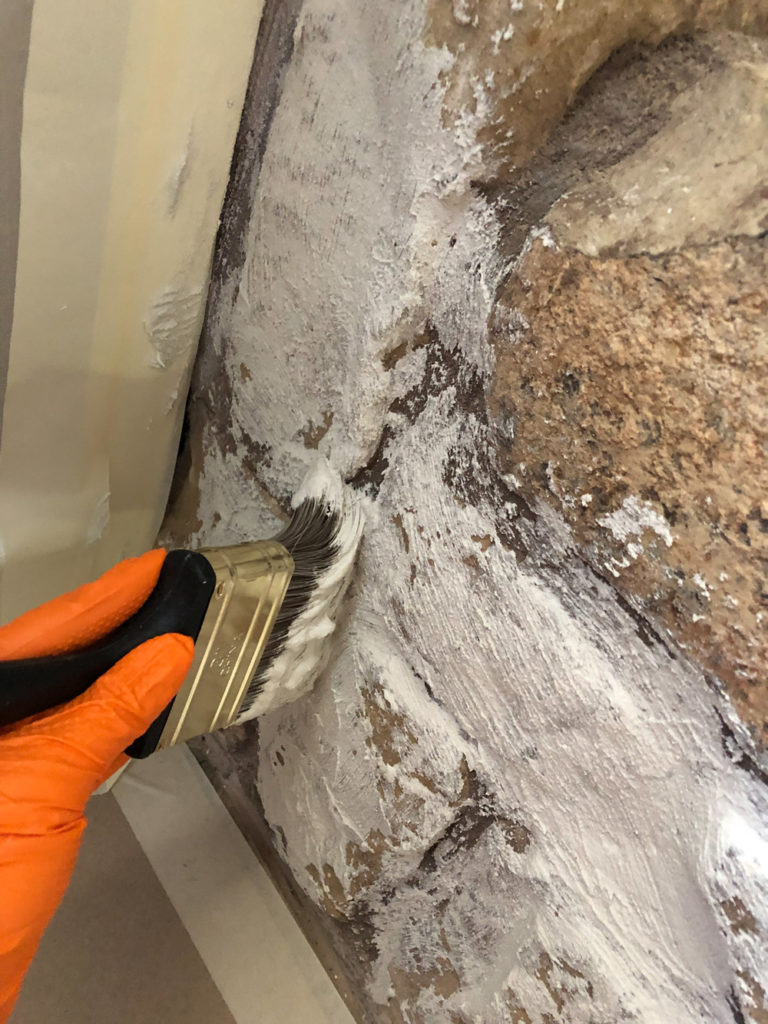
Now, you may notice in the picture above that you see lots of brush strokes. I initially started with a brush I cut down to make more stiff. I was concerned that I would need a stiffer brush to apply this stuff. I found that this stiffness left the brush marks I really didn’t want, so I switched to a normal paintbrush at this point, which was one from the set I linked above.
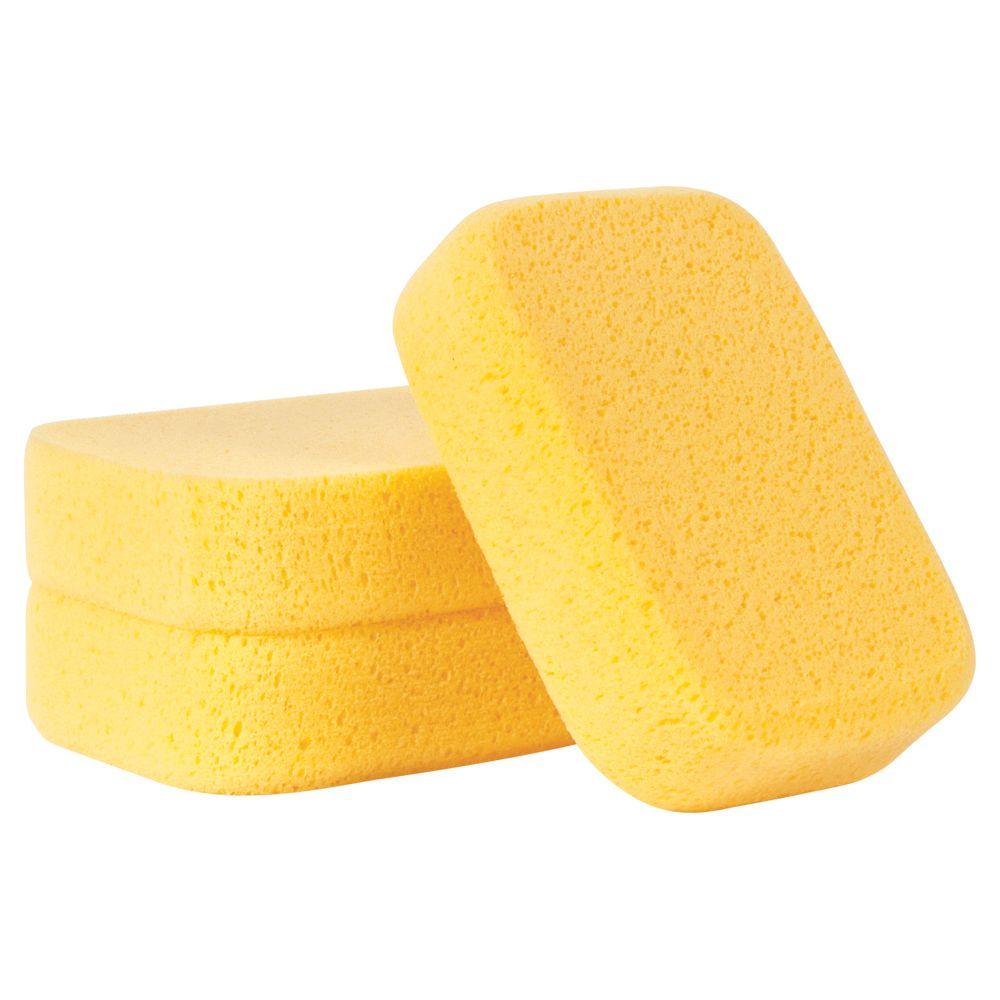
Basically at this point, I worked my way around. This is where you can decide what you want yours to look like. You can add more mortar to get a more white look, or you can add less to keep more stone or brick exposed. Also, you can use a sponge to wipe away what you brush on. THESE are the sponges I used on mine. I only used mine to smooth brush strokes, bot really wipe away because I wanted #allthewhite.
On this spot you can see the rougher edges of the mortar and some brush strokes.
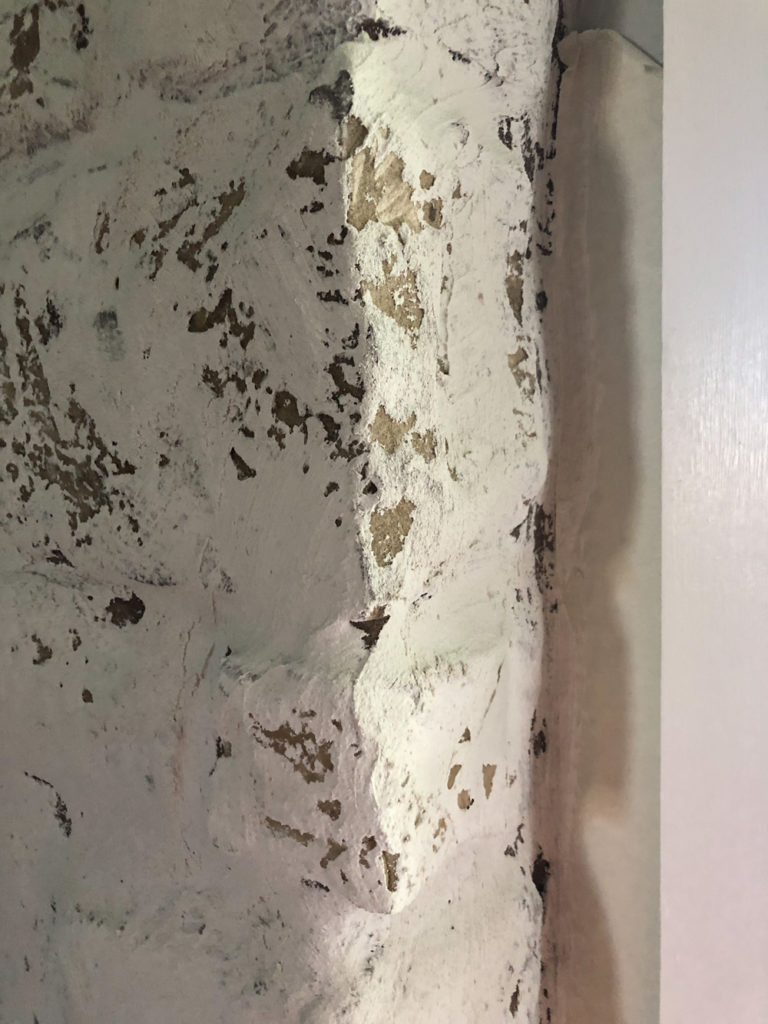
I used the wet sponge to smooth areas like this out. After letting the mortar sit for about 30-45 minutes, I used the sponge dampened with water to smooth those areas out.
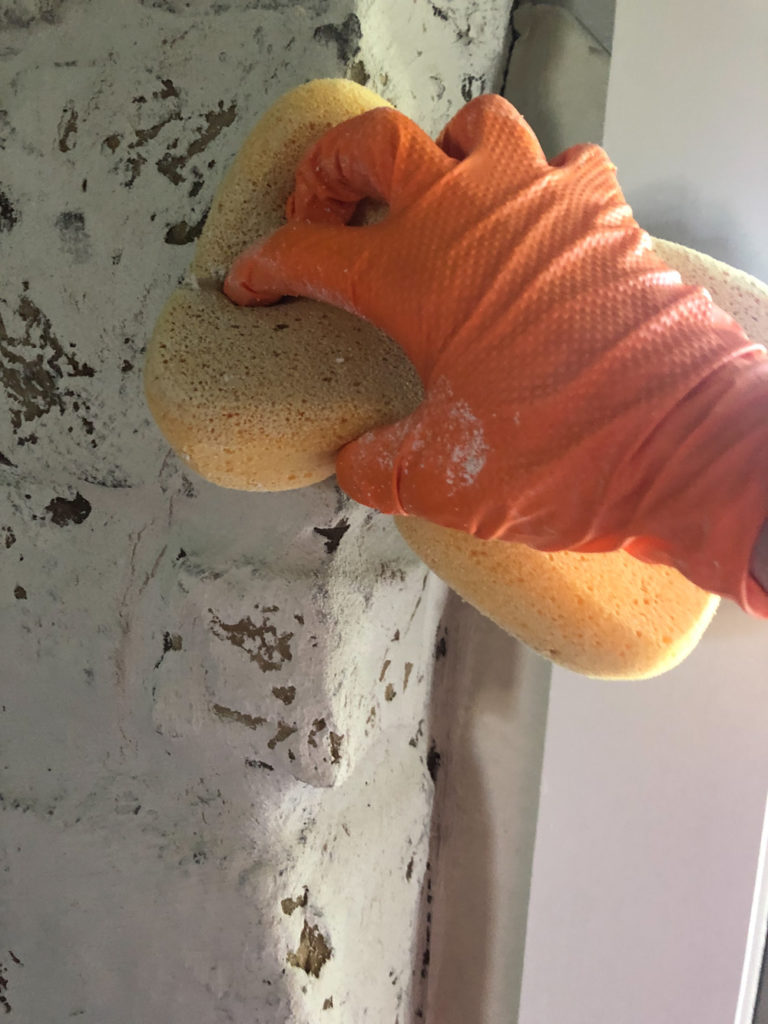
You can see below the progress I made. Again, I would let an area sit and set up for about 30-45 minutes before I smoothed it out.

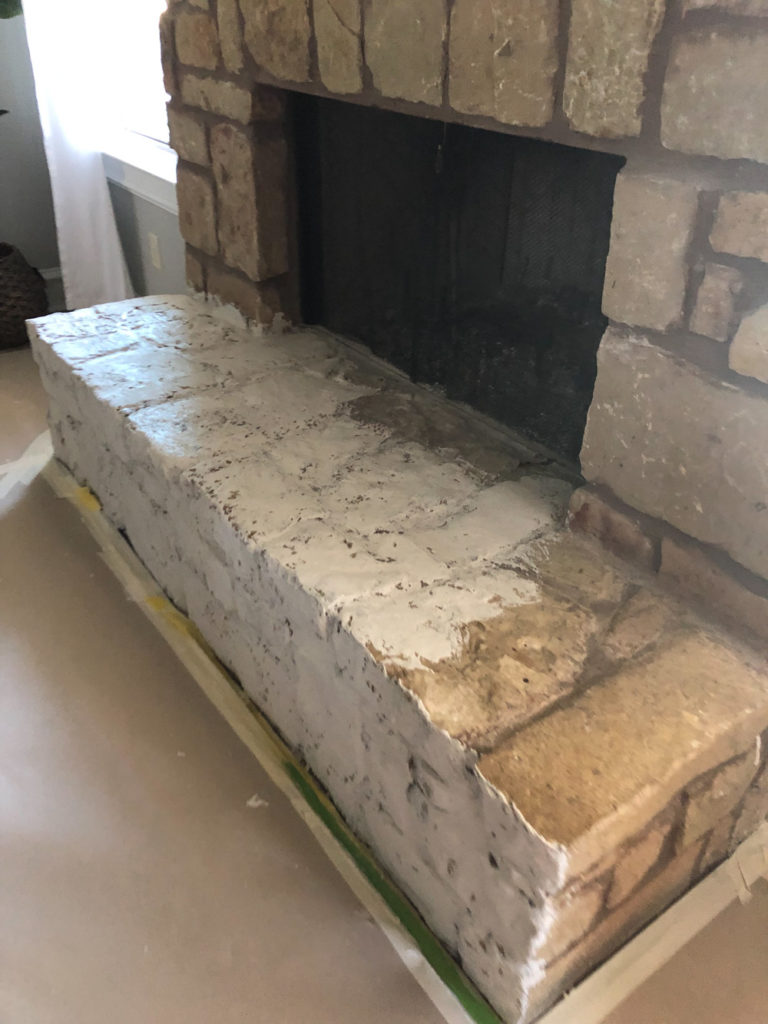
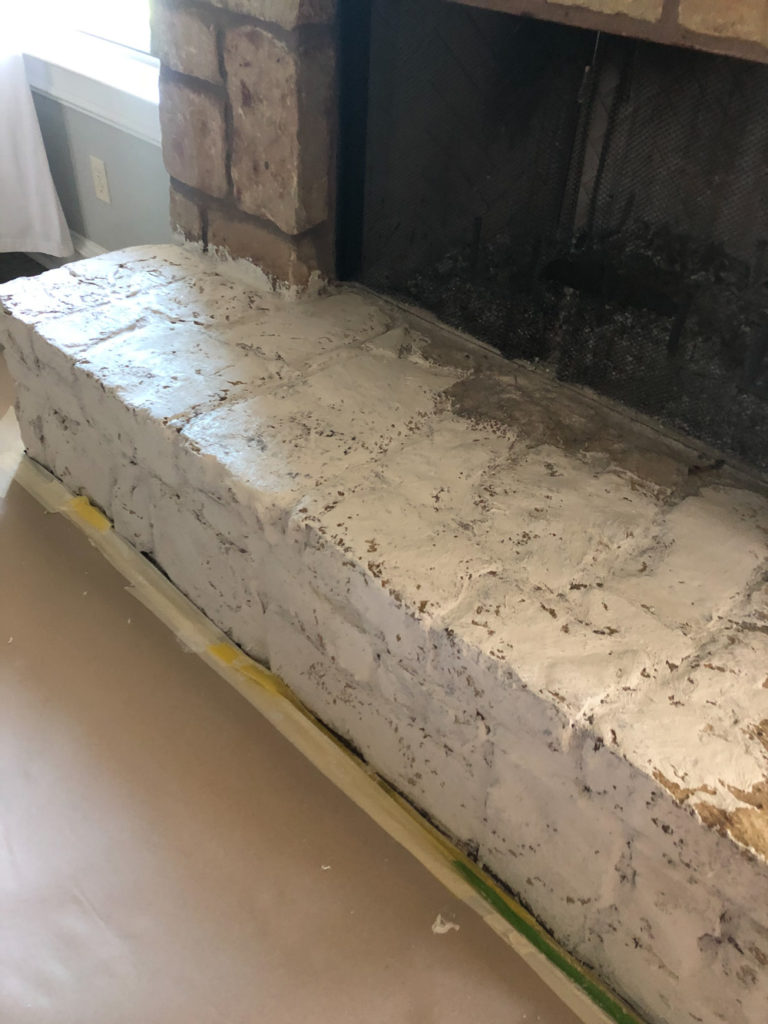
Once I finished the hearth, I worked my way up the wall!
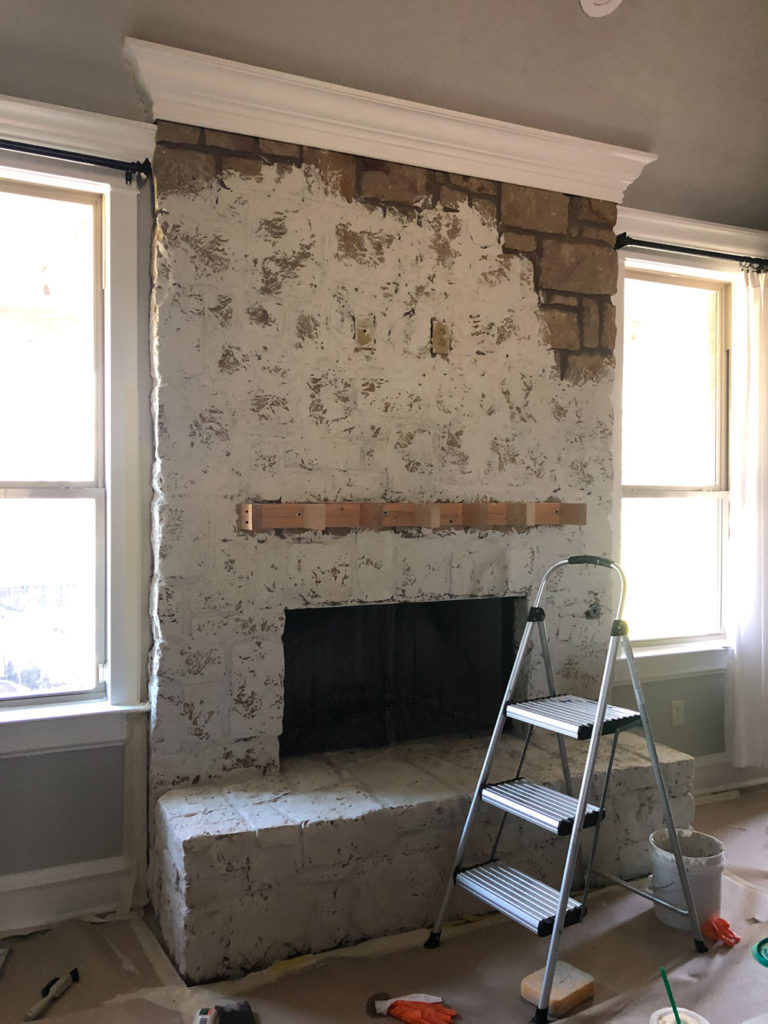
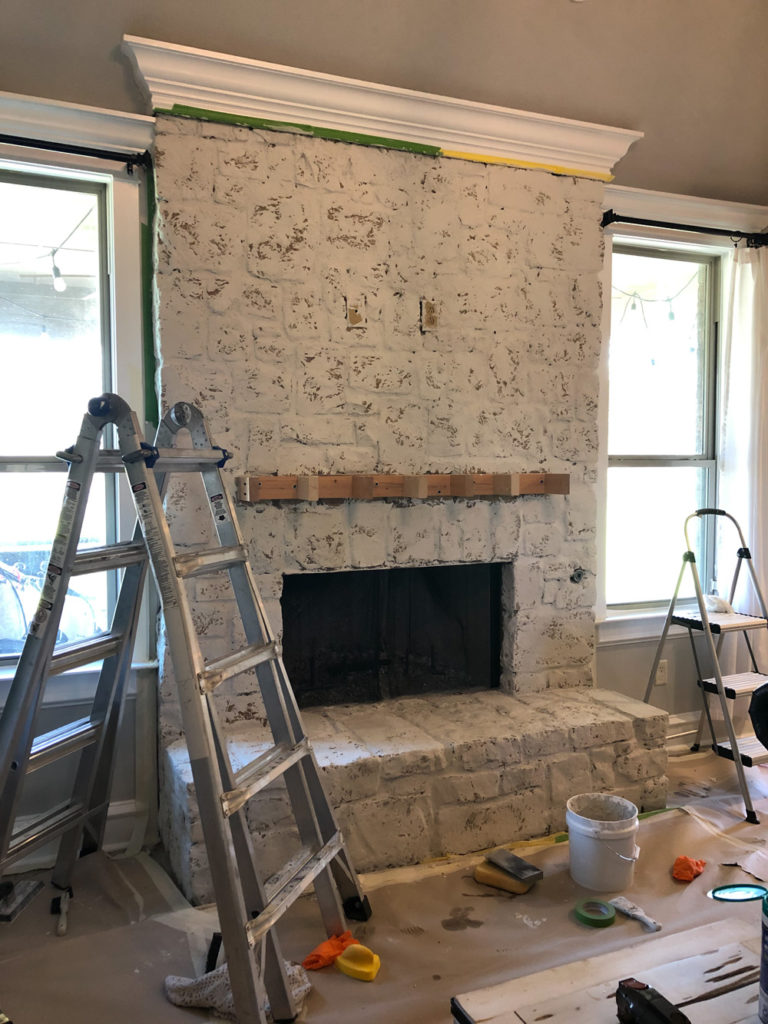
Check out the finished fireplace!
So… How long did it take me?
I went to Home Depot that morning around 9 after I dropped the kids off at school. I made it home and began taping off around 10. I stopped to take care of the baby and do school pickup, and finished the job before 5pm that same day. Depending on the size of your fireplace, this is easily a 1 day job! And, the mortar dries fast. I did take a quick pick with decor that evening, but took it off to let the mortar dry overnight before dressing it up the next morning! For me, it was the best $63 I have spent in a long time!
I know there will be some of you that prefer the original stone and that’s ok! It’s just like painting and decorating… We all have our own tastes and opinions :-). You won’t change my mind on this one though… I LOVE IT! Let’s look at it some more, shall we??
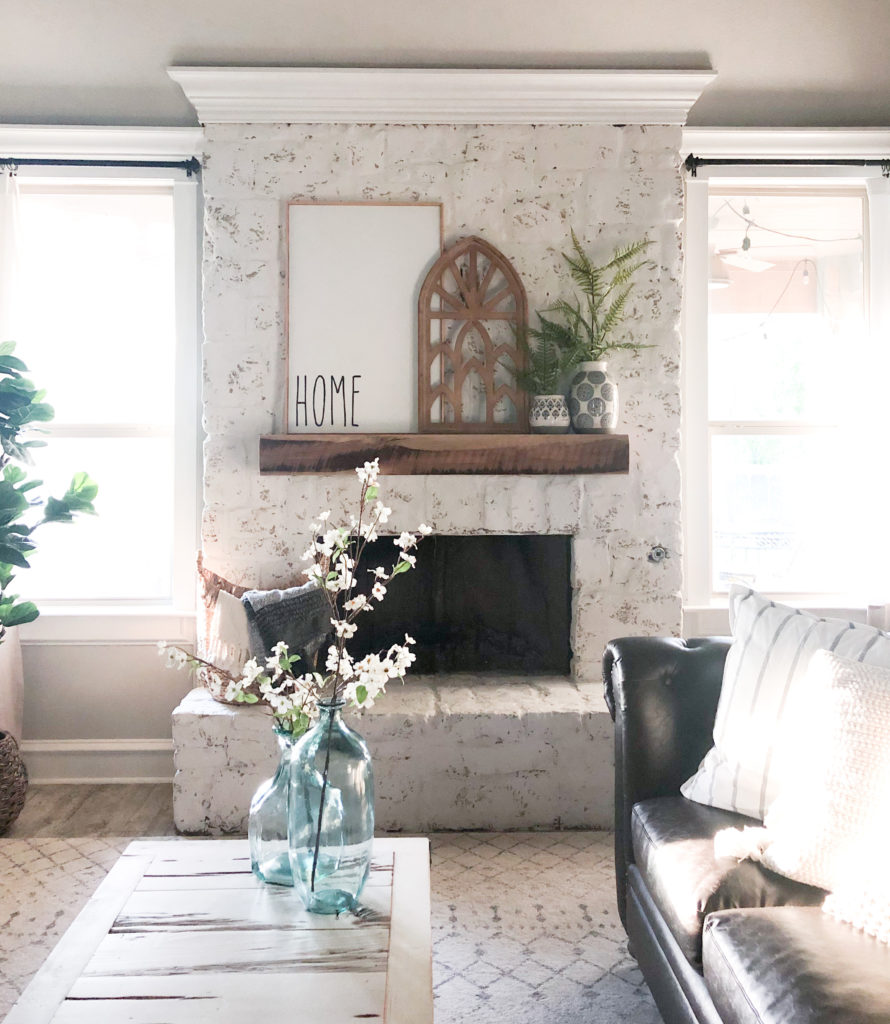
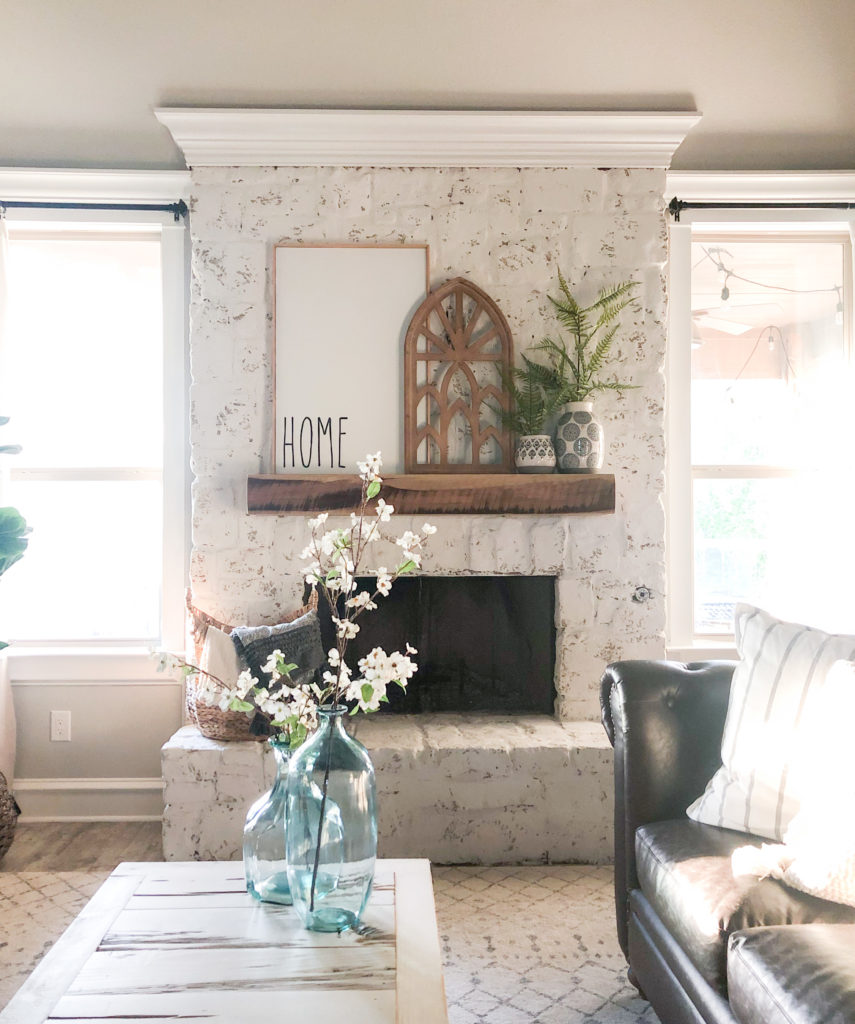
Links to all the decor!


Absolutely beautiful. I’m going to do this to ours!
Would this work in faux stone?
Absolutely gorgeous!👍
We are going to do this to our 20 year old stone fireplace to match our newly remodeled kitchen, thats right next to it. Thank you for the very very simplistic instructions and video. I wish more people would do this with their remodeling projects. You made it look easy, inexpensive and something fun my wife and I can do together on a weekend!
Is there a way to get rid of the brush strokes once it has already dried? I got a little brush happy doing this last night!
I have a weird question! I’d love to do this to my fireplace, but mine has these round (river rock) stones and the “grout” between them is deeper set than the grout between your stones. Do you think I could use mortar to fill in the grout lines? I’m scared to try! Lol
Do you use your fireplace often? I live in Vermont and we use our fireplace daily in the colder months. I’ve been debating doing this project on our fireplace but worry the finish will look different with the soot and heat of the fire, or be difficult to clean.
This technique worked great on most of my rocks! Unfortunately, I have a few sandstone rocks on my fireplace and they are red and very crumbly. I had hoped the mortar would keep them from doing that in the future (always little piles of red dust around my fireplace where they continuously “shed”) but it does not appear to be working. The red “bled through” the mortar. Even a second coat did not stop it. Going to try sealing the rocks on the other side with a spray before applying mortar. Not giving up yet!
So you ended up getting the look without going back and doing any sanding, correct? Trying this today!
That looks so good! We’re considering doing this on our jagged stone fireplace, though I must ask, do you know what paint color you used on the walls? We can’t seem to find a gray paint that looks right.
How does the schmear hold up to every day use? Does it rub off on clothes or fall off the stone? Our kids sit on our fireplace in the winter. Wondering what that would do or cats jumping up on it and hanging out.
I just completed this project maybe 2 weeks ago. I used pre mixed mortar though and watered it down so their results may have been different. Mine was crumbly at first around the edges of the stone and I worried any time we sit on it little pieces would come off and just be a mess. Initially this was true but once all these tiny bits fell off it has been fine and didn’t change the look, seriously they were tiny crumbs. Mine didn’t turn out as white as theirs, maybe it was my stone, maybe it was pre mixed mortar, maybe it is because I have crisp white cabinets next to it. Either way, it turned out so much better than the before. Good luck!
Did it only require the 3 cups or did you end up running out and having to mix more? Husband didnt listen haha and just bought a container of the premixed stuff for this project. Debating on using it anyway as long as it should be enough or making him take it back.
We just finished ours and it took about 7-8 buckets of 3-cup mixtures.
Thank you so much for this idea!!! It’s so beautiful! I ended up doing the exact same to mine!!! I get Bonus because My husband LOVES it!!!!! LOL
I love this! I want to do mine but worry about it drying very white. My house has more creams and off white. Do you think I could add some color to the mix? Or do you think it will be ok with the stone showing through?
Where did you get that “home” sign? Love it!!
Where did you get that home sign?