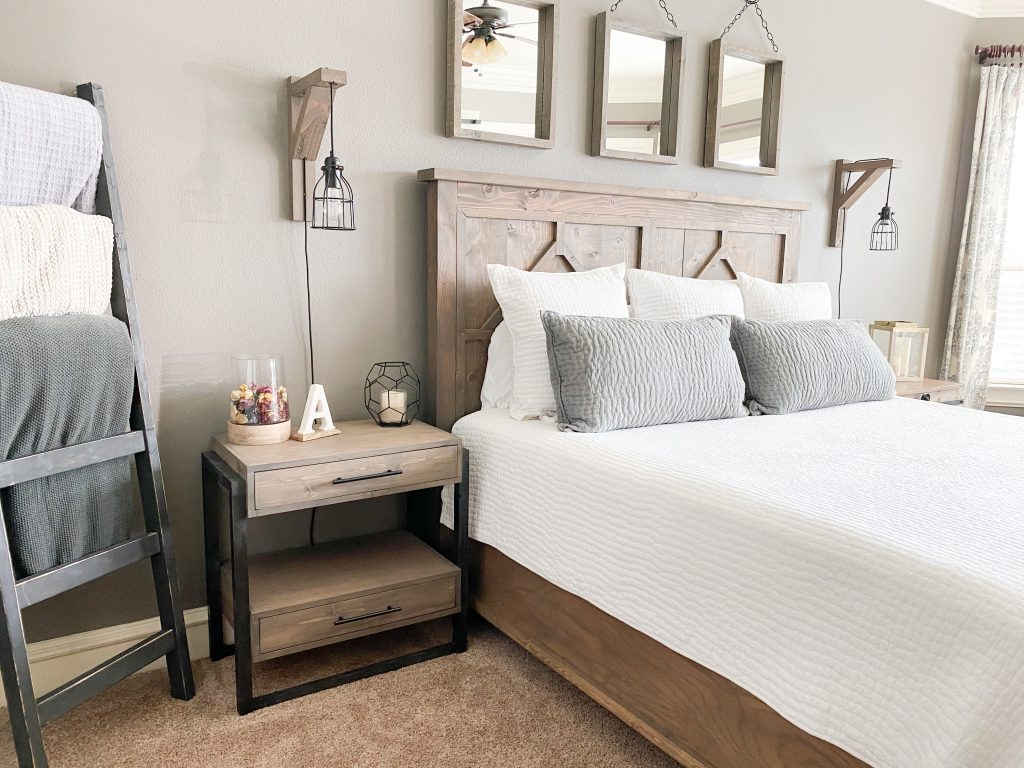
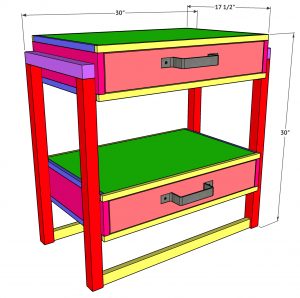
Learn how to build this DIY Nightstand with Drawers with easy-to-follow plans and how-to by Shanty2Chic.
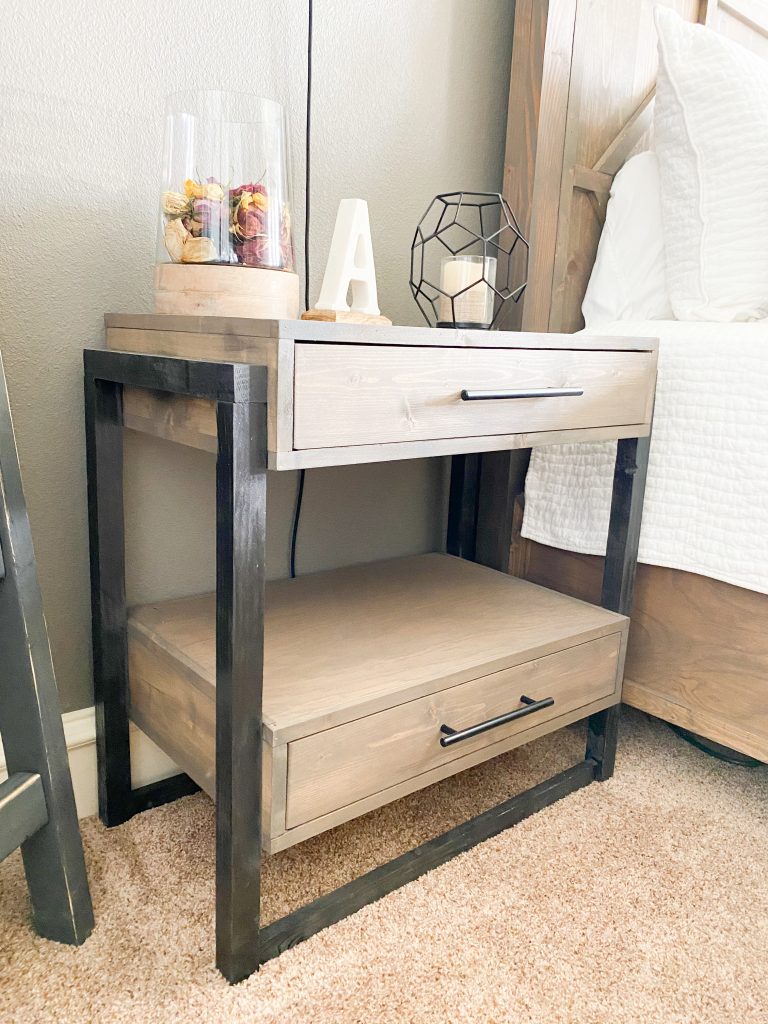
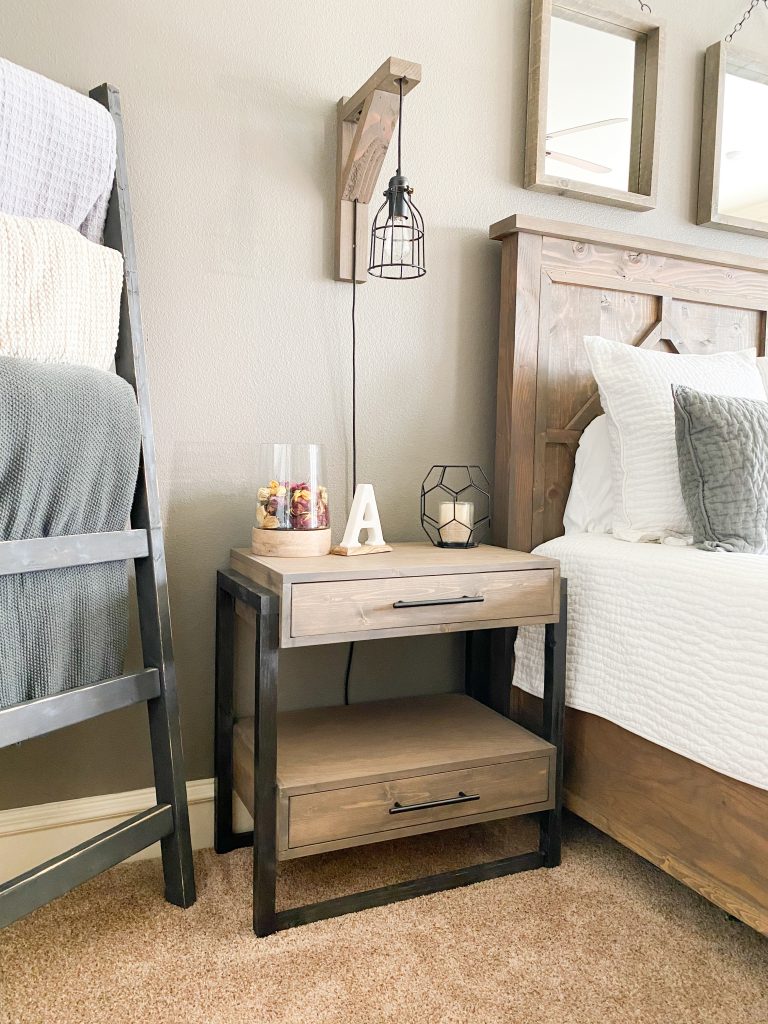
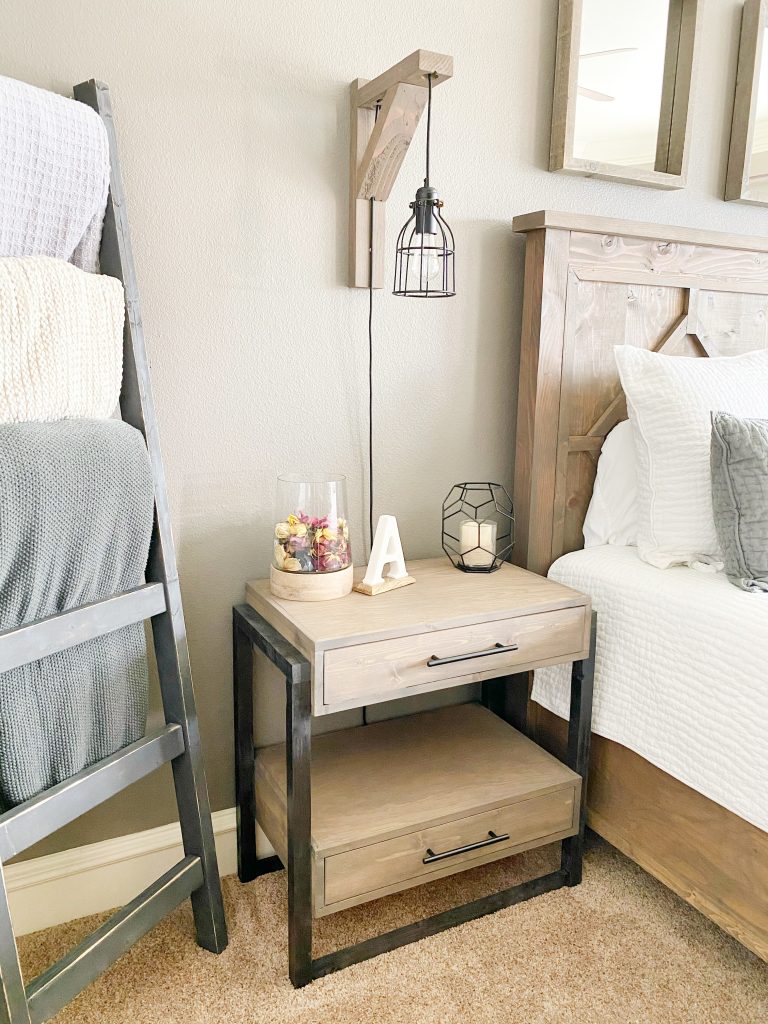
I’m so excited about these nightstands! I love the modern clean lines the black frame gives them, I love how they have shelves and drawers AND I love how the shelves look like they’re floating! It’s all of my favorite furniture features in one! They are a fairly simple build and they won’t break the bank either! Let’s get to building!
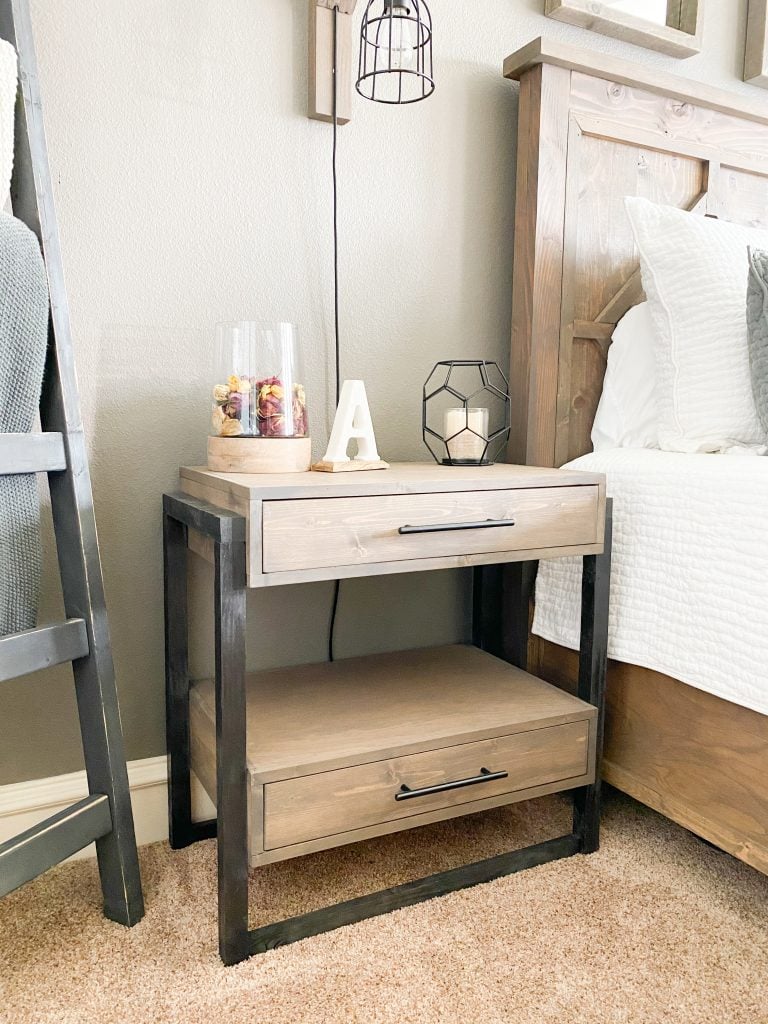
Table of Contents
Supplies
- 2 – 2x2x8
- 1 – 1x2x8
- 2 – 1x5x8
- 2 – 1/2″x3.75″x8′ Hardwood Plywood (can be ripped from the 3/4″ plywood
- 5 – 1/2″x3/4″x8′ Trim
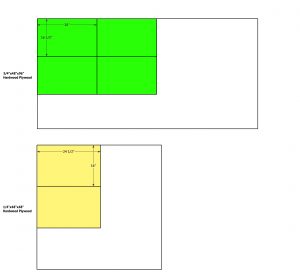
- 1/4″x48″x96″ Hardwood Plywood
- 3/4″x48″x96″ Hardwood Plywood
- 1 1/4″ pocket hole screws
- 2 1/2″ pocket hole screws
- 1 1/4 brad nails
- 1″ pin nails
- 1 1/2″ wood screws
- wood glue
- drawer pulls
Tools
How to Build a Nightstand with Drawers
Building the Shelves
Step 1: Top and Bottom Shelves

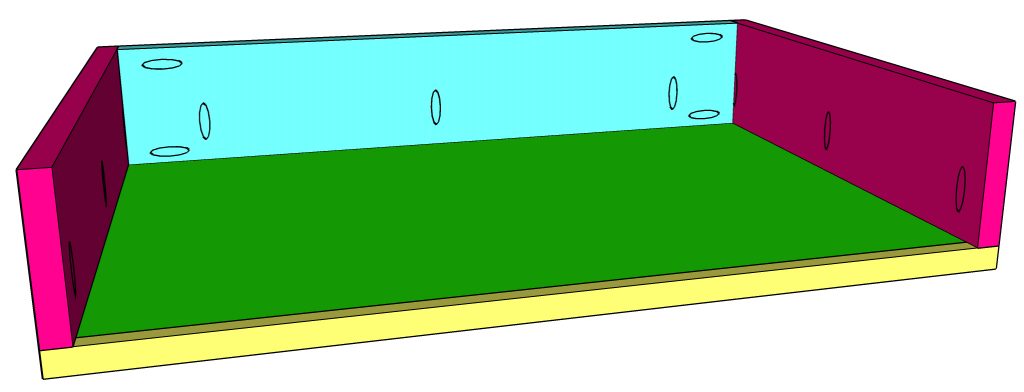
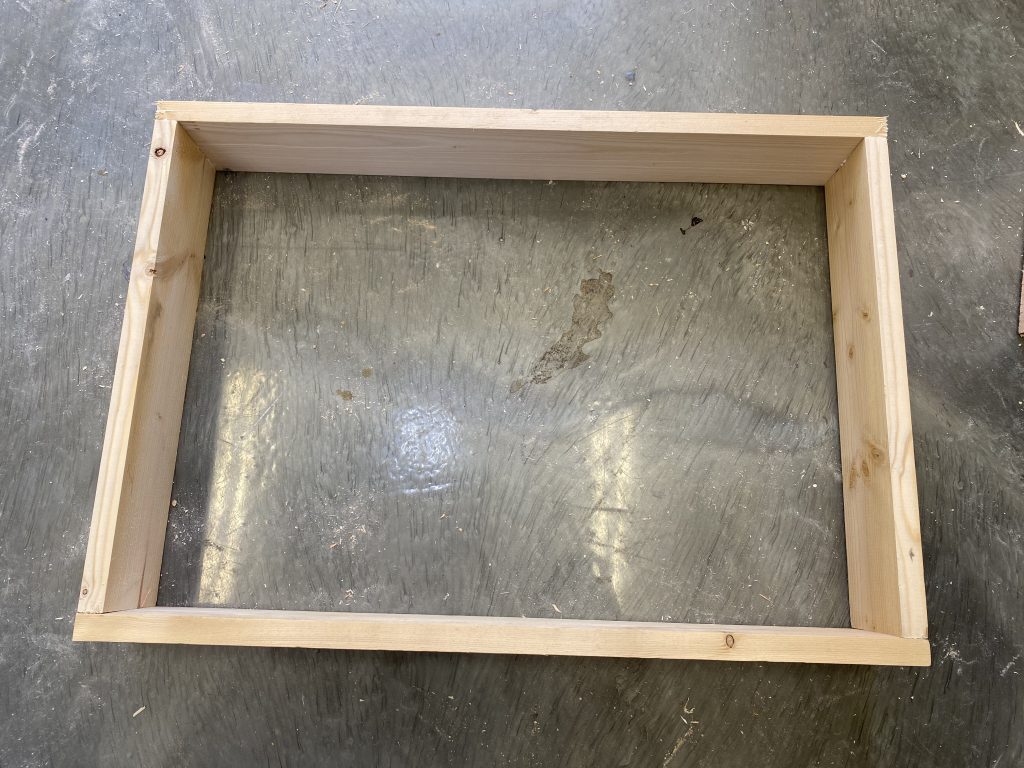
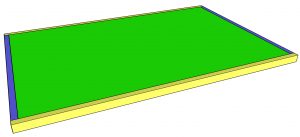
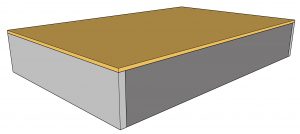
Cut the shelf pieces to size. Measure and cut the side trim pieces to size and attach them to the sides of the shelf with 1″ pin nails and wood glue. Measure and cut the front and back trim pieces to size and attach them the same way. Build 4 shelves.
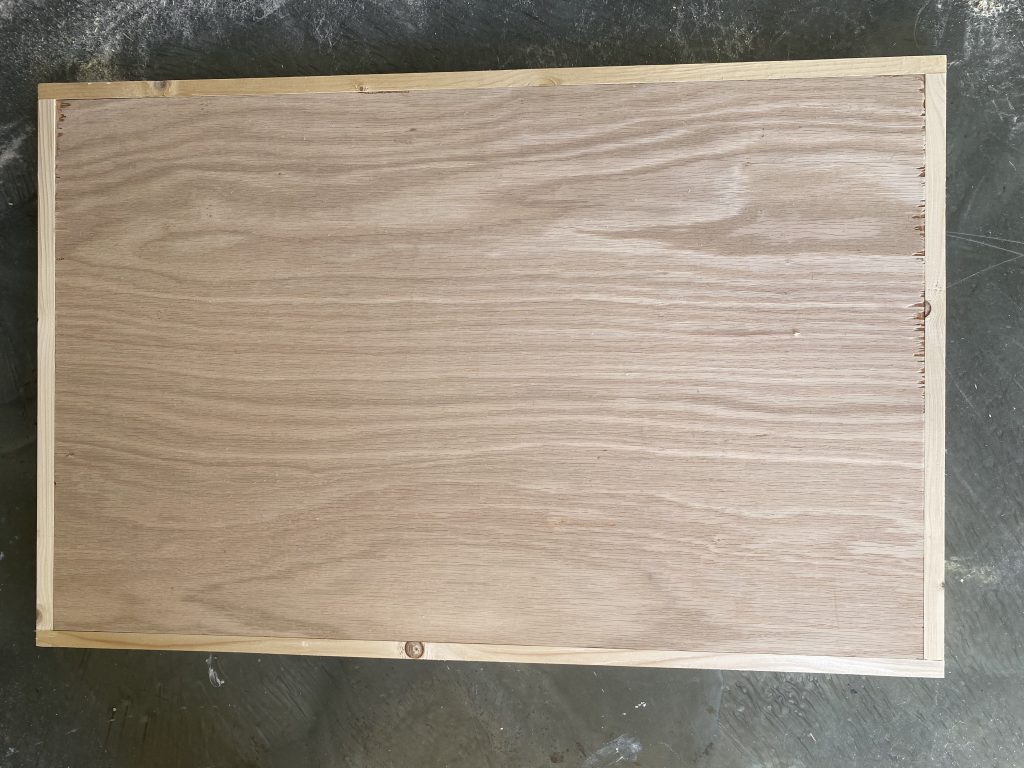
This is what the shelf will look like after the trim is attached.
Step 2: Shelf Sides
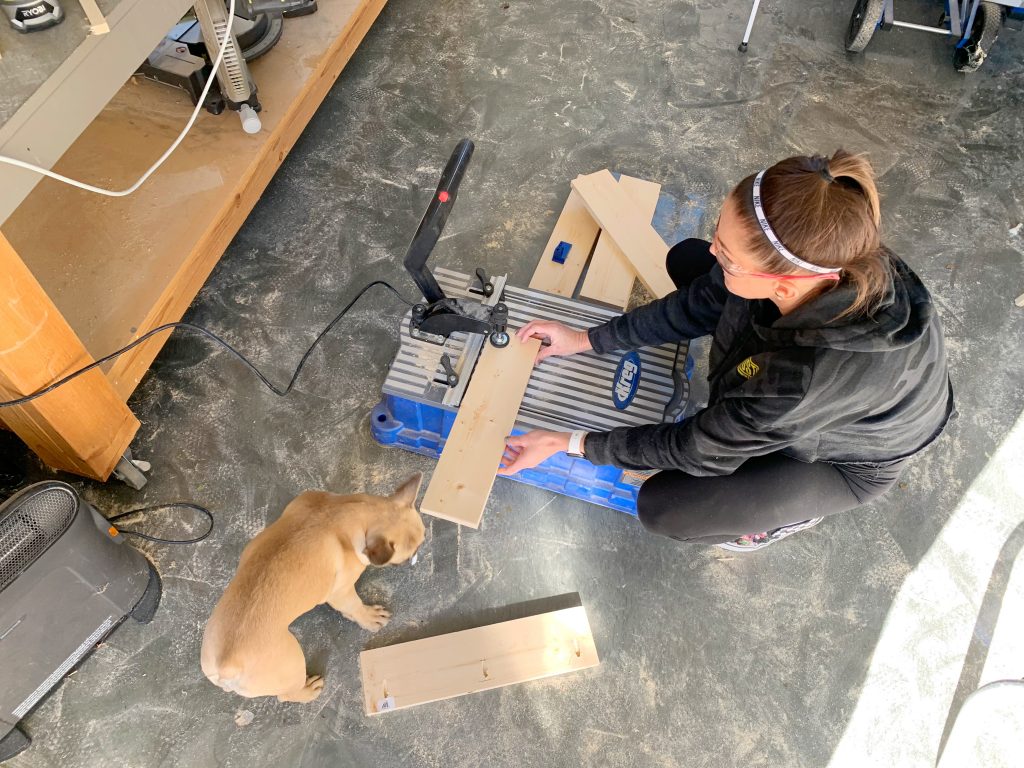
Next, cut the side shelf pieces to size and drill 3/4″ pocket holes in one side of each board. I used my Kreg Foreman for this project but you can use a smaller Kreg Jig!
- You can find the Foreman that I used HERE
- You can find our favorite Kreg Jig model HERE
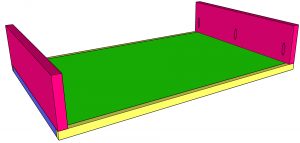
and attach them to the sides of the bottom shelf with 1/4″ pocket hole screws and wood glue. Do this for both bottom shelves.
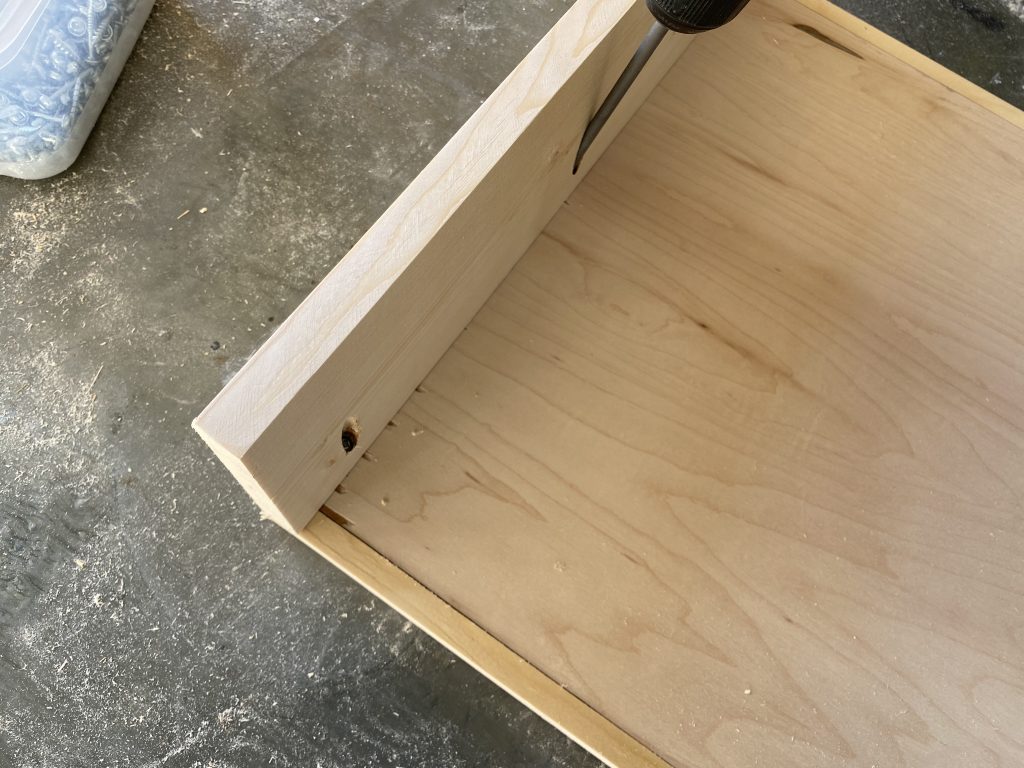
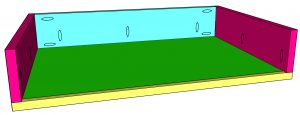
Step 3: Shelf Back
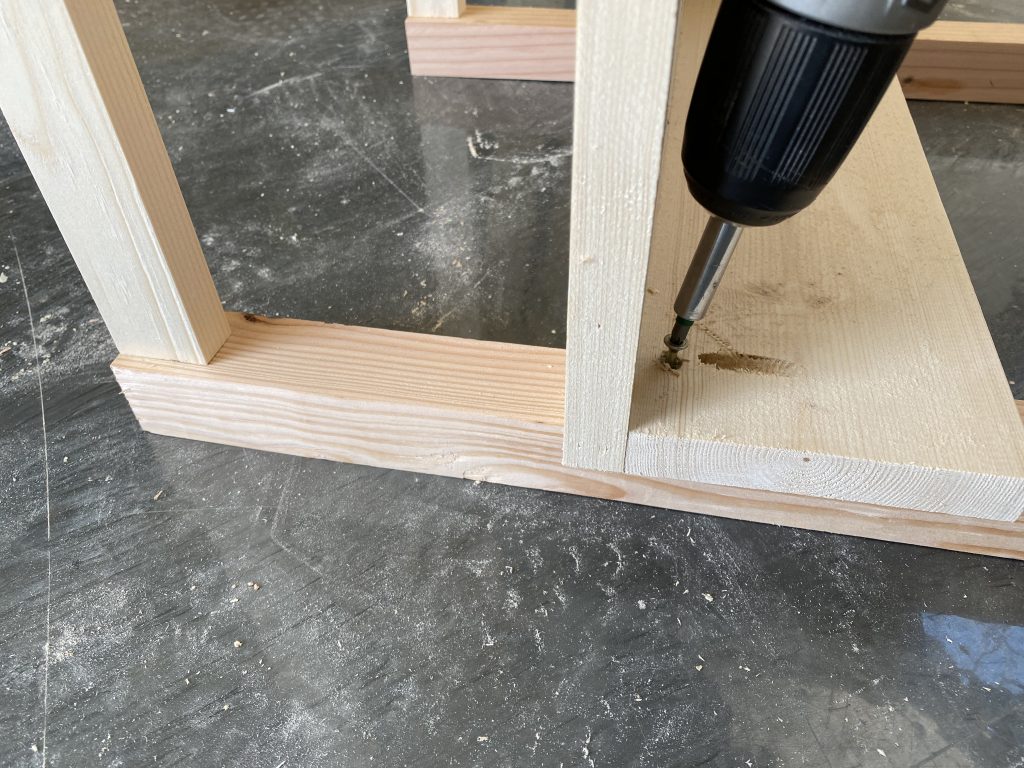
Measure and cut the back shelf piece to size, drill 3/4″ pocket holes on one edge and both ends of the board. Attach it to the back of the bottom shelf, between the side pieces with 1 1/4″ pocket hole screws and wood glue.
Building the Frame
Step 1: Attaching the Side Pieces
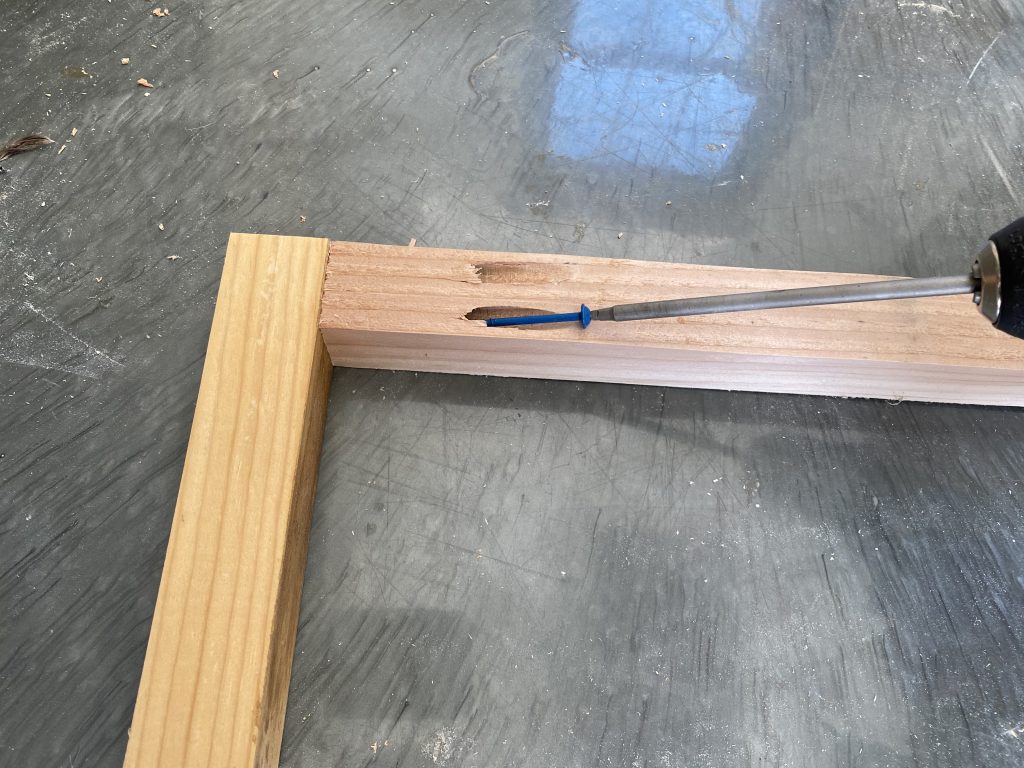
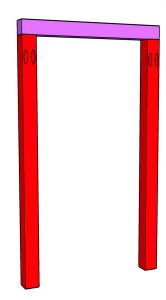
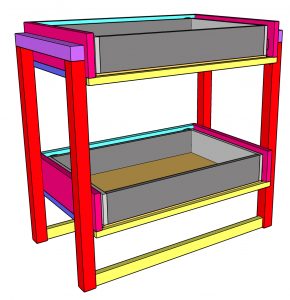
Cut the side frame and top frame pieces to size. Drill 1 1/2″ pocket holes at the top of each side frame piece. Attach the side frame pieces to the top frame piece with 2 1/2″ pocket hole screws and wood glue.
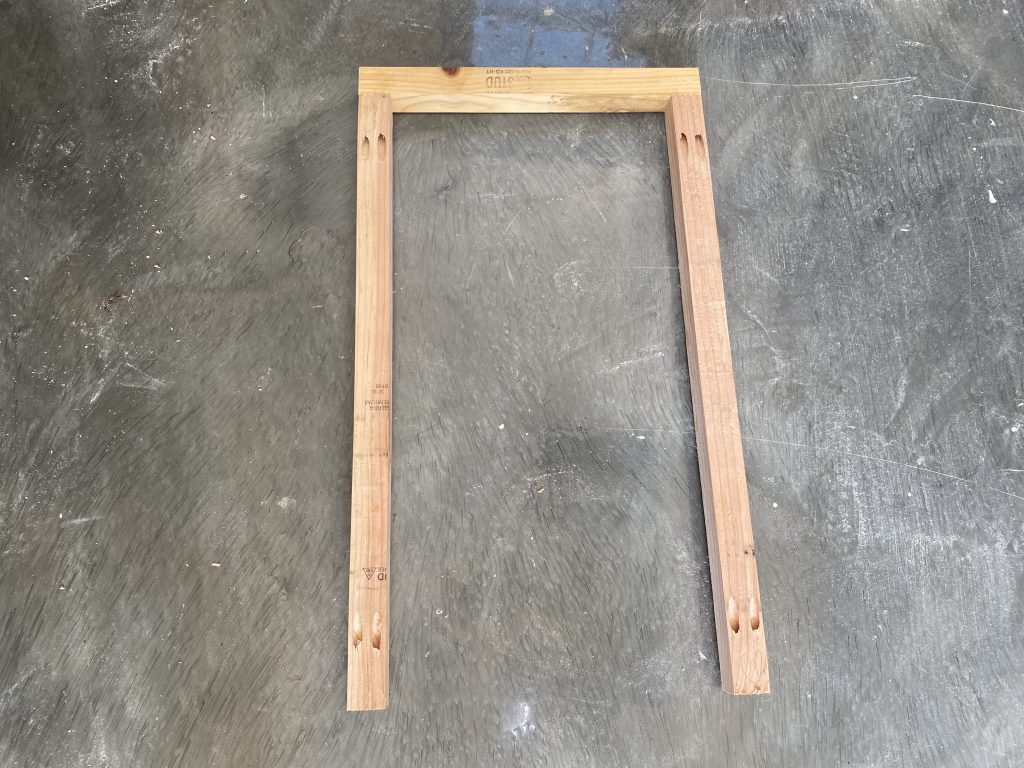
This is what the frame should look like at this point. Build two frames.
Step 2: Attaching the Frames
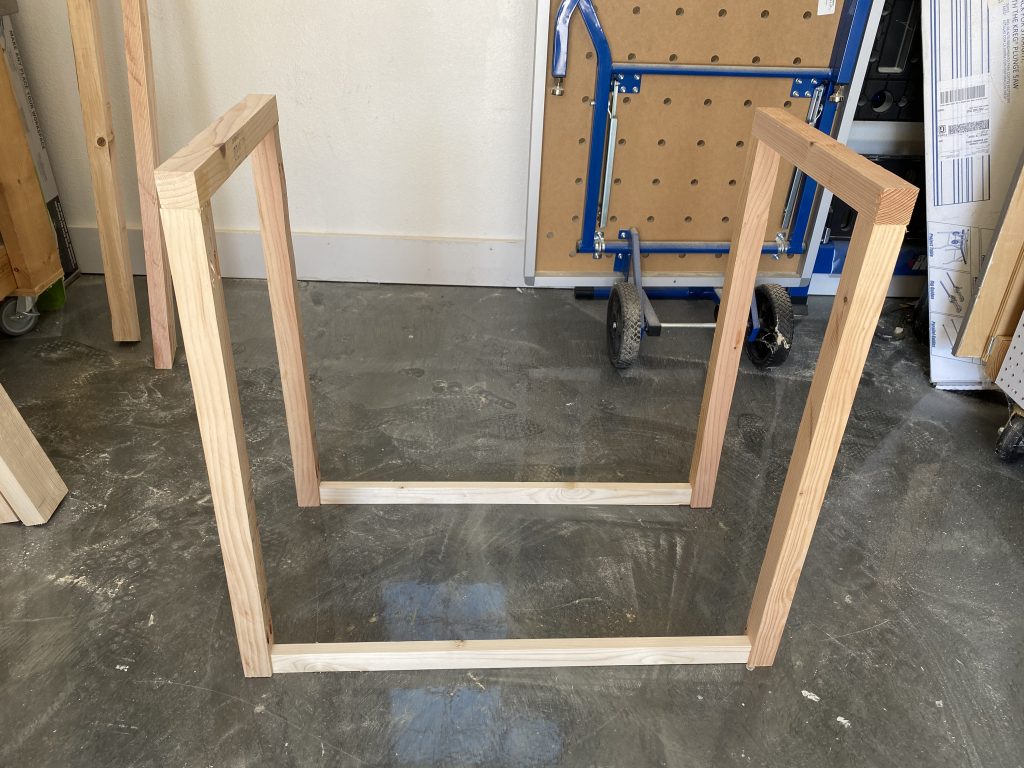
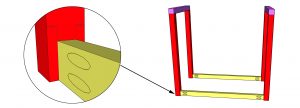
Cut the bottom rails to size and drill 3/4″ pocket holes at both ends. Center the rails on the inside of the frames and attach them with 1 1/4″ pocket hole screws and wood glue.
- Now is a good time to paint the frame if you want it to be a different finish than the shelves and drawers.
Attaching the Shelves
Step 1: Attaching the Bottom Shelf
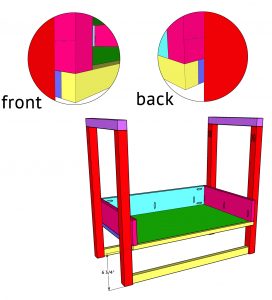
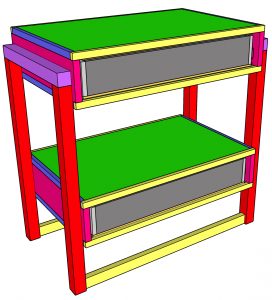
Attach the bottom shelf to the frame with 1 1/2″ wood screws from the inside of the shelf and into the frame. The shelf should over hang the frame 3/4″ on the front and back.
Step 2: Attaching the Top Shelf

Attach the top shelf the same way, making sure to allow a 3/4″ over hang on the front and back as well.
Drawers
Step 1: Building the Drawer Frame
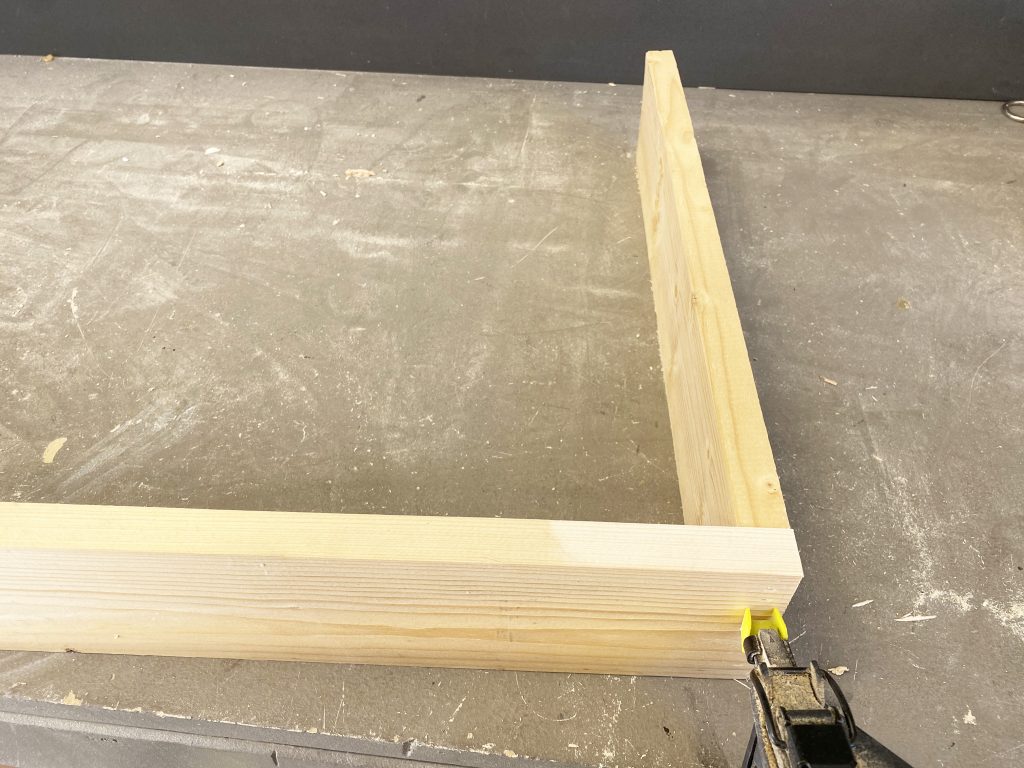
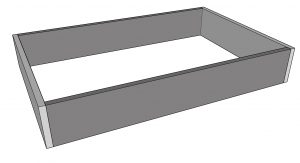
Cut the drawer frame pieces to size. Attach the short sides to the long pieces with 1 1/4″ brad nails and wood glue.
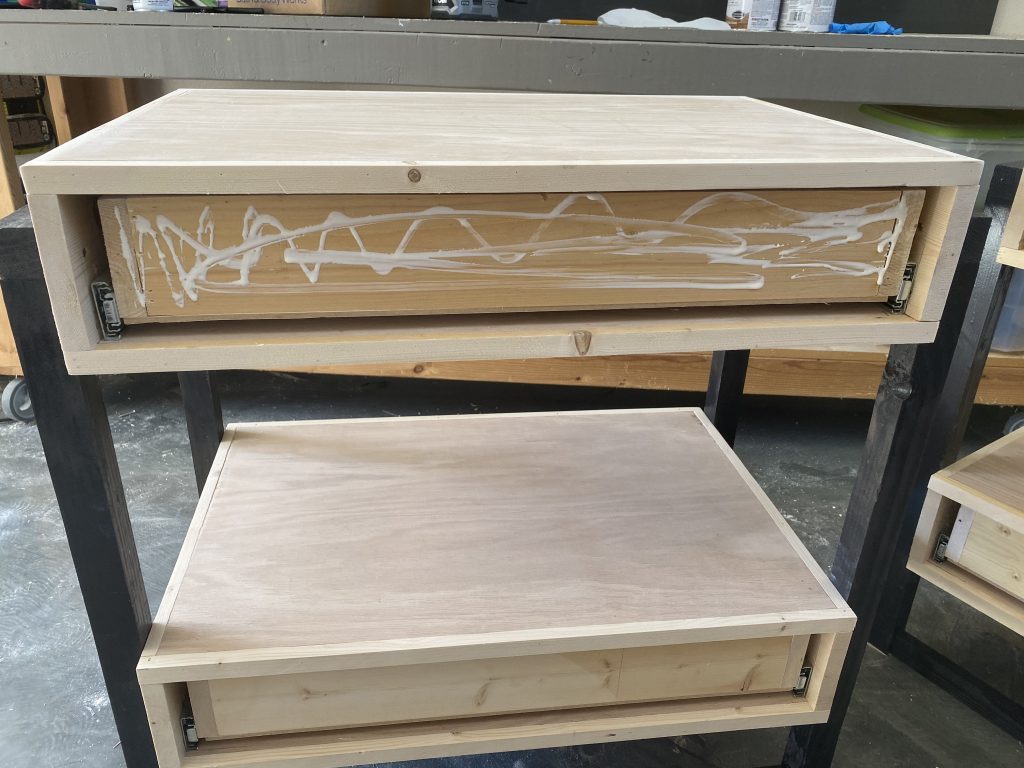
This is what the drawer frame should look like at this point. Build two drawer frames.
Step 2: Attaching the Drawer Bottom

Cut the bottom of the drawer to size and attach it to the bottom of the drawer frame with 3/4″ staples and wood glue.
Step 3: Install the Drawers
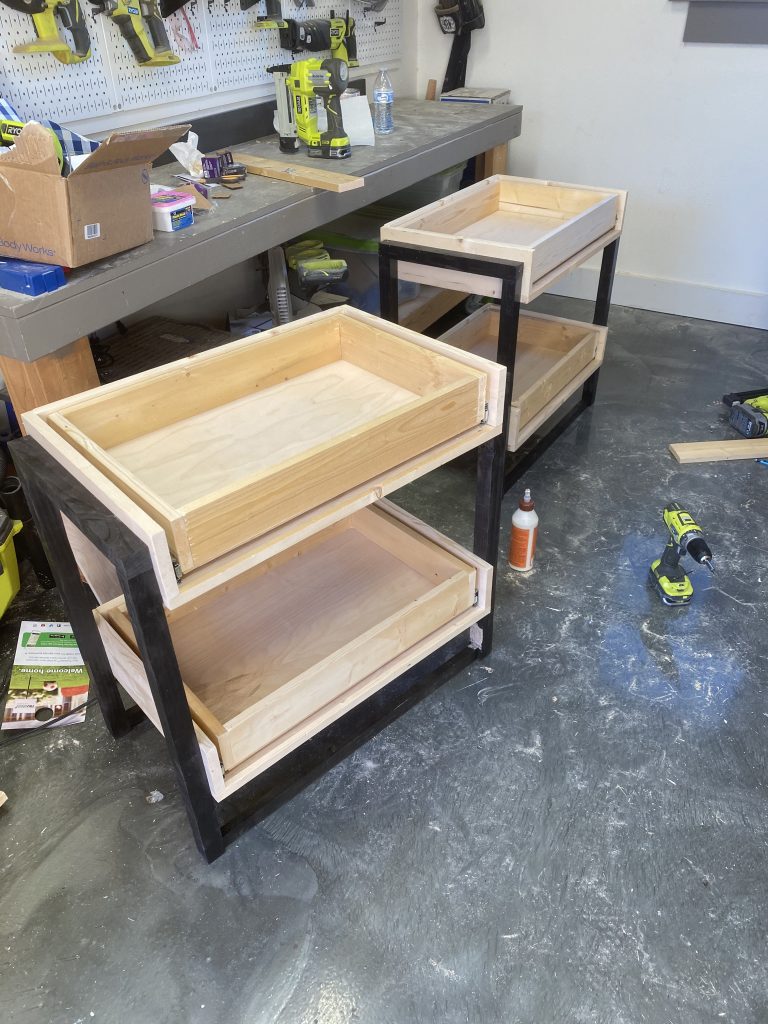
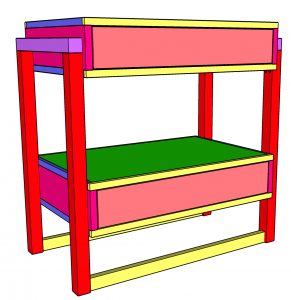
Install the drawer in the shelves before attaching the top shelves.
- You can find a detailed how-to install drawer slides HERE on our site!
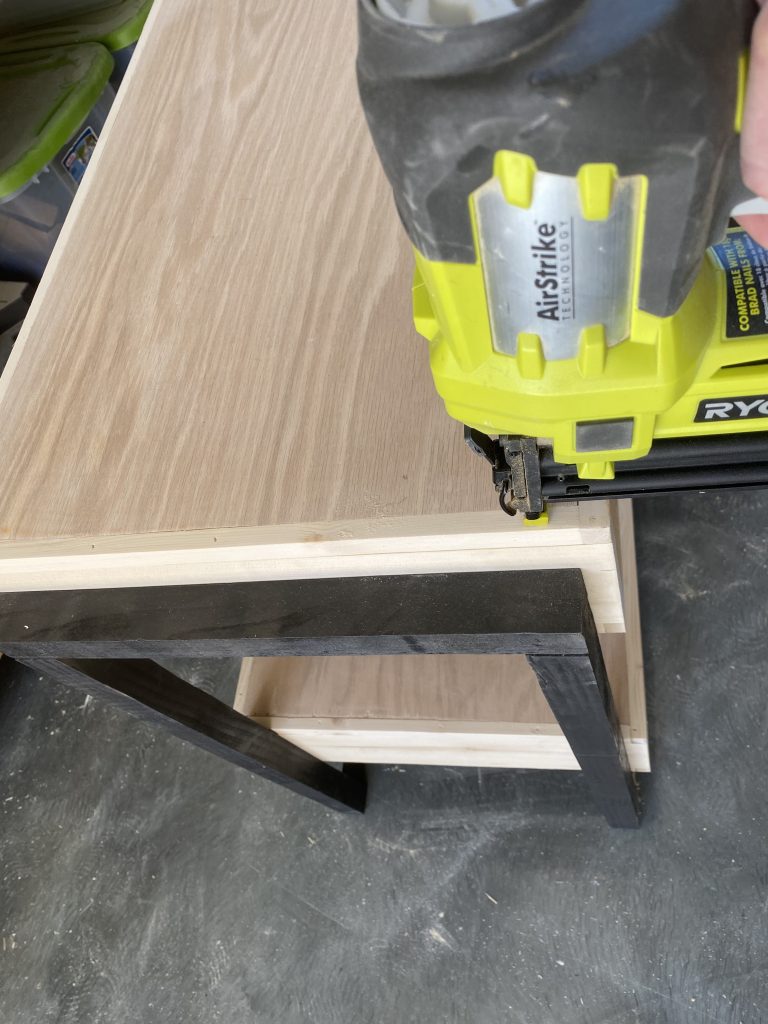
Attach the top shelf pieces to the top of the shelves with 1 1/4″ brad nails and wood glue.
Cut the drawer faces to size and attach them to the drawers with 1 1/4″ wood screws and wood glue from inside the drawer and into the drawer face.
- Tip: with the drawer closed, place the drawer face where you want and hold it in place with a couple of brad nails.
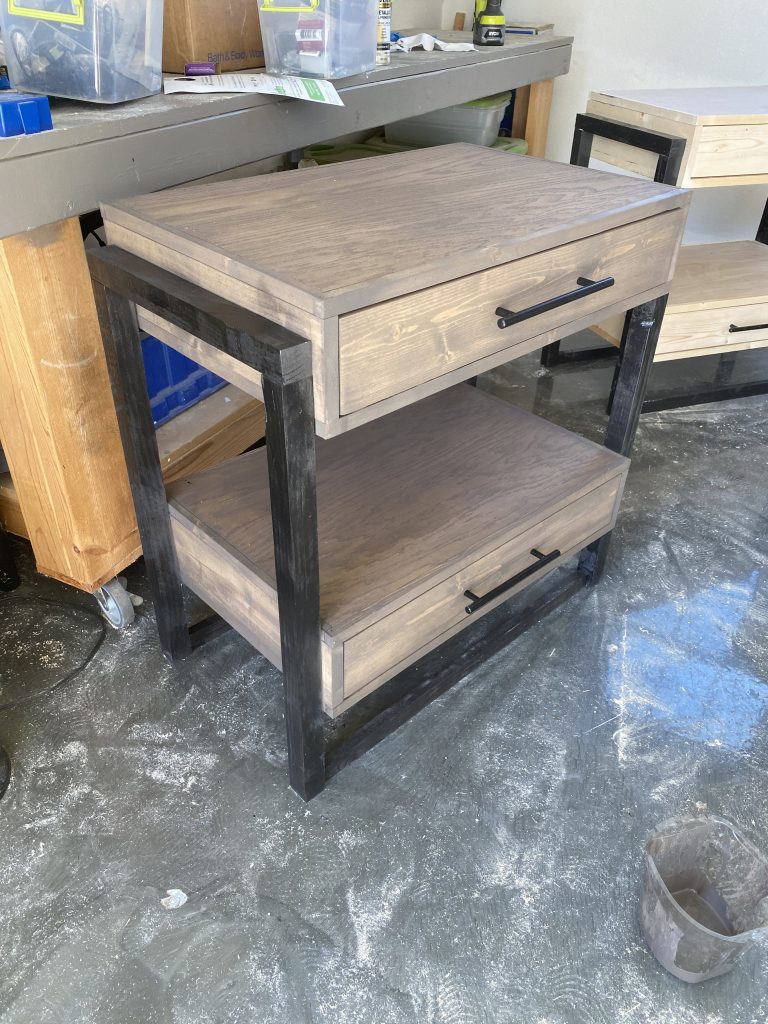
Now, just add a finish and hardware and you’re done!
- You can find the paint we used for the frame HERE
- You can find the stain we used HERE
- You can find the pulls we used HERE
That was it!
Make sure to share your builds with us on social media and use #shanty2chic so we can share them too!
Happy Building!
DIY Nightstand with Drawers
Tools
- Miter Saw
- Kreg Jig
- Drill
- Brad Nailer
- Pin Nailer (optional)
- Stapler (optional)
Supply List
- 2 2x2x8 Framing Lumber (I ripped from 2×4's)
- 1 1x2x8 Pine or Common Boards
- 2 1x5x8 Pine or Common Boards
- 2 1/2"x3/75"x8' Hardwood Plywood (can be ripped from the 3/4")
- 5 1/2"x3/4"x8' Trim (I ripped mine from 1x boards)
- 1 1/4"x48"x48" Hardwood Plywood
- 1 3/4"x48"x96" Hardwood Plywood
- 1 1/4" pocket hole screws
- 2 1/2" pocket hole screws
- 1 1/4" brad nails
- 1" pin nails
- 1 1/2" wood screws
- wood glue
- Drawer Pulls (link in post)
Instructions
Cut List
- Cut List 1

- Cut List 2


Building the Shelves
- Cut the Shelf pieces to size. Measure and cut the side trim pieces to size and attach them to the sides of the shelf with 1" pin nails and wood glue. Meausre and cut the front and back trim pieces to size and attach them the same way. Build 4 shelves.

- Cut the side shelf pieces to size, drill 3/4" pocket holes in one side of each board and attach them to the sides of the bottom shelf with 1 1/4" pocket hole screws and wood glue. Do this for both botto shelves.

- Cut the back shelf piece, drill 3/4" pocket holes on one edge and both ends of the board. Attach it to the back of the bottom shelf, between the side pieces with 1 1/4" pocket hole screws and wood glue.

Building the Frame
- Cut the side frame aned top frame pieces to size. Drill 1 1/2" pocket holes at the top of each side piece. Attach the side frame pieces to the top frame piece with 2 1/2" pocket hole screws and wood glue. Build 2 frames.

- Cut the bottom rails to size and drill 3/4" pocket holes at both ends. Center the rails on the inside of the frames and attach them with 1 1/4" pocket hole screws and wood glue.

Drawers
- Attach the bottom shelf to the frame with 1 1/2" wood screws from the inside of the shelf and into the frame. The shelf should over hang the frame 3/4" on the front and back.

- Attach the top shelf the same way making sure to allow a 3/4" over hang on the front and back, as well.

- Cut the drawer frame pieces to size. Attach the short sides to the long pieces with 1 1/4" brad nails and wood glue. Build 2 frames.

- Cut the bottom of the drawer to size and attach it to the bottom of the drawer frame with 3/4" staples aned wood glue.

- Install the drawers in the shelves before attaching the top shelves. You can get detailed instructions on how we installed our drawers in the post above!

- Attach the top shelf pieces to the top of the shelves with 1 1/4" brad nails and wood glue.
- Cut the drawer faces to size and attach them to the drawers with 1 1/2" wood screws and wood glue, from inside the dfrawer and into the drawer face. Tip: with the drawer closed, place the drawer face where you want and hold it in place with a couple of brad nails.

- Now just add a finish and hardware and you're done! Make sure to share your builds with us on social media and use #shanty2chic so we can share them too!Happy Building!


i cannot find a video of this on youtube please share the link….thank you in advance…
I am sure I missed where the metal base if from. Can anyone help me out
Thanks I want to make this!
It is wood stained black (deets in the instructions)
Hi! Love you guys and I was wondering if you could do a video of you guys making this night stand
Wow these look great! Anyone know what 3D design software is used to make those renderings?
Hi there! This nightstand is beautiful and I am wanting to build it for my room. I want to match the stain for another piece of furniture from your plans but it seems the link to the stain is not working. Could you specify what the exact stain is? Thank you so much!!
Hi Ladies. Love this design and thought that you had a console/sofa table with the middle shelf slanted like a library shelf instead of drawers around the same time. You featured it in a child’s room as extra storage . Do you happen to have that link? I can’t seem to find it.
Love the night stand but have a few questions. What color of stain was used in the nightstand. Supposedly there is a link in the pictorial instructions but it does not work. It also mentions drawer slides in pictorial instructions And how to install them but then again the link does not work and but there are none listed on supply list. Can someone reply to these questions so my husband can get started in this for our granddaughters birthday. Thank you.
Does anyone know what stain was used?
Im very fond of the space between drawers, I peruse magazines while resting, that was perfect!
It looks beautiful and looks like a great design; however, it also looks kind of expensive because of the the 4 sheets of hardwood plywood. I do understand though. Regular plywood would not look good for the shelves and you need to have large enough material to complete the design. I decided to build 2 of them anyway. The is one other thing. You guys forgot to place the drawer slides on you supply list (even though you talk about them in your instructions). Thanks guys, I really enjoyed this project.
There should be room on each sheet of ply to do all cuts for two nightstands.
Does this material list make 1 or 2 nightstands?
By looking at the cut list, it would be for one nightstand
Unbelievable, I was looking for a bedside table to build. I will be making this for sure.
I absolutely love these bedside tables. I have been looking for something different. The drawers will be helpful and yet still have drawers to hold things that don’t need to be seen! Love Love Love these! Thanks for sharing this great project. I also love the light fixture above it.