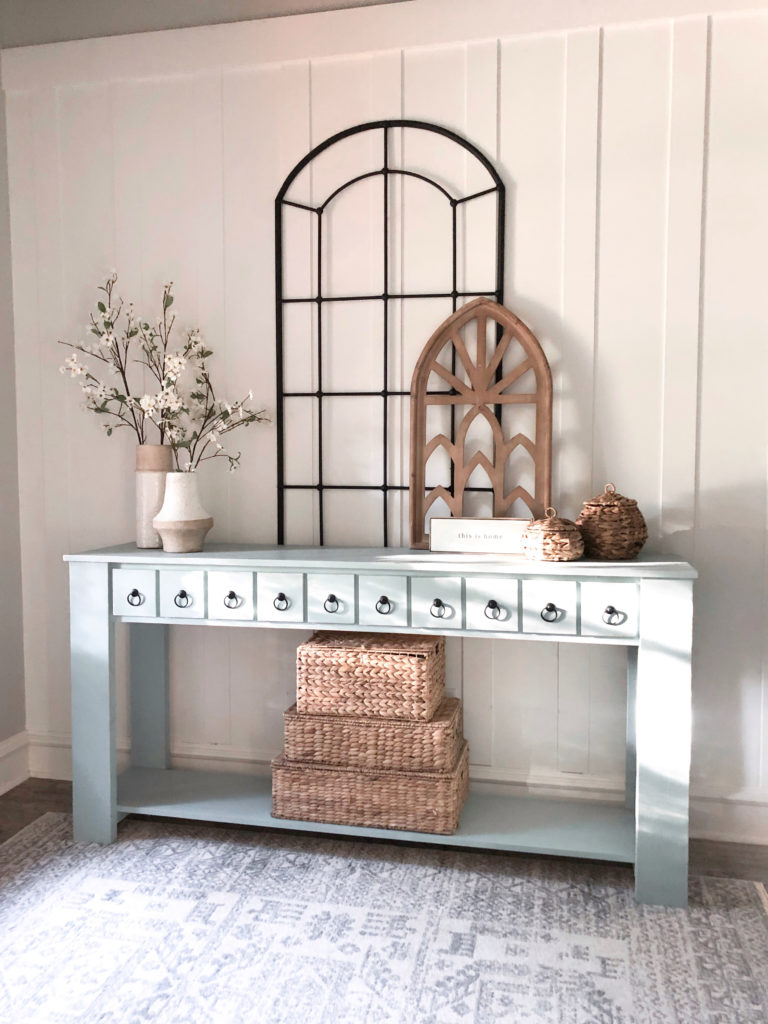
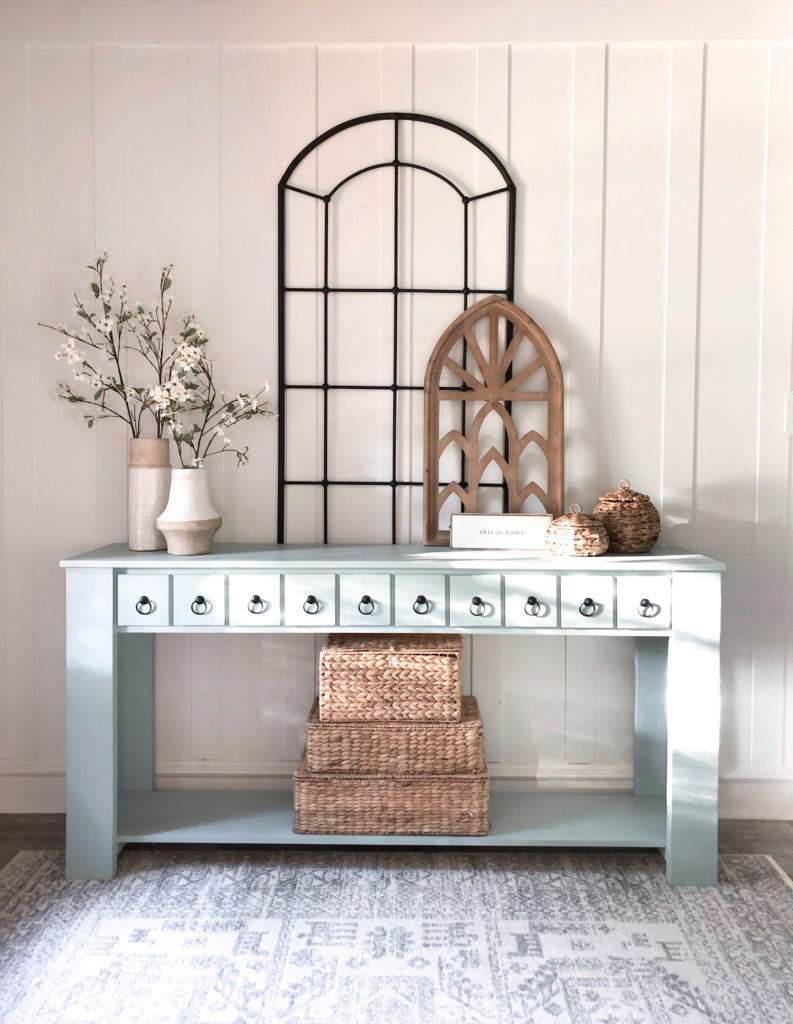
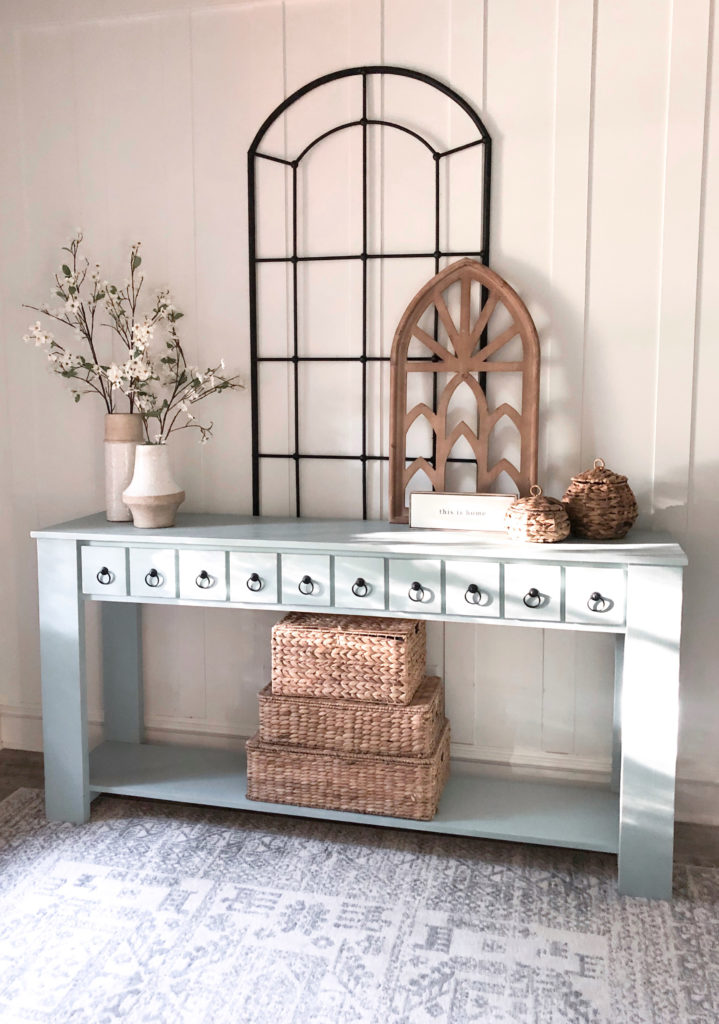
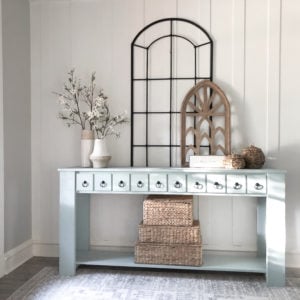
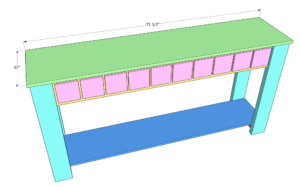
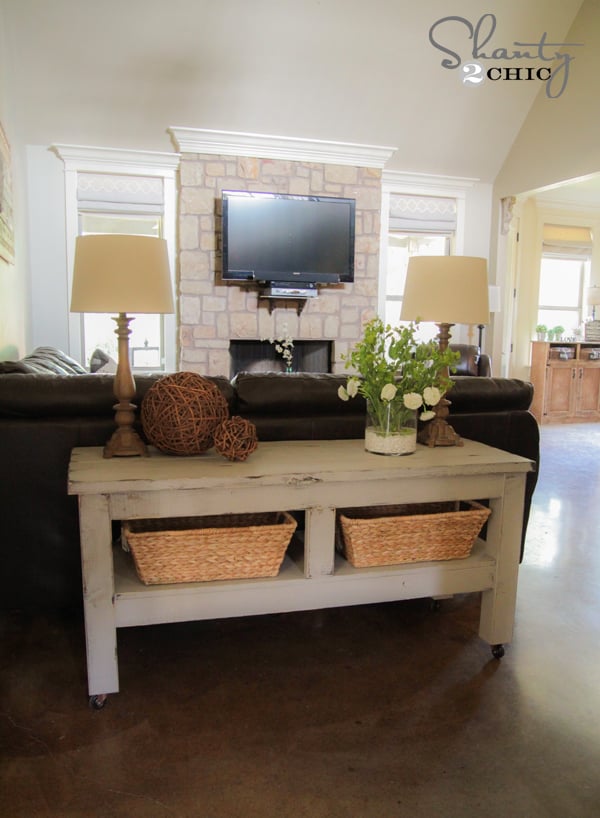
I LOVE how cute this DIY Faux Drawer Console Table turned out! I was looking for a way to create a cute and functional entry table that didn’t break the bank. This one is super easy to build, and the supplies cost me under $100.
Now let’s build it! I’ve added a link to the free printable plans at the bottom of this post!
Table of Contents
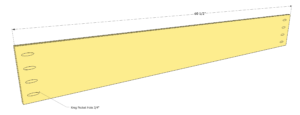
Step 1
After cutting your aprons to size, add 3/4” pocket holes to each end of the back of both longer apron pieces.

I used my Kreg Foreman to create my pocket holes, but a K5 is another one of our FAV Kreg Jig models. You can see it HERE on Amazon.


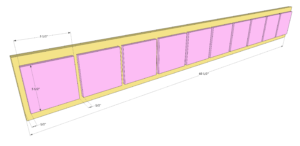
Step 2
Now, add your faux drawer faces. These are made from 1/2” x 6” craft boards. I used poplar because it is so smooth. Cut each piece to 5.5” to create squares. Then, evenly space them along the front of one of your longer aprons and attach them using wood glue and 1” brad or pin nails.

Before placing drawers on apron, use another board to create a straight line. This will give you a line to place the top of all of your drawer faces on. This line will be 1″ from the top of the apron.


I used my Ryobi Pin Nailer for this part. I LOVE this nailer. It leaves tiny holes which is great when attaching smaller boards and trim.

I used a scrap of the craft board to create the 1/2″ space in between each drawer face. It made this part super fast and easy!


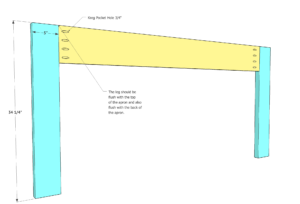
Step 3
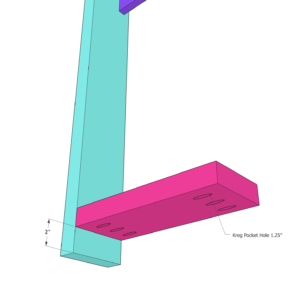
Attach both aprons to the legs. You want the back of the apron to be flush
with the back of each leg and also flush with the top of each leg. Attach each leg using wood glue and 1.5” pocket hole screws through the pocket holes in the aprons and into each leg.


Step 4
Attach both shelf supports to the base of one leg assembly. These are also 2×6 boards that have been ripped to 5”. Attach them 2” from the base of
both legs using wood glue and 2.5” pocket hole screws through 1.5” pocket holes.
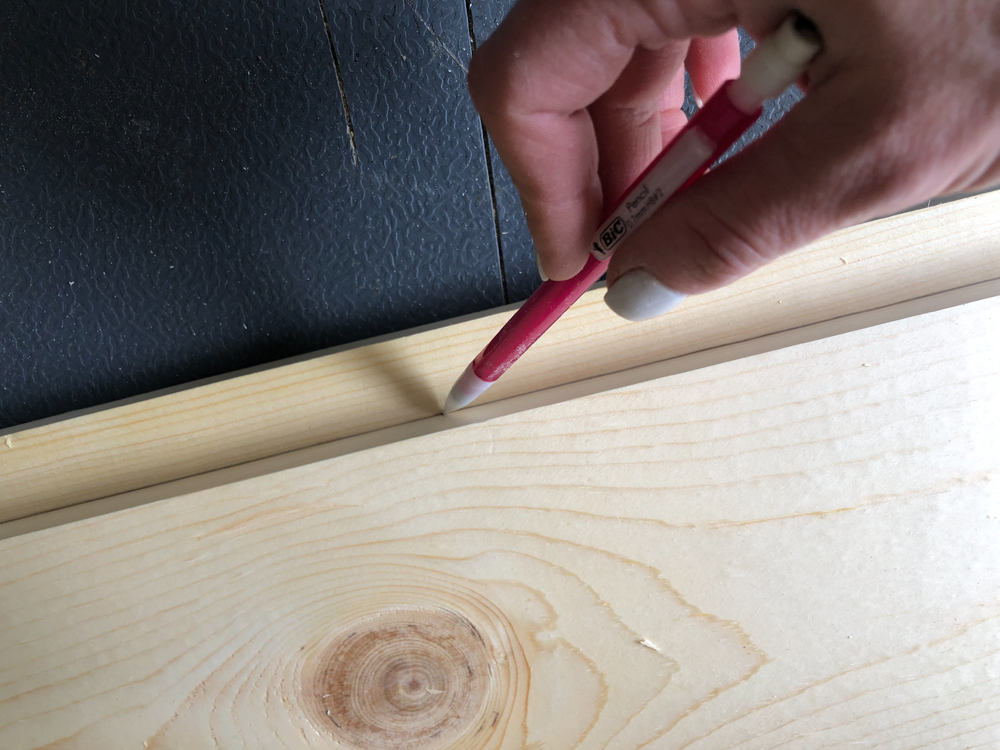
I used a pencil to mark 2″ from the base of each leg to line up the shelf supports.

I used my K5 to create the pocket holes on this part. These are 1.5″ pocket holes.

This is what the bottom of the shelf supports look like after adding the pocket holes.


Step 5
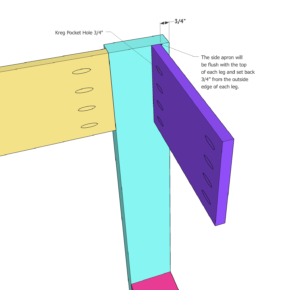
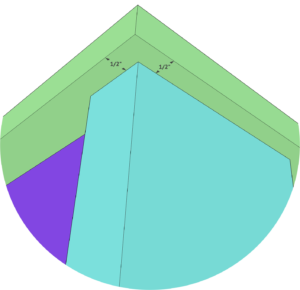
Attach both shorter aprons to the end and top of this leg assembly as well. They will be flush with the top of the legs and set in 3/4” from the outside
edge of both legs. Attach them using wood glue and 1.25” pocket hole screws through 3/4” pocket holes.


Step 6
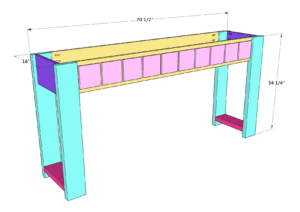
Now attach both leg assemblies together. Attach them through the pocket holes on the shelf supports and through the top aprons. Don’t forget to use wood glue between all joints.

Step 7
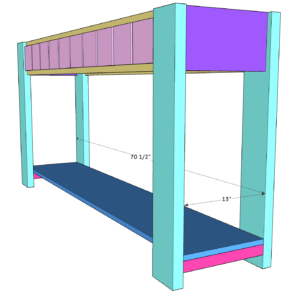
Now add the bottom shelf. This is a 3/4” thick laminated pine project panel. I purchased one that was 16” x 72” and used my table saw to cut it to size.
Attach it to the shelf supports using wood glue and 1.25” brad nails through the shelf and into each support.


Step 8
The final step is attaching the top of the console table. Attach it to the base of the table using wood glue and 1.25” brad nails through the top and into
the base.


And here she is ready for paint!

Be sure to check out our video next week! We walk you through the entire process on how we painted and finished this table!
And… let’s talk about that cute hardware!! You can find them HERE on Amazon!

Check it out!
Links to DIY Faux Drawer Console Table Decor!
DIY Faux Drawer Console
Supplies
- 2 2 x 6 x 8 framing lumber
- 2 1 x 8 x 8 pine or whitewood
- 2 1/2' x 6" x 48" poplar or pine craft board
- 2 laminate pine project panels check plans for size needed
Instructions
- Add 3/4” pocket holes to each end of the back of both longer apron pieces.

- Now, add your faux drawer faces. These are made from 1/2” x 6” craft boards. I used poplar because it is so smooth. Cut each piece to 5.5” to create squares. Then, evenly space them along the front of one of your longer aprons and attach them using wood glue and 1” brad or pin nails.

- Attach both aprons to the legs. You want the back of the apron to be flush with the back of each leg and also flush with the top of each leg. Attach each leg using wood glue and 1.5” pocket hole screws through the pocket holes in the aprons and into each leg.

- Attach both shelf supports to the base of one leg assembly. These are also 2×6 boards that have been ripped to 5”. Attach them 2” from the base of both legs using wood glue and 2.5” pocket hole screws through 1.5” pocket holes.

- Attach both shorter aprons to the end and top of this leg assembly as well. They will be flush with the top of the legs and set in 3/4” from the outside edge of both legs. Attach them using wood glue and 1.25” pocket hole screws through 3/4” pocket holes.

- Now attach both leg assemblies together. Attach them through the pocket holes on the shelf supports and through the top aprons. Don’t forget to use wood glue between all joints.

- Now add the bottom shelf. This is a 3/4” thick laminated pine project panel. I purchased one that was 16” x 72” and used my table saw to cut it to size. Attach it to the shelf supports using wood glue and 1.25” brad nails through the shelf and into each support.

- The final step is attaching the top of the console table. Attach it to the base of the table using wood glue and 1.25” brad nails through the top and into the base.

- Note the spacing on this step.

Where can I watch the video to paint the table?
What is the paint color please?
Y’all are the reason that women think that they can’t have a voice. You should be ashamed of yourselves.
Very Impressed with this design! will look great beside my taxidermy cock goblin
You have one too?
I can’t believe that others had the same idea!
Thanks, Ladies! It’s adorable!