Learn how to replace an existing door with a sliding barn door! Easy to customize the door to fit any space! Free plans and how-to video!
We are back with the final episode of our sisters Shanty House Crash! Our final project in this series was to tackle her pantry doors. We wanted to give her a sliding barn door for the pantry doors because they are visible from so many rooms in the house and giving this space a custom look would not only serve a function, it would look beautiful on the wall! We get so many questions asking us “how to replace an existing door with a sliding door” so, we are covering just that! The best part is, this DIY Barn Door is easy to customize to fit any door size! It’s a super easy and affordable project AND you don’t have to remove the door trim!
So, let’s get building! Just click the Play Button below to watch!
How fun was that?! Make sure to get the FREE Printable Plans HERE and you can follow along with the step-by-step below!
Tools:
18-gauge Stapler (optional)
23-gauge Pin Nailer (optional)
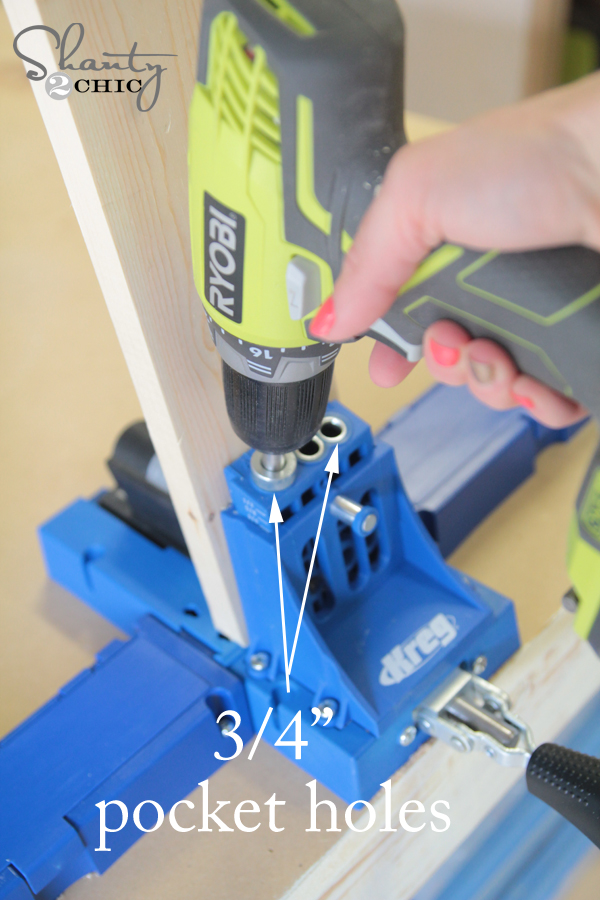
To start, we cut the frame pieces to size and drilled 3/4″ pocket holes into each end of the 1×2’s. You can find our favorite Kreg Jig model HERE.
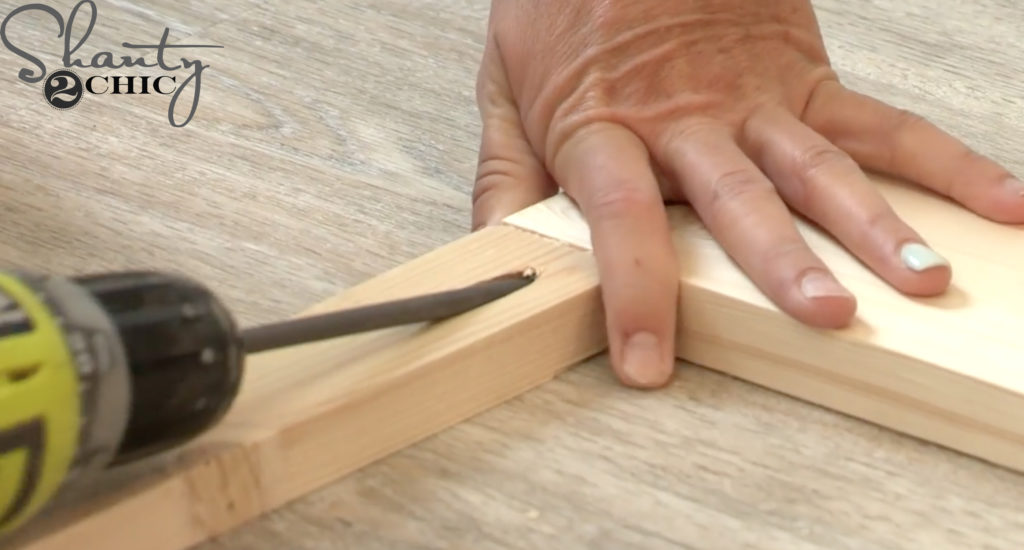
Then we attached the 1×2’s to the 1×4’s with 1 1/4″ pocket hole screws and wood glue.
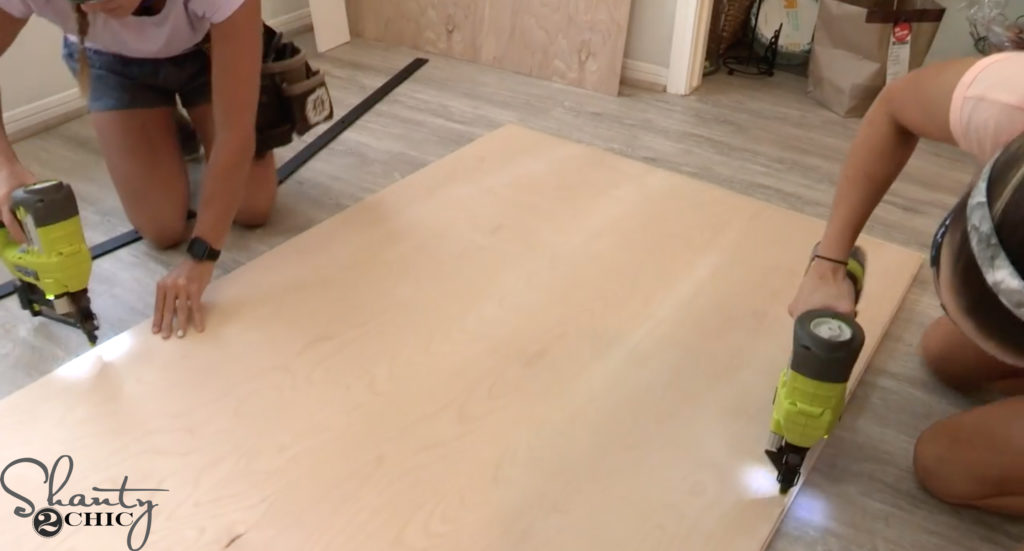
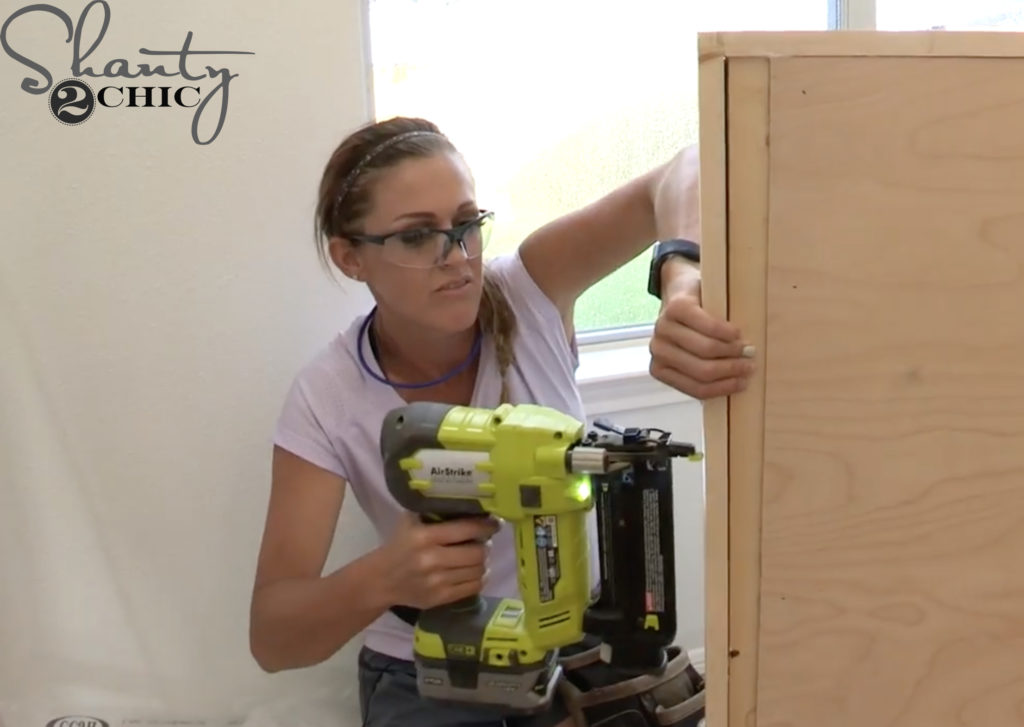
Next, we cut the 1/4″ plywood boards to size and attached them to the front and back of the frame with 3/4″ staples in our Ryobi 18 gauge Narrow Crown Staplers and wood glue. If you don’t have a stapler, you can use a nailer! You can find our favorite 18 gauge stapler HERE!
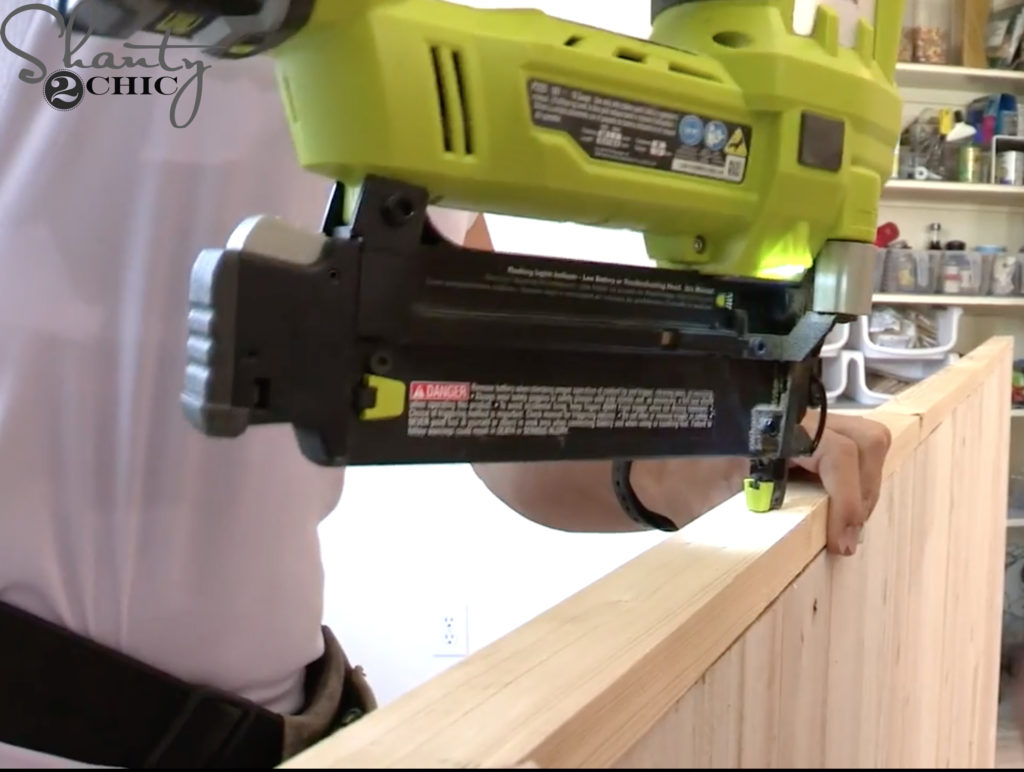
We cut the side trim pieces to size and attached them to the side of the barn door with 1 1/4″ brad nails and wood glue. You can find our favorite Brad Nailer HERE!
Once the side trim was attached, we measured and cut the bottom trim to size and attached it with wood glue and 1 1/4″ brad nails.
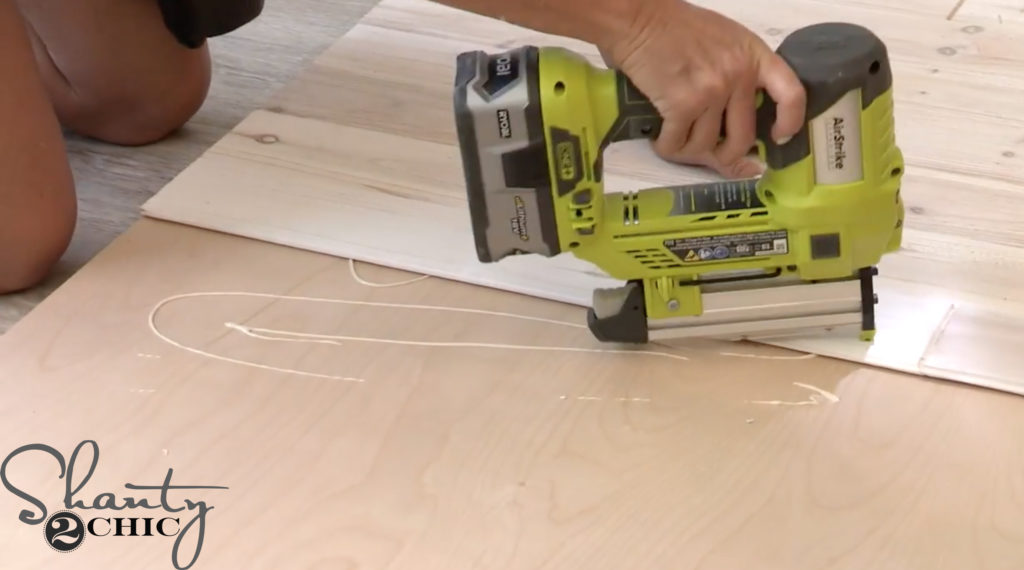
We used a Driftwood tongue and groove wall plank kit for the front of the barn door. We used about 2.5 boxes. We started with the top left corner and worked our way to the other end. Make sure to cut the tongue and groove edge off of the first board, so that it is flush with the trim. Fit and arrange the pieces so that the seams stagger between each row. We used our 23-gauge Pin Nailer, with 1″ nails, and wood glue to attach the planks. You can find our favorite Pin Nailer HERE!
We added a protective finish to the driftwood planks. You can find what we used HERE!
We also dry brushed a bit of paint onto the 1×2 trim pieces, to match the driftwood. You can find the paint we used HERE.

The final step was to hang the door. We attached the wheels and the handle to the door. You can find the barn door hardware that we used HERE and the Handle that we used HERE!
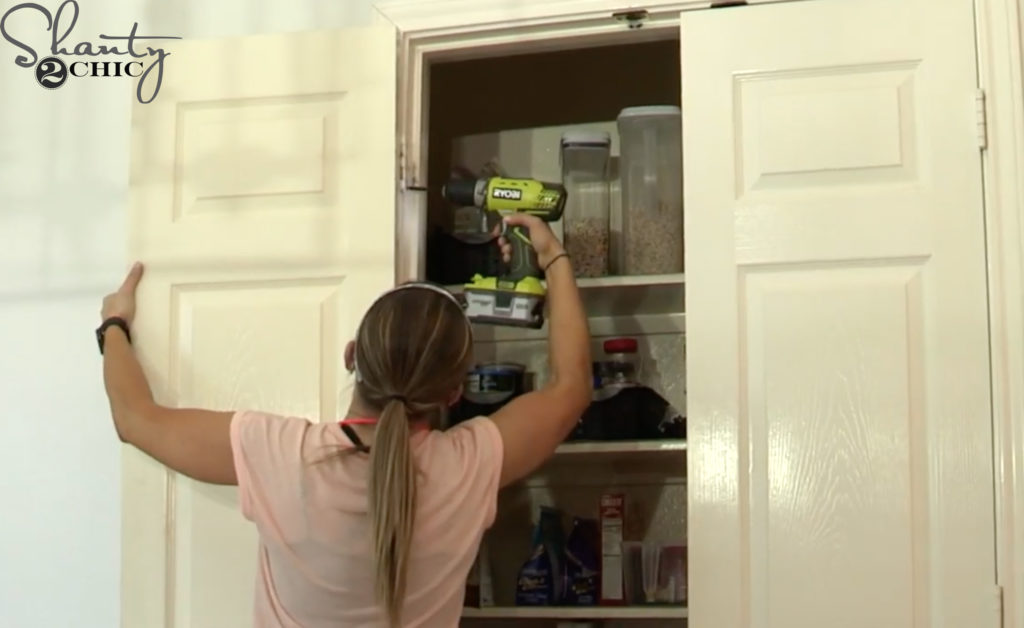
We removed the existing doors and filled the screw holes with wood putty. Once the putty dried, we touched them up with a little paint.

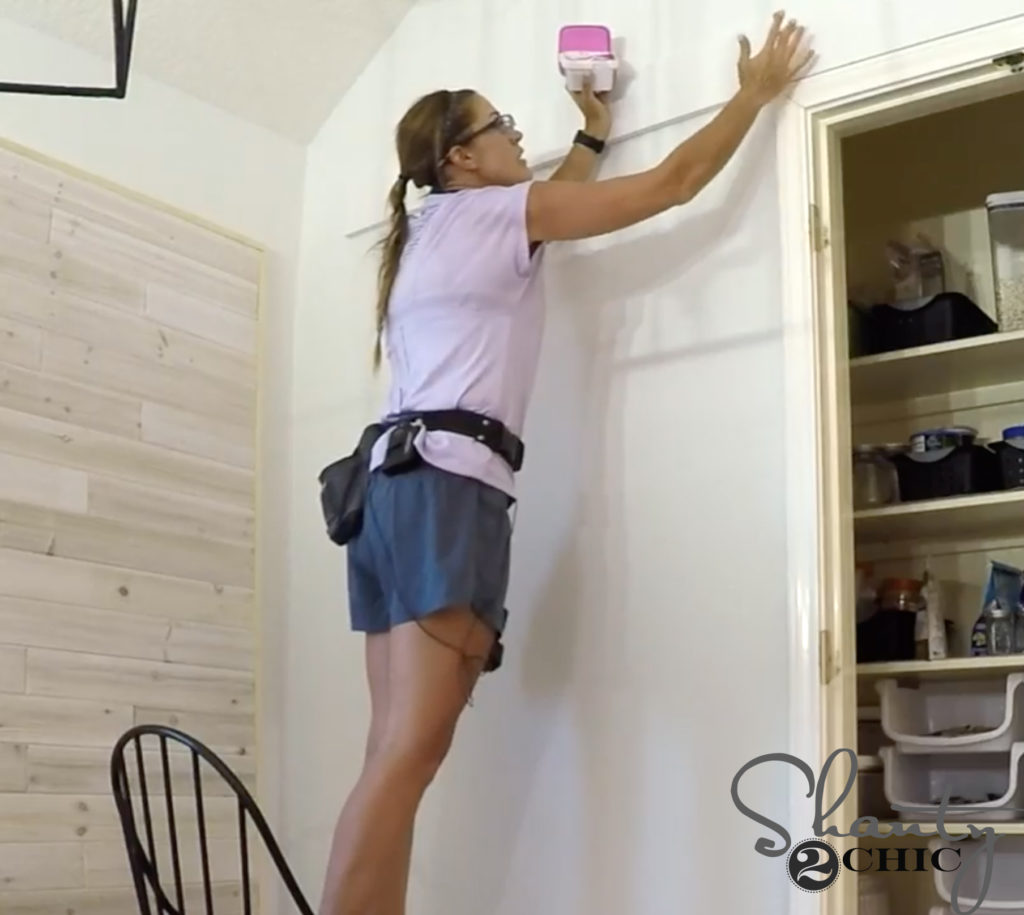
If you choose to leave the door trim, like we did, you can used a pre-primed 1×6 pine board for attaching the barn door track. This board also makes it easier to attach the track to the wall.
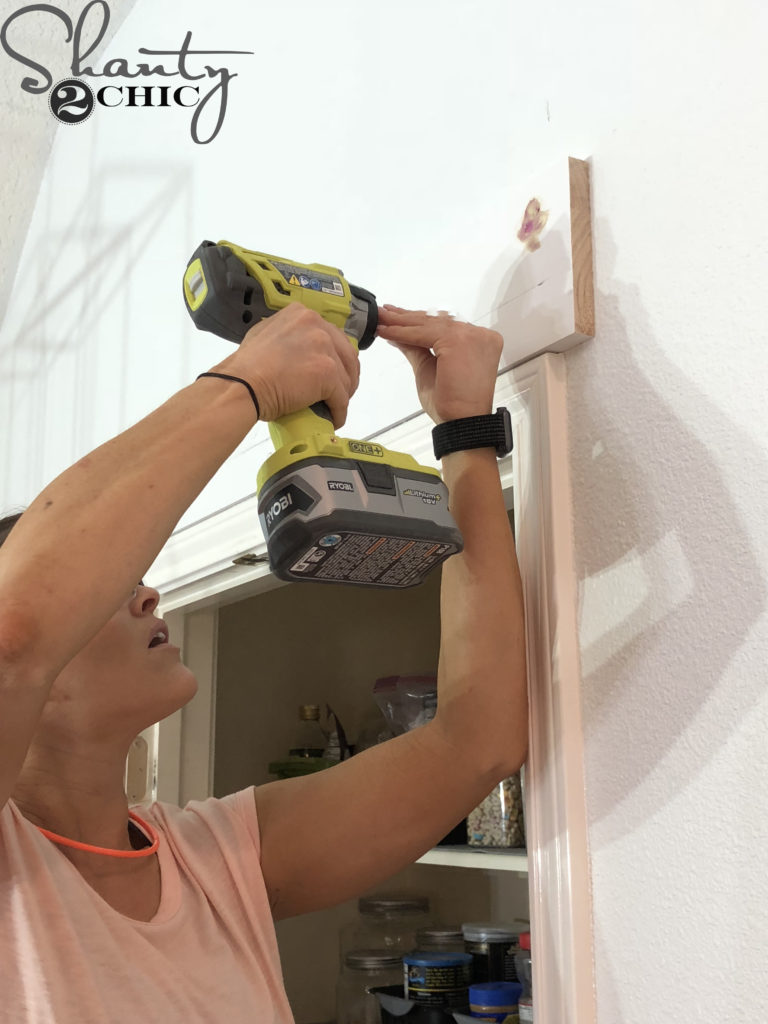
We attached the 1×6 board with 3″ wood screws, through the studs in the wall.
Then, we filled the screw holes with wood filler and painted it the same color as the door trim. You can find our favorite wood filler HERE.
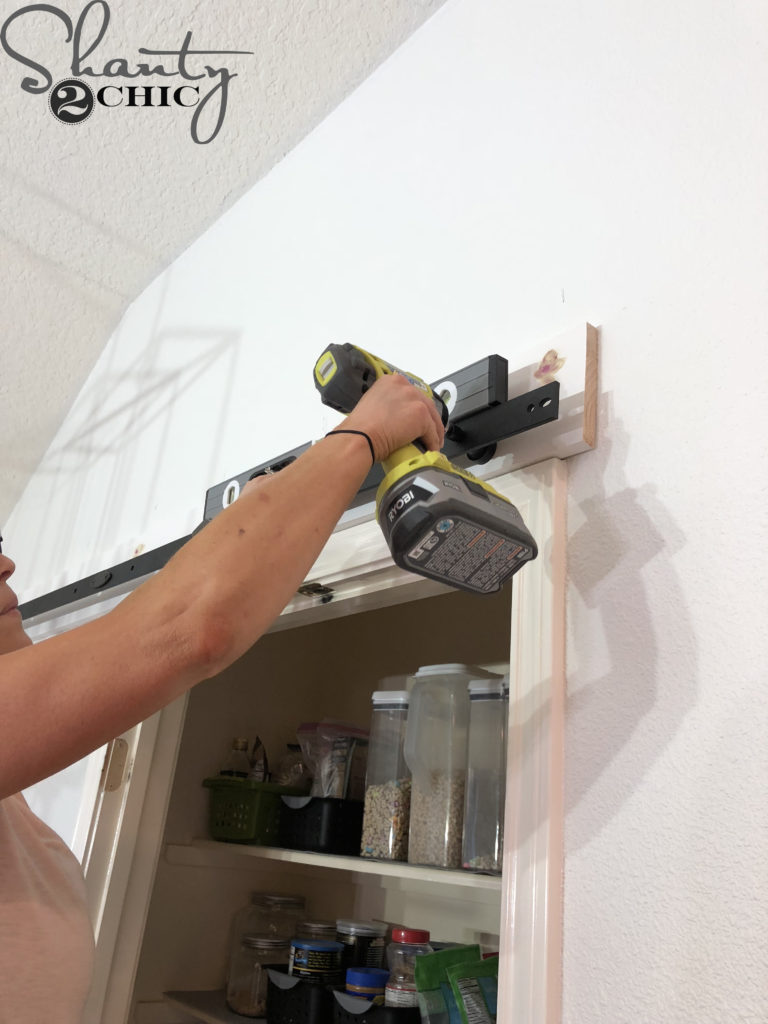
Once the paint was dry, we began attaching the barn door track.
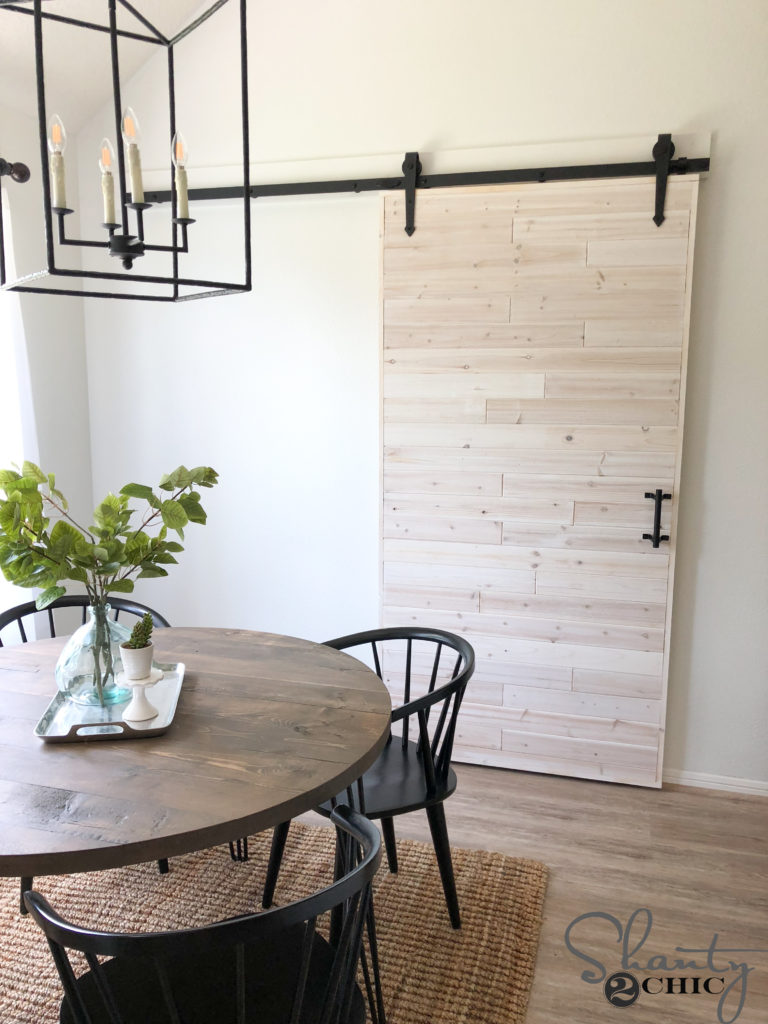
We slid the door onto the track and that was it!


Here’s the before!
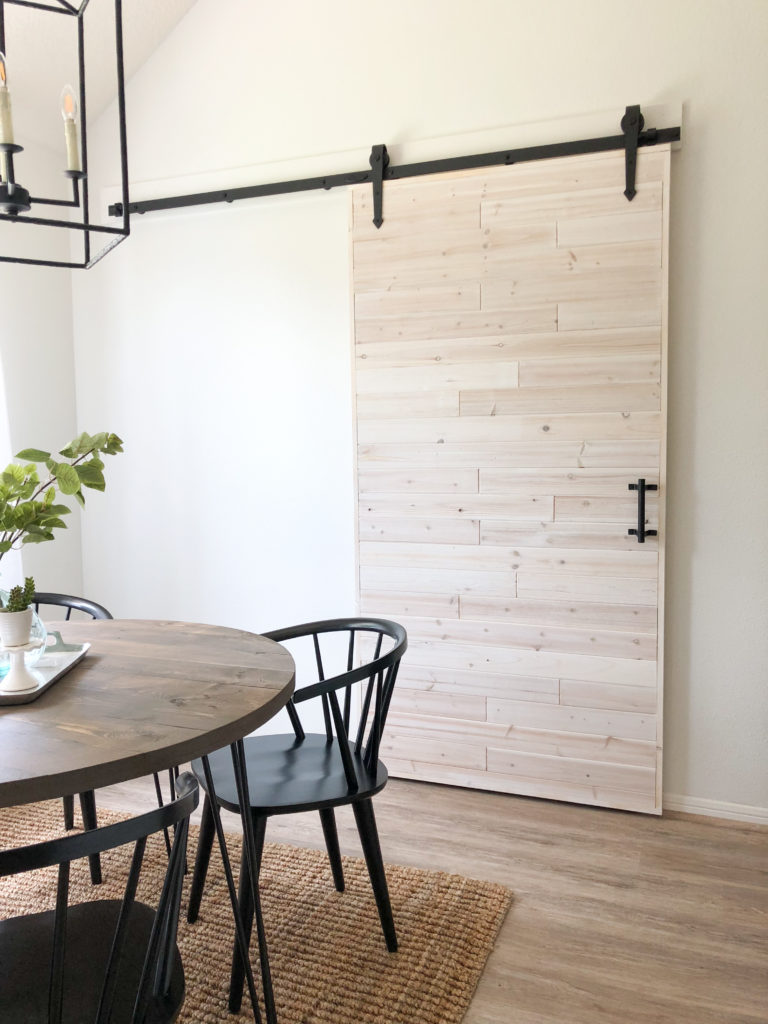
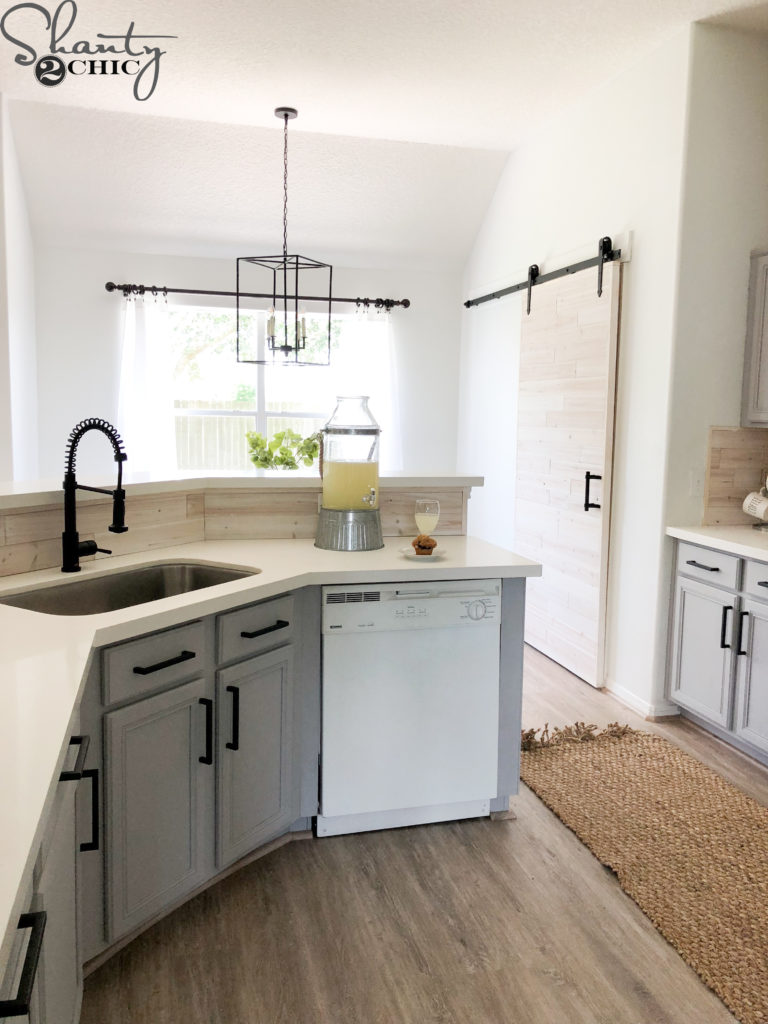
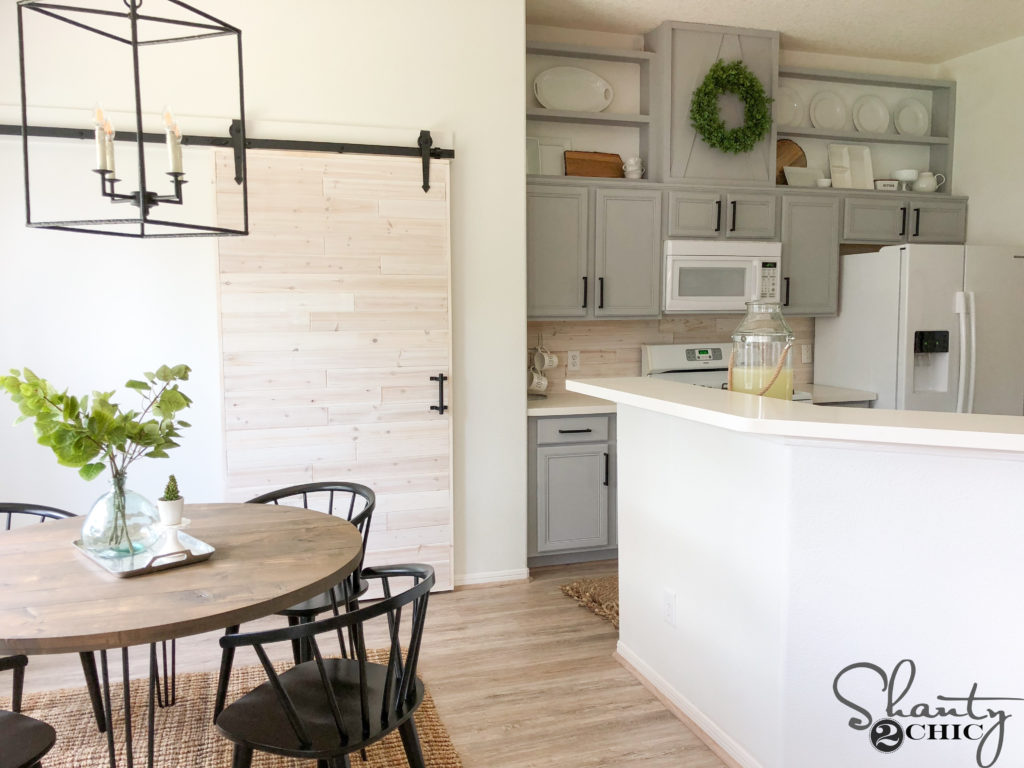
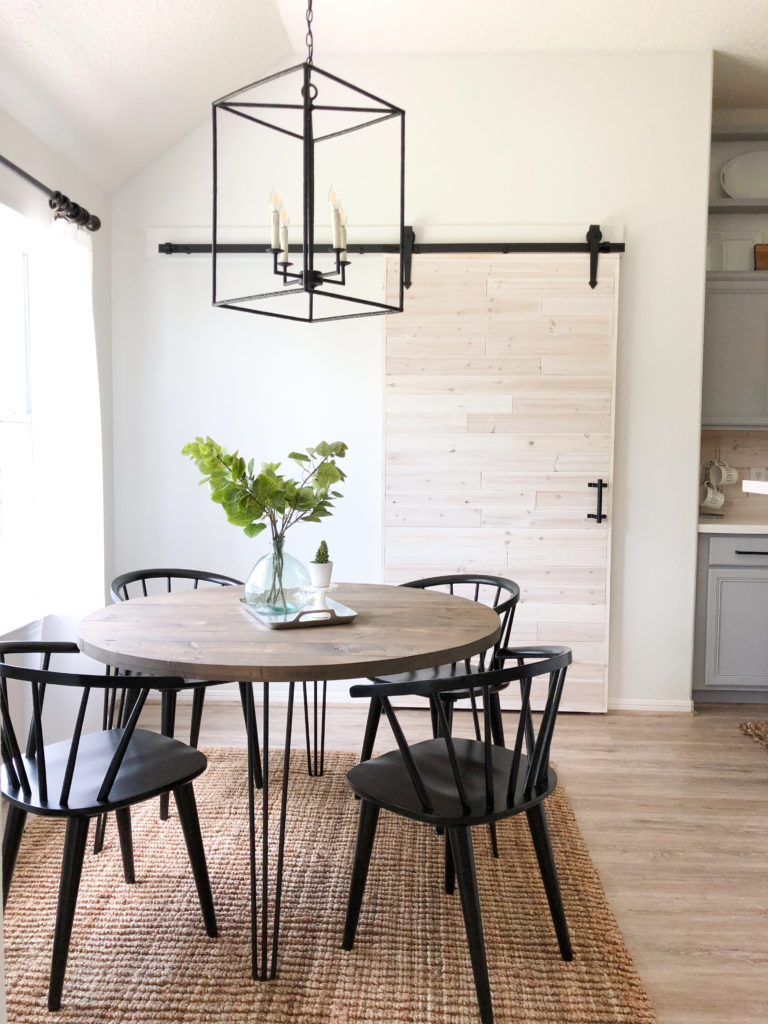
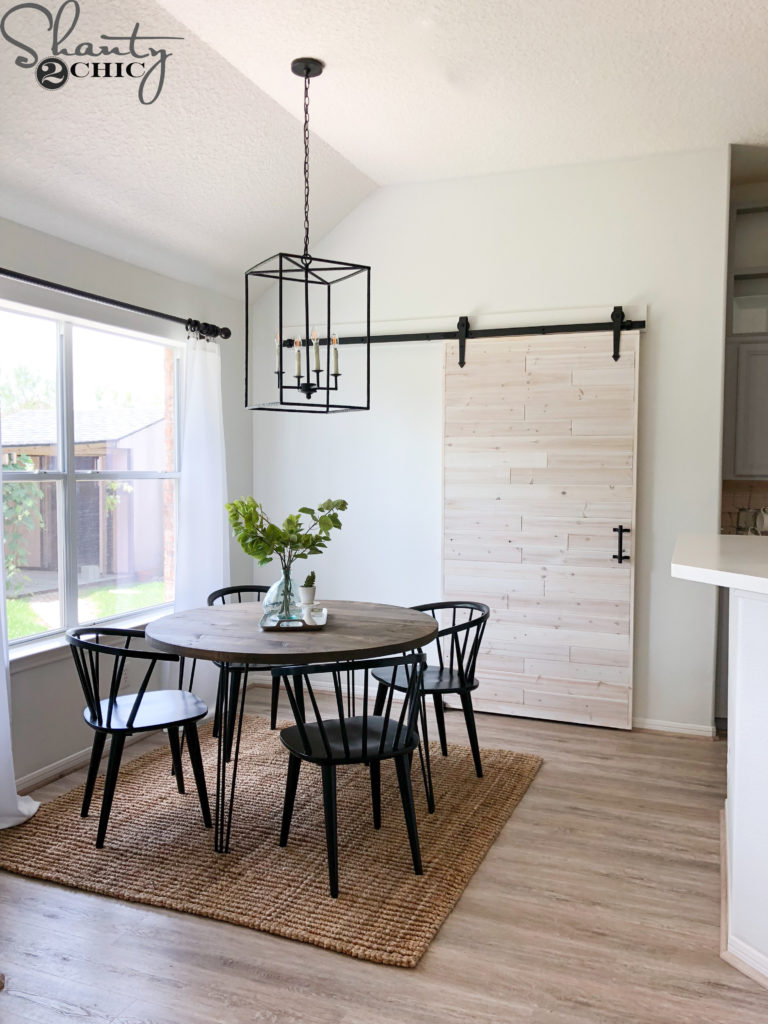
Not only did we give her an updated, custom pantry door, we gave her a piece of art on the wall that is visible from so many rooms in her home!
Linking to all of the other items in this space below!
Barn Door Pull – (the one we used is out of stock but we have also purchased this one for another barn door.
Check out all of the other projects from this Shanty House Crash series below!
Farmhouse Dining Table – Free plans and how-to video live, now!
DIY Driftwood Backsplash – Free plans and how-to video live, now!
How to Add Height to Kitchen Cabinets – Free Plans and how-to video live, now!
Custom Cabinet Trim Hack – Free Plans and how-to video live, now!
How We Paint Cabinets –Free Plans and how-to video live, now!
How to Frame and Cover a Crescent Window – Free Plans and how-to video live, now!
DIY Round Kitchen Table – Free plans and how-to video live, now!
DIY Pipe Shelves – Free plans and how-to video live, now!
DIY Barn Door for Pantry – Free Plans and how-to video live, now!
Thanks so much for stopping by!
Happy Building!

This is a very practical and well-explained guide. Replacing a traditional door with a sliding barn door is a great way to save space while adding a strong design feature to a room. I appreciate how the steps cover both functionality and installation details, making the process easier to follow. It’s always interesting to see space-saving solutions alongside broader interior and material trends here: https://plywoodbazar.com/
A useful and stylish upgrade idea.
This is such a great walkthrough for converting a standard doorway into a sliding barn door. The step-by-step process makes it much easier to understand how important accurate measurements and sturdy door materials are for smooth operation. Projects like this really highlight how quality wood panels and well-finished boards can improve both durability and the overall look of the space. We’ve found resources like https://plywoodbazar.com/
useful when exploring different wood and panel material options for interior door and furniture projects. Beautiful result!
I am interested in a lightweight ( single layer) horizontal panel barn door. The actual opening is 2.1m × 800/900 cm. We want to attach a mirror on one side if possible.
This looks AWESOME! Can you give me a final cost for the project? I know pricing may have changed, but I’m curious about the cost to build the door.
What is the link to the bar door hardware. The link doesn’t work. Awesome foorvkadies. Thank you!
How do i locate the link for the barn door hardware? I dont see it on your site
I love that stuff they are so Beautiful I love the pantry Farm door in the kitchen we just remodeled kitchen and I going talk to my husband to make me one on my pantry is the same size as your sister pantry i’ll post a picture he’s done with it thank you girls
Almost all the links Sent me To Walmart.com.mx…. is it because I’ m in Mexico?