We are so appreciative of all of your support for our pilot, Open Concept! It was such a fun and rewarding opportunity that we are so grateful for. If you missed the premiere and the repeat airings, you can learn more about it and check out all of the before and after pictures HERE!
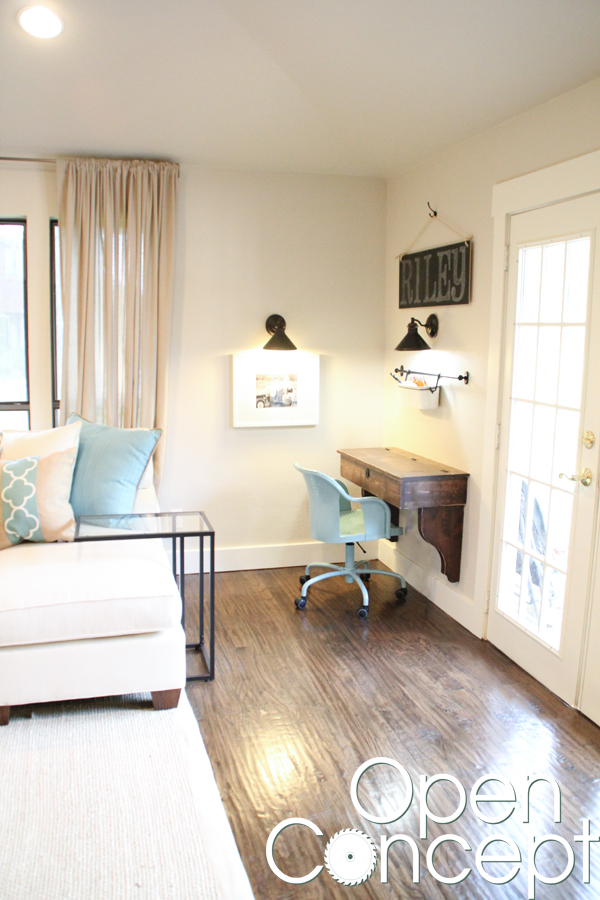
Dack and Brooke told us that their kids needed a place to do their school work, and that they were all sharing the same desk. We thought that the family room was the perfect place for the kids desks and we built floating desks so that they would tie in with the room and look like pieces of furniture.
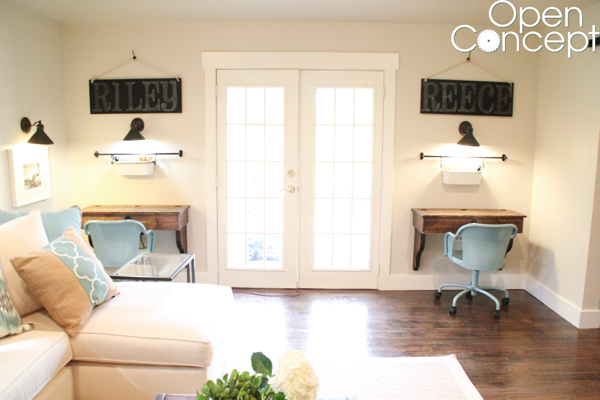
Not only were we able to give them their own work space, we added flip-tops allowing them to hide their stuff! This was huge for us because we wanted the work spaces to be part of the room but didn’t want them to become cluttered and eye sores!
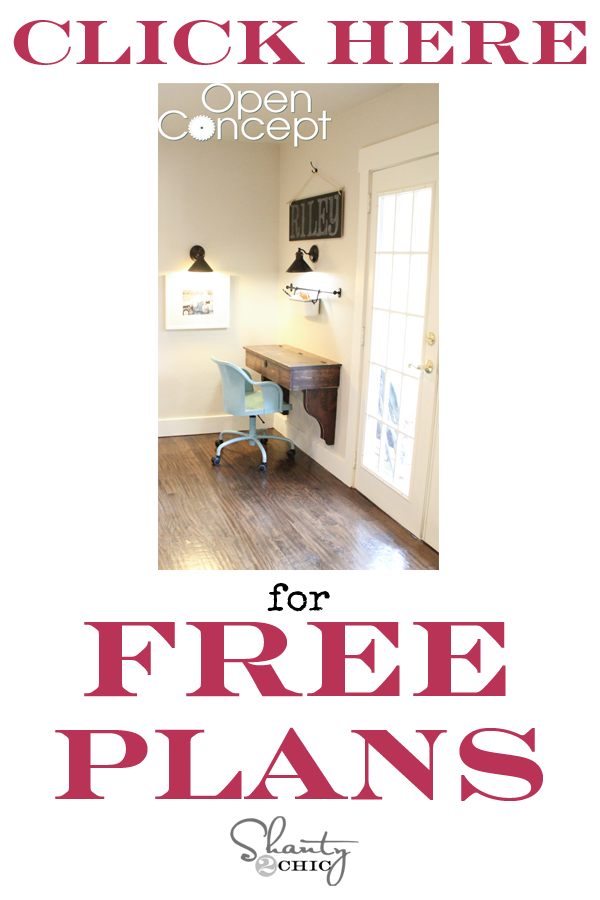
AND, we have the free plans for you and the step-by-step tutorial! You can click HERE or the image below to print the FREE Plans!
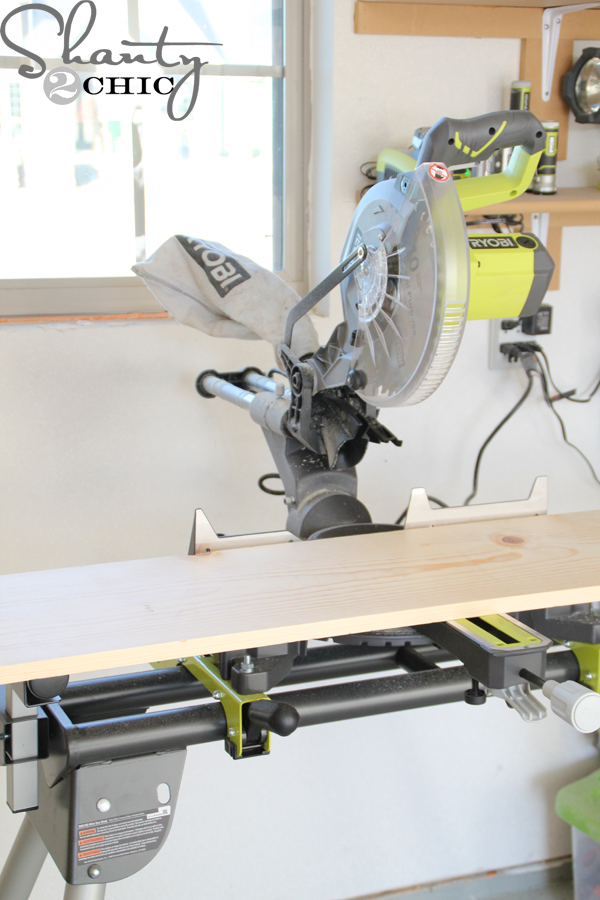
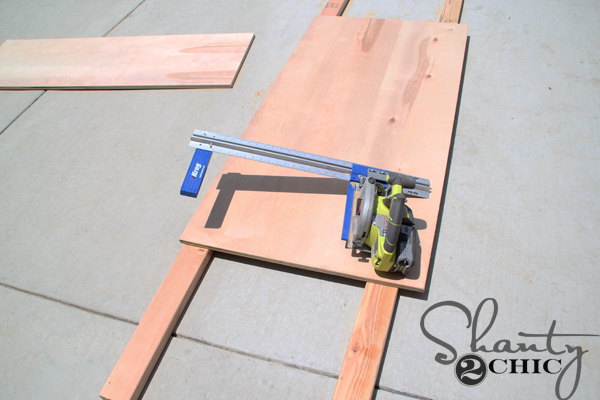
I started by making my cuts with my miter saw.
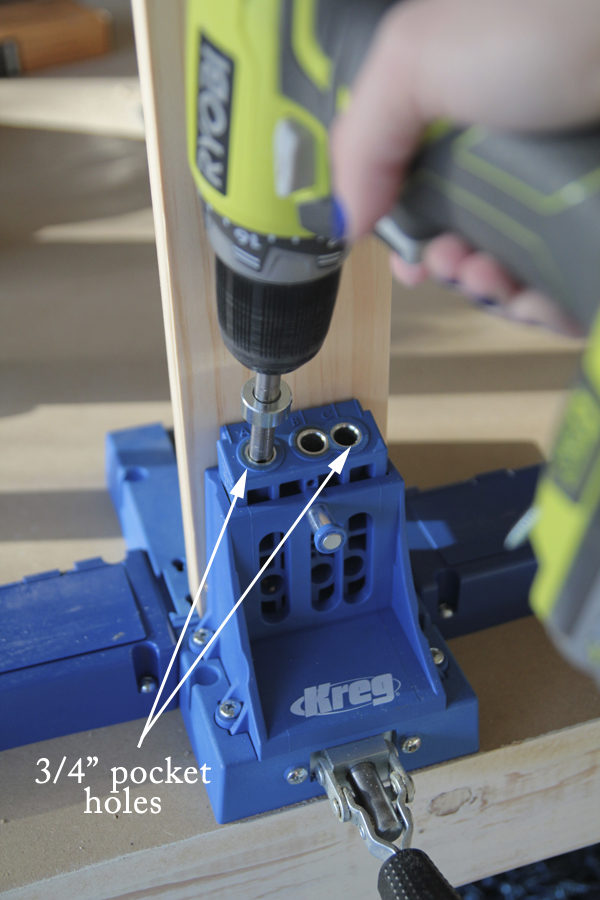
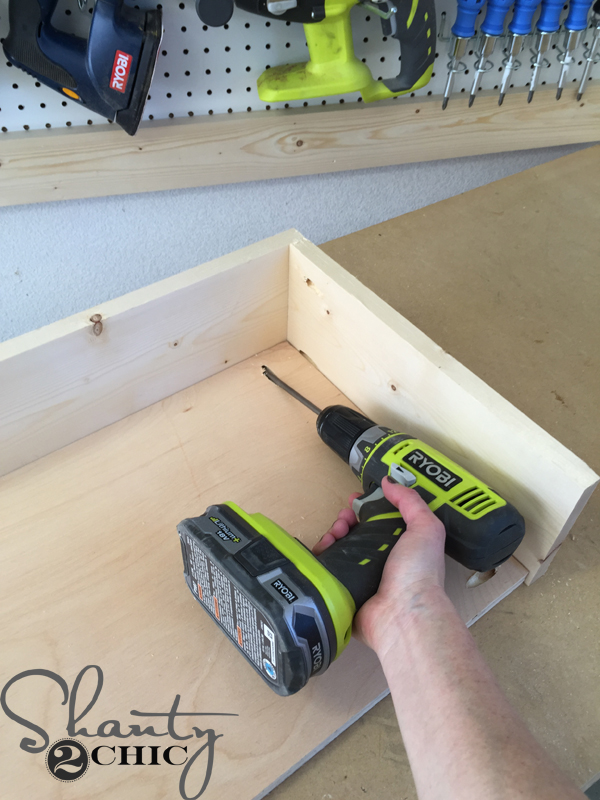
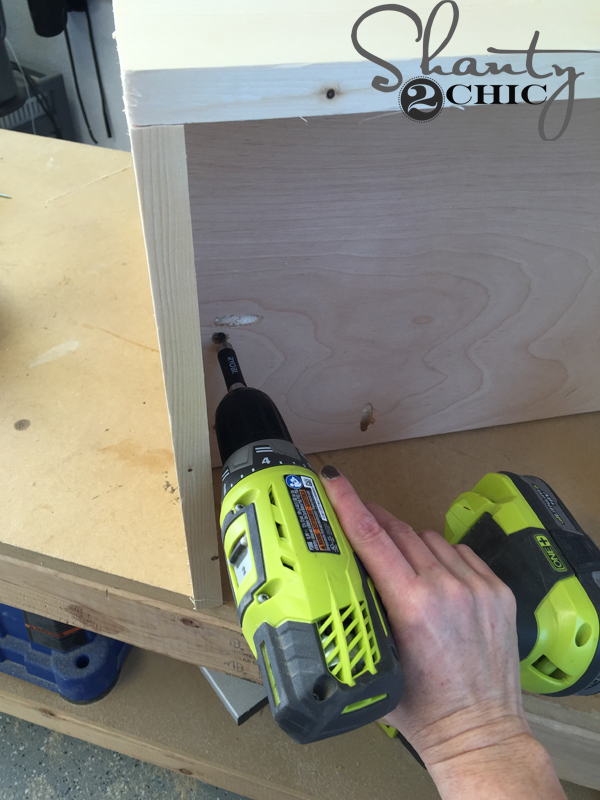
Next, I drilled 3/4″ pocket holes, with my Kreg Jig K5, into the short sides of the desk.

You can see in this picture where I drilled the pocket holes.

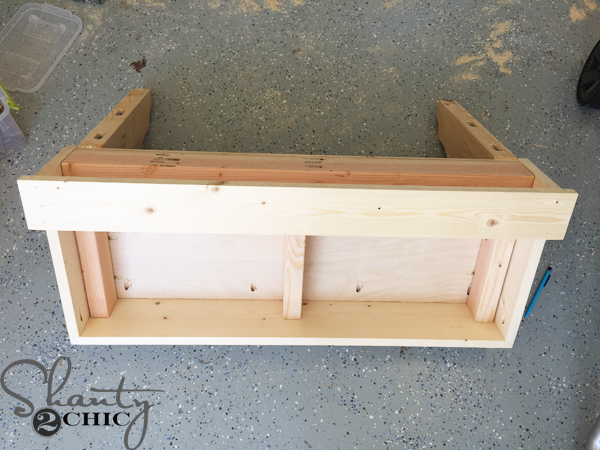
I attached the short, side pieces to the long, front pieces. I used wood glue and 1 1/4″ pocket hole screws to attach them. This is the main from for the desk.
Next, I cut a piece of 3/4″ Purebond Plywood to fit inside the frame. The Rip Cut is a great alternative to a table saw. It is inexpensive, and it doesn’t take up very mush space! You just attach it to your circular saw and the arm has a guide, on the end, allowing you to make precise, straight cuts, every time. I have my plywood propped up on 2×4’s.
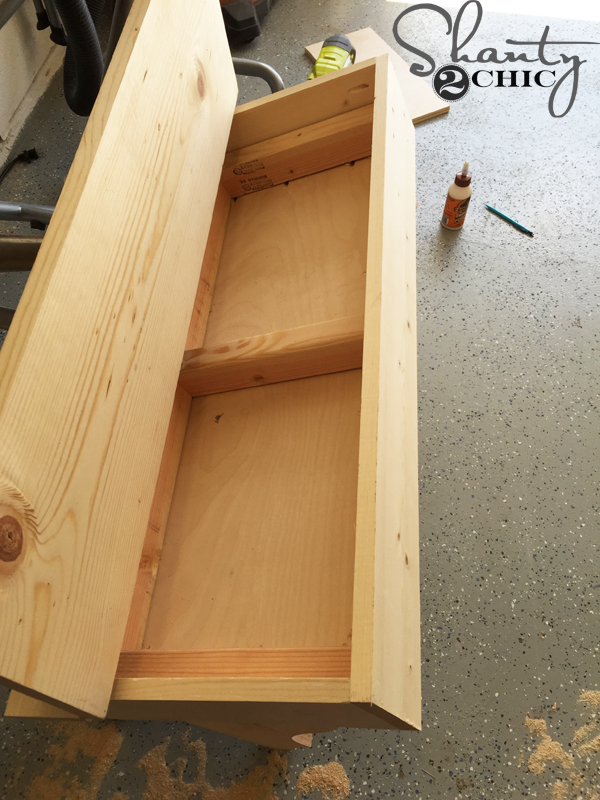
Refer to the plans for pocket hole placement, on the plywood. Once you drill your 3/4″ pocket holes, you can attach the plywood to the inside of the frame. This is the bottom of the desk.

We picked these knotty pine corbels from Osborne Wood Products! The corbels are the bulk of the cost of the desk but, they really “make” the desk 🙂 You can find them HERE on Amazon.
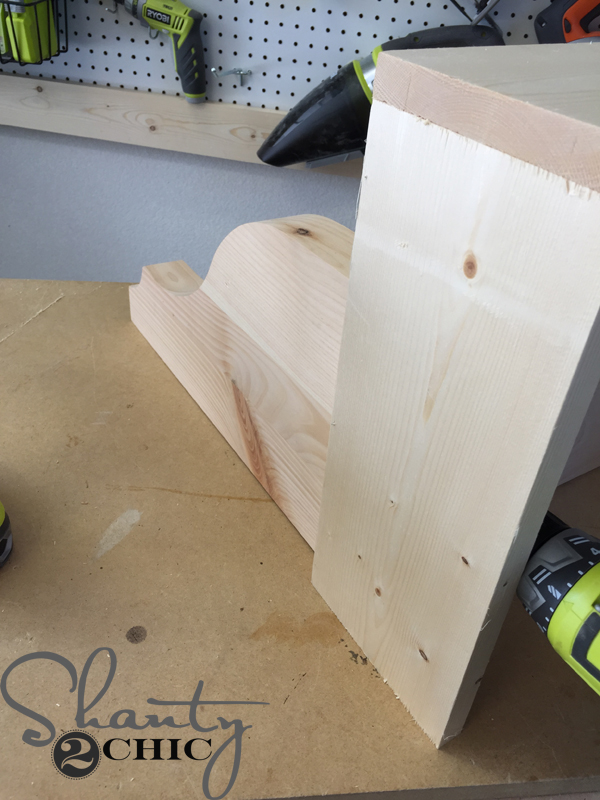
Use 3″ Spax screws and wood glue to attach the corbels to the bottom of the desk. You will drill from the inside of the desk into the corbels.
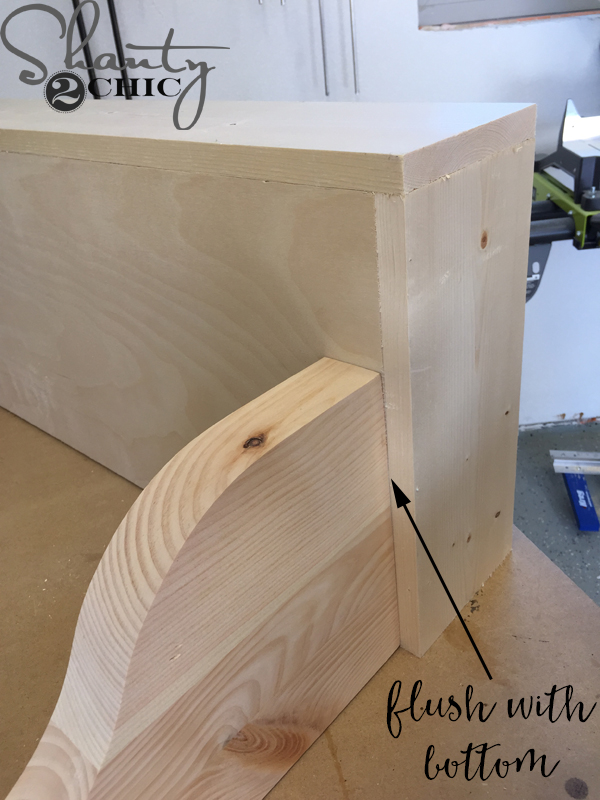
Make sure the edge of each corbel is flush with the end of the plywood bottom.
I used two screws per corbel.
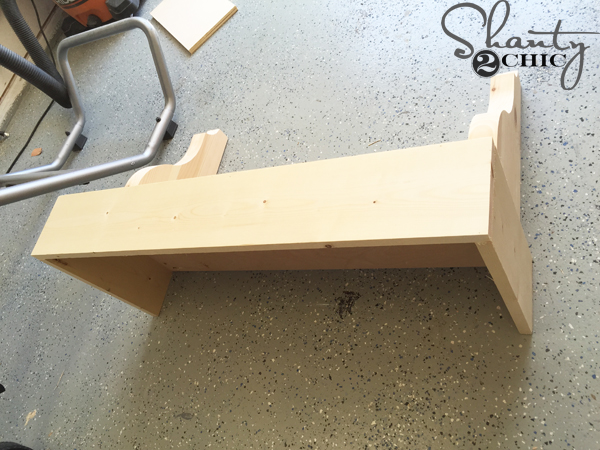
Here is a view of the top of the desk, at this point…

and a view from the bottom! Lookin’ good right 🙂
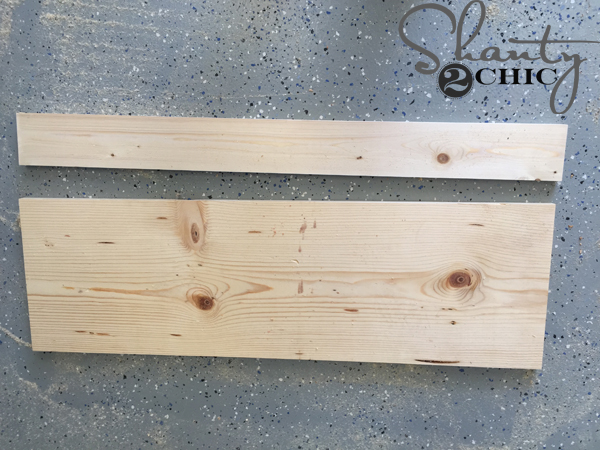
Now, measure and cut the two piece for the top of the desk. There should be a 3/4″ over hang on the sides and the front of the desk.
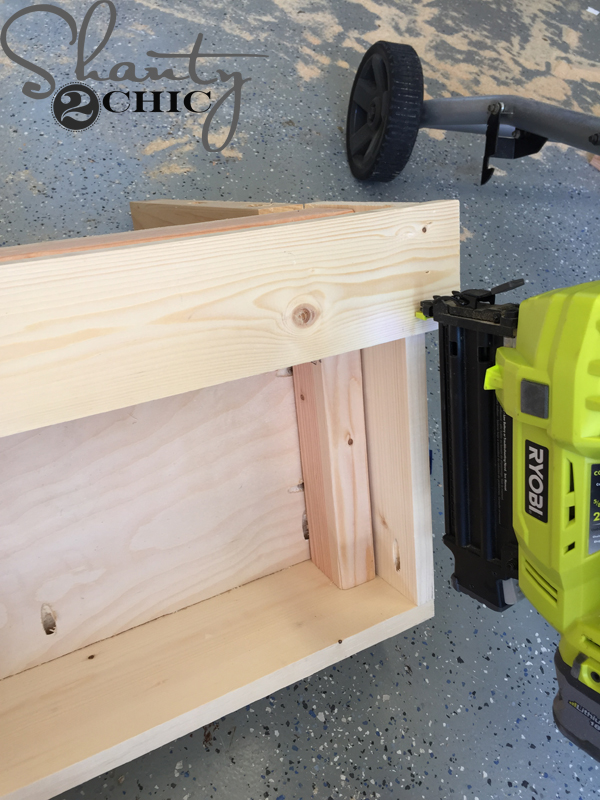
I used wood glue and my Airstrike 18 gauge nailer to attach the 1×4 piece to the top of the desk. The 1×4 will be flush with the back of the desk.

Then, I measured and cut the 2×4 pieces to create the cleat. Refer to the plans for the pocket hole placement. You will drill 1 1/2″ pocket holes to each short piece and attach them to the long piece with 2 1/2″ pocket screws and wood glue. The outer pieces should be flush with the edges of the long 2×4 and center the middle piece.
Make sure it fits 😉

Don’t attach the second top piece until you stain! You don’t want to have to work around the hardware.
This is what the desk should look like (without hardware).
Time to stain!
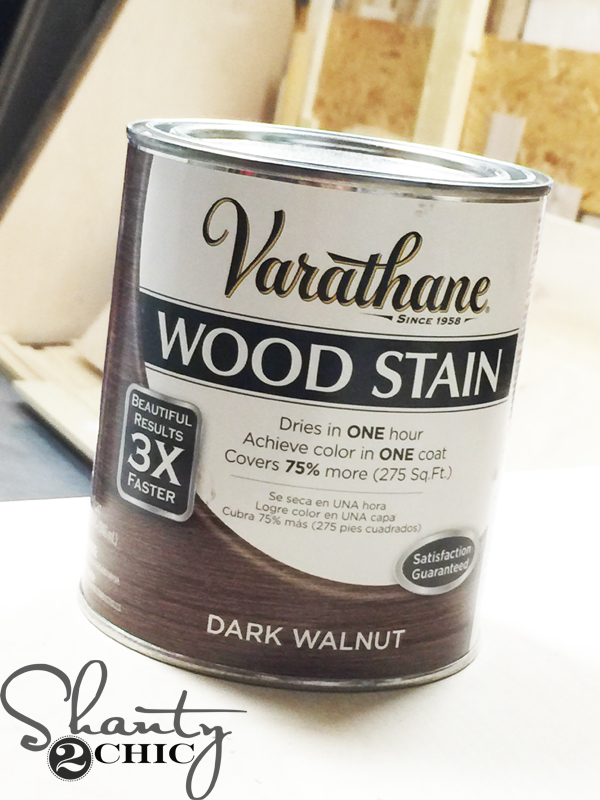
I applied one coat of Varathane Dark Walnut stain to the entire piece. Just wipe on with a clean cloth, wait five minutes and then blend it with a new clean cloth.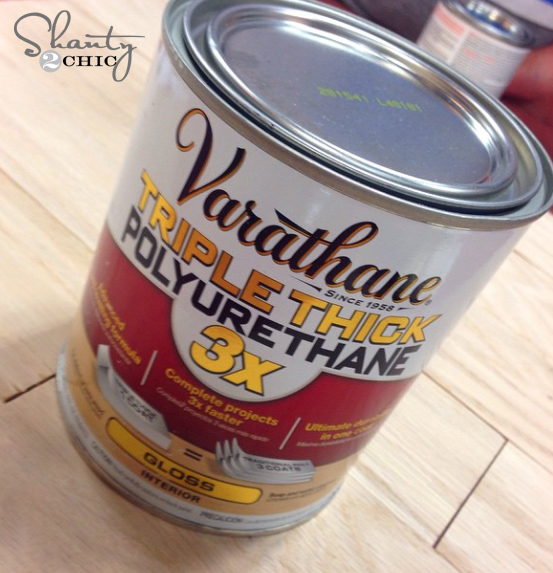
Once the stain dried, I applied one coat of Varathane Triple Thick Polyurethane to the entire piece. Just apply with with a bristle brush. It will look white while it is wet but it will dry clear and smooth. We love this stuff because one coat equals 3 coats and it is silky smooth to the touch!

I added 3 hinges to the top, for the lid, and I used a decorative key hole piece that I had left over from the Campaign Hardware from Liberty Hardware.
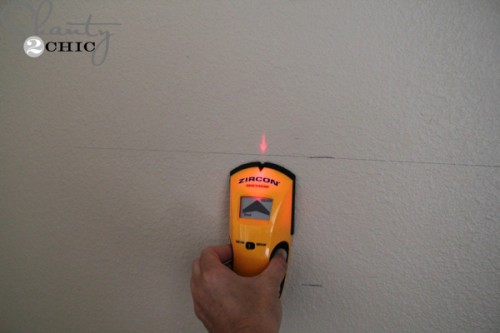
To hang them, mark your studs with a stud finder. We like THIS one.
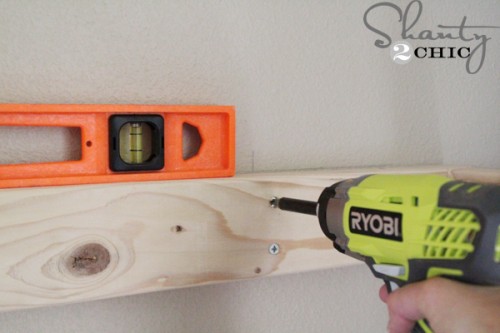
Then, use 3″ Spax screws to drill into the 2×4 and then into the stud behind the wall. I like to use my impact driver to drill into 2x material and especially when I’m drilling into studs. You can use a basic drill too. The impact driver just does more of the work for you. Make sure you use a level to keep the desk level on the wall 🙂
Slide the desk over the cleat and brace it to the cleat by drilling 2 1/2″ Spax screws from the bottom of the desk into the 2×4 cleat.
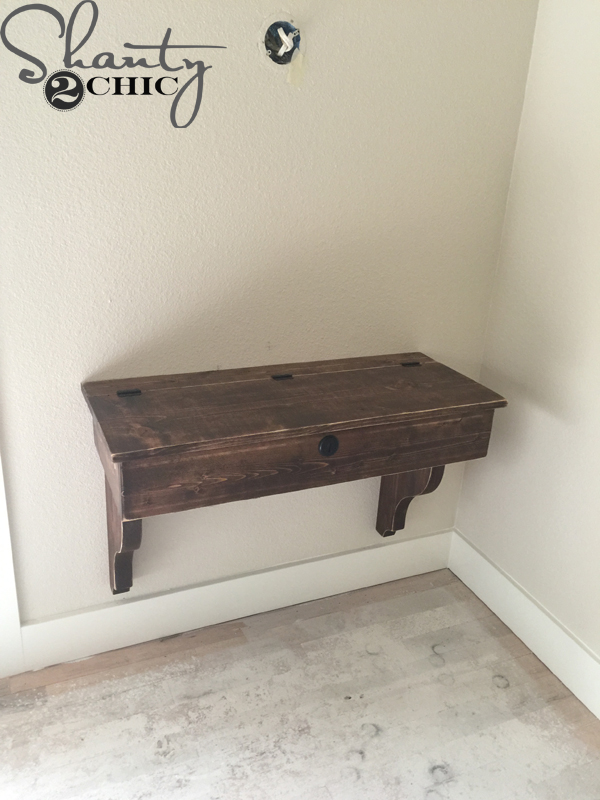
That’s it!!! A basic floating shelf that we modified to create the perfect floating student desk WITH storage!


Here’s a little behind-the-scenes shot for ya’ 🙂

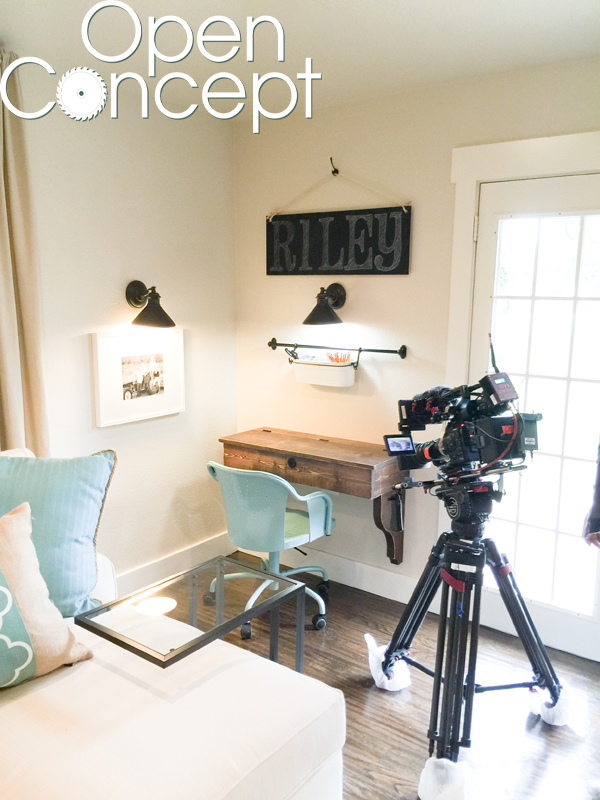
We were so honored to build these desks for Reece and Riley! Please make sure to tune in tonight at 11 PM EST! You will see us design, build and install these desks and a WHOLE LOT MORE!
Thanks so much for stopping by!
~Ashley and Whitney


I want to mount a desk like this in a dormer in my daughter’s room, but the window is the way so I wouldn’t be able to mount it to the back wall. How would I go about mounting it from the sides?
hi y’all! 1st off – u sisters are awesome & amazing & everything in between! I am such a fan!! I am a wood-working beginner so just a quick question or 2 (’cause it’s so hard for me to figure it out on my own) there seems to be a discrepancy on the free plans between the cut list table & the visual cut list.. are the front & the sides of the desk cut from 1×12’s or 1×6’s? (& the desk sides should be cut @ 13-1/4″?) & are the wall mount & the wall mount sides both cut from 2×4’s? so sorry if u’ve already answered this, I tried to read every comment
Hi. What are the basket holders you have above the desks and where did you get them? Thanks
Plans for measurements of side pieces that say 34 1/2 are not corrected….,
How sturdy is this? I would like to put one up in my daughters’ room, but I cannot guarantee that my toddler will not hang from it or climb on it. Do the corbels add enough support?
The corbels do not add support. The cleat is attached the the studs behind the wall. If you can make the desk wide enough to drill into two studs it will hold hundreds of pounds 🙂
Awesome. Mine will probably end up being around 4′ long, so I should be able to find a couple studs. Thanks!
A couple more questions. Did you stain the inside of the desk? And does it matter if the pocket holes on the plywood are on the inside of the desk or on the underside?
Hey there! I have a questions about the plans I’m a little confused on the sides of the desk and the cleat sides. On the cut list the desk sides seems to be long 34.5″ when it should only be around 15″ from the wall. And then the wall mount and wall mount sides, the measurements seem weird. E & F are both out of 2×4’s? And shouldn’t there be 3 wall mount sides and only 1 wall mount? I could totally be understanding it wrong, but just wanted to make sure?
Hey there, you are so right. So sorry about that. There should only be one long wall mount piece and the desk sides should not be that long. Only 13 1/4″. Those are typos and I will fix them ASAP. Thank you!
Thanks! I thought I was crazy, but glad I’m not! I’m excited to build it!! love all your stuff!
Thank you!! Send us the finished shots :)))
Just opened the plans and plans are still showing all the typo’s. my husband and I are trying to make this desk and we are finding many measurements are not correct. 7/22/2017
I corrected it in the comment above.
Where did the desk chairs come from?
I saw similar ones (if not these ones) at ikea.
We love the show. I follow you on all social media. We are in the process of building this desk (with little modification) but we do not know what kind of hinge. Home Depot was not helpful. I would love to post an after for you !! And thanks so much for the inspiration I can not wait to do more!!
Thank you Heather! I just used some decorative hinges that I found at Home Depot. I believe they are Everbuilt brand. They have 3 holes for screws on each side and I used 3 of them. Hope this helps and can’t wait to see!
Thanks for fast response !!
You girls inspire me so much. I loved Open Concept and I’m hoping you get a show! I’ve been following you for years and I think you have great style. I do have a question for you tho. What color stain did you use on the round table you made for the pilot of OC? Loved the color and I’m guessing it’s Early American? Thanks and good luck!!
Thank you so much! It was actually Wheat that I distressed a ton but Early American is super close!
Just finished watching Open Concept…it immediately gave me the urge to clean, organize, and build! (Not necessarily in that order). However, with Hurricane Joaquin making his presence known, looks like I’ll be dream building for the next few days. I’m just wondering, do you have plans already to build the locker system you put in place for Reece & Riley? I have 3 step kiddos and I’ve been hunting for a great entryway piece to help with staying organized for school and I love the look of that one!! I just finished building the boys their bunk beds and I found the plans to build the baby her day bed, so it’s the perfect time to start planning another project!!
Also, if HGTV doesn’t pick up your show, I’m boycotting! LOL!! Loved it!!!
Just finished watching your show…LOVE IT!
Love your new show! Hope it continues! I have SO enjoyed following your blog and all your projects! Love this desk idea!
Love this! Would it be cheaper to cut the corbels yourself with a jigsaw?
We are in the midst of remodeling and updating my son’s room and we will definitely be putting in this desk. Do you have a source for the barn light and the desk chairs? Love them and they would complete the industrial/rustic look we’re doing.
I loved the show by the way and hope to see more episodes in the future. Y’all are just too cute.
I love furniture that “floats” it makes my small space seem larger.