Hey friends!
Back to school is just around the corner for my clan (insert happy dance), and my oldest daughter is all about the supplies. She does come by in naturally… I get giddy when I walk into office supply stores and the supply aisles at Target. I can’t help it. We are in the process of giving her room a little update, and she wanted a space to store some supplies as well as a memo board. She is in a smaller room, so I had to be creative with the space we have. Check out my Magnetic Supply Organizer!
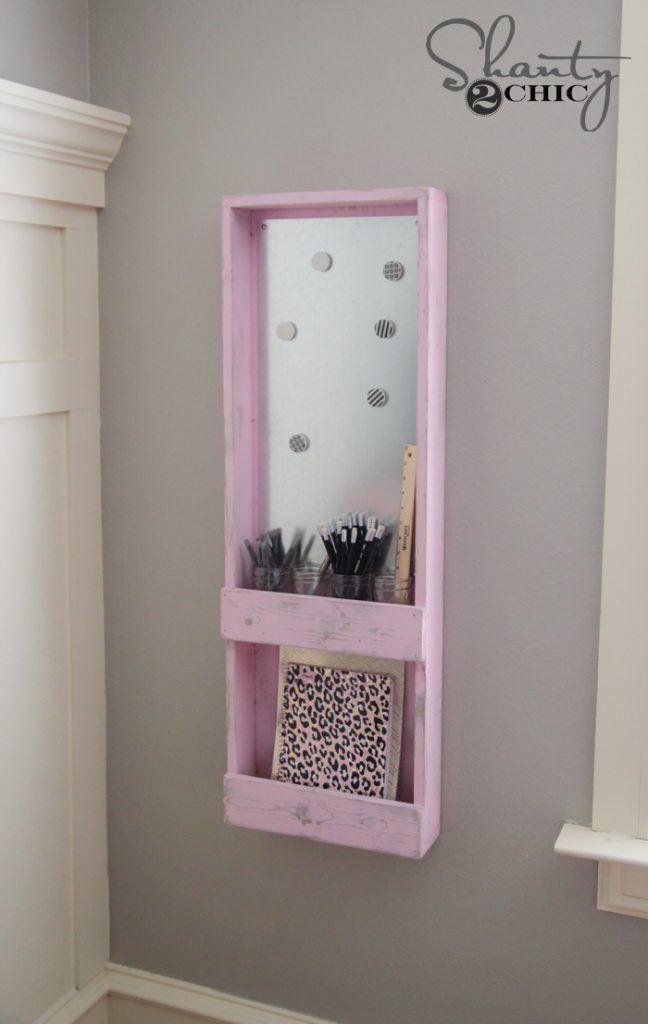
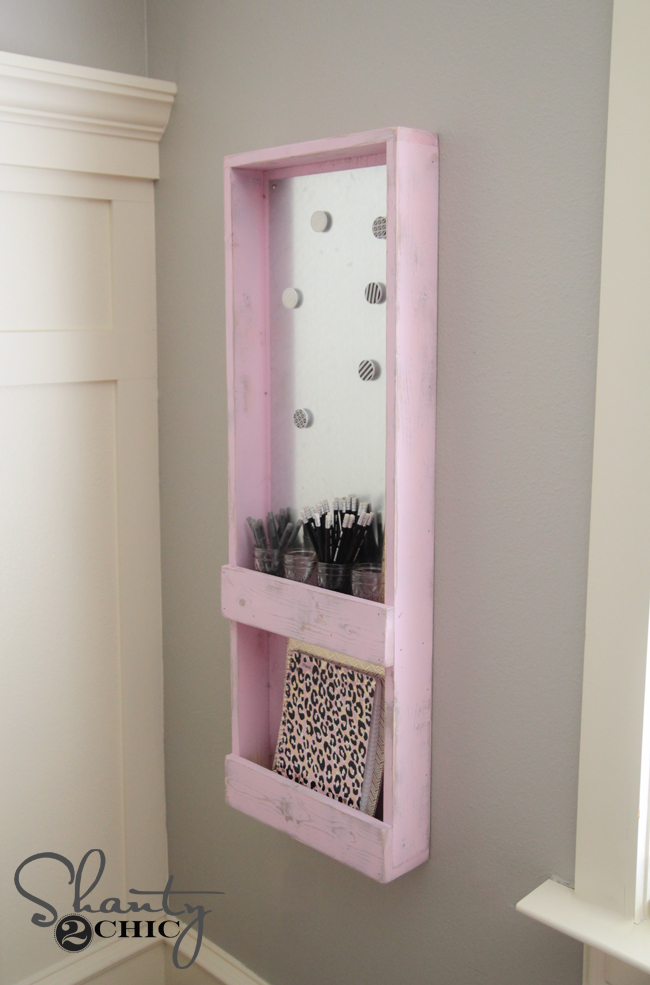
Isn’t it fun? I was happy she went light pink in her room because I can’t really go that direction anywhere else 🙂
This is a super simple project guys! Here is how to do it!
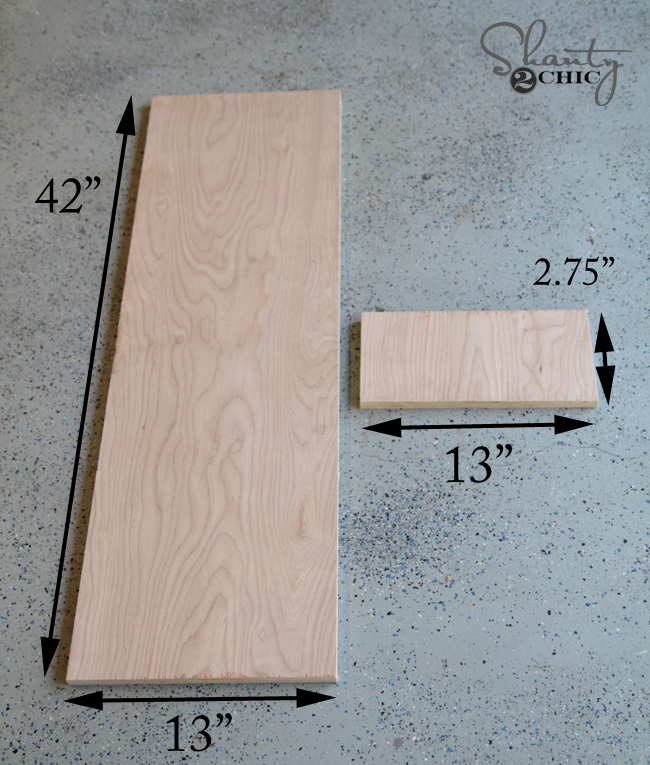
Start by ripping down your hardwood plywood panel. I used my table saw to rip my sheet to 13” wide. Once you have that ripped, use a miter saw to make one cut at 42” and one cut at 2.75”
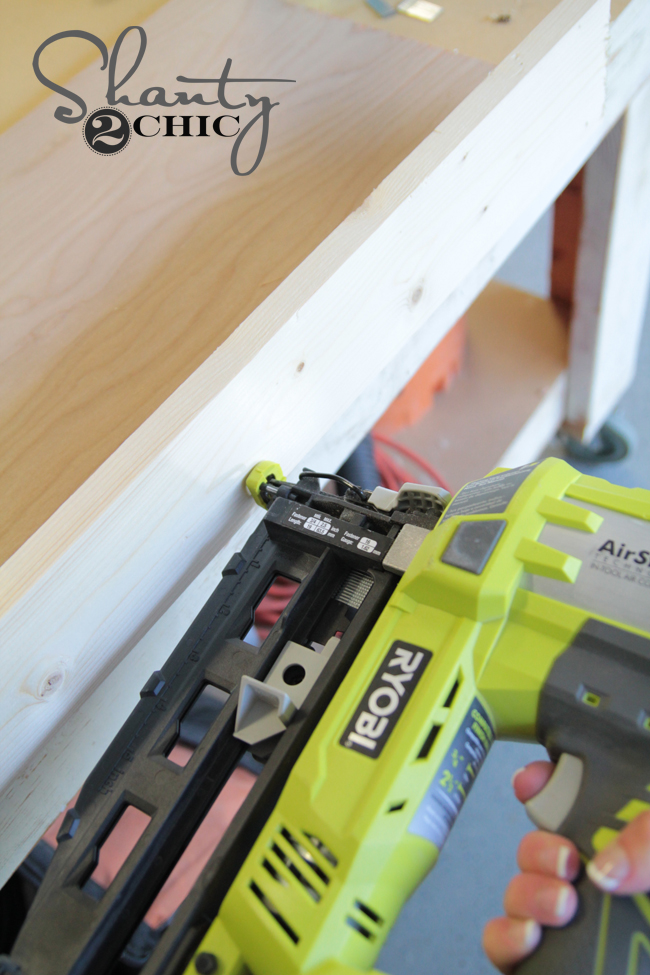
Cut one of the 1×4 into two pieces. Each cut will be 42” long.

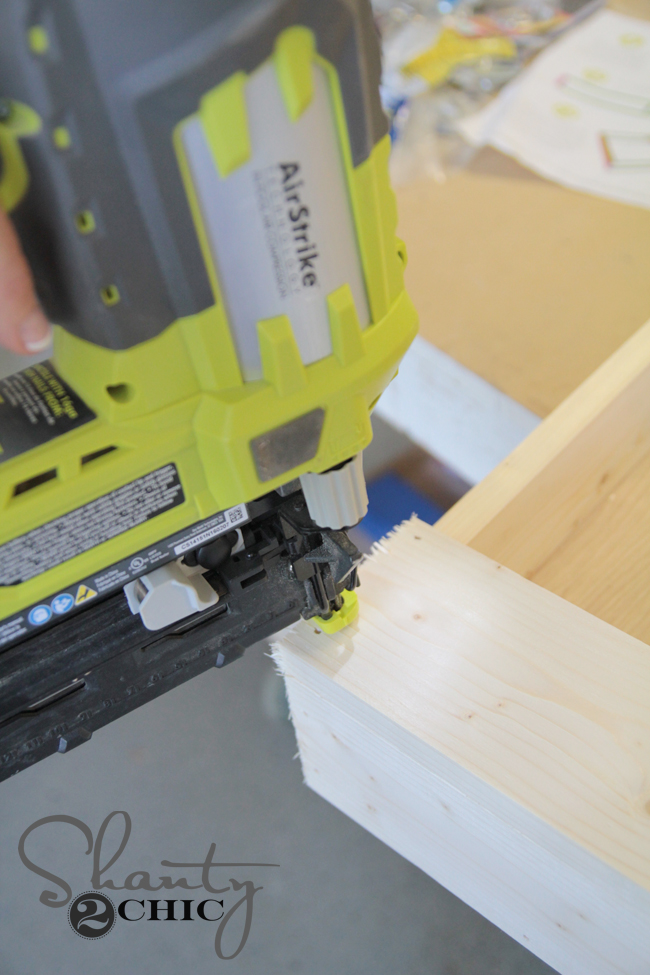
Add a line of wood glue to the edges of each board.

Use your finish nailer to attach one of these boards to each long side of the plywood using 1.25” finish nails.
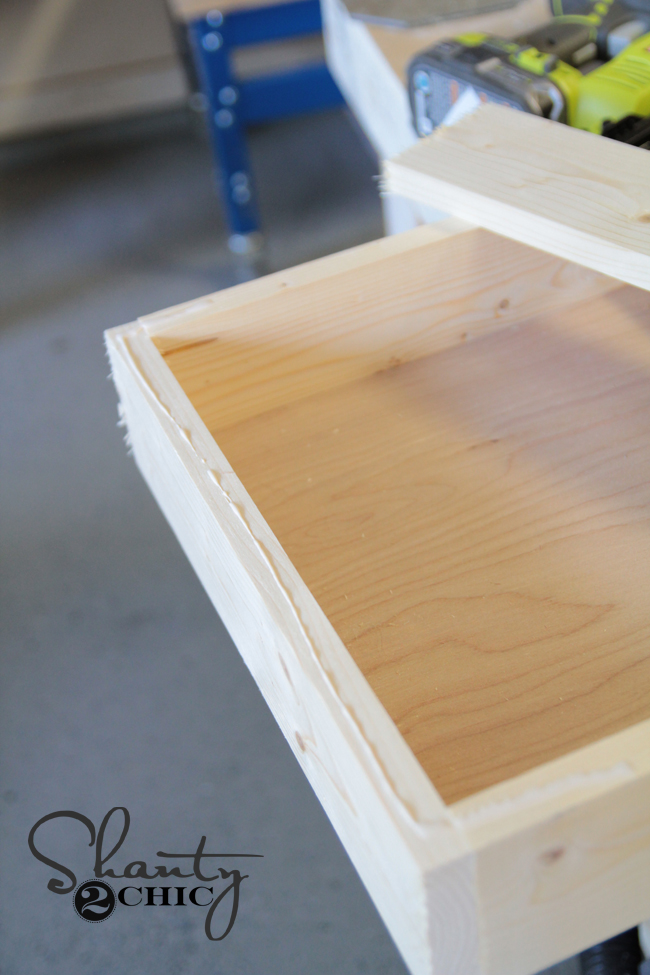
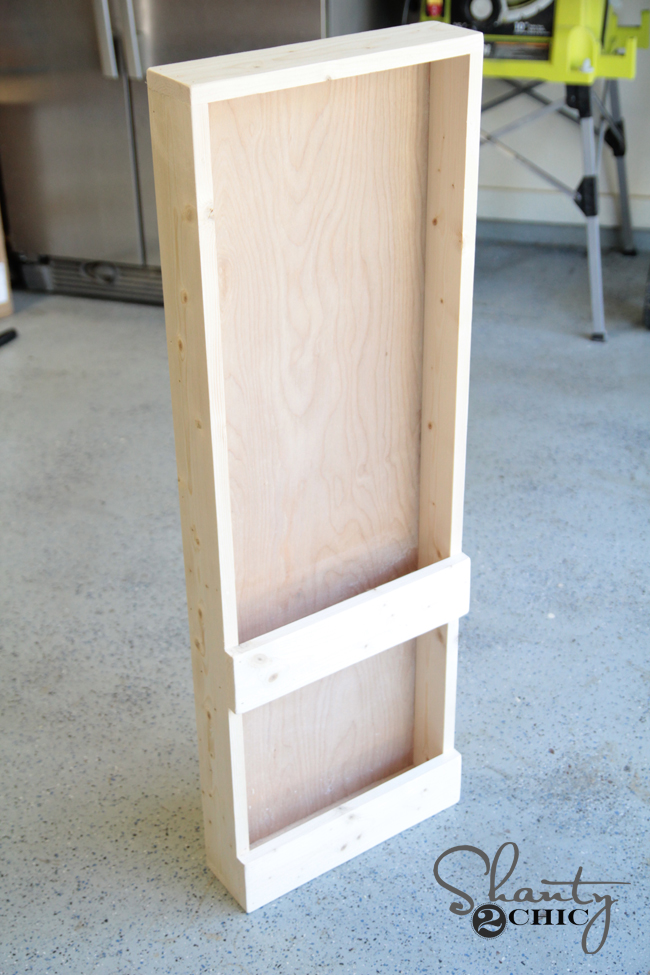
At this point, your project should look like this.

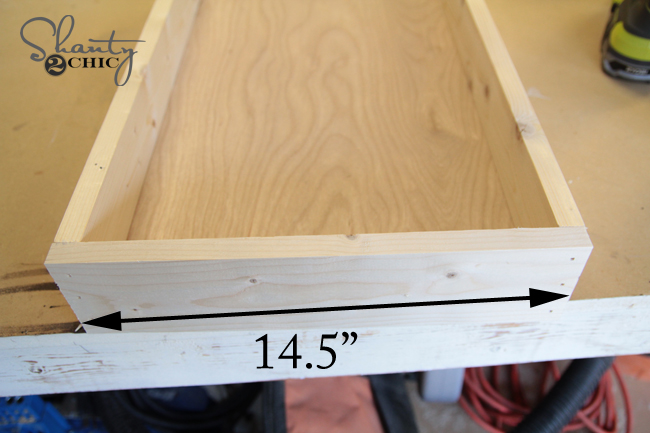
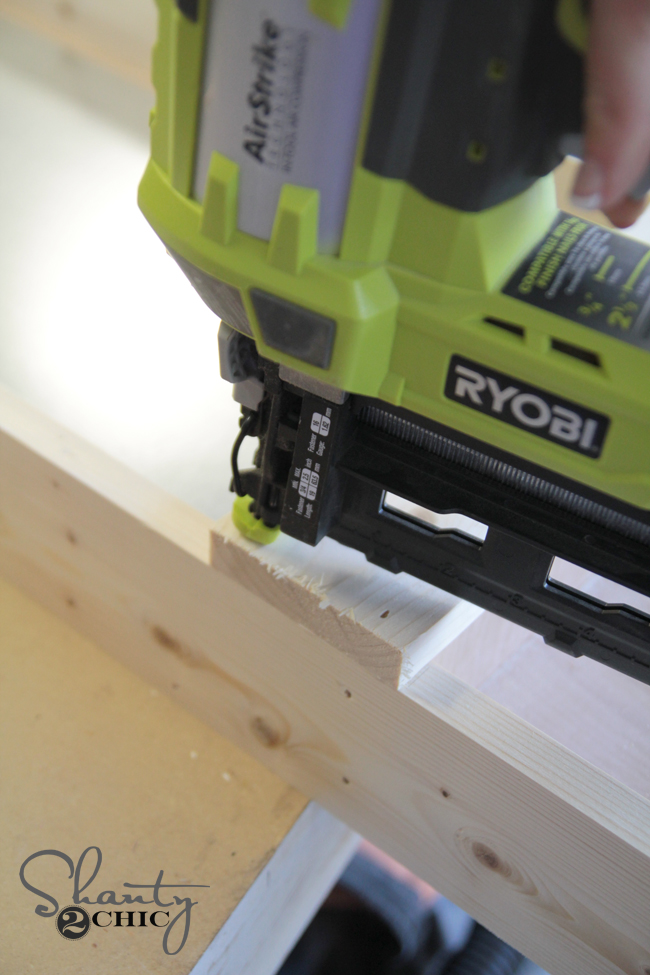
Now make your cuts for the top and bottom of the organizer. Use the miter saw to make two cuts of the 1×4 both at 14.5”. Use a line of wood glue and the nailer to attach these boards to the top and bottom of the piece.
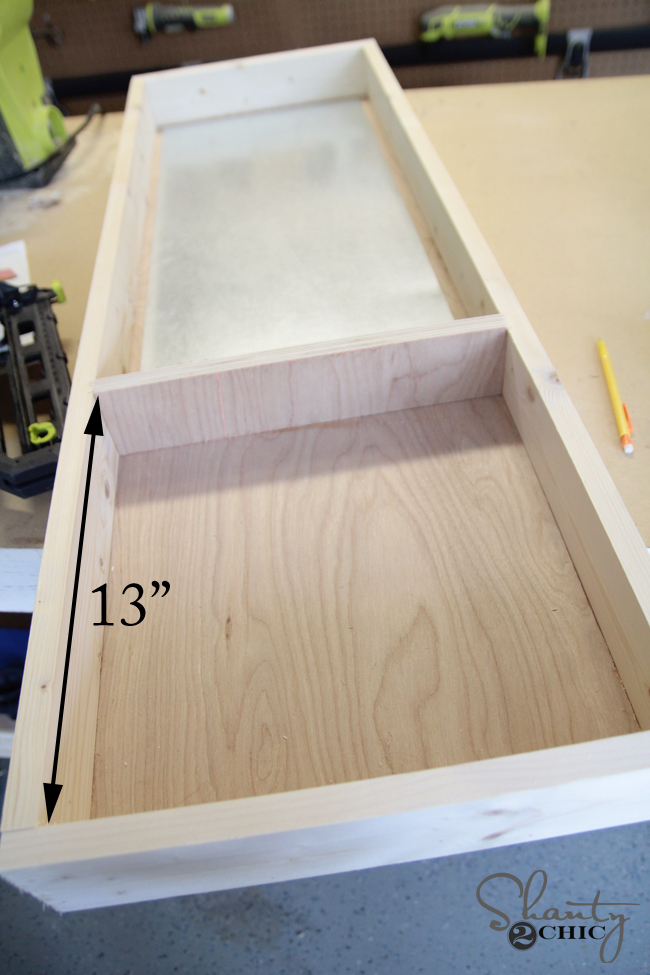
Line up the smaller plywood piece to serve as the shelf. I lined mine up 13” from the bottom 1×4 piece. Add a line of wood glue around the sides and back of this piece and use the nailer to add finish nails from the outside of the side 1×4’s and into the shelf piece.
Cut two more pieces of 1×4 at 14.5”. This will be the front pieces of the organizer. Add a line of wood glue and attach one of the pieces at the base of the organizer using the nailer with 1.25” finish nails.
Finally, attach the second piece where at the base of your divider using glue and the nailer.
Your finished project should look like this. Finish your organizer to fit your style. Once you have stained or painted yours, use epoxy or other strong multi-purpose glue to attach the metal sheet to the top of the organizer. I also added a furniture tack to each corner just to dress it up a bit. I have a happy middle schooler! It’s now ready for her to display or organize just about anything!


What is the best method for attaching items such as this to the wall? Some type of bracket? Thanks! 🙂