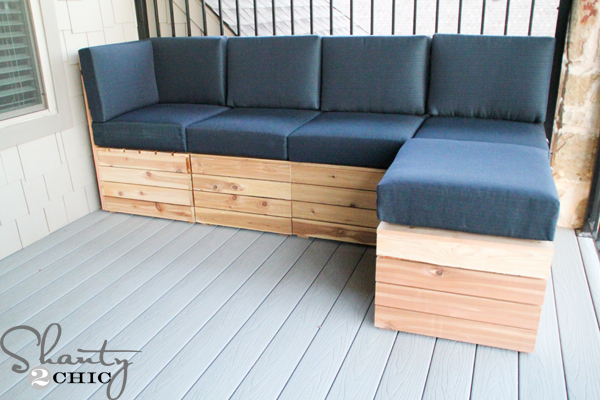
Hey there! Living in Texas, Fall is the BEST time for us to spend outdoors! One of the big reasons we picked the house plans that we did, when we built our house, was the balcony! I dreamed of a giant comfy sectional – the kind I see in expensive magazines – and of course my goal has been to build it! I finished it just in time – the weather has finally cooled off and this space is becoming my FAVORITE place to spend time!
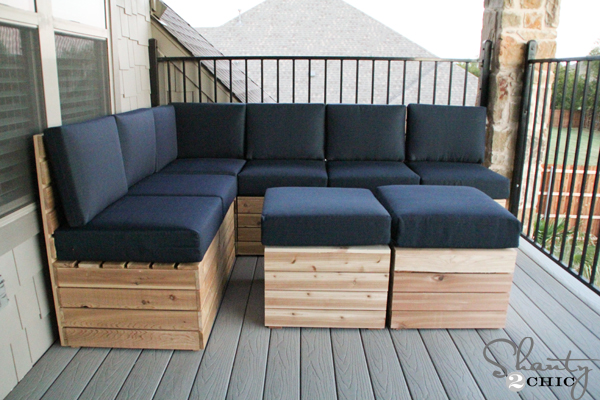
Not every space is built the same so I wanted to come up with a seating solution that could fit all spaces! I came up with this modular sectional that is SO easy to build. Every piece is basically a box and you can add a backrest or leave it off and there is a corner piece to create a sectional!
Today, I’m sharing the basic box seat with the optional backrest and of course, I have the step-by-step tutorial for you to follow as well as FREE Printable Plans! You can click HERE or the image below for the free plans!

*You can find the plans and tutorial for the corner piece HERE!
Now, let’s get to it! I built this for outside so I chose cedar boards.
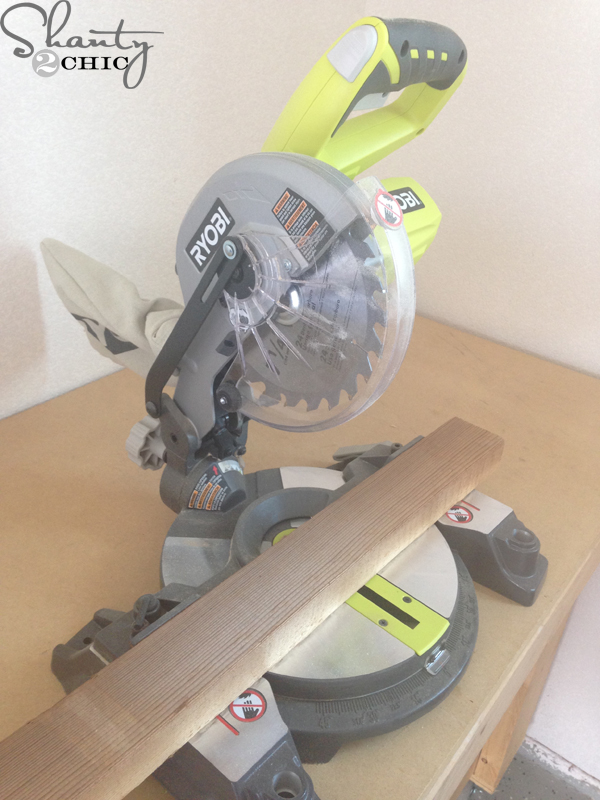
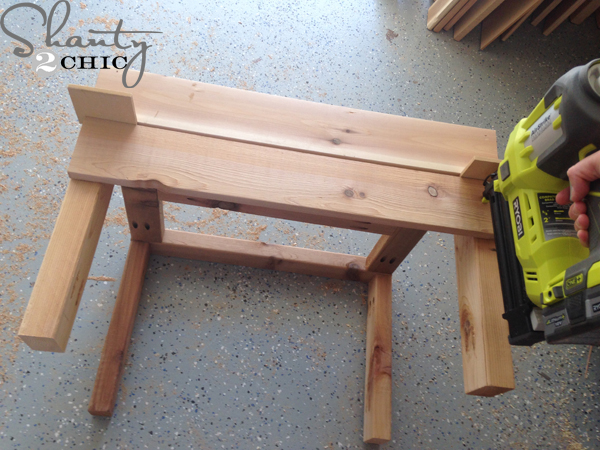
To start, I used my Ryobi 18V miter saw to cut every piece. This is a great saw that runs off of the same batteries as all of our favorite Ryobi 18V tools. It’s small enough to move around with you and doesn’t take up very much space. Whitney and I actually used it on a hotel balcony when we had to cut pieces for a class (shhhhhh 😉 )
I made the 2×3 cuts for all of the boxes that I wanted to build.
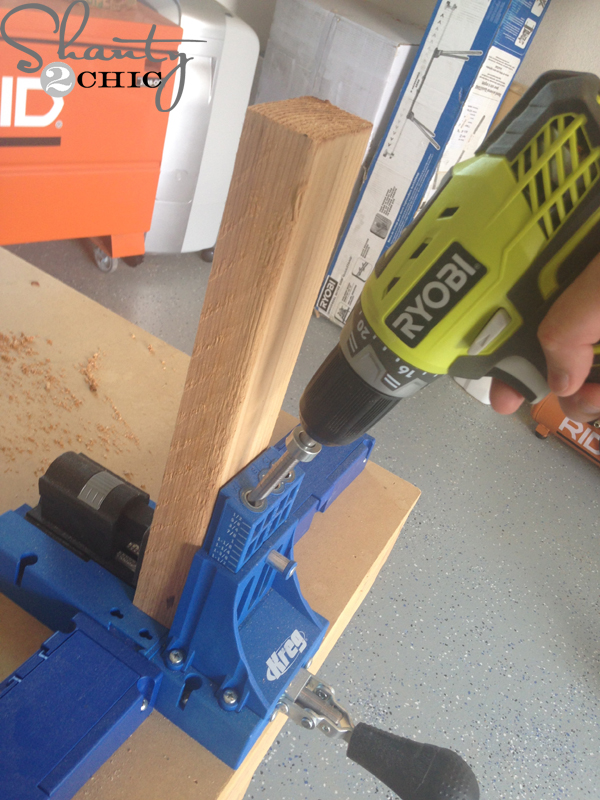
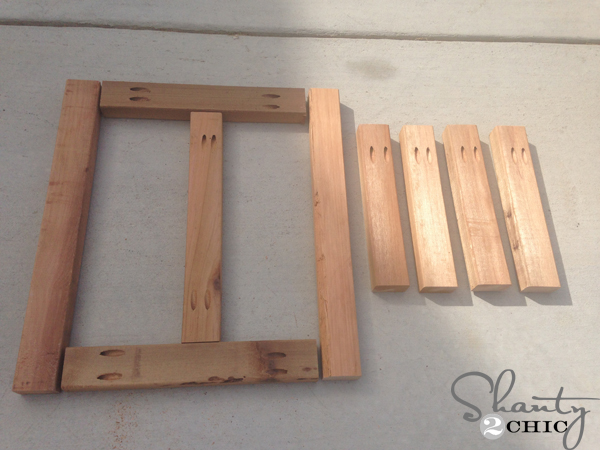
Then, I used my Kreg Jig K5 to drill pocket holes (you can find the Kreg Jig HERE on Amazon). You can refer to the plans for the pocket hole location and you can see them in the cuts picture above.
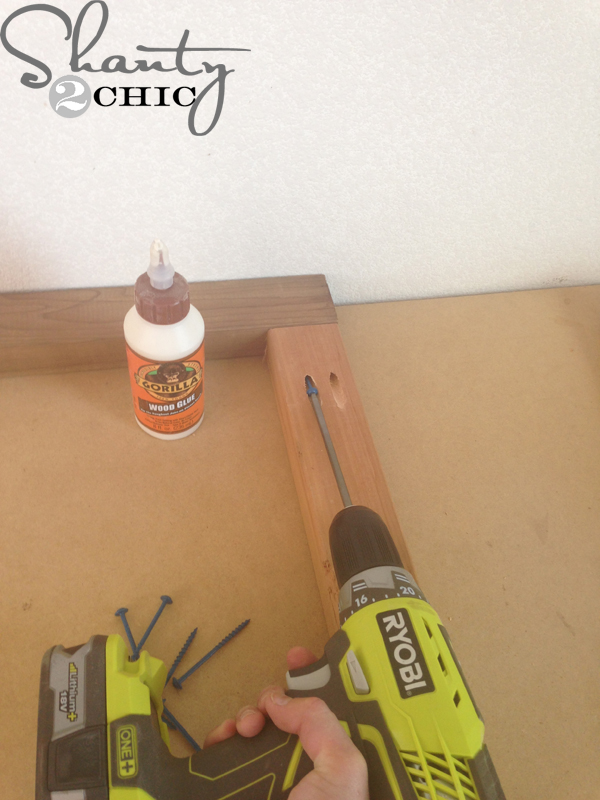
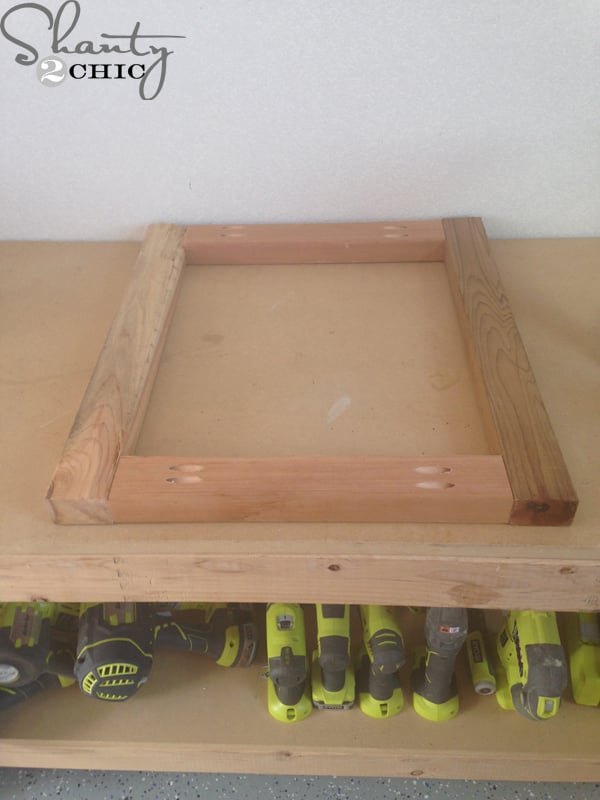
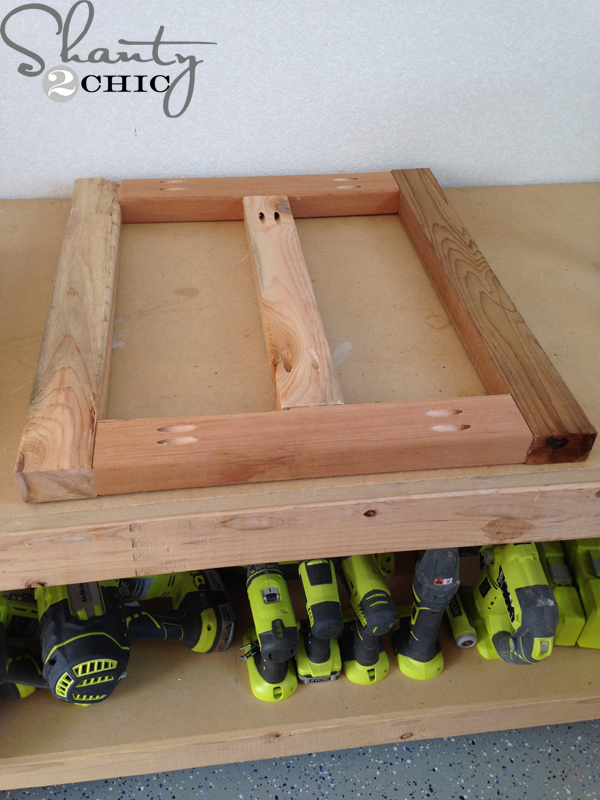
I attached the frame of the seat first,then added the center support piece.
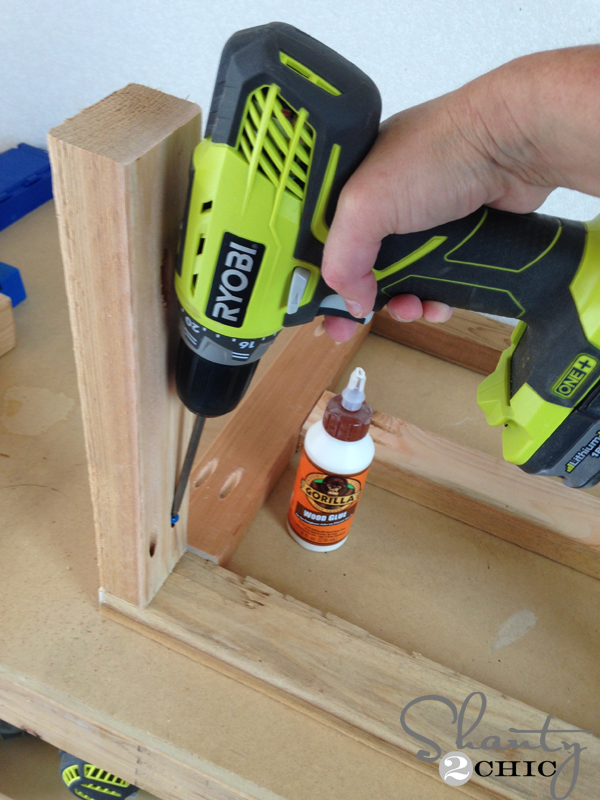
To finish the seat frame, I just attached the legs.
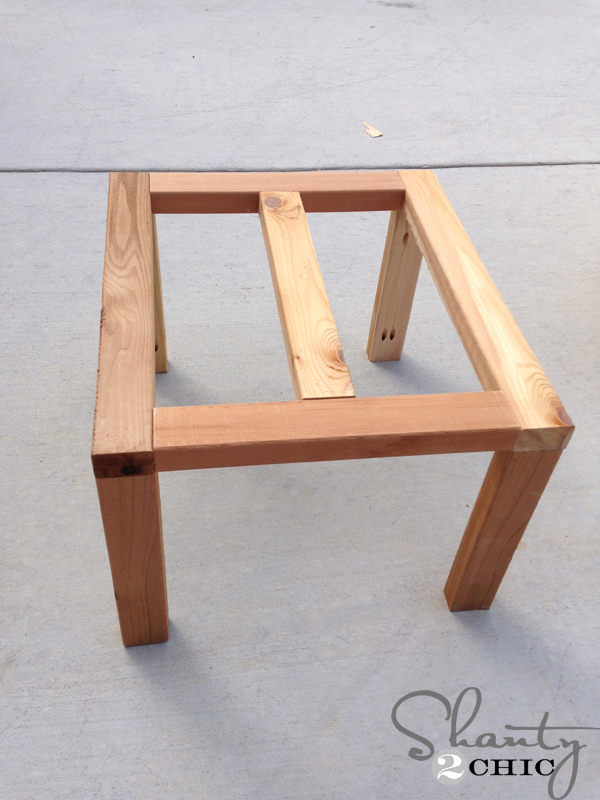
Frame = DONE 🙂 Easy enough!! Now for the slats!
I began attached the side slats first. To make spacing easy, I used scrap 1/4″ pieces as spacers. Start at the top of the seat making the top slat flush with the 2×3 frame. I attached them with Gorilla Wood Glue and my Ryobi 18 gauge Airstrike Nailer (1 1/4″ nails for this).
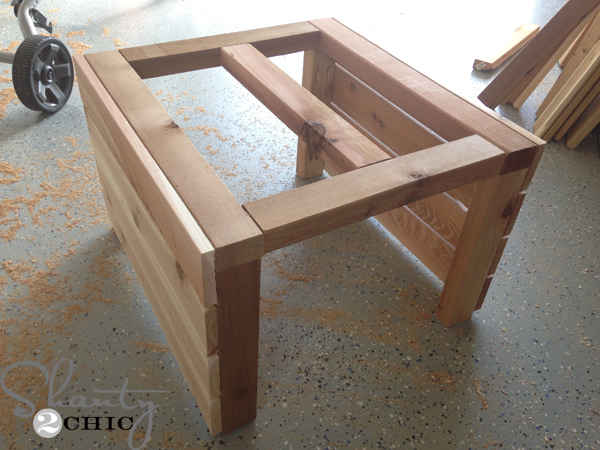
Work your way to the bottom and you will have about a 1/2″ gap between the last slat and the end ground.

The front and back slats are easy. No spacers needed, just line the slats up with the side slats, glue and nail in to place.
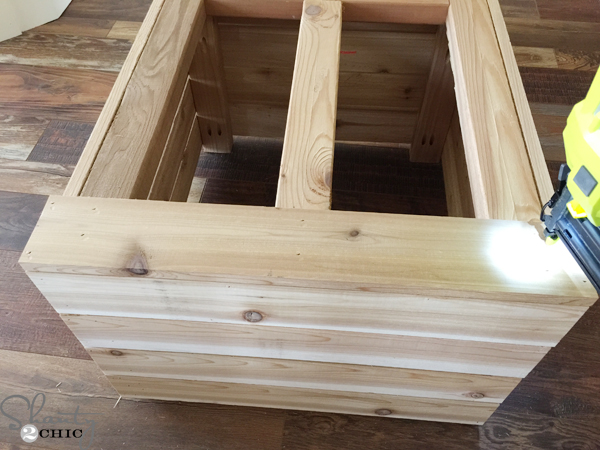
The top slats are last! I attached the front and back slats first, making them flush with the front and back slats (you will cover the slats so that you only see the top slats).
I used my 3/4″ cedar scraps to space the rest of the slats out and attached them with wood glue and my nailer. Nail these into the center support, as well.
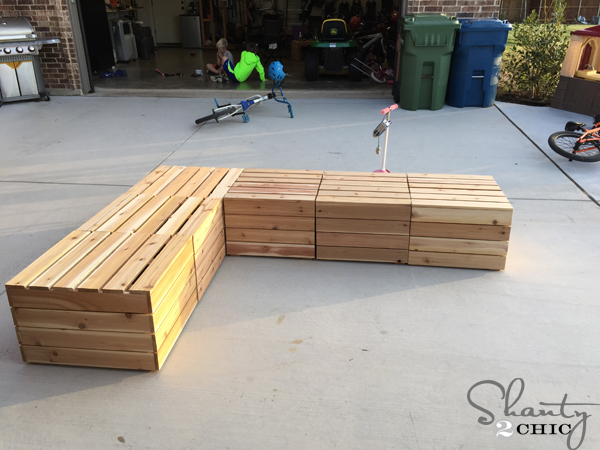
Here are the assembled boxes! (The corner box is a different size that I will share plans to next week). At this point, you can leave it as-is or add backrests!
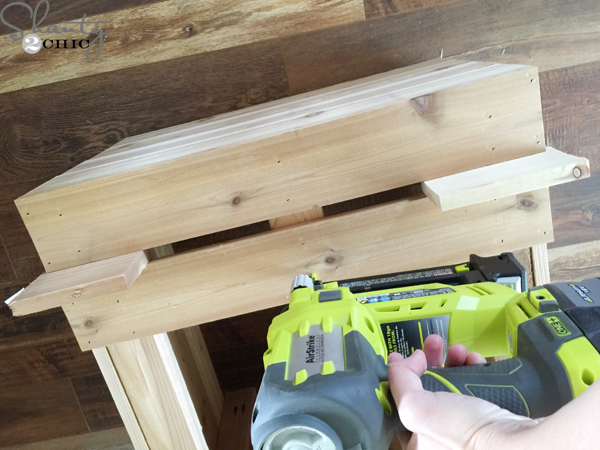
I opted for backrests 😉
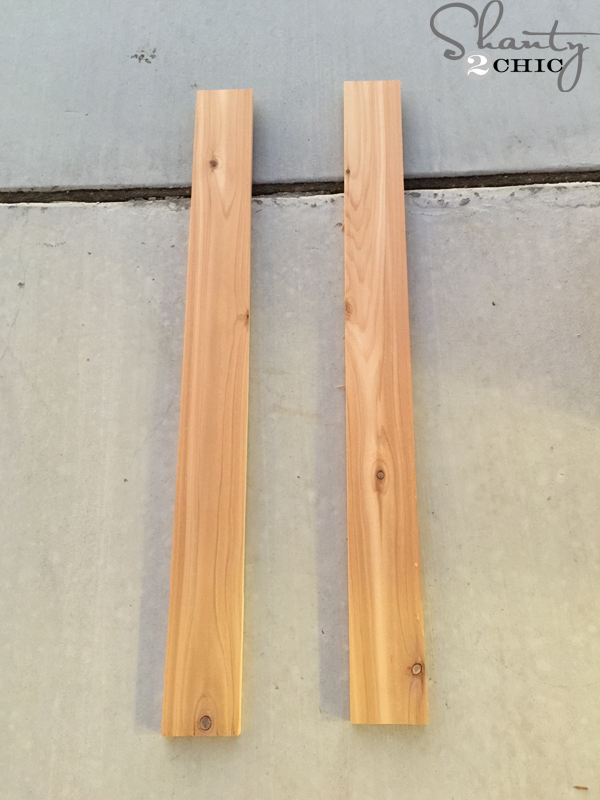
I cut the posts first
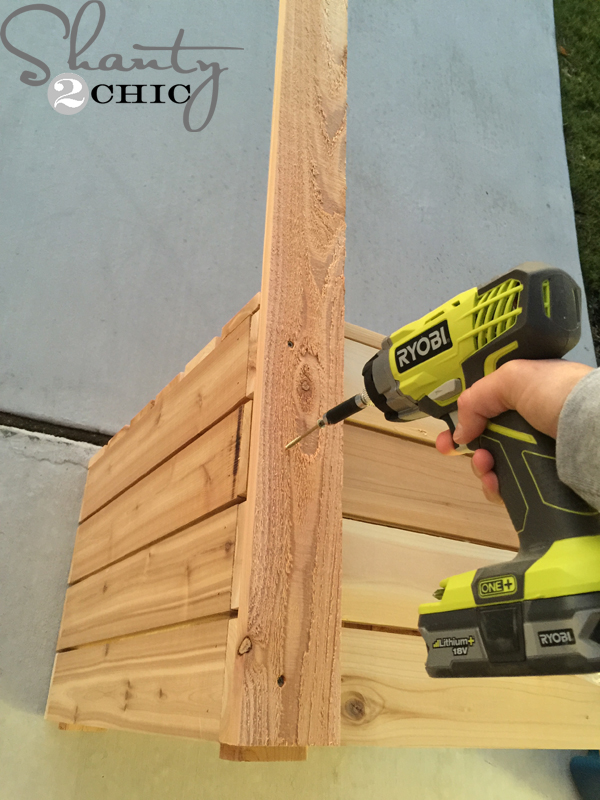
Then attached them to the back of each box with 2 1/2″ spax screws. The screws will go into the 2×3 legs inside the box.

Then, I added my slats. Begin at the top of the backrest and attache with wood glue and 1/4″ nails. I used 3/4″ spacers and attached 5 slats.

That’s it!!!! I wanted to keep the natural cedar look so I just applied 2 coats of Varathane Spar Varnish all over and called it a day 🙂
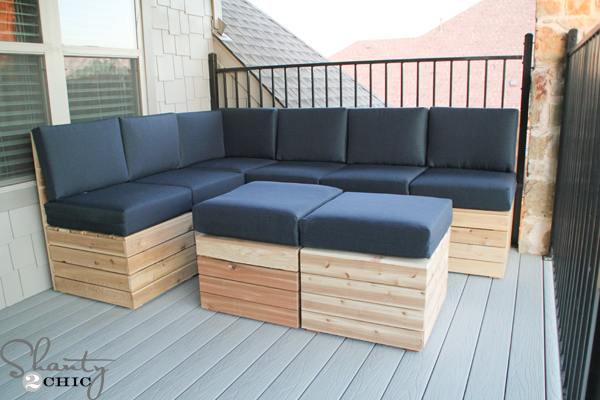
I found a great deal on deep seat cushions at target.com. I used my Red Card so I saved 5% after the sale price and got free shipping. I did design the seats based on the cushion measurements but they are pretty standard measurements and should fit a variety of cushions. Just make sure to check dimensions if you choose different cushions and modify the plans accordingly. You can see the cushions that I purchased HERE.
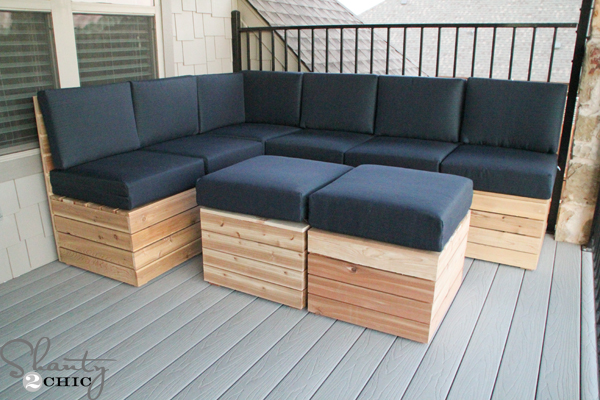
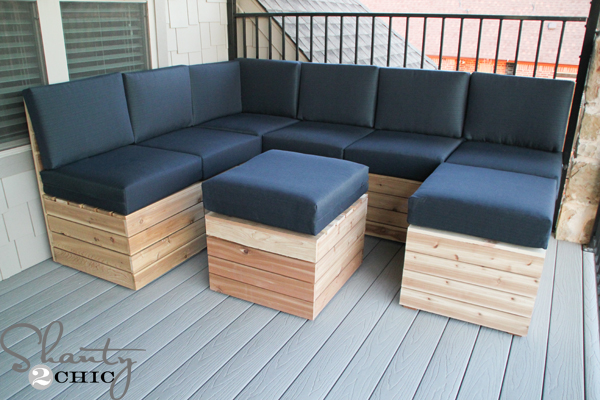
I have mine set up to have two boxes create a coffee table that can double as ottomans
or they can be arranged to create a chaise lounge end
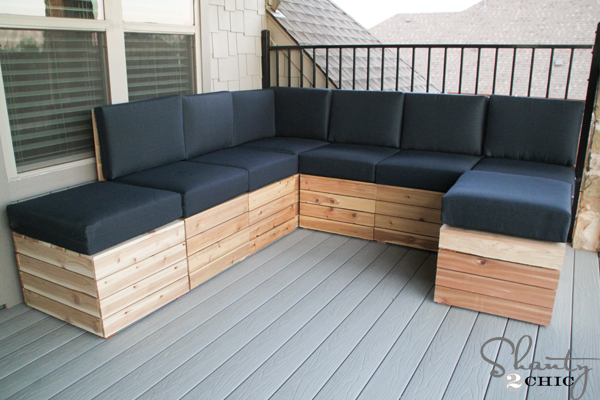
or this set up 🙂
or this!

You could even create an individual chaise lounge, or two, for a small space!
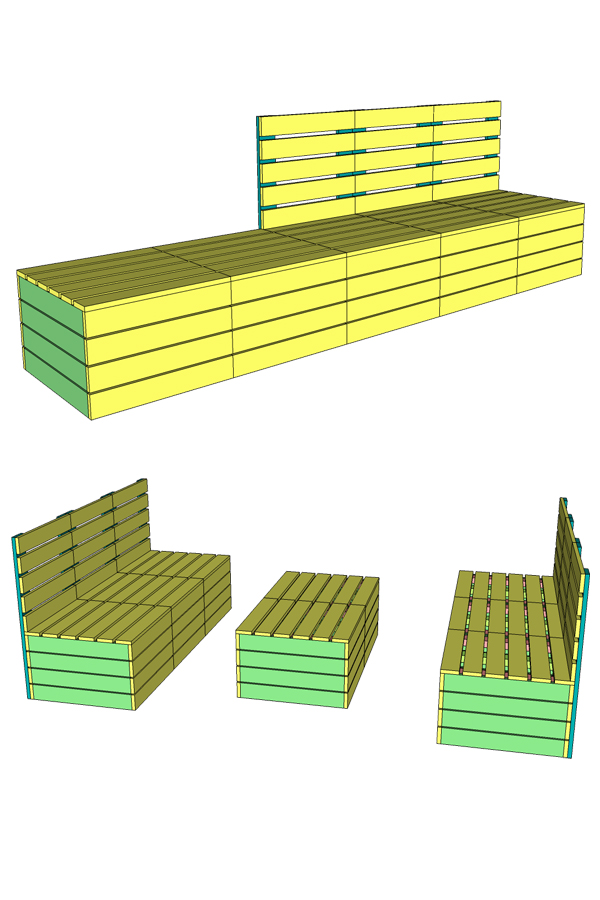
There are so many possibilities, even without the corner piece!
I LOVE, LOVE, LOVE this space now! And, if I get bored with it I can always rearrange things;) This seating works great with our without cushions and another cool thing about this type of seating is that you can build a little to start and add to it as your budget allows! I’ll be back next week to share the corner piece plans!
Happy Building!

Hi –
Is this project doable for someone without a lot of experience? I am a beginner and my husband and I want to try building this together. Where can I find the instructions for the corner piece?
Thanks!, Melissa
Hi. I have been dreaming of making this since last year but too many other projects got in the way. So I finally got to it. Made one piece (out of white board per the cut list) as a sample to make sure I liked the design and comfort due to the comments about the straight backrest. I found it to be very comfortable with the cushions. I was ready to build the entire project and in re- reading you instructions saw that you used cedar instead of whiteboard for outdoor use. I loaded up the lumber I bought and back to the home improvement store I went to exchange the lumber for cedar and found that they do not carry 2 x 3 lumber in cedar, nor do they have 1 x 4 s in cedar. How did you and others that stated they used cedar find lumber in those measurements? I know I can rip it down but that seems like too much work and waste. PLEASE help….I am so motivated to get this done and re do my outside area before it’s too hot here in Cali to enjoy it. Any assistance would be greatly appreciated. Treated lumber isn’t an option for me due to the chemicals. I thought of continuing the project with the whiteboard and then using a good outdoor sealer such as Thompsons but not sure if that will hold up. It is a lot of work to make something that isn’t going to last. The are I will be putting this is covered but outside.
You can easily use 2×4 cedar if they have it. It shouldn’t change the measurements of the frame cuts by too much. You can also swap 1×4 for 1×6 if they have it! It will change the spacing of the boards but not by much. Hope this helps!
Thank you for the quick response. I will go see what they have in those measurements.
Try cedar fence slats. You have to cut the end off but it will get the job done.
Very cool! Looks pretty easy to make. Thanks for the post.
To save a little money on wood, is it necessary to put the boards around the sides? Is it for stability or esthetics?
Built over the course of two days, was about $600+ for all 6 boxes. Live in California so everything is a little more expensive. Waiting on cushions which are about $300…
Built over the course of two days, was about $600+ for all 6 boxes. Live in California so everything is a little more expensive. Waiting on cushions which are about $300.
I built these this week although I altered the dimensions slightly to accommodate different cushions. I also built “double” benches instead of individual units. I used Redwood for the frame and Cedar boards. The plans were very easy to follow for a complete novice like myself, thank you! Now I’m looking for another project!
Can you tell me what your dimensions are for the different size cushions? Thanks!
I built these this week although I altered the dimensions slightly to accommodate different cushions. I also built “double” benches instead of individual units. I used Redwood for the frame and Cedar boards. The plans were very easy to follow for a complete novice like myself, thank you!
I added wheels to the Ottomans, so I can push them around. I also rounded all the edges with a belt sander.
Hi Shanty2Chic can you tell me what it cost for you to do this?
Got started on this yesterday.
❤❤❤❤❤❤❤❤❤
??
I built my own using the plans at www. WoodworkPlans.info – highly recommended you check those out too. They are detailed and super easy to read and understand unlike several others I found online. The amount of plans there is mind-boggling… there’s like 16,000 plans or something like that for tons of different projects. Definitely enough to keep me busy with projects for many more years to come haha
????????
www. WoodworkPlans.info
✌✌✌✌✌✌✌✌✌✌✌
im confussd by the 1x4x8′ measurement surely each seat is not 8ft square??
1x4x8′ is a 1×4 board that is 8 ft long. A 1×4 is 3/4″ thick and 3.5″ wide.
Also Swaya the 8 foot part of your 1x4x8 gets cut down to more than one piece
Thank you so much for sharing these plans! My husband made these for me for mother’s day. He even made an umbrella table for me so I could have some shade.
What type of saw blade (#) would you recommend? My husband and I are buying a chop saw for this project and a few others. Thanks so much!
Just a standard blade for wood. Hope this helps!
Get something like a 40-tooth blade. 24-tooth blades (which are likely the default) have too much tear-out–especially for soft woods like Cedar. Don’t go higher than 60, since 80 is for specialty uses. A nice 40-tooth Diablo blade is my default.
Hi, is each section attached to the section next to it? If not, do they tend to push apart from each other?
They are all separate pieces so you can form the sectional how you want to. They stay together perfectly.
Thanks Justin!