If you’ve ever tried to shop for a monitor stand online, you already know… they’re either unattractive, overpriced, or somehow both.
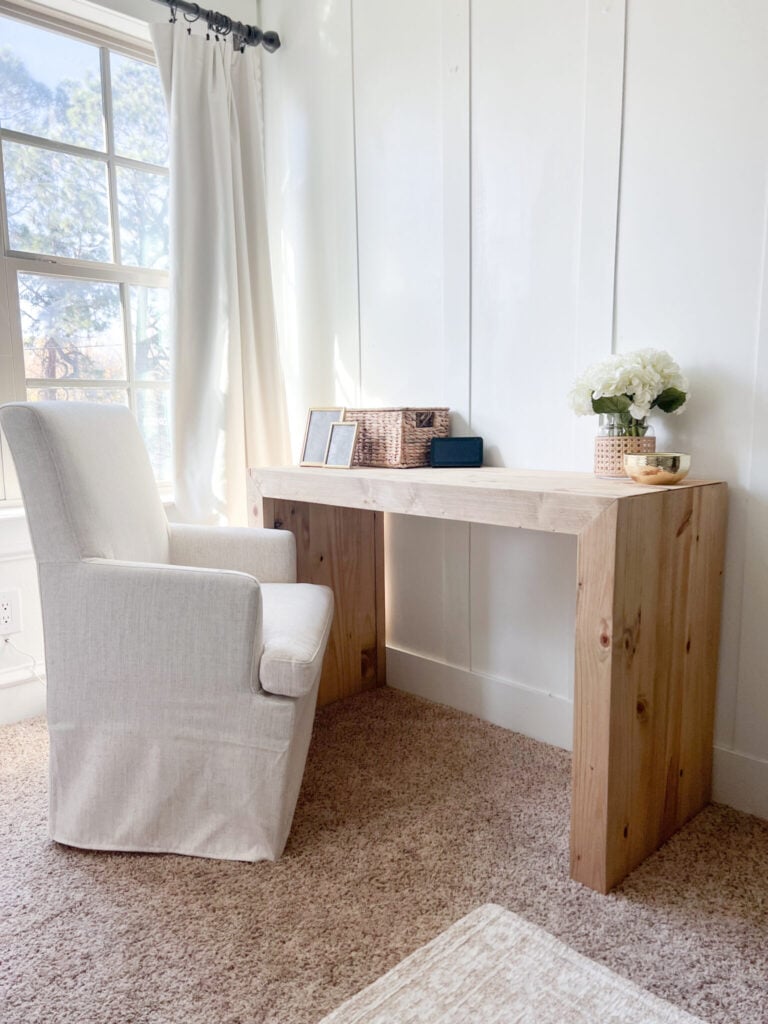
When I finally turned one of our extra bedrooms into my very first real home office (because my son moved out), I built my dream desk. But once I added both my laptop and an external monitor, something felt off and I needed better function and better flow.
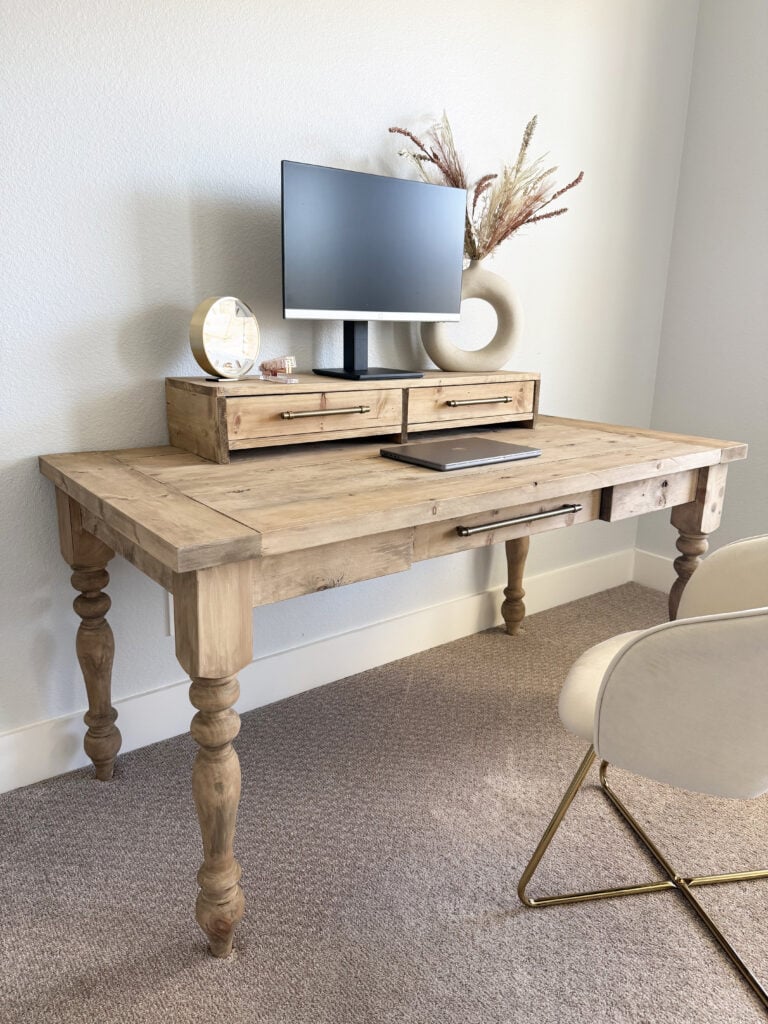
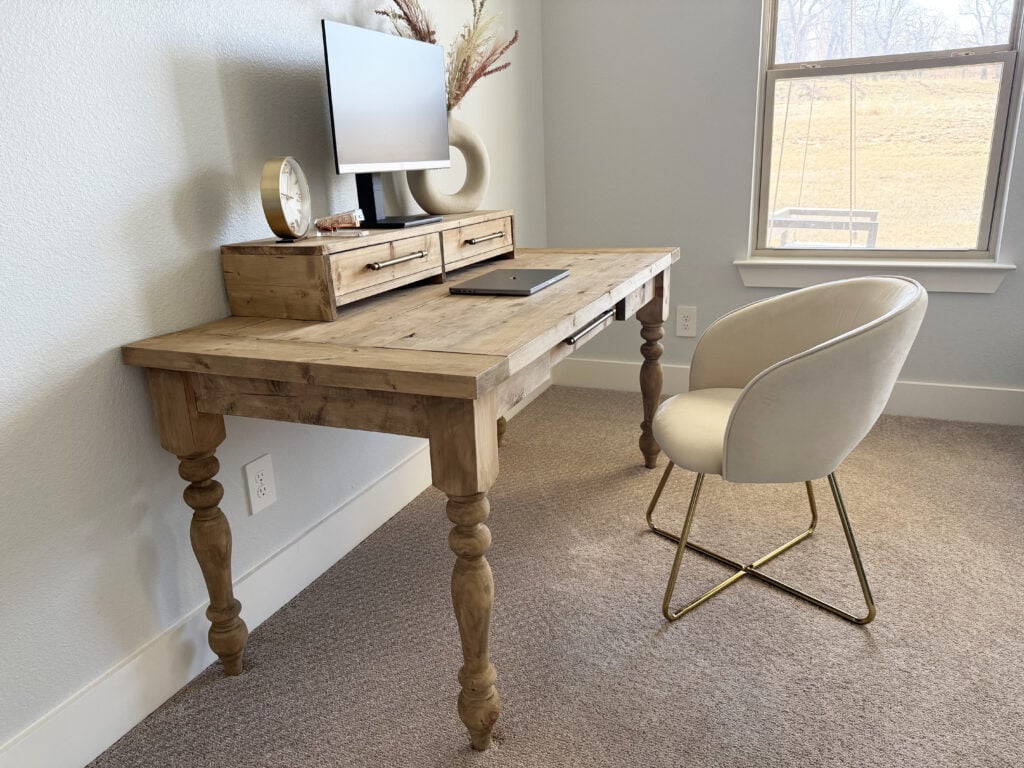
My goal was to have my monitor to sit just above my laptop, centered on my desk. I wanted storage. I wanted it to match my desk. And I definitely didn’t want to spend $100+ on something that looked and felt cheap.
So I built my own DIY Monitory Stand.
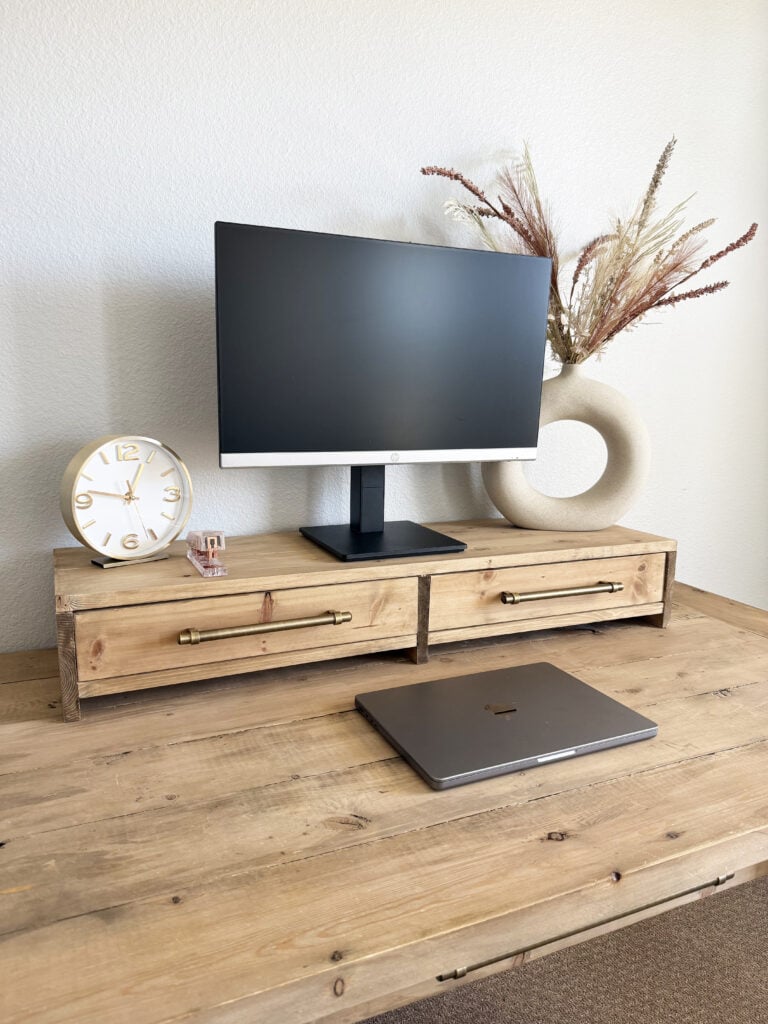
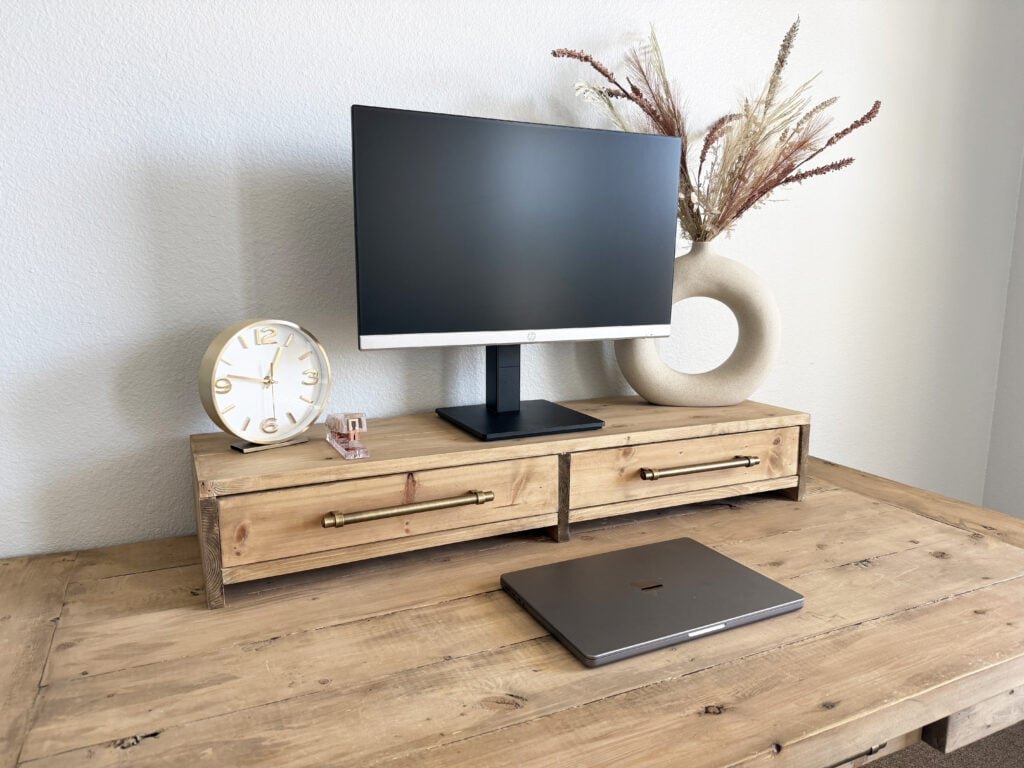
It’s 39″ long, has 2 drawers, 2 open cubbies for laptops, and cost me about $40 in materials. And the best part? The free printable monitor stand plans are completely customizable so you can adjust the dimensions to fit your space.
Let me show you how to build it.
Watch Whitney and I build it – just click the play button below!
Table of Contents
Why Build a DIY Monitor Stand?
A good desk monitor stand does more than just lift your screen.
- Improves posture
- Creates visual balance
- Adds functional storage
- Hides laptop clutter
- Makes your workspace feel intentional
This wooden monitor stand gives you both aesthetics and storage, which is exactly what I was missing.
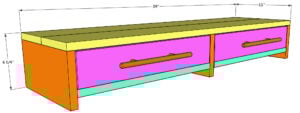
Monitor Stand Dimensions
- Overall Length: 39″
- Overall Width: 11″
- Overall Height: 6 1/4″
- 2 Drawers for storage
- 2 Open cubbies for laptops underneath
- Fully customizable size
If you need a shorter version, a wider one for dual monitors, or deeper drawers, the plans can easily be modified.
How to Build a DIY Monitor Stand
Below is the full step-by-step guide. You can also grab the free printable woodworking plans and watch the full video tutorial for extra guidance.
Click here to jump to the free printable plans!Materials
Tools:
- Miter Saw
- Drill
- Kreg Jig
- Stapler (or Brad Nailer/Hammer and Finish Nails)
- Orbital Sander
- Table Saw (optional)
- Kreg 6″ Face Clamp (optional)
- Kreg Cabinet Hardware Jig Pro (optional)
- Kreg Project Blocks (optional)
Supplies:
- 1 – 1x4x8 Pine or Common Boards
- 3 – 1x6x8 Pine or Common Boards
- 2 – 19″x11″x1/4″ Scrap MDF or Plywood
- 1 1/4″ Pocket Hole Screws
- 3/8″ Staples (or Brad Nails)
- 2 Cabinet Pulls
- Wood Glue
- Finish (links to finish combination I used below)
Building the Monitor Frame
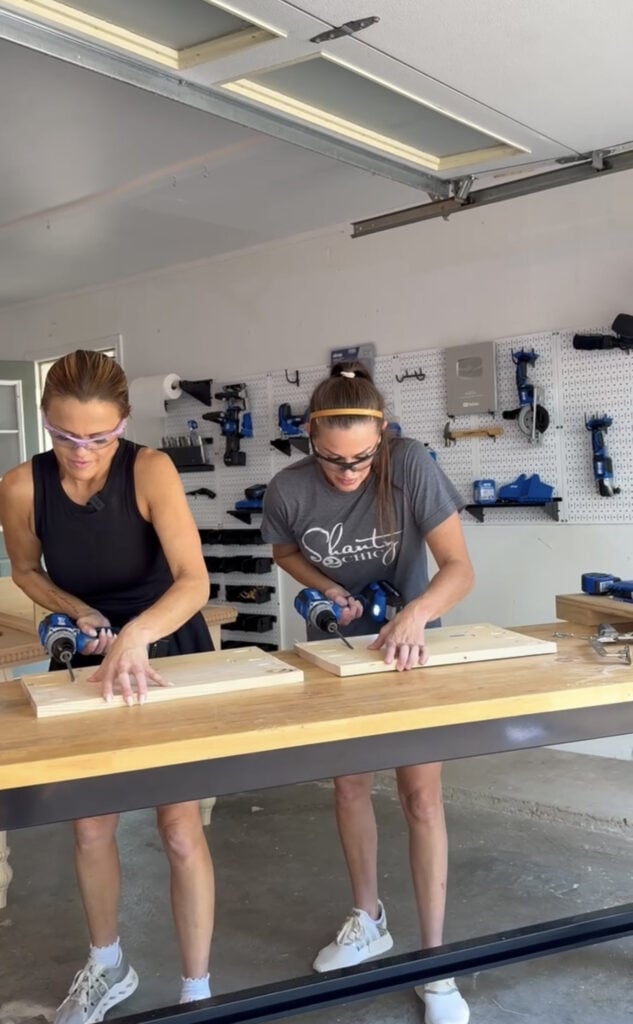
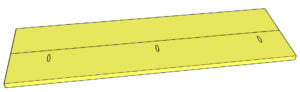
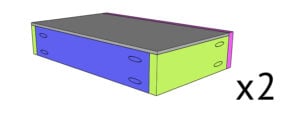
Step 1: Assemble the Top
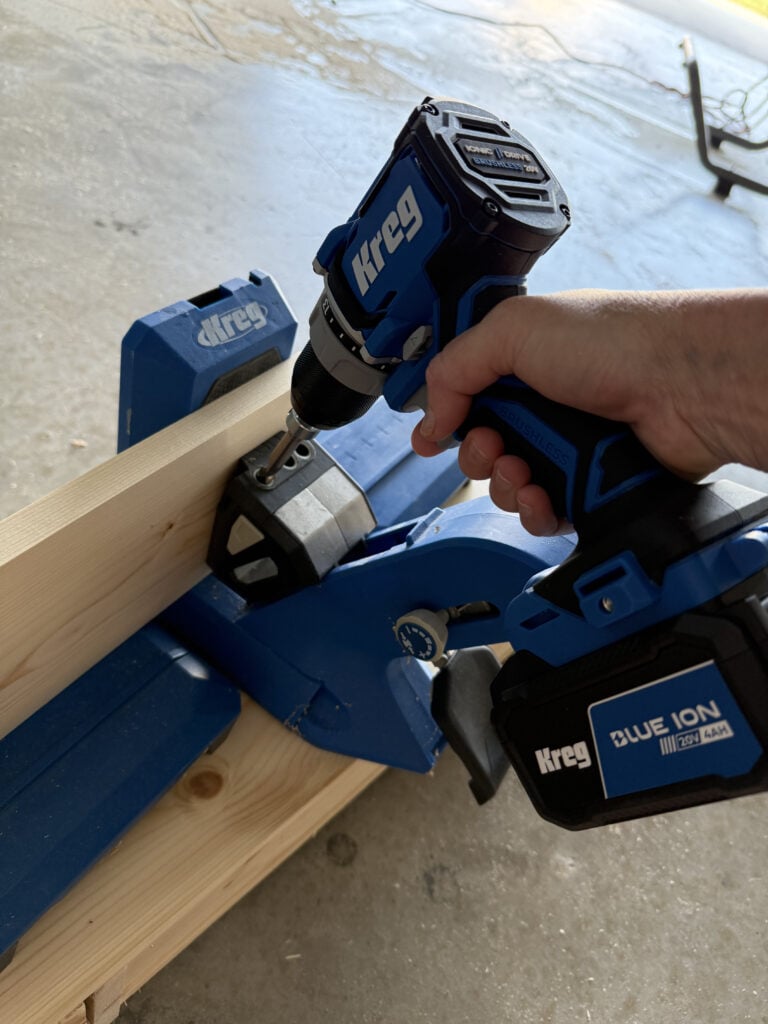
Cut your top plank pieces to size. I used my Kreg Jig 720Pro and my Kreg 20-Volt Drill to drill 3/4″ pocket holes on one edge of one plank.
- You can find the Kreg Jig 720Pro here.
- You can find the new Kreg 20-Volt Ionic Drive Drill here
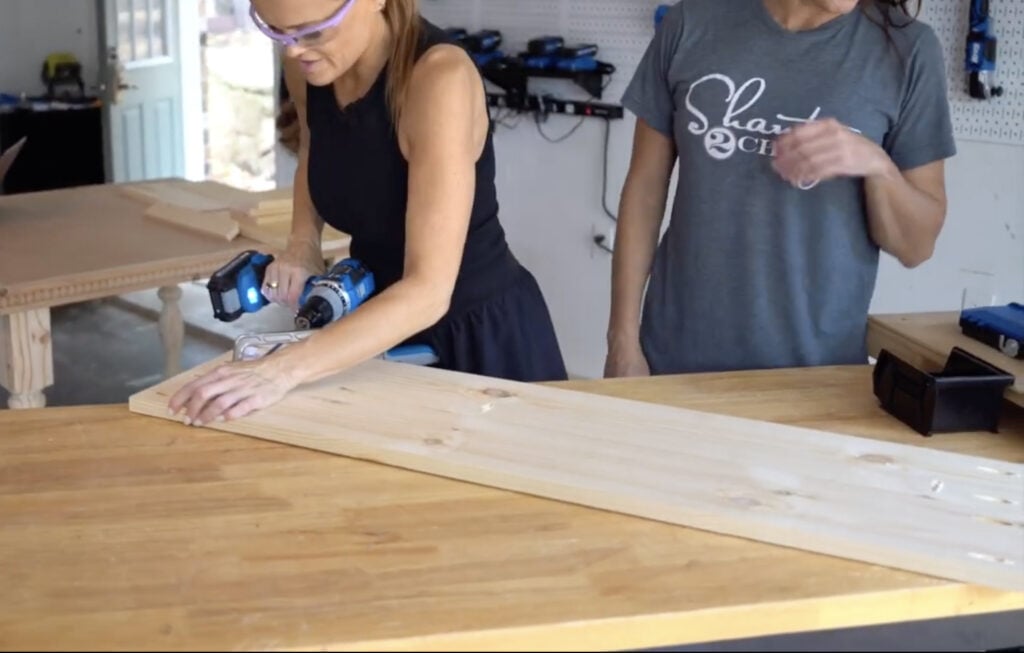
Attach the planks together using 1 1/4″ pocket hole screws. This creates your full top panel. We always use our Kreg 6″ face clamps when we are planking boards for a smooth finish! It’s like an extra set of hands when you’re building!
You can find the Kreg 6″ face clamps here.
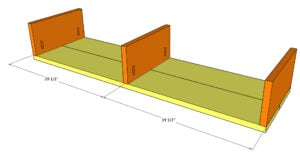
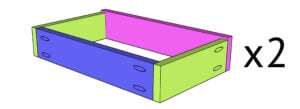
Step 2: Attach the Sides and Divider
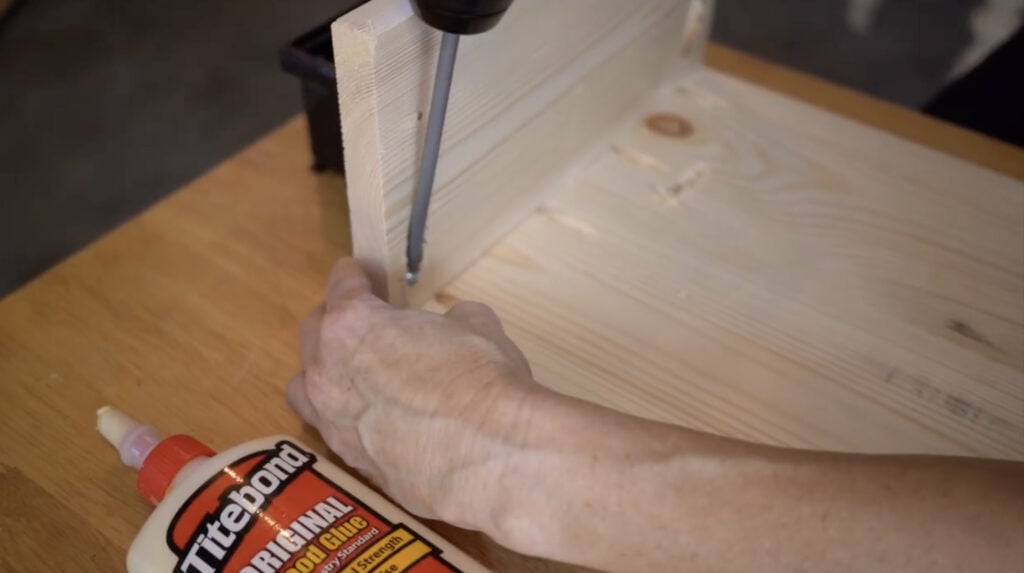
Cut your side pieces and center divider to size. Drill 3/4″ pocket holes on one edge of each board. Attach one on each end and one in the center of the planks with 1 1/4″ pocket hole screws and wood glue.
Now you’ll start to see the frame of your DIY monitor riser take shape.
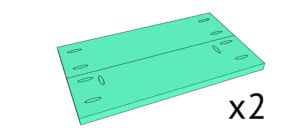
Step 3: Build the Bottom Shelves
Cut the bottom shelf pieces to size and drill 3/4″ pocket holes on one edge of one board and both ends of each board. Attach them together with 1 1/4″ pocket hole screws. Build two bottom shelf assemblies.
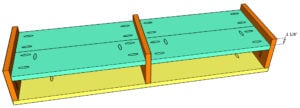
Step 4: Install the Shelves
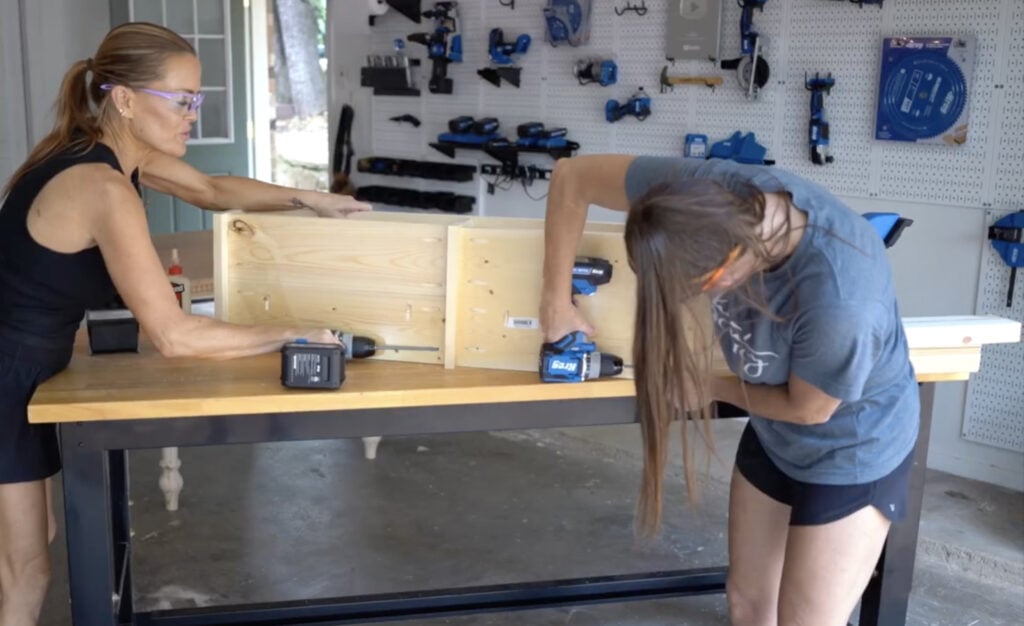
Attach each bottom shelf assembly to the side pieces and center divider with 1 1/4″ pocket hole screws and wood glue. The shelves should sit 1 1/8″ from the bottom of the sides and divider.
At this point, your wooden monitor stand body is complete.
Building the Drawers
This is what really sets this apart from a basic monitor riser DIY build.
Step 5: Build the Drawer Frames
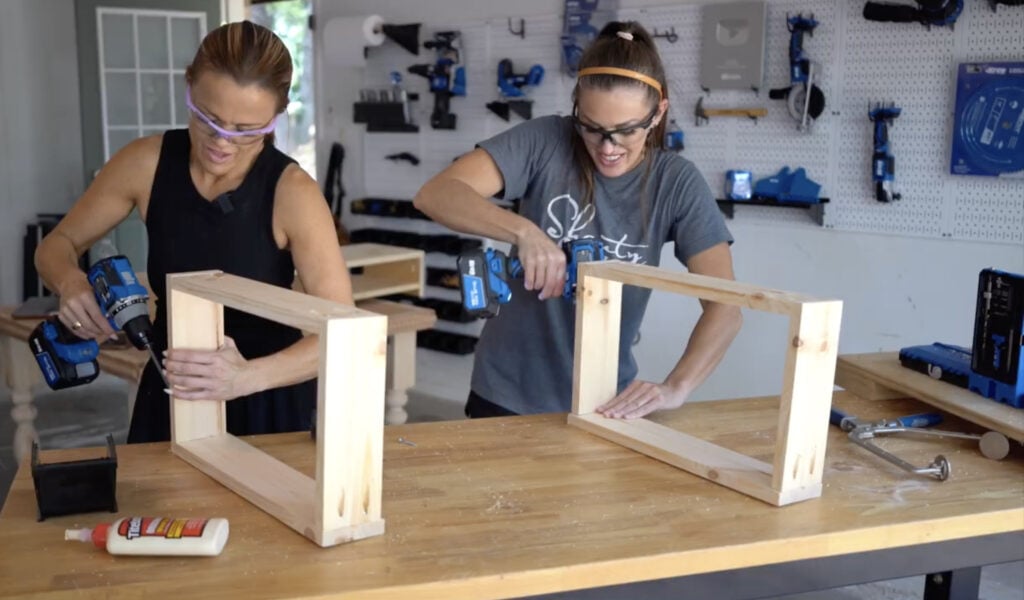
Cut your drawer frame pieces to size and drill 3/4″ pocket holes on one end of each side piece and both ends of the back frame piece. Attach them together with 1 1/4″ and wood glue.
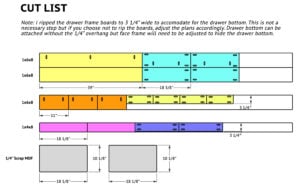
The tops of the boards should be flush, The drawer face should overhang 1/4″ on the bottom to allow space for the drawer bottom.
Build two drawer frames.
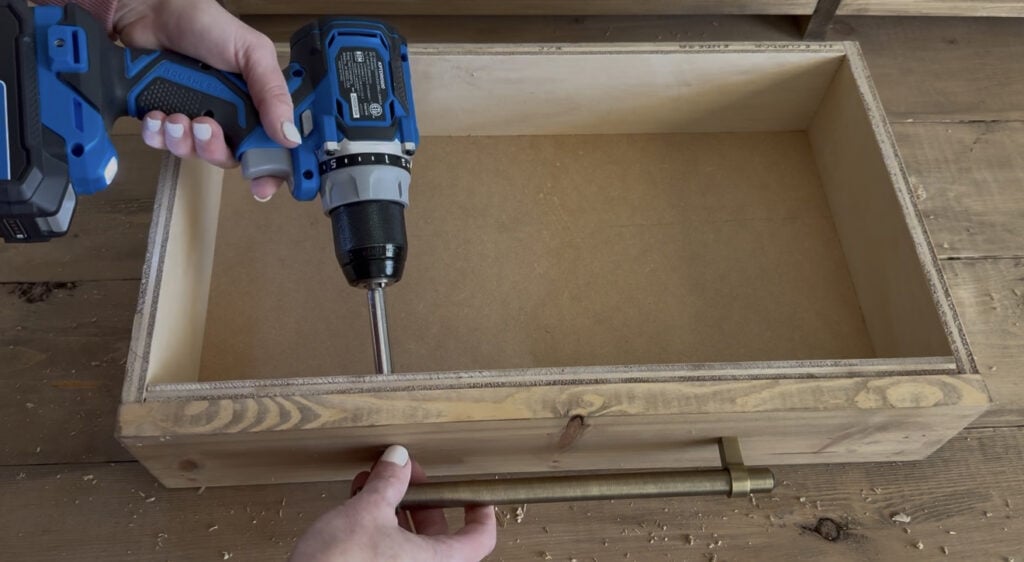
Step 6: Attach the Drawer Bottoms
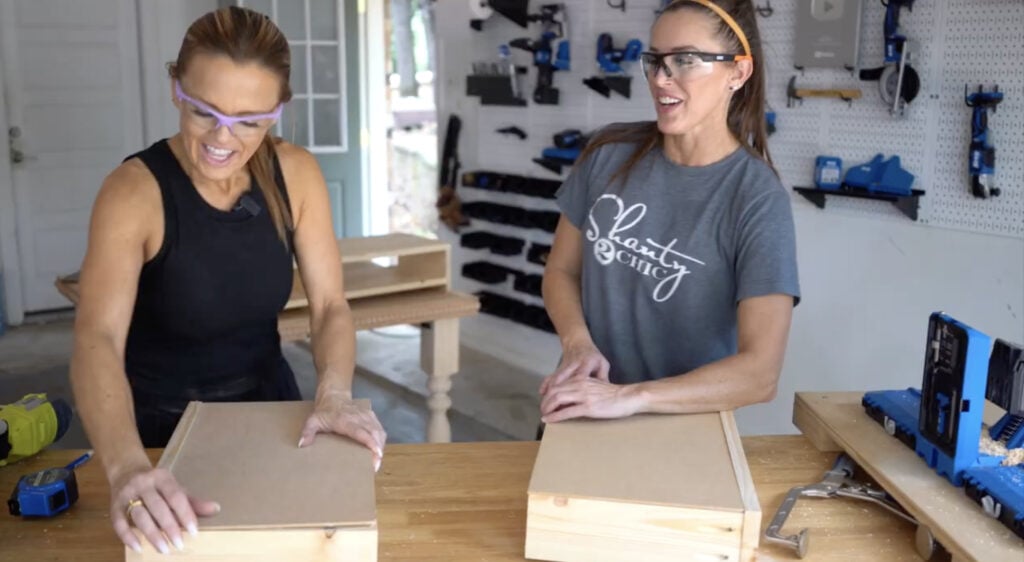
Cut the drawer bottom panels to size. I used scrap 1/4″ MDF that I had. If you don’t have scrap, you can buy 2’x2′ pieces at the hardware store.
Attach them to the bottom of each drawer frame using 3/8″ staples and wood glue. If you don’t have a stapler, you can use brad nails or a hammer and finish nails.
Now you have two fully functional drawers ready to install.
Finishing the DIY Desk Monitor Stand
Step 7: Sanding
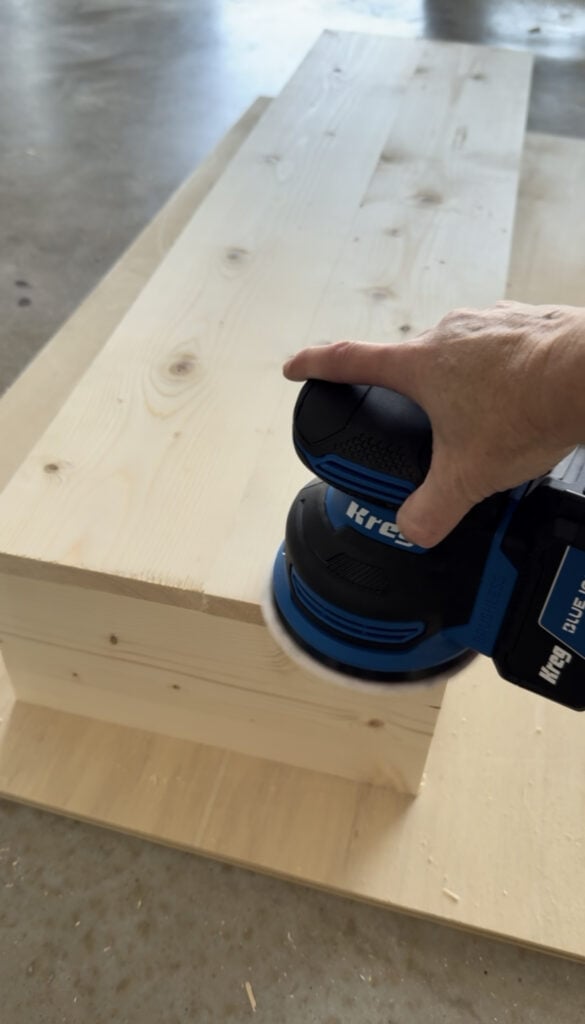
I sanded the entire piece thoroughly using my Kreg Orbital Sander.
- You can find the Kreg Orbital Sander here.
Step 8: Staining
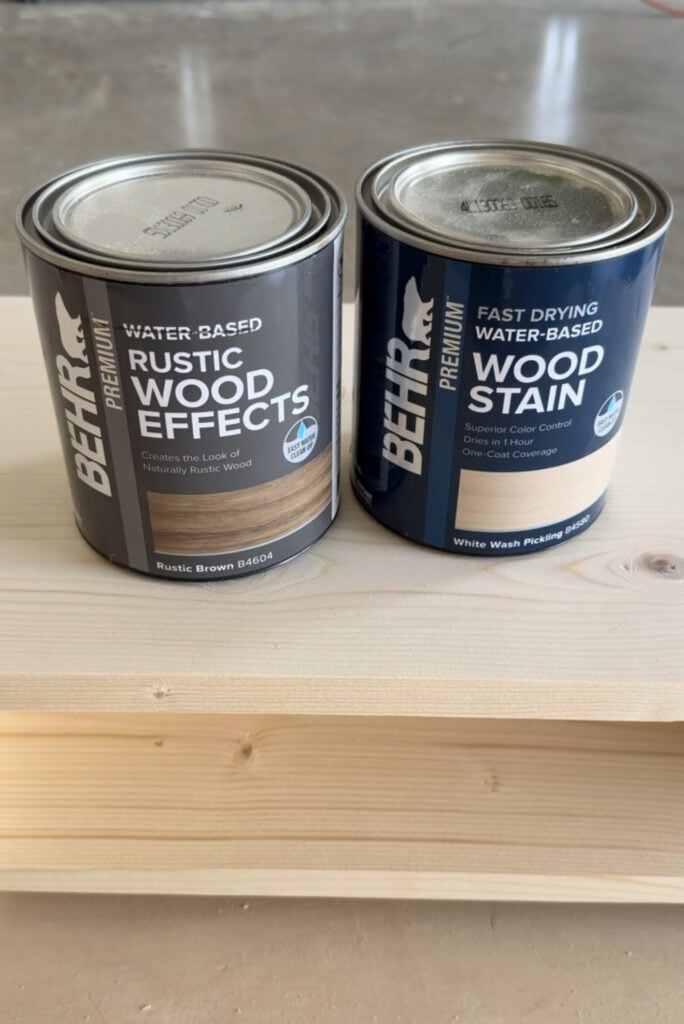
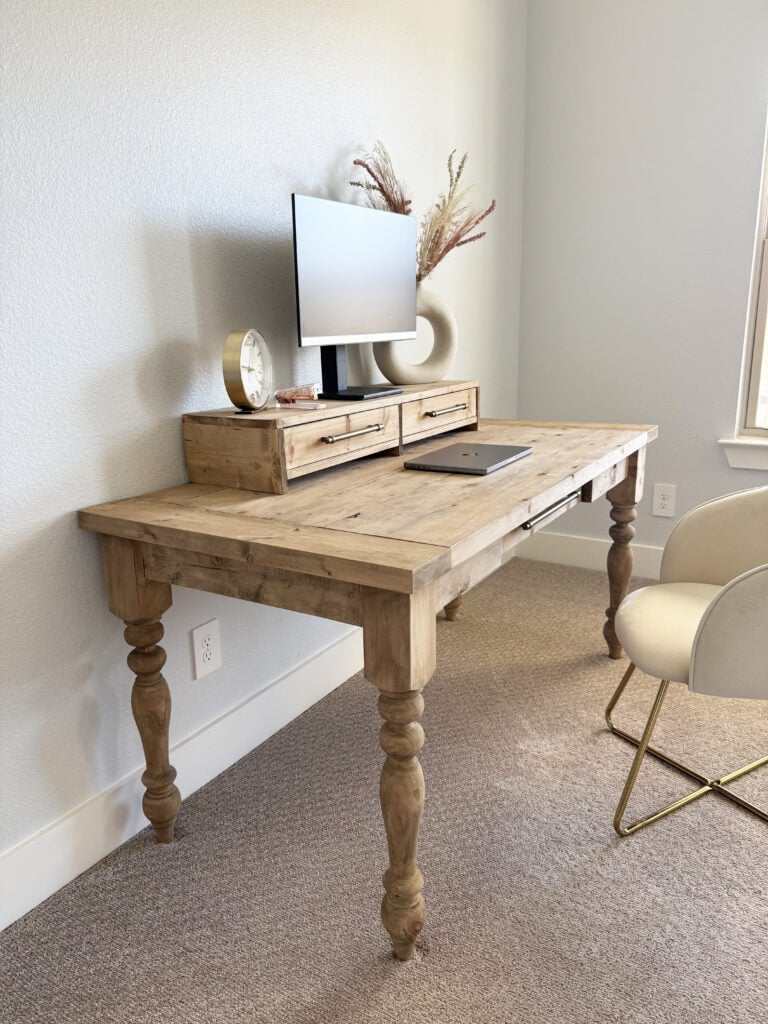
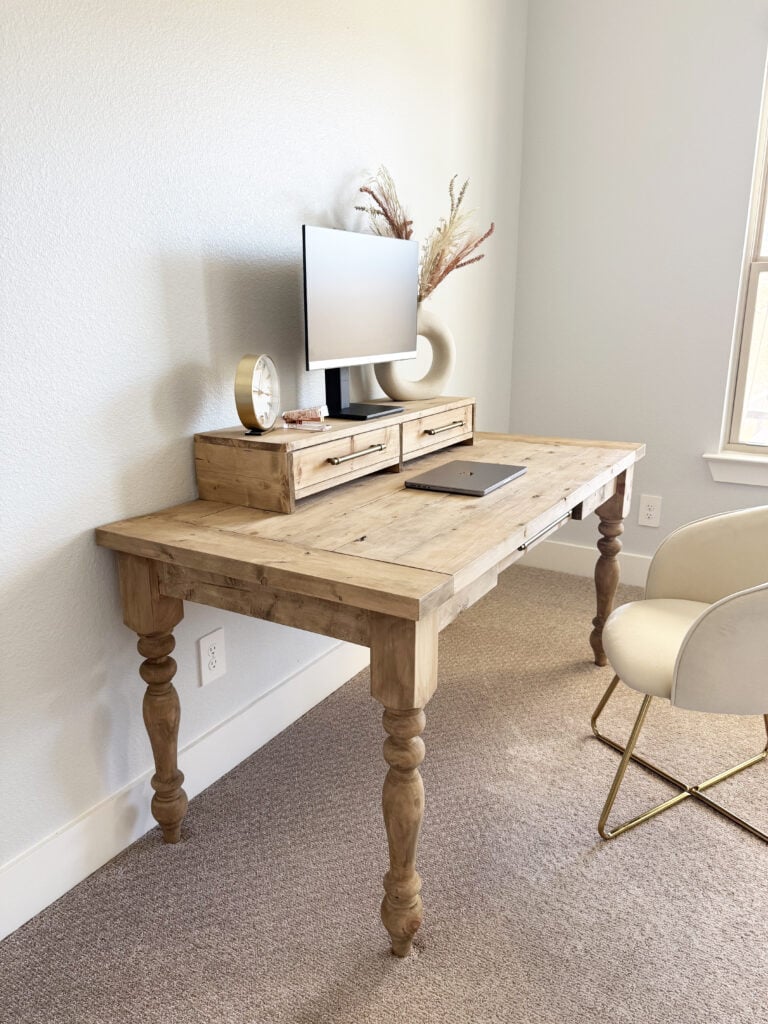
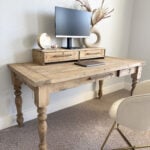
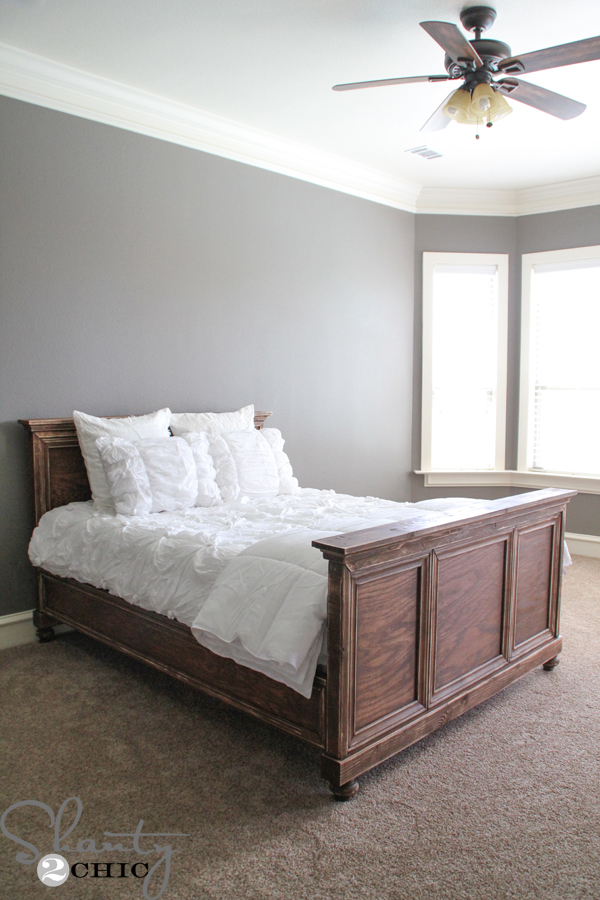
I stained mine to match my DIY desk with turned legs so everything felt cohesive and intentional. This stain was a custom application that I created with Behr White Washed Pickling and Behr Rustic Brown stains.
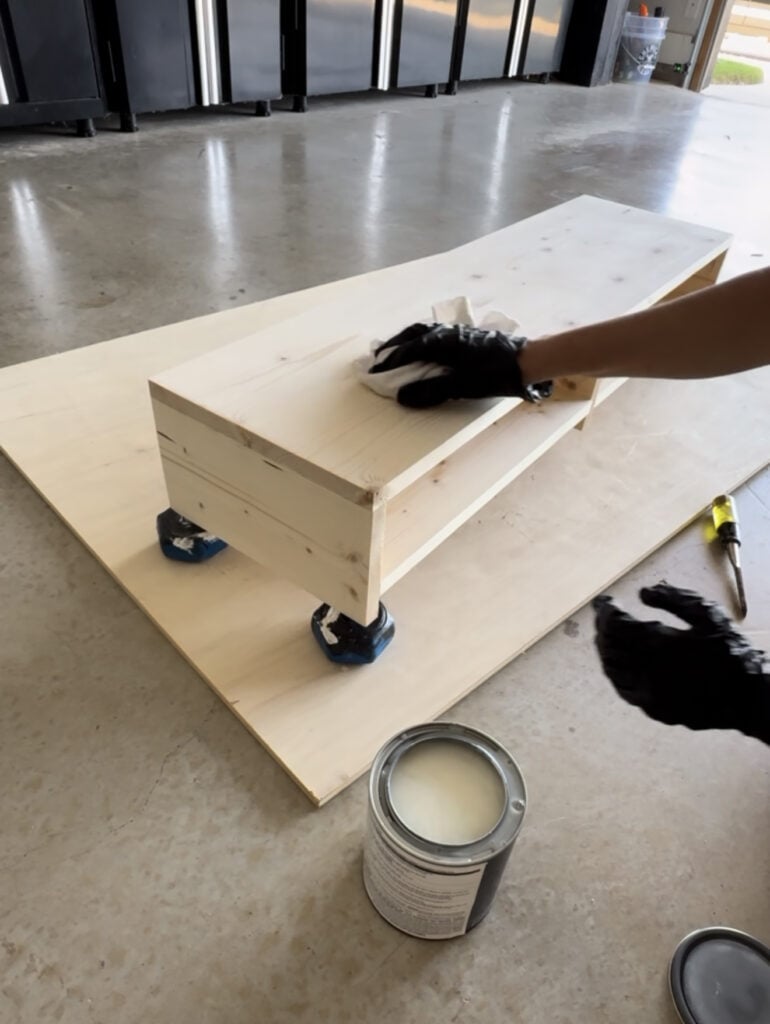
I started by applying one coat of the White Washed Pickling stain over the entire monitor stand.
- You can find the White Wash Pickling Stain here.
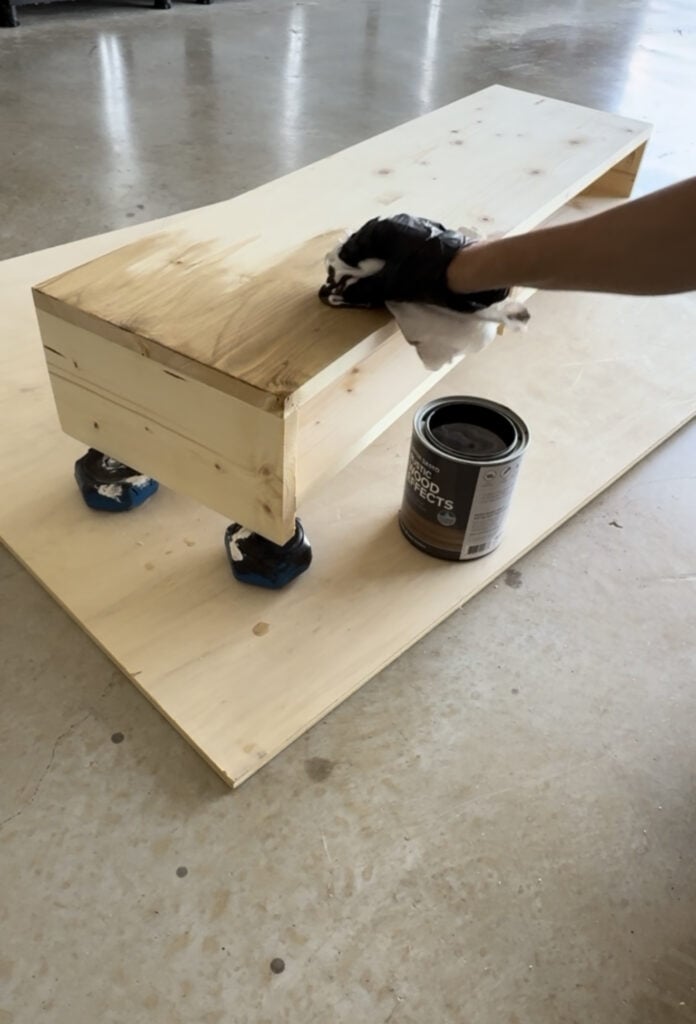
Once that was dry, I applied one coat of the Rustic Brown stain over the White Washed Pickling. This helps to mute the Rustic Brown for a light modern stain.
- You can find the Rustic Brown Stain here.
Step 9: Adding the Hardware
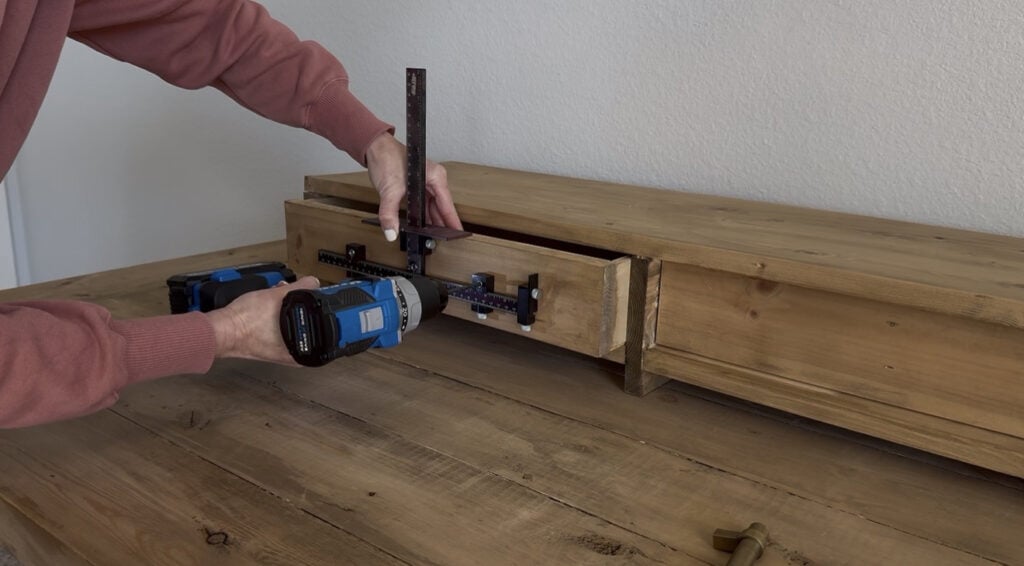
I used my Kreg Hardware Jig Pro to pre-drill the holes for the cabinet pulls. This is one of our favorite shop accessories. It makes installing cabinet hardware so easy, with built-in stops that ensure perfectly placed hardware every time – no measuring over and over again and no misplaced holes!
- You can find the Kreg Hardware Jig Pro here
Once the pilot holes were drilled, I followed up with my cabinet pulls.
- You can find the cabinet pulls I used here.

I slid the drawers in place and that was it! A completely customizable, unique and quality monitor stand for under $50!
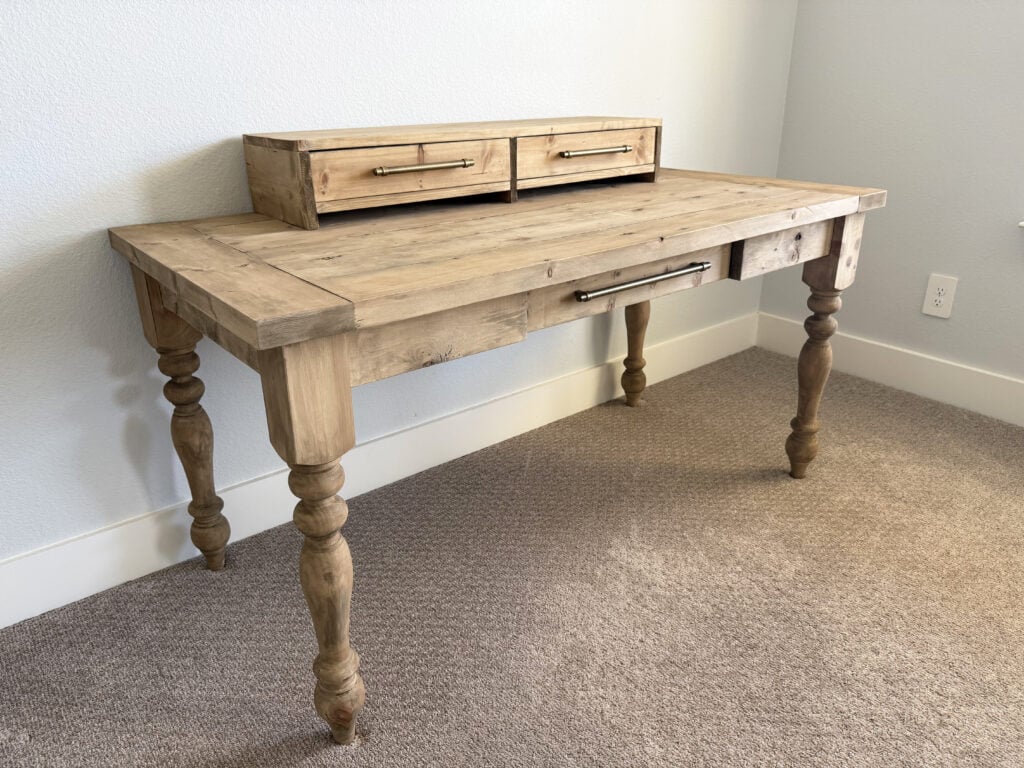
This monitor stand has made working from my desk more organized and functional! I love that I was able to build exactly what I needed and have it match my new desk perfectly!
Make it your own! Make sure to share you builds with us on social media and use #shanty2chic so we can share them too!
Happy building!
Cost Breakdown
Materials cost me roughly $40.
Compared to store-bought options that:
- Cost 3-4x more
- Don’t match your aesthetic
- Have minimal storage
- Low quality materials
This DIY monitor stand is a winner!
Download the Free Printable Monitor Stand Plans
If you’d like exact cut lists, measurements, and diagrams, grab the free printable plans below.
They’re fully customizable so you can adjust:
- Length
- Height
- Drawer configuration
- Shelf spacing
And don’t forget to watch the full step-by-step video tutorial if you’re more of a visual learner.
FAQ: DIY Monitor Stand
What is the ideal height for a monitor stand?
Your monitor should sit at eye level when you’re seated upright. The height will depend on your chair and desk setup, but typically 4–6 inches of lift works well.
Can I build a monitor stand for dual monitors?
Yes. Simply extend the length of the top plank and adjust your divider placement to accommodate two screens.
Is a DIY monitor riser sturdy enough?
Absolutely. When built with proper joinery and wood glue, this wooden monitor stand is strong enough to hold multiple monitors and laptops.
Our Other Desk Plans

DIY Monitor Stand
Tools
- Drill
- Kreg Jig
- Miter Saw
- Stapler (or brad nailer)
- Sander
- Table Saw (optional)
Supply List
- 1 1x4x8 Common Board
- 3 1x6x8 Common Board
- 2 19"x11" Scrap MDF or Plywood
- 1 1/4" Pocket Hole Screws
- 3/8" Staples (or Brad Nails)
- 2 Cabinet Pulls
- Wood Glue
- Finish
Instructions
Cut List
- Cut List

Building The Monitor Frame
- Cut the top plank pieces to size and drill 3/4" pocket holes on one edge of one of the planks. Attach them together with 1 1/4" pocket hole screws.

- Cut the divider and side pieces to size. Drill 3/4" pocket holes on one edge of each board. Attach them to the center and both ends of the top planks with 1 1/4" pocket hole screws and wood glue.

- Cut the bottom shelf pieces to size and drill 3/4" pocket holes on one edge of one board and both ends of each board. Attach them together with 1 1/4" pocket hole screws. Build two bottom shelf assemblies.

- Attach each bottom shelf assembly to the sides and divider with 1 1/4" pocket hole screws and wood glue. The shelves should be 1 1/8" from the bottom of the side pieces and middle divider.

Building The Drawers
- Cut the drawer frame pieces to size. Drill 3/4" pocket holes on one end of each side frame piece and both ends of the back frame piece. Attach them together with 1 1/4" pocket hole screws and wood glue. The top of the baords should be flush and the bottom of the drawer face should overhang 1/4" on the bottom to allow for the drawer bottom. Build 2 drawer frames.

- Cut the drawer bottom piece to size and attach it to the bottom of the drawer frame with 3/8" staples and wood glue.

The Finish
- Sand the entire piece down, add a finish and some cute hardware and you're done!Make sure to share your builds with us on social media and use #shanty2chic so we can share them too!Happy Building!


This is a great example of how a simple woodworking project can improve both ergonomics and workspace organization. The clean design and step-by-step plans make the project very approachable, and the added storage underneath the stand is a smart use of space.
Projects like this also reflect a growing interest in well-designed home workspaces, where functional furniture pieces play an important role in productivity and comfort. It’s interesting to see how thoughtful material choices and compact designs are influencing both DIY furniture and larger interior workspace solutions. We’ve been observing similar material trends and interior product developments in the industry as well: https://plywoodbazar.com/