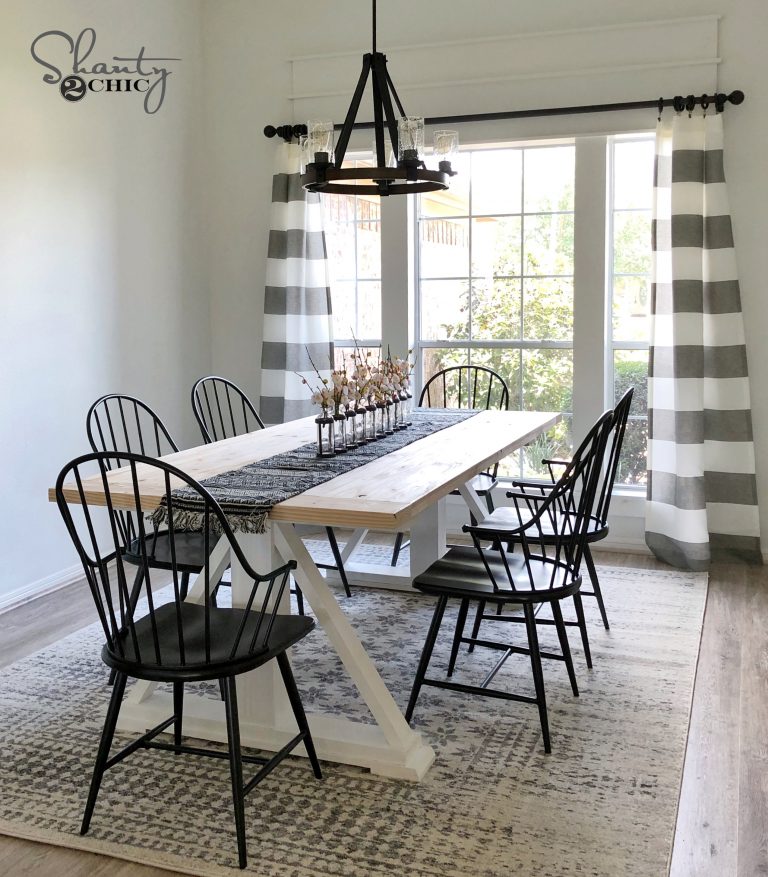
With Thanksgiving and Christmas just around the corner, I decided to build a new DIY Modern Farmhouse Sideboard for my dining room. I love the storage it provides and how it looks in the room! Grab the free plans for this buffet cabinet at the bottom of the post.

Table of Contents
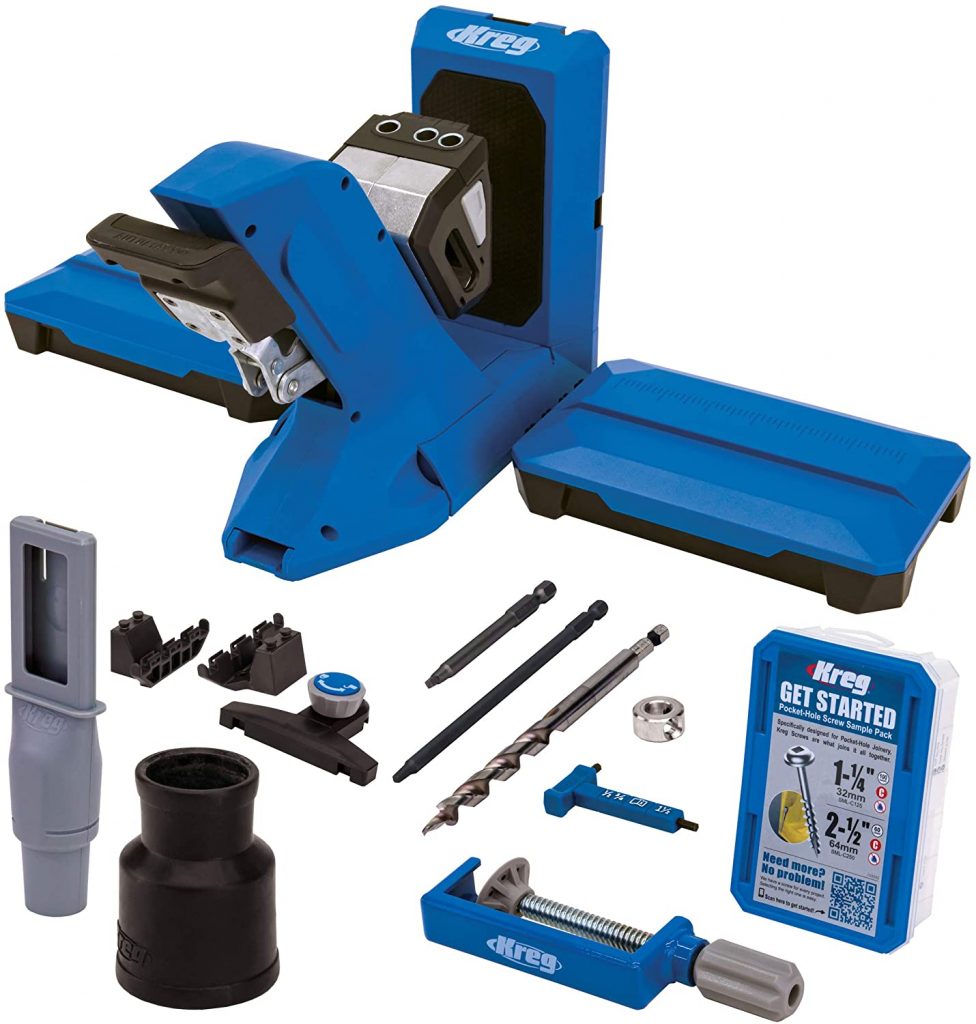
Kreg Jig
One question we get asked consistently is, “What tools do I need to start building furniture”, We have always recommended three basic tools for beginners to get started, a miter saw, a drill and a Kreg Pocket Hole Jig. What is a Kreg Jig? A Kreg Jig is a tool that drills pocket-hole joints. It makes joining two boards faster and gives you stronger and cleaner joints than countersinking a wood screw. We discovered them shortly after we starting building furniture and it was a HUGE game changer for our furniture building! We were so impressed with how user-friendly they are and the strong joints it gave our builds! For this table, I used my Kreg Jig 720 PRO for this build and I LOVE IT! You guys will love it too… definitely worth the upgrade for those of you that already own a different model. You can see it HERE on Amazon! You can also check out our video on how to use it HERE!
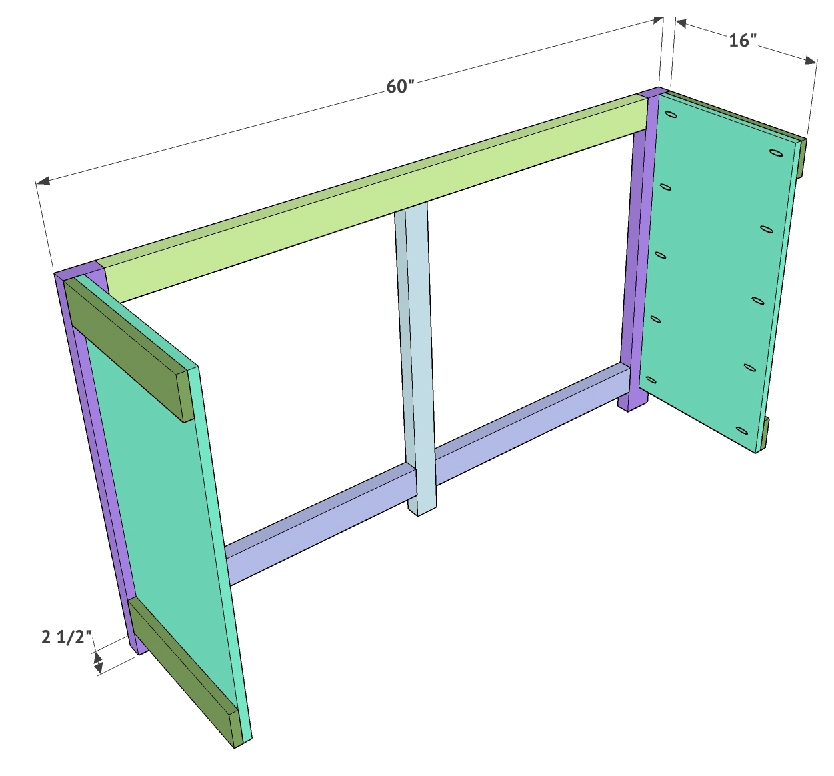
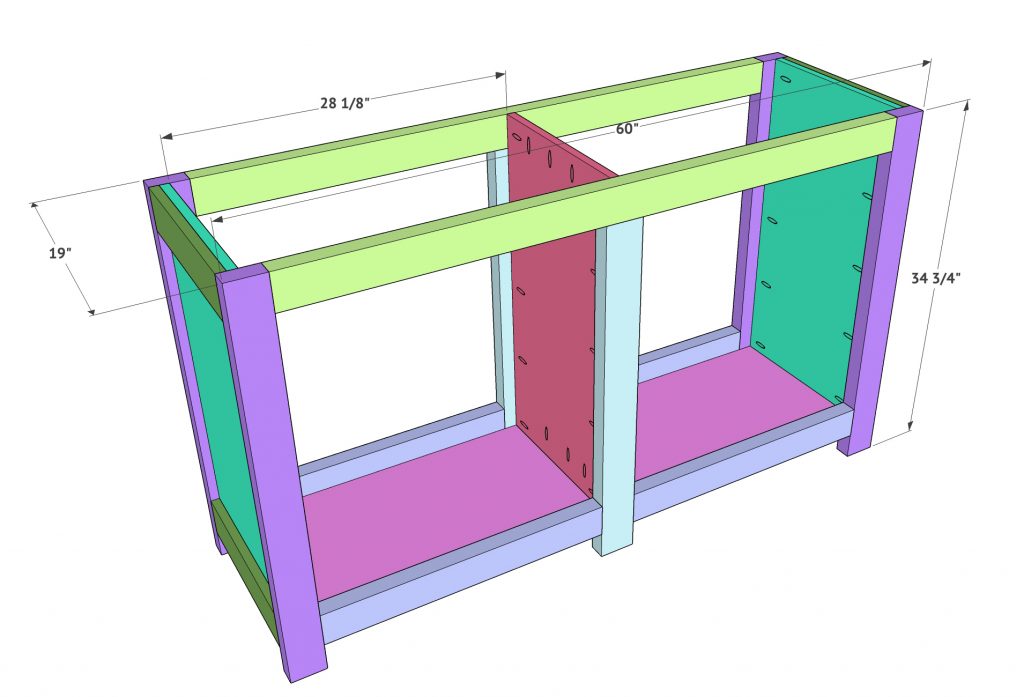
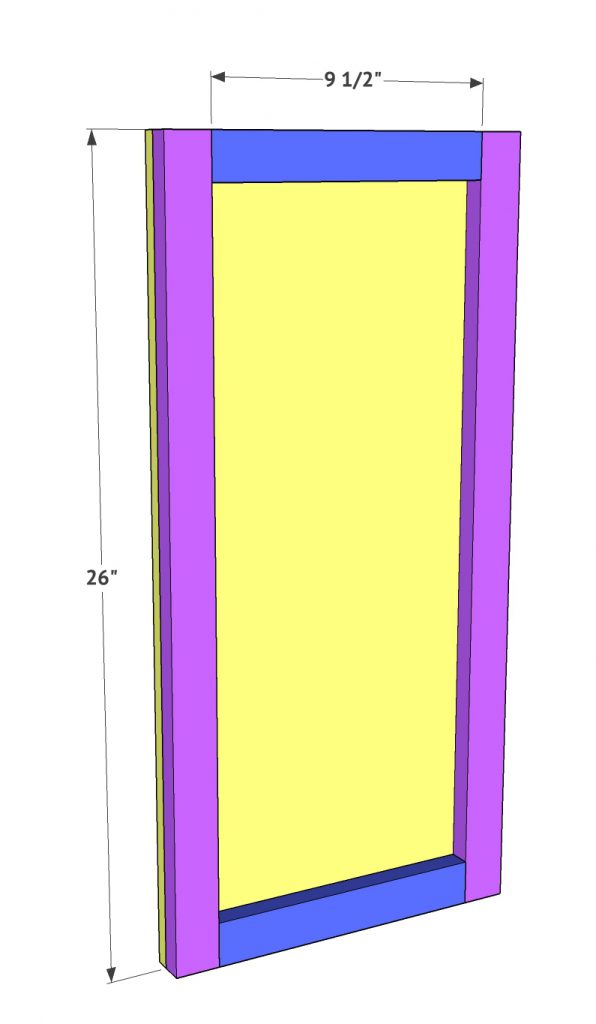
Build the face frames
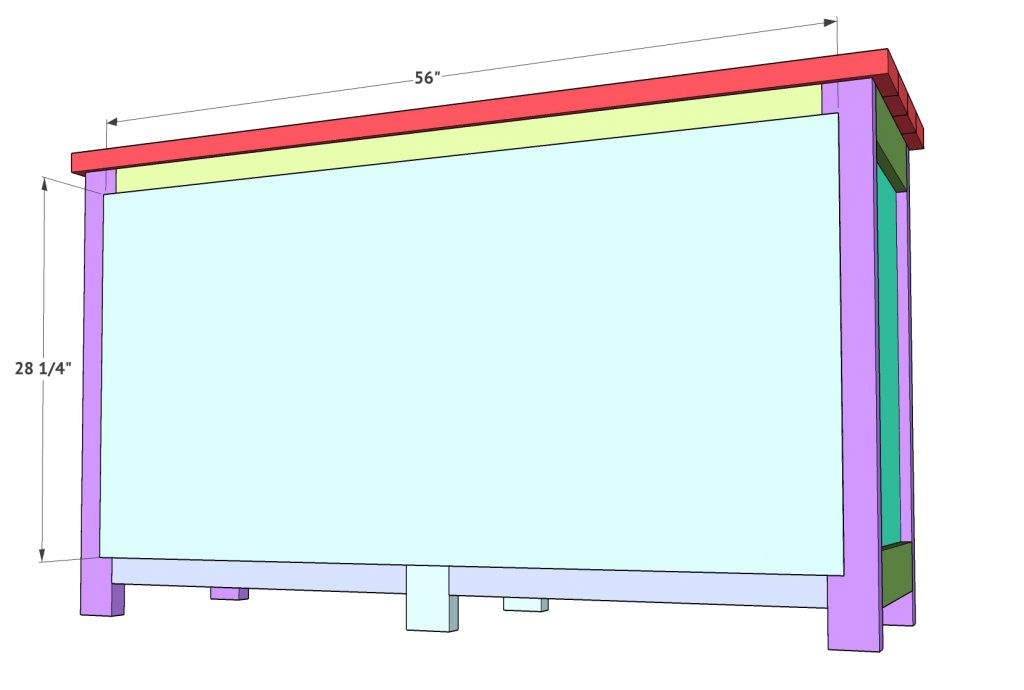
The first step is to build your 2 face frames.
These are made from 2×4 boards that I ripped to 3” wide each. Add 1.5” pocket holes where they are shown here and attach in place using wood glue and 2.5” pocket hole screws. The bottom horizontal boards will line up 2.5” from the base of the leg pieces.

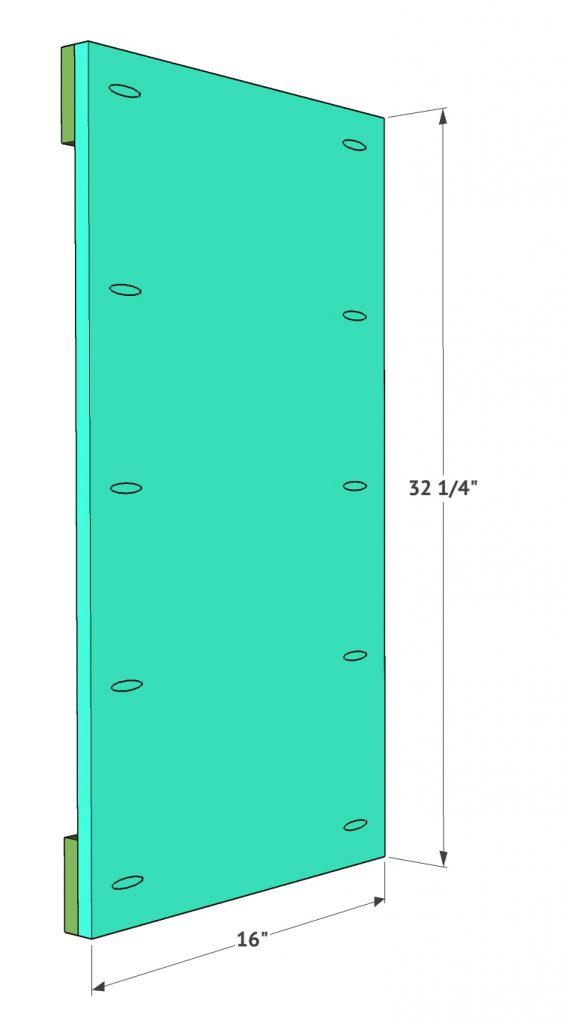
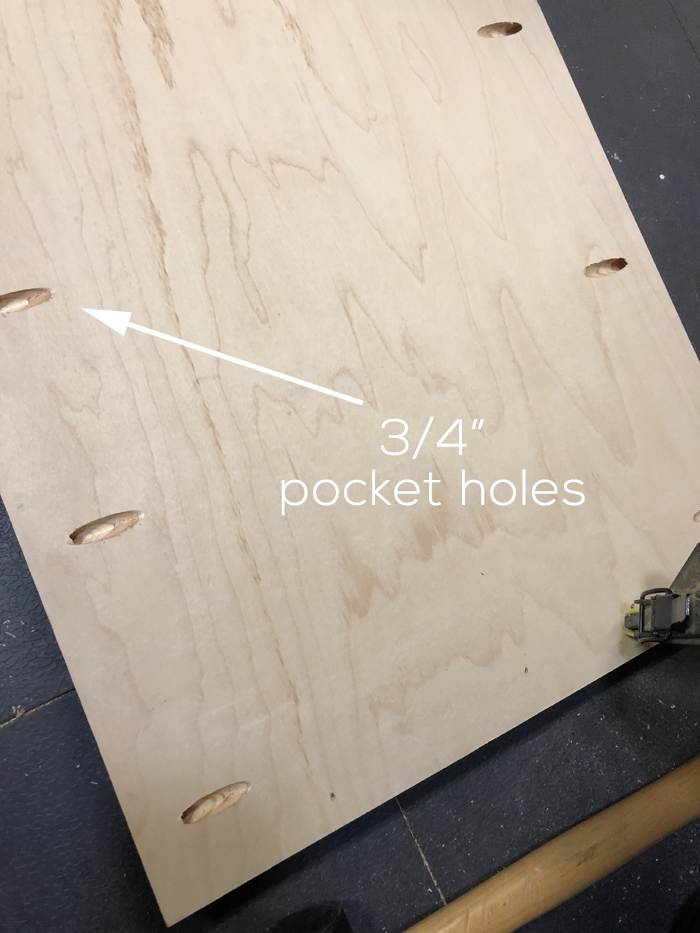
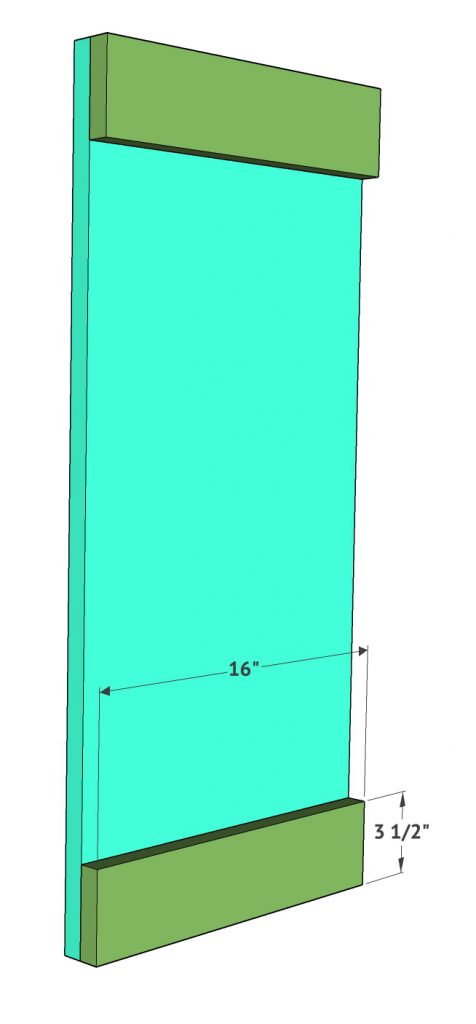
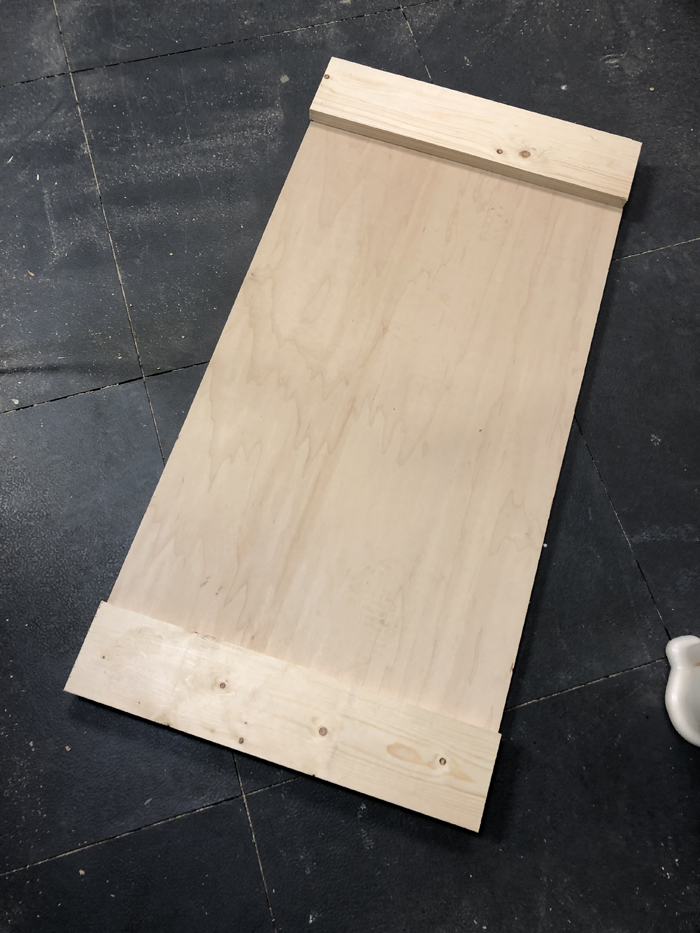
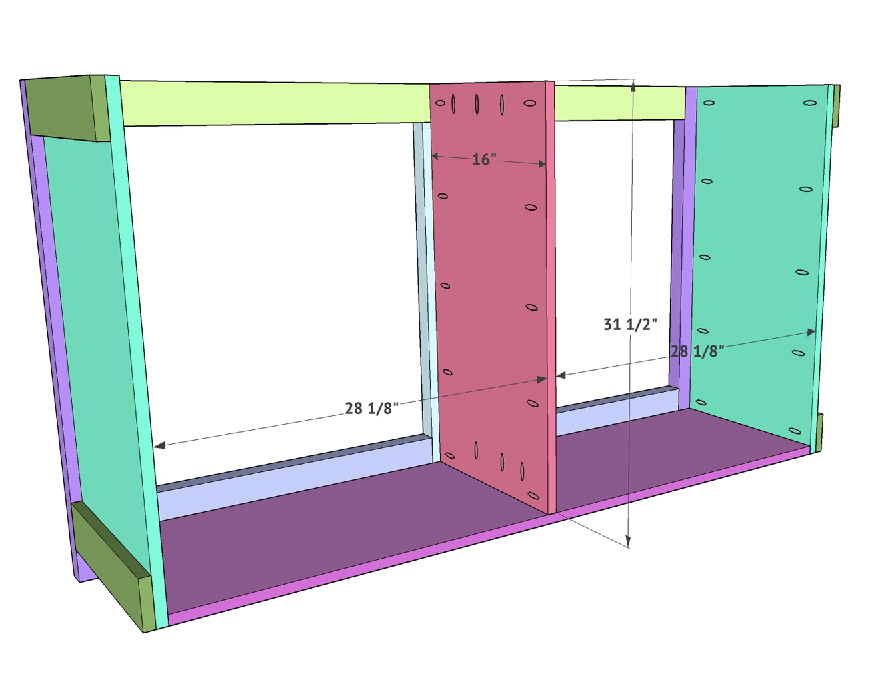
Build the side panels
The side pieces are constructed with 3/4” hardwood plywood and 1×4 boards. Add 3/4” pocket holes down each long side on the back side of the panel. Then, attach the 1×4 trim to the front of the panel using wood glue and 1.25” brad nails and a nail gun. You will build two of these that will be indentical.
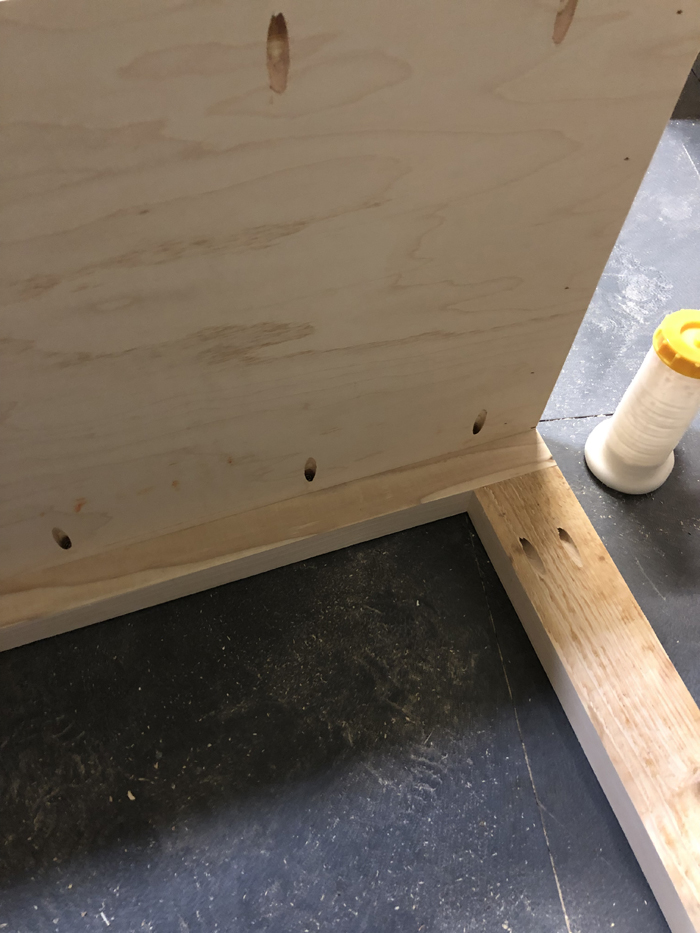
Attach side panels to back face frame
Now attach the two side panels to the back face frame using wood glue and 1.5” Kreg pocket hole screws. You want the top of the side frames to be flush with the top of the back face frame which will leave a 2.5” space below the bottom of the side frames. You also want the outside of the trim boards to be flush with the outside edge of the face frame.
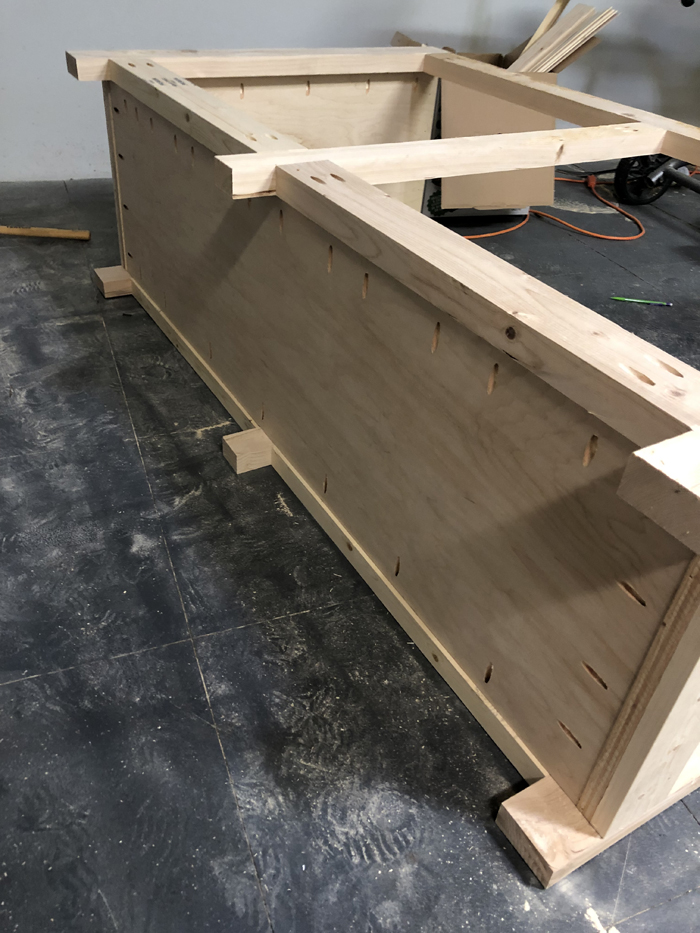
Attach the cabinet base
The base of this cabinet is also 3/4” hardwood plywood. Add 3/4” pocket holes with the Kreg Jig along all 4 sides of this piece. Then, attach it to the back face frame and side frames using wood glue and 1.5” pocket hole screws.
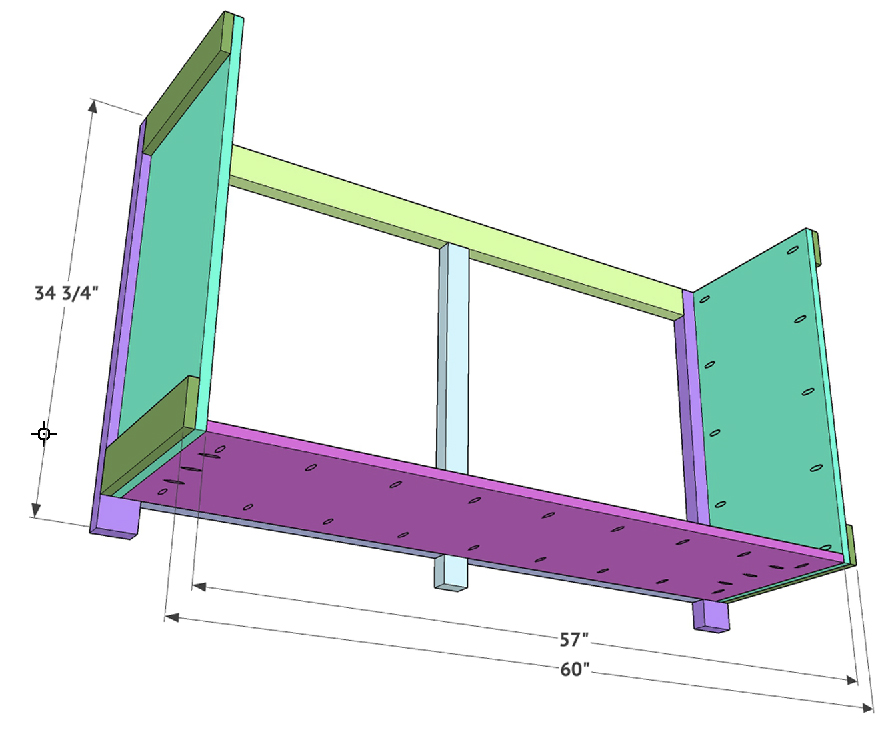

Add the middle divider
Attach the middle divider next. This is also 3/4” hardwood plywood cut slightly shorter than the side frames. Add pocket holes down both long sides and the bottom of one side of this board. Attach it to the base of the dresser and the middle leg of the face frame using wood glue and 1.25” pocket hole screws for the bottom and 1.5” pocket hole screws for the longer sides. Don’t forget to use wood glue too!
Attach the front face frame
Attach the front face frame next! Use wood glue and 1.5” Kreg pocket hole screws to go through the side frames and center divider and into the face frame. Just like the back face frame, you want the outsides and top flush with the outside edges of the face frame.
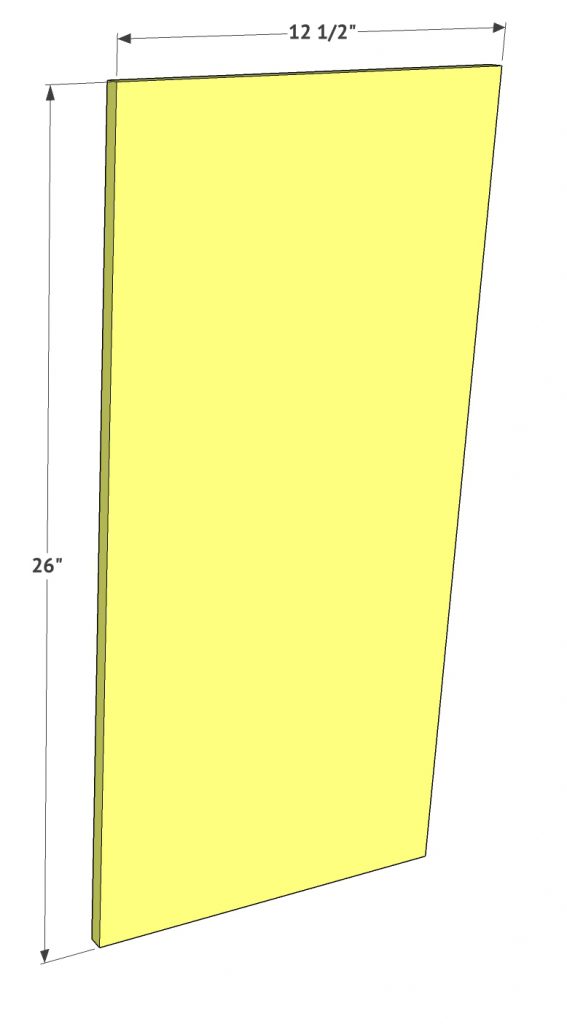
Build the cabinet doors
At this point, I like to stop and build the doors before adding my top and back. These doors are constructed from 1/2” hardwood plywood. Cut each panel to size. I like to leave 1/8” gap all around each door. It’s best to measure and cut this part exact in case one of your doors is uneven.
Attach trim to doors
Attach the door trim next! This is 1×4 boards cut to size. Measure and cut your longer vertical pieces first, and then measure and cut the shorter horizontal pieces. Attach the trim pieces using wood glue and 1” brad nails. Be sure to fill your nail holes with putty before painting!
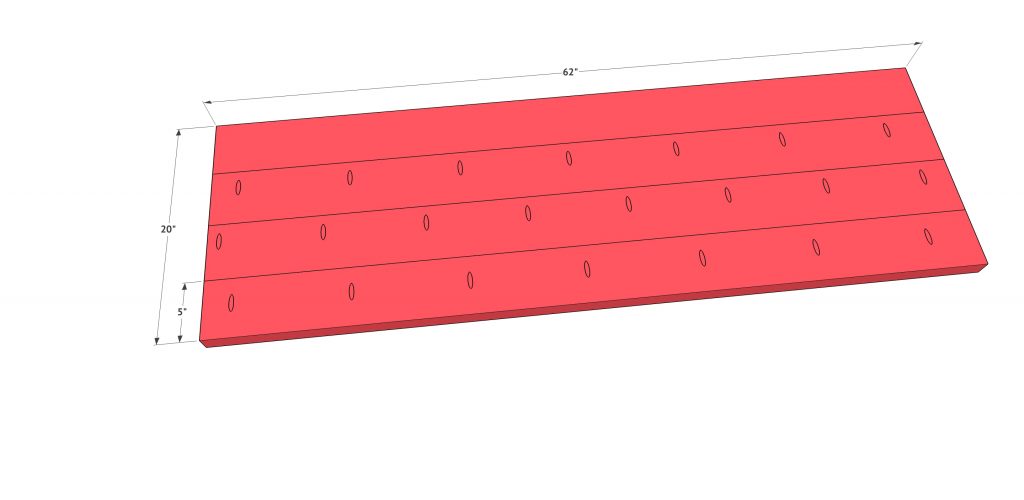
Build the cabinet top
Build the top of the cabinet next. These are 2×6 boards that. I ripped down to 5”wide each.
Add 1.5” pocket holes down one side of 3 of the boards. Then, line them up flush and attach them using 2.5” pocket hole screws.
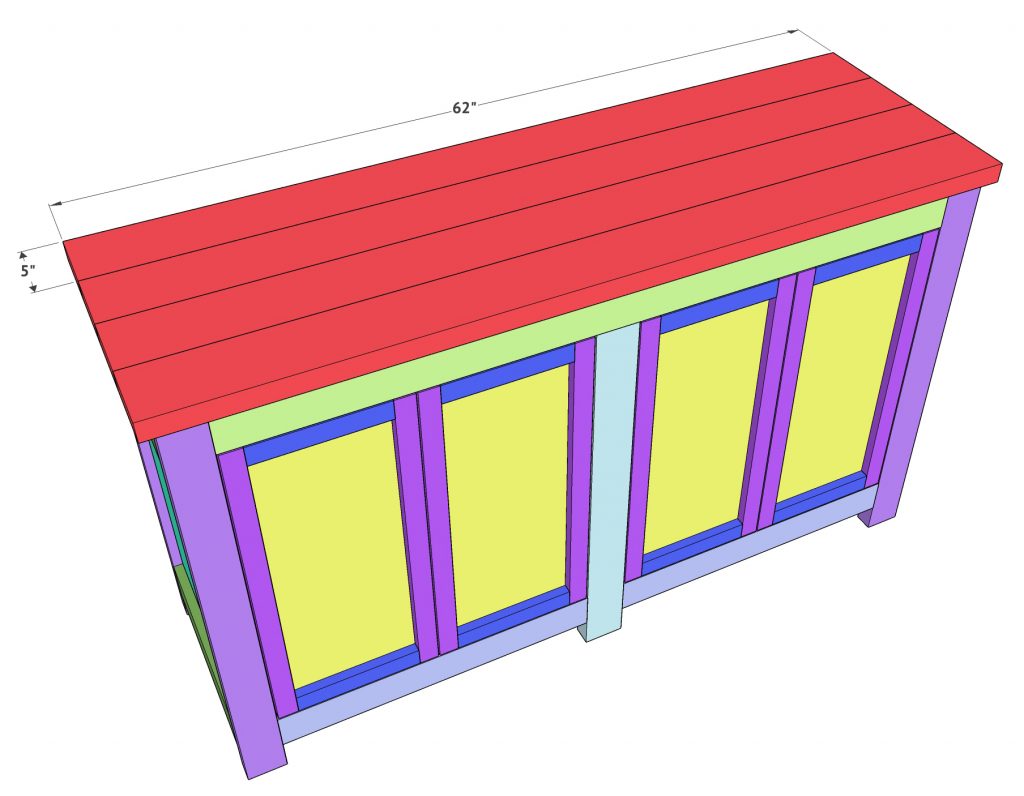
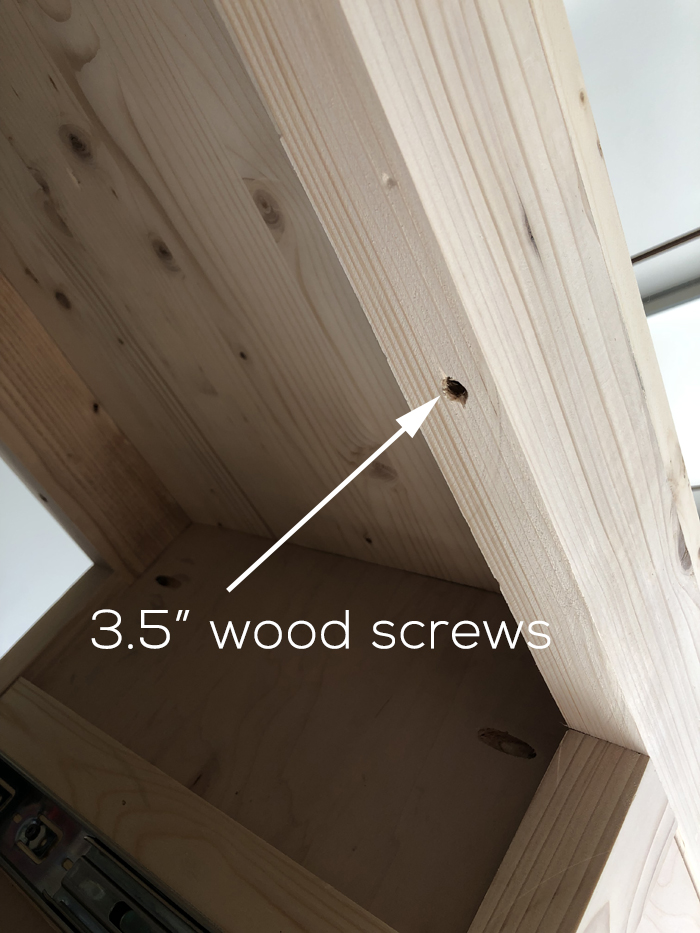
Attach the cabinet top to the cabinet
Attach the top to the cabinet with 3.5” wood screws through the face frame and into the top. The top uses 2×6 boards that you rip to 5″ each.
Add the back of the cabinet
Final step is adding your back panel! This is just 1/4” sheet of plywood cut to size. Attach it to the back of the dresser using wood glue and 1” staples or nails.
Painting the cabinet
Now let’s talk about the finish! I painted the entire cabinet with a new paint that I love. I used the same kind of paint to paint my bathroom cabinets HERE. You can see it HERE on Lowe’s. The store had cans already tinted to Kettle Black in a satin finish so I went with that! I applied all the paint with THIS paint brush! Of course you can also pick any paint color of your preference!

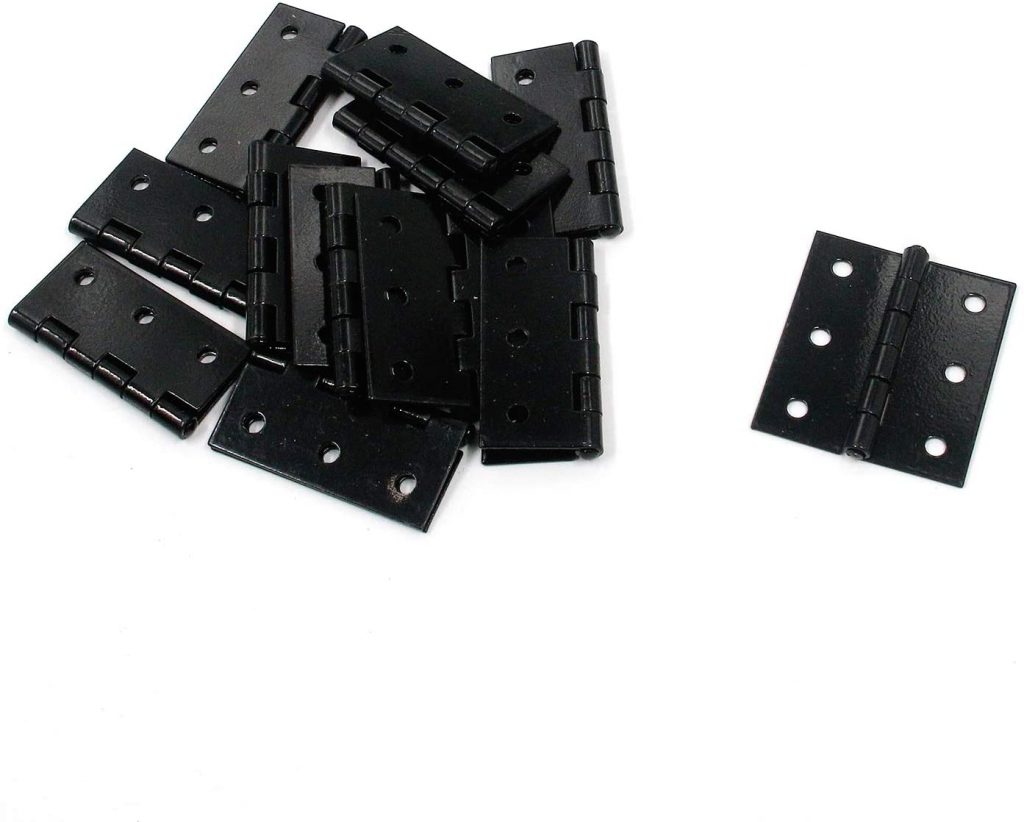
Cabinet Hardware for DIY Sideboard
I found the best hinges on Amazon. You can find them HERE! Great price too!
The door pulls I found are my very favorite! I love what they added to the piece! They were very affordable on Amazon. You can find them HERE! These would also make the cutest drawer pulls!

The Finish
I love how this DIY Modern Farmhouse Sideboard turned out! I love the extra storage for dishes and other things! I love the function it adds to my dining room and I can’t wait to decorate it with Thanksgiving around the corner!

Free Plans!
You can download and print the FREE PLANS and cut list for this DIY Sideboard Cabinet HERE!


looks extremely beautiful, you have very good taste
I like this design
I am impressed with its design. It looks very fashionable and eye-catching.
Does this have shelves inside it? Also about how much did it cost to build?