Hey guys! We are back with Day 4 in our 12 Days of Christmas series!
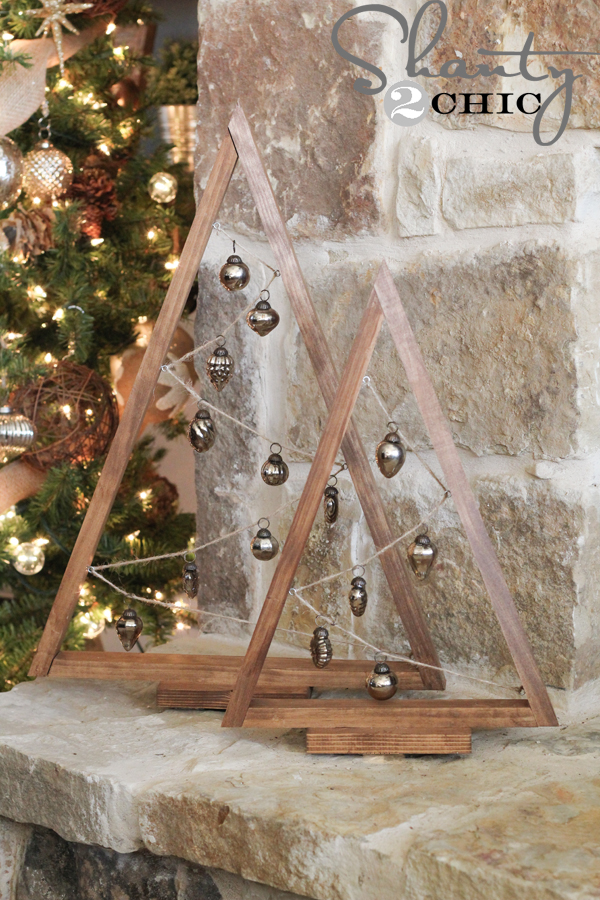
 This might be one of my favorites (actually, I really can’t decide 😉 ) But this DIY Ornament Tree is definitely at the top!
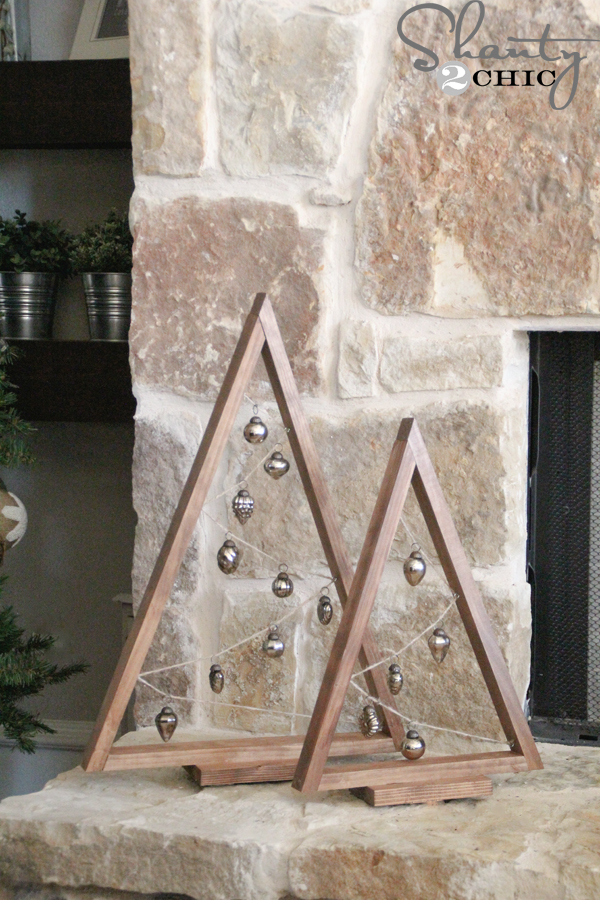 Aren’t they adorable! They only took me about an hour to make and I spent about $15 for both of them!
I’m going to show you how I made them but, make sure you also print the Free Printable Plans! You can click HERE or the image below to print them.
 Let’s get started!
 I made my 50 degree cuts
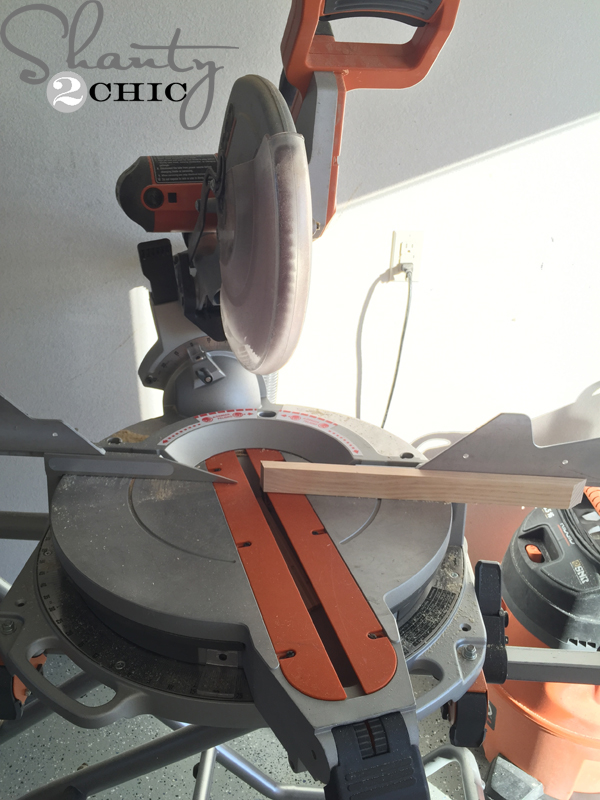 Then slid my miter arm over and cut my 20 degree angles on the other ends.
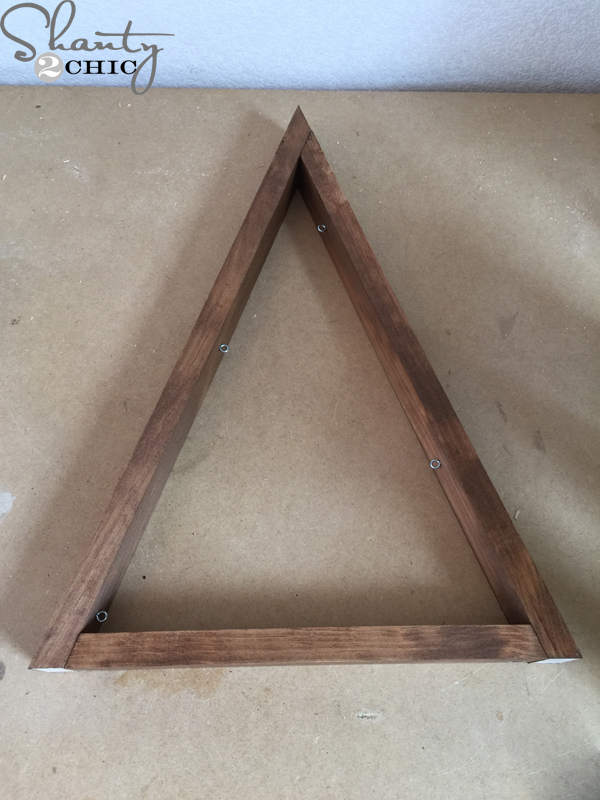
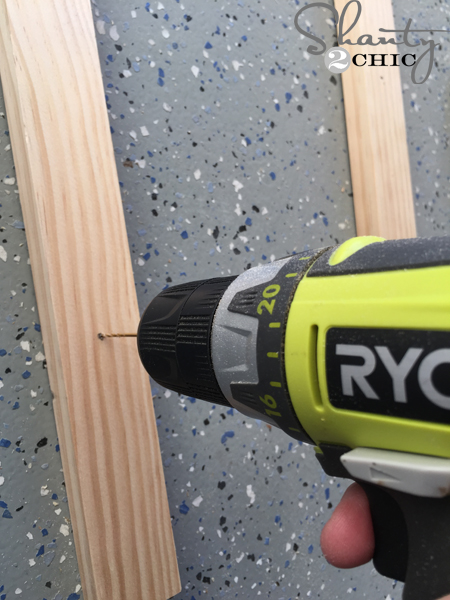 Next, I drilled pilot holes to fit the eye hooks.
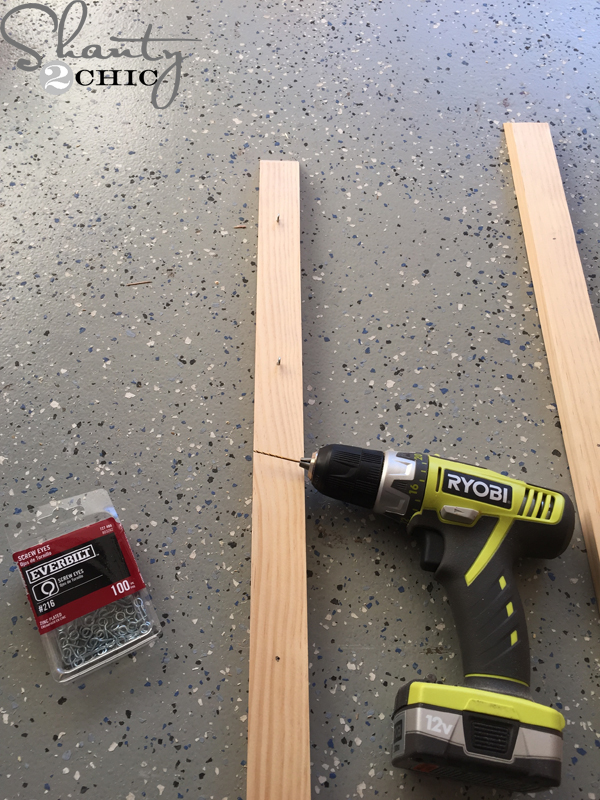 Here is where I drilled my holes:
Large Tree:
Left (green) piece: 3″, 9″, 18″
Right (red) piece: 6″, 14″, 22″
Small Tree:
Left (green) piece: 2.5″, 11″
Right (red) piece: 8″, 16″
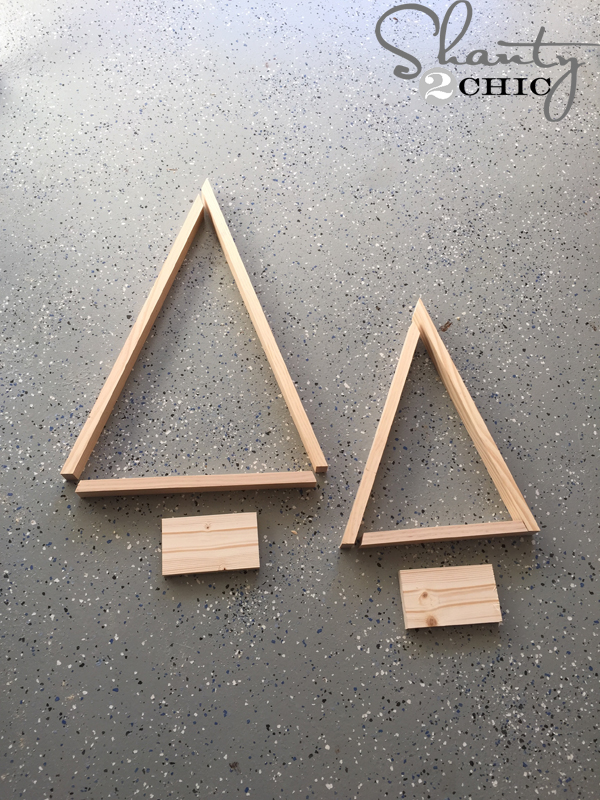 My last cuts were the 1×4 bases.
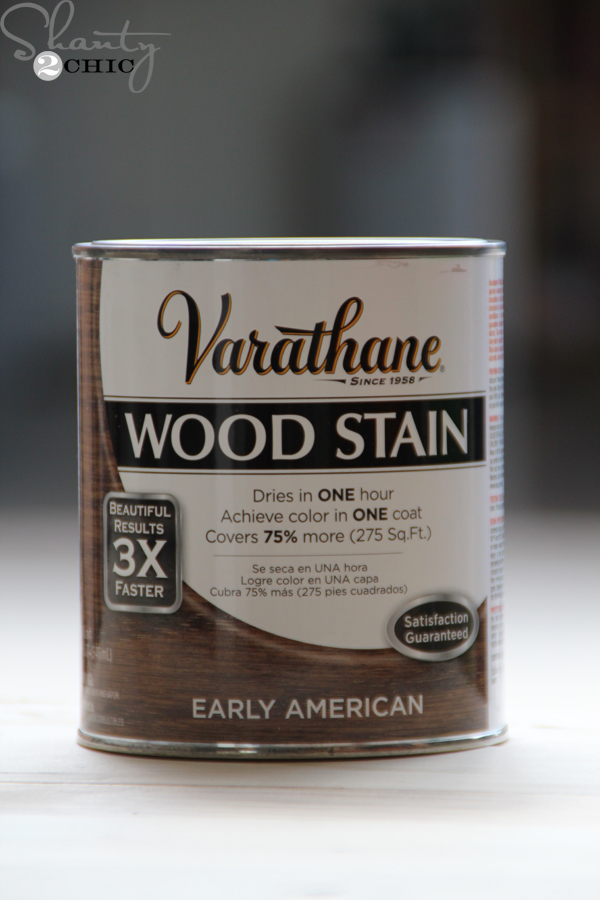 I decided it would be easier to stain the trees before assembling them. I applied one coat of Varathane Early American stain to all sides of each piece. I used a clean cloth to apply the stain then blended the stain 5 minutes later with a separate clean cloth.
 I used Gorilla Super Glue Gel to attach the pieces. Typically I would use wood glue but my pieces were already stained.
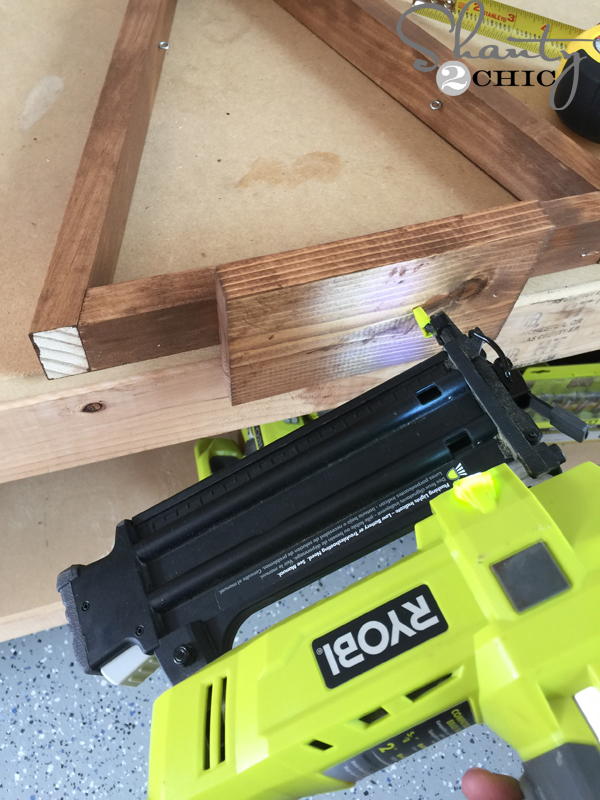
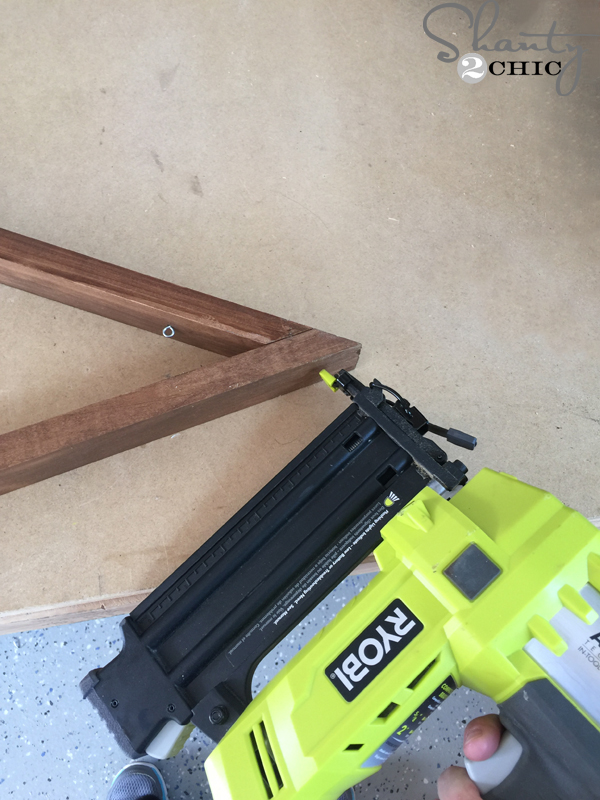 Then, I used 1″ nails in my Airstrike 18-gauge brad nailer. If you don’t have a nailer, you can just use a hammer and finishing nails.
 Easy!
Easy!
 Now, attach the 1×4 bases the same way.
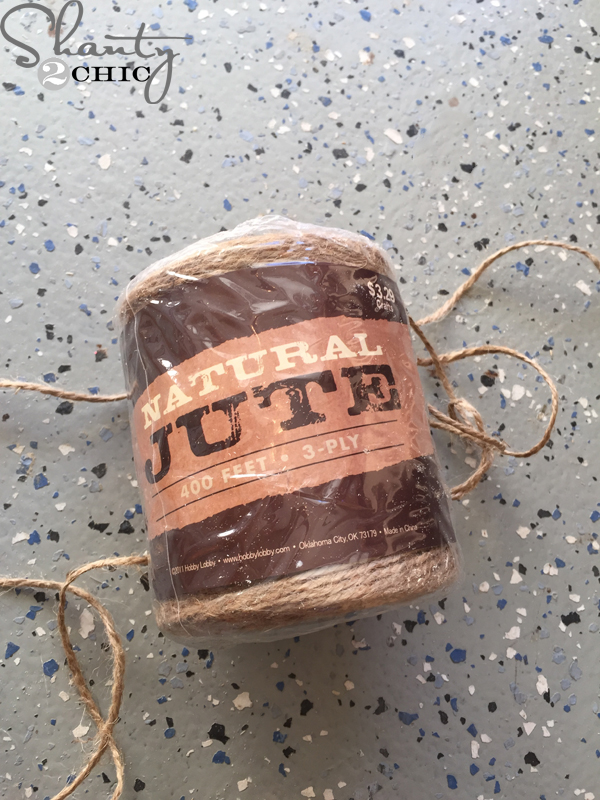 Now for the finishing touches! I cut one long piece of jute for each tree
 and tied a knot at the lowest eye hook.
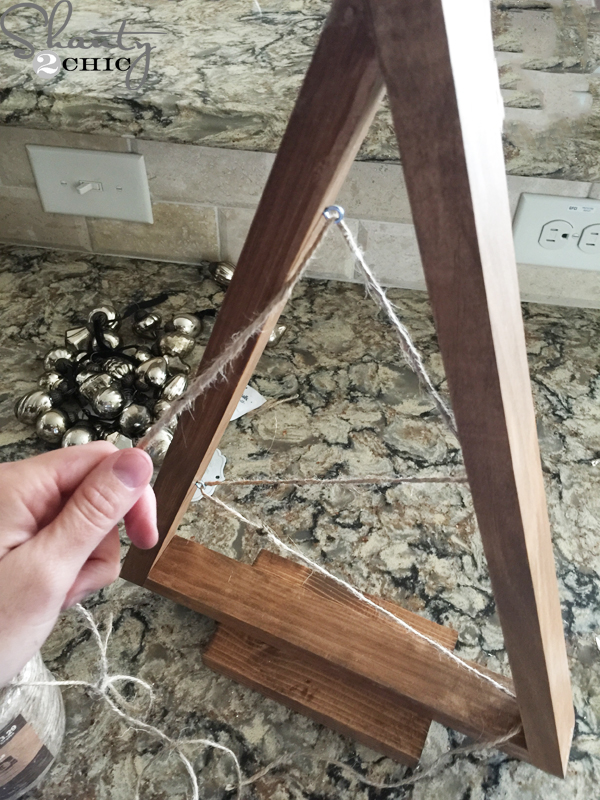 Then, I thread the jute through each eye hook. I worked my way to the top and tied another knot at the top eye hook.
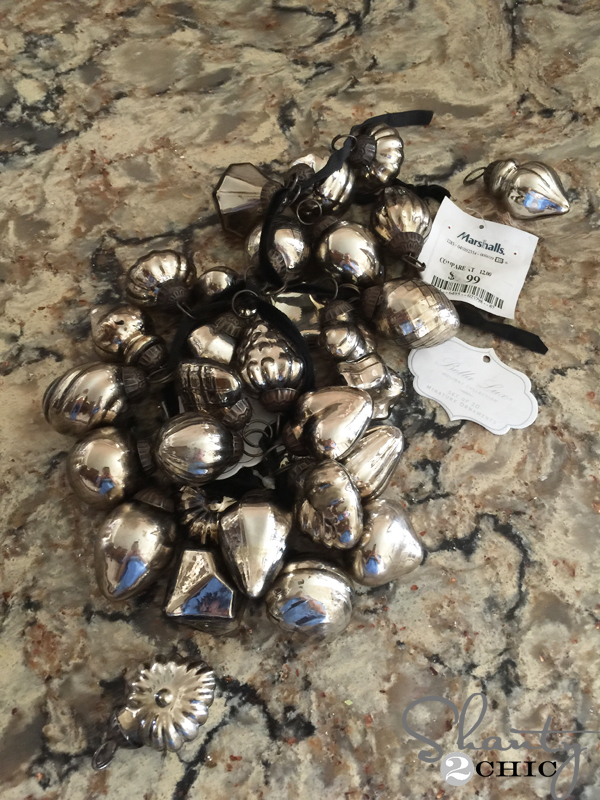 I found these cute mini ornaments at Marshall’s and thought they would be PERFECT on my new trees 😉
 They have a keyring type hook so I was able to just pinch the jute between the rings. If you don’t have something similar, you can just use a small piece of jute and tie the ornaments to the jute on the trees.
Done 🙂
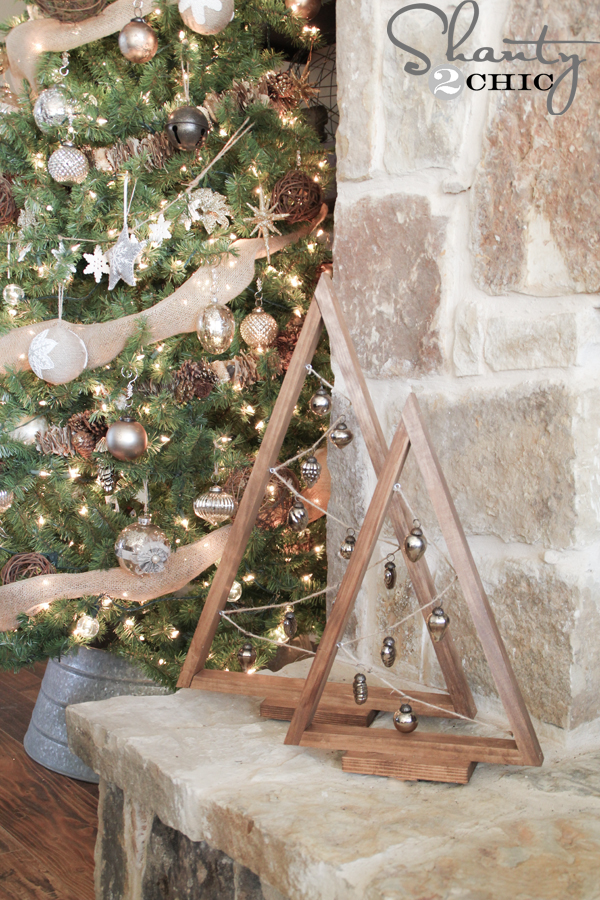 I love them! Inexpensive, easy and there are so many ways to change these up and personalize them to your taste!
Thanks so much for stopping by!
Make sure to visit our friends participating in the 12 Days of Christmas series! They are sure to impress and there is a giveaway going on one of our blogs everyday!


This DIY tree looks amazing. I think I can create new decor for my room.
Keep up the good writing. please visit our beautiful website, spread the love, thankyou!
Hello,
Could you please tell me what size of eye hooks do you use? I’m making 25 of these with a bunch of my friends, and I need to order all the eyelets but want to make sure the size is right! I can’t quite zoom in to the pic far enough to read the size.
I’ve looked at them for the last three years, but I can’t afford to pay a heavy price for them, even on clearance. These are so beautiful! I love a window seat, I love how sunlight can get inside. They have a Kling-type hook so I was able to just pinch the jute between the rings. If you don’t have one, you can just use small jute and tie the jewelry to the trees.
Could you please tell me what size of eye hooks do you use? I’m making 25 of these with a bunch of my friends, and I need to order all the eyelets but want to make sure the size is right! I can’t quite zoom in to the pic far enough to read the size.
????
I built my own using the plans at www. WoodworkPlans.info – highly recommended you check those out too. They are detailed and super easy to read and understand unlike several others I found online. The amount of plans there is mind-boggling… there’s like 16,000 plans or something like that for tons of different projects. Definitely enough to keep me busy with projects for many more years to come haha
Head on over to www. WoodworkPlans.info if you want to learn more – click the pink link above for some more plans! Best of luck on your building adventures!
✌✌✌✌✌✌✌✌✌✌✌
We just keep finding such great stuff on your site! We love this and would like to share it in our upcoming Christmas decorations post. I’ll get the link over to you as soon as it’s live…Thanks again Jamie
Reminds me of the metal ornament trees from Crate and Barrel. I’ve looked at them for the past three years or so, but I can’t bring myself to pay their hefty price, even on clearance. This year I told hubby that we should make one.
I plan to use metal or dowel for the display rods, but thank you for sharing the basic design!
Adorable. I really want to make this but my saw only goes to 45 degrees what would I change the bottom angle to so that it would not have a gap? Thanks!
I printed off the plans and realized my saw only goes to 45 degrees in both directions. Is there a hack I should know?
just found this site, so late on the answer. just made these myself. you could easily cut a block with a 5° angle, put that against the fence and set the saw at 45°… bam! 50°.
Great project for adding to the holiday decorations. Might build them this weekend.
You girls know I LOVE these! Your tutorial is perfect. If I have time, I’m making them this weekend … IBC style. 😉
xo Michael
Adorable! And I’m officially obsessed with those ornaments.
These are so gorgeous! I’d love a set for in front of a window, love how the sunlight can shine right on in!