Hey guys! My son Brooks has been asking for some shelves in his room. After finding some great inexpensive hardware on Amazon, I knew exactly what I wanted to do. Ash came over and helped me build these DIY Pipe Shelves and the best part was that I was able to build them for around $100! Check out the video of how we built them below and print and save the FREE plans at the bottom of this post!
Step 1
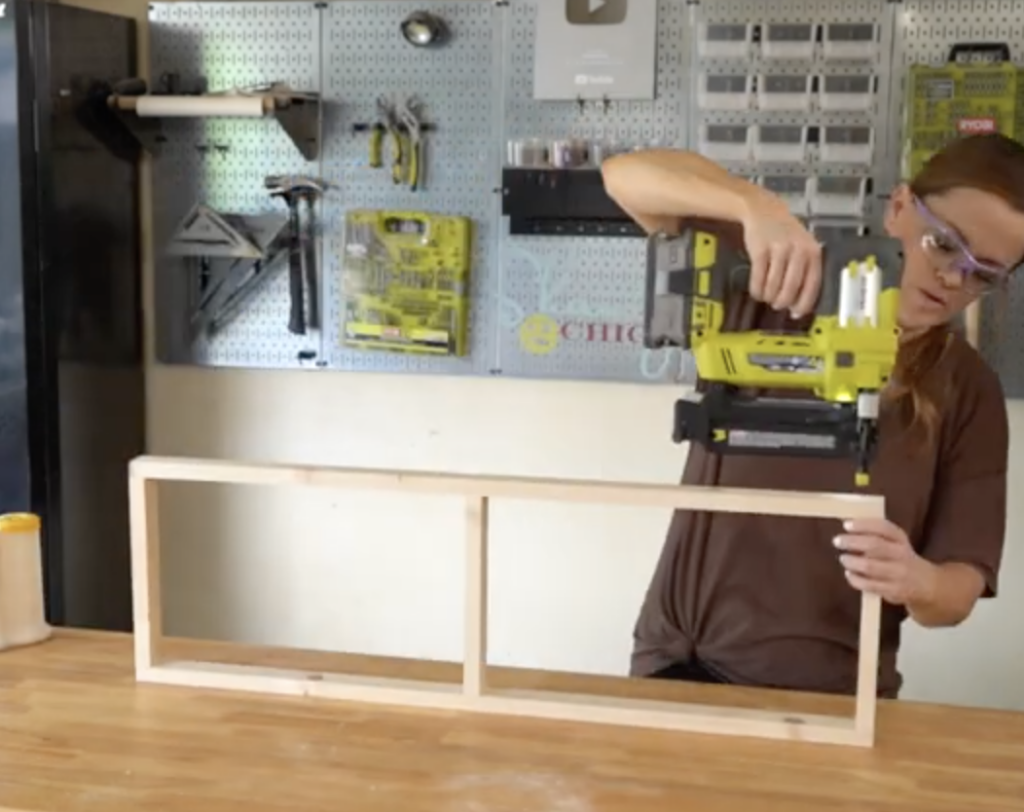
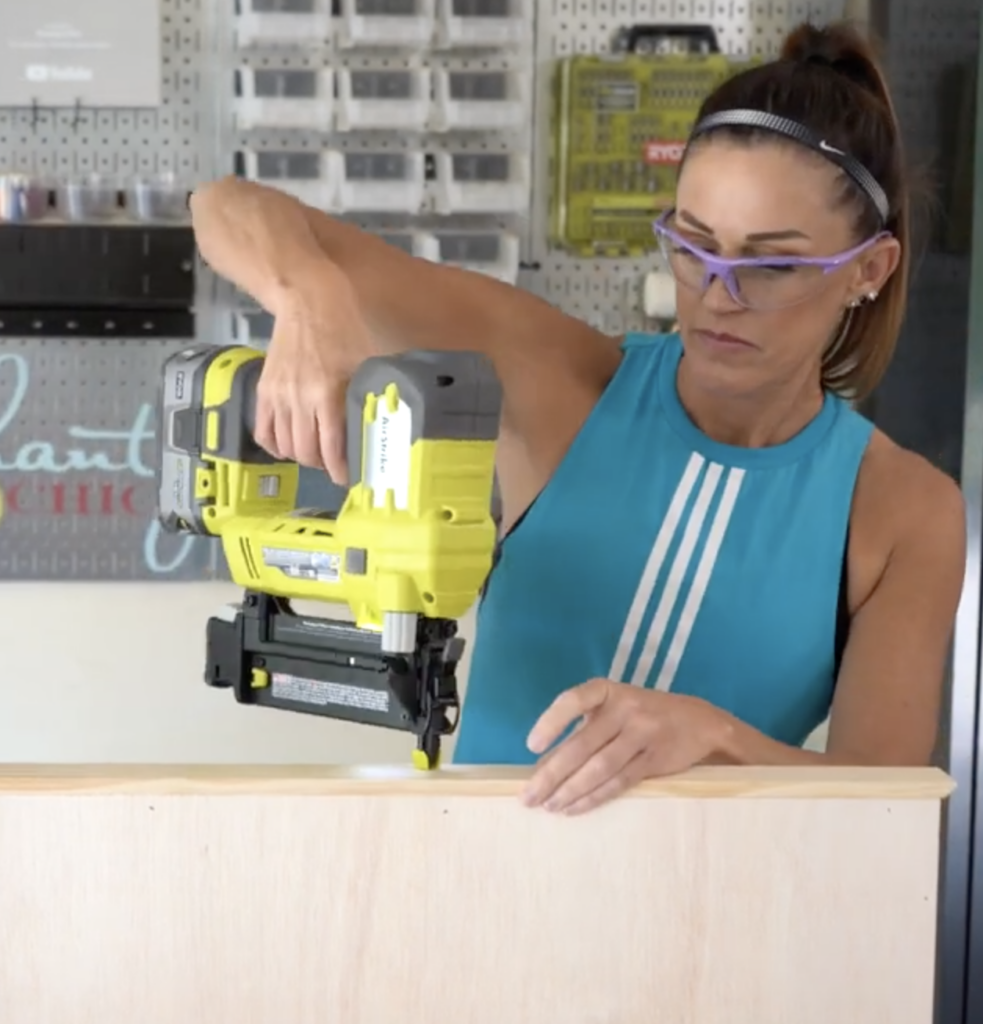
Build the frame of the shelf first. These are built with 1×2 boards. We ripped our 1×2 from a 1×6 to save money, but you can also just use 1×2. Cut each piece to size and attach the long boards to the short boards using wood glue and 1.25” brad nails.
Step 2
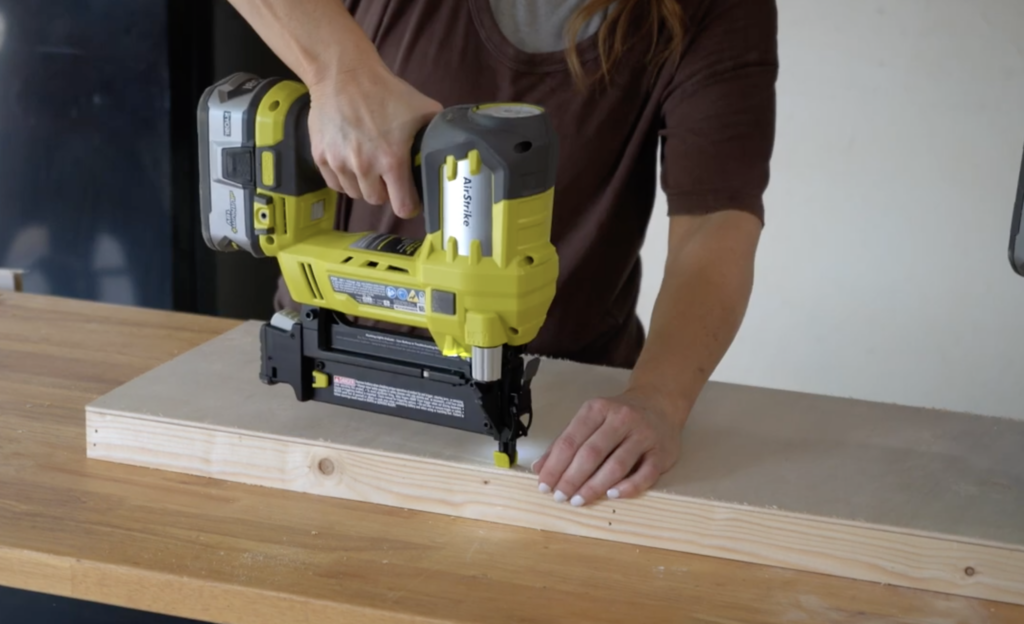
Next, attach the top and bottom plywood pieces. This is 1/4” lauan plywood. I used THIS plywood from Lowe’s. It’s really inexpensive and takes stain well, so it was perfect for this project. Rip each to size and attach to the bottom and the top of the frame using wood glue and 1.25” brad nails or staples.
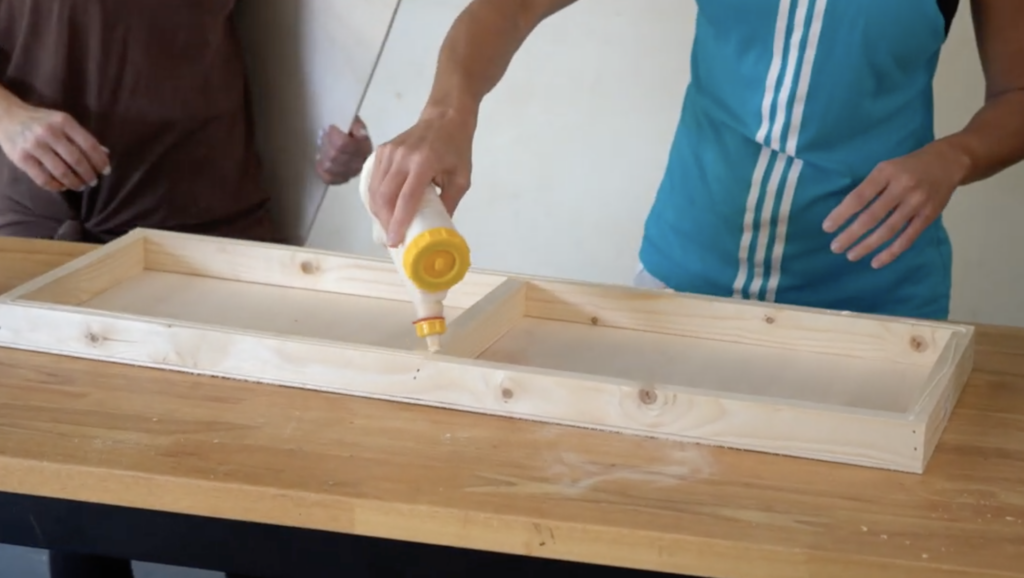
We used our GluBot for the gluing… LOVE this tool! You can see it here on Amazon.
Step 3
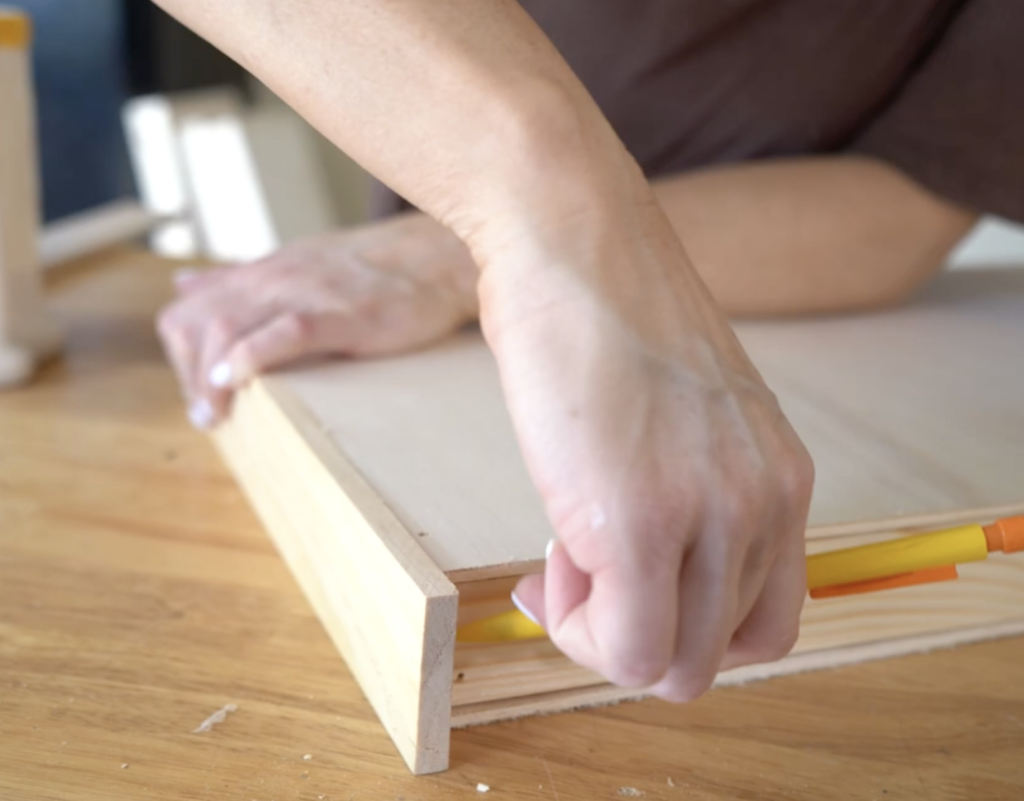
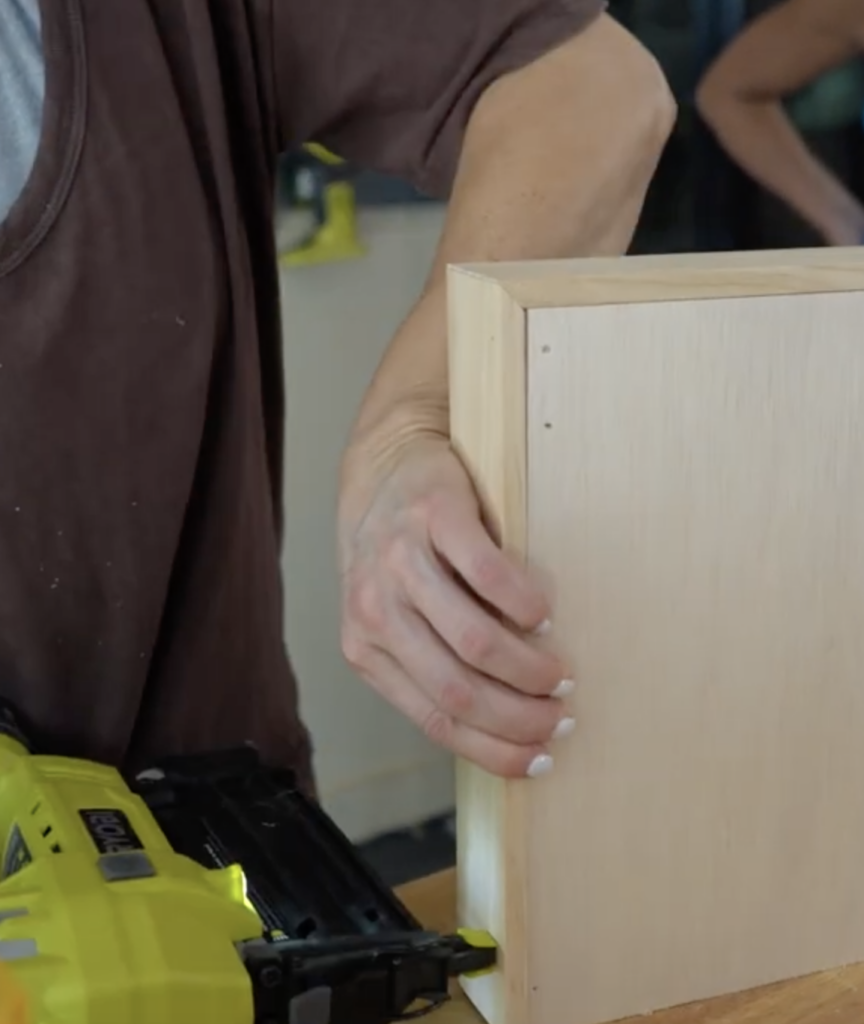
The final step is adding the trim on the sides and front. I used 3/8” pine craft boards for this part. I purchased the 3” width and ripped each down to 2”wide each. You can see them HERE! I purchased 2 for each shelf. The corners are cut at 45˚ angles. Attach the trim to the frame using wood glue and 1.25” brad nails. It’s best to hold the wood in place and mark your cuts with a pencil.
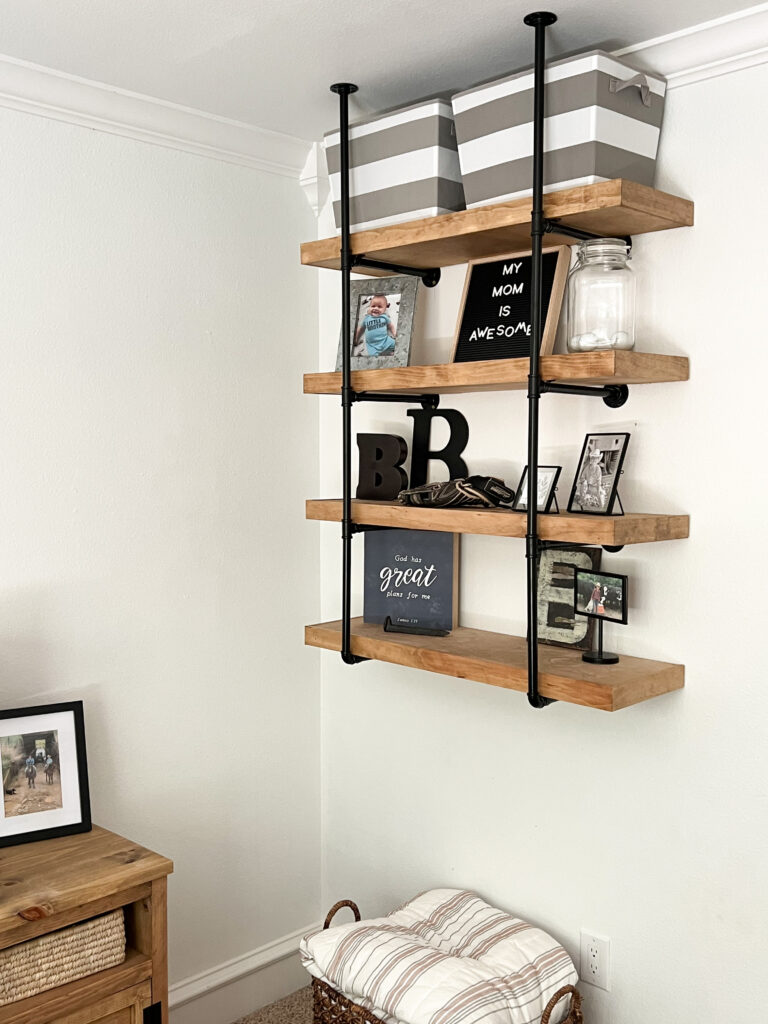
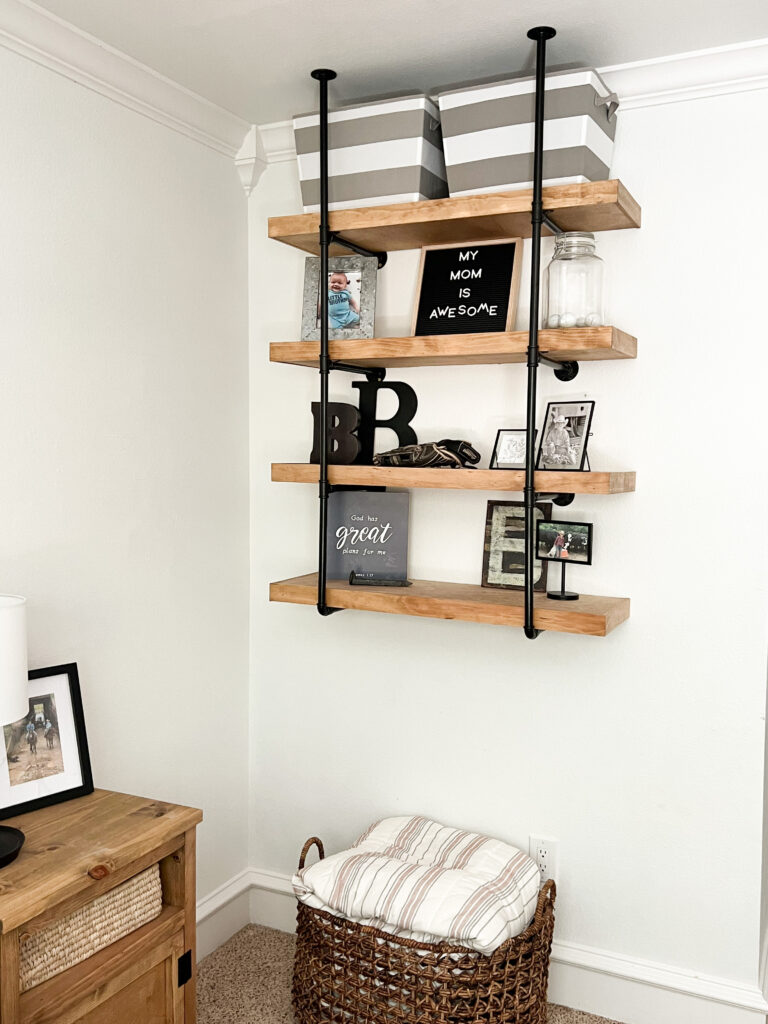
Once we built all of the shelf pieces, we stained everything with golden oak stain and let it dry. I found the shelf hardware on Amazon for under $50. You can find it HERE!
Hardware
It was so easy to put together! You can see it here on Amazon. I decided to mount the wall brackets into studs. On the ceiling brackets I put one speed anchor into each side, and the rest of the screws just went into sheet rock since they aren’t holding weight. Look how cute it turned out!
You can also check out the reel below of me getting them attached and decorated! So easy!


You are very talented with the grace of our lord.
This is so beautiful, wish I had all that equipment needed. I mean I wish I had space to store all the tools!
Could I use 1×12 boards instead? Or would they be too heavy?
hello
Your video is so interesting, I’m looking for next product.
The brackets didn’t have a link
Click on the red lettering in the description and it will take you to the hardware