
Table of Contents
Free DIY Platform Bed Plans (Beginner-Friendly Design)
Learn how to build a DIY Platform Bed with free woodworking plans! This is a great build for beginners, you only need 3 basic tools and about $50 in lumber.
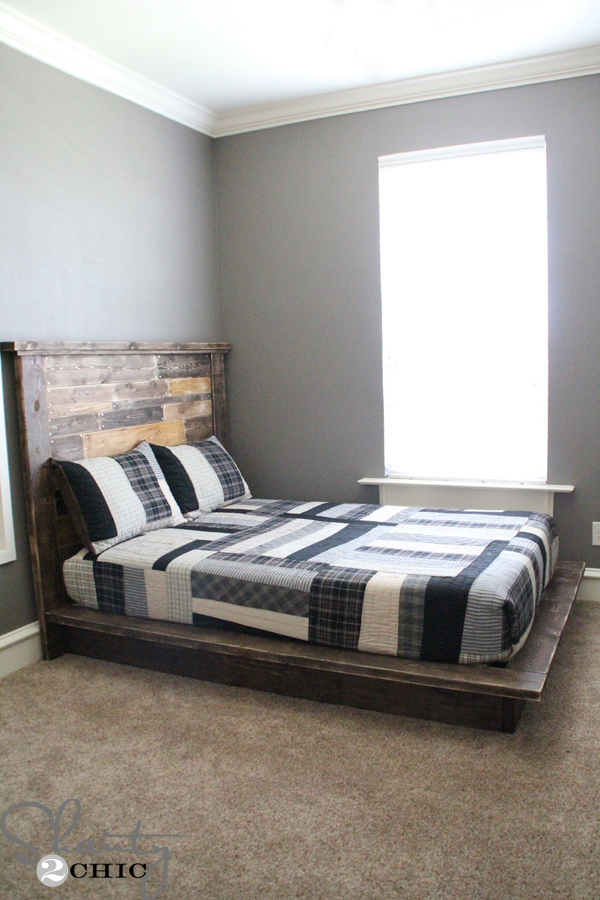
Before You Build This
- Skill level: Beginner
- Tools required: Kreg Jig, Drill, Miter Saw, Sander, Brad Nailer (optional)
- Approximate build time: 8 hours
- Cost at time of build: $50 for lumber
- What I’d do differently today: Change up the color scheme and rip the rounded edges off the 2x boards.
- Who this project is (and isn’t) for: This project is perfect for anyone that wants to learn how to build furniture because it’s a great first build! This project isn’t for you if you don’t like to DIY.
Would I build this the same way today?
I built this bed in 2014 and have improved my skills over the last 12 years. If I were to build this bed again, I would change the color scheme on the headboard to one solid color for a more modern aesthetic and I would definitely rip the round edges off of the 2x boards for a more modern, clean look. Other than that, this is a solid bed that I sold in great condition a few years later to replace with a new design.
Building the DIY Platform Bed
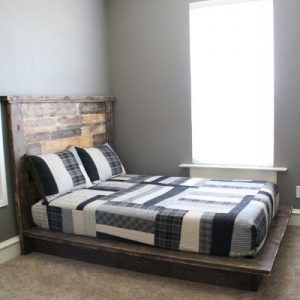
I’m back to share the Easy DIY Platform Bed that I made for my son 🙂 If you missed the Free Plans for the Planked Headboard, go check them out! I saw a platform bed in a West Elm catalog and loved how chunky the base and platform were, so that was my inspiration and I built it for about $55!!!
CLICK HERE TO JUMP TO THE FREE Platform Bed PlansThis is a very simple build so it is perfect if you are a beginner! You can follow along in the instructions below! This plan is for a full size bed but it is very easy to adjust the measurements to accommodate another size 🙂
Materials and Lumber Cut List
Supplies You’ll Need
- 8 – 1x3x10 Furring Strips for Slats
- 1 – 2x8x10 Pine Boards or Common Boards
- 2 – 2x8x8 Framing Boards
- 3 – 2x6x8 Framing Boards
- 1 – 2x4x8 Framing Boards
- 3 – 2x2x8 Pine Boards or Common Boards (I ripped from 2×4’s)
- 2 1/2″ Pocket Hole Screws
- 1 1/4″ Screws (to attach the slats if you don’t use a brad nailer)
- 2 1/2″ Wood Screws
- Wood Glue
Tools Required
- Miter Saw
- Drill
- Kreg Jig
- Sander
- Brad Nailer (optional)
How to Build a DIY Platform Bed Frame
Step 1 – Assemble the Bed Frame Base
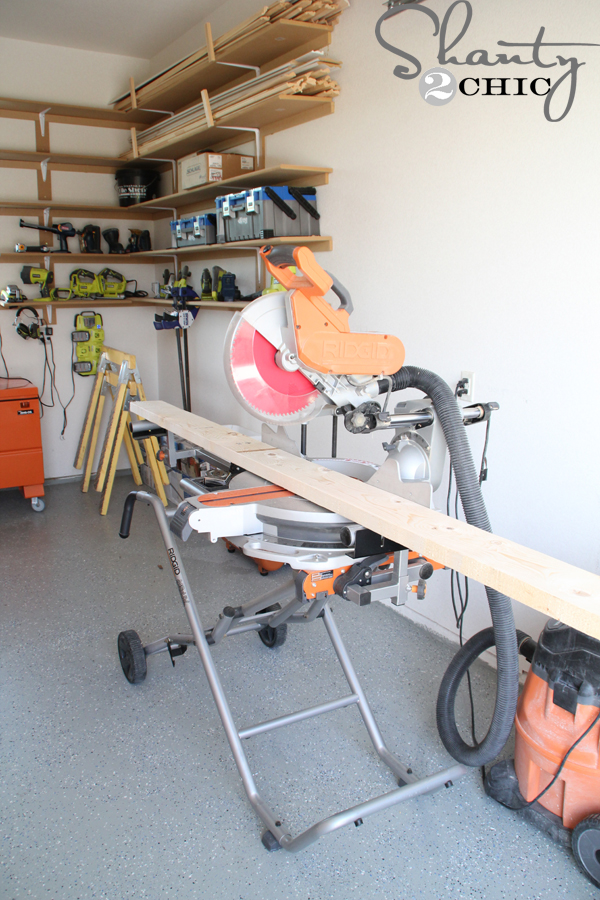
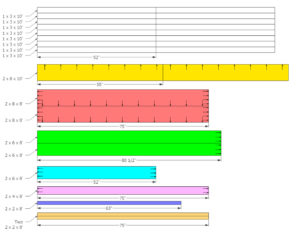
I started by making all of my cuts for my top and bottom frame. You can find the cut list diagrams in the fee plans. Watch our How to Use a Miter Saw video HERE!
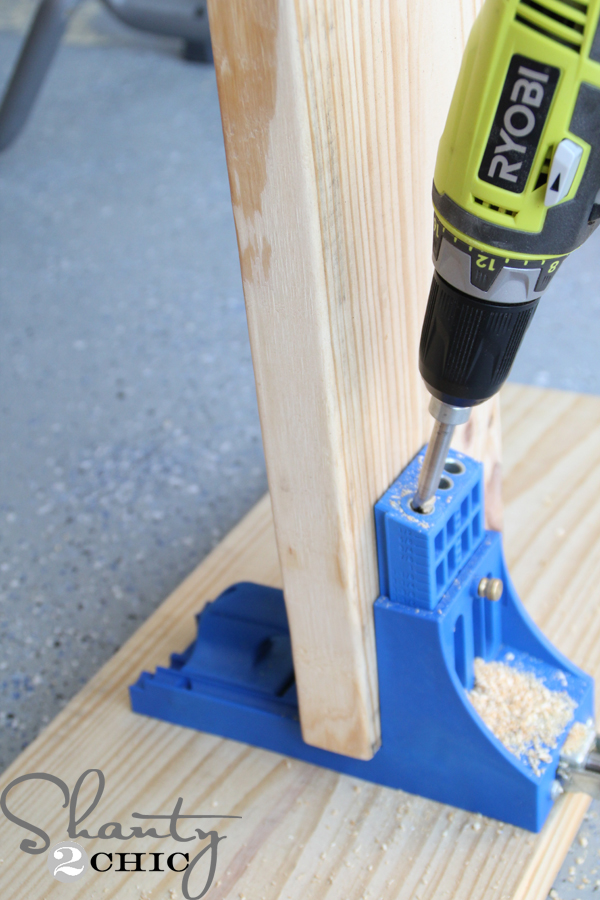
Then, I drilled all of my pocket holes with my Kreg Jig pocket hole jig set for 1 1/2″ thick boards. (You can find the Kreg Jig HERE on Amazon) and check out our How to Use a Kreg Jig Video HERE!
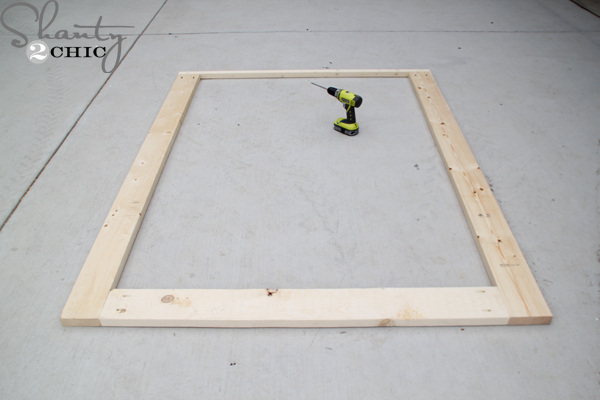
I attached the top frame with 2 1/2″ pocket hole screws and wood glue.
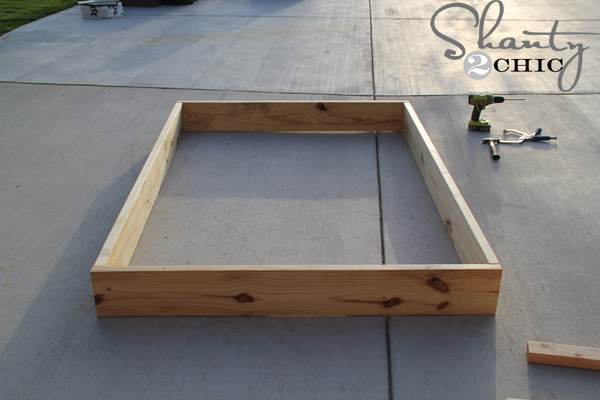
I followed up and did the same for the bottom frame.
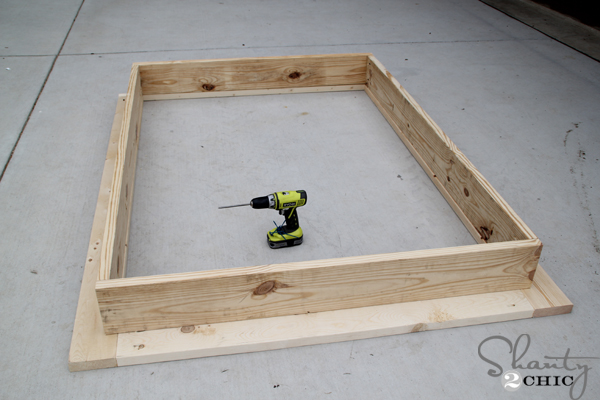
Next, I flipped the top frame over and attached the bottom frame to the side rails with 2 1/2″ wood screws and wood glue.
Step 2 – Attach the Bed Frame Supports
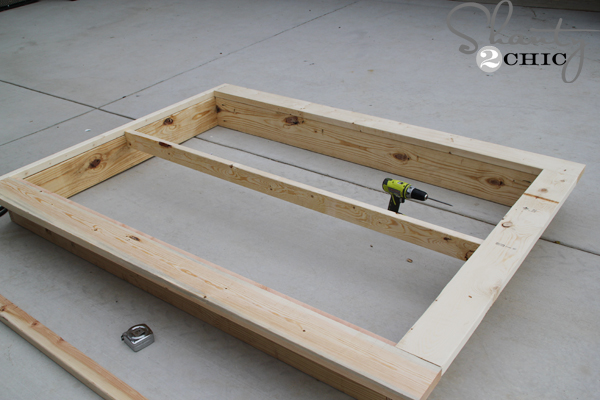
I flipped it back over and attached the center support with 2 1/2″ pocket hole screws to the headboard and footboard. You may need help flipping the bed back over, at this point, because it is heavy.
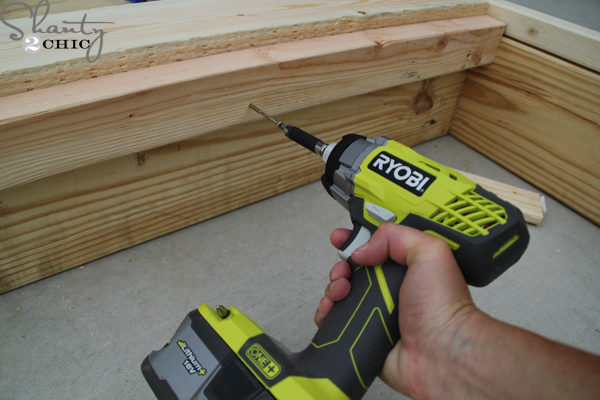
Finally, I attached the 2×3 cleats, to the sides of the bed, with 2 1/2″ wood screws (I call for 2×2 in the plans because 2×3’s are not available in every region. If you do use 2×2’s for the cleats, get furring strips to save money). I like to use the Spax self-tapping screws. I find them at Home Depot and they are pricey but you don’t need to pre-drill with them! If you use regular wood screws, make sure to pre-drill first to prevent the wood from splitting.
Step 3 – Sanding and Finishing the Wood
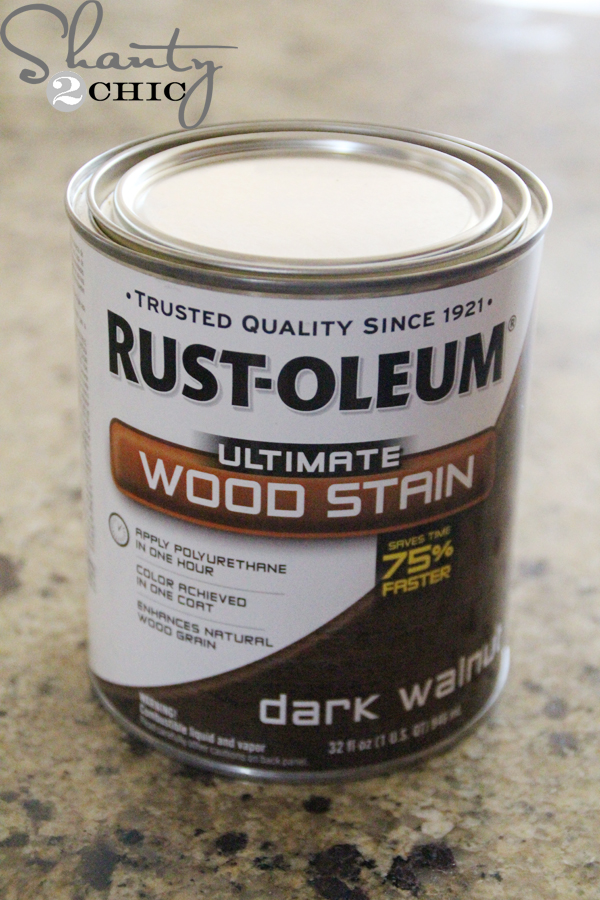
After sanding the entire Platform Bed down, I applied one-coat of Rust-Oleum Dark Walnut Stain (you can find it HERE on Amazon). If you are buying your supplies at Home Depot, get the Varathane brand in Dark Walnut (it’s the same stain).
Step 4 – Install the Mattress Slats
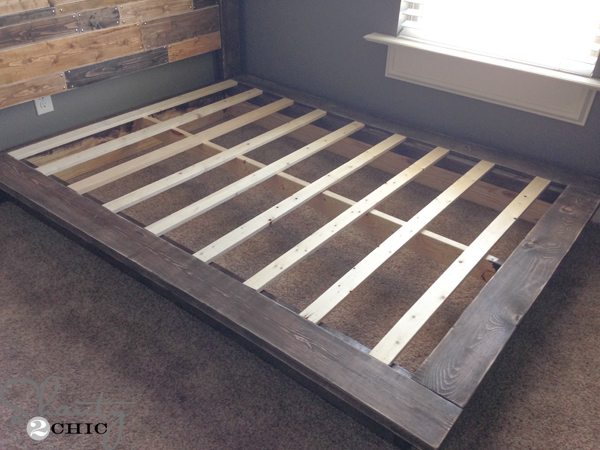
When the bed was dry, I took it inside and into my little man’s room! I used my brad nailer, with 1 1/4″ brad nails to attach the 1×3 slats. I just spaced them out evenly and attached them to both cleats and the center support. You can use the cheap furring strips (douglas fir) for this part, Just make sure they are smooth so they don’t tear-up your mattress. Note: you can also use 1 1/4″ wood screws to attach the bed slats.
Step 5 – Attach the DIY Headboard
To attach the headboard to the bed, I drilled 2 1/2″ spax screws from the backside of the headboard legs into the bottom and top frames of the platform.
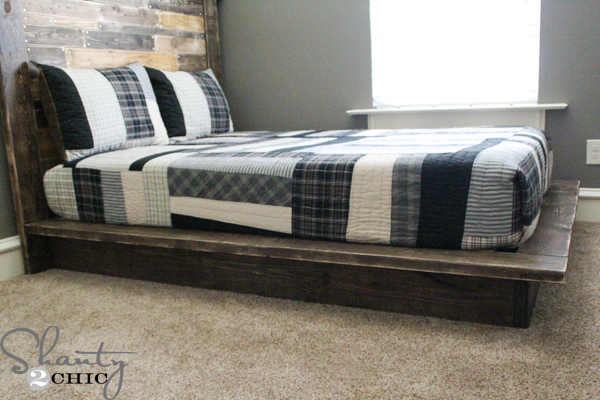
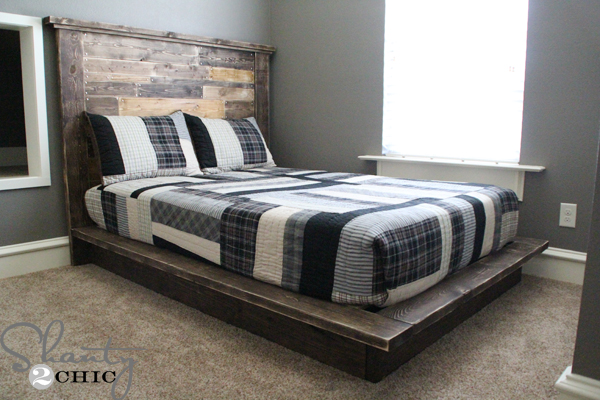
I just love this DIY Platform Bed so much! It’s the perfect combination of rustic and modern farmhouse and it’s so sturdy! I know my son loves it just as much. I’ve overheard him bragging to his friends (on a few occasions) that his mom built his bed – which is the best part for me 😉
Don’t forget to check out the headboard plans and if you like the wall color in his room (I’m obsessed!) you can read about it my wall color choices! I have received a lot of questions about the quilt on his bed, it is from Pottery Barn Teen but, I bought it a couple of years ago so I’m not sure that it is still available.
DIY Platform Bed FAQs
How much does it cost to build a platform bed?
The cost to build a platform bed can vary by design, materials used and current lumber prices. We typically build with framing lumber, like this platform bed design. We always share our supply list which makes it very easy to research the current lumber prices in your area to get an exact price on the cost to build your bed.
Is this project beginner friendly?
Yes! This is a great first build! The size might be intimidating but beds and dining tables can be the best first-time projects! They are straight forward and just a few steps and basic tools! Many of our readers have built beds from our plans as their first DIY build!
Can the dimensions be modified?
We always get questions on how to modify the measurments to fit other mattress dimensions. This DIY Bed Frame is easy to modify to fit any mattress size.
- Twin Size Mattress – Subtract 15″ from the width.
- Queen Size Mattress – Add 7″ to the width and 5″ to the length
- King Size Mattress – Add 23″ to the width and 5″ to the length.
- California King Size Mattress – Add 19″ to the width and 9″ to the length.
What tools are absolutely required?
The only tools you must have are a miter saw (a hand saw and miter box would work as well as a circular saw), a drill and a Kreg Jig!
What size mattress fits this DIY bed frame?
This bed frame was designed and built to fit a full-size mattress but you can always modify the dimensions to fit your mattress.
Can I build a platform bed without a headboard?
You absolutely can! We shared these platform bed plans separate from the headboard plans because it can stand alone without a headboard or, you can mix and match the platform bed plans with a different headboard design.
Is this bed sturdy enough without a box spring?
This bed is incredibly sturdy and no box spring needed! The cleats offer the support for the mattress slats. You can make the bed frame even more sturdy with short support blocks installed underneath the slats. This is highly recommended for mattresses larger than a full-size. Using the slats verse a box spring is a good option to save money and allows for a lower profile, more modern looking bed.
Would you still recommend this approach today?
Absolutely! We have been building furniture the same way for over 15 years. It’s sturdy and durable! The only changes I would make would be to rip the round edges with my table saw and change the stain colors!
More DIY Bed Frame Plans You’ll Love
- DIY Modern Farmhouse Platform Bed
- Free Platform Bed Plan with Headboard
- DIY Twin Platform Bed with Chevron Headboard
- Platform Bed on Wheels
- How to Build a Platform Bed with Storage
Free Printable DIY Platform Bed Plans
Tools
- Miter Saw
- Kreg Jig
- Drill
- Sander
- Brad Nailer
Supplies
- 8 1x3x10
- 1 2x8x10
- 2 2x8x8
- 3 2x6x8
- 1 2x4x8
- 3 2x2x8
- 2 1/2″ Pocket Hole Screws
- 2 1/2″ Wood Screws
- Wood Glue
- Finish of Choice
Instructions
- Cut List

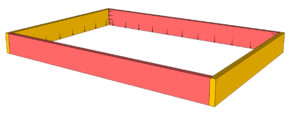
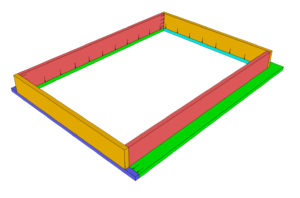
- Assemble the bed upside down. Start with the top frame. Use glue and 2 1/2″ pocket hole screws at each connection.

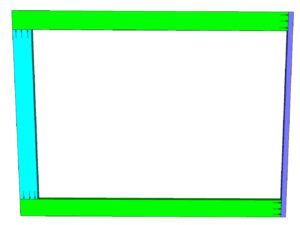
- Assemble the lower frame. Make sure the edge pocket holes are facing the same direction.

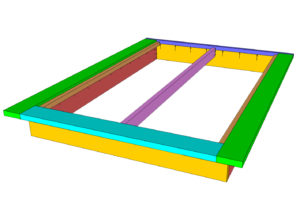
- Lay the top frame on the floor with the pocket holes facing up and stack the lower frame on top. Secure them together with pocket hole screws.

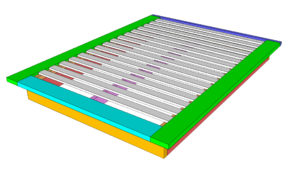
- Attach the 2×2 cleats to the sides and the center 2×4 support in the middle. The 2×2 cleats are just screwed into the bed frame with wood screws and the 2×4 support is secured with pocket hole screws on each end. All three of these pieces should be 3/4″ lower than the top of the top frame.

- Add your slats and the construction is done! Now, all you have to do is sand and finish as you wish and enjoy your new platform bed. This platform bed was made for a previous headboard that I also made. Search our site for “Planked Headboard” to see it. As always, if you decide to make this bed be sure share it on social media and use #shanty2chic so we can share it too!


What a fantastic and achievable project! I love how you broke down the steps and made it look so easy. Can’t wait to try this out in my own space! Thank you for the inspiration!
This DIY platform bed project is amazing! The easy-to-follow instructions and beautiful design have inspired me to tackle my own bedroom makeover. Thanks for sharing such a creative idea! Can’t wait to get started!
I absolutely love this DIY platform bed idea! The design is simple yet stylish, and it looks like a fun weekend project. Can’t wait to try it out in my own bedroom! Thanks for the inspiration!
I love this easy DIY platform bed idea! The step-by-step instructions were super helpful, and I can’t wait to give it a try in my own bedroom. Thanks for sharing such a stylish and affordable project!
This platform bed looks great and is easy to build! I might try this project at home.
Could I skip the wood glue? I am planning to make this for a college bed and it will need to be moved each year.
Will a full size mattress sit down in the platform if i lower the inside rails?
What measurements for a Queen size?
How tall is that whole bed frame from floor to the top of mattress and how thick is the mattress
I got this referral from a friend who built one for his daughter. Great solid design! I built this for twin (not reading at first that the basic design is for full size but modified after buying the wood). Mine has rounded corners along the outer platform and is painted in glossy white. I also forgot to use any wood glue but everything seems solid. Only critique…this thing is heavy and will be a bear to move if it ever comes to that! Will likely need to take it apart.
So I’m not very good at math. What are the dimensions for a California king please?
Can someone please help me with the dimensions for a Queen sized bed? I know to add 6″ to the width and 5″ to the length, but am still very confused on what to get when buying wood.
Good response in return of this issue with solid arguments and describing the
whole thing on the topic of that.
I’m sure I probably missed it in the comments somewhere, but can I get the exact dimensions for a twin size bed and I know I have seen you said to take off 15 on the width does that mean you take 15 off of the headboard too?
Ladies, I absolutely love you two. ?
Here I was, fawning over beds at CB2 (aka Crate and Barrel Kids). These two models I thought would be good for my preteen sons; The Drommen Acacia Wood Full Bed (I’m crazy about this aesthetic) and the Andes Acacia Full Bed. My younger son nixed both options because he wants his bed to sit higher. I found your therefore recreation of the Pottery Barn inspired bed, and this will be his bed. I believe the Rustic Modern Queen Bed, will be my older sons choice. We shall see.
Thank you for putting together these plans and sharing them with all of us ?. That’s so kind and generous of you both. And the best part, it’s so affordable. ? I was heartbroken over the retail prices I came across at all the retail sites. But today, I happened to look through my emails and there was your latest post. Hence my need to look and then search your site for bed options. I feel like I hit the jackpot!!! From now on, Shanty-2-Chic will be my first stop.
Again, thank you so much.
Best,
Cindy R
P.S. No need to attach to Facebook, but please add a thumbs up button to each of the posts.