Hey guys! I am LOVING my latest knock off piece! I fell in love with the inspiration piece in a popular home decor catalog and had to have something like it!! I enlisted the help of our sweet and talented friend, Ana White, on this project and boy did she deliver!
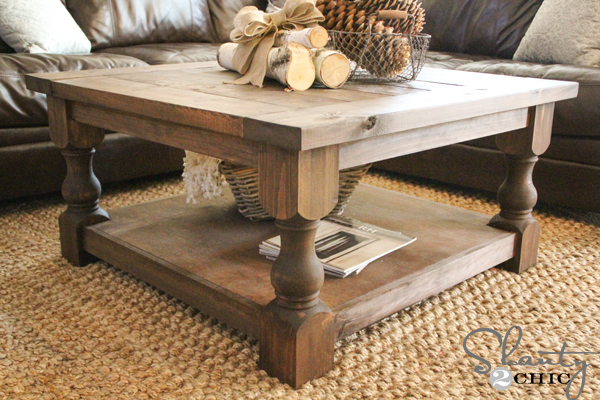 Ahhhh I am so in LOVE and I LOVE the legs, they just make the table! Don’t let them intimidate you though, I didn’t make them 😉 An awesome company, Osborne Wood Products designed them for me based on Ana’s plans! This table is unbelievably easy to build and I was able to do so for under $200!! I’ll show you how I did it!
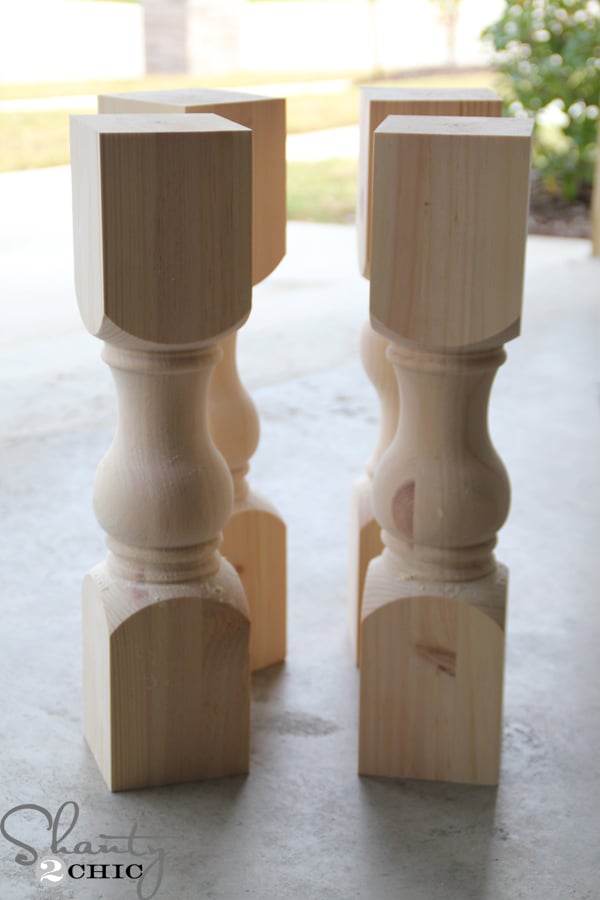 I started with four of these GORGEOUS legs from Osborne, you may have seen a sneak peak picture of them on our Instagram 🙂 They are custom legs BUT they are offering them to our readers for the price of a stock leg making them half-off, Heck yah!!! Click the box below to purchase the legs!
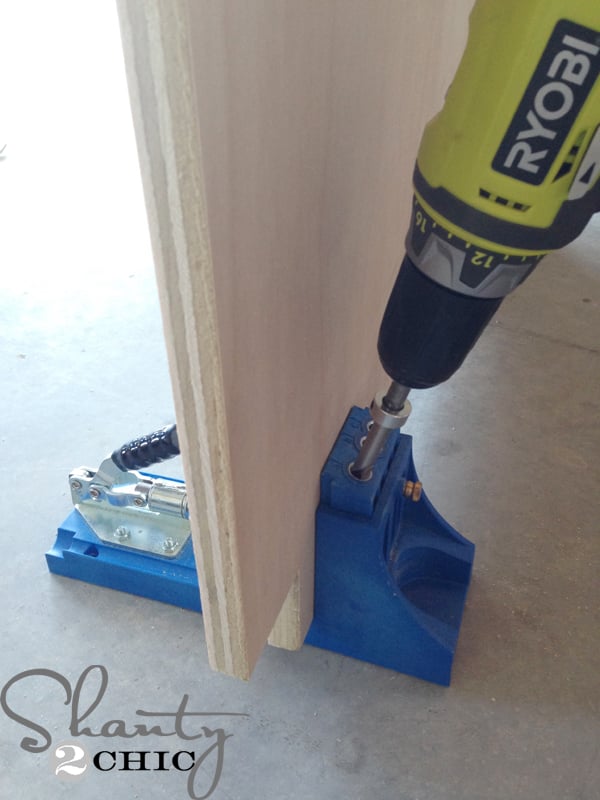
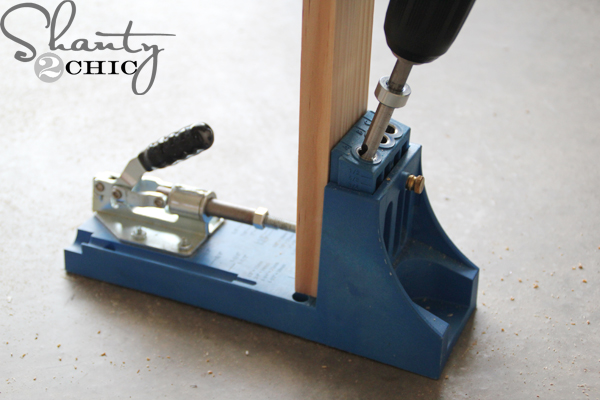 First step is to attach the sides of the table to the legs. This is super easy, I just drilled pocket holes in the boards with my Kreg Jig.
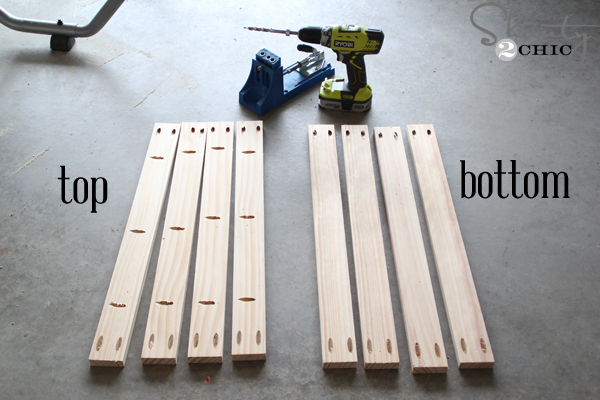 Here’s a picture of the sides of the table and where I drilled my pocket holes!
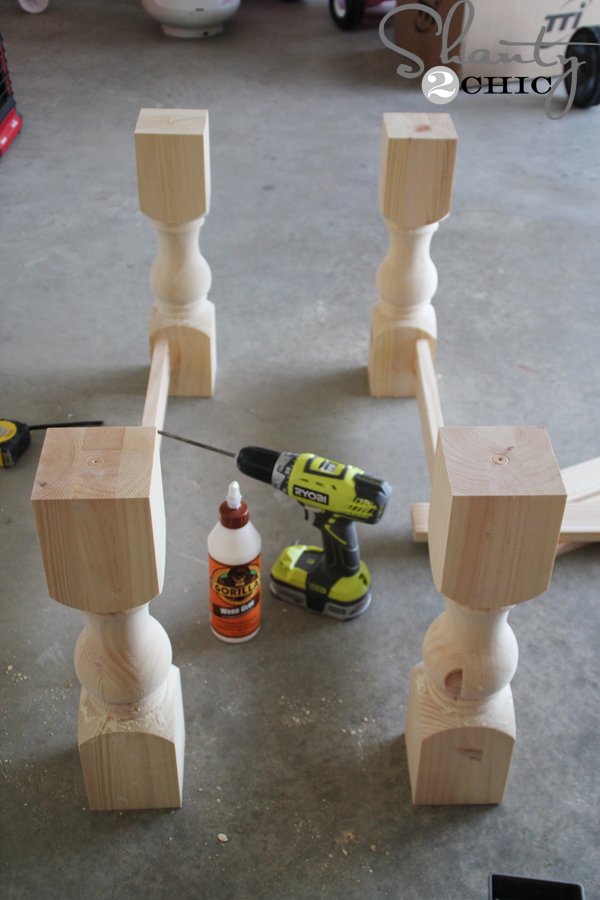 I used Gorilla Glue wood glue and my Ryboi 18V Lithium Drill to attach the boards to the legs.
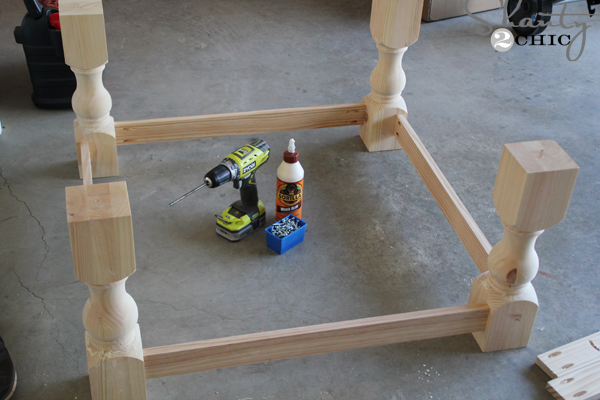
 Well, that was EASY! On to the bottom shelf!
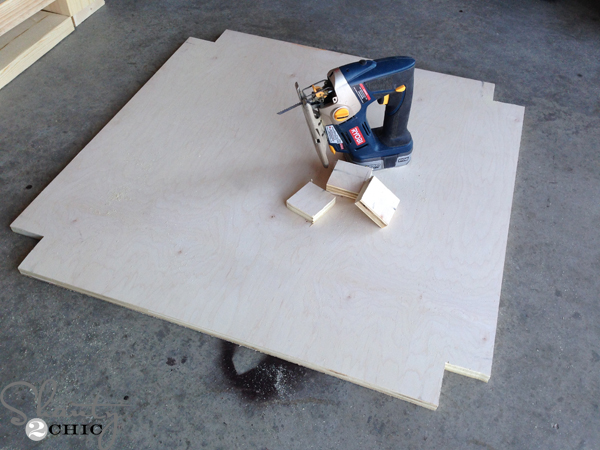 I used my Ryobi Jigsaw to cut notches out of my Purebond Plywood so that it will fit between the table legs. We always use Purebond Plywood where we can because it is gorgeous, formaldehyde-free and it’s made with wood from sustainable forests. You can learn more about why we have taken the Purebond Pledge HERE!
 After I cut the notches out, I used my Kreg Jig to drill pocket holes on all four sides.
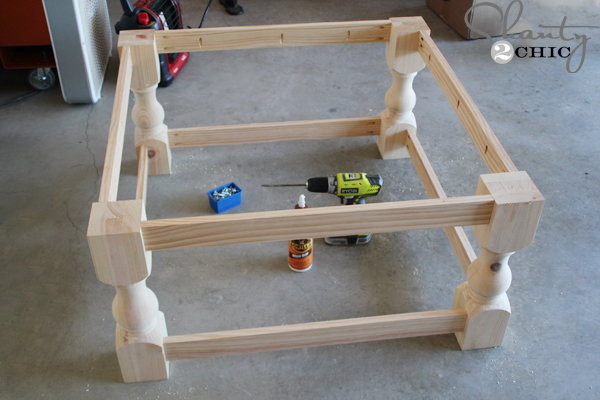
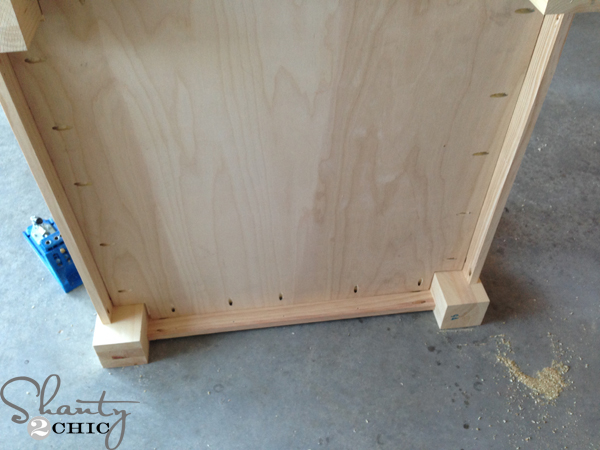 To attach it to the bottom apron, I just laid the table on it’s side and worked my way around, making sure to keep the plywood flush with the top of the boards, as I went.
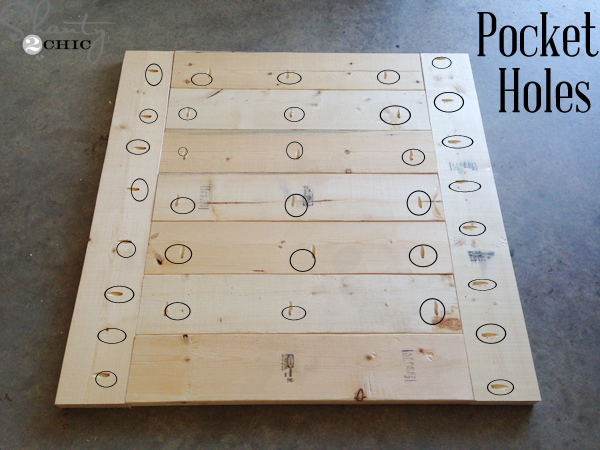 Once the bottom was attached, it was time to build the planked top. You can see that I circled where I drilled all of my pocket holes.
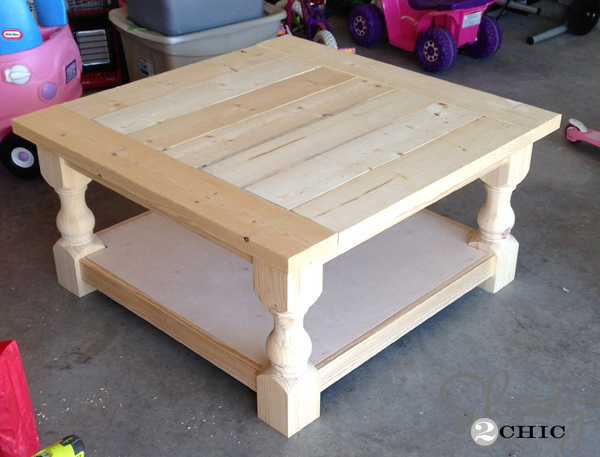 Finally, it was time to attach the top. The pocket holes that I drilled in the side pieces made this part so easy and I don’t have any nail holes to cover!
Whoop! Time to stain 🙂
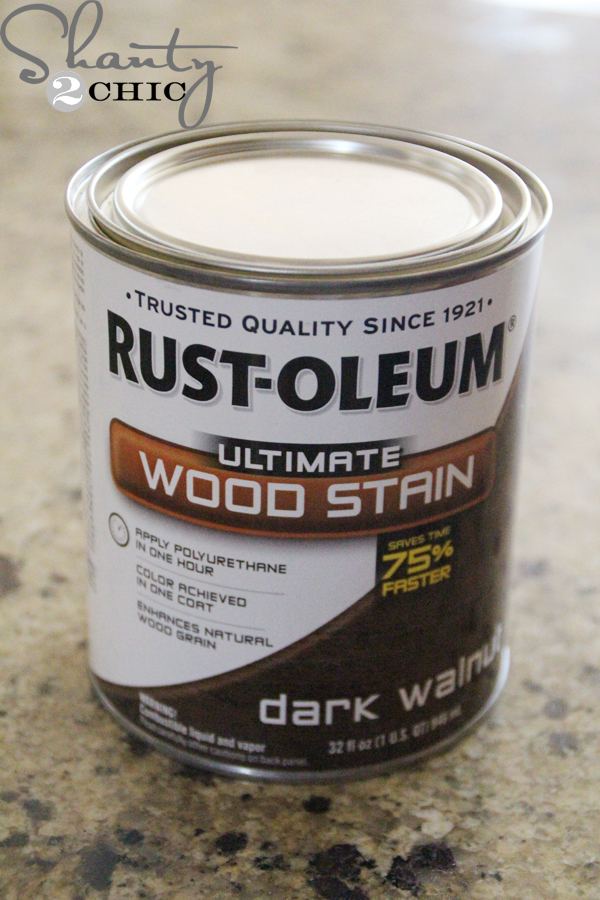 I applied one coat of Rust-Oleum Dark Walnut stain with a foam brush. I let it sit for 5 minutes and then wiped the stain with a clean cloth. Don’t wipe the stain away, the purpose of wiping is to blend the stain so that it is even all over the piece.
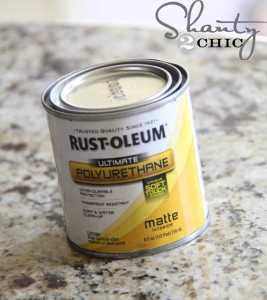 And, because this is a coffee table and it will see lots of ware and tear, I applied two coats of Rust-Oleum Polyurethane in Matte finish.
That was it!
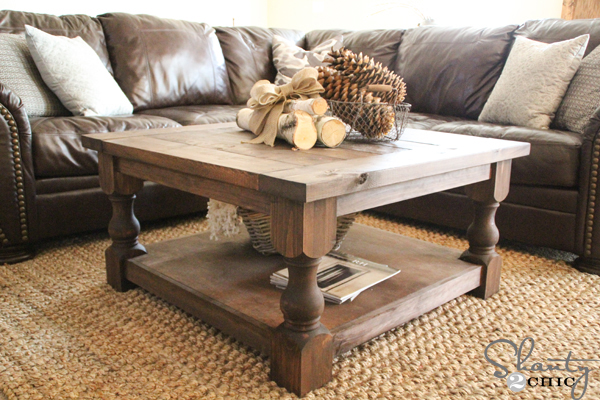 Thanks to Ana’s plans and Osborne’s gorgeous legs, I have a beautiful, DIY, square coffee table for under $200!!!! It’s so much fun to decorate with the large base at the bottom! I’m going to be busy year-round with this beauty 😉


I hope you love this coffee table as much as I do! Go check out all of the wood working products that Osborne has to offer! I was so inspired to build different pieces of furniture just looking through their selections!!
We always appreciate your shares and pins!
Thanks for stopping by!
Ashley


What type wood did you use for the table ? Also did you order the knotty pine legs from Osborne or was it a different type of wood?
Is there an inventory list any where or measurements? Thanks for sharing it’s beautiful
Such a beautiful piece!
Hi
Could you please give me CUT List for DIY SQUARE COFFEE TABLE
Hi,
could you please share the material list for all the timber pieces.
Thanks,
Sai
Please please please make matching end tables to go with this!!!
I just wondered how you made the table for $200 when the the legs are $194.80???
What size does this table end up?
I’m trying to find the link for the table legs and I’m not seeing it… Can someone help?
Where can i find the dimensions & wood used at so i can make this myself??
Thanks for the inspiration on my build. I did a rectangular version to better fit my space. I used 1 1/8” select pine from Home depot with 2 coats of Gloss urethane on the base and the epoxy ‘liquid glass” on the top piece. I’m currently trying to design or find a nice end table that I can build to match/compliment this piece.
OMG! That looks amazing, Tommy. What color stain did you use?
Brazil nut from sherwin williams 🙂 thanks Erika.
Can you share your detentions please. It looks amazing!!!
dimensions
Has anyone tried this project and added drawers?
Do you have any pics or plans?
Any suggestions on getting the legs a bit cheaper or making them?
Hi what type of pine did you use for all the boards?
Is there a printable version with all of the plans for this table? Thanks so much! also, What version of the Kreg Jig would you suggest?
Get the whole kit! Its great….Ive never built so much as I do now with the Kreg Jig