Happy Friday friends! So glad you are here! Make sure to FOLLOW us on Instagram to keep up with all of our projects from start to finish!
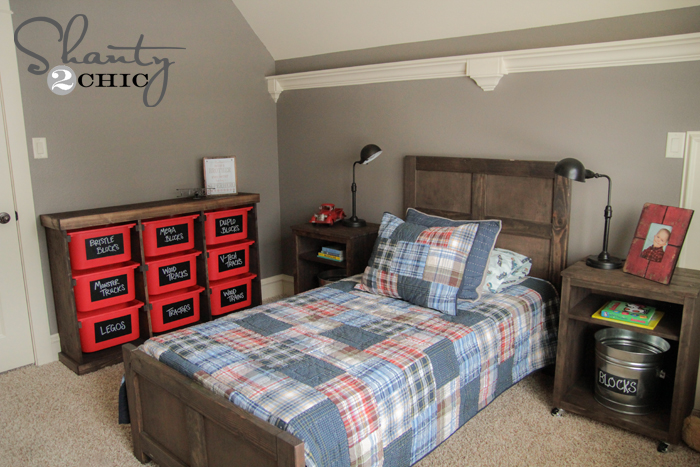
I am in the process of giving my littlest one his new ‘big boy room’. I have had so much fun with this room, and he loves it. I won’t lie… Dragging him back to his bed 27 times in the evening isn’t the most fun, but it was time. (I do miss the crib. Lots 😉 )
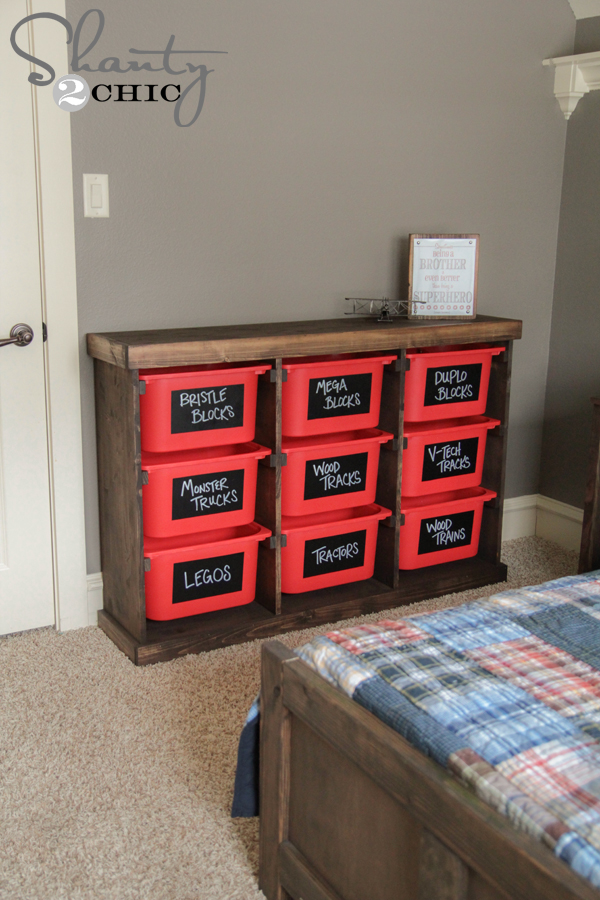
One thing this boy has is toys. Little toys. Lots of them. I was going crazy trying to find a way to organize them and keep them separated so he could play with them more. I did a lot of searching and shopping for ideas and fell in LOVE with Ikea’s Trofast baskets. You can buy these online as well. They were the perfect combination for me. They are a great size, no small holes for things to fall through, and they are cheap! That’s my favorite thing about them… Just can’t beat that $4 price tag. I decided to build my own frame for these! I prefer real wood at half the cost! Plus, I could coordinate it to his room. Here is how it turned out!
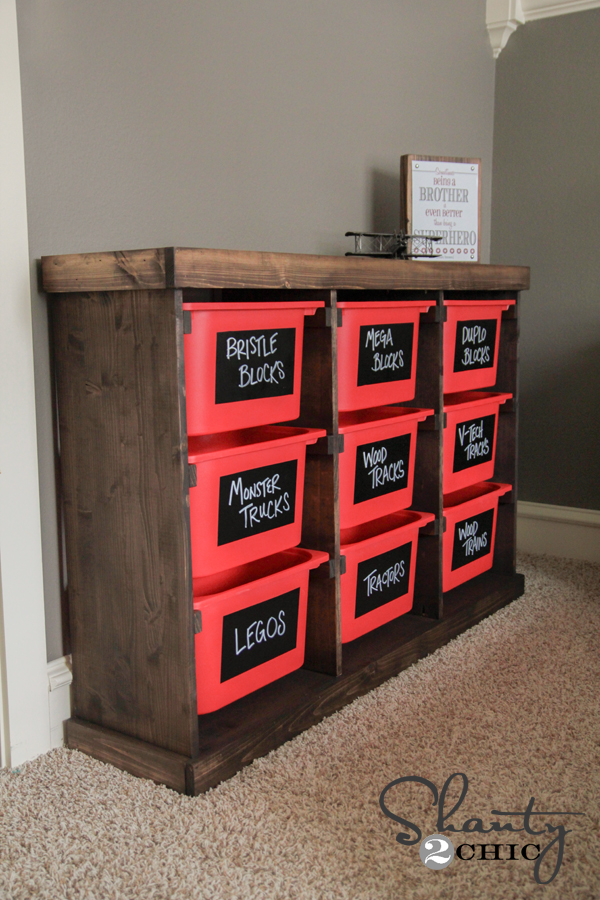
I say organization can be functional and pretty darn cute at the same time… Agreed??
We have some GREAT news friends! We are now offering FREE printable plans for all of our original Shanty2Chic projects! You guys begged for them… And here they are! Just click the button below to take you to them in another window. Then, just click print or download and save them!

As always, we will still give you guys a full tutorial of tips and pics to help you tackle these plans!
This is a really simple build! I broke it all down for you. Here we go!
DIY Storage Idea Supply List
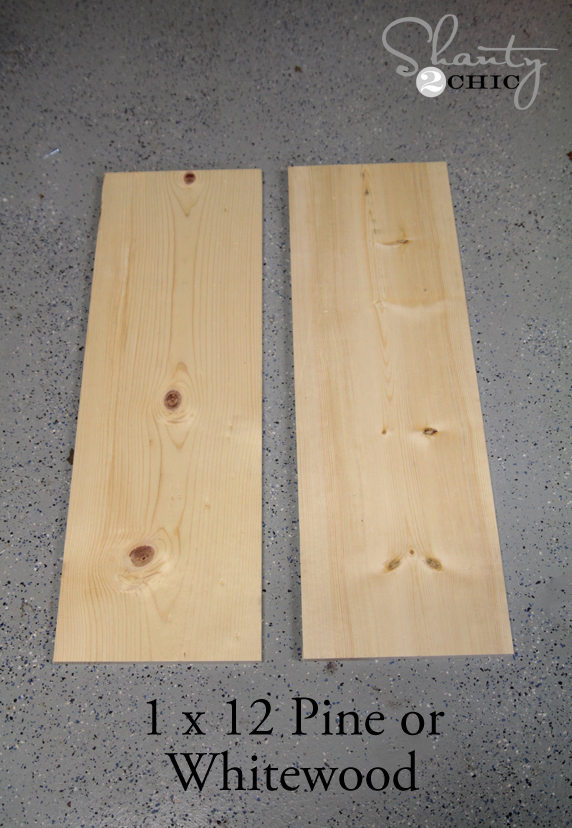
2 – 1 x 12 x 8′ pine or whitewood boards
2 – 1 x 12 x 4′ pine or whitewood boards
3 – 1 x 2 x 8′ pine or whitewood boards
2 – 1 x 3 x 8′ pine or whitewood boards
9 Ikea Trofast bins
Kreg Jig (optional and totally recommended)
Drill
Brad nailer
Gorilla Wood Glue
Wood Stain
DIY Storage Idea Build it!
I started by making all of my cuts to my big boards. This is 1 x 12″ board, and you can buy it in different lengths. An 8ft boards is about $16 and a 4ft board is about $7. I went with 2 of the 4ft boards rather than another 8 footer because it saved me a couple dollars. Every dollar counts, right? 😉
Here is my cut list for the 1×12 board…
1 @ 53.25″
1 @ 51.75″
2 @ 35.75″
2 @ 33.25″
Now for the pocket holes! I used my ever so handy Kreg Jig for this part! Who doesn’t own one yet? It’s time! You can see the model that Ashley and I use HERE![]() !
!
For those of you wondering what the heck a Kreg Jig is… You can check out our video HERE. We really try to break it down and give you a very basic understanding of what it does and how easy it is to use.
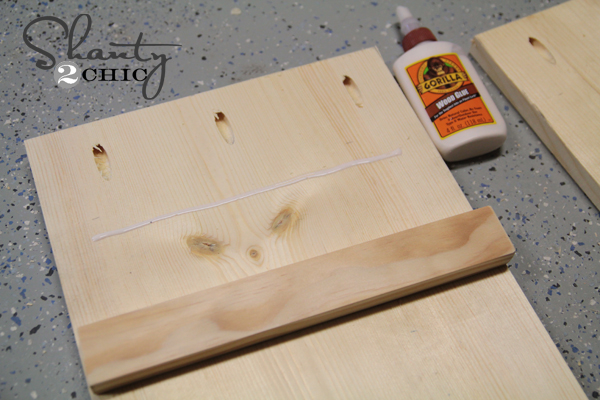
I started by making my pocket holes. I made 3/4″ pocket holes since that is the thickness of the wood I am working with. I put my boards into my Kreg Jig like this…

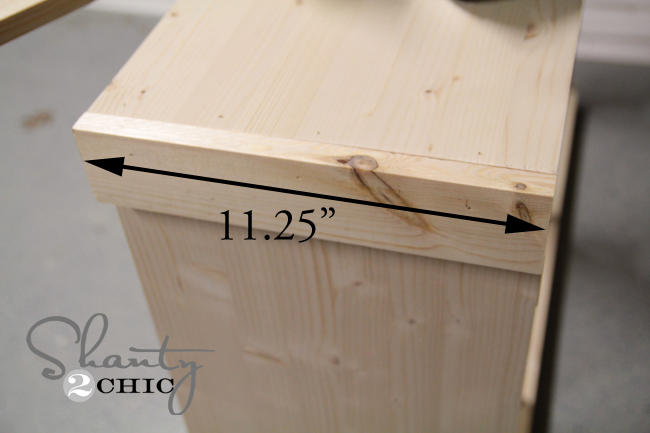
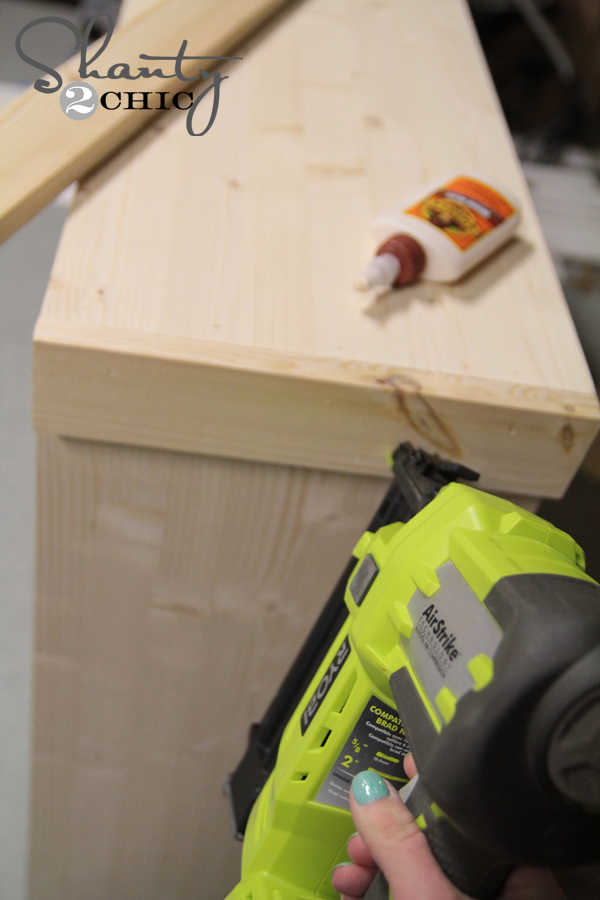
You can see below where I put all of my pocket holes. Before attaching them, I also added my 1×2 rails that will hold the baskets. I cut 18 of these at 11.25″ a piece. To attach them, I ran a line of wood glue on the 1×12…
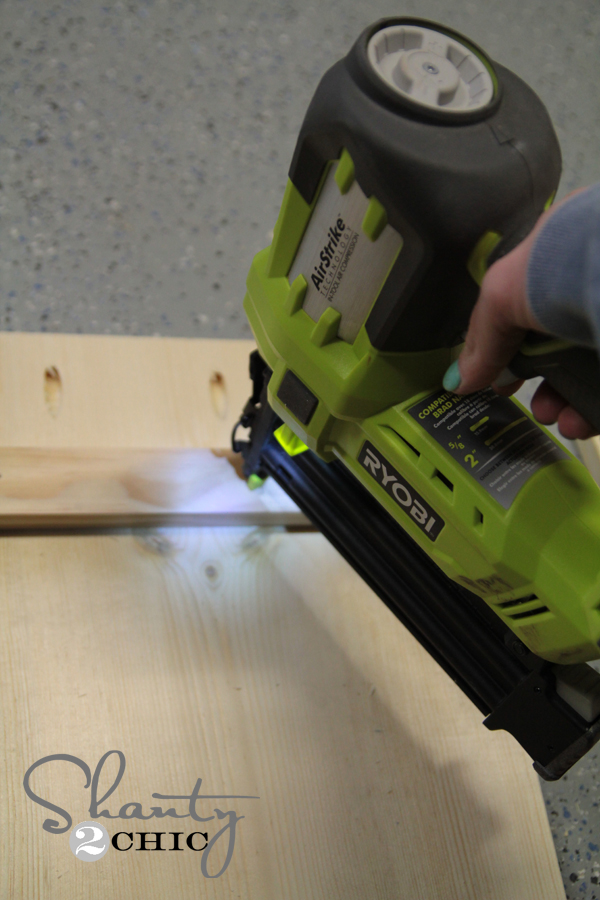
Next, I used my Ryobi Airstrike Nailer with 1 1/4″ brads to attach each rail. I used 3-4 for every rail. This tool is by far one of my favorites! It has all of the greatness of a pneumatic nailer (those are nail guns that hook up to an air compressor), but it uses the 18V battery… Too legit! I use mine on nearly every project I create. You can get these at Home Depot!
You can see here where I lined up all of these rails. You can also see the pocket holes.
These are the longer side boards. I only put pocket holes on one end of each of these.
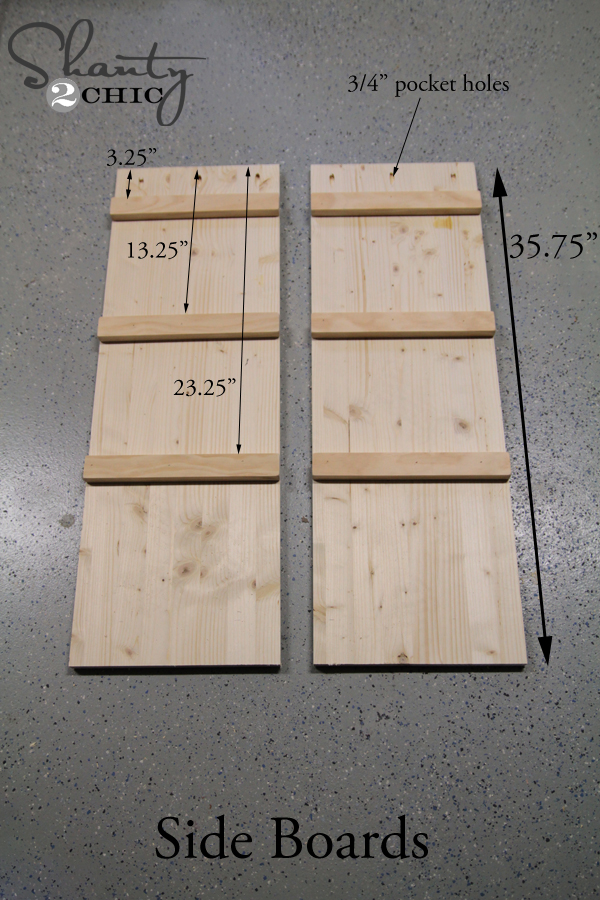
These are the shorter boards in the middle. I put pocket holes on both ends of each of these boards.

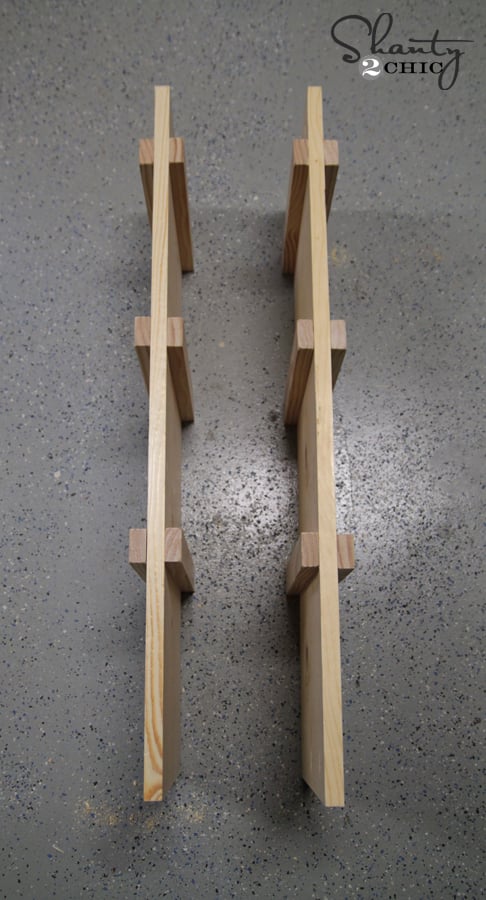
The middle boards will have rails on both sides. Once I had the first sides attached, I flipped it over and repeated this on the other side. Here is a profile shot of what they looked like finished.
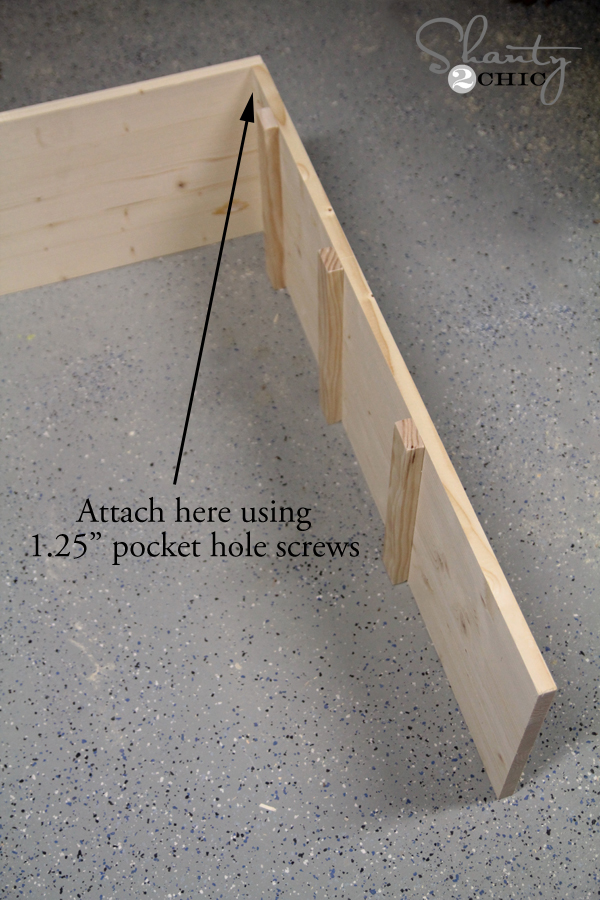
Now to attach them! I used 1 1/4″ pocket hole screws for this part.
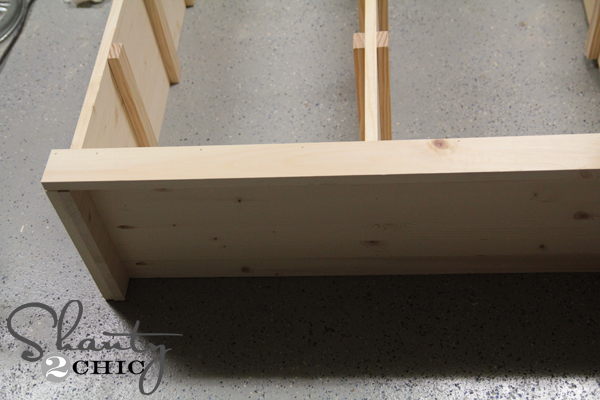
I started by attaching my longer side pieces to my top piece like this.
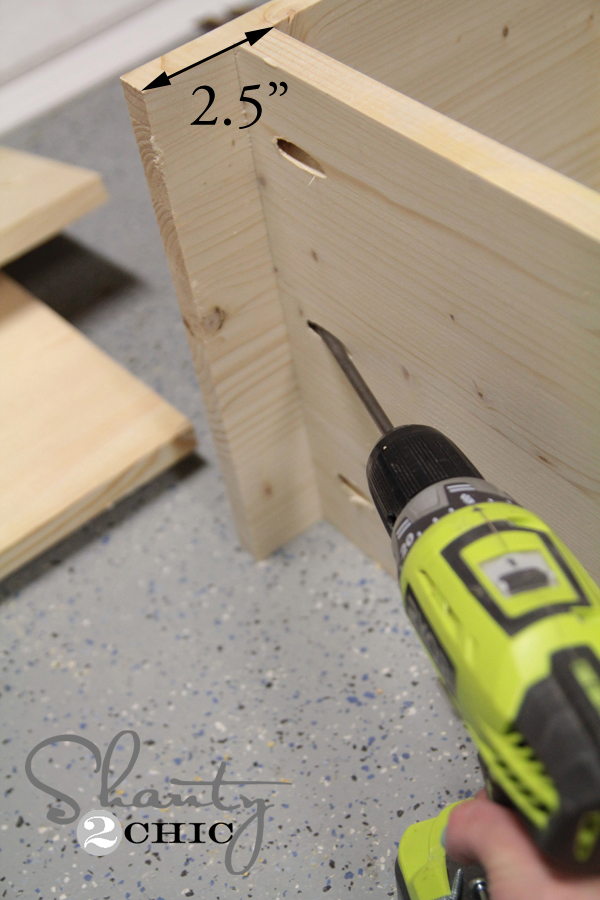
Next, I cut my other long board that is my bottom 1×12 piece. This board is slightly shorter than the top board. I added 3/4″ pocket hole screws to the bottom side of each ends. Then, I attached them to the long side pieces using 1 1/4″ pocket hole screws. You can see that I set this board where the top is 2.5″ from the base of my side boards.
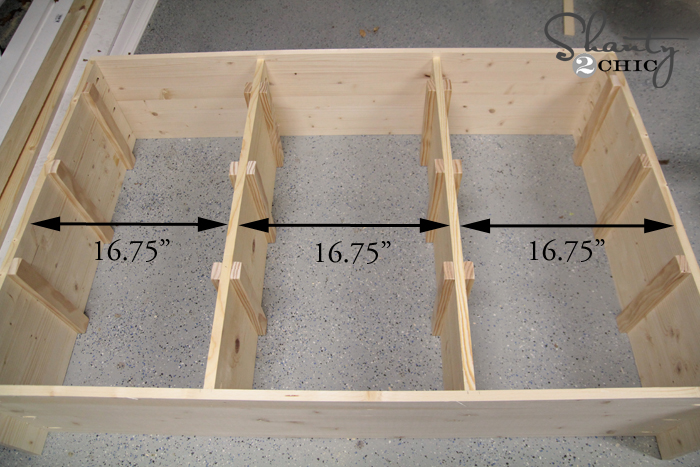
Now to attach the middle boards! I placed these each 16.75″ apart and also attached them using 1 1/4″ pocket hole screws.
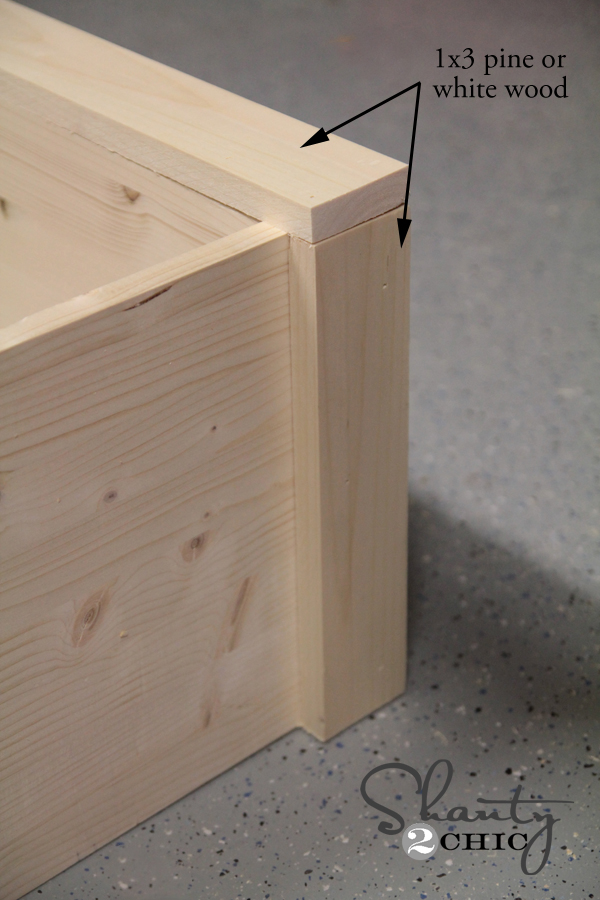
Now to trim it out! I used my 1×3 boards for trim. I started by adding my side pieces to both the top and bottom of the piece.
To attach these pieces, I used Gorilla Wood glue and my cordless nail gun again… Easy peasy!
My final step was adding the long front trim pieces. Measure this before cutting. Mine was about 54.75″, but it’s best to measure here to make it perfect!
The sides will look like this…
That’s it! DONE!
After building it, I stained the whole piece to match his bed and nightstands I made him. It’s Varathane Stain from Home Depot and I used the color Kona.
To stain, I work in small sections and brush it on. After a couple minutes, use a wiping cloth or old t-shirt to wipe off any excess stain. It’s easier than painting I promise! And, this stuff dries in under an hour!
Here it is all finished up!


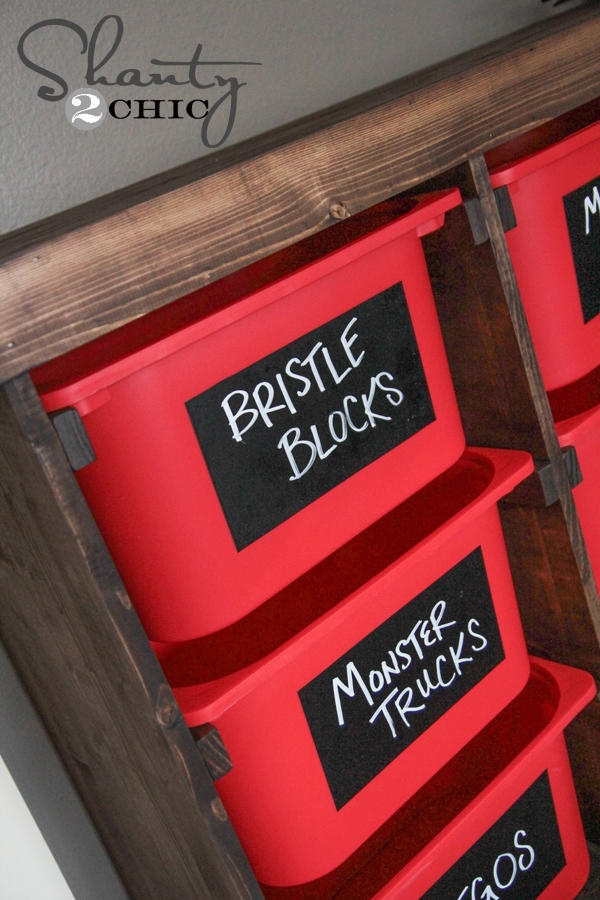
To create the chalkboard labels on the front of these, I used Chalkboard Contact Paper![]() !
!
I buy mine on Amazon HERE![]()
! I also use a white wet-erase chalk pen![]()
for neat lines and it keeps the kids from smudging it all up. I LOVE these pens! Just cut the contact paper and stick it on there!
I hope you love this as much as I do! I love functional furniture pieces, especially in my kiddos’ rooms. Now to make sure he puts the toys into the baskets…. 😉
Thanks so much for stopping by! I would LOVE for you to share and PIN this with all your friends!
Remember, you can access the full set of FREE printable plans by clicking HERE! Thanks so much to Jay from Jay’s Custom Creations for putting our ideas into plans for our readers! Jay is an awesome guy with some great project ideas… You guys should check him out!
And for those of you that may ask…
You can check out the paint color HERE!
You can check out the DIY bed HERE!
You can check out the DIY nightstands HERE!
The quilt is from PBTeen!
~Whitney


Which size Trofast bins?
What size trofast bins?
Where did you get the red IKEA Trofast baskets? I am wanting blue but I could go with red. All I see in the IKEA link is green, orange, or pink.
Thank you!
Another question where did you find those bins and what dimensions? I don’t live near an IKEA. Please let me know.
Can you give me the sizes of cuts for the top and
Bottom if I use just to columns of baskets? I keep getting 36.5 for the top and 34.5 for the bottom. But somehow when I do the math the same way to figure out your measurements for the 3 columns my numbers don’t match. What am I missing?
Do you have the dimensions of the completed project?
i just finished this. My son is always looking for projects to work together on. We did this. He had a blast building it. We are going to drill a hole in one of the bins so he has a bin to charge his controller, etc, without cords being exposed.
Thanks for the idea! And the plans
Please please please can you make me one… I have totally fallen in love with this but am no where near capable enough….
Just finished mine this weekend. Switched up the bin sizes and chose to miter corners on the trim. My kiddo loves it! As always, thanks for the free plans. 🙂
On a side note – I noticed that Lowes has stopped carrying Rustoleum stain in my area! Any recommendations for alternative stain? I used a Minwax stain & poly in one on this piece and it worked out better that I expected, but I love and will miss the Rustoleum color choices.
Hi! Can you measure where the tops of the ledges are on the two end sections? I want to use different size bins too and was curious where you put those ledges. Michellekorb@hotmail.com
Here are my notes. 🙂 Happy building!
What size Trofast bins did you use?
Three people have asked this but none got a reply! I want to know too! The link to IKEA takes you to the catalog page for the whole system, and not to a specific bin. I can’t seem to find what looks like the exact bin, but pictures can sometimes be deceiving. Can’t build until I’m sure they still sell that size.
Thanks for the free plans…just what I’m looking for to organize my son’s lego! I too love the Ikea Trofast system but didn’t want to have to pay for the shipping online.
Hey Whitney and Ashley, I have a question. I definitely need to add this plan in my home (to the many of yours I have already completed) for all my miscellaneous items with nowhere to put them. I will have to put this in the guest room so it will need to double as a media chest. Do you think if I used the top middle space and closed it in to put a dvd player/cable receiver/etc. it would look tacky? I would need to add a back to it then?
looks great! what size containers did you use to fit? I want to see if I can use what I have or get similar ones locally.
Thank you so much for this inspiration. I think it will be a perfect solution for storage in our garage, too. Very versatile. I just shared a link to your project on NewlyWoodwards.
LOVE IT!! Its awesome. Have to have hubby build one for all my daughters horse toys:0) LOL
Are the Trofast bis you used Red or Orange? While looking online, Ikea doesn’t have a red option (which I prefer), only orange. If the orange leans more red, that’ll help my choice. Thanks!