Happy Tuesday friends!
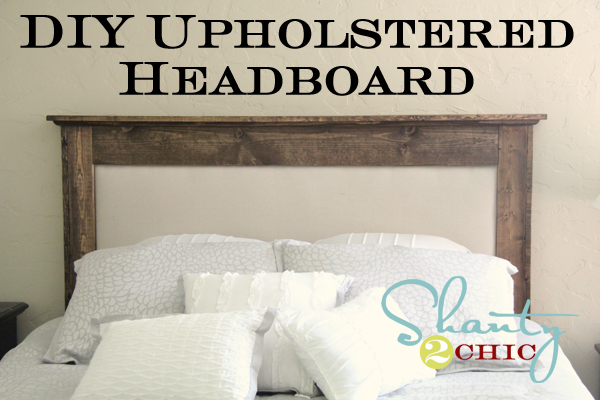
Hope you guys had a great weekend. I am really excited to show you the WHOLE bed I built for my sister. I shared the Queen Platform Bed several days ago, and now I am here to show you the upholstered headboard we made to go with it.
Ana made me a perfect plan to match a beautiful upholstered headboard I found at Pottery Barn.
You can find the full plan for this headboard HERE at Ana’s site. This is one of the easiest builds I have done and I would love to share a few money saving tips with you!
For my back board I used 1/2″ MDF. I just had the nice man at Lowe’s cut it for me to Ana’s plan size to save me time.
For my foam backing I used this mattress topper from Wal-Mart. It is only $10… Whoop!
I cut it down and attached it to my MDF like this…
Here is the batting I used.
Pottery Barn uses linen for their headboard. I feel like you can achieve the same look for much less cost going with canvas drop cloth. I used this $5 one from Lowe’s.
Stapled to the board…
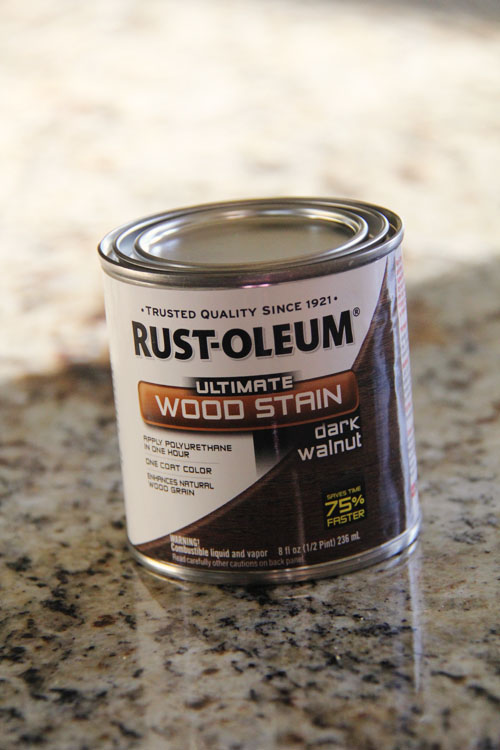
Before attaching my side pieces I stained them first. I used our ver favorite stain for this bed.
Rust-Oleum Ultimate Wood Stain in Dark Walnut
This stuff is the best. It dries faster and only requires 1 coat… Woohoo! You can get it at Lowe’s. You can also follow Rust-Oleum on Facebook and Pinterest for fun and inspirational project ideas!
Here are my boards drying…
After attaching those boards I attached the side trim and top and stained them after attaching. Want to see it all finished??
Hope you like it!
It was so much fun building it for her!
Make sure to check out Ana’s site for the full plans on this headboard!
Many of you ask us questions about tools all the time. We are so excited to share a new tool with you later in the week! We will also be giving one of them away to a reader! Stay tuned for that ;-)!
Thanks so much for stopping by!!
It would make my day for you to pin this and share it below ;-)!! Have a great day!
~Whitney







I am going to make one for a King size bed, wall mount and would love to have your Shopping list to also include the cuts for that size.LOVE the design and hope that I can find similar for King on your or Ana’s website so that i can duplicate your success.
I am going to make one for a King size bed, wall mount and would love to have your Shopping list to also include the cuts for that size.LOVE the design and hope that I can find similar for King on your or Ana’s website so that i can duplicate your success.
I’ve built this bed and headboard to the letter from ana’s site but she isn’t clear on how to attach the headboard and I need help! Please!
On her site it shows the headboard lining up with the outside edge of the bed when it clearly does not. I bought an L shaped bracket but since it doesn’t line up with the edge of the bed how in the world can I attach it? (Can’t attach to the wall)
Thank you!
Did anyone ever find the plans for the headboard?
The plans are in Ana White’s website
The plans for the headboard do not seem to be available anymore… is there anyway to get them?
The plans are on Ana White’s website
I LOVE this! I have found other plans online but they were WAY too many steps. This is straightforward and easy to follow. Thanks for the inspiration!!
I love your ivory rug!! May I ask where you got it?
????? Super excited because I built this myself and it turned out so beautifully! SO happy! I used the plans at WoodworkPlans.info to build mine – I highly recommend you visit that website and check their plans out too. They are detailed and super easy to read and understand unlike several others I found online. The amount of plans there is mind-boggling… there’s like 16,000 plans or something like that for tons of different projects. Definitely enough to keep me busy with projects for many more years to come haha ???
☁☁☁☁☁☁☁☁☁
☁☁??☁??☁☁
☁???????☁
☁???????☁
☁???????☁
☁☁?????☁☁
☁☁☁???☁☁☁
☁☁☁☁?☁☁☁☁
☁☁☁☁☁☁☁☁☁
Go to www. WoodworkPlans.info – click the pink link above for some more plans! Best of luck on your building adventures!
?✨?✨??
How did you do the corners without squashing them? I’m using a faux textured leather instead of fabric and I tried folded the corners like you would a package, but it’s bulky. Not sure what to do now. Any suggestions? Thanks in advance.
Love this idea! Have been looking & looking for a stylish, affordable headboard. Love the stain, but may go with cream (my safety color) or red (if I dare!). Thank you for the steps, the tips, the great photos!
Stunning! Love the frame as well…I am feeling some confidence building (pardon the pun)!