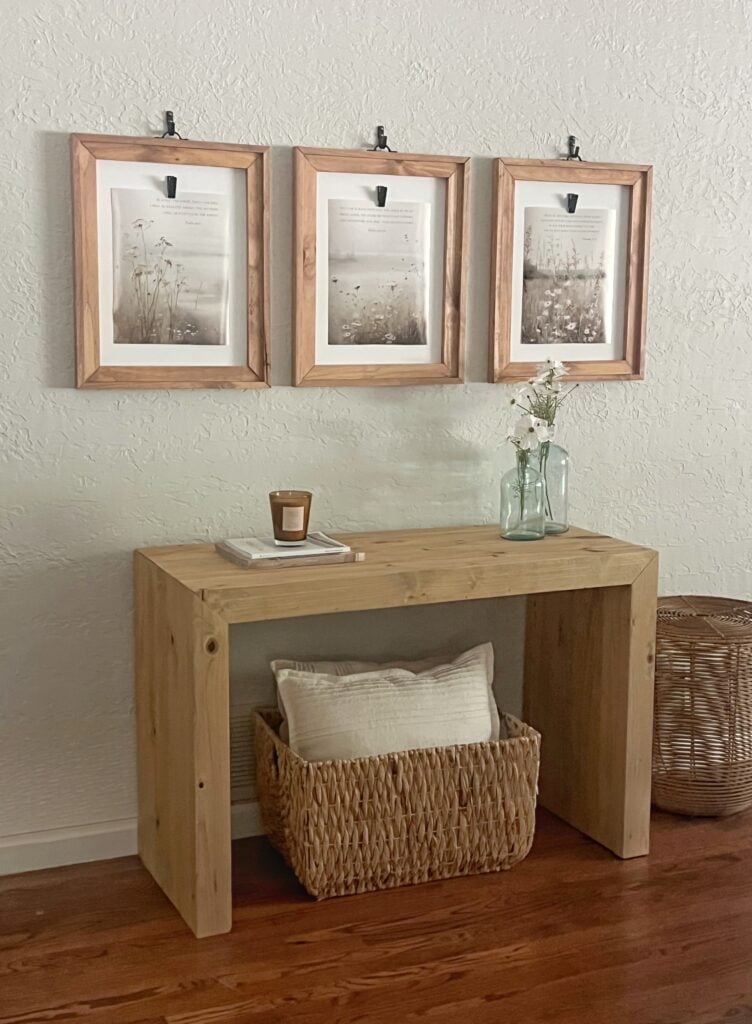
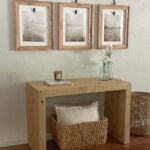
Looking for a stylish, small-space solution with big impact? This DIY Waterfall Console Table is just the thing! With clean lines, a modern silhouette, and a solid wood build, this project is beginner-friendly and budget-conscious – the whole thing cost under $100 in lumber and don’t forget the DIY waterfall console table plans!
We’re sharing the full step-by-step tutorial along with free printable plans and a YouTube video to walk you through the build. Whether you’re sprucing up your entryway, adding a console behind the couch, or just need a slim piece for a tight corner, this build has you covered.
Table of Contents
Why We Built It
Originally designed as a writing desk for my college-aged daughter, this piece quickly proved it could do double-duty. With its minimal profile and “waterfall” edge design, it’s the perfect modern console for small spaces. We’ve styled it as a console here, and I love how versatile it is — think entryway table, narrow hallway shelf, or even a stylish vanity setup. Customize the length, width, and finish to fit your space and style. And you can build it for under $100!
DIY Waterfall Console Table Video
Want to see the build in action? We originally created this project as a writing desk, but the design works perfectly as a sleek console table too! You can follow the same steps in our YouTube tutorial [linked here], and just adjust the size if needed to fit your space.
Supplies & Tools Needed
This is a great project for beginner woodworkers or weekend DIYers. Here’s what we used:
- Drill
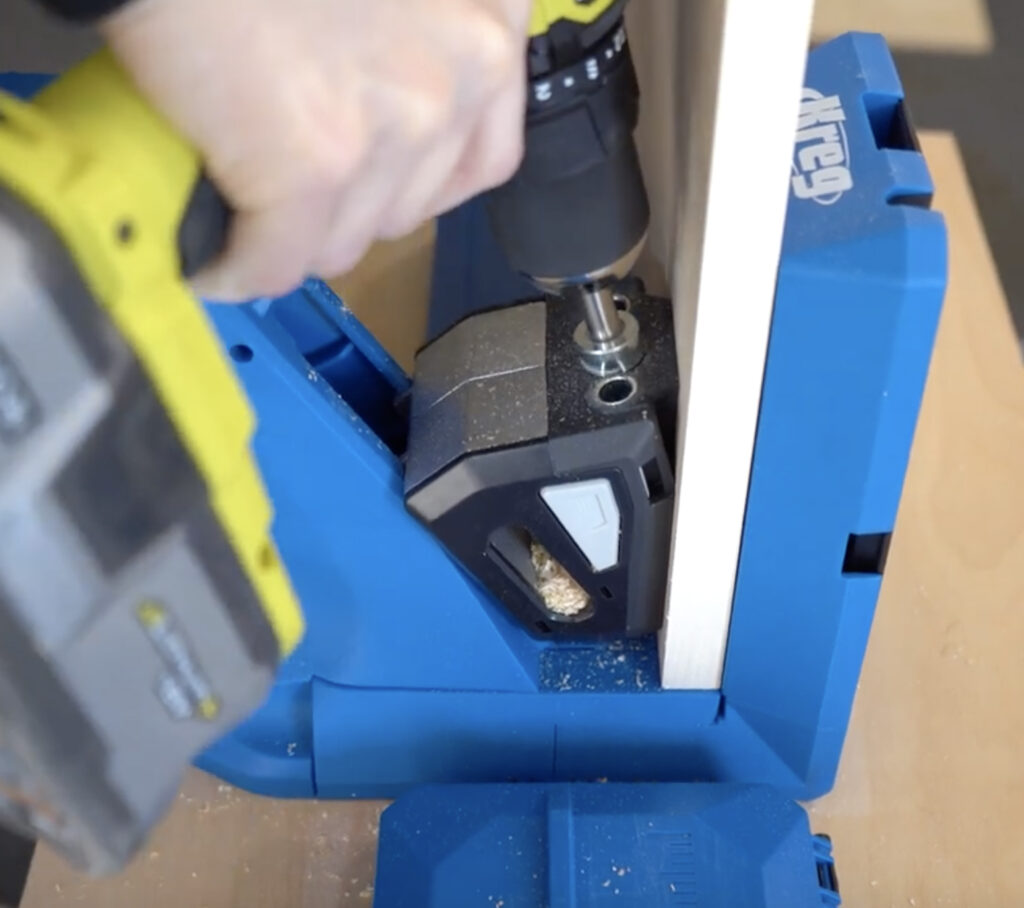
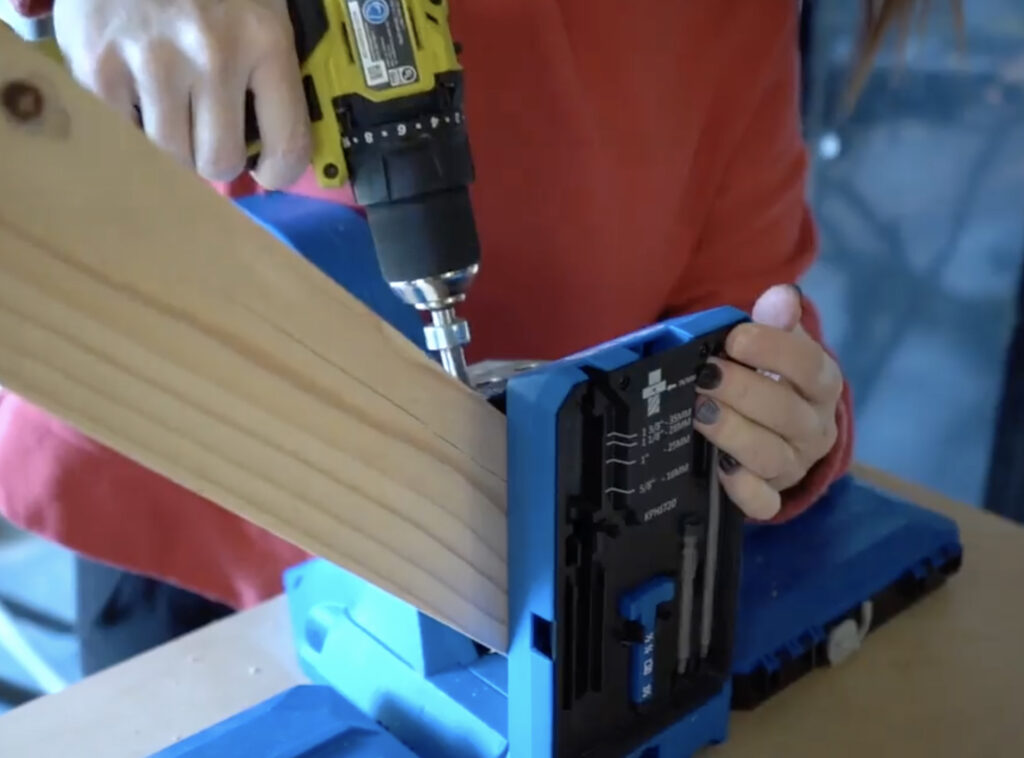
- Kreg Jig (we used the 720 PRO — love it!)
- Miter Saw
- Table Saw
- Brad Nailer
- Sander
Wondering what a Kreg Jig is? It’s a pocket-hole jig that lets you join boards with strong, clean joints. Total game-changer for furniture building! You can check out our favorite Kreg model here and watch our tutorial on how to use it here.
Lumber Breakdown
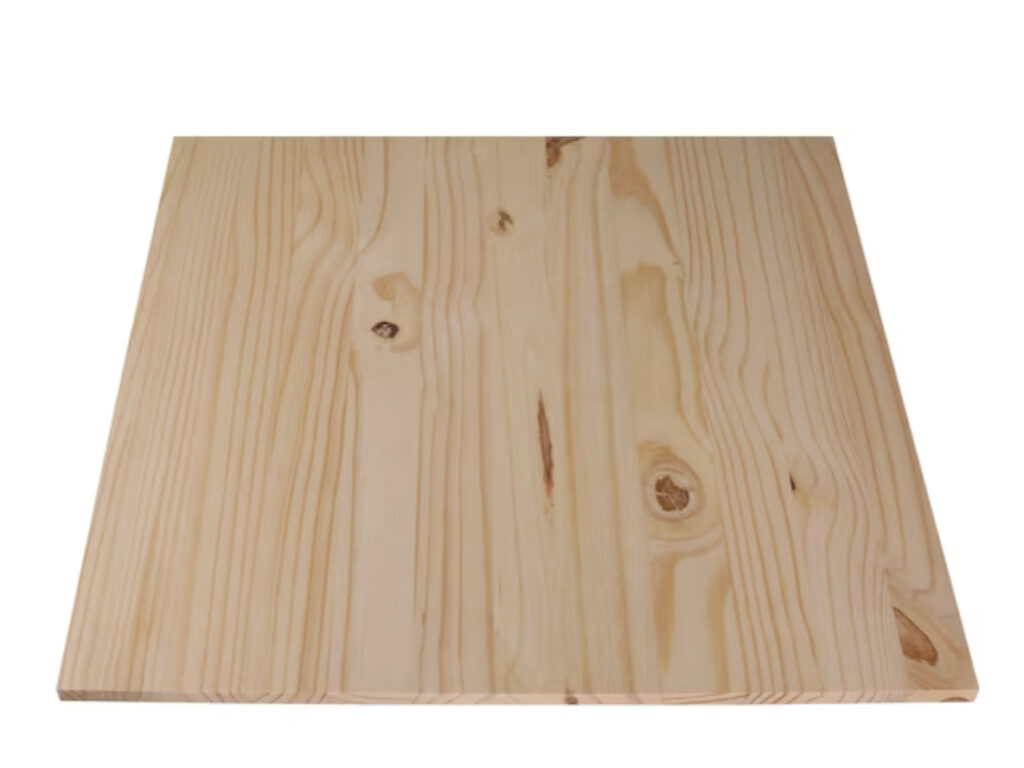
We used a mix of framing lumber and laminated pine panels for this build:
- 2×4 boards for the frame (ripped down to 3″ wide for a clean edge)
- Laminated pine panels for the top and sides (we kept them at 16” wide, but you can adjust!)
These project panels are easy to find at Lowe’s or Home Depot — they’re often shrink-wrapped and sold in various sizes, perfect for avoiding too much scrap.
How to Build the DIY Waterfall Console
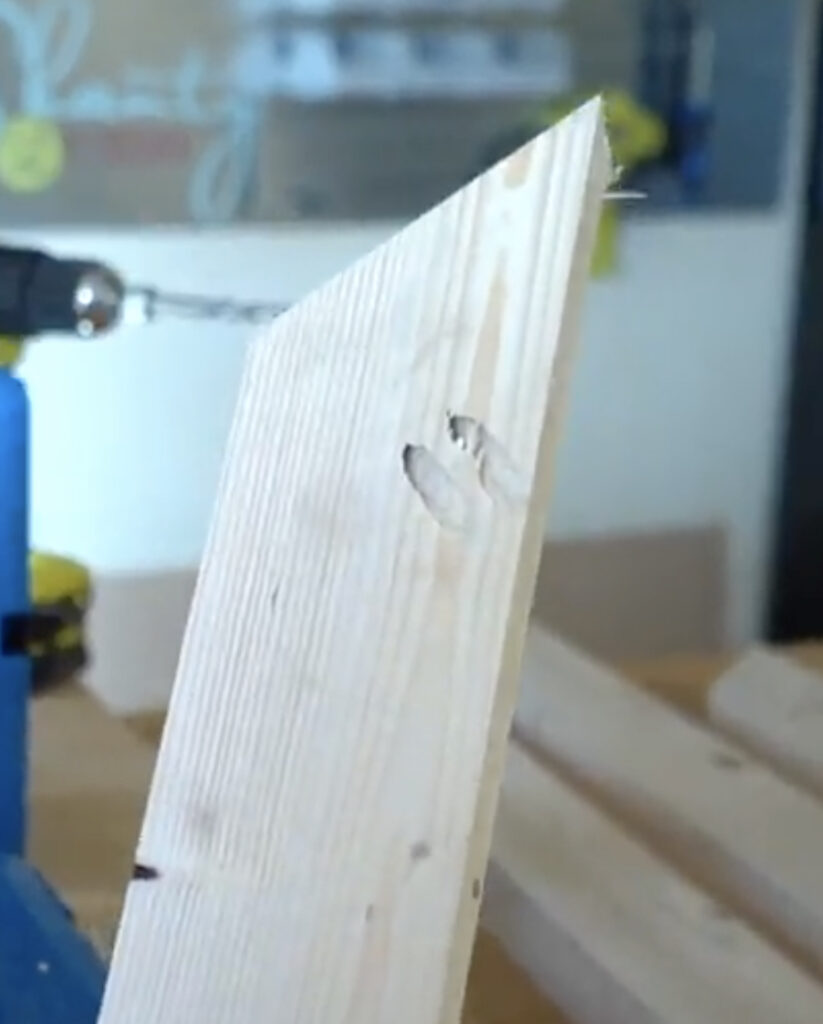
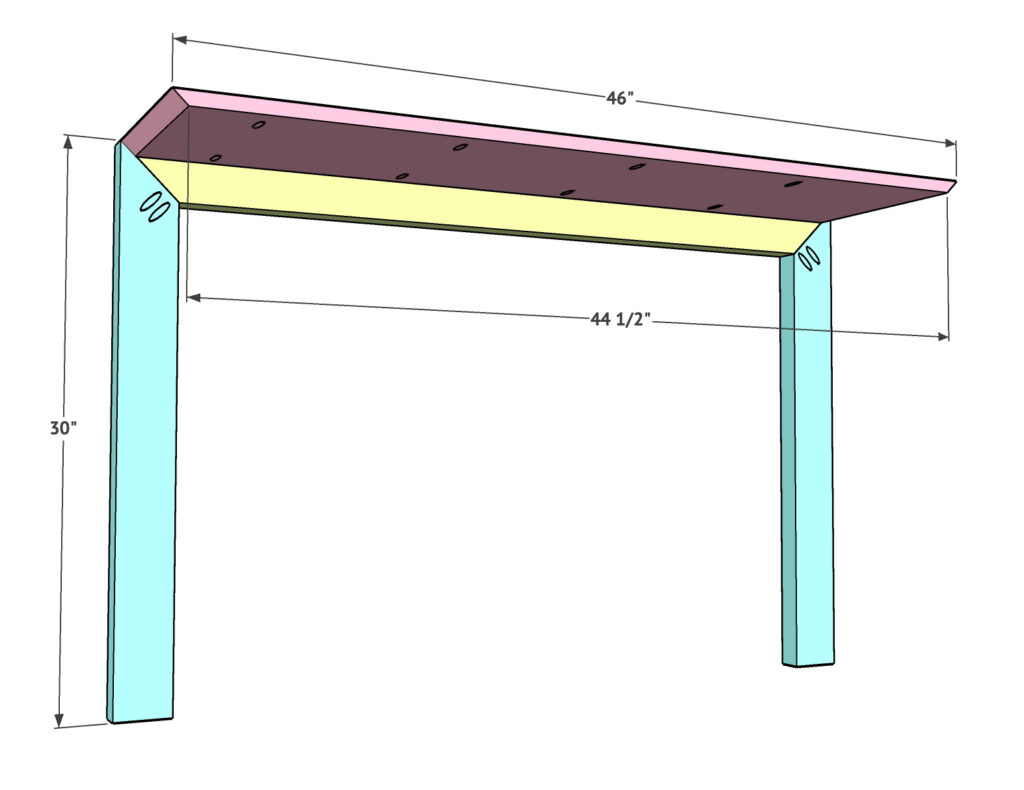
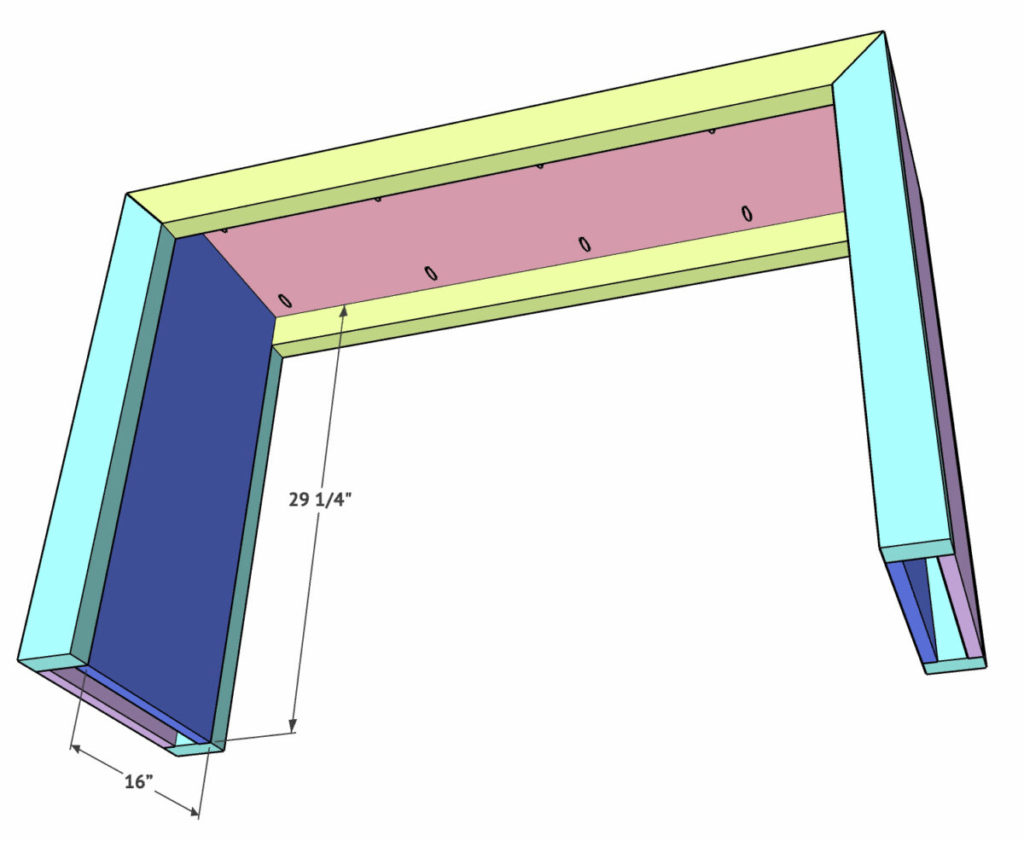
Step 1: Cut Your Boards to Size
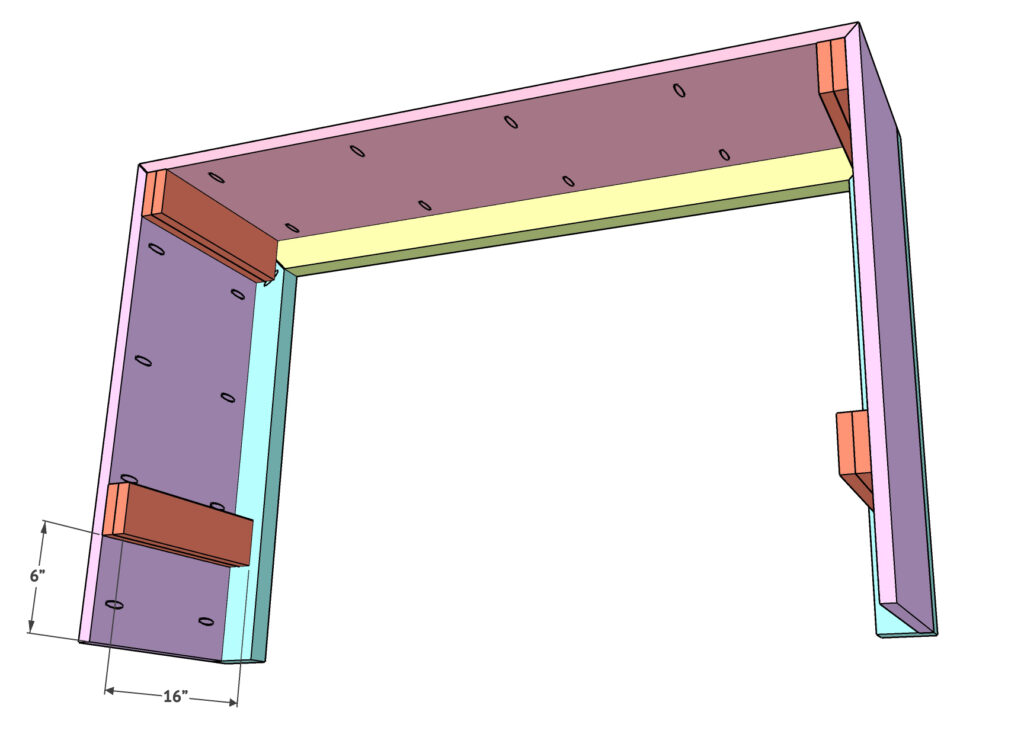
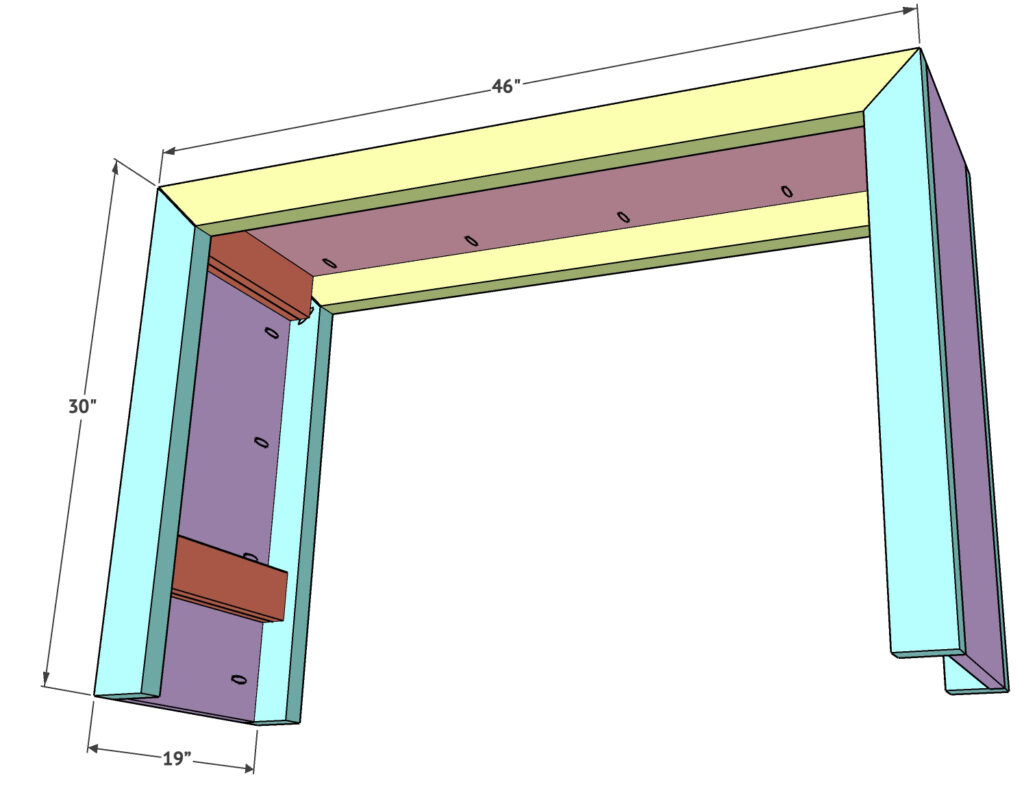
Rip your 2x4s to 3” wide. Cut the boards at 45º angles and drill 1.5” pocket holes into the angled ends. Assemble two identical rectangular frames using wood glue and 2.5” pocket hole screws.
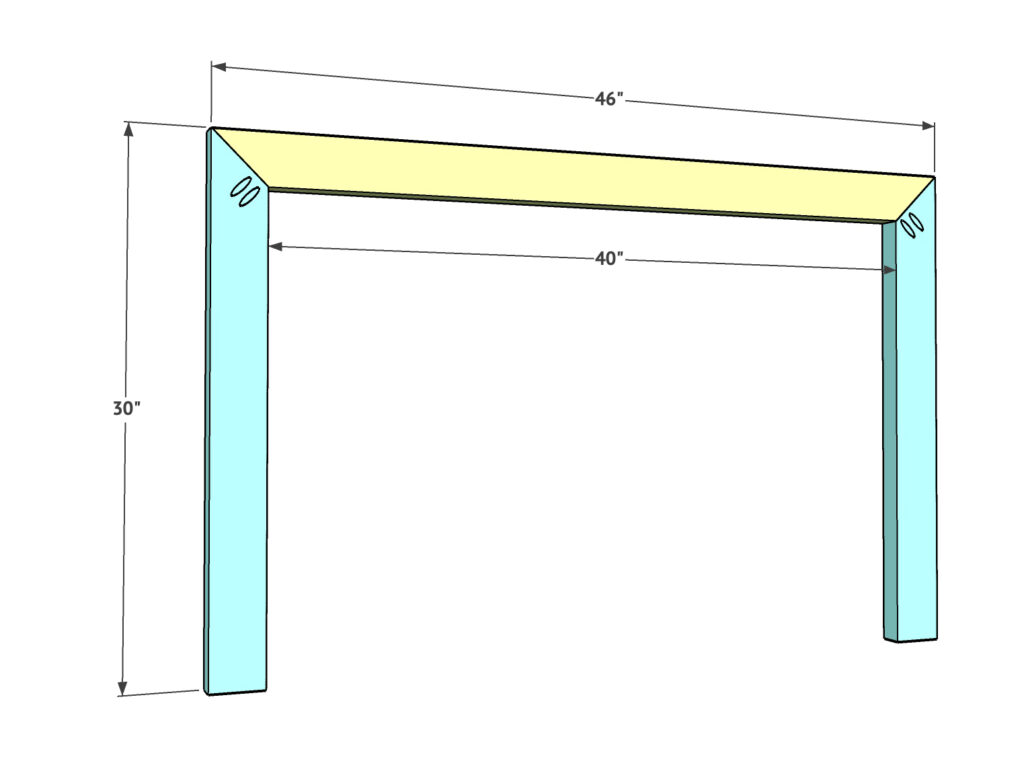
Step 2: Assemble the Waterfall Console Frame
Drill 3/4” pocket holes along the bottom edges of the console top. Attach it to one of the frames using wood glue and 1.25” pocket hole screws. Make sure it’s flush with the top of the frame.
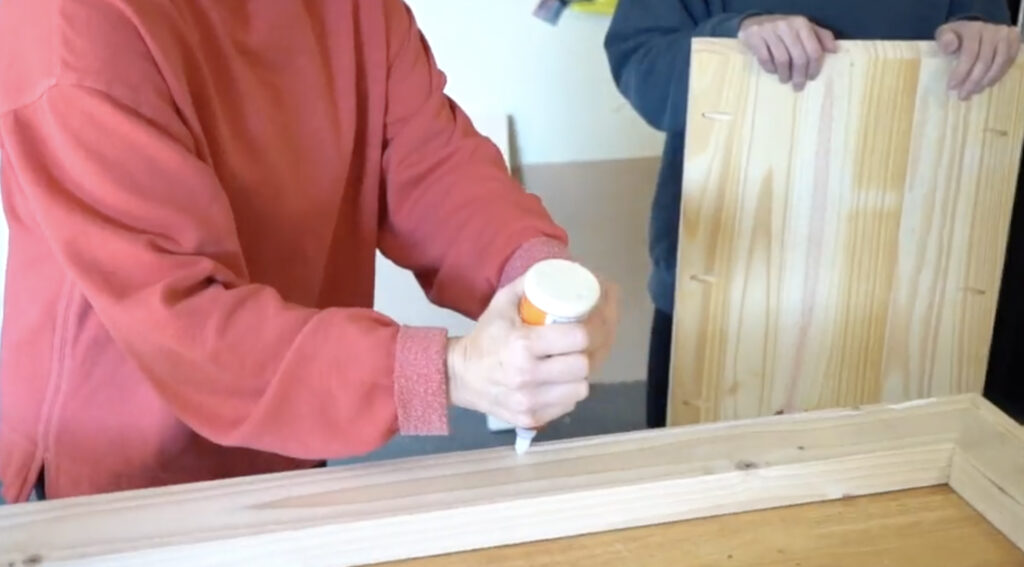
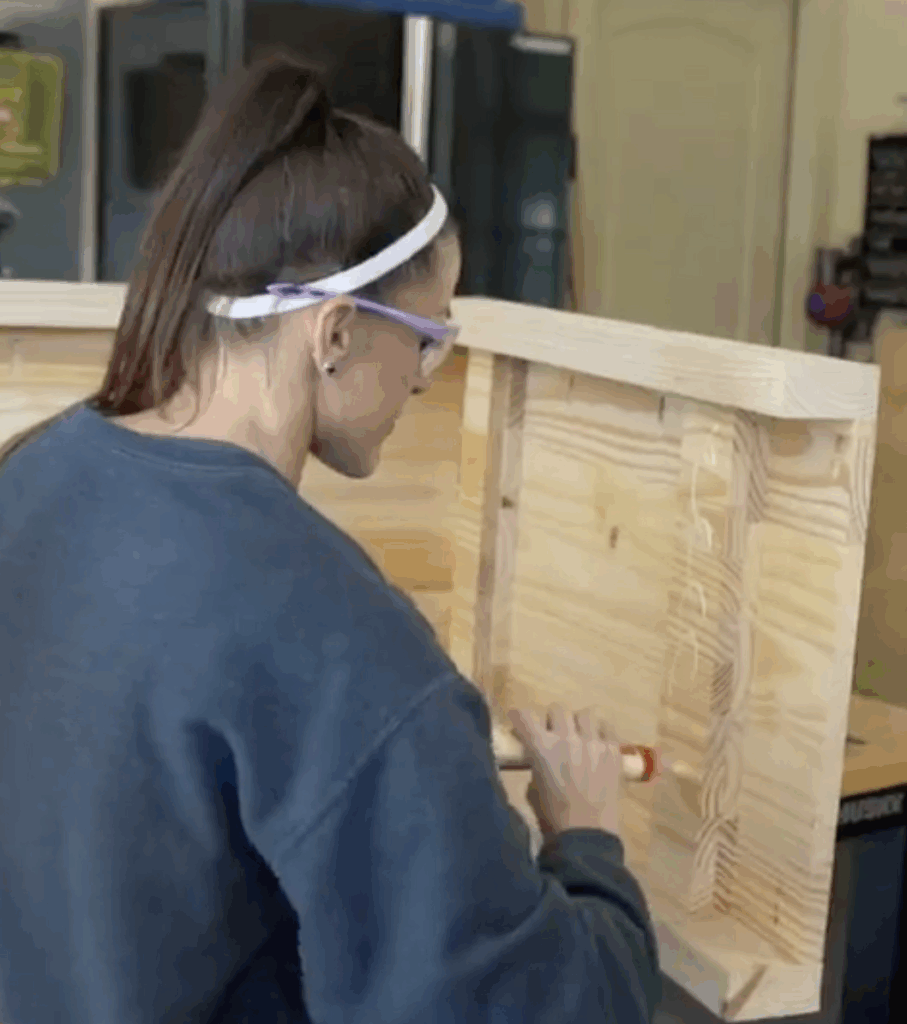
Step 3: Add Side Panels & Waterfall Edges
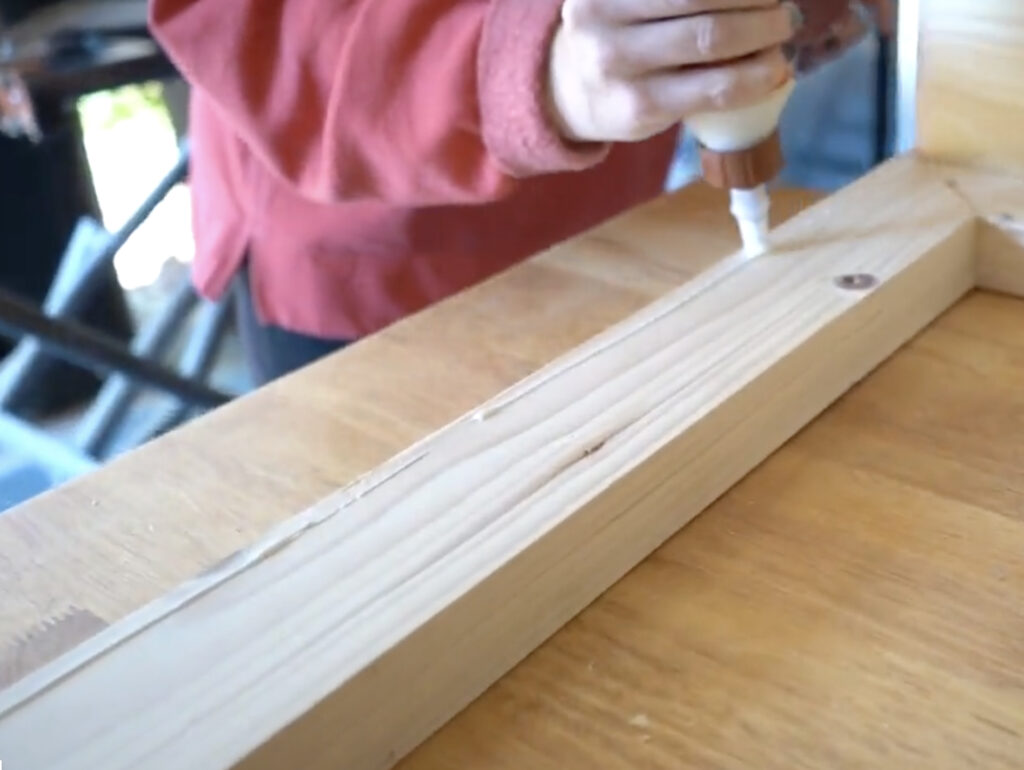
Cut your side panels at 45º on the top edge to continue the “waterfall” effect. Add 3/4” pocket holes along the long inside edges, then attach them to the console sides using glue and 1.25” pocket hole screws.
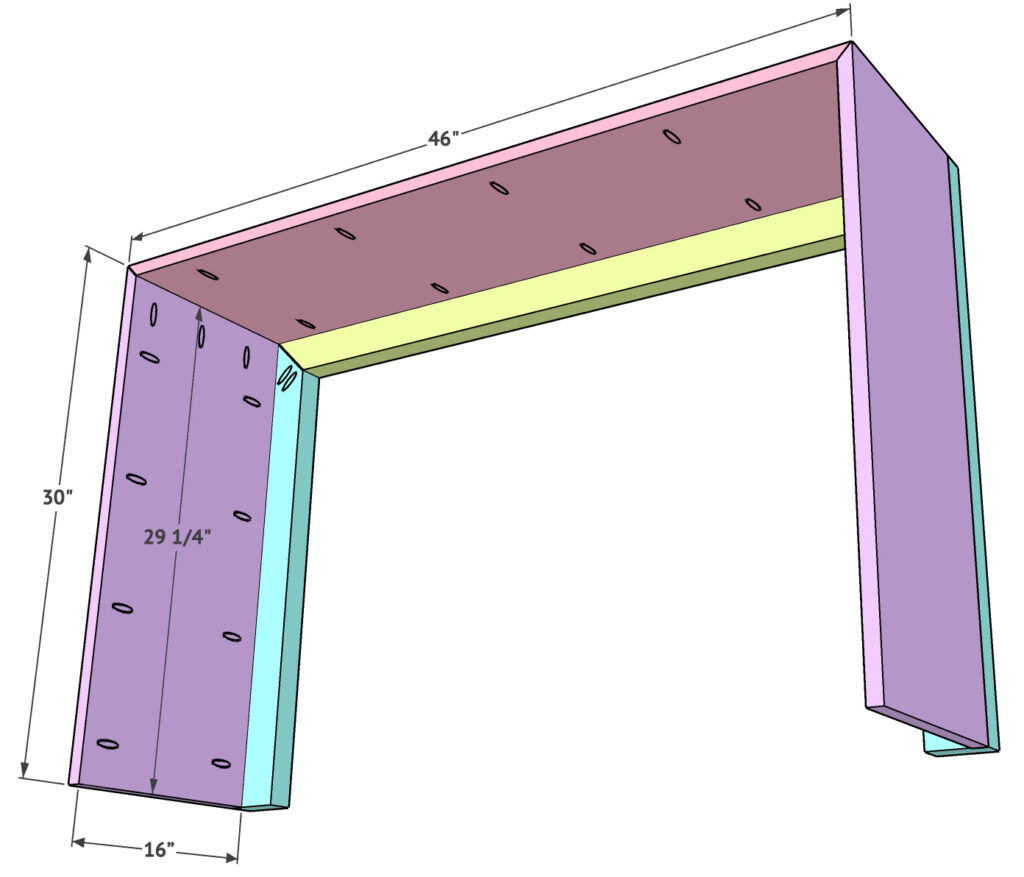
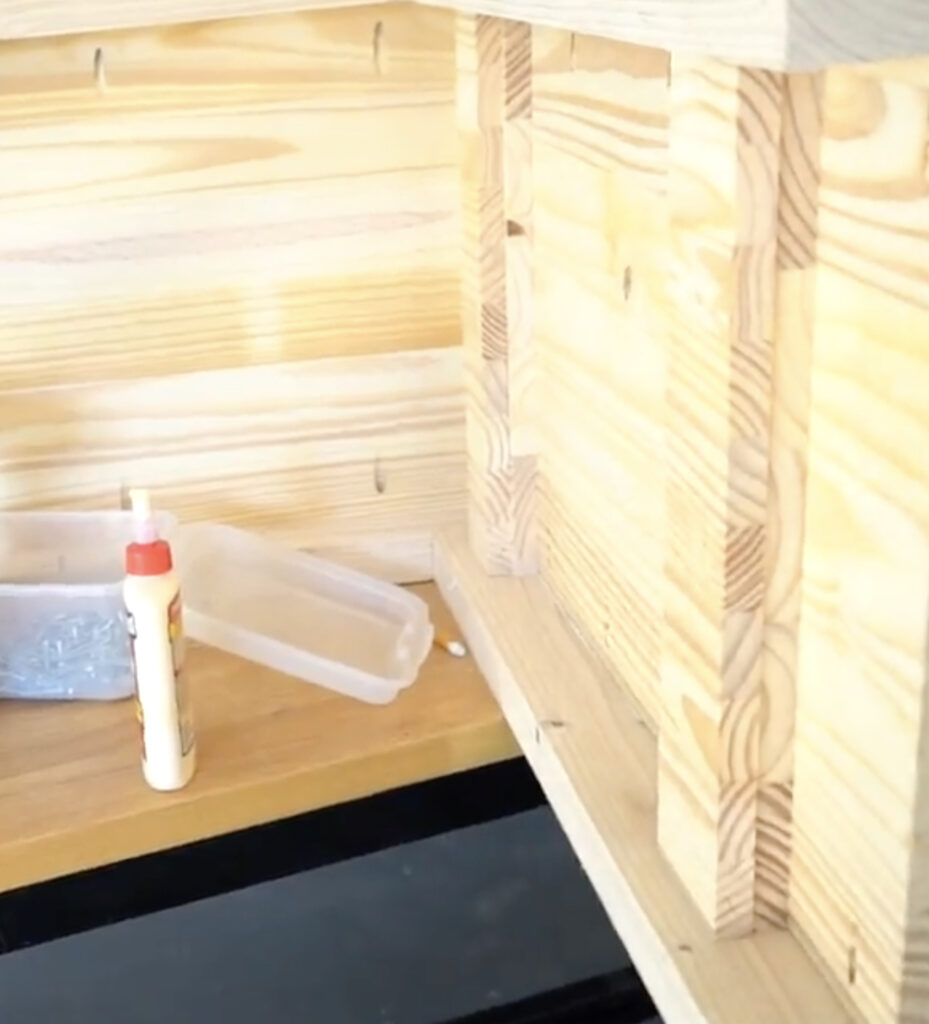
Step 4: Add Interior Support Strips
Cut 3” wide strips from scrap panels and attach them to the inside of each side panel — two on each side, one toward the top, one toward the bottom. Use brad nails and wood glue to secure.
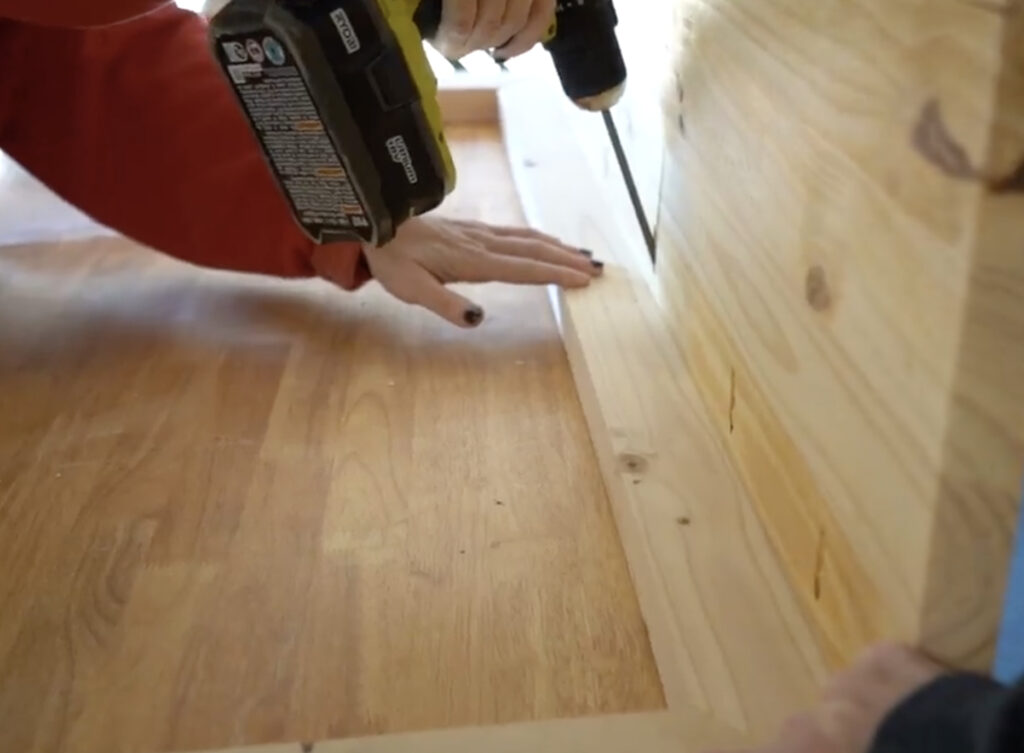
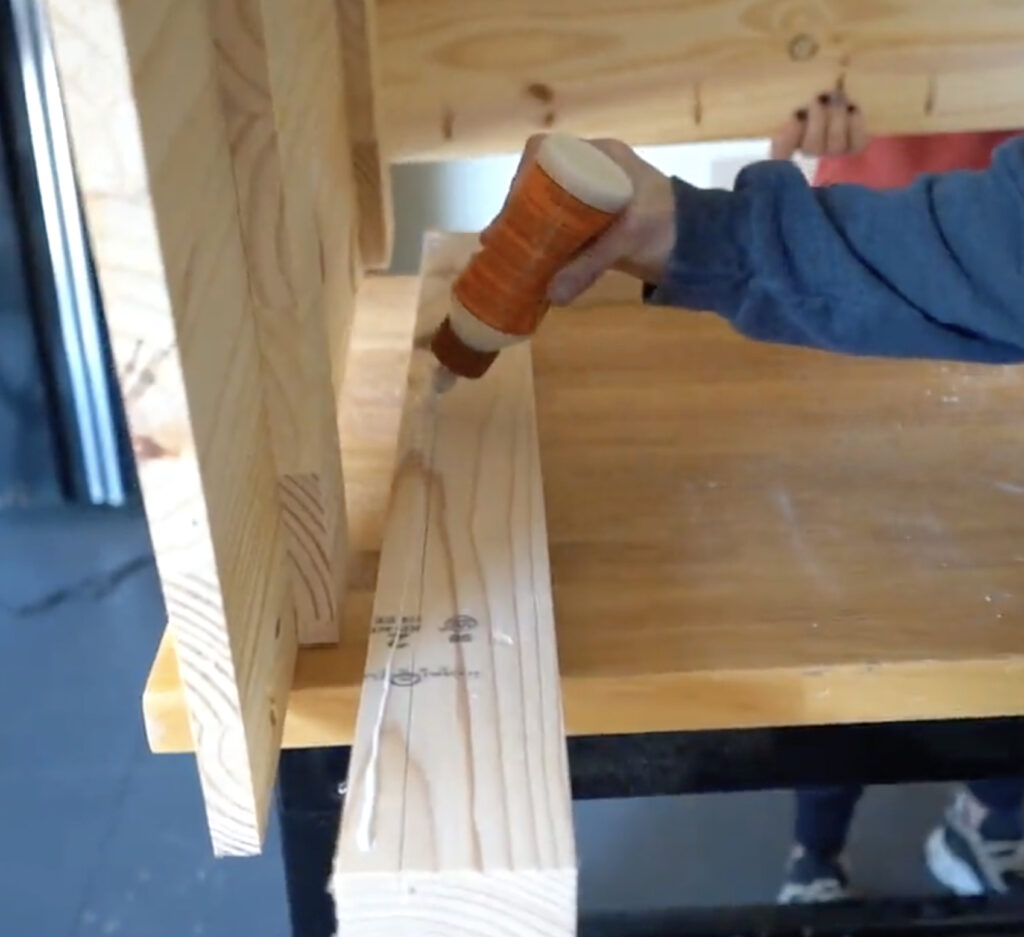
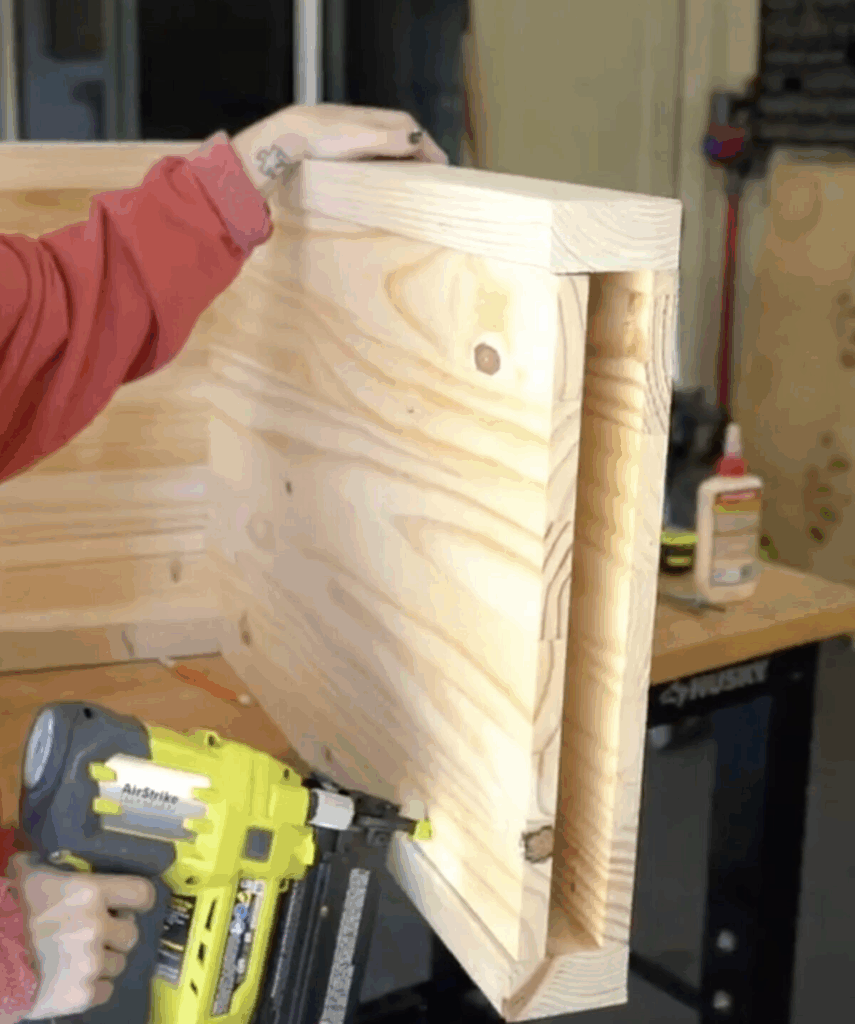
Step 5: Attach the Second Frame
Line up the second frame with the open side of the console body. Add glue to all contact points and secure using 1.25” pocket hole screws. Everything should be flush!
Step 6: Hide the Pocket Holes
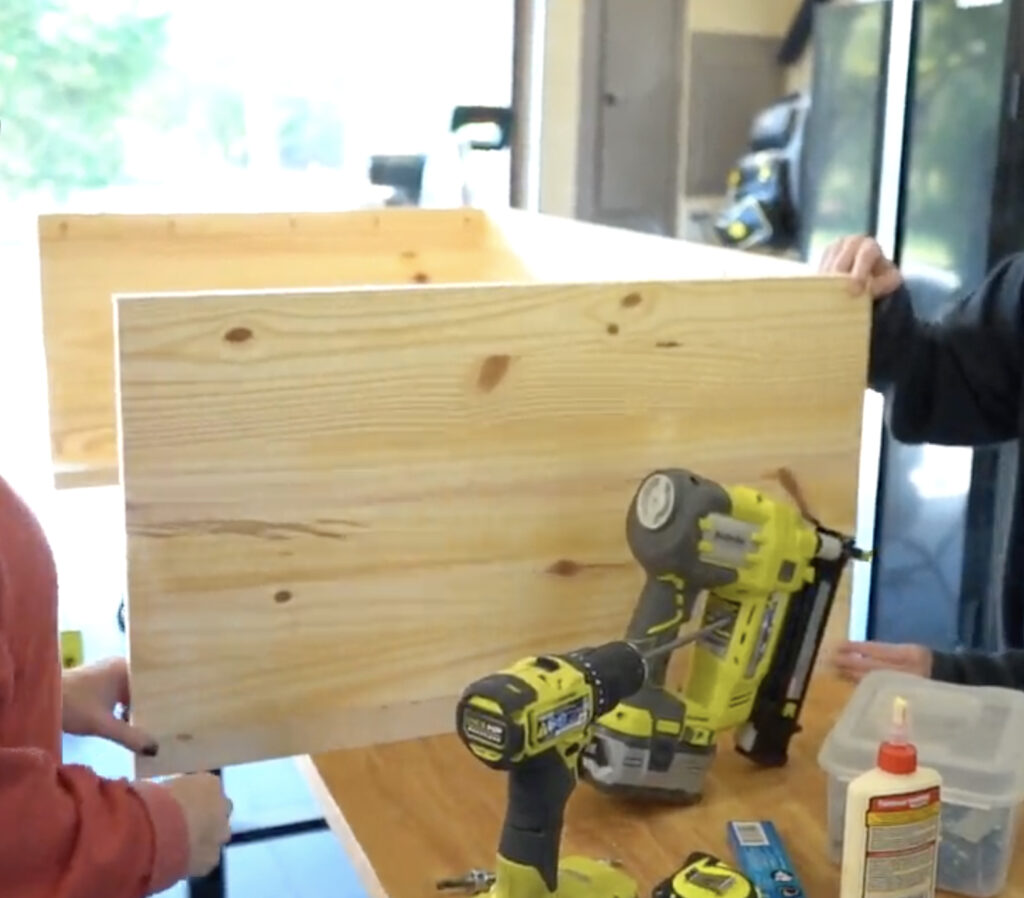
Cut additional pine panels to fit the inside of the console sides and top. These cover the supports and pocket holes, giving that seamless “waterfall” finish. Use glue and brad nails to attach.
Step 7: Sand, Stain & Finish
I made my own custom stain mix using three Varathane colors:
- 2 parts Natural
- 1 part Golden Oak
- A splash of Weathered Gray
Mix them together in a small bucket or tub, stir, and apply with a cloth or brush. Sand all surfaces well before staining — I used my Ryobi Corner Cat, but any sander will do.
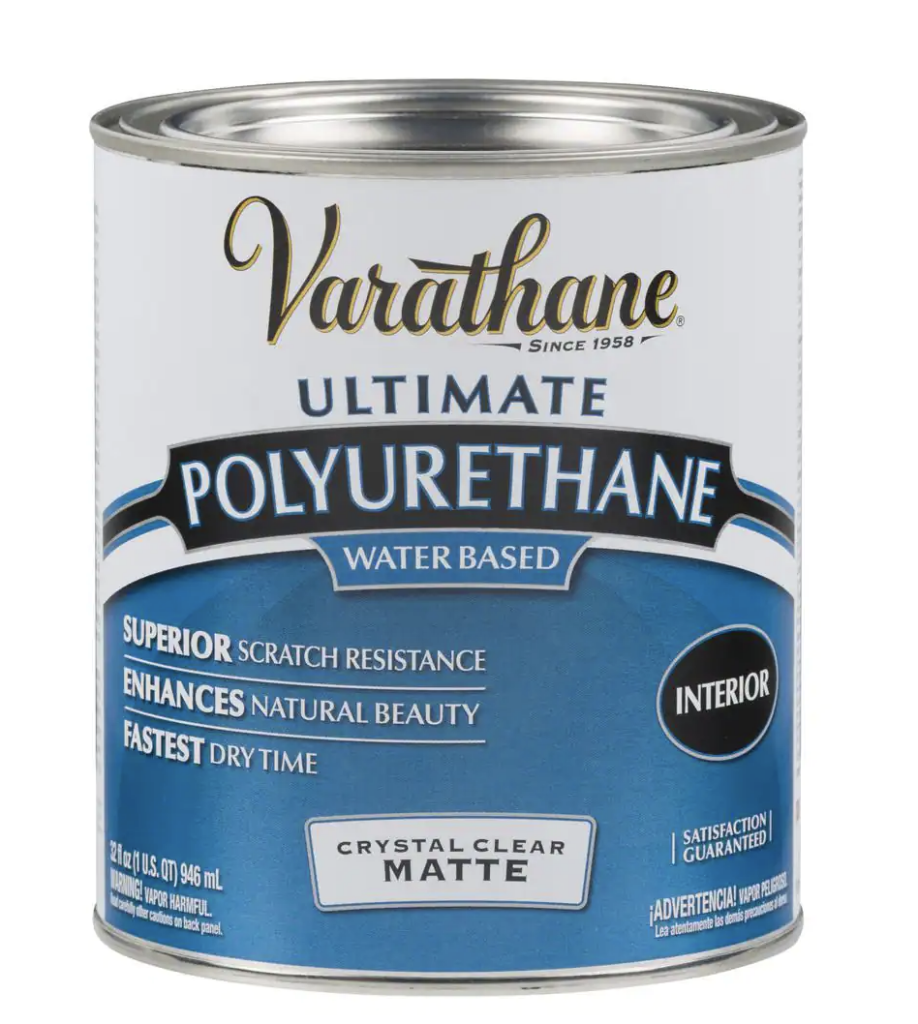
Top it off with your favorite clear coat — mine is this poly!
Free Printable Console Plans
DIY Waterfall Console Table
Tools
- Miter Saw
- – Kreg Jig (pocket hole system)
- – Drill/driver
- – Orbital sander
- – Clamps
- – Tape measure & square
Supply List
- 3 – 2×12 pine boards @ 8 ft
- Wood glue
- 2 ½″ pocket hole screws
- Stain Varathane custom mix
- Polyurethane or spar varnish
Instructions
- Instructions:
- Cut the 2×12 boards to size for the top and sides.
- Drill pocket holes using a Kreg Jig where the boards will join together.
- Assemble the base: attach sides to the top with glue and screws to form the waterfall effect.
- Sand thoroughly until all surfaces and joints are smooth and flush.
- Apply stain, let dry, and seal with polyurethane or spar varnish.
- Style and enjoy your new modern DIY waterfall console table.
Want the full cut list and dimensions laid out step by step?
Download the Free Plans Here!
More Small-Space Builds You’ll Love:
DIY Waterfall Console Table
Build a stunning, custom console for under $100 with just a few tools and a weekend. Don’t forget to tag us if you build one — we love seeing your projects!
FAQ: Building a Waterfall Console Table
Q: What is a waterfall console table?
A: A console table with continuous “waterfall” edges where the top flows seamlessly down the sides, creating a modern, clean look.
Q: How much does it cost to build this?
A: This DIY build costs under $100 using affordable pine boards.
Q: Can I change the dimensions?
A: Absolutely! You can easily adjust the length or height to fit your space.
Q: What finish works best?
A: We used a mix of stains for a warm, modern look, but you can customize with any stain or paint.

How many boards and project panels?
There is no link to the video.