Hey guys!
I made my girls some window panels for their room today. These are so easy to make, and can go in pretty much any room of the house. If you can handle a hot glue gun, you can master these. I added some stripes to the girls’, but you can totally skip that part for a neutral panel.
Here is how theirs turned out!

For the fabric I use this drop cloth from Lowe’s.

This is a long drop cloth that is already hemmed on all the edges. One drop cloth will make 2 long valance… Cheap!
I always start by cutting the drop cloth in half which leaves me with 2 pieces that are about 4′ x 7.5′.
For those of you that want to add some stripes… Here is where I did it. If you don’t, just skip to the next part!
I used blue painter’s tape to section off a few stripes at the hemmed end of both pieces.

Next I used acrylic paint and foam brushes to fill in my lines… Easy!


That’s it for the lines! Let the paint dry and you are ready to finish them off!
Now I added my top hot glue hem. I cut my panels 2″ longer than the finished length I wanted them.

Next, I folded that end 1″ and ironed it.

Then I folded it again and ironed the fold.

Here is where “Old Trusty” comes in…
I used my hot glue gun to hold down that fold. This is my hot glue gun. Don’t judge… It’s been very loved.
I bought this one at Walmart and it is my very favorite hot glue gun. And it’s $6. Best power tool a mom can buy.


That’s it! Once you glue that hem down the panel is finished!
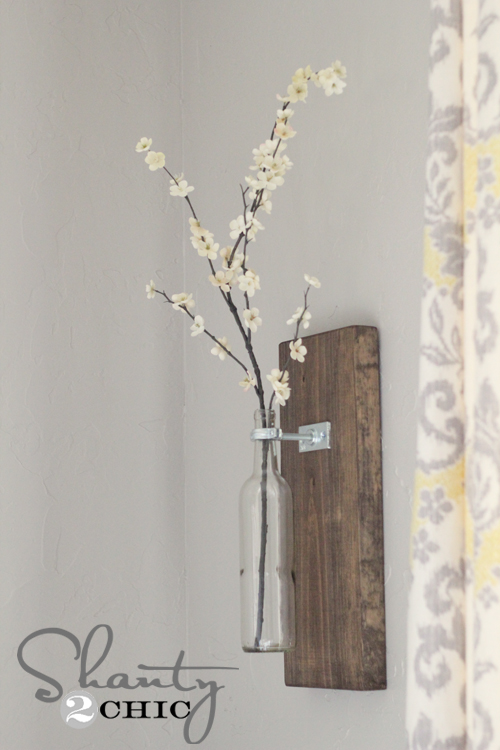
This is what I did for the hardware. I love wood drapery hardware, but it costs a pretty penny. So… I made my own for my bathroom a while back and decided to do the same here!
Here is what you will need…
Wood pole from Home Depot or Lowe’s. You can have them cut it to the length you need it.
I use these rod brackets from Lowe’s. They are in the wood section by dowels.

I also use these finials found in the same section at Lowe’s.

I cut the wood pole to the size I needed and gave everything a coat of my NEW fav…

You can find Rust-Oleum Ultimate Wood Stain at Lowe’s as well. Loving the Kona color…
I attached the wood brackets to the wall with screws and hung everything up. To attach the finials you just screw them into both ends of the pole.
For my drapery rings I used these that I found at Lowe’s. You can also find these at Hobby Lobby.


Just clip your panels up and that’s it!
How easy are those? They can be easily customized, or just left plain and simple. And the best part… No sew baby! Here are the girls’ all finished!


Hope you like them! These really can be used in every room of the house. You can customize them so easily and they can be made in no time at all!
If you like them, I would so appreciate some pins and shares below! Hope you have a great Friday night!
Thanks so much!!
~Whitney


I love the panels, but what I realllllllly love is the paint color on the wall! Do you happen to know what shade it is??
You are awesome! I love that you did that without sewing bc I SEW can’t! (Sorry, that was bad.) Love it and repinned. Thanks!
What a great tutorial! I’m always looking for cheep answers to my curtain nightmares!
OH and fyi in the bedroom its thick enough to just put a soft glow in the room in the morning!!
DID IT!! Thanks a bunch my new home slider had nothing because curtains that size were $$ pricey $$ couldn’t get myself to pay that much for something I didnt “LOVE” So did the bedroom with out a cute in the middle since I never open and when i do its off to one side. loved it so much did the living room slider also!! Split that one down the middle so they could tay open!! thanks for the tip, the home depot here in california the 10×15 was about $28. but left a bunch to work with on an 8′ door wall.
I have been a curtain maker for 30 years and these are the best no sew curts I’ve ever seen!! I’m going to make some for me ! 🙂
Just stumbled across these pin pintrest… Well try these once we move… Also I love your name 😉
Just LOVE you girls!!! I am looking at my windows, going hmmmmm
Painters Drop Cloth…brilliant…going to make these this weekend. Thanks for the DIY Lesson.
Very well done and thanks for the idea…to the fabric store I go…
just made these for two smaller windows in my bedroom and they turned out great! thanks for the “how to”. 🙂
Found you on Pinterest. LOVE THIS IDEA.
Yes it is Kelly! 😉
I can’t tell you how happy I am that my friend pinned this post today! I’ve been all over the internet and 2 fabric stores trying to find inexpensive canvas that I could use for drapes. This made. my. day. 🙂
Great Marie!! Glad to help! Good luck… I would love to see them when you get them all finished! 🙂
Thanks so much!! Good luck on yours! 🙂
Awesome! a project I might actually finish!