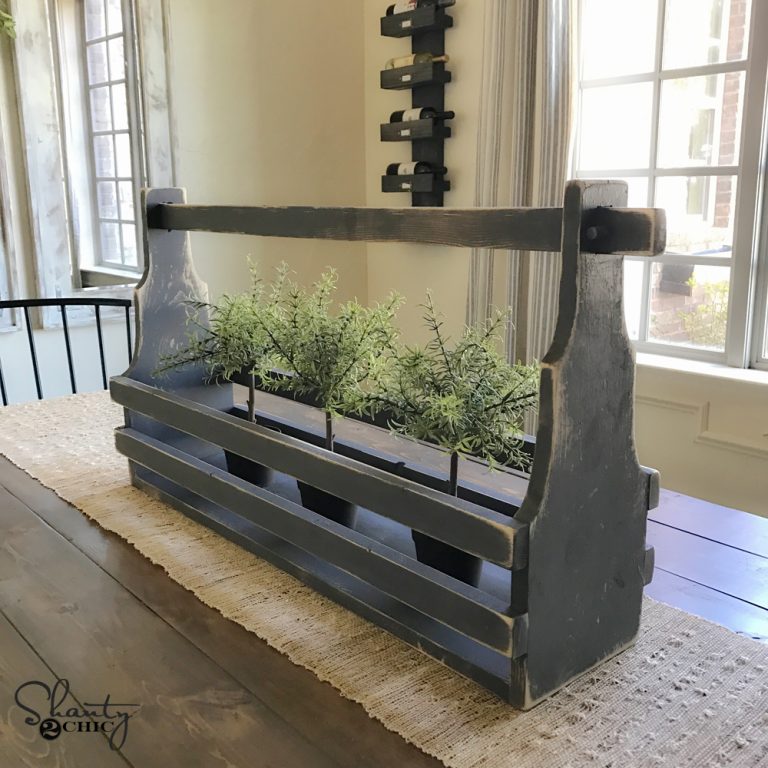
Hey guys! I built a super fun and functional vintage-looking soda crate this week. I got my inspiration from Ana’s! I modified mine quite a bit and I just LOVE it!
 Here’s how I made it for $12!
 I purchased 1 1×6 @ 8ft. and cut it down. You can use a hand saw for this!
4 @ 11″
3 @ 9.5″
2 @ 4.25″ (cut these after you build the crate for a snug fit)
 I joined one 9.5″ piece, with the two 9.5″ pieces, together with Gorilla Glue Wood Glue and my battery nailer. If you do not have a battery nailer, a hammer and finishing nails will be awesome!

Then, I added two 11″ pieces on each end and followed with glue and nails.
 I flipped it over and attached the last two 11″ pieces to form the bottom of the crate.

After measuring for the dividers, I pushed them down inside to form 4 cubbies. These will need to be snug so measure before you cut!
 For a fun handle, I purchased a bag of little candle sticks and a glass knob from Hobby Lobby (knobs are always 1/2 off now ~ WHOOP!)
 I then drilled a hole in the center of the candlestick (just large enough to squeeze the knob screw in)

 A little Gorilla Glue epoxy on both ends, I attached the knob at the open end of the candle stick and attached the base of the candle stick to the center of the crate.
I filled the cubbies with 32 oz. wide mouth mason jars and had a little fun:)

What a fun way to shanty up silver ware for a cook-out!
Or a fun centerpiece full of fresh flowers!


 Want to know how I finished it? Check out my tutorial on how to weather wood!
Thanks so much!
~Ashley

Started this as my first project building something with wood as I thought it looked the easiest! NOPE. I got the wood cut at home depot – mistake as they don’t cut cleanly and I had to do a lot of sanding and there were lots of splits at the edges. Then of course they are not pinpoint accurate so I am having a real job aligning it all to be as near square as it can be. Thankfully it should look rustic so the bits that aren’t square won’t look to out of place. I am keen to try more out but think I need to invest a bit more into the tools of the trade so to speak! 🙂
Just found this on Pinterest. I love it!! Pinning and sharing on my FB page too. Fabulous!
Super love this! If it weren’t so late, I would go chop saw some wood right now and get started! Tomorrow will be soon enough… 🙂
Lol!!! Good luck Katie:))
Hey. It really looks amazing …but how do you make the painting??
Cute project & a great tutorial! Thanks!
Hey Ashley, I LOVE your projects and I’m making one of these silverware crates this week. I’m also making the casserole dish holder at some point. I’ve already cut all my wood for both projects. I was wondering if I can feature you on my blog with links back to your posts and pics of your project. I’m going to show my finished product and then steer my readers your way for instructions. Here’s the web address of my blog: http://www.doodlesandstitches.com/ Thanks for all the inspiration and great project ideas! Let me know if that’s okay with you and I’ll let you know when the post goes live.
I just started this project today and of course the bottom pieces of wood were a little crooked but it still turned out great for my first one. I have the first coat of stain on it. I can’t wait to finish it. I am going to put a rustic handle that I bought from hobby lobby on the top instead of the knob. I love your site and your tutorials. Yall are just wonderful. Now my hubby has to share his workshop with me!!!!LOL!!!!!
What a fun theme! Filing that one away for later;)
Sent from my iPad
I love this project. I did it today but I had a problem. I followed your directions and cuts but for the life of me could not get the dimensions to work out. I ended up having to cut down one of the 11″ pices to 9.5″ in order for it to make the box. In the end it all worked out and looks awesome! I did mine in a turquoise-ish blue! Thanks for all the great projects! can’t wait to see what you come up with next!
I am sooooo sorry Ami! My brain is on summer vacation;) I updated the cut list! Thank you for letting me know!
Sent from my iPad