So, I have an amazing friend I have that I have mentioned about to you all before. Well, she is amazing for many reasons but the quality I will share with you today is that she will dumpster dive just for me! I can’t tell you how many times she has called me on the way to my house with a piece a funiture she jacked from someones trash. That’s where this story starts!
I get a call right after morning drop-off from Lauri. She is camped out on someone’s driveway guarding the most awesome broke-down rocking chair that someone tossed with the trash. Knowing it was the perfect addition for my nursery she not only stayed guard in her car so no one would take our treasure, she helped me load it in my truck in her pjs! It was quite a site… both in our pj’s and me in my rollers loading a broken (yet amazing) rocking chair into my pick-up!
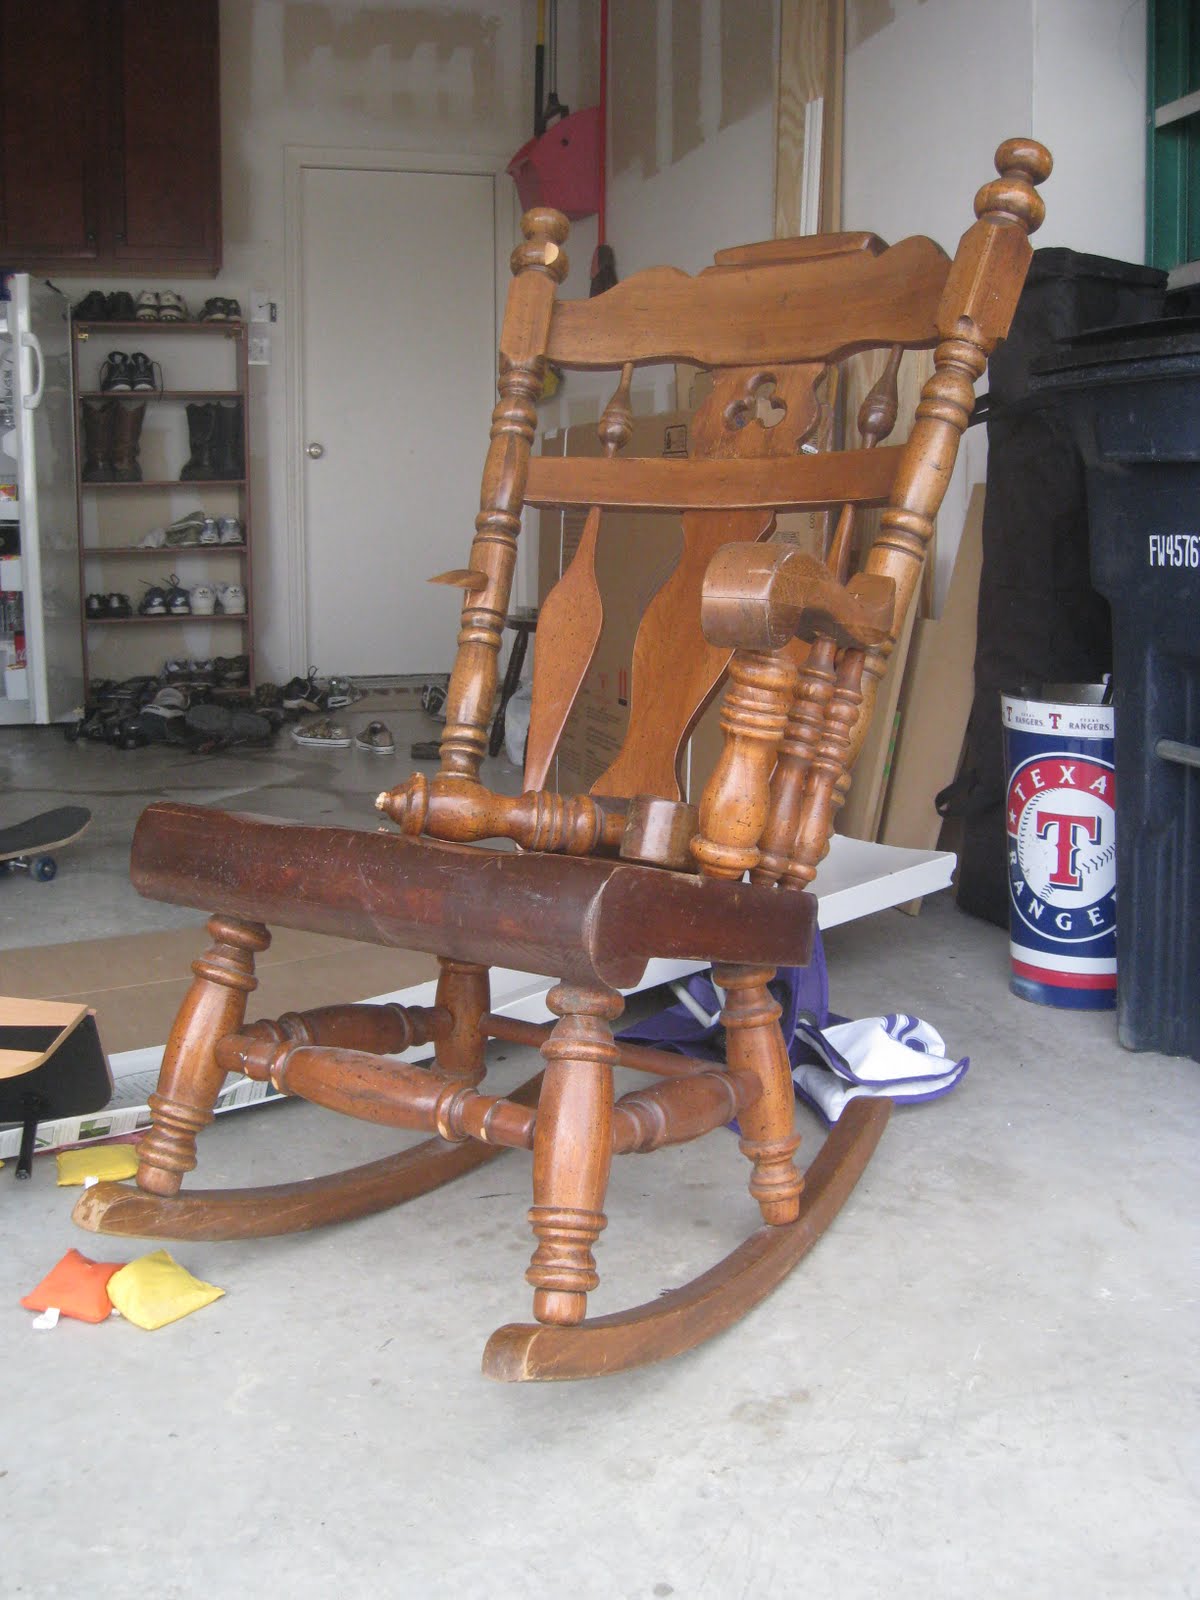
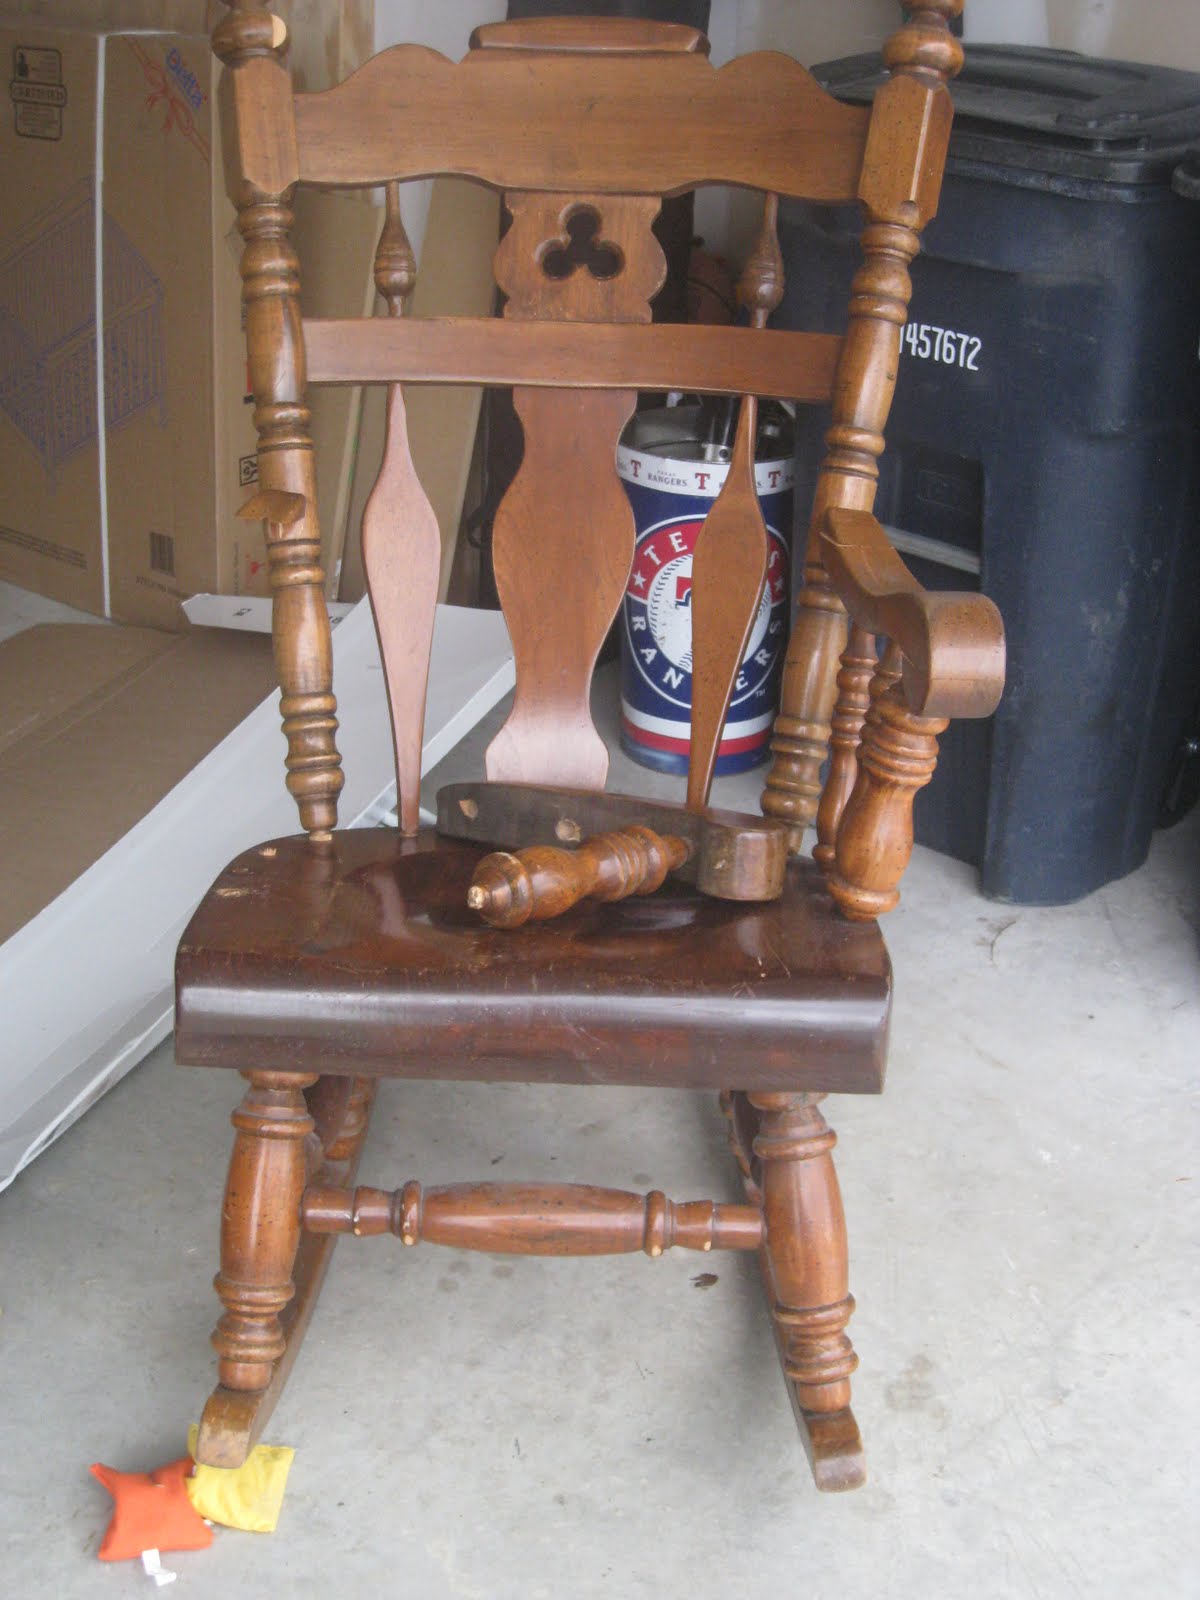
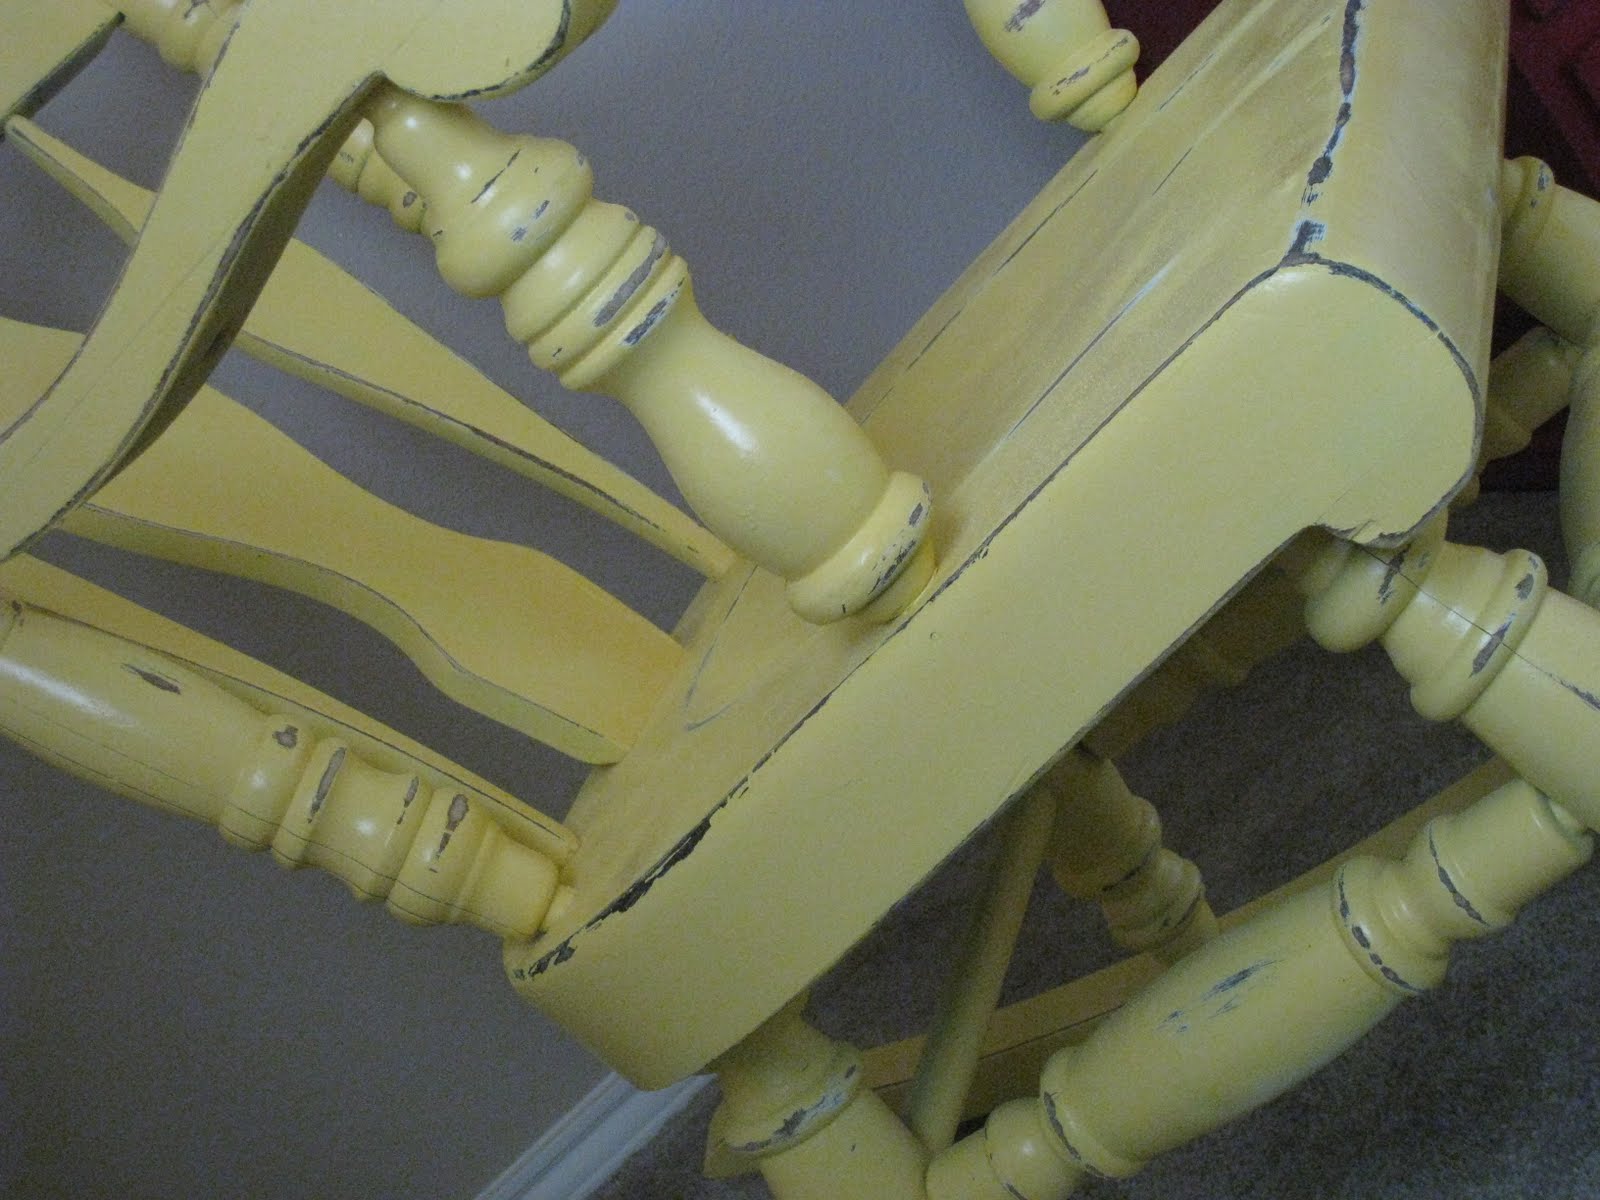
Fast forward 3 months and many cobwebs later and it was ready for rehab! As you can see one of the arms had broken off and was missing two of the spindles. There were also many cracks and pieces falling off……this chair was begging for some Gorilla Glue Wood Glue!
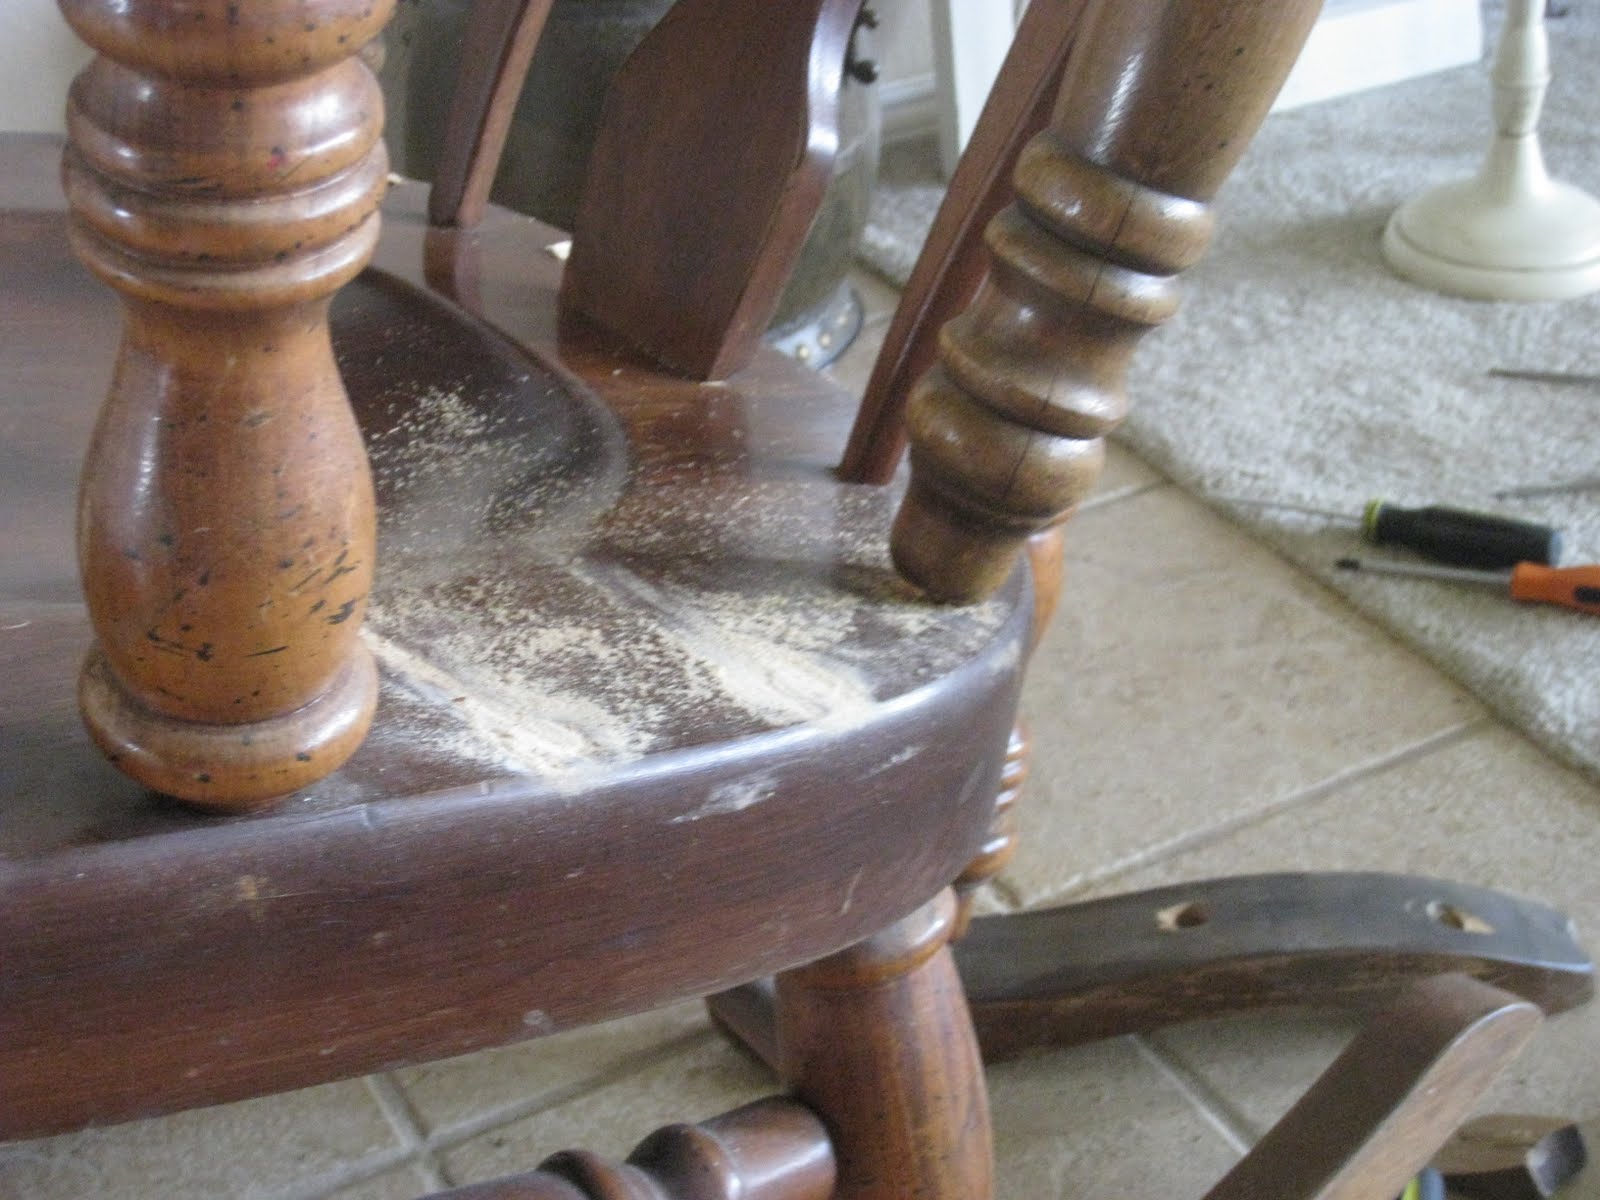
Because the spindles were missing from the broken arm rest, I sawed off the same spindles on the opposite side.
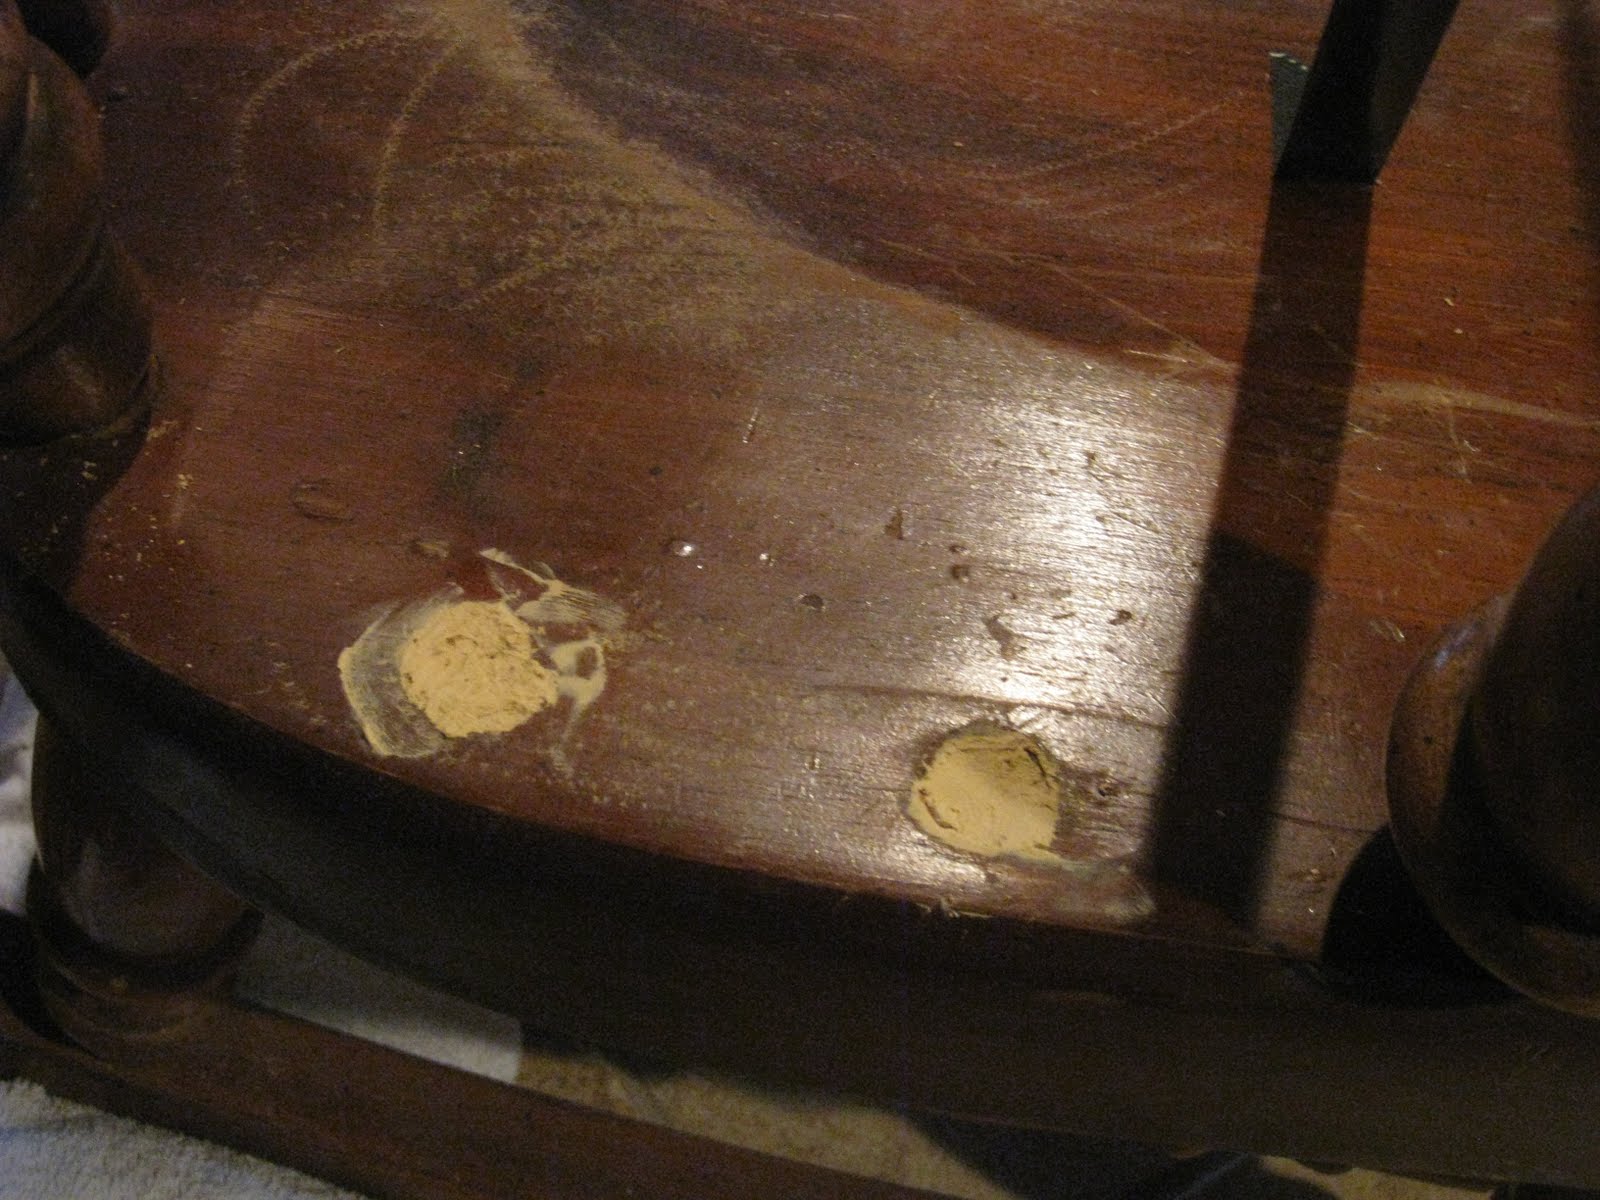
I then sanded the stubs down flush with the seat and filled the holes on the bad side with wood putty. To attach the broken arm I predrilled a hole though the seat and then drove a long wood screw up from the bottom through the spindle. I secured with Gorilla Wood Glue and it worked like a charm!
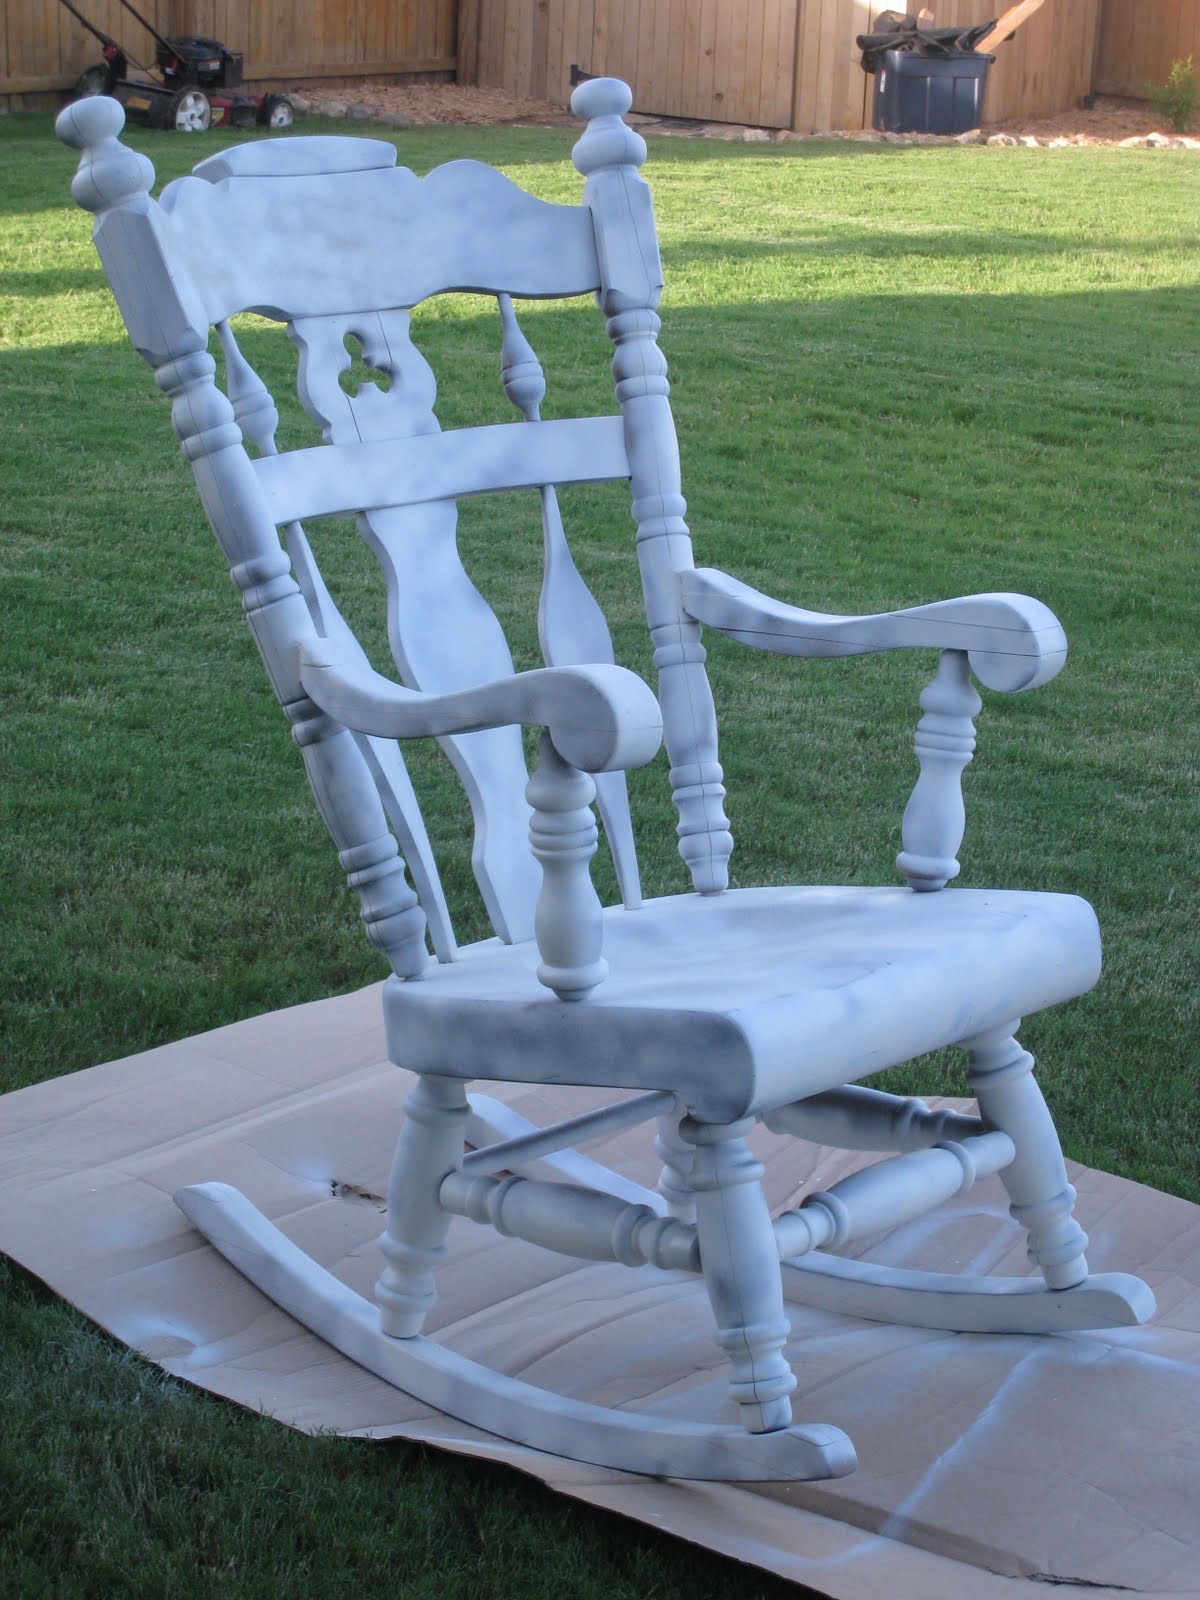
Because I have no clue who this chair came from or where it has been I opted for two coats of Killz (spray paint) before painting. This also helped reduce the coats of colored spray paint!

I found the perfect spray paint to match the baby bedding…and it just so happens to be our fav Rust-Oleum! The color is Summer Squash and it is the prettiest yellow I have ever seen!
2 coats later…..

I distressed the edges with my 3M sanding block…
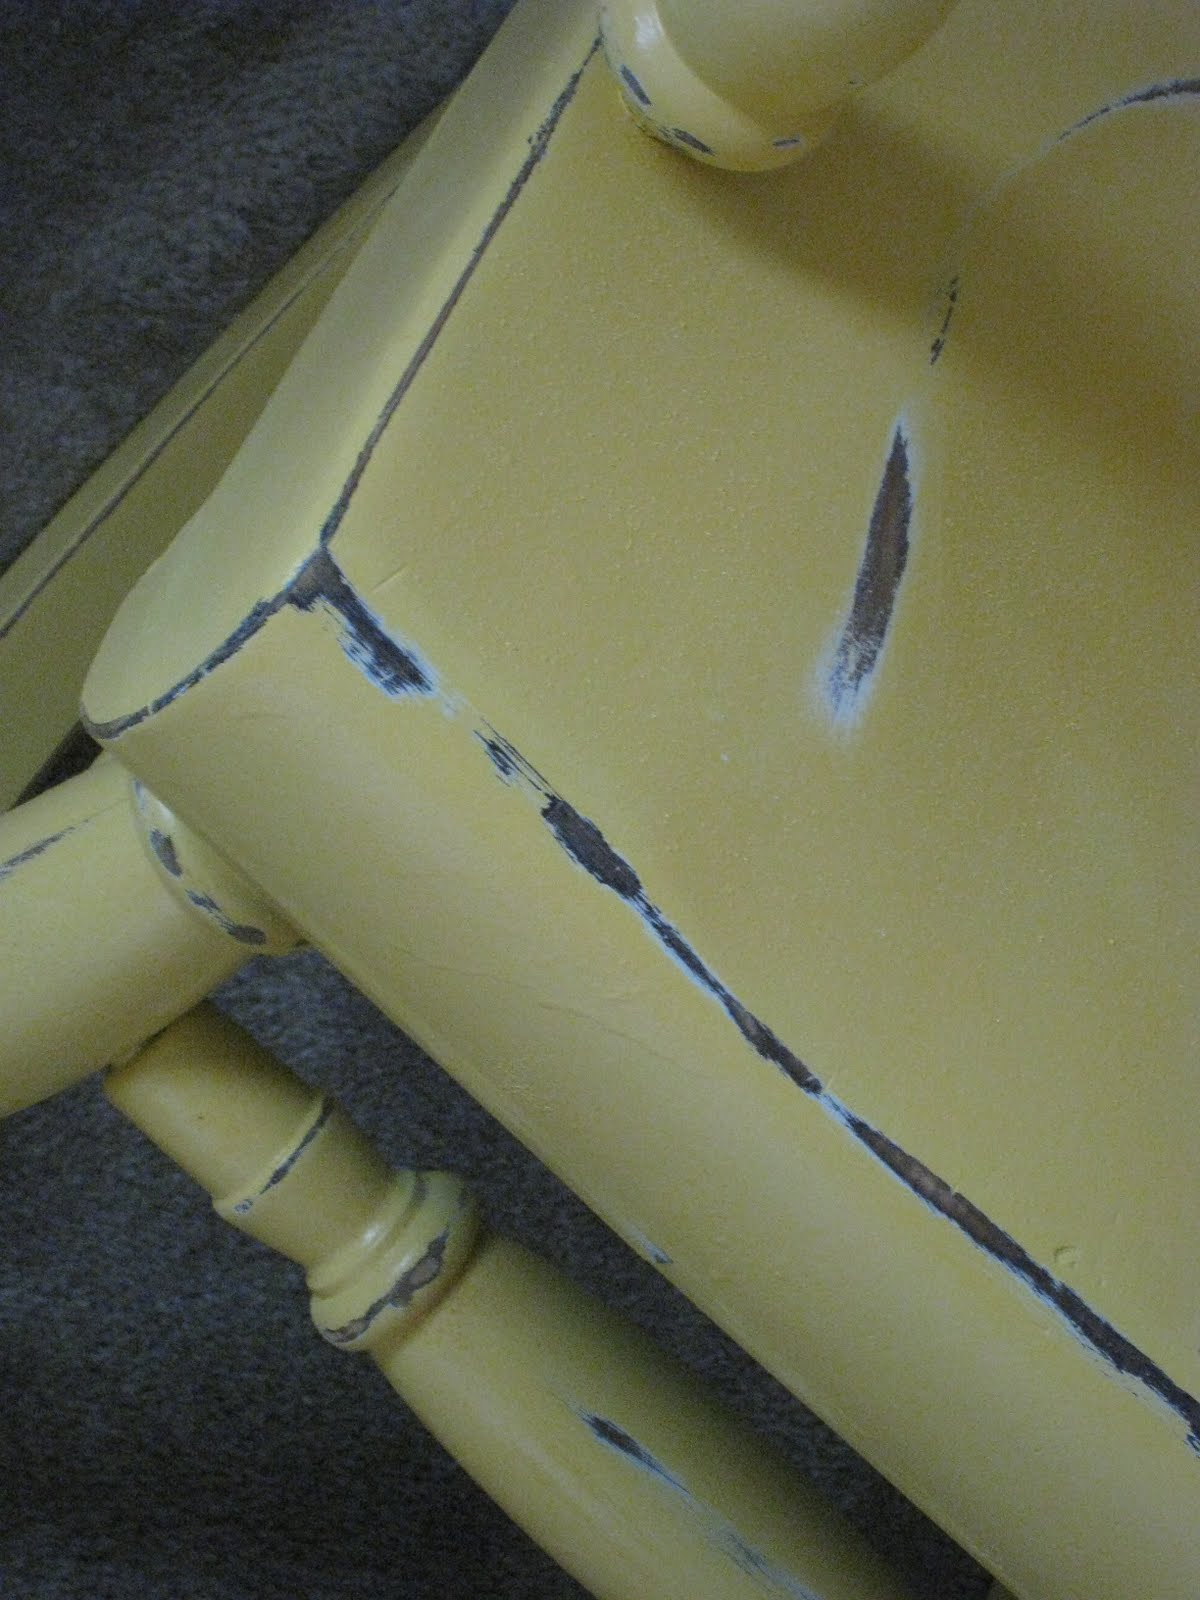
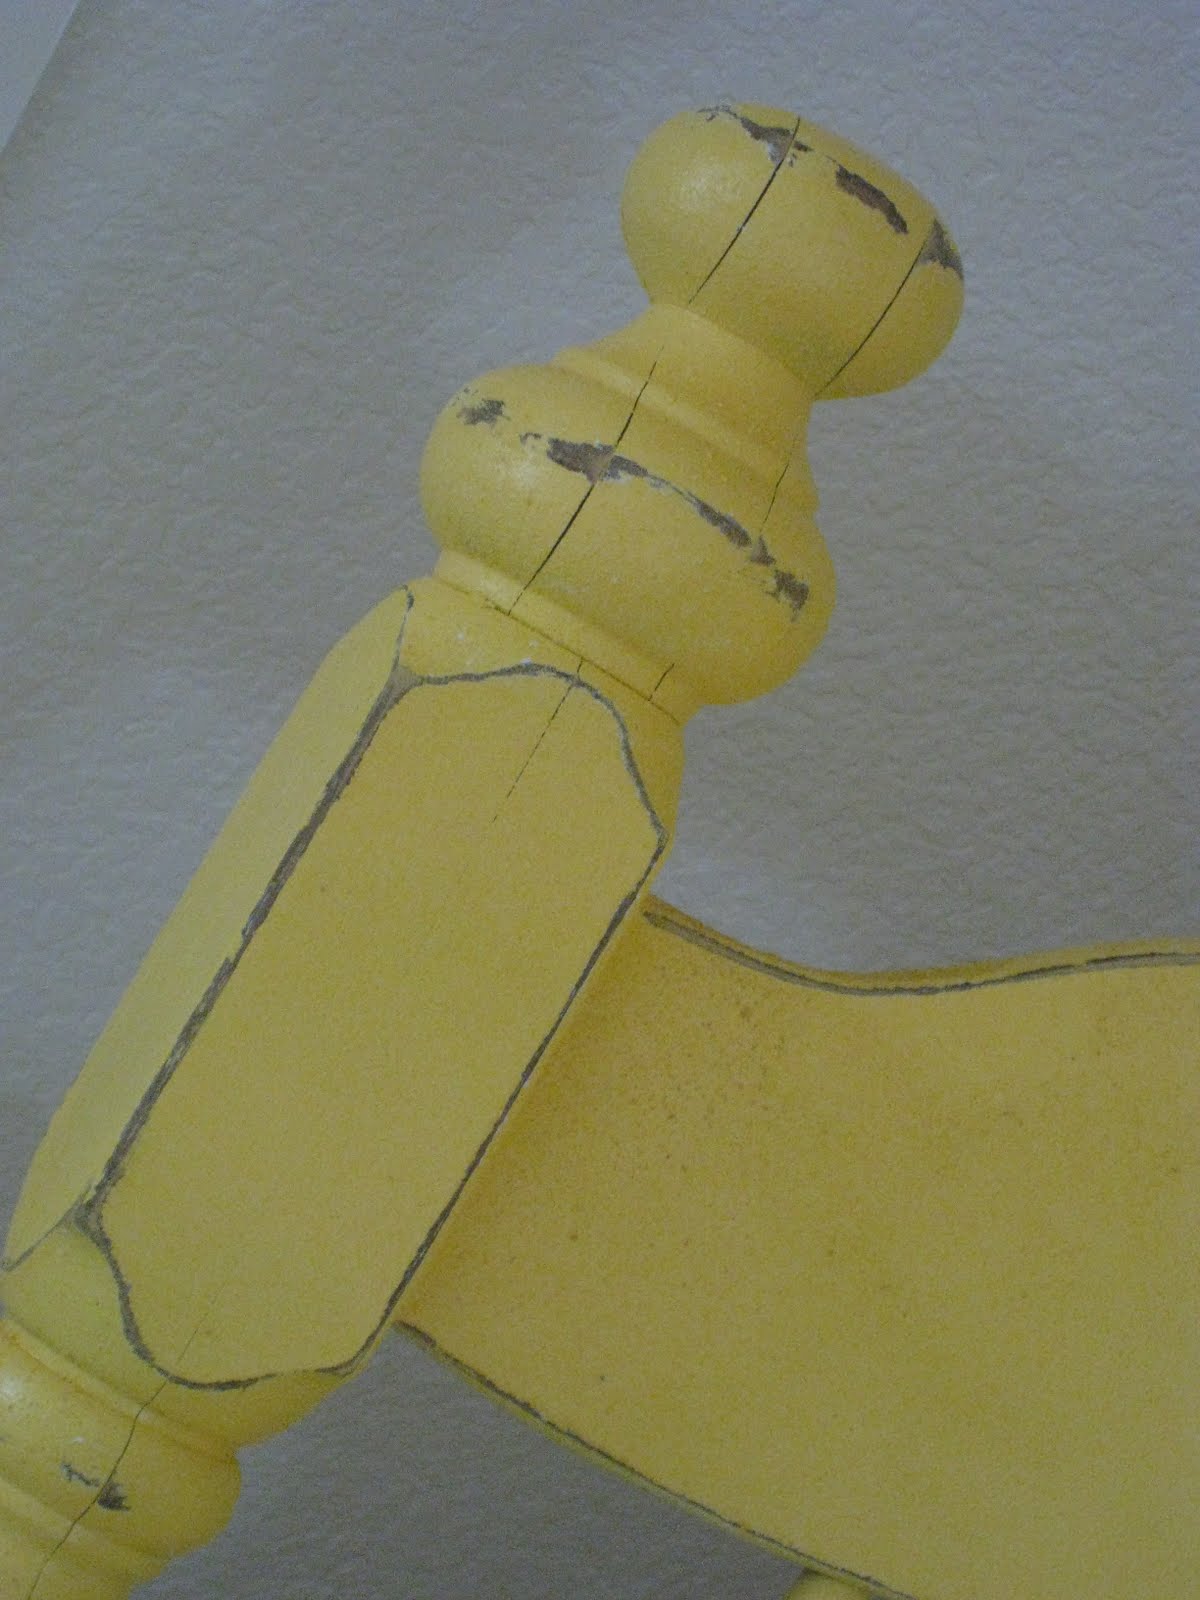
You can see cracks where I had to Gorilla Glue Wood Glue some pieces back on….I could have puttied over the cracks but I LOVE that you can see the cracks…adds to the worn look.


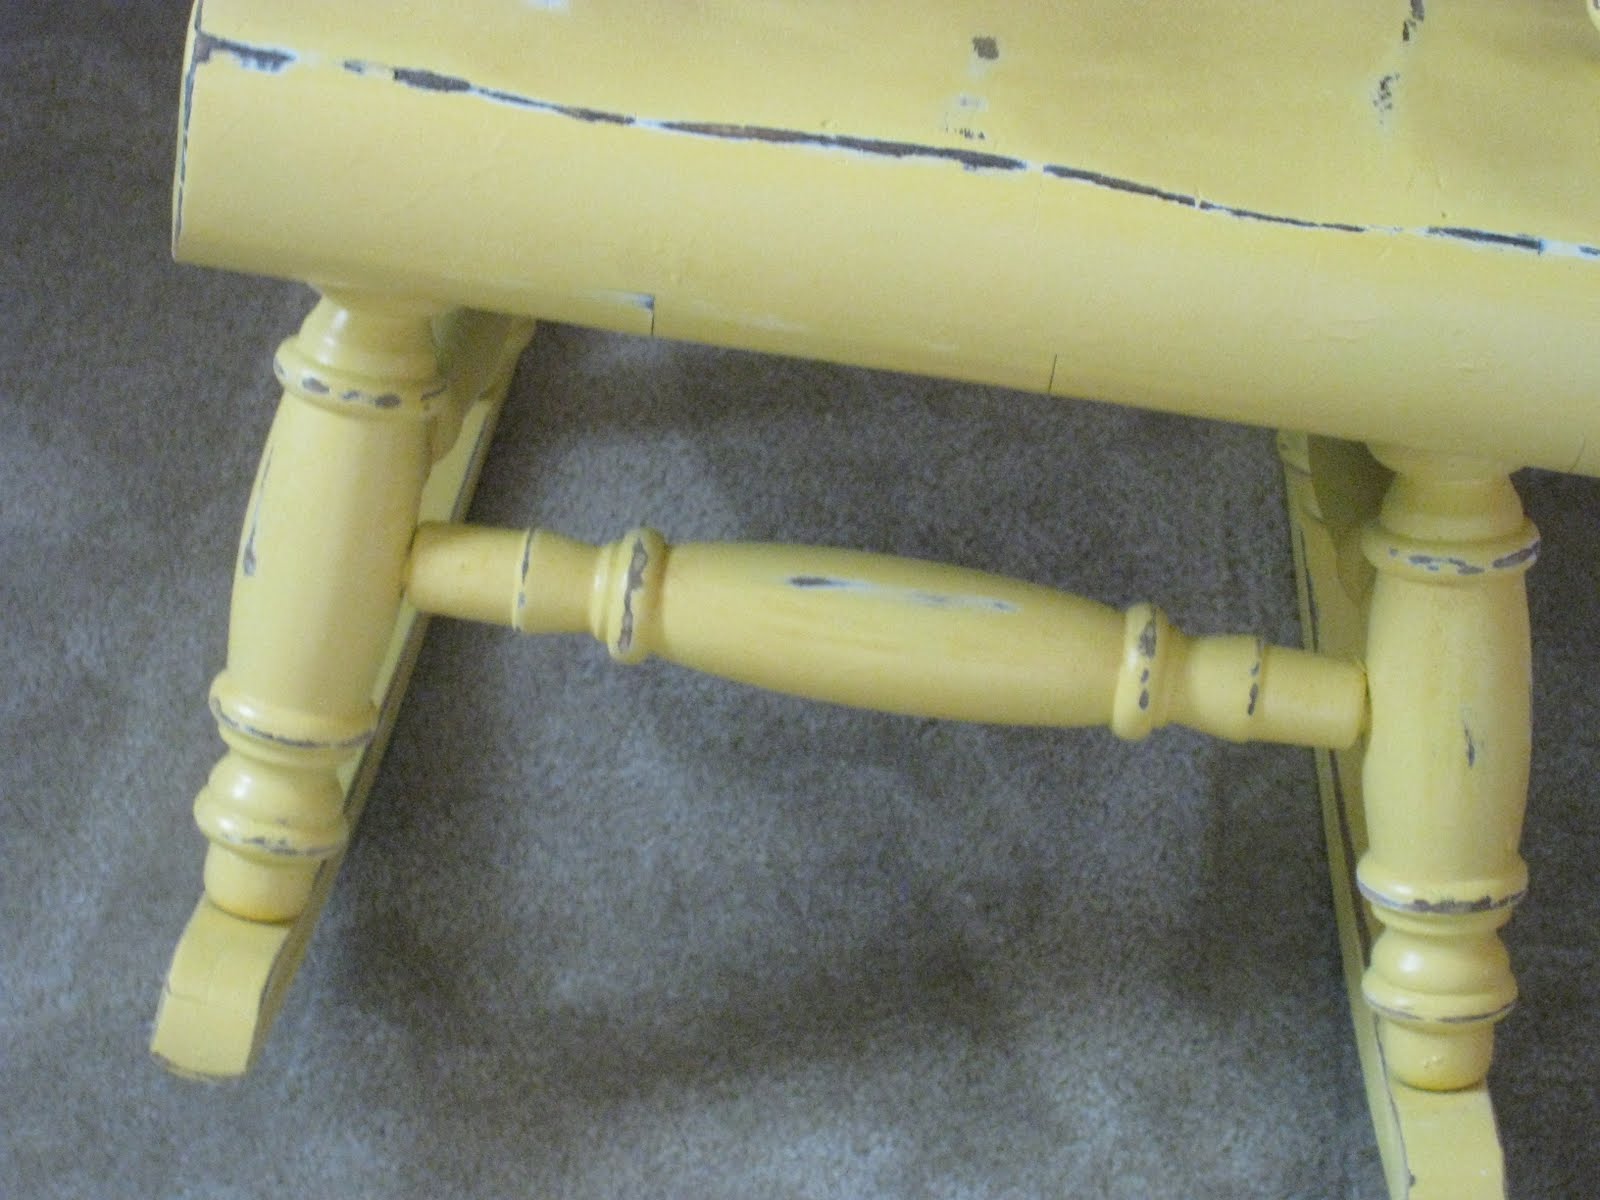
I love the seat! It’s solid wood and about 4″ thick!

Pictures don’t do the size of this chair justice! It’s a Grand Rocking Chair and solid wood! It just hugs you when you sit in it!


Did I mention it was FREE! Minus the $9 for spray paint! I owe this find to Lauri!!! This is the perfect rocker for my nursery and it’s such a focal point in the room. I can’t believe someone put it out with the trash but I am very thankful they did! Hope you all have a great week!
~Ashley
Stop by Kara’s Party Ideas for great inspiration for your next shindig!


Thanks for all your great tips and for sharing your tools of the trade! I'm new at furniture redos, but now that I've tried it I think I've caught the fever. You girls have some really great ideas. You girls are so talented.
I just recieved a hand-me-down family rocker from my mother-in-law for my little guy due in January.
I've been trying to figure out what I could do with it. I just have a couple of q's for you:
Did you have to strip off any of the previous finish?
Did you do any sanding before you painted?
How many coats of paint did you end up using?
Thanks for your help and all the great ideas!
Nine dollars!?! Wow! It looks fantastic! Thanks so much for sharing, I'll be linking in an upcoming Revamp Roundup.
That chair is so adorable, I love your blog its my fave its the 1st blog i visit everytime,so theres an award for you over at http://missyelpington.blogspot.com/
From Miss Yelpington xxx
I now follow you and by the way "AWESOME" blog… I will have to attempt a few of your projects!!!
Check out my blog… I am new to the blog world.
http://stinkeymonkey.blogspot.com/
oh this is soo so cute! what a great find! I love curbside trash days! Some people don't know the value of their trash. LOL
What a beautiful transformation! I wish my husband understood the whole distressing thing… he doesn't understand why you would paint something and then scuff it up!! I think it is just gorgeous and adds so much character!
Hannah
http://youngancrafty.blogspot.com/
I love it! The color is perfect, great job!
Great job!!! Love the color!
lifeofperks.blogspot.com
I love it!!!! Looks even better in person. Really cute addition to the room. We need to find one for Whit.
Love it!
Learning makes life sweet.......................................................................