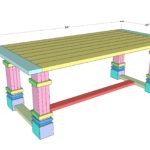
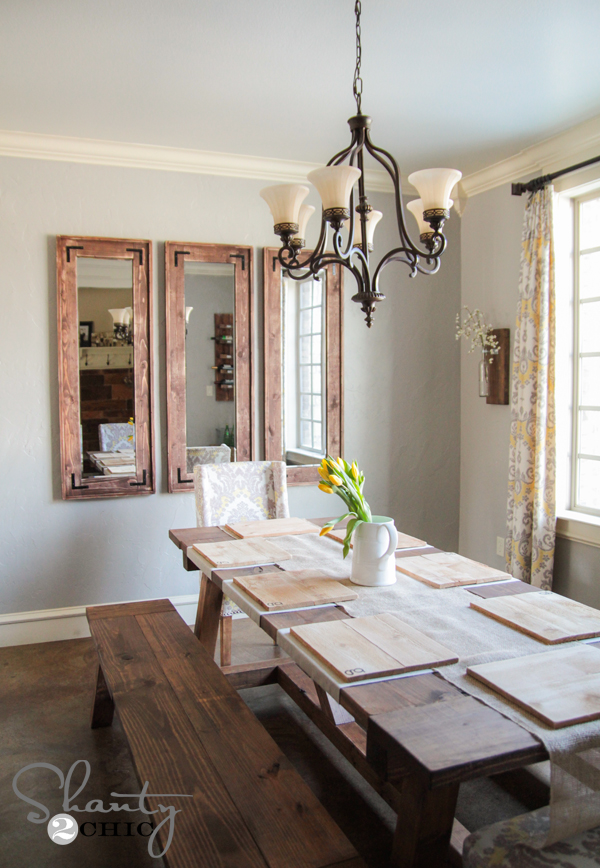
Happy Wednesday everyone! We are so happy to be rounding the final curve of our flip house and getting it ready to put on the market. Today I want to share the DIY modern farmhouse dining table for the flip house! This may be one of my favorite dining tables I’ve built yet… and that list is long! Let’s get started! I have added a link to the printable version of these plans at the bottom of this post!
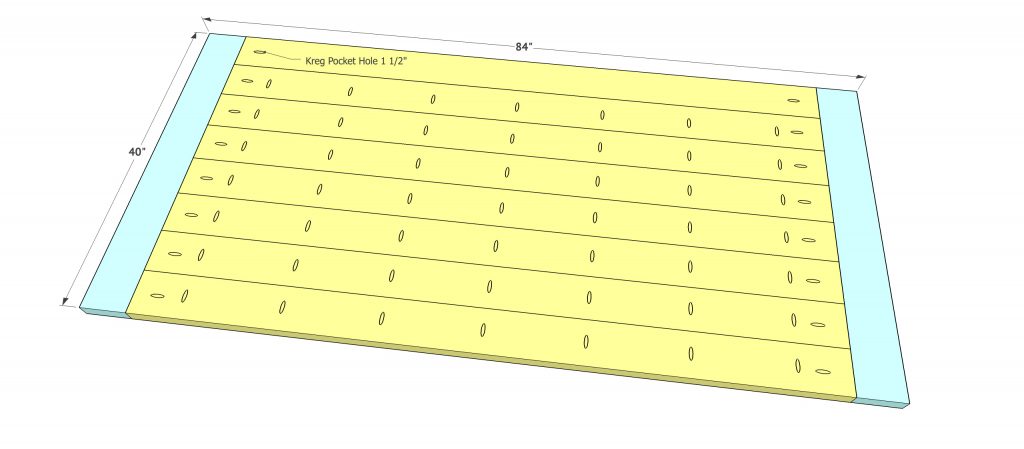
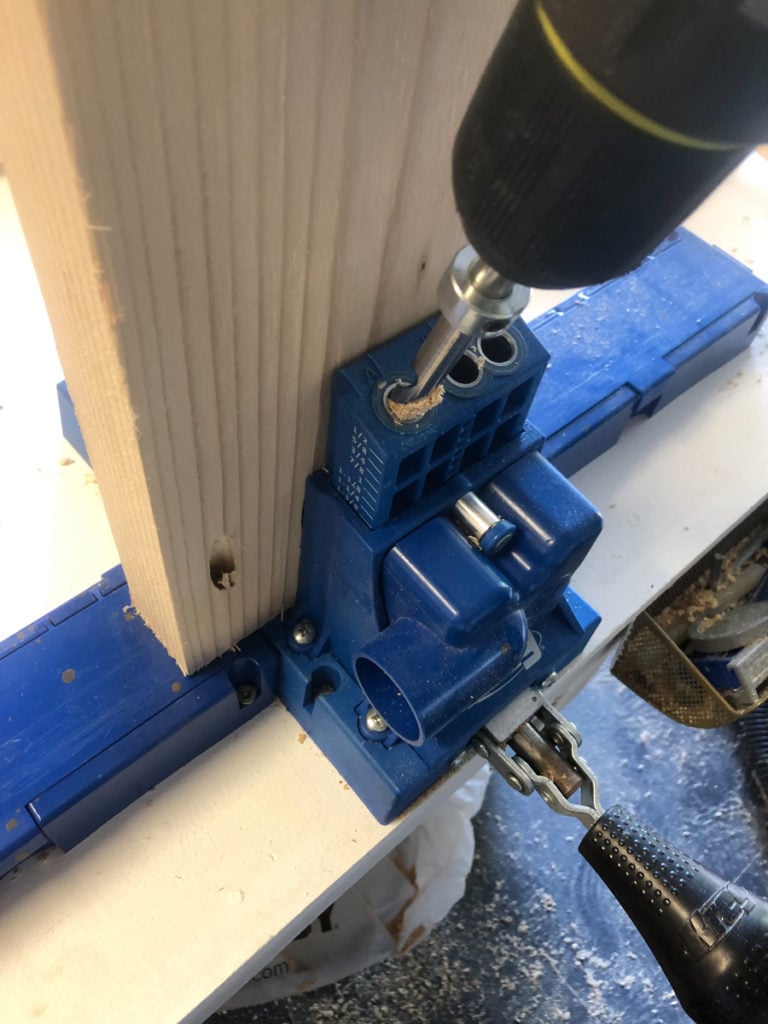
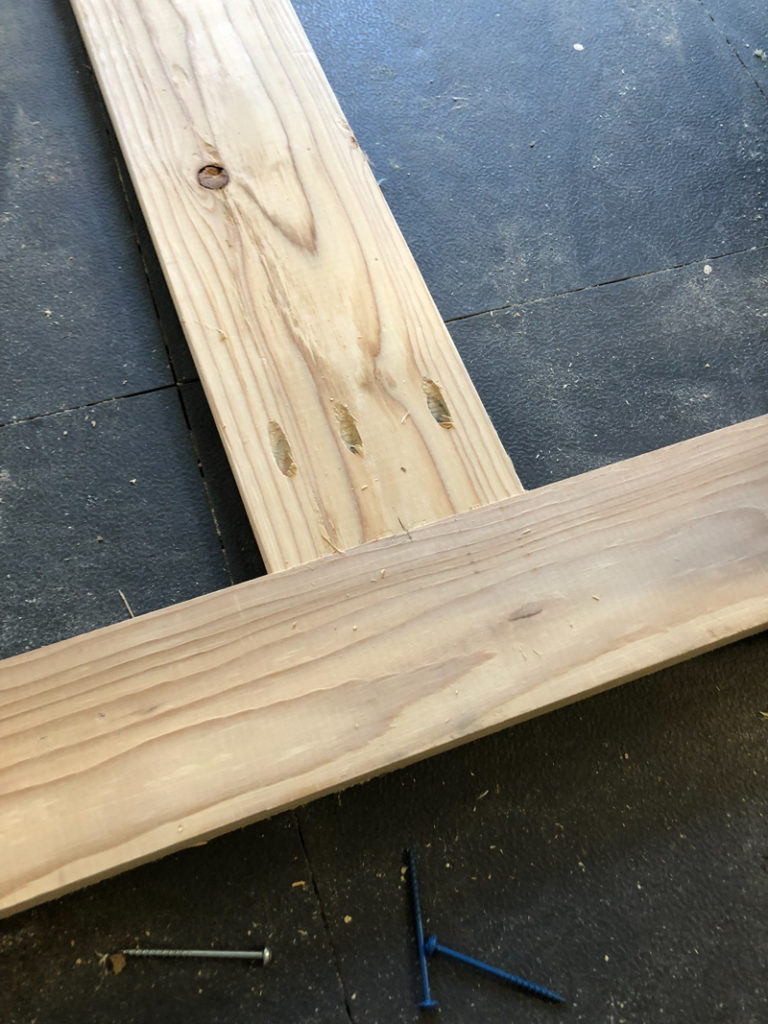
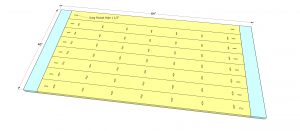
The first step to building this table is creating the table top. These are 2×6 boards that we ripped down to 5”. We added 1.5” pocket hole screws down one long side of all but 1 of our plank boards, and also at the ends of each plank board. We attached the plank boards together first using 2.5” pocket hole screws. Once all plank boards are attached, line of the boards on each end and mark the exact measurement of the breadboards. Attach the breadboards using 2.5” pocket hole screws.
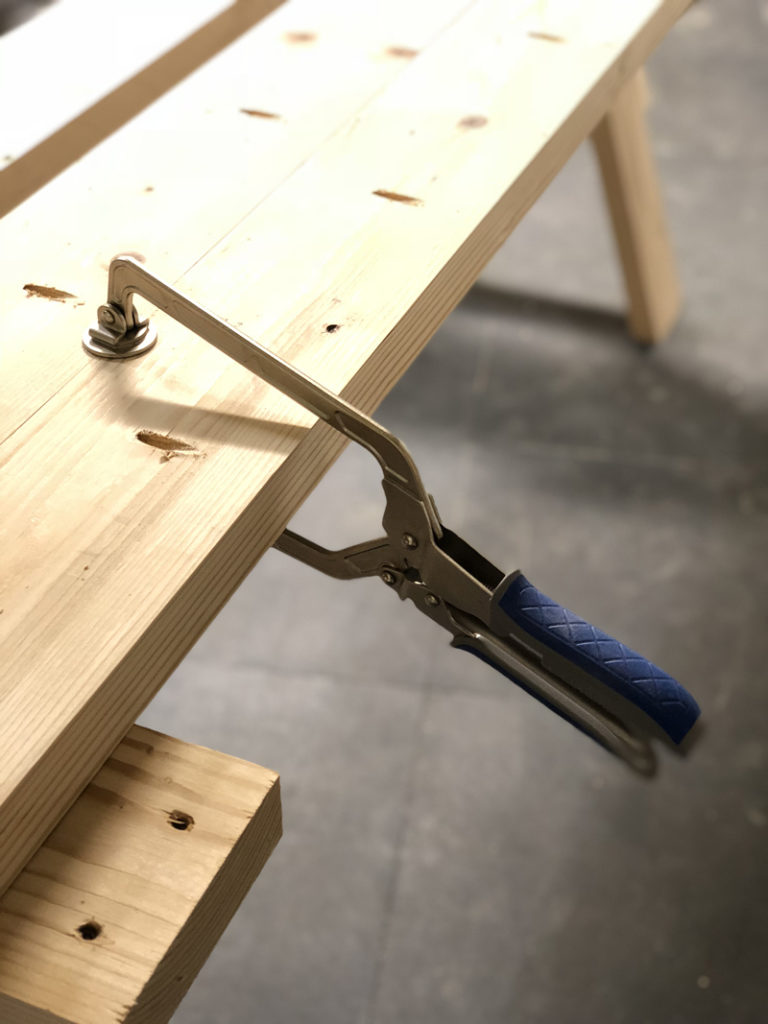
One of our favorite tools to use on this part is the Kreg Face Clamp. It allows us to flatten the boards easily. We just run it along the seam as we go down each board. You can see it HERE on Amazon.
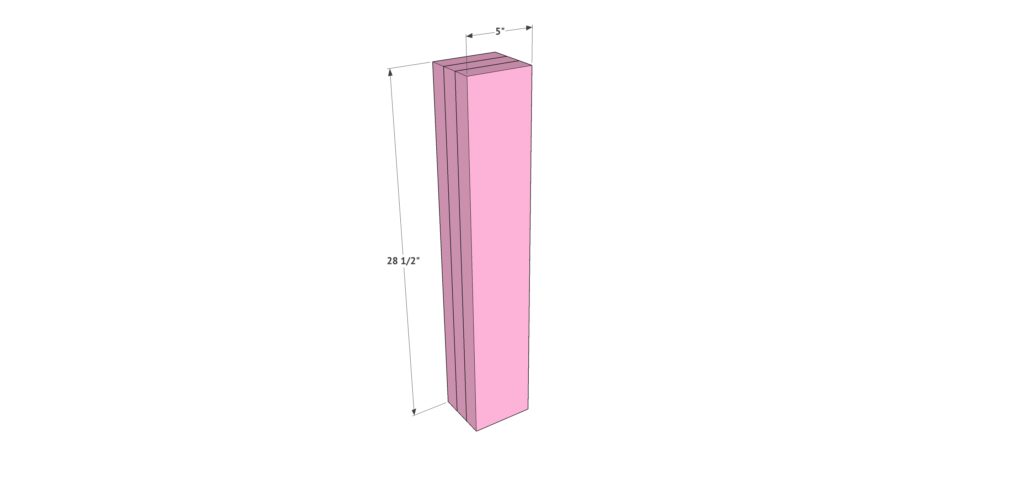
Now it’s time to build the legs. You will build 4 identical leg assemblies.
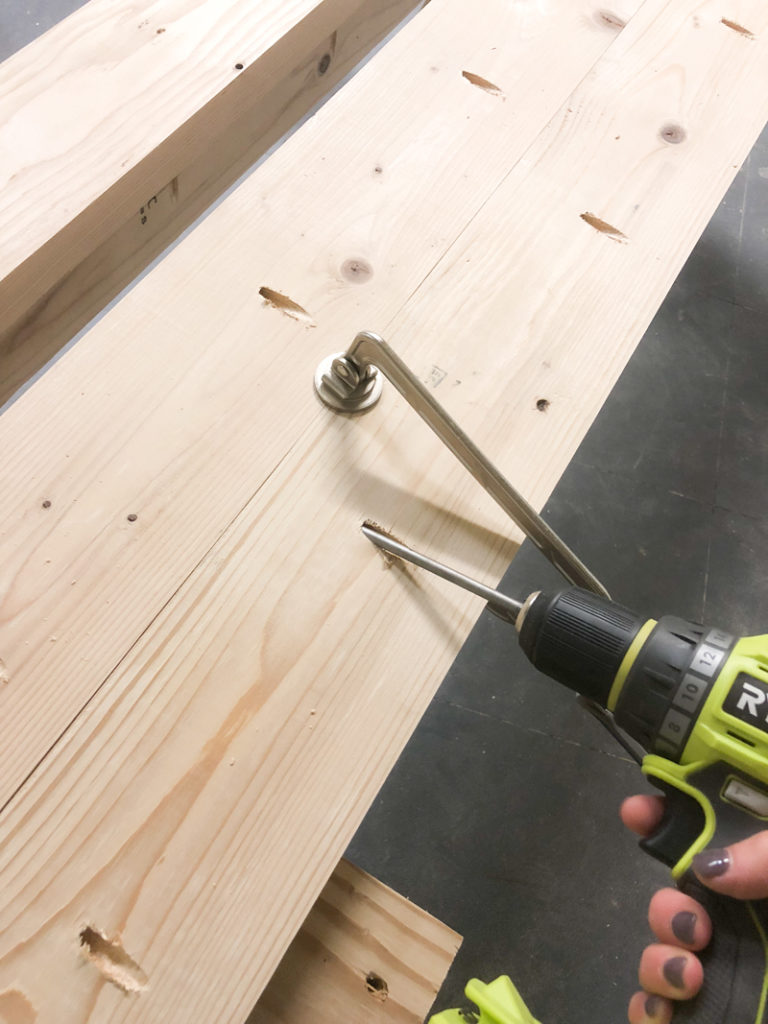
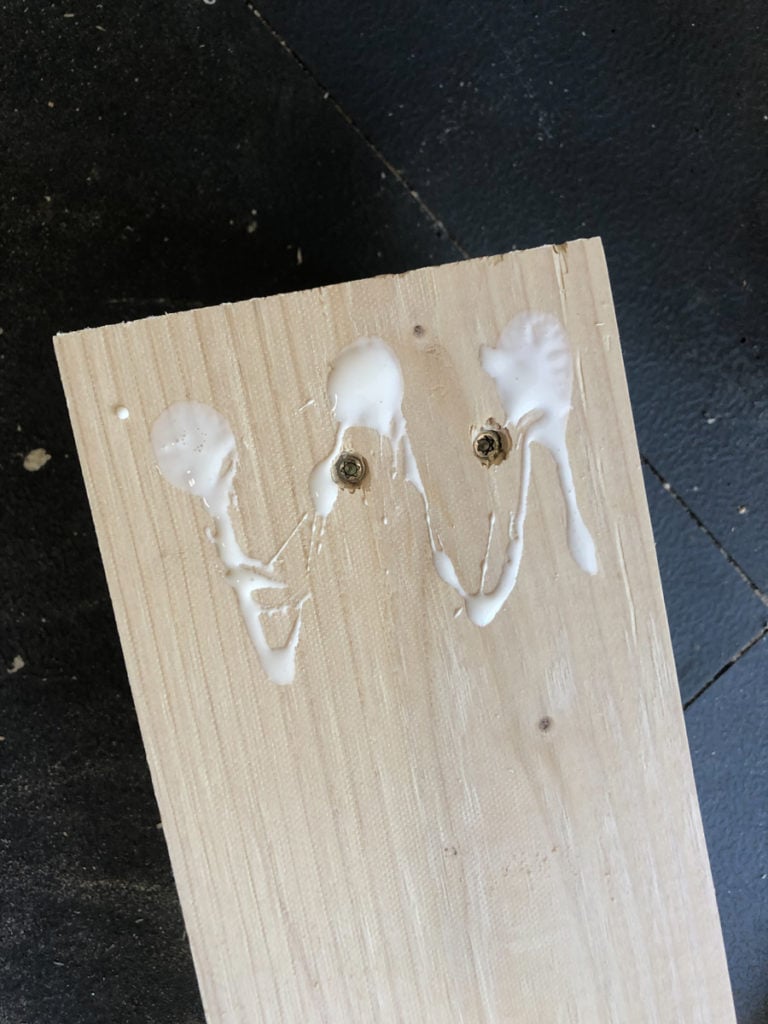
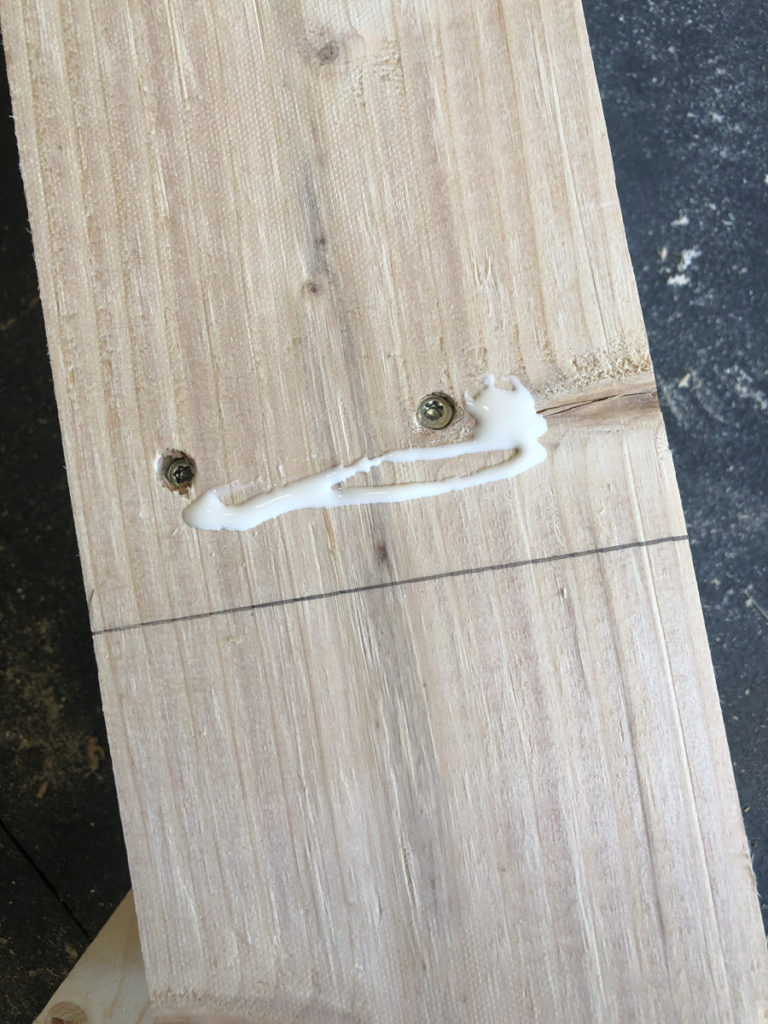
The first step is to laminate 3 boards together. Add a good amount of wood
glue between each board, and attach them using 2.5” wood screws through
the outside pieces and into the inside pieces. I lined my screws up 5.5” from the top and 3” from the bottom so that the holes from the screws would be covered with trim in a later step.

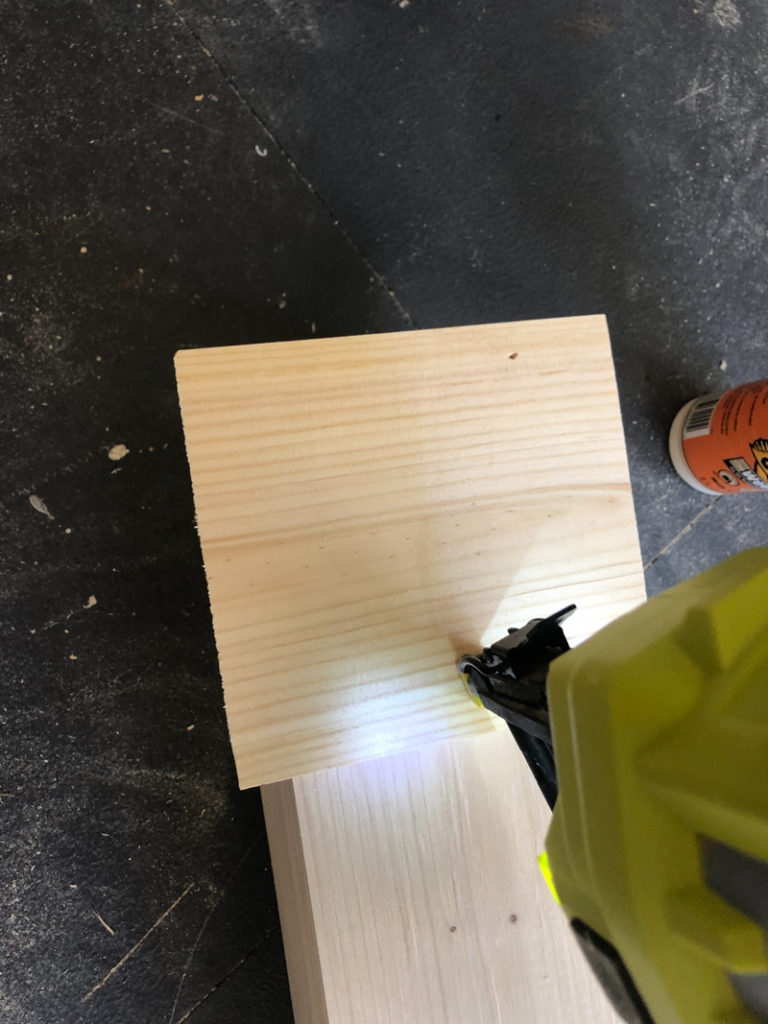
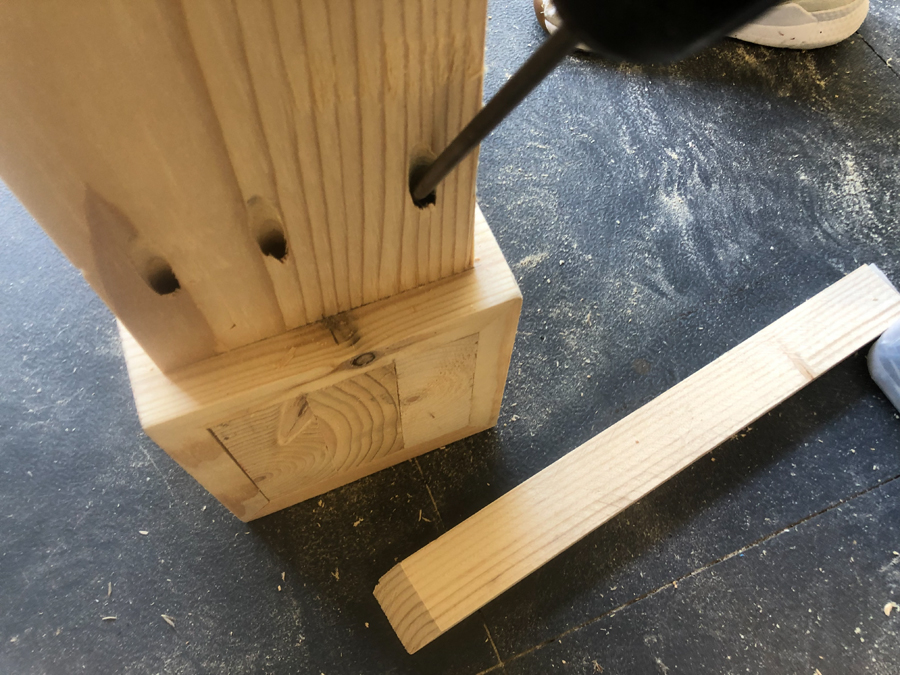
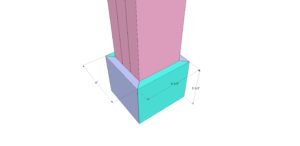
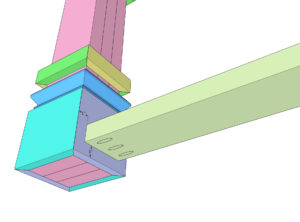
At the bottom of your legs, measure and cut 1×6 boards and attach them using wood glue and 1.25” brad or finish nails. Each corner is cut at a 45˚ angle.
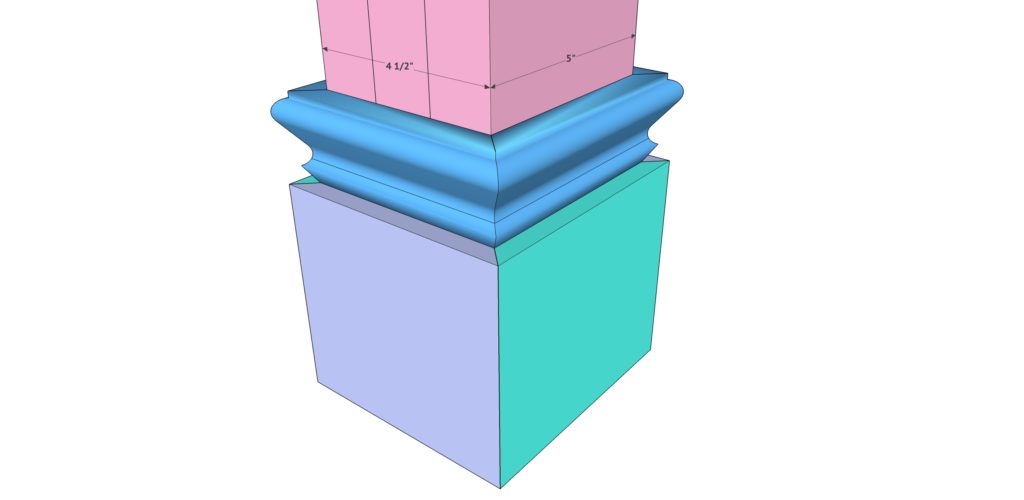

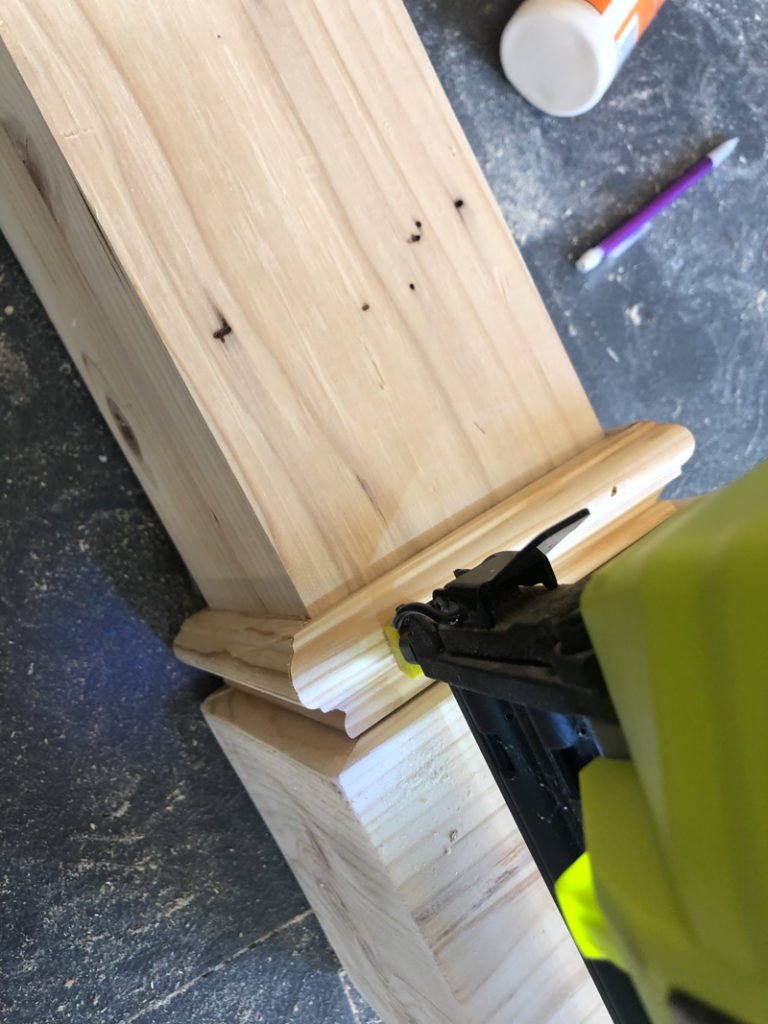
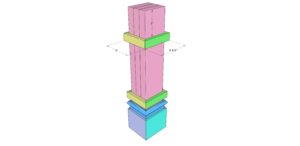
Now add the trim. I used 1.5” wide casing, but you can have fun with this part to get a very custom look! Cut each angle to 45˚ and attach just above the 1×6 using wood glue and 1.25” brad or finish nails.

Measure and cut the 1×2 trim next. These are also cut at 45˚ angles. Line them up 1” from the to of the trim piece, and attach using wood glue and 1.25” brad or finish nails.
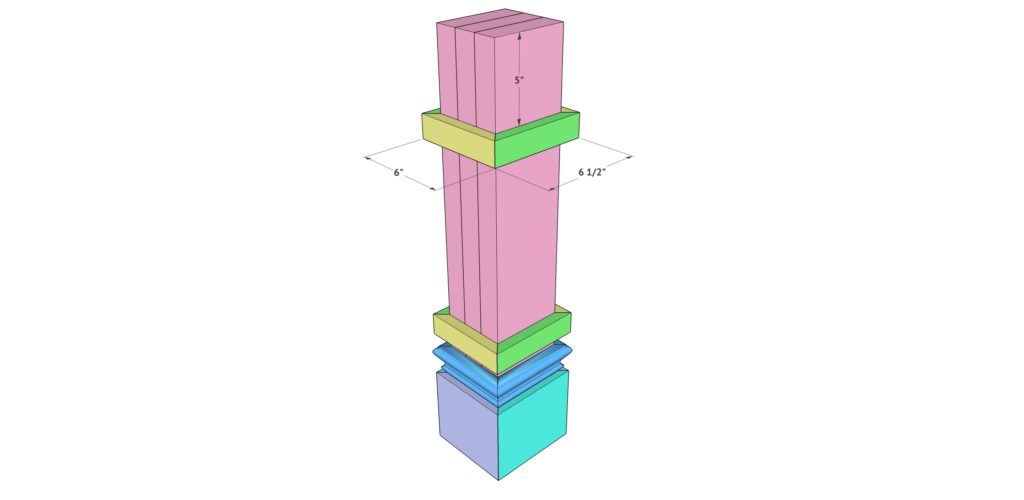
The top 1×2 trim will be attached the same way. Line it up 5” from the top of each leg.

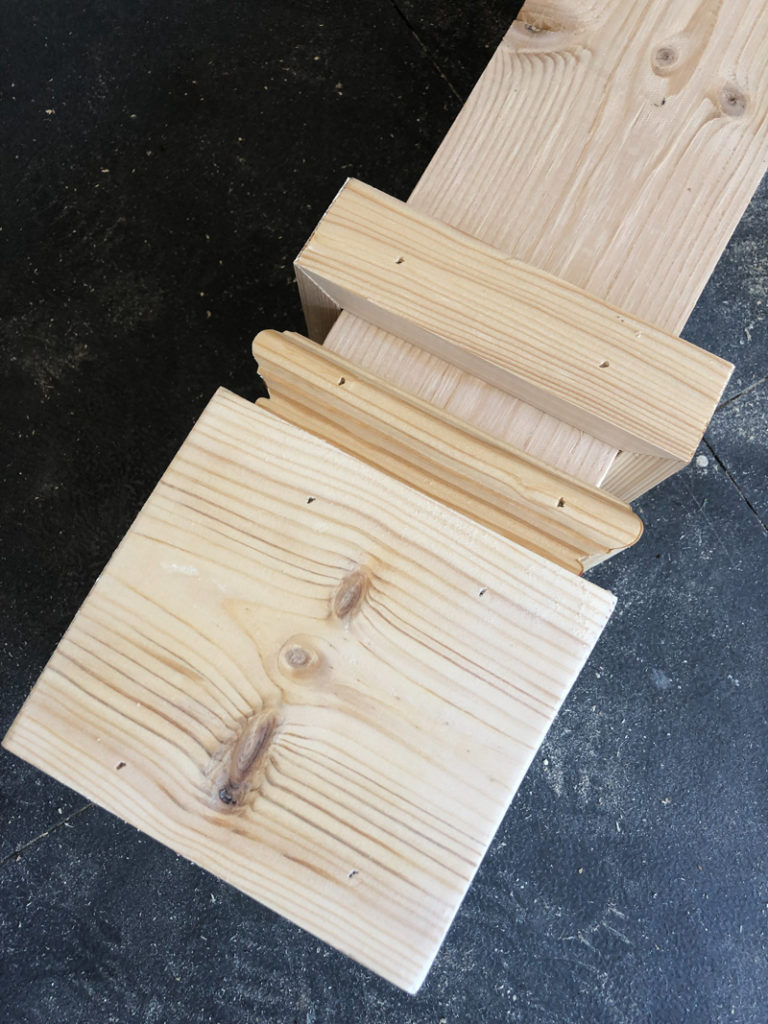
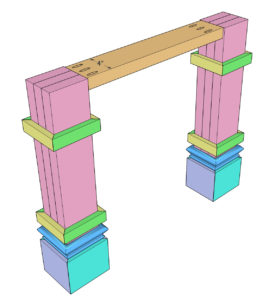
Now, attach two of the leg assemblies together. These will attach with the 2×6 (ripped to 4”) board through 1.5” pocket holes. Line the 2×6 board up flush with the top of each leg aseembly and centered as well. Attach using wood glue and 2.5” pocket hole screws. Repeat this with the other 2 legs.

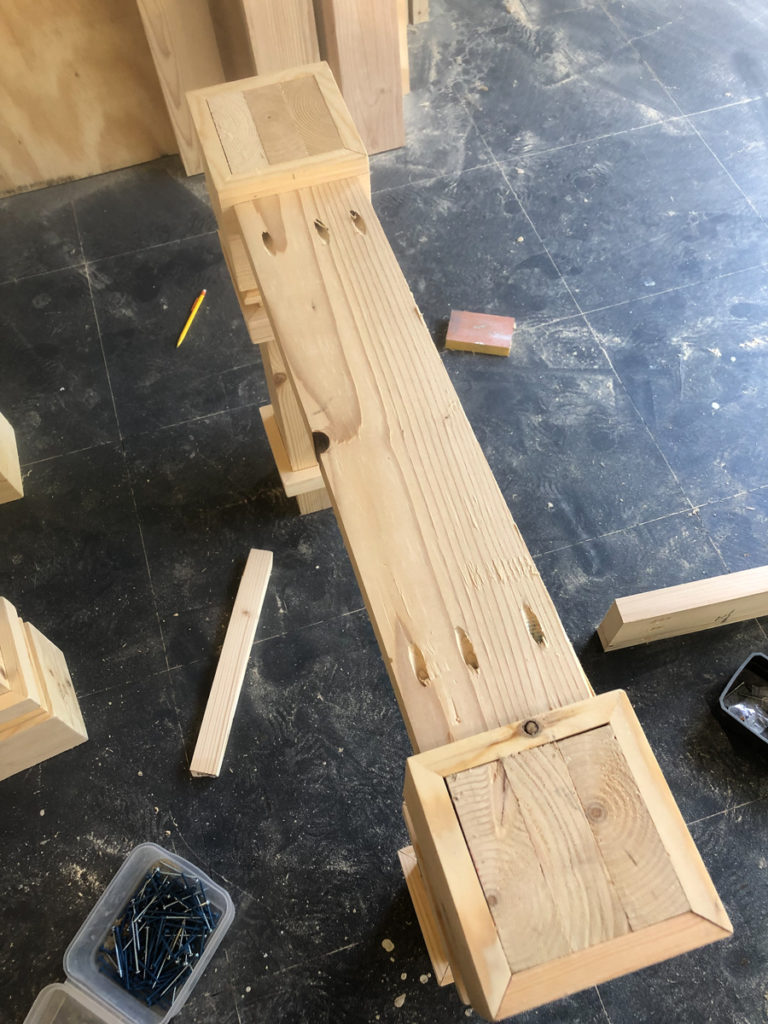
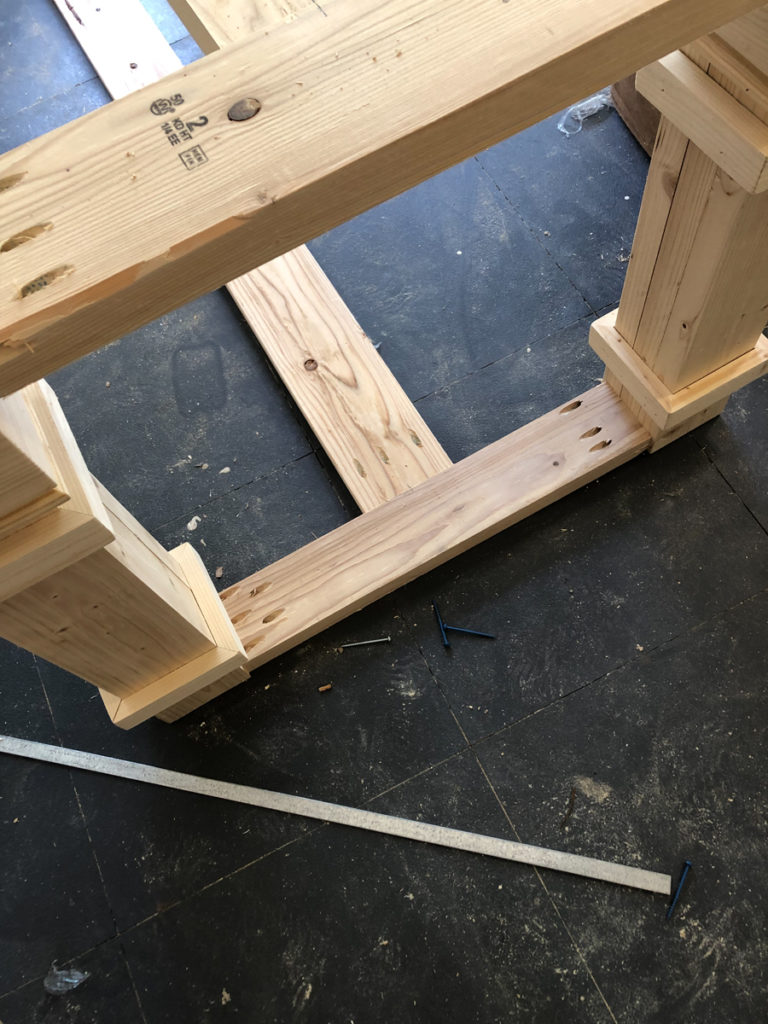
Attach the bottom runner to both leg assemblies. These will be placed 1” from the bottom of each leg base and centered as well. Attach them using wood glue and 2.5” pocket hole screws through the 1.5” pocket holes.
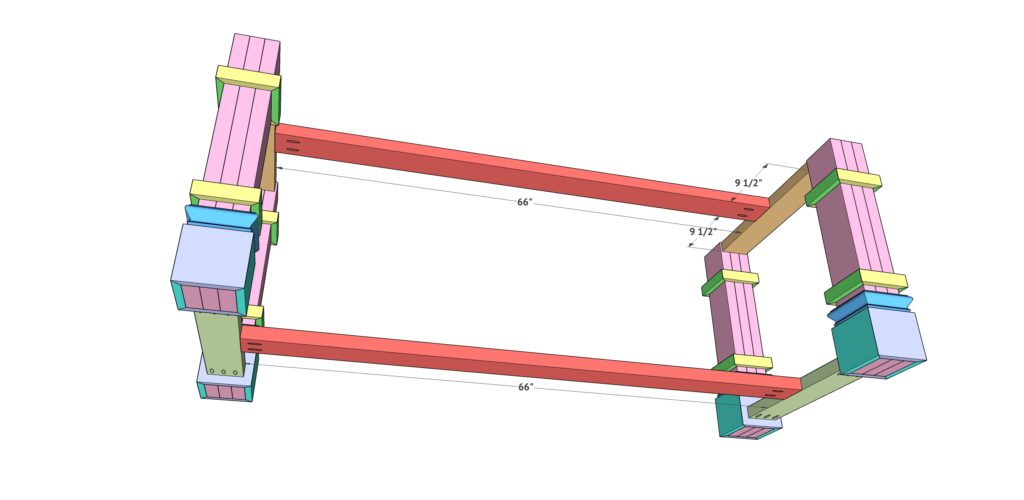
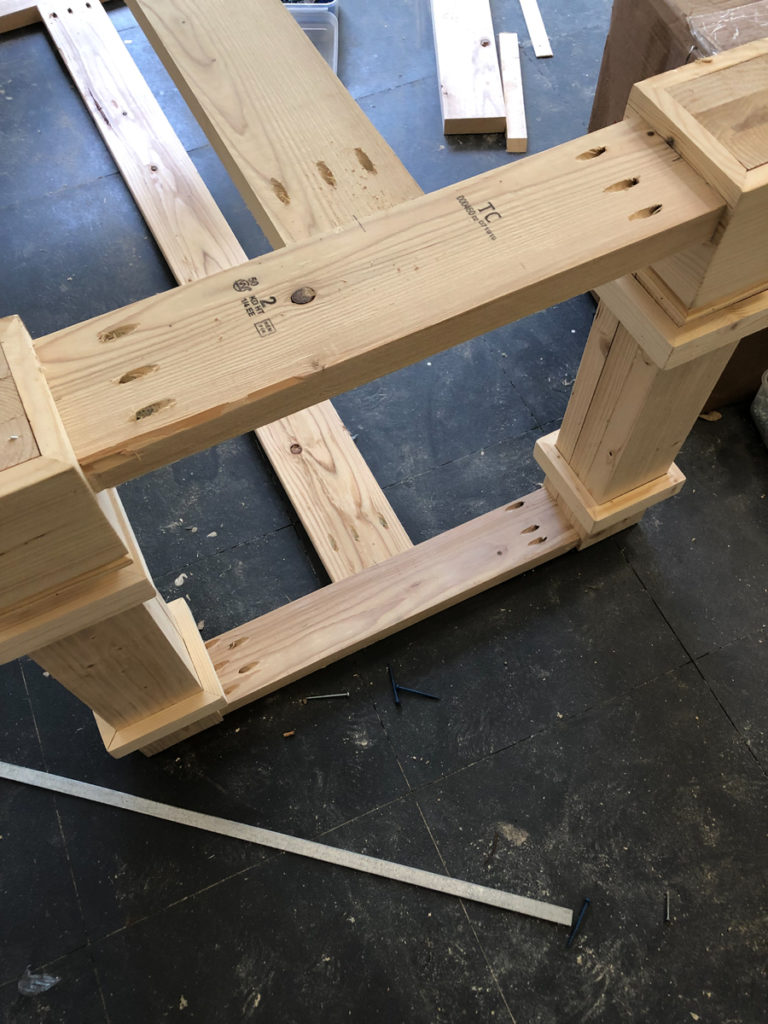
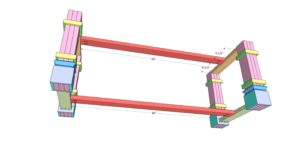
Attach the long runners to each leg assembly. These will attach with wood glue and 2.5” pocket hole screws through 1.5” pocket holes on each end of the long runners. Make sure to keep the pocket holes facing down on this part.
The final step is adding the plank table top to the base. Once you have your table placed in the room it will stay in, line the table top up centered on the base and attach with 2.5” wood screws through the top runners and into the bottom of the table top. Don’t use glue on this part so you are able to disassemble and move if needed.
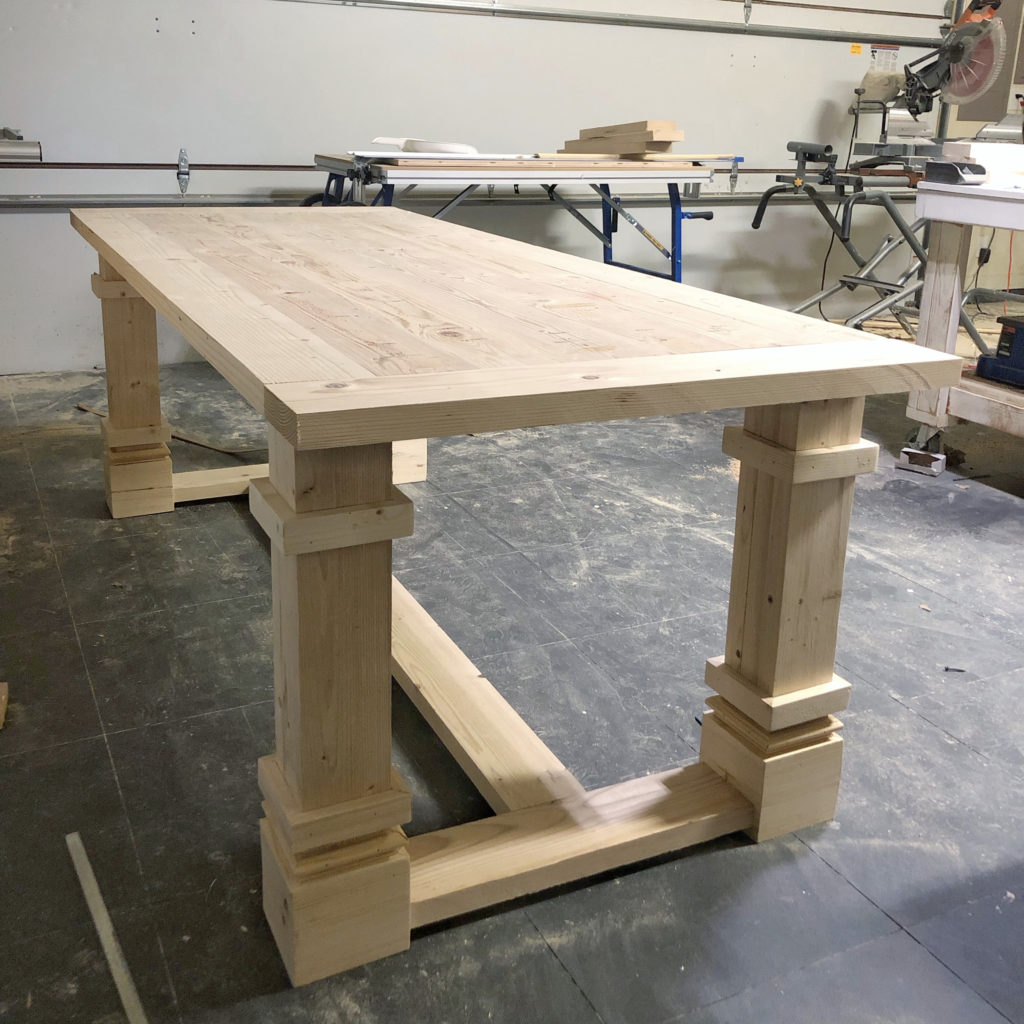
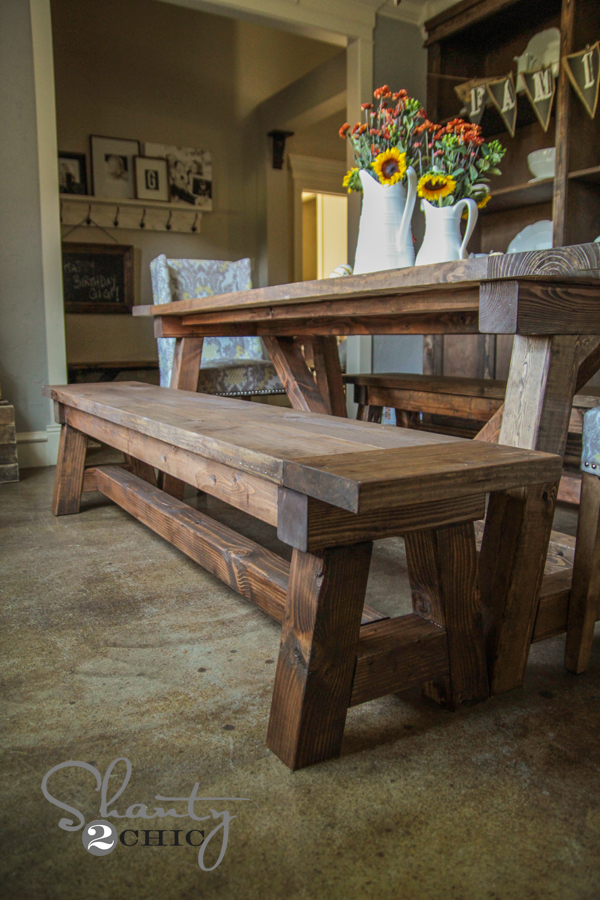
Here she is all finished up! We stained this table using Varathane Wood Stain in Golden Oak. You can see it HERE on Amazon!
You can find the dining chairs HERE!
You can find the table runner HERE!
You can find the olive tree centerpieces HERE!


DIY Modern Farmhouse Dining Table
Supply List
- 13 2x6x8 ripped to 5"
- 3 2x6x8 ripped to 4"
- 3 1x2x6 pine or white wood
- 1 1x6x6 pine or white wood
- 1 1x6x4 pine or white wood
- 1 1.5" wide casing at least 96" pine
Instructions
- The first step to building this table is creating the table top. These are 2×6 boards that we ripped down to 5”. We added 1.5” pocket hole screws down one long side of all but 1 of our plank boards, and also at the ends of each plank board. We attached the plank boards together first using 2.5” pocket hole screws. Once all plank boards are attached, line of the boards on each end and mark the exact measurement of the breadboards. Attach the breadboards using 2.5” pocket hole screws.

- Now it’s time to build the legs. You will build 4 identical leg assemblies.
The first step is to laminate 3 boards together. Add a good amount of wood
glue between each board, and attach them using 2.5” wood screws through
the outside pieces and into the inside pieces. I lined my screws up 5.5” from the top and 3” from the bottom so that the holes from the screws would be covered with trim in a later step.
- At the bottom of your legs, measure and cut 1×6 boards and attach them using wood glue and 1.25” brad or finish nails. Each corner is cut at a 45˚ angle.
- Now add the trim. I used 1.5” wide casing, but you can have fun with this part to get a very custom look! Cut each angle to 45˚ and attach just above the 1×6 using wood glue and 1.25” brad or finish nails.

- Measure and cut the 1×2 trim next. These are also cut at 45˚ angles. Line them up 1” from the to of the trim piece, and attach using wood glue and 1.25” brad or finish nails.
- The top 1×2 trim will be attached the same way. Line it up 5” from the top of each leg.
- Now, attach two of the leg assemblies together. These will attach with the 2×6 (ripped to 4”) board through 1.5” pocket holes. Line the 2×6 board up flush with the top of each leg aseembly and centered as well. Attach using wood glue and 2.5” pocket hole screws. Repeat this with the other 2 legs.

- Attach the bottom runner to both leg assemblies. These will be placed 1” from the bottom of each leg base and centered as well. Attach them using wood glue and 2.5” pocket hole screws through the 1.5” pocket holes.

- Attach the long runners to each leg assembly. These will attach with wood glue and 2.5” pocket hole screws through 1.5” pocket holes on each end of the long runners. Make sure to keep the pocket holes facing down on this part.
- The final step is adding the plank table top to the base. Once you have your table placed in the room it will stay in, line the table top up centered on the base and attach with 2.5” wood screws through the top runners and into the bottom of the table top. Don’t use glue on this part so you are able to disassemble and move if needed.


Check out our complete collection of DIY Dining Table Plans with over 25 free tutorials to choose from!


The boards that are ripped to 4″ to attached the legs, top and bottom, what length are they cut to? And are the long runners ripped to 4″ as well?
What are the finished measurements of the table ? Thanks
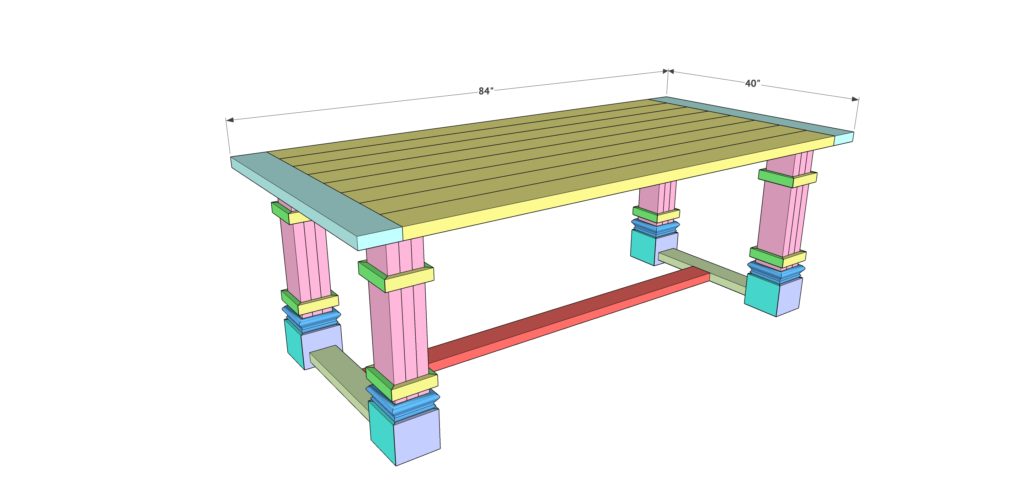
It’s approximately 84″ L x 40″ W x 30″ H
Anyway you’ll be making a matching bench? Ready to make this but would love a matching bench
My overall tabletop is turning a bit, not flat. It isn’t cupped like a smile, but 2 opposite corners are turned up. I hoped the breadboards would turn it back down but it only helped some. What did I do wrong and what can I do to fix it?
Loved making this table. I made one slight modification. The legs were so chunky that I thought the top should look thicker too. So I added a trim board around the edge. Not sure how I’m going to paint it yet so I just have it in my dining room while I think about it.
I have all the wood cut and the legs laminated. I can’t seem to figure out how to cut the trim for the legs. Do you have a video? I can usually figure out the detail but I just keep messing this one up. Thanks.
Did I miss how much this cost to make (estimate) … need to stay within a budget and all :-/
They posted on IG this was $120 in lumber but of course need to consider tools & other materials (wood glue, screws, etc.) if you don’t already have those.
How long did this table take to build?
Thanks!
Heather
Very nice!!
What do you use to flea your DIY tables?
Thanks!
Is there a video to show this being built?
Did you ever get an answer on this? I need to see how they do the angles for the legs
Use a miter saw and adjust to a 45 degree angle.
Do you think I would I be able to lengthen each end to accomodate two seats more seats on either side?
I did it! Made it 8 ft long.
The table is amazing looking! I wonder if it would be possible to make it without the extra base boards so that it is just supported by the 4 legs. That would allow people to sit at each end as well. Thanks for sharing this beautiful build.
What do you use to clean* your DIY tables?
Thanks!
Amanda