
Hey guys!
Thanks to all of you who left comments on my coffee table post. I loved reading them and totally appreciate the love :-)!
I actually took a break from the closet addition to build that table. I find that if I do one thing for too many days I become very unmotivated…. So, I built a table.
I am actually in the process of painting the new closet. I thought this room would be the baby’s nursery, but after much thought I have decided to give it to my two oldest girls. They are super excited and won’t leave me alone about it, so I am hoping to be done with it soon!
In the meantime, I thought I would share a quick how-to on my trim. I get lots of questions and comments about it. I took several pictures of trim work in some other homes before we started building ours. I gave those pictures to my stepdad and this is how he trimmed out my doors and windows.

These are my kitchen windows…
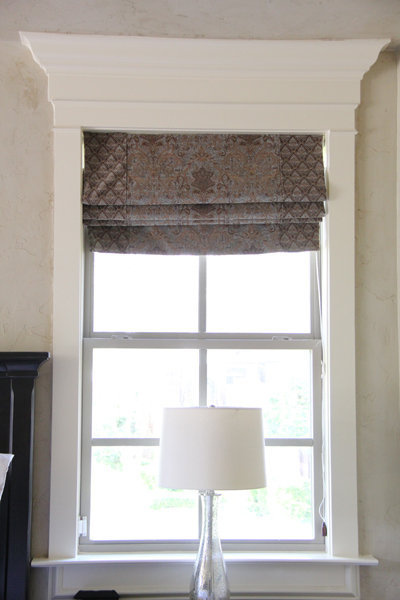
And that is one of my bedroom windows. I also have all of my doors trimmed out the same way. Since we had the new closet door to trim, I figured I would share a little how-to!
We started by trimming the entire door with 1×4 boards. We actually used primed mdf boards from Lowe’s because they are much smoother and cheaper than the nicer pine.
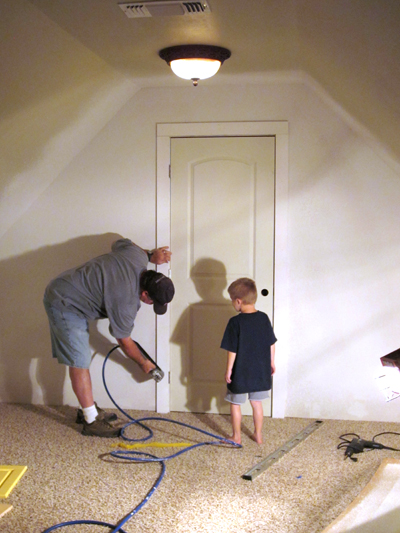
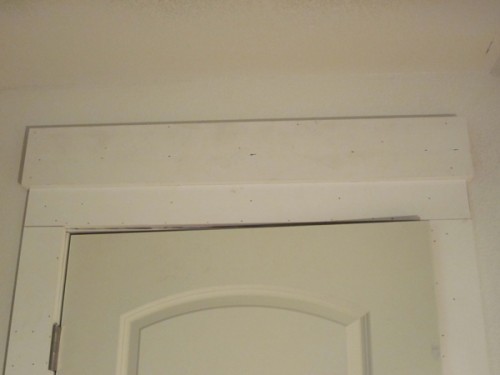
Above the top 1×4 are 2 stacked 1×6’s that are 1″ longer than the 1×4.
After that comes the crown. We used a big 4″ crown for this part. To get our cut we measured the length of the 1×6.
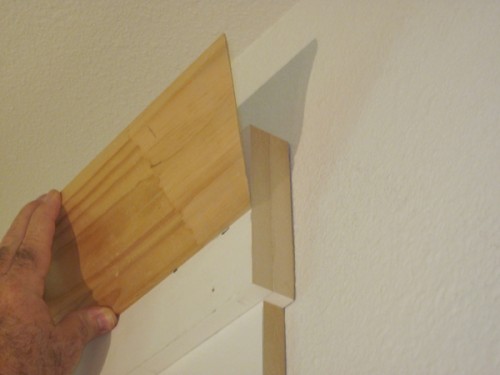
To get our side pieces we measured the distance to the wall. Then, we used Gorilla Wood glue to assemble our crown piece.
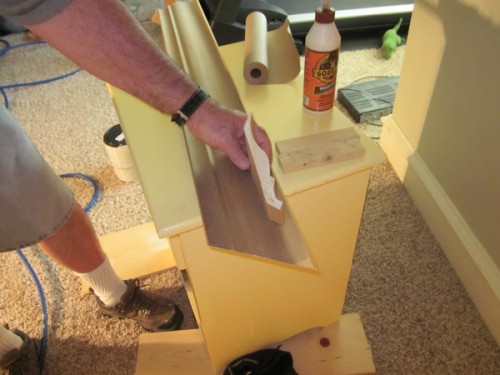
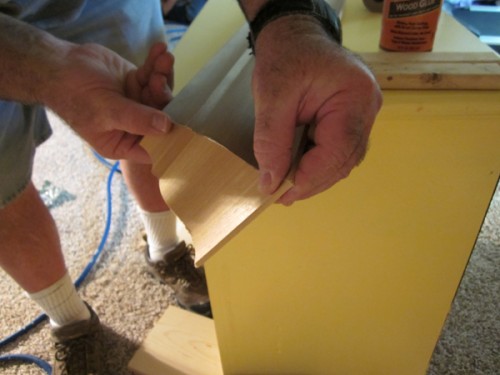
And we used my brad nailer to hold the ends… LOVE my brad nailer.
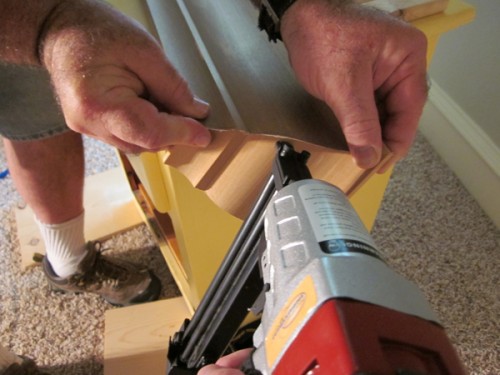
After the crown piece was assembled, we used the brad nailer to attach it to the 1×6.
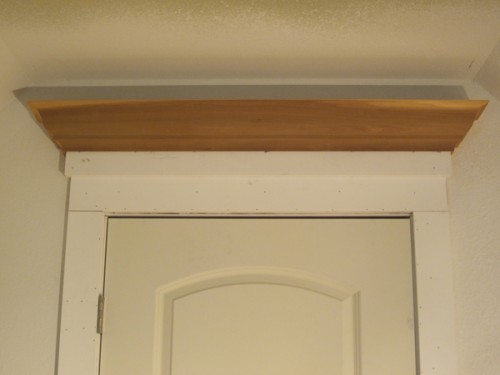
To cover up the seams, we used a really small piece of trim over the top of them.
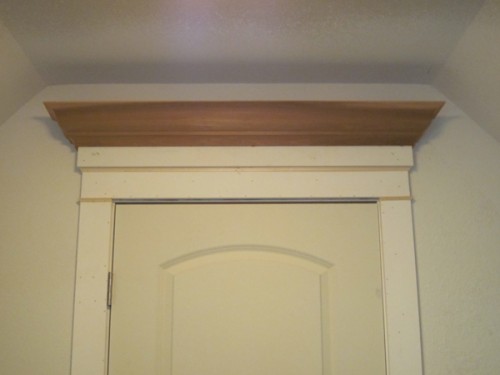
A few simple steps make a big impact!
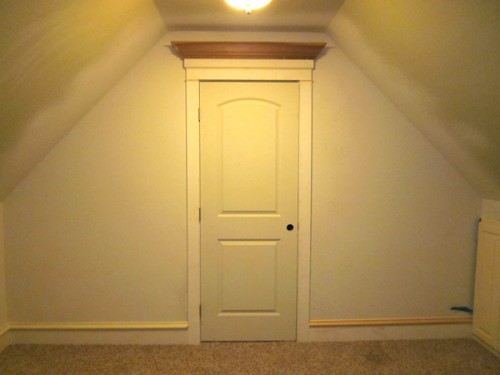
I will be back to show you the room all painted soon! And then it’s time to get started on the nursery! I will be making his bedding and I just got the fabric in the mail last week! Can’t wait to share!
Have a great Friday and thanks so much for stopping by!!
~Whitney

I love the door and window trim you did in your house and I’m ready to trim mine but I can’t tell what the small trim is that hides the seems….looked at Lowe’s but wasn’t sure what to get. Any way you could take a profile pic of it or describe it to me? Thanks so much….love your website!
How do you trim out the bottom of a window that doesn’t have a sill? Would you add another 1×4 and a piece of trim on the joint?
That looks great! I did something similar on my windows. I know what you mean about the price difference between the primed MDF vs the choice pine. What I did was use the primed fingerjoint pine they had. They take smaller pieces of good pine and glue them with fingerjoints. You couldn’t use it for staining, but once it is painted the joints are invisible. But, you get the look and feel of pine and it’s knots and grain. Its kind of the middle of the road approach between pine and MDF.
Were did you get the roman shades? They are beautiful.
Love the look of it so far! The door looks very cute with the way how the room is shaped.
The trim makes a lot of difference. Thanks for sharing a lovely tutorial.
Whitney,
Really love the way your windows are trimmed out. Looks great! So regal.
Really loved how the whole windows look especially the kitchen ones with the neat embellishment on your pretty
shades, that really looks so rich.
Blessings on your new nursery!
Hope to see the pictures when your done.
Nellie
Great tutorial! I am bookmarking this, since I have been giving lots of thought lately to trimming out my windows. Yours look fantastic!
I LOVE., LOVE, LOVE this treatment!! Did you miter the corners? I can’t really tell from the picture, i’m thinking you would have to and i’m kind of a whimp about mitering.
WOW! This is breathtaking! You make it look very easy – I may have to try it! Thanks for the inspiration!
Those look great and fairly easy. About how much did it cost to do? I would love to spruce up some windows and doors in my house but don’t want to break the bank 🙂
I’ve been wanting to do this in our home, but wondered how and how much it would cost. Did you take off the trim that was already up?
We built this home so there wasn’t anything to tear down. Since you are using boards though, you should be able to do it fairly cheap!
I need to do this to my kitchen windows! Thanks so much for the how-to Whitney!
Thanks so much Kari! Good to hear from you! 🙂
The trim makes a plain door look something really special, thank you for sharing this.
Jan x
Thanks Jan!!!
WOW!!! That looks great! So dramatic! Doorways/windows can be so boring, but yours looks awesome! I love it!
Thanks so much Stephanie!!
Did you make the shades for your windows or did you buy them somewhere? I just started following your blog a few weeks ago, so if you have blogged on it before just let me know. Thanks!
I made them! Here is the link 🙂
https://www.shanty-2-chic.com/2009/08/whitneys-roman-shades.html