Oh hey there! I am so excited to share my next project with you guys because it was so fun to make and I am sure you will all be making one of your own! Ashley and I went to Michael’s over the weekend to look for shantys. While I was checking out, she was glancing at a magazine and ran across a lady that made apothecary jars from mason jars…. That started my wheels spinning. I would love to give her a shout out but I didn’t even see the title of the magazine. Hers were different but she for sure inspired me! Here are the supplies you will need to make these cuties… I found all of mine at Hobby Lobby for under $8. You will also need a small piece of burlap.
 First you will need to glue your candlestick to your wood circle… I used Gorilla Glue and put a book on top of it for about 30 minutes.
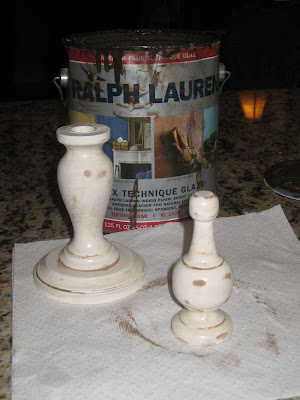
Next, paint your finial and your candlestick. I sprayed mine with Rustoleum American Accents Heirloom White. While those are drying I started working on the top of the jar. Hot glue a small piece of burlap to the top of your lid… Mine was 5” x 5”. Glue down the burlap to the sides of the lid, starting with your corners.


Next, take a piece of twine and wrap it around the sides of the lid a few times. I also added a dab of hot glue here to keep everything in place. You can either tie a knot at this point or add a little something.

I found this little pewter cross at Hobby Lobby for $2 so I tied it to my twine…

Now take your painted pieces and do a little distressing. I also added some Ralph Lauren Smoke Glaze to mine to make it even cuter…
 Next, hot glue your the bottom of your jar to the top of your candlestick… we’re almost done!
 Hot glue your finial to the top of your lid… SO FUN… Love these!!

Now your final and most fun step will be to fill her up. I used some shells I had that needed a home to fill this one. But I did think about what a great teacher gift this would be… Find out her favorite candy or coffee and fill your jar up with that. She will get to enjoy her treat and her new apothecary jar! There are endless options for these babies…. I would so love to see yours when you make it…


Wow. I think I say that everytime I see your creations.
New to your blog- You guys have so many great and creative ideas! I am in awe everytime I visit your site!! Great Job!
You have got to be kidding!! SO Amazing! I'm going to steal this egg-zact project and LOVE it!!! Thanks!!
thanks for visiting my DIY lampshade re-fo. I just love the jars! Blessings…Sherry
Super duper creative.
What a wonderfully creative and beautiful idea. It turned out great!
If you get a chance stop by my Blog and say hi! I just put up a new post…
Have a great day,
Aimee
WOW!!! I so wanna learn how to distress (it is stressing me out that I can't distress!!).
Love how you distressed the paint! Thanks for sharing!
So cute! Love the distressing. 🙂
Hey girls! Thanks for all the sweet comments! If you glue your burlap to both the top and the sides of the lid it will unscrew like normal.
~Whitney
Cute idea! The lid of the jar screws off as normal, even with the burlap on it, right? I might have to try this project …!
And by the way, this blog totally makes me wish I had a sister!
How do people come up with this stuff!? It is so stinkin clever!
SOOOOO Cute!! Thanks SO much for sharing!!
That is so stinkin cute! And easy! And fun! I feel a craft project coming on! You two are great!
Love, love, love, love IT!!!! I am on my way to Crafts Direct tonight to make these!!!
Blessings,
Cara