Hey friends!
I get asked about my roman shades all the time. I decided it was time to change mine out, and I thought this would be a great time to attempt a tutorial. You should be warned…. I feel like writing this tutorial is harder than making the darn shades… Just saying 😉
So, here we go. If you can sew a straight line, you can make these. Promise!
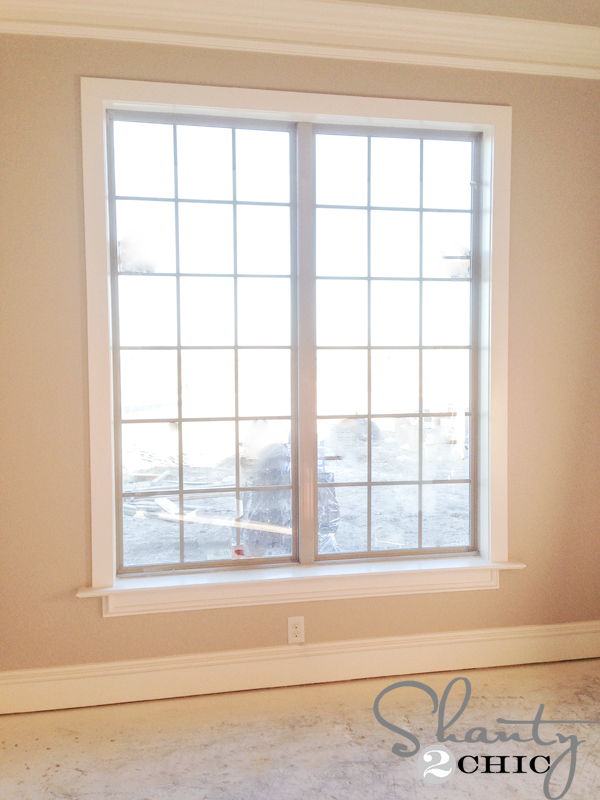
You need to measure your window. You can make these wider than your window, but for mine I prefer to mount them on the insides of the window. Measure your window width and write it down.
Fabric…
I decided to use good old drop cloth for mine!
Cheap and easy, and I will be stenciling it in a later step.

Your fabric needs to be cut 1″ wider than your window width, and 8″ longer than your window length.
You will also need your liner fabric. You can find drapery liner at any craft store. Your liner needs to be cut the same length as your other fabric, but 1″ smaller than your window width.
Lay your fabrics out. Fold each fabric up 3″ from the bottom to create a hem on each piece. Sew a straight line on each piece to hold this hem in place.
Now you will attach both pieces together like a giant pillowcase with the top and bottom open. Place the good sides of both fabric pieces together a do a straight stitch up both of the long sides.
Now for the dowels…
I use dowel rods to keep my shades folding clean and pretty. You can buy these at any craft store up to 36″ and Lowe’s sells them up to 48″. I use 1/4″ diameter dowels. Cut each dowel about 4″ less than the width of your window. My window measures 30″, so my dowels are cut at 26″. I just used a really sharp pair of scissors to cut mine.
I use Aleene’s Tacky Glue to attach the dowels to the fabric. This is what the bottle looks like.

You’re going to be attaching your dowels on the inside of your fabric piece, not your liner. Lay your fabric out flat on the ground.
Measure 9″ up from the bottom of your hem. Add a line of glue to attach your first dowel like this…

Now you will attach your other dowels. Measure 7″ up and glue down your next one. You will glue the dowels every 7″ until you get to the top of your fabric. It should look like this…

After your glue dries you will turn your fabric piece inside out. This can be a little tricky with the dowels, but just do it slowly and it’s easy. The front fabric piece will be just a bit wider than your liner fabric on the sides. Now it’s time to attach the rings. You can buy plastic rings at any craft store in the drapery or fabric section.
This is the tedious part because you have to sew these on with a needle and thread. It’s easy though! Starting with your bottom dowel, sew on three rings. You will sew one one each side and one in the middle. Put your thread in through the liner, or backside first. You will actually go through the front of the fabric also. Your thread will show just a bit on the front, so make sure to use a thread color that blends with your shade fabric. You won’t notice it at all when the shade is down.
Also, make sure you sew your thread around the dowel.


There will be three rings on every other dowel until your reach your top dowel.

Next, you need to attach your shade to a 1×2. These are super cheap. They can be easily cut with a cheap hand saw, or Lowe’s can cut them for you also. It needs to be 1/4″ smaller than the width of your window. Attach 3 eye hooks to one side of the wood like this.


Then, measure your fabric from the bottom hem. Draw a line on the back liner fabric at the length of your window. Attach the fabric to the wood at this line using a staple gun.

Cut any extra fabric off after you staple it.
Your final step before hanging it up will be attaching drapery cord. This can also be purchased at any craft store. Tie the cord to the bottom right ring and then string it through the rings above and through the eye hooks like this…
After going through your third eye hook cut the string at about 3-4′ and leave it to the side.

Now do the same thing starting with your middle bottom ring like this…

Finally, do the same thing starting with your bottom left ring. You will then have three long strings out to the side of your shade. I use a fan pull for my cord pull. I found mine at Lowe’s. Just run your three cord pieces through the pull and tie a knot like this…

Pull the knot into the pull like this…

Almost done I promise!
To hang your shades you will use an L bracket like this. Again, found mine at Lowe’s. Measure where your 1×2 will sit and attach them to your window like this…


Now you will put your shade up on your 1×2 and screw a wood screw up through the bottom of the L bracket like this to hold it in place.

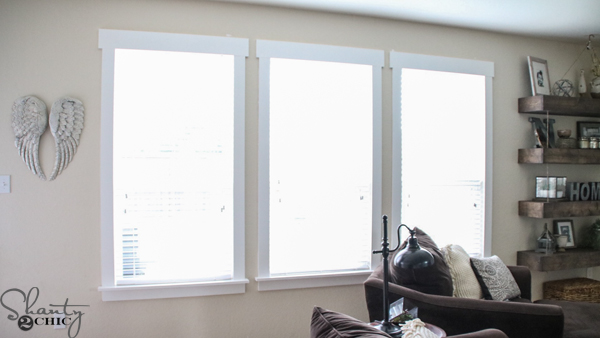
That’s it! I know it sounds like 4385734598743095 steps, but I promise it is super easy! It’s just really hard to put the steps into good words, so hopefully the pictures will help with that. If you have any questions just ask! You can also ask me on Facebook for a quick answer. Want to see it all finished??


I used plastic cord cleats like this (Lowe’s) to hold my cord…

Hope you like them! These babies will last too! I have had my other ones hanging for almost 3 years. I open and close them every day and have never had a problem with them.
If you like them, please Pin it, Stumble it, and Share it below! I would appreciate it!! 🙂
Have a great weekend!
~Whitney


Wow, this looks amazing!
I made a faux roman shade, and if I had seen your tutorial I would have made a real one. Your directions are so clear and simple. Will definitely try it in the future! = )
Thank you so much for this tutorial. You shades look so good! I will file this away for when I am ready to make blinds for my bedroom.
Thank you for the tutorial. I feel like I can actually make Roman shades now.
Nice job!! This is an outstanding tutorial!! Very clear and easy to understand!! Thank you for being there to answer questions when I get around to this!!
I’m so glad you posted this! I’m was just about to attempt a roman shade myself but I like your way so much better! Thank you! It looks beautiful!
Great tutorial! I’m so glad I found this on Pinterest! Can you tell me about how much you money you spent making the shade? Thanks!
Hey Michelle~
You can easily make these for $20-30 a window depending on your fabric and liner you choose. Hope this helps!
Great tutorial. It looks fantastic. Hugs, Marty
This is truly one of the best and most doable Roman shade tutorials I’ve ever seen! Thank you for sharing this. I do have one question. When you sew on the rings around the dowels, it seems like you are going through the front fabric because the dowels are glued down to the front fabric. I don’t think this is right, but I’m not sure how to do avoid thread showing on the front.
Carnan~ You actually do go through the front of the fabric! I should have been more clear on that. When picking your thread use one that blends with the front of your fabric. It will only show a bit, but if it blends with the fabric you won’t ever notice it! Promise! 🙂
Hi. After you put the dowels on and turn it inside out.. do you see the bottom hemmed 3” piece together? Maybe I am not understanding. You said to seen the long sides together…than attach dowels..turn inside out…the tip gets attached to wood piece. But the bottom is still technically opened… do I hem it together?
Hi Carnan, just fyi: There is actually a “clear” thread – like super fine fishing line – that would work for sewing those rings onto any fabric you choose.
Great! Another idea to add to my project list LOL It is a great idea for some windows that I have been trying to figure out window treatments on. Thanks for the ideas. Hugs!
I love this! I didn’t know these were so easy to make, and you used drop cloth too! Thanks so much for sharing. 🙂
thanks for sharing this!! 🙂 They came out perfect!!
Terrific job! The shade is AWESOME!! Can’t wait to see what tomorrow brings from S2C. 🙂
Whit, LOVE it. I am so coming over sometime to check those out. Too cute.
Your shade turned out beautiful! Thanks for posting the tutorial.
You have nailed this. I have been looking for a tutorial to do these for my kitchen and dining room windows and NOW I actually think that I can. Keep them coming.