I am so pleased with how this project turned out! I have been on the fence about what to do to the front of my new shed! Seriously, a shed this cute deserves something as cute to dress it up, right?? I wanted to add some flowers and add a bit of function at the same time, and this is what I came up with! Check out my DIY Planter Box Bench!
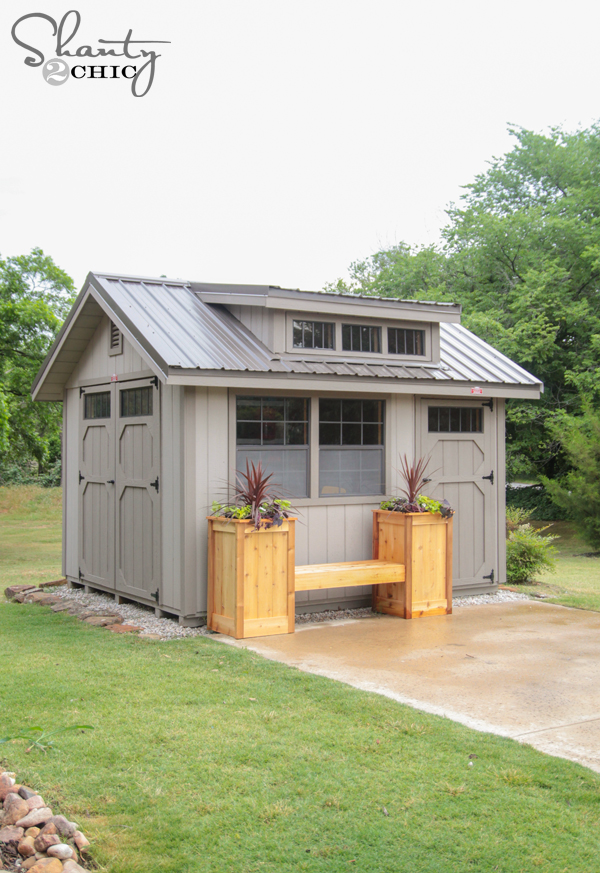
How cute is that?? I love that I have a space now to sit and watch the kids play on the driveway as well. We also keep all of their rollerblades and toys in the shed, and this gives them the perfect spot to sit and put them on… Win win!
The best part about this bench is that the majority of it is made from cedar fence pickets! This keeps the cost of it really low, and it will hold up well outdoors.
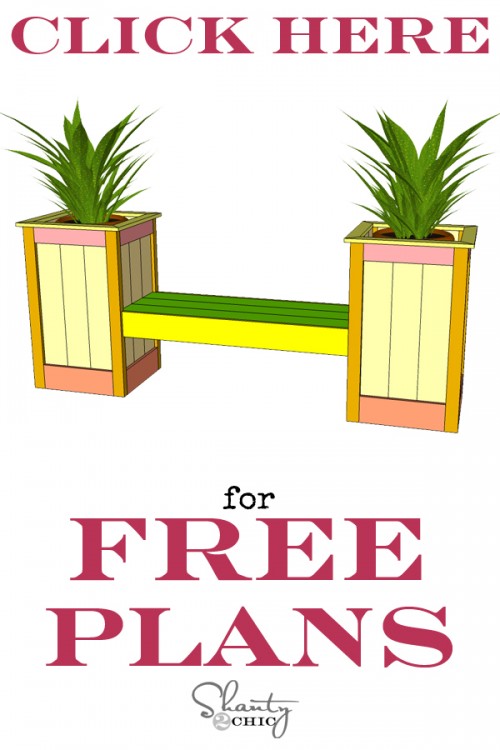
You can click HERE or the button below to download and/or print our free plans!
Let’s get started! I found all of my wood and materials for this project at the Home Depot. Keep in mind that most fence pickets are 5/8″ thickness. My Home Depot carries one picket that is 3/4″ thick. This is the one that I chose to go with because I like working with this thickness when using my Kreg Jig. If you can only find 5/8″, it will work, but you will need to adjust your Kreg Jig for that thickness. You can also go with cedar boards, but this does drive the cost up, which I am never a fan of 😉 .
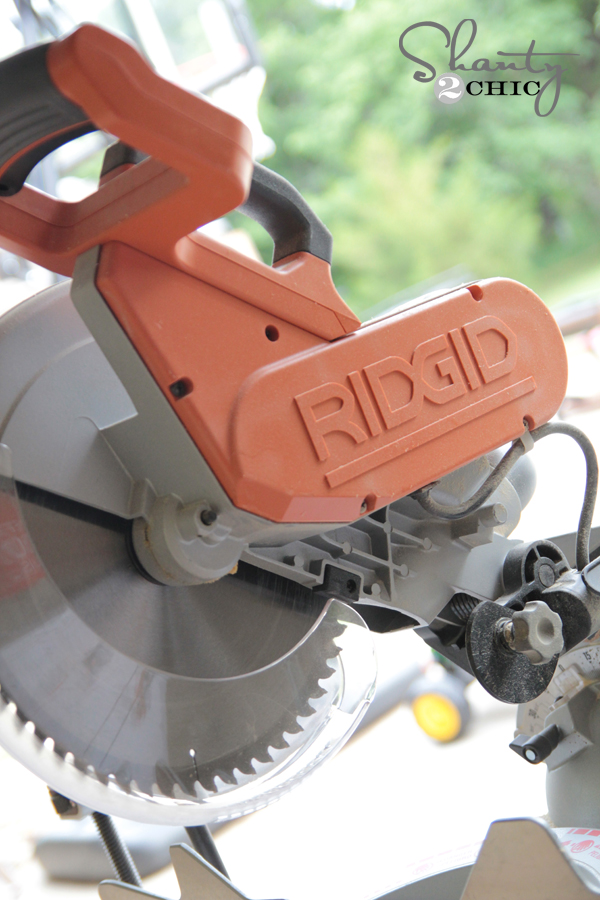
I started by making all of my cuts. I used my Ridgid compound miter saw for this one. This is my favorite, and most used tool in my garage.
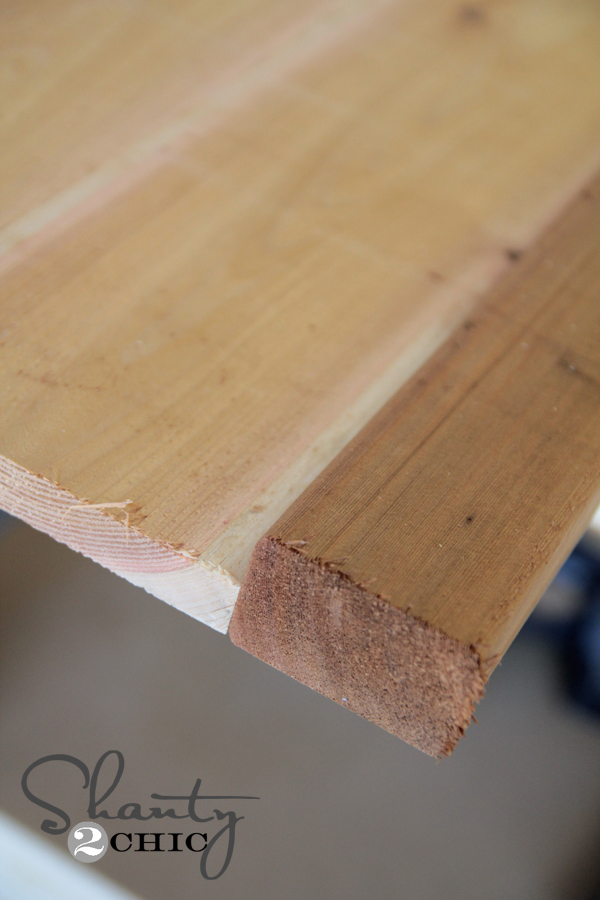
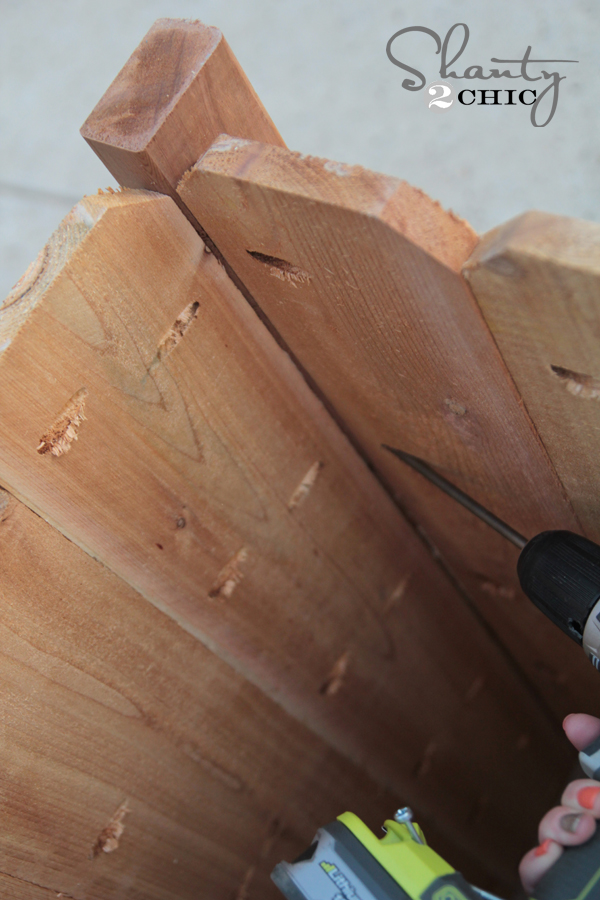
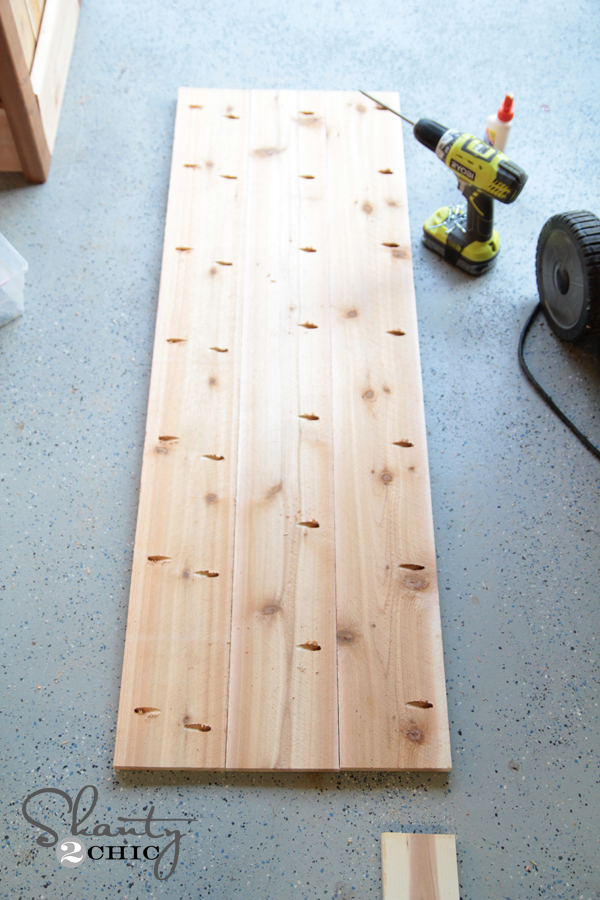
Because these are fence pickets, many of my ends were dog eared. This is fine, I just made sure to keep those ends at the bottom when I lined it all up. I knew that my trim would cover it later, and it helps eliminate wasted wood. You can see here on this one that I have already added my 3/4″ pocket holes using my always awesome Kreg Jig!

Many of you ask which Kreg Jig Ash and I use. We are both currently using the newest K5 model. Before that we were using the K4, and built most of the furniture in our homes with it. They are both amazing models, but the K5 has a few upgrades on it making it even more user friendly. If you just read this paragraph and have no clue what the heck a Kreg Jig is, no worries! Ash and I have a quick video you can check out HERE explaining what it is and the basics of what it does!
Alright… You can see here how I lined up the pickets in the jig to make my pocket holes. I used my Ryobi 18V drill to make all of the pocket holes.
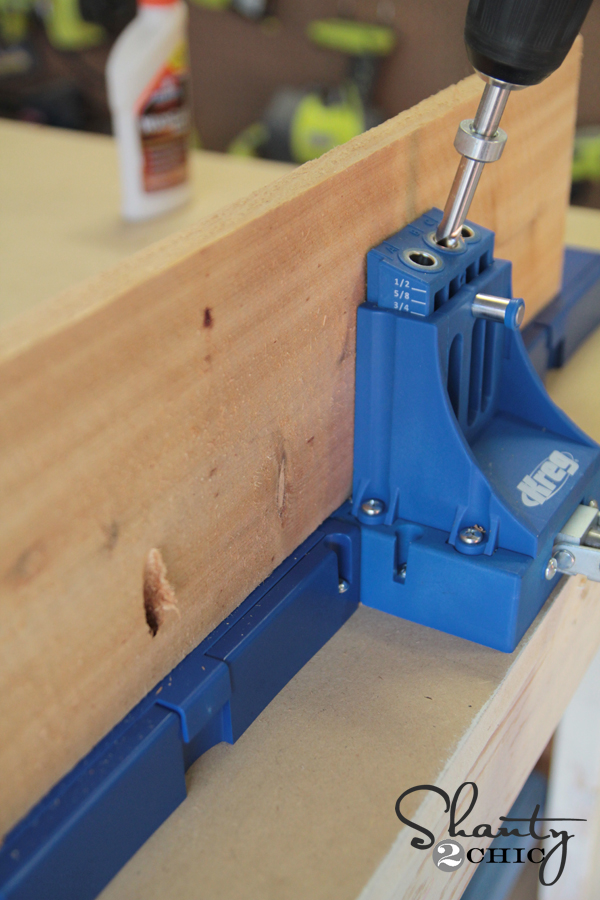
You can see I am making 3/4″ pocket holes, because that is the thickness of the wood I am attaching this piece to.
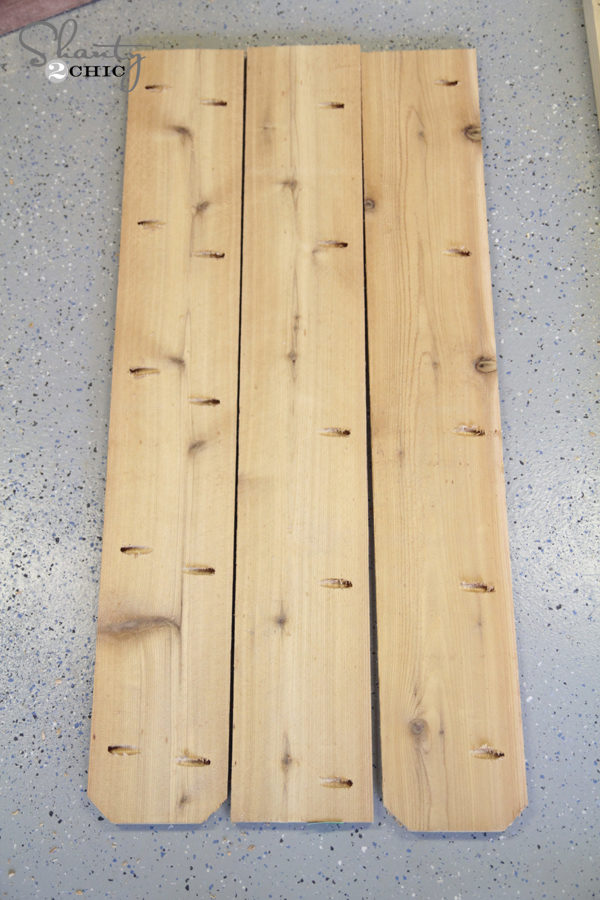
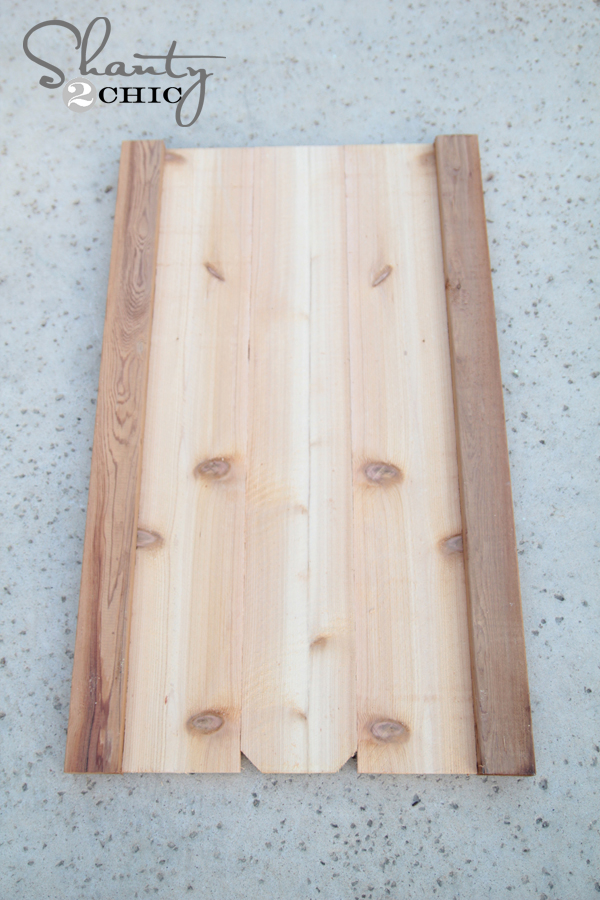
Each planter box side will have 3 pickets. Here they are with all of their pocket holes before I attached them.
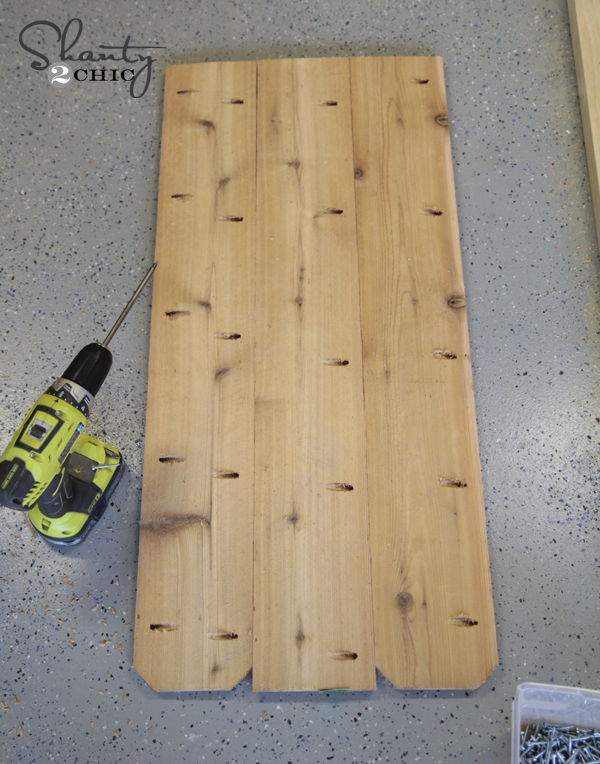
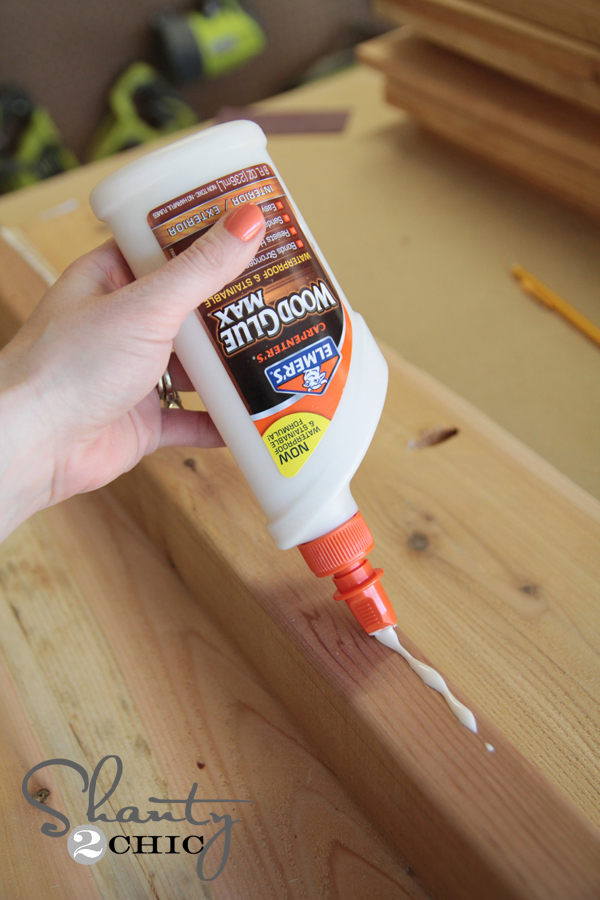
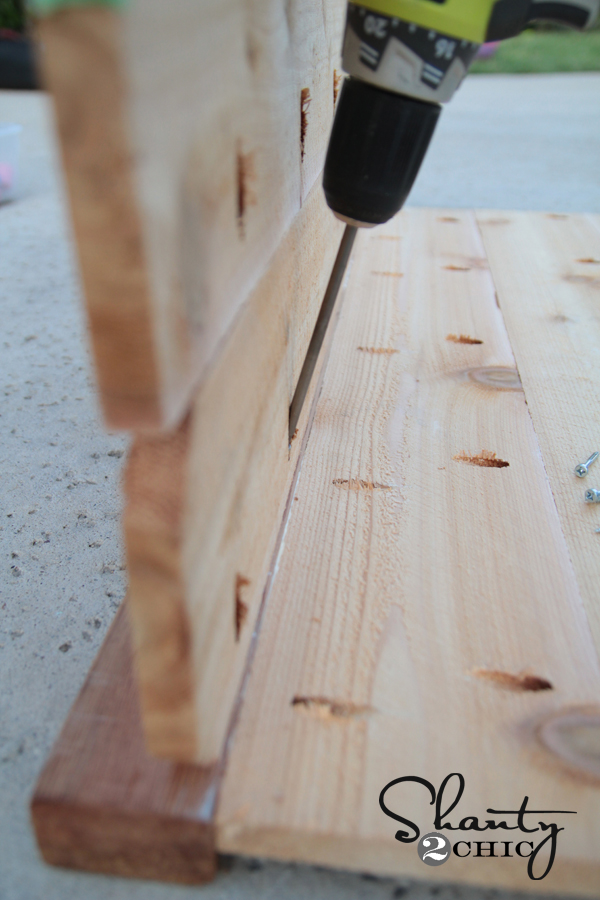
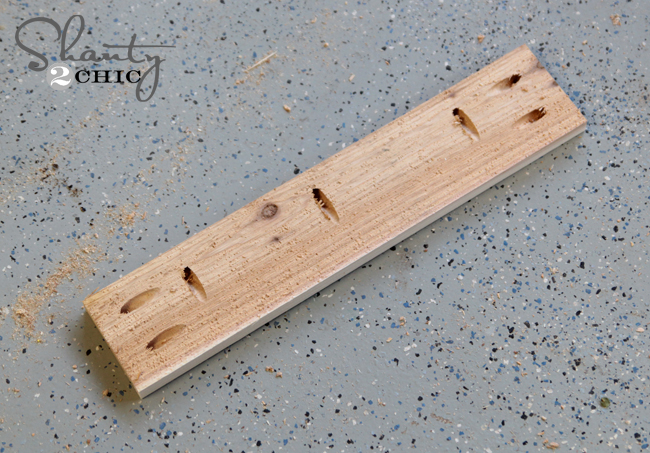
Next, I ran a line of glue down each edge, and attached the pickets using 1 1/4″ pocket hole screws.
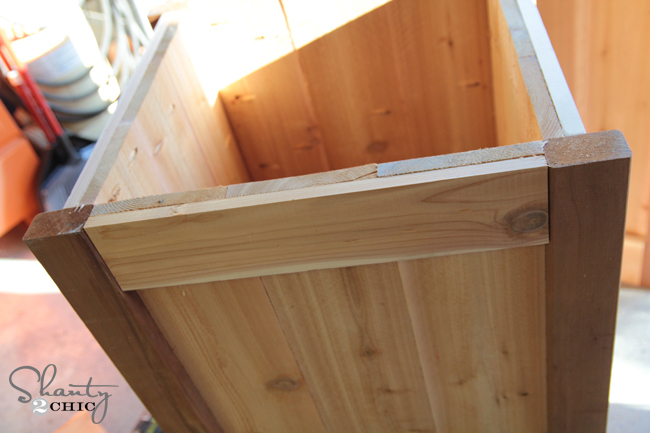
The corners of my planter boxes are 2×3 cedar boards. I found these at HD in the fencing section. I used a longer screw on this part to attach my sides to the corners. First, I ran a line of wood glue down the edge.

This is what the sides look like from the bottom.
Here is a finished side from the front!
I finished all of my sides and it was time to attach!
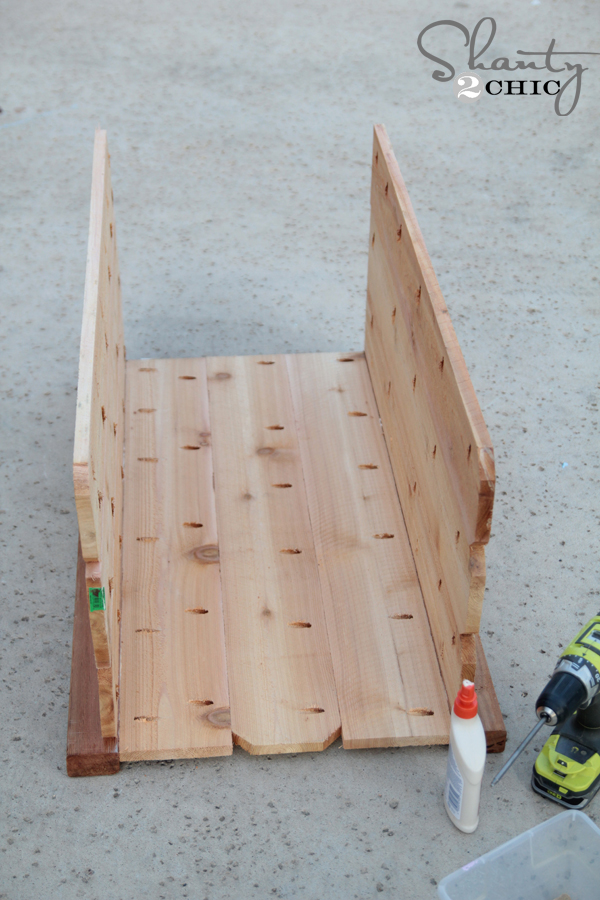
I started by attaching one side without a corner piece to a side with a corner piece. I used 1 1/4″ screws and glue on this part as well.
At this point it looked like this!

Same thing for side 2!
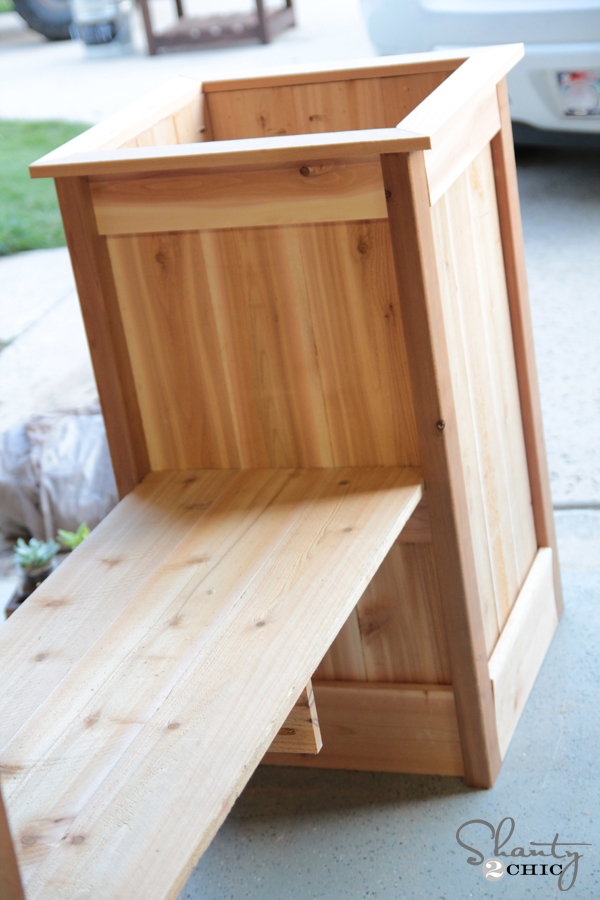
To attach my final side, I set the whole box upright. I lined up the final side and attached it in the same method. I did have to reach into the box a bit to get to some of the pocket holes. This may be because I am only 5’2″ and the box is over half my height 😉 The ones I couldn’t reach, I flipped the box over to finish.
Bada Bing Bada Boom….

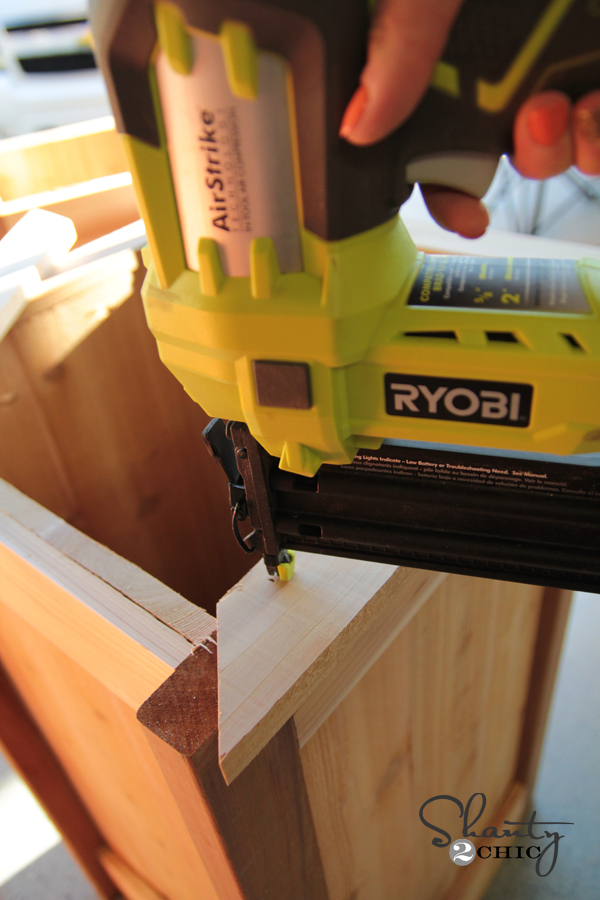
Once I made both boxes, it was time for trim!
This part is super easy thanks to my ever so awesome Ryobi Airstrike Brad Nailer. This thing is awesome, and cordless making it so easy to use! It uses the same battery as my drill which is super convenient. I just added a line of wood glue to each trim piece and attached it using 1 1/4″ brad nails from the inside of the box. I recommend you measure this part before you cut. Given that these are fence pickets we are using here, the width of each can vary just a tiny bit. I like to measure each space before I cut the trim to fit it.
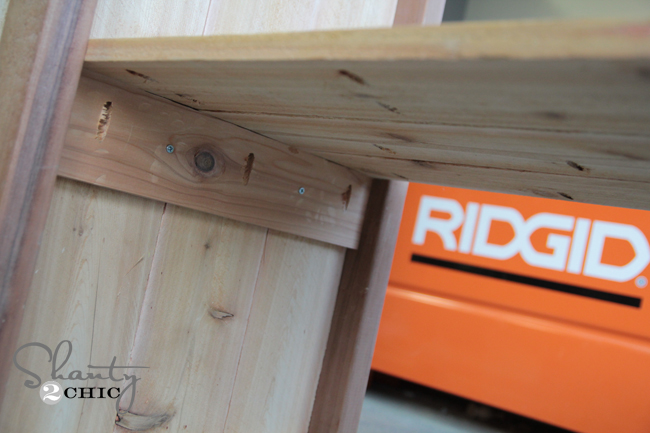
Once I had all sides trimmed, I added my mitered top. This is very simple to do! This is simple 45 degree cuts and a perfect way to try out mitered corners if you haven’t done many. I used a line of glue down each side and attached the trim using my nail gun.

Finally the bench!
I made my pocket holes for the bench the same way I did on the boxes.
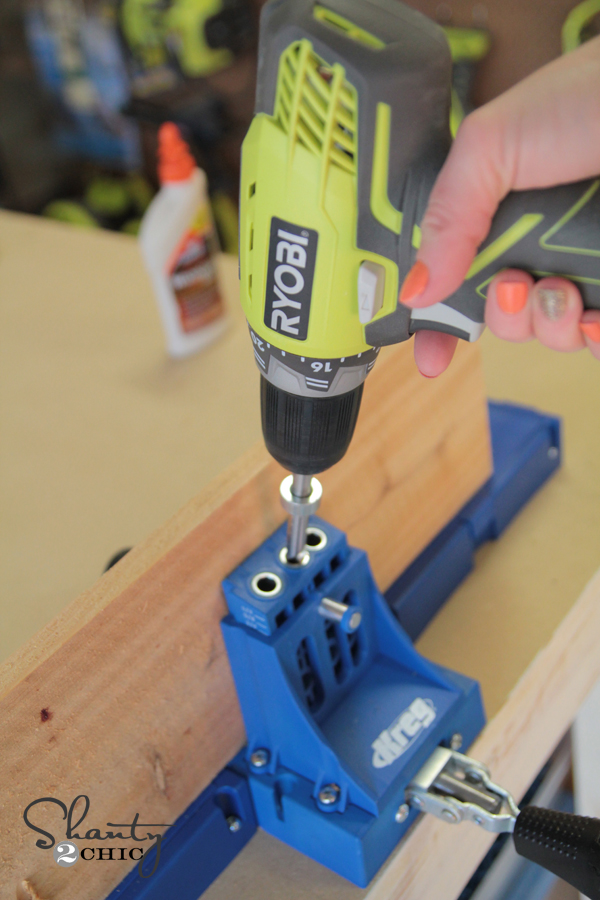

I used wood glue and 1 1/4″ pocket hole screws to attach the three pieces.
This is my middle support piece. You can see where I have added pocket holes to it before attaching it to the bottom of the seat.
Once you have added your seat, it should look a bit like this…
You can kind of see how it all looks on this shot.
The final step is trimming the front and back. You attach these pieces using pocket hole screws through the holes you made on the bench… Easy peasy!
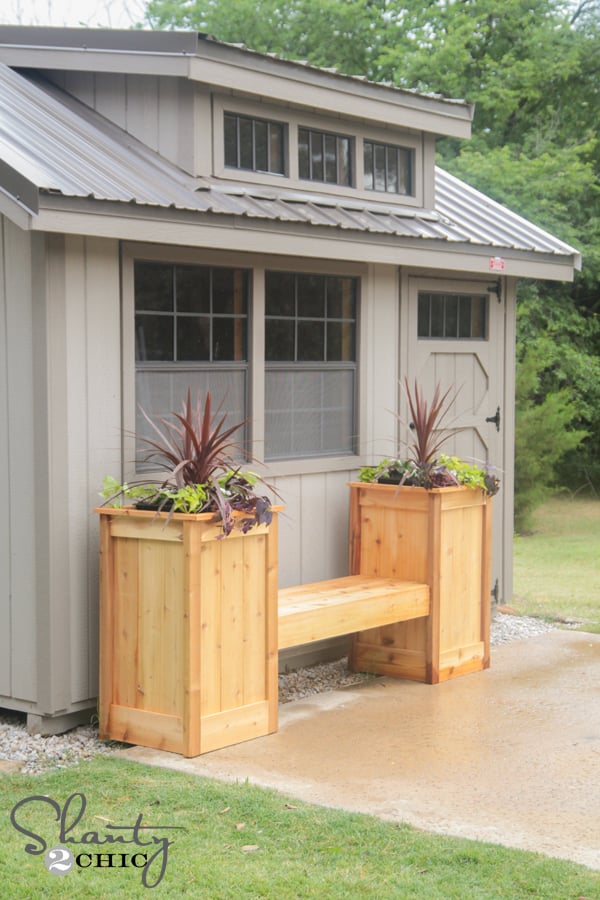
My last step was filling it up with flowers after I put it in front of the shed! Yesterday, we took the whole gang to Home Depot to pick out flowers for it. We even had one of Ashley’s kids with us 🙂 How many kids does it take to find flowers? A whole lot apparently! And yes, my little one has on one lime green sock which I have no explanation for.

I got the flowers home just in time to fill the pots before we got some rain! Here it is sitting pretty in front of my shed…
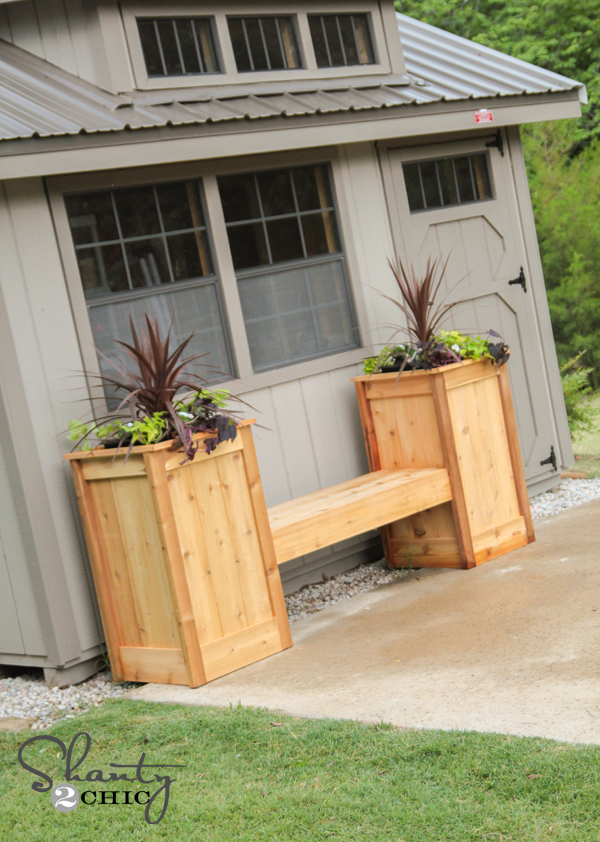
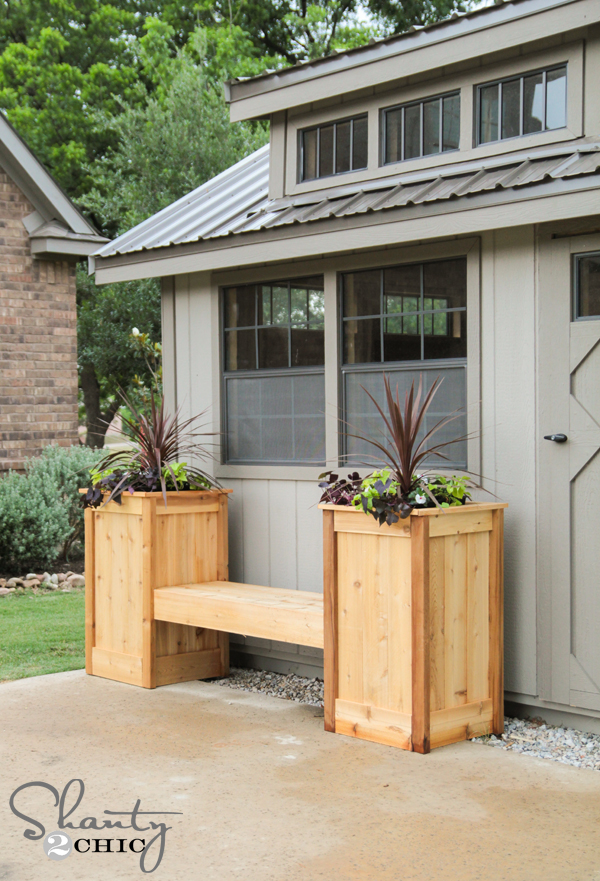
Oooooh I love it! Almost as much as I love my shed! My shed is one of my favorite additions to my house yet. It opened up my garage space giving me room to work. The kids call it our ‘little house’ 🙂
Thanks so much for stopping by guys! I would LOVE for you to share and PIN this project with all your friends!
Let me know if you have any questions at all!


Absolutely in love with your DIY planter project! It’s everything I’ve been dreaming of. And those pictures and step-by-steps are so easy to follow, you’re a star! Just one tiny question: Are the pots supported by something inside the squares or just chilling on top?
Curious as to what the final measurements are for the finished project? My son is making this for me in his Gr. 12 woodworking class. I’m super excited to put it on our deck but just want to know how big it is. Thanks!
I LOVE this and it is exactly what I have been wanting to build: ) Thanks for the great pictures and step by step instructions! So easy to see and follow! My question is, are the flower pots sitting on something down inside, or are they sort of just resting on top of the square openings? Thanks!
LOVE IT….that is amazing.
Love this! Would making the bench wider potentially make it structurally unsafe for 2 adults? I’d love to make this for my patio, but I want to be able to fit 2 adults comfortably. Thanks for your help! 🙂
Absolutely amazing! It’s like you guys read my mind when you build! I’ve been looking for a plan for this exact idea and here it is!! Approximately how muh did this cost you? You and your sister do amazing wood work!! It inspires me everyday 🙂 keep it up!!
wow it’s beautiful! I just got a ryobi miter saw for mother’s day-the one that you had in the video. Is it still considered a good saw? My husband got a non sliding Ridgid first but I thought the sliding would be more versatile…so I exchanged it for the ryobi…
I love it!