Happy Wednesday guys!
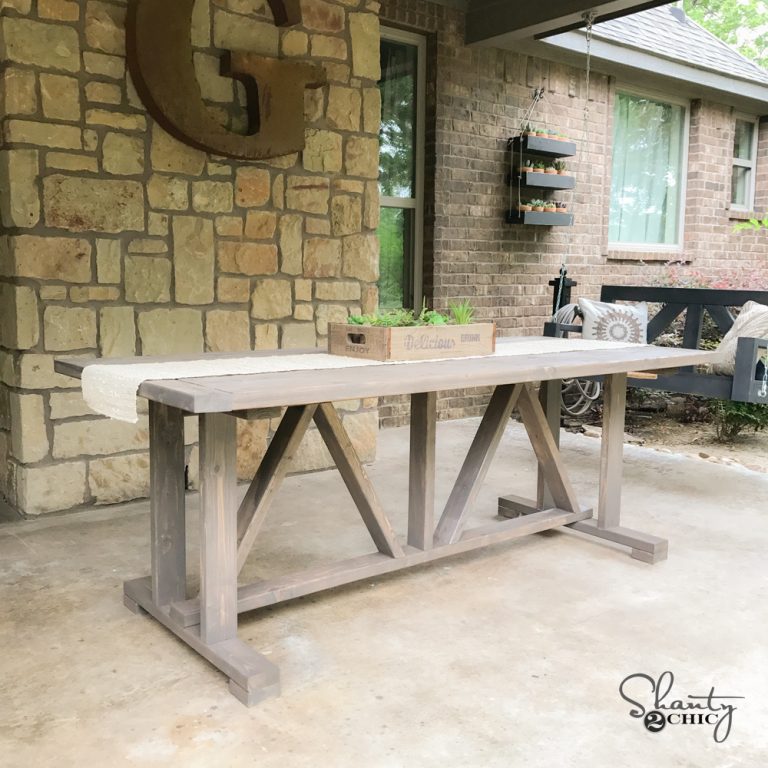
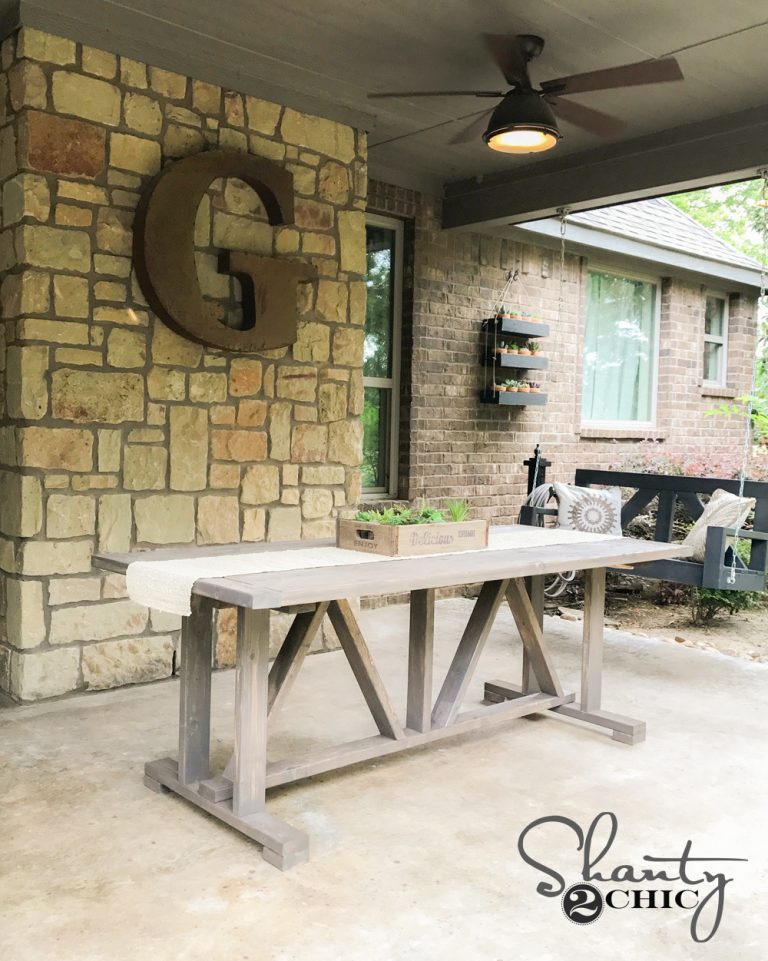
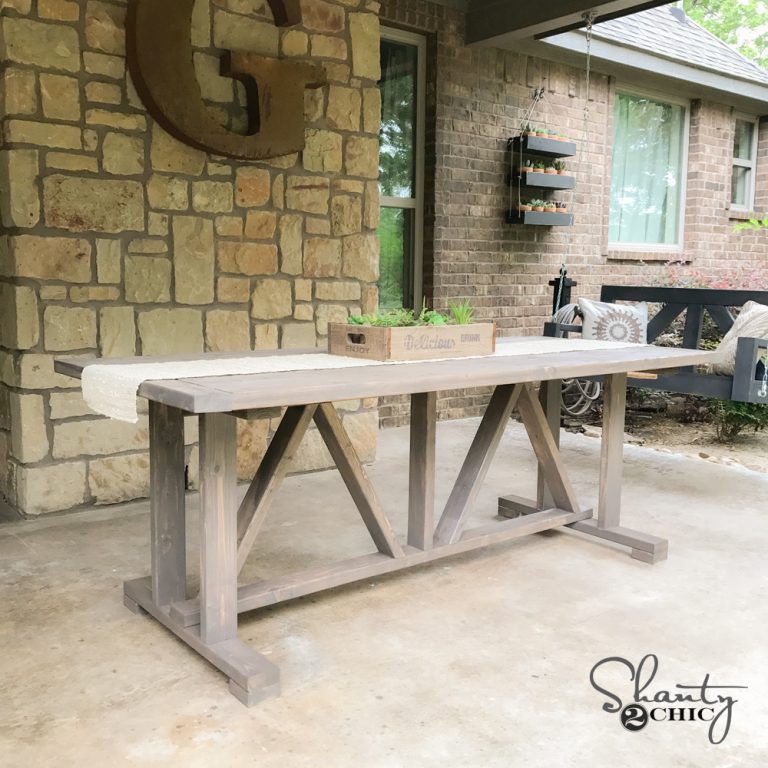
We are back with another plan today. I am THRILLED with how this design turned out. I wanted to design a table using only 2×4 studs and that’s exactly what I did. This one uses 17 of them, which made my cost of lumber just under $60. YEP… $60. Before we get started on the build, you can see exactly how we built it in this weeks YouTube video tutorial HERE or by clicking below!
Now look how cute this thing turned out!
Be sure to download and print the FREE PLANS by clicking HERE!
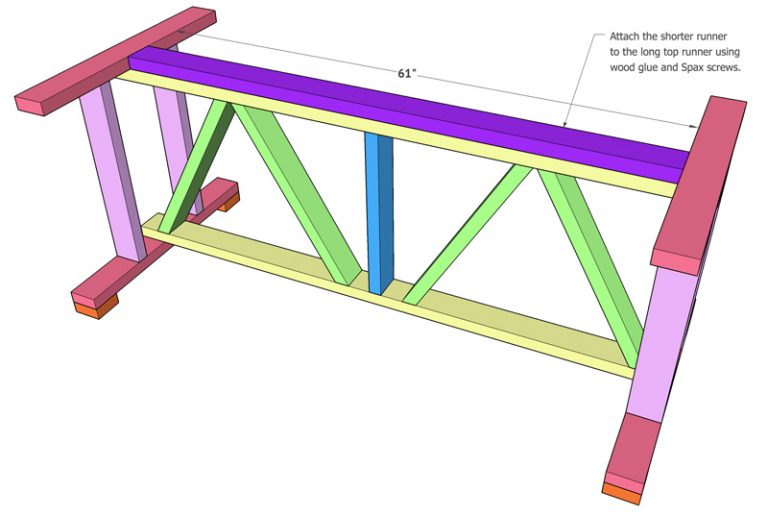
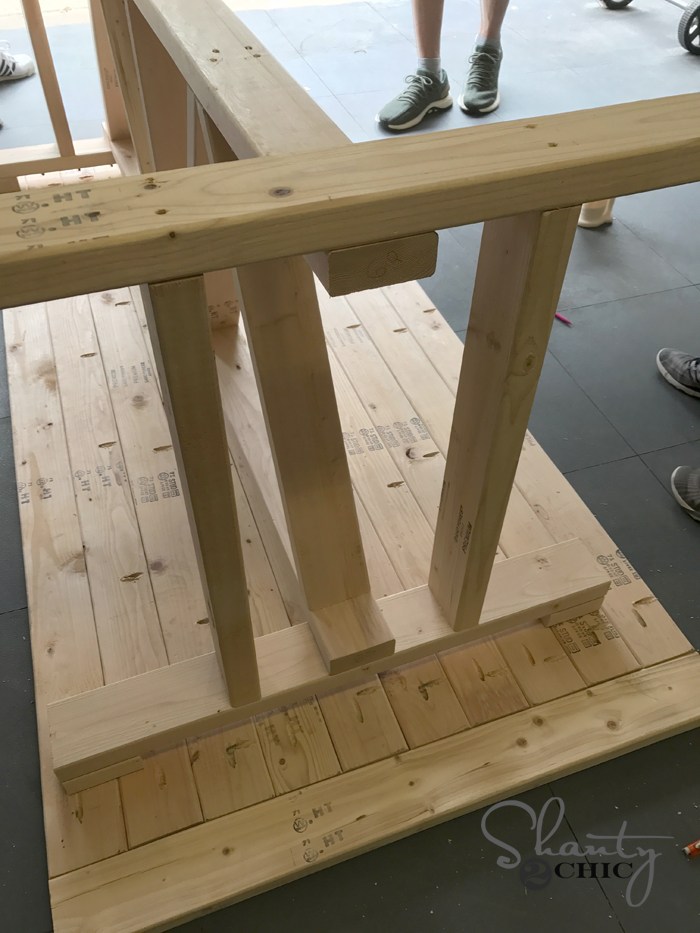
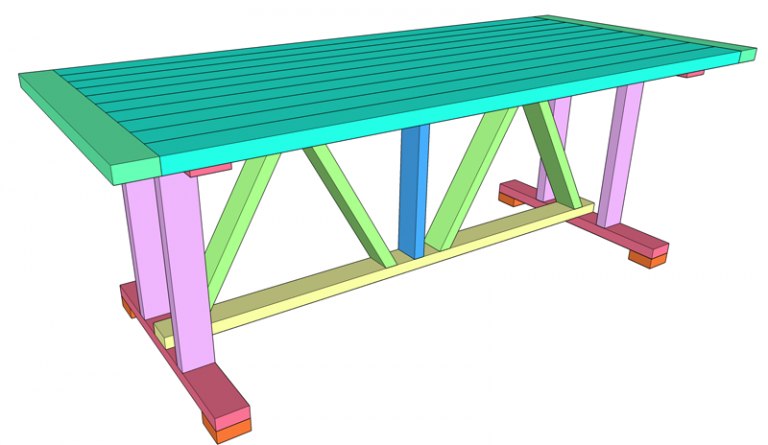
First step is creating two table bases like below.
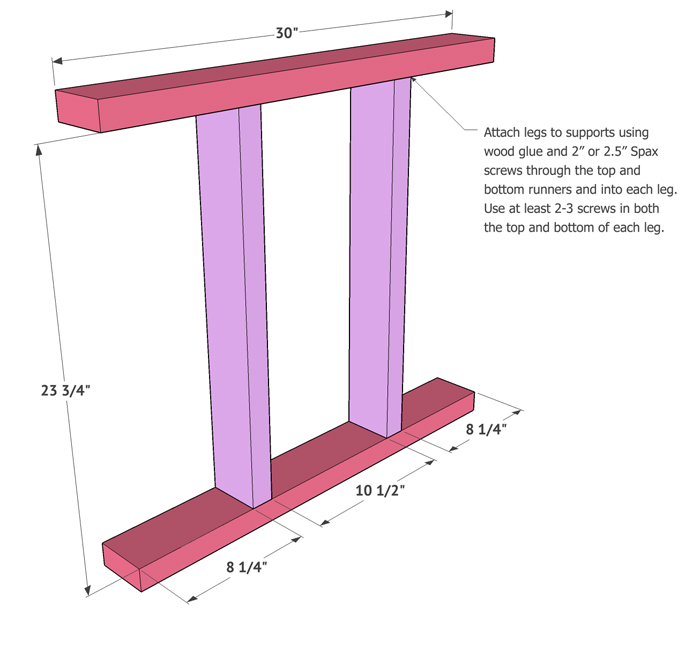
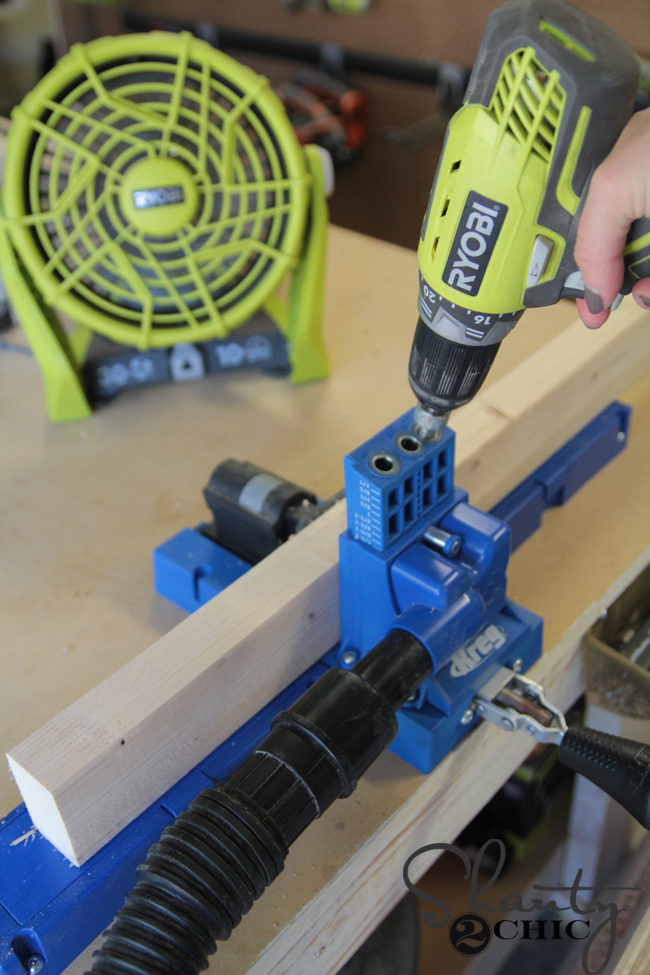
We attached all of the pieces using wood glue and our Ryobi 18V Quietstrike Driver. Guys… This thing is too legit. It basically does all of the work for you, but it’s quiet like a drill not like the traditional driver.

We used 2.5″ Spax screws with the driver to attach the screws.
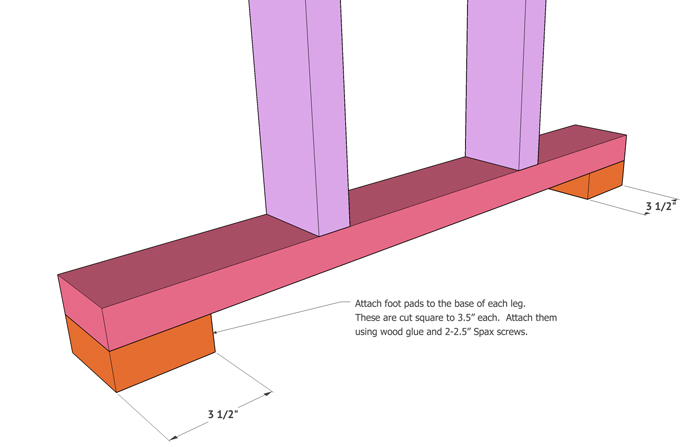
Once the bases were built we added the foot pads. We used wood glue and screws to attach these to the bottom of each leg assembly.

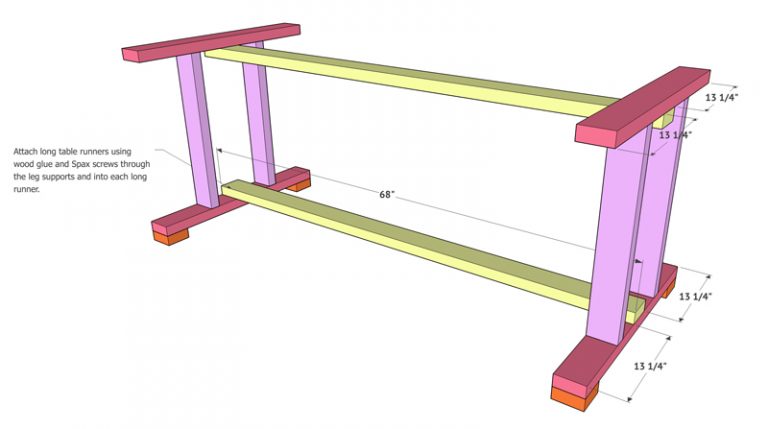
Once the bases were built, we attached the long runners to each base which created the basic bottom of the table. Line the boards up on the center of the both the top and bottom of each leg assembly and attach them using wood glue and Spax screws.

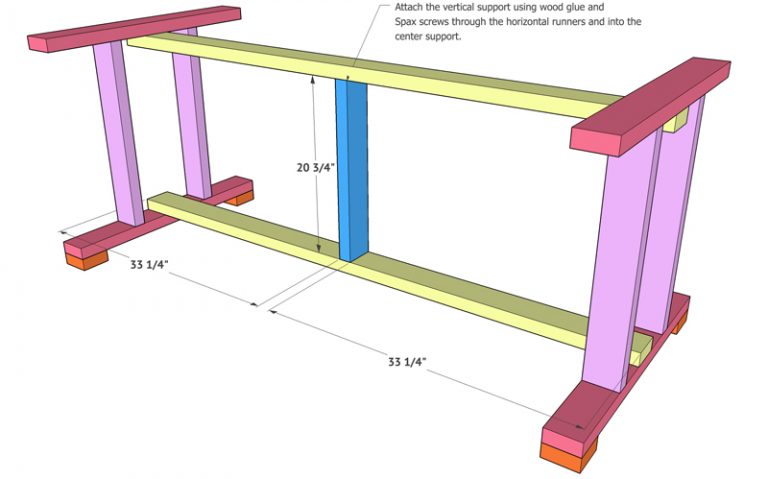
Next, we attached the vertical support board. This will attach to both long runners in the center to support the weight of the table. We attached this board using wood glue and Spax screws.
At this point we attached the diagonal pieces. We like to line the boards up and actually mark our cuts with a pencil to get the best fit. Attach these boards using wood glue and Spax screws.


The final step of the base is attaching the shorter runner that will sit just on top of the the longer top runner. Cut this to fit and attach it using wood glue and Spax screws through the top of the runner and into the runner below it.
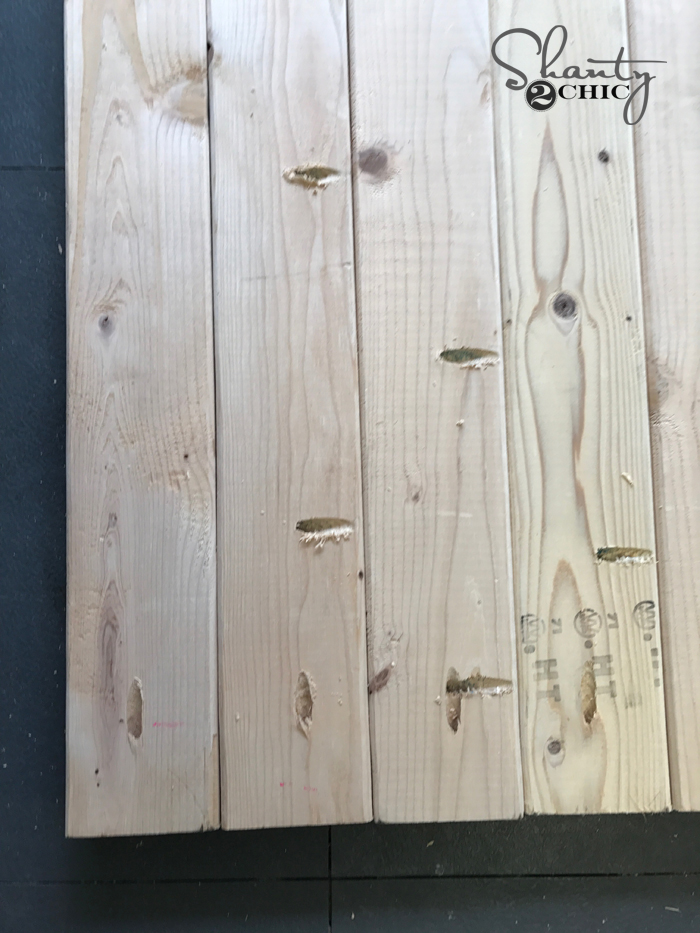
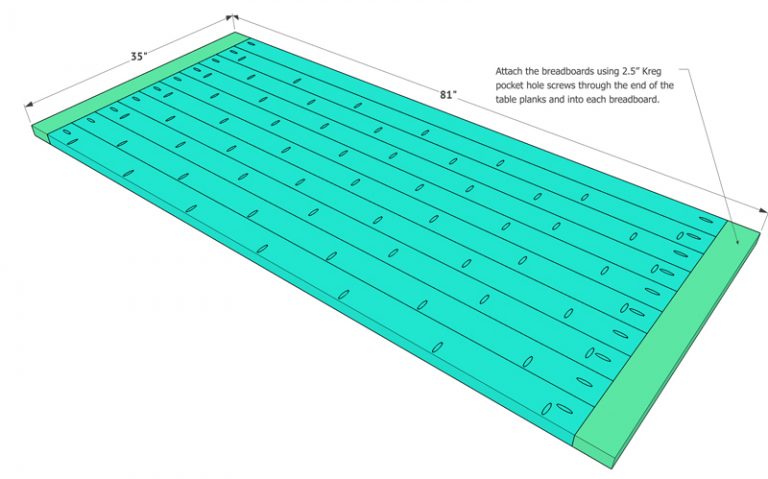
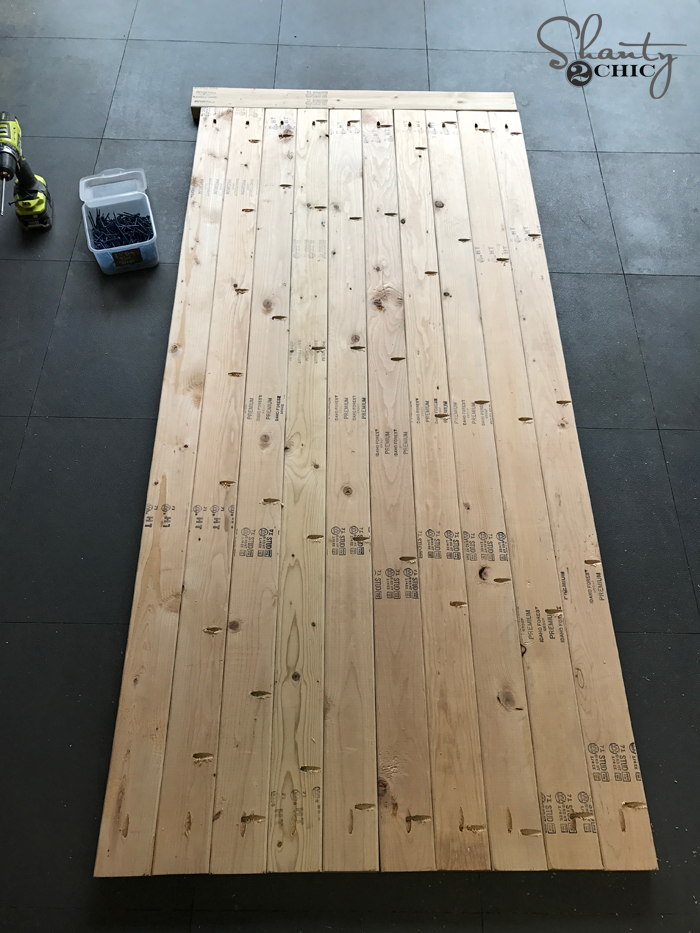
Once the base is built, it’s time to build the table top. We cut all the planks to size and added 1.5″ pocket holes to one side of all but one of these boards using our K5 Kreg Jig. You can find the K5 HERE on Amazon. We also added a pocket hole to the end of each board. We will use those to attach the bread boards in a next step.
Attach the planks together using 2.5″ pocket hole screws.
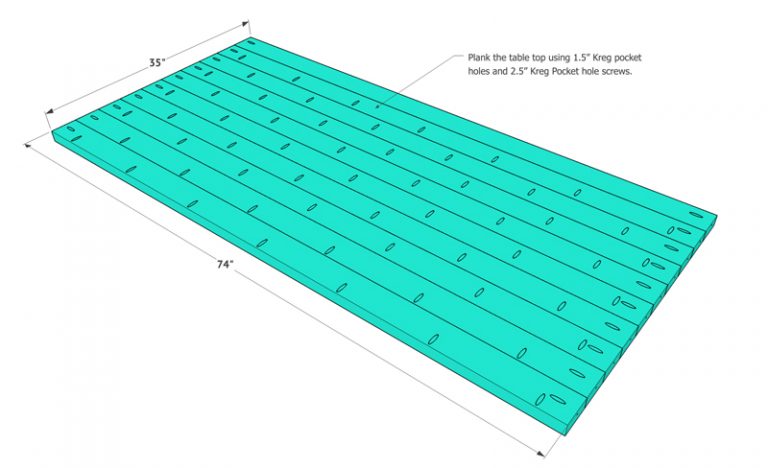
Now cut the breadboards to exact size, and attach them using 2.5″ pocket hole screws.
Final step is attaching the base of the table to the top of the table. Turn the base assembly upside-down on top of the bottom of the table top and attach it using longer Spax screws through the base and into the table top.
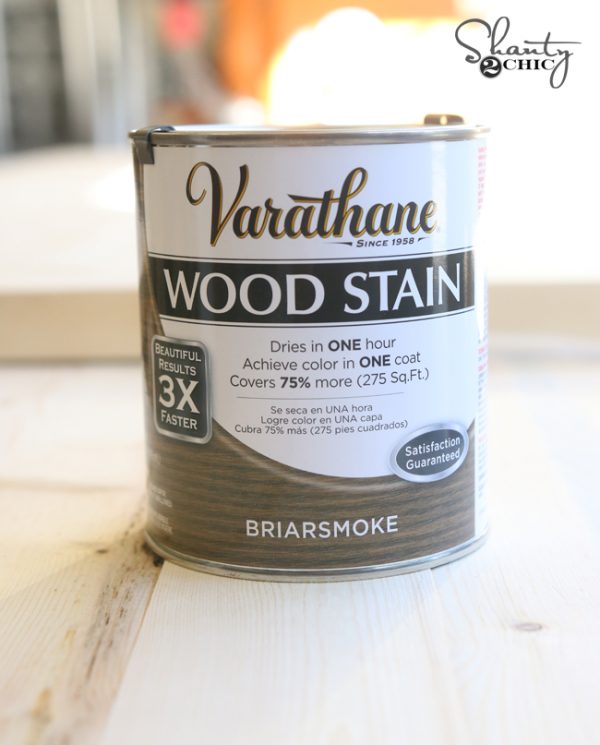
We stained our table using our fav… Varathane Briarsmoke!
Be sure to add a coat of outdoor protectant like Spar Varnish on top of that since the table will be outdoors!
Here she is all finished up!
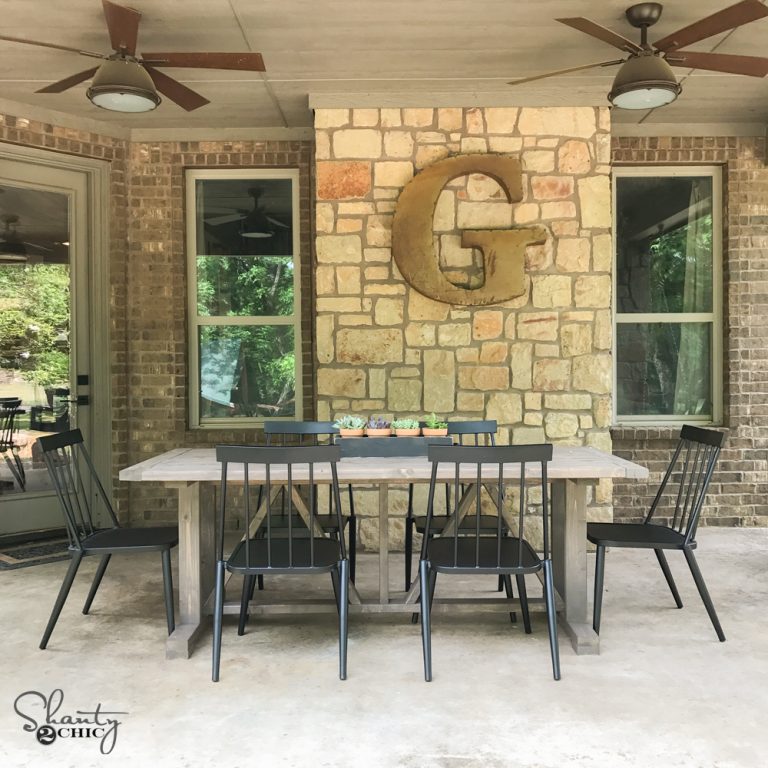
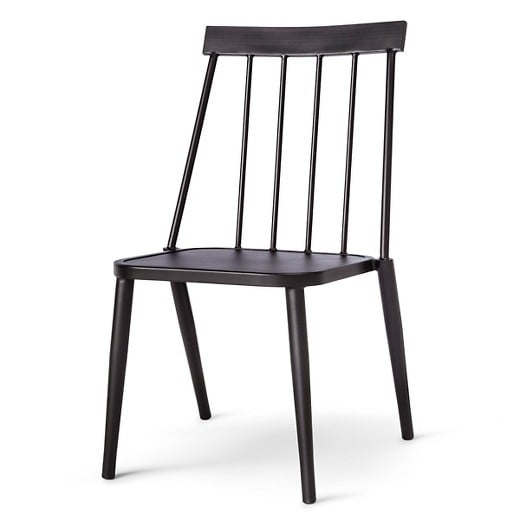
How cute are those chairs??? Those were a great Target find Ashley made and you can find them HERE!

Curious, what would be the best thing to do if you were to want to expand the table to accomodate ten people? Would making it larger be detrimental to the strudyness/integrity of the table?
Wondering the same thing!
do you have to leave spaces in-between table top if leaving outside all winter
It gets cold and snow here in buffalo, ny
Hi, i love the table, do you think the support is strong enough to create a larger table top?
The design looks great, although I have to put a diagonal cross support along the vertical legs, they wobble a little too much for my comfort level.
The feet are a nice touch.
Where did the “G” decoration come from?
Anybody ever figure out the miter cut?It isn’t mentioned in the video or the plans? Is it 45 degrees?
43 degrees
What wood do you use seeing that the table is meant for outdoors?
cedar is better for outdoors or you can use yellawood or any other pretreated wood.
or paint it with an outdoor stain and finish.
Is there a way to do the top without the pocket holes? I don’t have a way to do those.
Dowels, dominos, tongue and groove, rabbets, screwed together using a perpendicular piece of wood, etc. You can even just glue them together and then clamp them tight for 24 hours, although any further type of joinery will add strength.
or just plain old style dowels. works great for putting boards together
Hi! I am at the diagonal pieces and i am stumped! I am new to angle cuts! Are the angle cuts 45 degrees?? Help please!!
Wondering the same thing. Did you end up just doing a 45?
I used 30* angle.
They are 43 degrees
Hi there, I am in the process of making this table and wondering what angle the diagonal pieces are? I can’t find it anywhere…Is it just a 45* angle?
thanks!
Are these kiln dried 2×4’s? If not, don’t they warp?
I like this but as a desk for my office at work, I love how big it is. If the center support was to be shifted to an outer side of the bases would it still be stable or is it too wide? I want a room centered desk not one up against a wall. Or would it look okay if I kept it like a table haha?
Any bench ideas to go with this table?
My husband and I just built this table and made benches to match. We basically just took the over all design and shrunk it down to bench size. They fit easily under the table and don’t stick out at all!
Any way you could upload those dimensions? Math is not my strongest skill. ????
Could you post those dimensions?
Hi Amy!
Do you have the plans for the benches? Trying to figure out how to size it down!
This would look good inside too!
What a Great looking table.