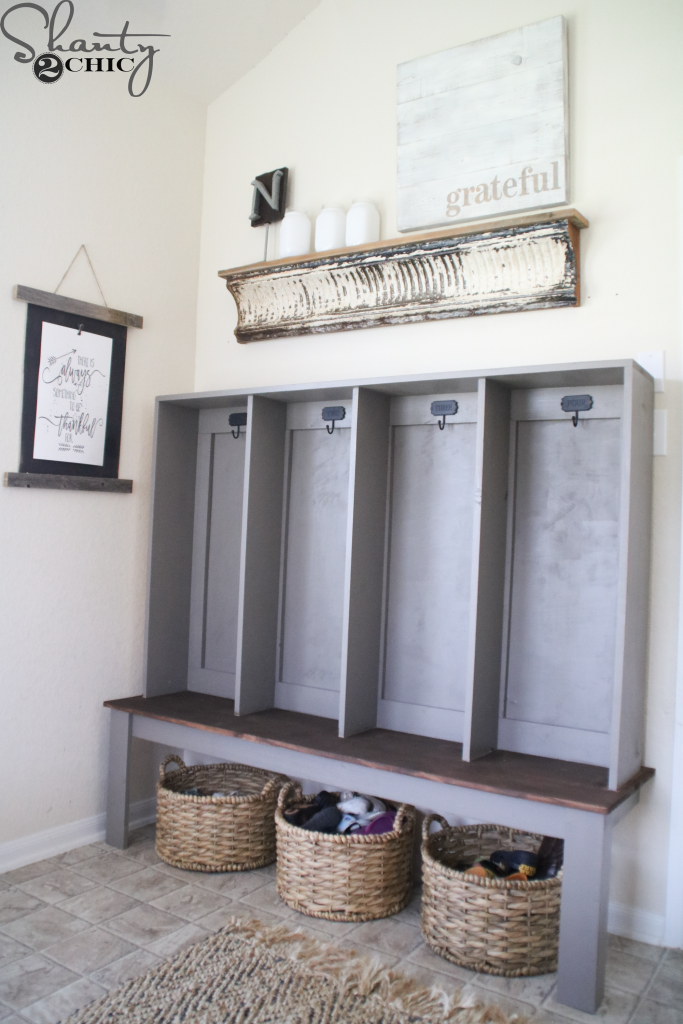
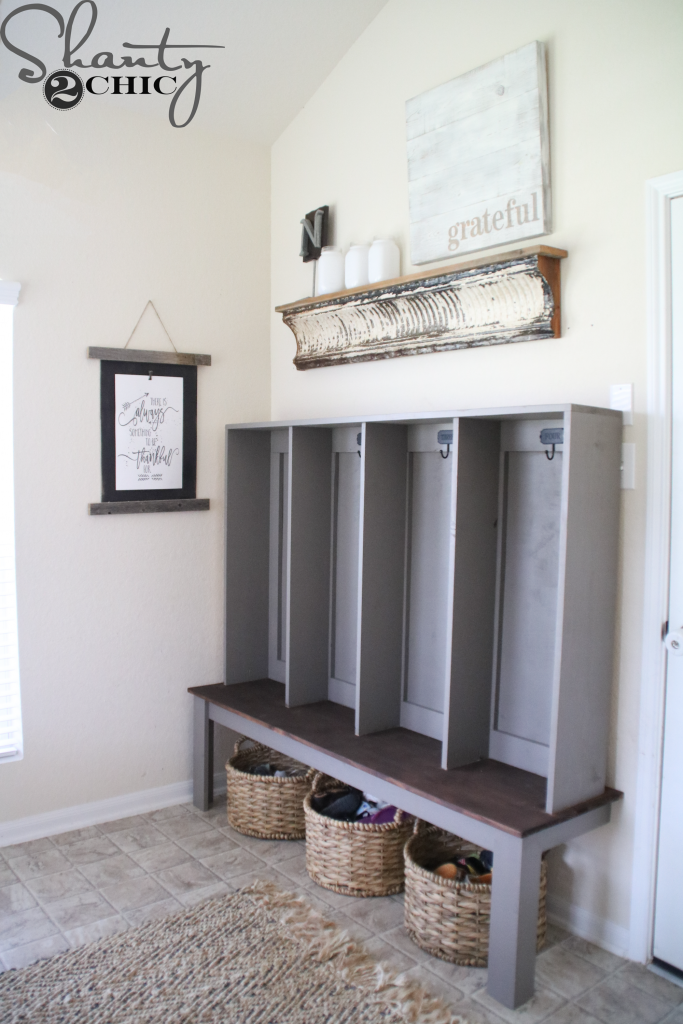
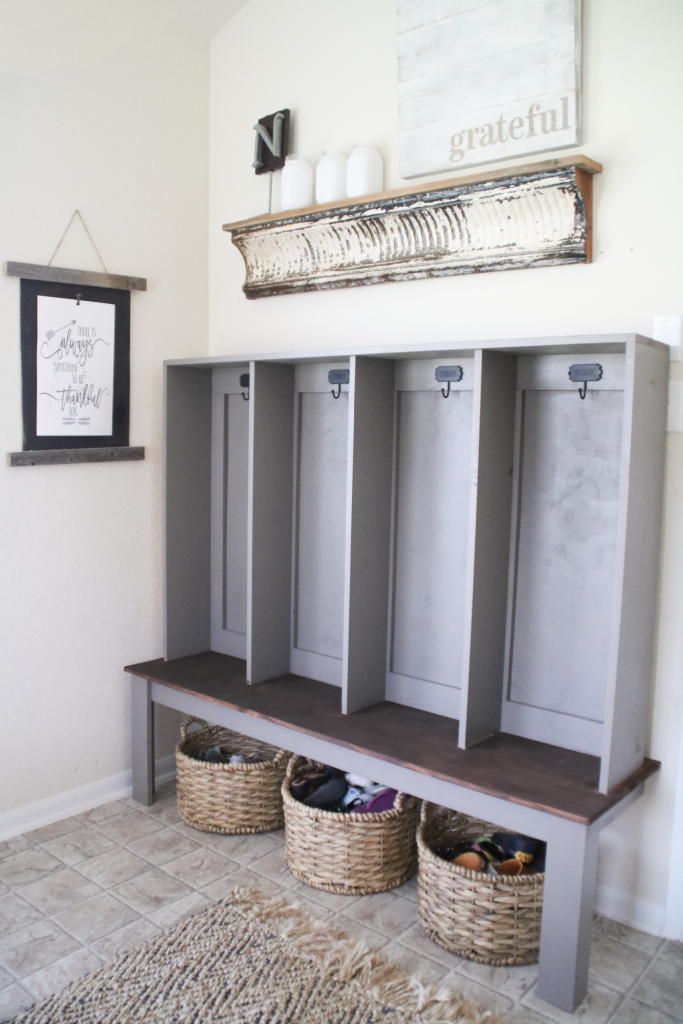
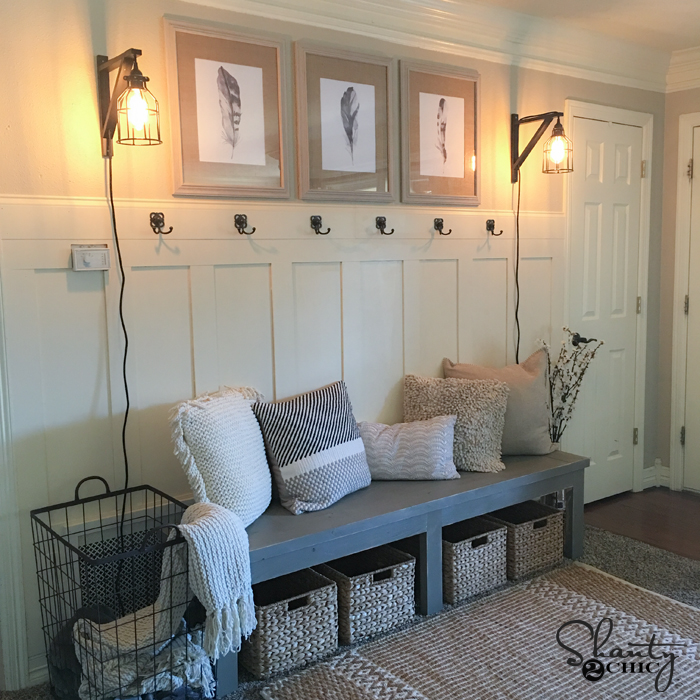
Last summer, Whit and I loaded our tools, lumber and kids in the car and headed to Houston to crash our sisters house! We’ve shared what we did to her living room but we haven’t shared this DIY Wall Locker that we built to revamp her entryway/mudroom area!

Her space was fine but she complained that the way they were using the room was a waste of space. They have a dining room, so they didn’t need another table to eat at and this room is right off the garage, so it’s the main entrance for the whole family. She said it had become a giant collect-all space with bags and shoes everywhere.
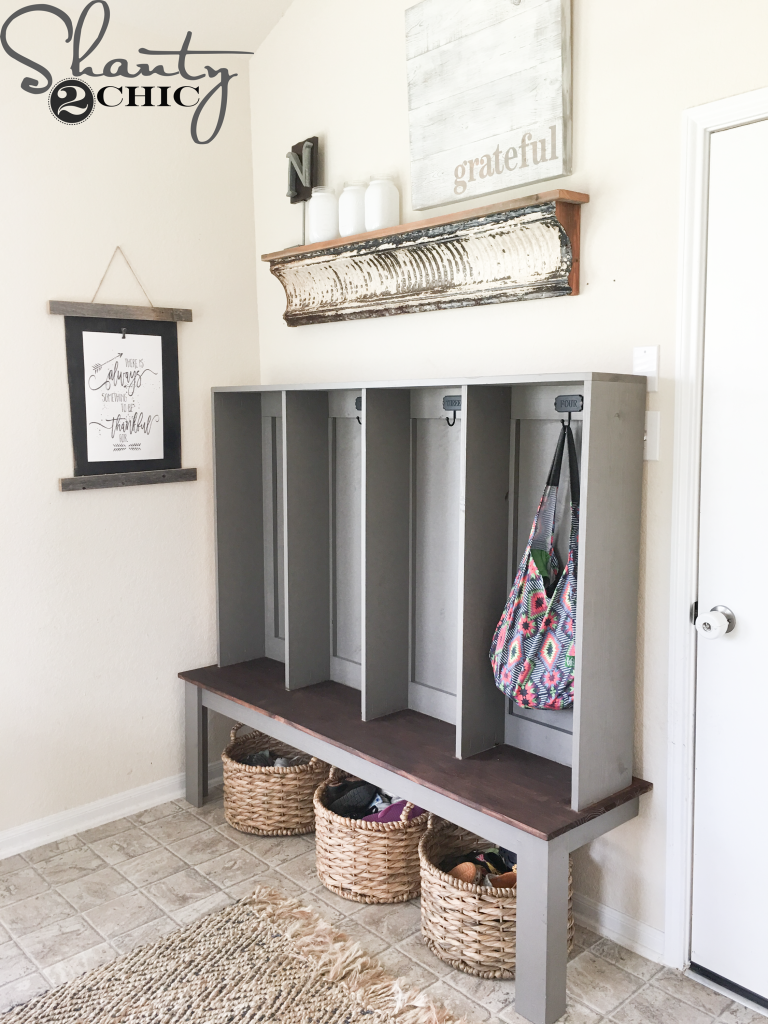
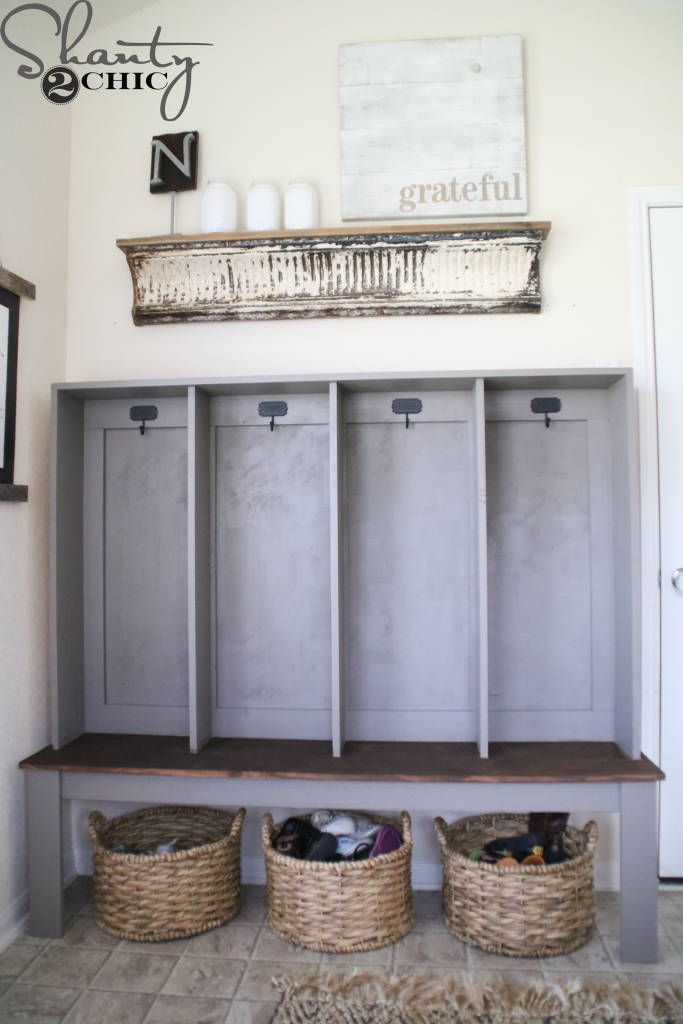
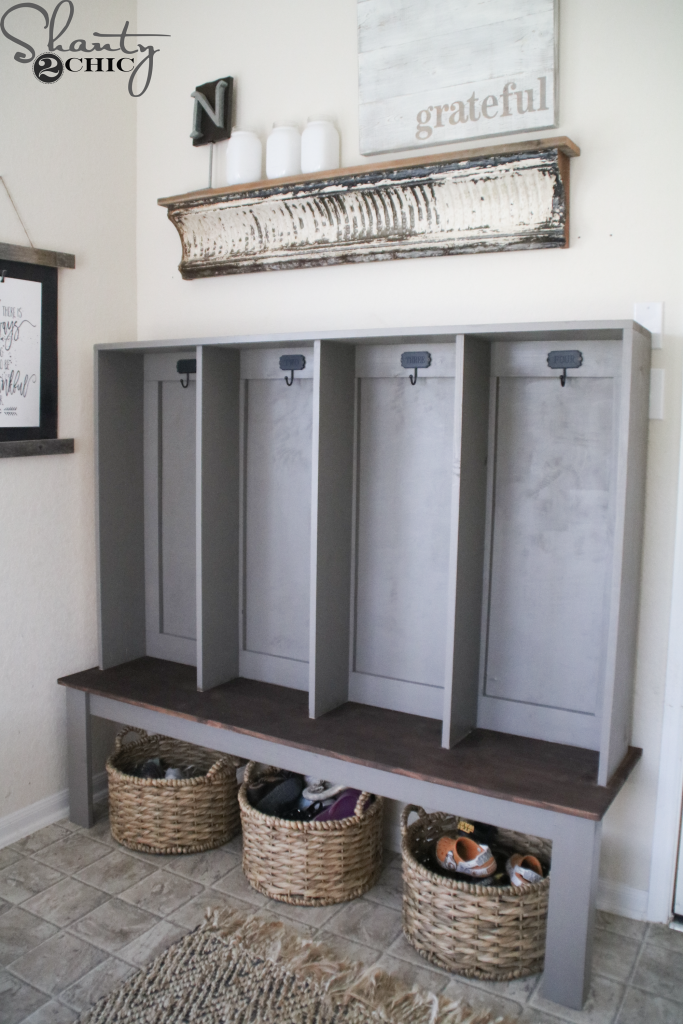
DIY Wall Locker – with built in bench
I had her measure the space so that I could design the locker before we headed down to Houston. I came up with a built-in bench with a locker hutch. The open bottom of the bench was perfect for shoe baskets and the locker cubbies gave each of her four kids a space for their backpack and lunch box.
***We have had a lot of questions regarding the light switch. Our sister sent us measurements, along with a before pic, and I had her give me the exact location of the switch plate. Unfortunately, with where it was located, I was left with a few challenges:
- I could have the hutch wider to completely cover it, which wouldn’t allow it to be accessible.
- I could have built the hutch shorter but I felt that it wouldn’t look good that short.
- I could make the cubbies more narrow.
I opted to make the cubbies more narrow but I measured my kids backpacks first, to make sure the cubbies were wide enough to accommodate a full backpack. Four cubbies, 15″ wide still made the hutch cover the switch plate so, I called our sis and asked her if she would prefer me to slide the hutch away from the wall about 1″ so that she could slide her hand behind it to access the switch or if she would rather me figure out another solution to leave the switch completely exposed. She opted for the 1″ gap from the wall. There was a TON of planning that went into this piece, from the very beginning. Before we even attached the hutch to the bench, we tested the switch and had Leasha test the switch to make sure it wasn’t a hassle. That is what is so great about DIY! You can customize any piece to fit your needs :)***
This piece is so fun and so easy to build! You can find the FREE Printable Plans at the end of this post!
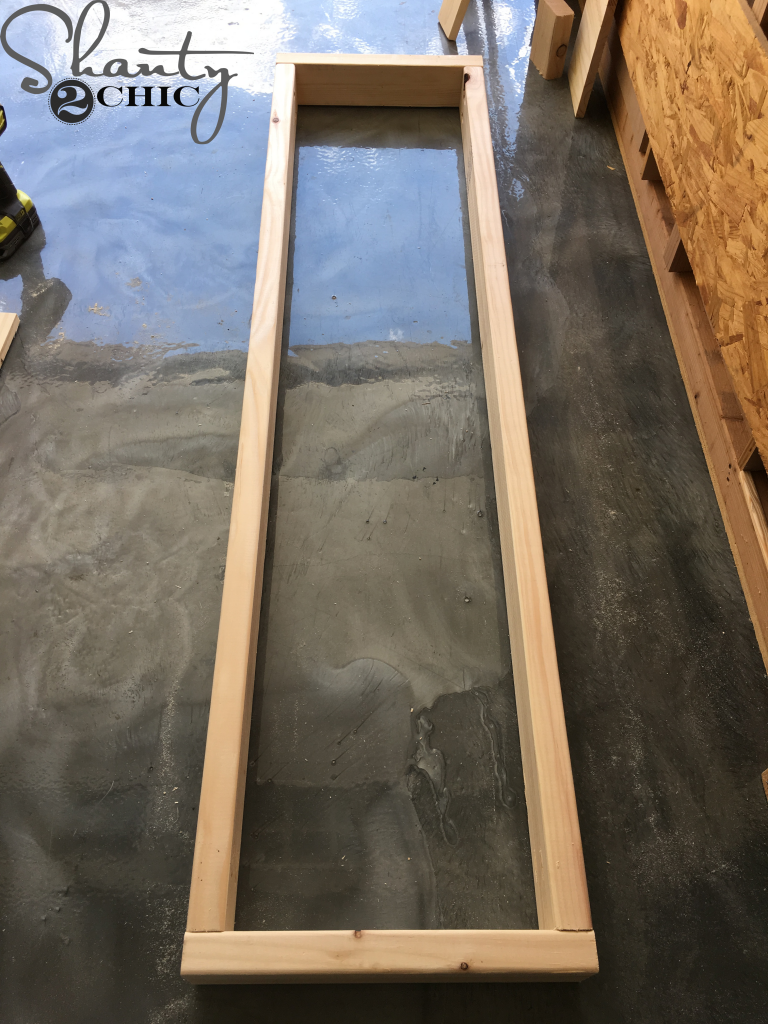
Step 1 – Building the Bench Frame
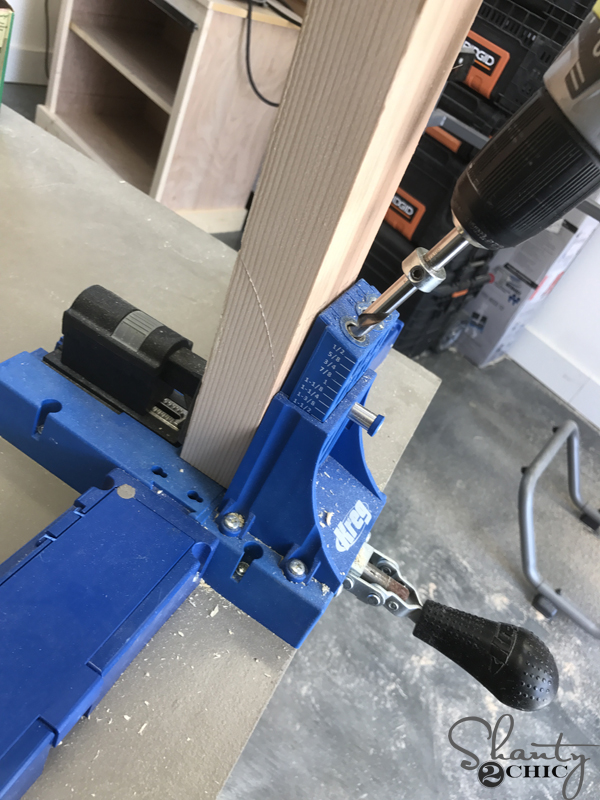
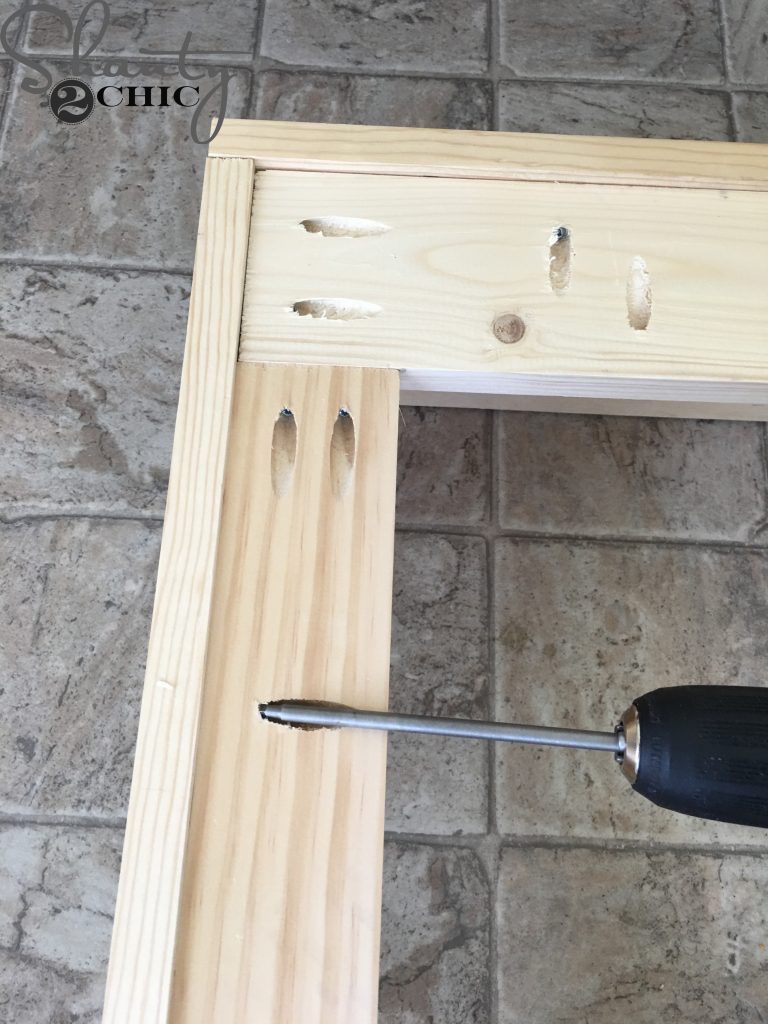
I started by building the bench frame. I made my cuts, then I drilled 1 1/2″ pocket holes into the ends (and 3/4″ pocket holes along the length) of the front and back apron pieces. You can find our favorite Kreg Jig model HERE on Amazon.
Then I attached the front and back pieces to the side pieces with 2 1/2″ pocket hole screws and wood glue.
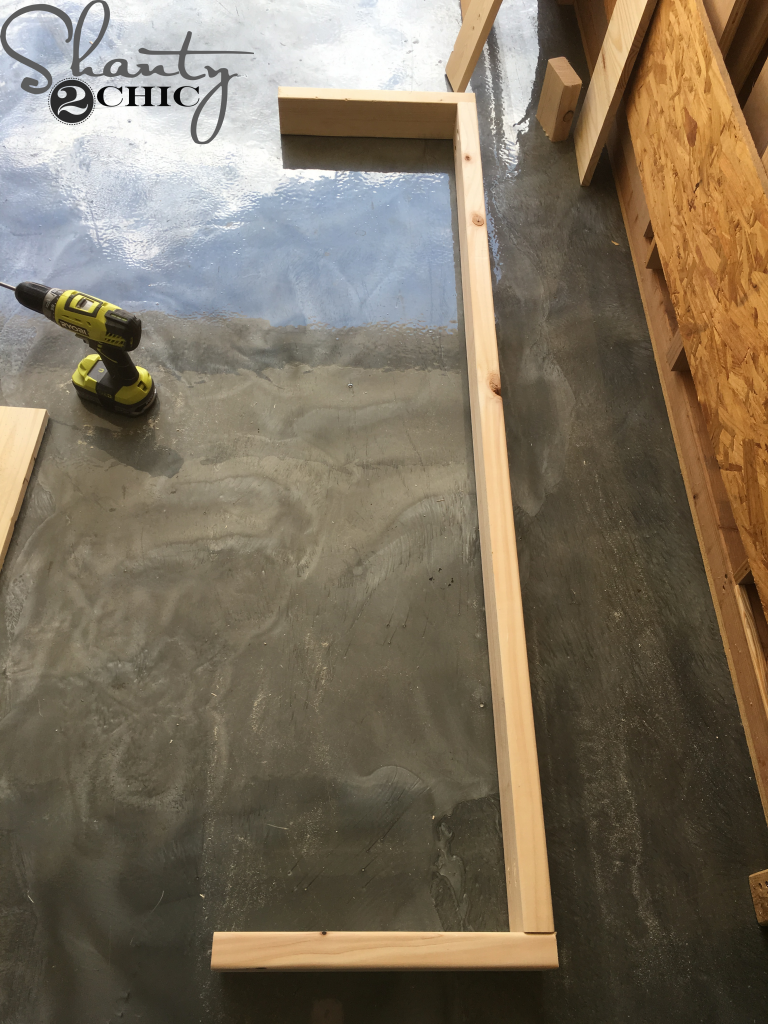
Here is one apron piece attached to the side pieces.
Make sure the pocket holes along the length of the apron pieces are facing the same way when you attach the side pieces.
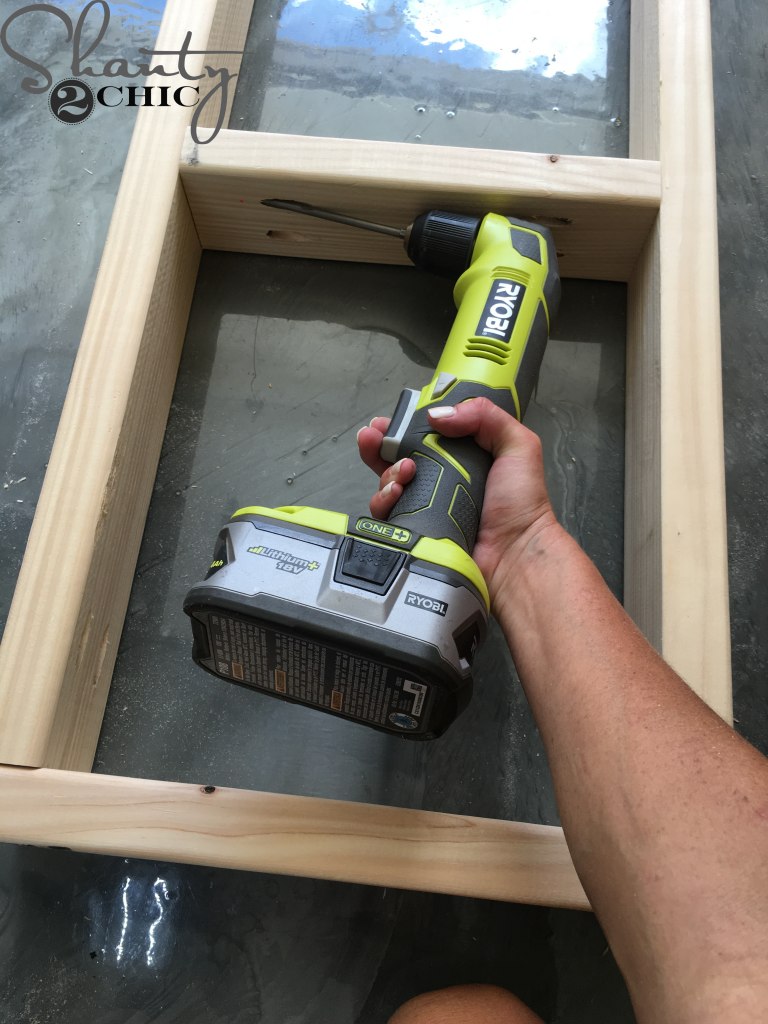
Table of Contents
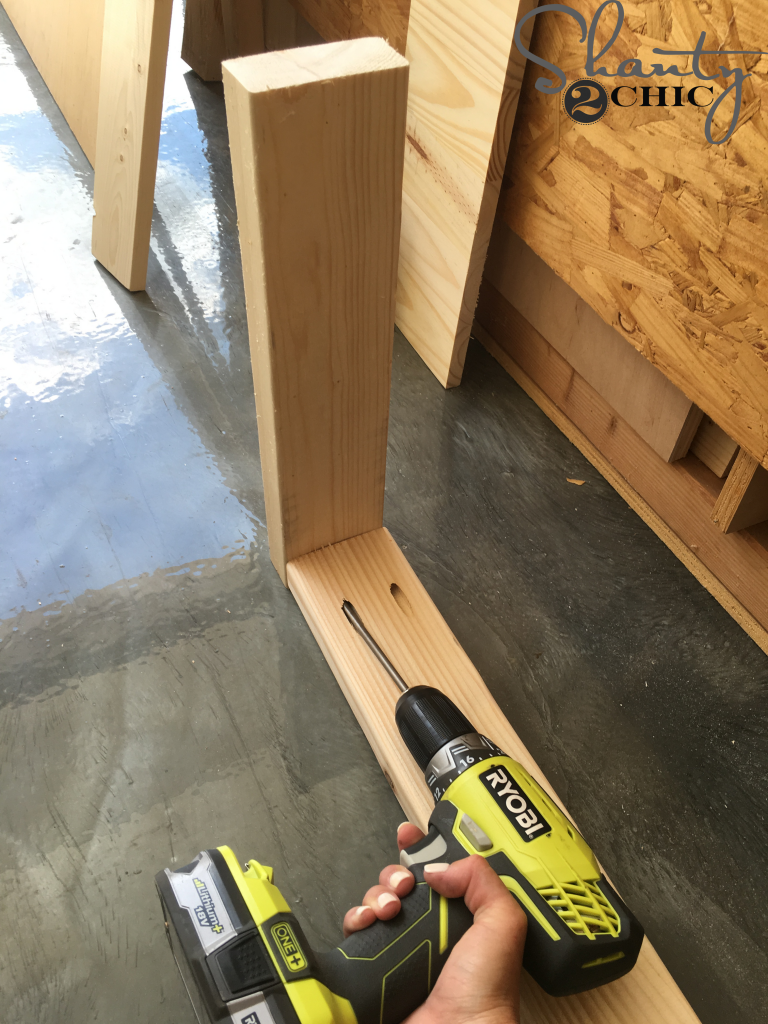
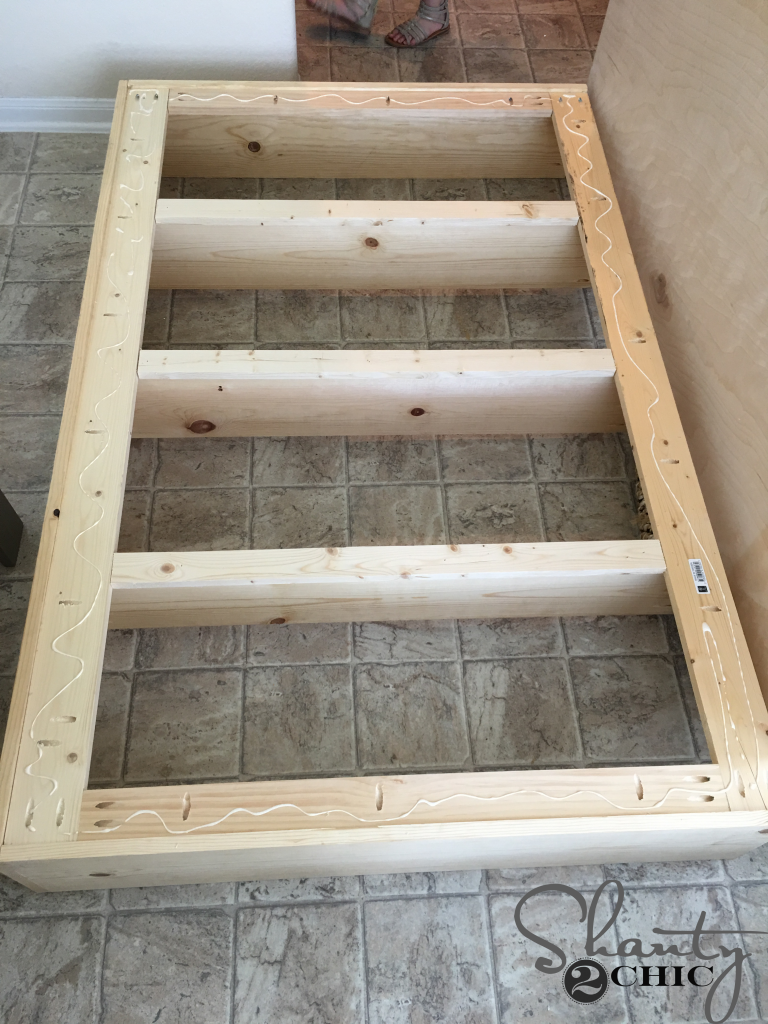
Step 2: Bench Legs
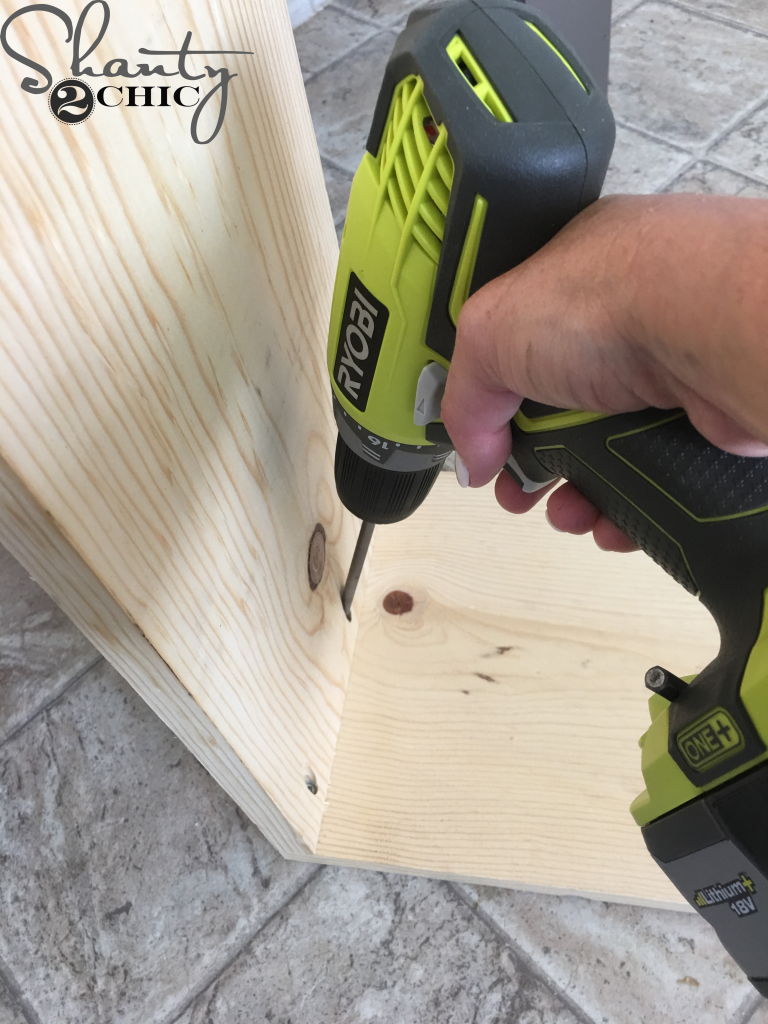
Next, cut the support pieces, drill 1 1/2″ pocket holes and attach with 2 1/2″ pocket hole screws and wood glue. I used my Ryobi 18V, right angle drill for this part. If you don’t have one, you can also use a shorter Kreg driver bit.
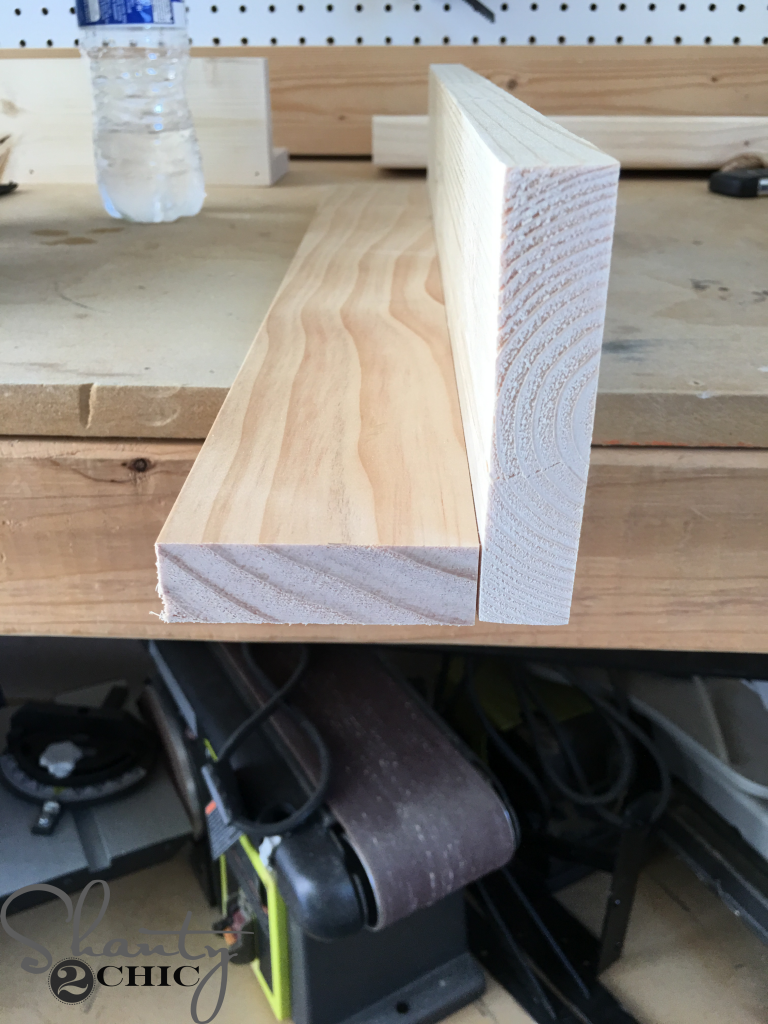
I cut the pieces for the bench legs
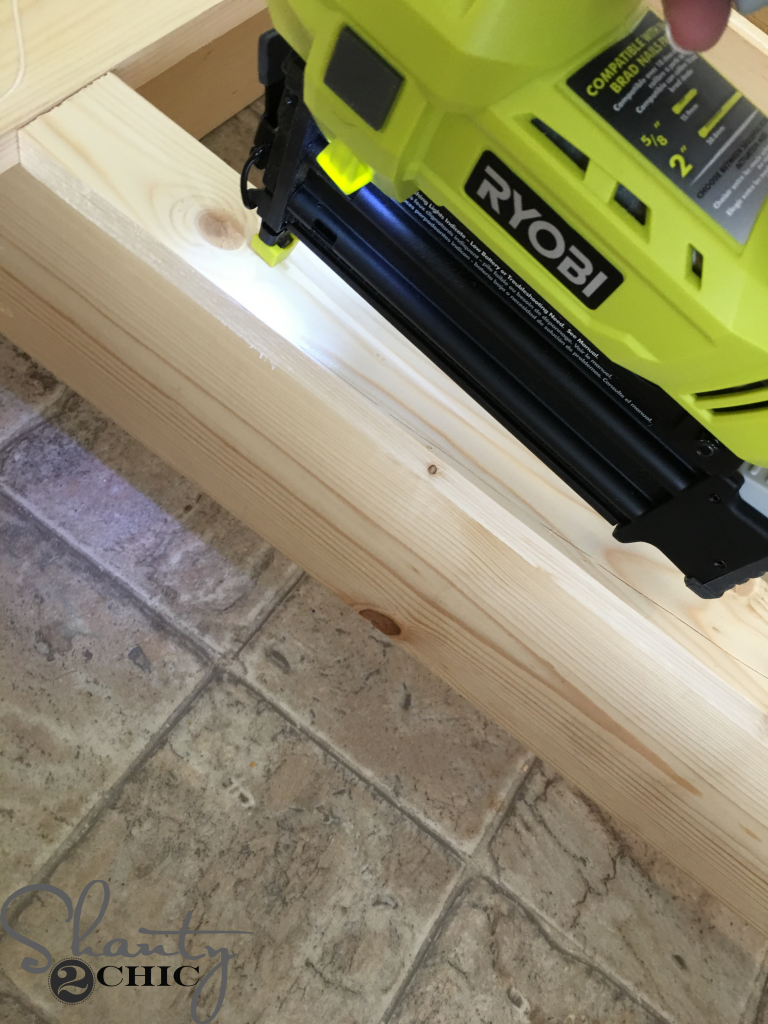
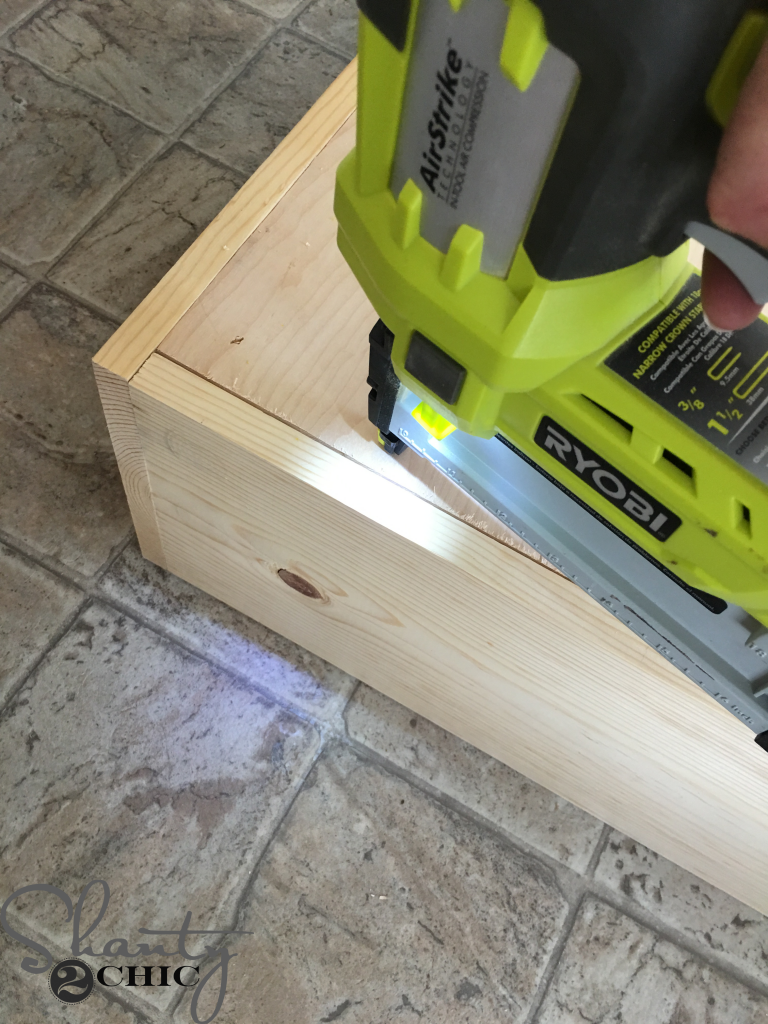
and I used my Ryobi 18V Airstrike Nailer to attach the 1×4 piece to the 1×3 piece with 1 1/4″ brad nails and wood glue.
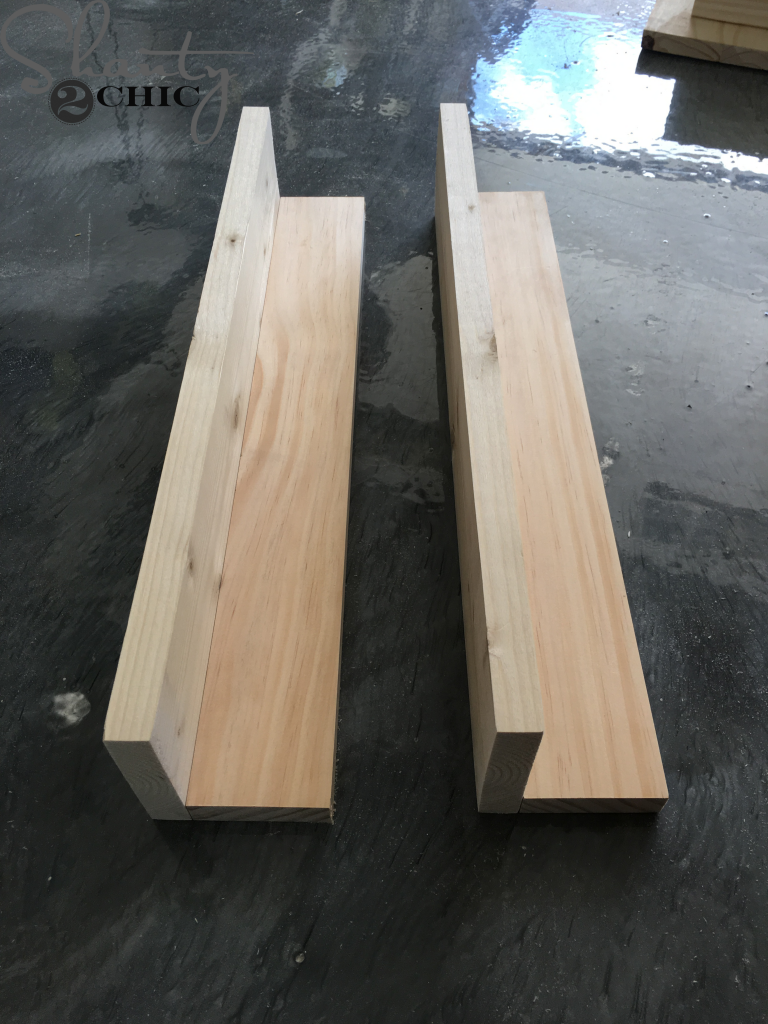
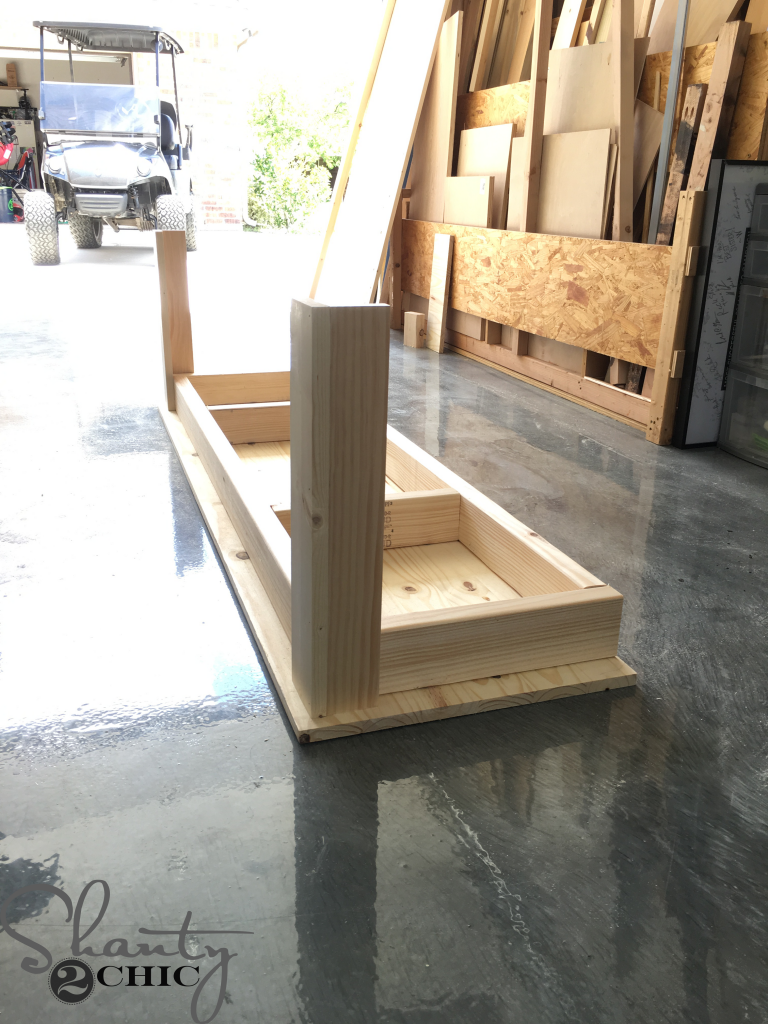
The legs should look like this.
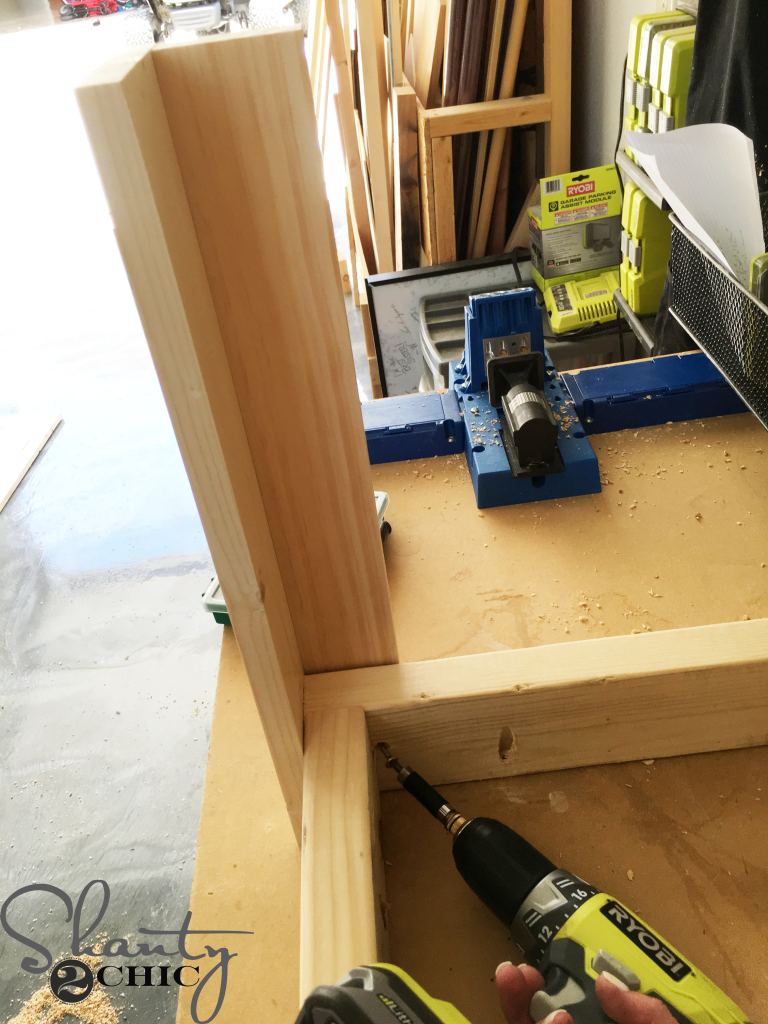
Next, attach the bench legs to the front corners of the bench frame, with 1 1/2 wood screws and wood glue, from the inside of the frame. The legs should be flush with the frame. Make sure that the pocket holes are facing down when attaching the legs.
Step 3 – Bench Top
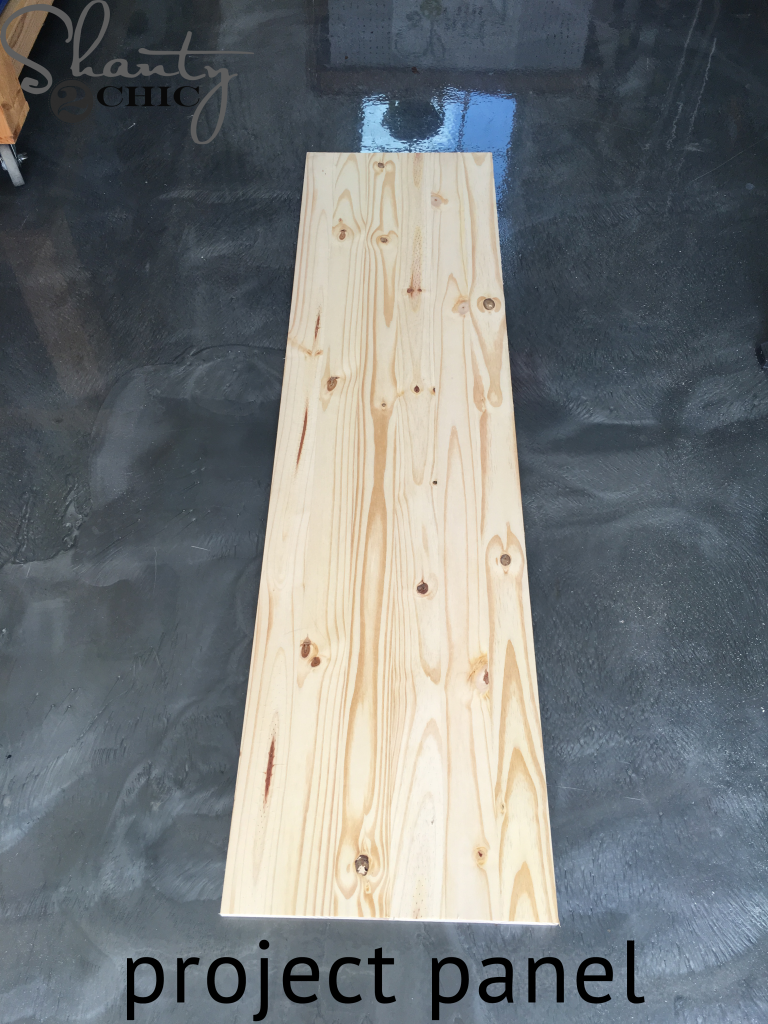
DIY Wall Locker – project panel #homedepot
I used an 18″x72″x3/4″ project panel to create the top of the bench. You can find it HERE from Home Depot.
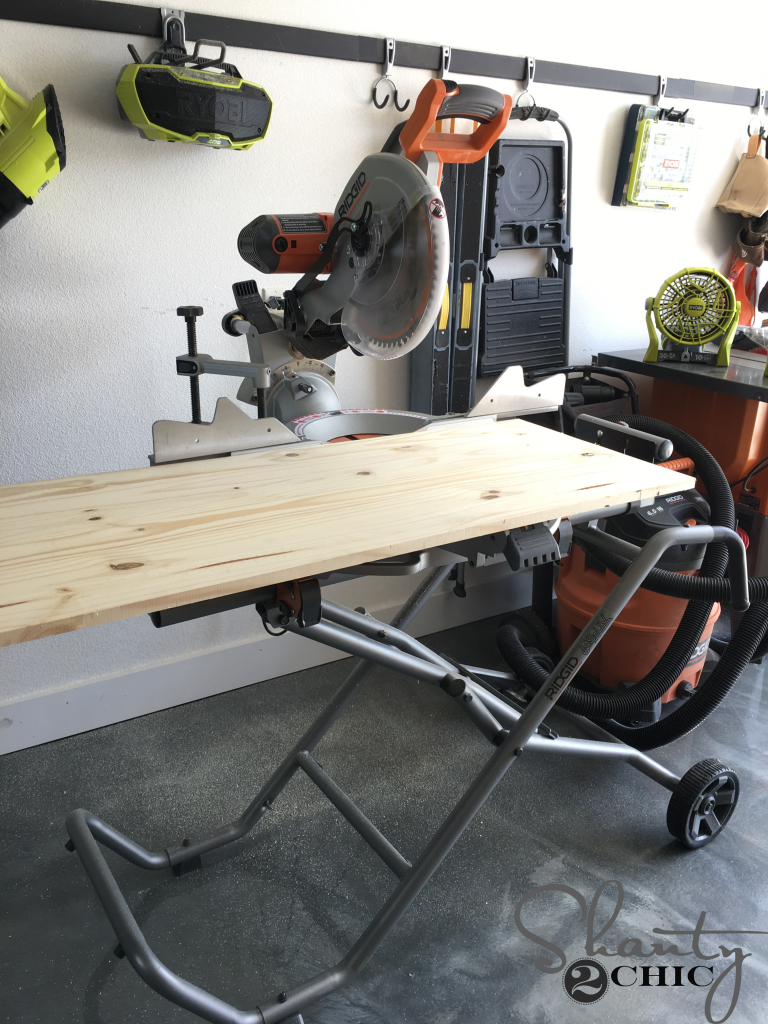
You can cut the project panel with your miter saw, just make your first cut, flip the board and cut through the rest of the board.
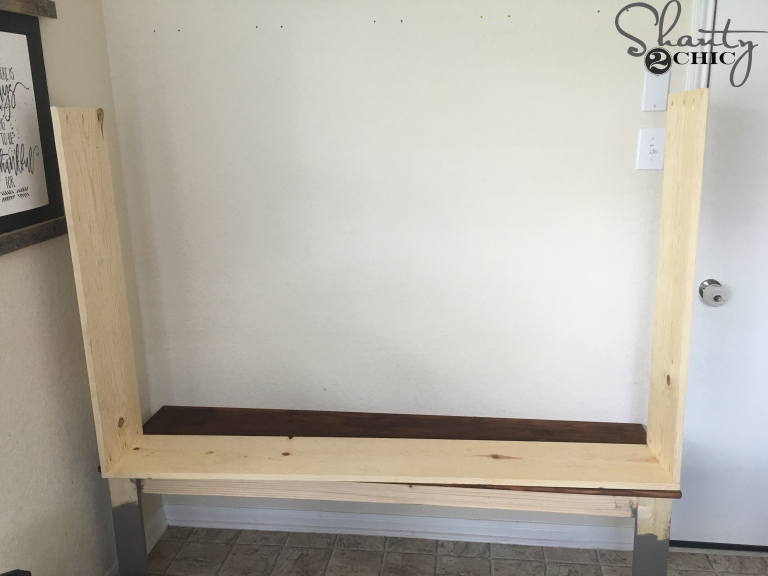
Step 4 – Attach the Bench to the Wall
I made sure the bench top fit the frame but I waited to attach it until I attached the frame to the wall.
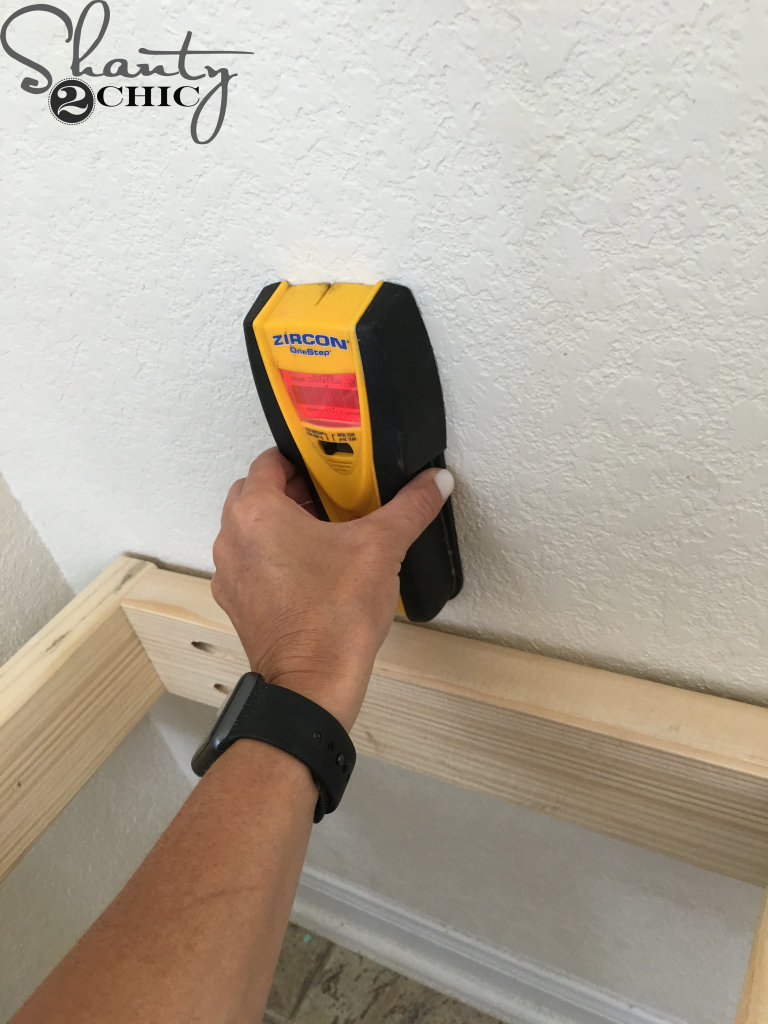
To attach the frame to the wall, locate the studs with a stud finder. You can find our favorite stud finder HERE on Amazon.
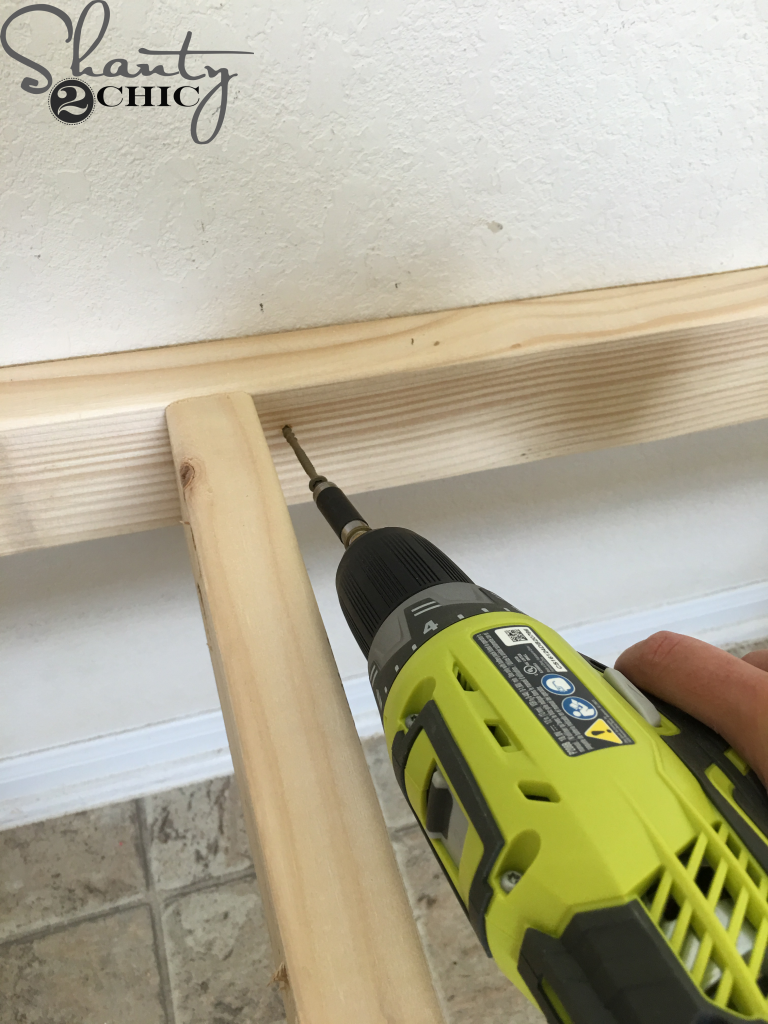
Use 3 1/2″ wood screws to attach the frame to the studs behind the wall. Drill from the inside of the frame.
Step 5 – Paint and Stain
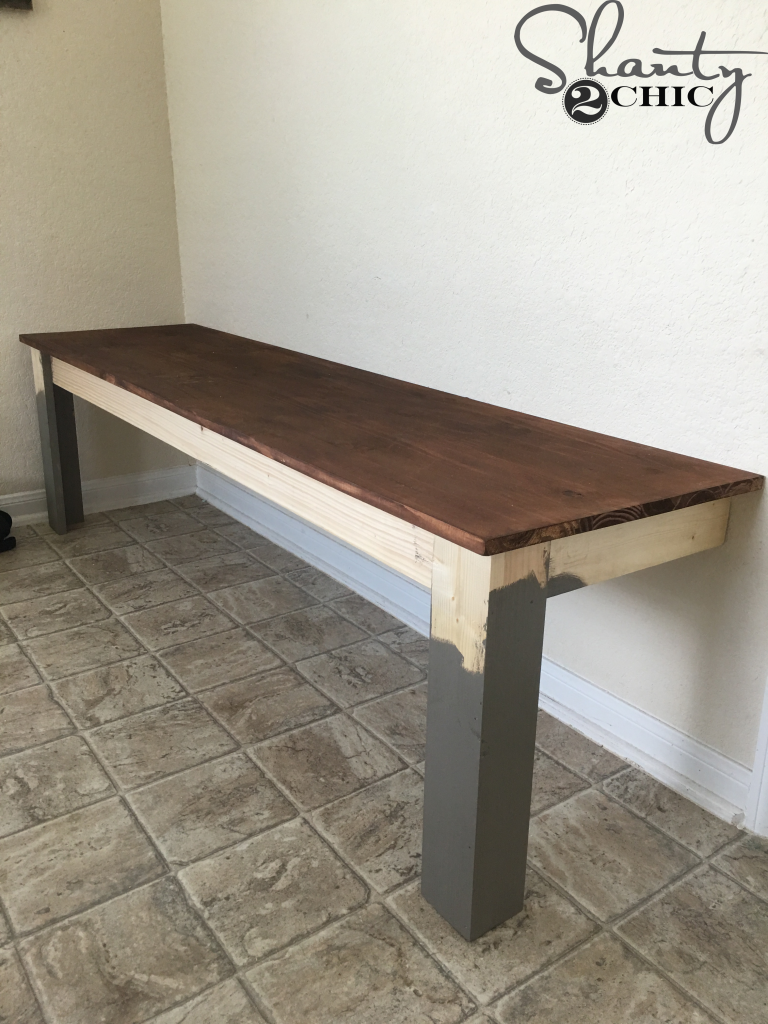
Attach the bench top to the frame with 1 1/4″ pocket hole screws through the pocket holes that you drilled into the front and back apron pieces of the bench frame.
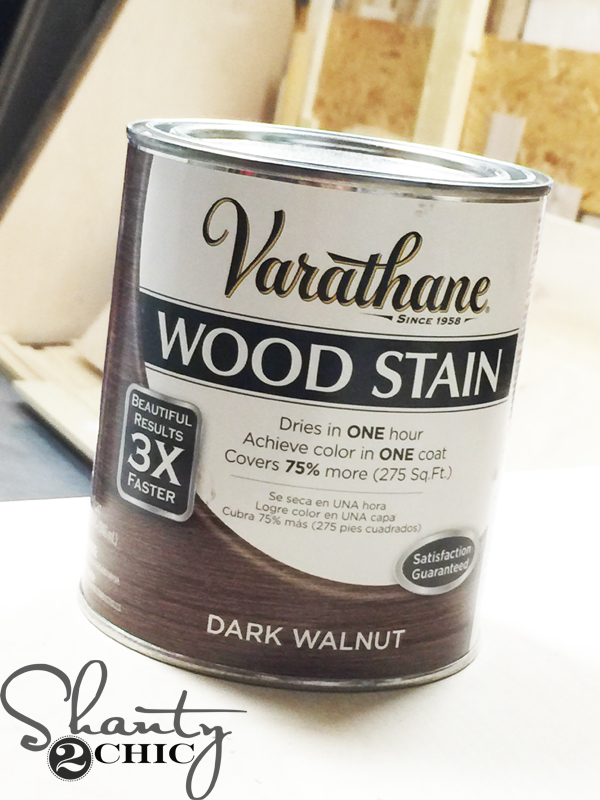
Because I wanted a stained bench top, I went ahead and stained the top and let it dry while I built the hutch. I used one coat of Dark Walnut stain by Varathane. You can find the stain HERE on Amazon.
I painted the rest of the piece Seine by Valspar.
Step 6 – Building the Lockers
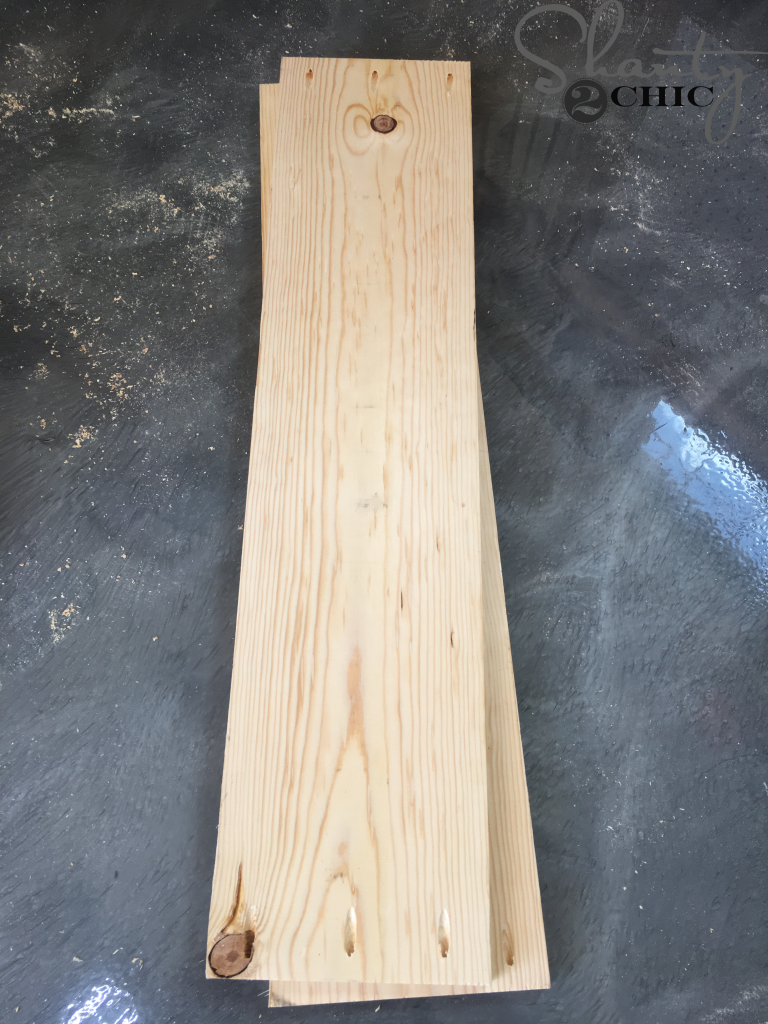
To build the hutch, I made the cuts for my dividers, bottom and sides of the hutch. Then, I drilled 3/4″ pocket holes into both ends of the dividers and side pieces.
I attached the side pieces to the top piece with 1 1/4″ pocket hole screws and wood glue.
Here is the outside frame of the hutch assembled (upside down).
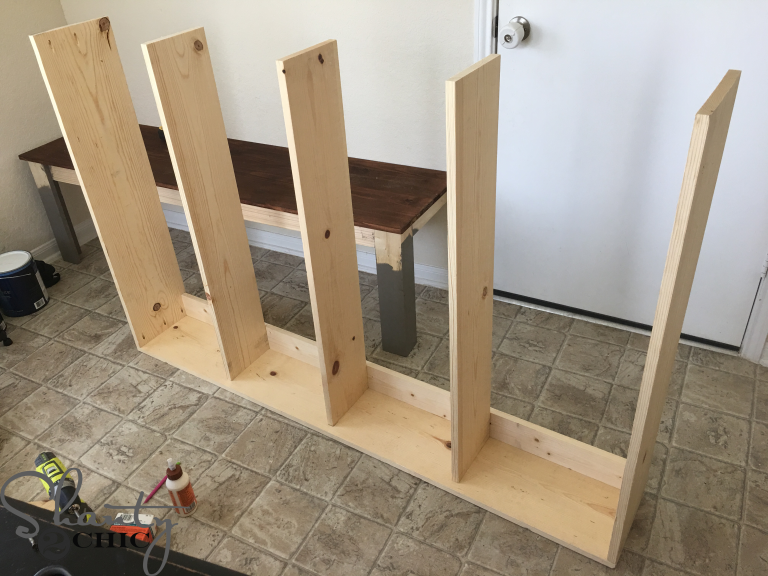
Next, I attached the dividers with 1 1/4″ pocket hole screws and wood glue. The dividers will be centered on the top board with 1″ on each side. Refer to the plans for exact placement!
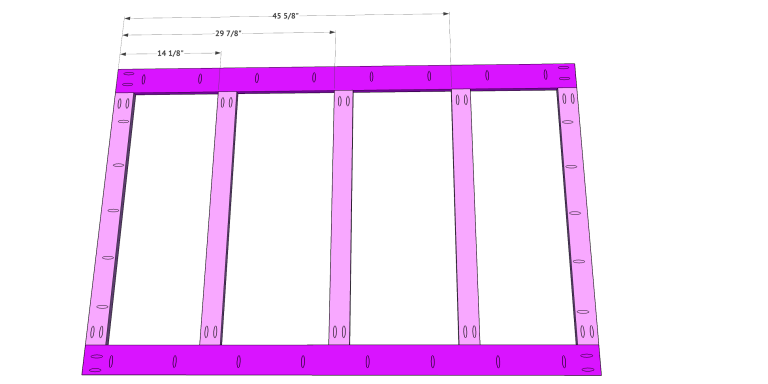
DIY Wall Locker – frame support
To build the frame support for the back of the hutch, I made all of my cuts and drilled 3/4″ pocket holes into the ends of every board. I also drilled 3/4″ pocket holes along the length of the two side 1×3 boards and the top and bottom 1×4.
I attached the frame support to the hutch frame with 1 1/4″ pocket hole screws through the pocket holes in the side and top and bottom pieces. The frame support will rest on the dividers and be inset from the back of the hutch 1/4″ to allow for the plywood backing.
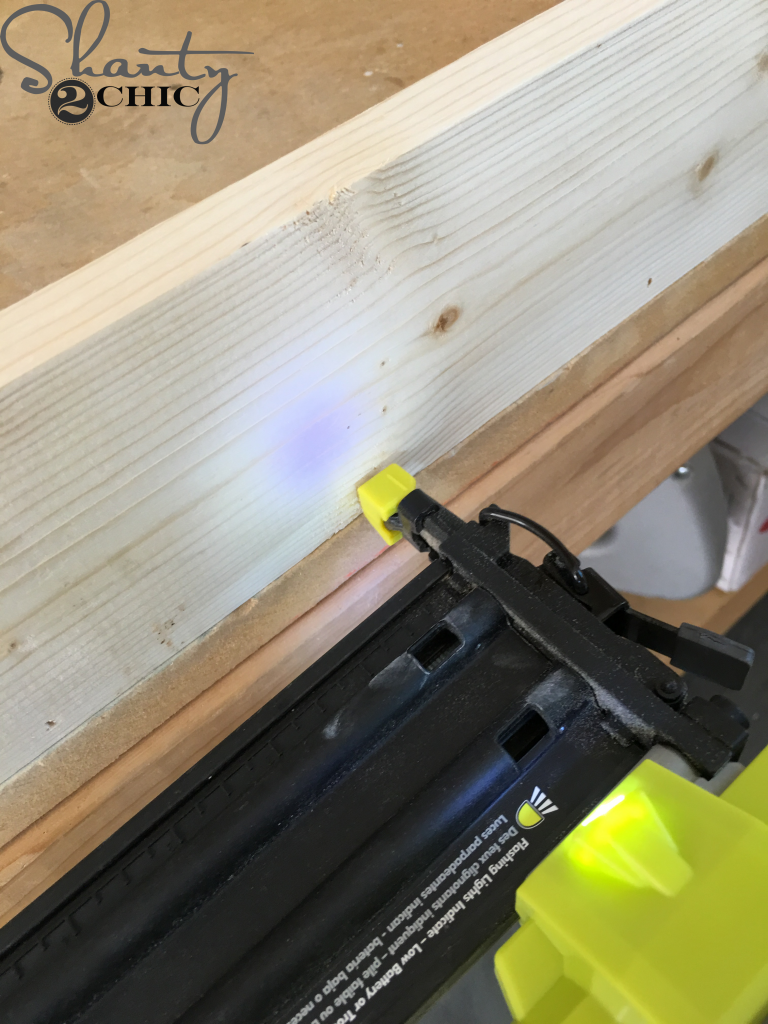
I attached the frame support to the dividers with 1 1/4″ brad nails.
Before attaching the backing, run wood glue along the back of the frame support.
I attached the backing with 3/4″ brad nails in my Ryobi 18V Crown Stapler. If you don’t have staples, you can use a nailer. We prefer to attach 1/4″ backing with staples because the staples grip the plywood better.

Here is the locker hutch assembled!
Step 7: Attach the Lockers to the Bench
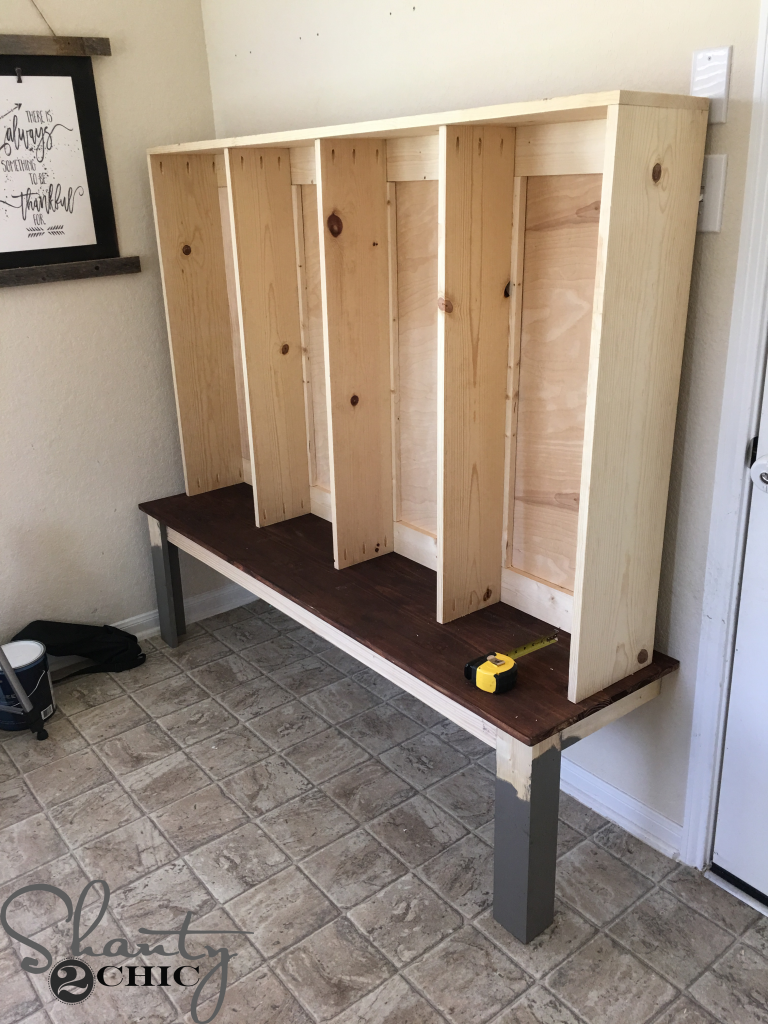
I attached the hutch to the bench with 1 1/4″ pocket hole screws. Make sure to fill your pocket holes with wood filler 🙂
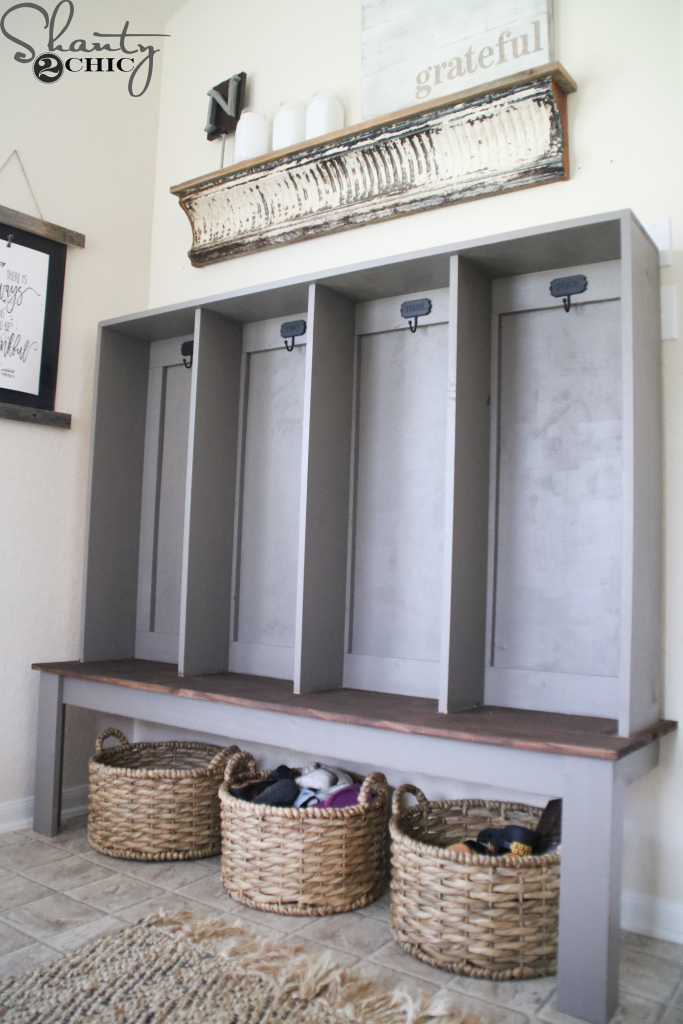
I gave it a paint job, added hooks and a few baskets and that was it! We used the hooks that she already had. She found them at Home Depot.
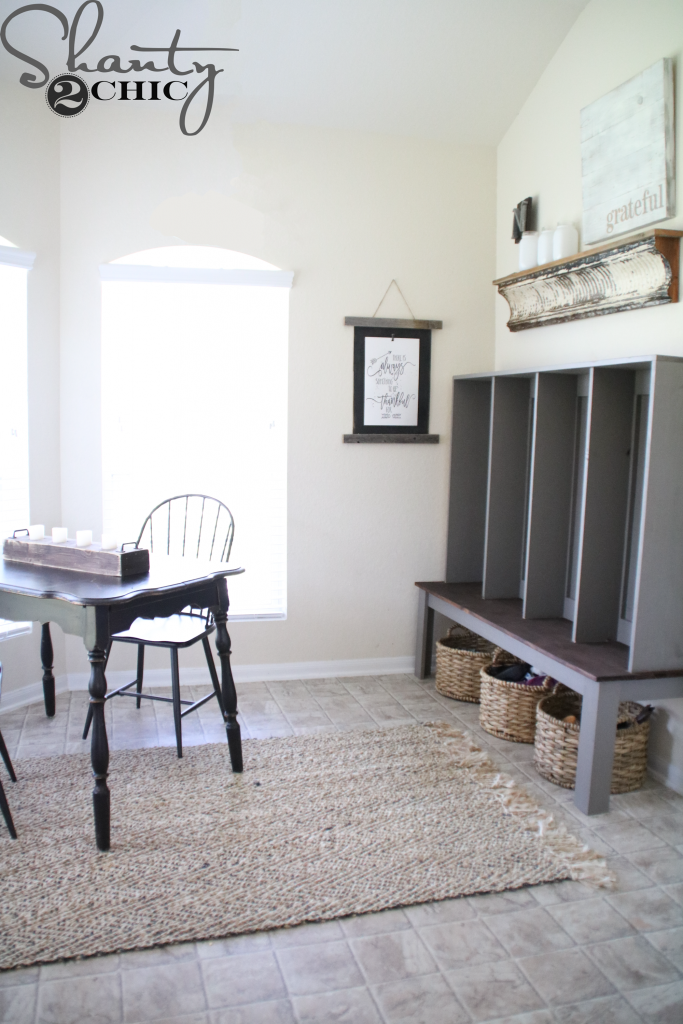
We moved her cute antique table next to the bay windows to give her and her hubby a quiet place to sit and have coffee and the rest of the space is dedicated to the kids things!
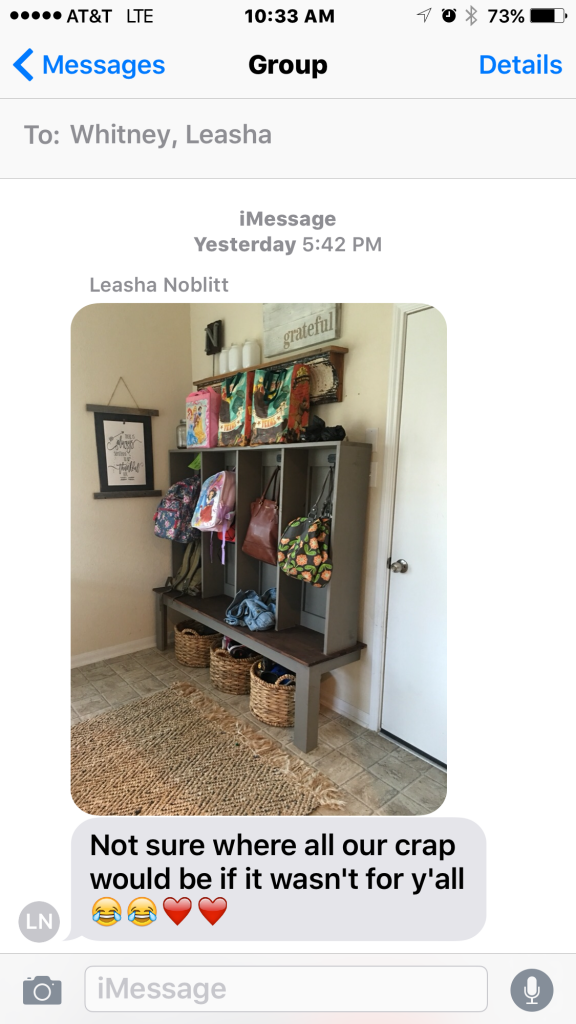
Our sis sent us this message when school started and it made our day 😉 We love seeing what we built being used and loved!
We found the baskets from AtHome and Whit made the grateful sign (click here for the how-to).
Don’t forget to download the FREE Printable Plans HERE!
Thanks so much for stopping by!
Happy Building!
Want to see the rest of her #shantyhousecrash? Click the links below!
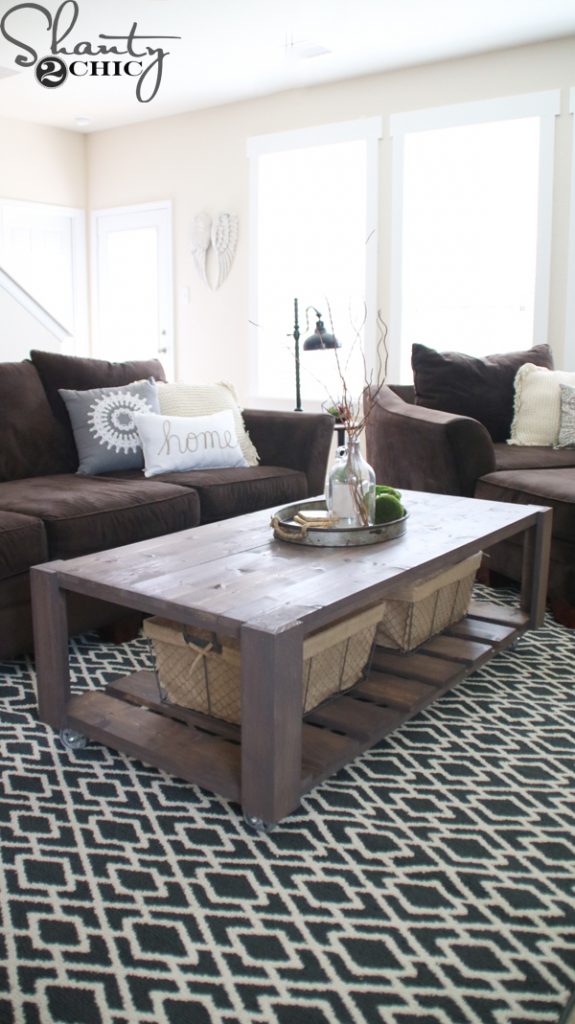
DIY Crate Coffee Table on Wheels
Window Trim


Can you please post the link for the project panel, it’s not showing up and I can’t find it anywhere, even home depot like it says
‘
I’m building a mudroom bench with just MDF to kind of do do wainscoting as a backdrop and for hooks but I am stuck on how to decide how high to hang the hooks. Any tips/guidelines to follow? Thanks
Looks great! Would love it if you guys came up with a closet shoe storage project for those of us who love shoes!!
Hi
Where did you get the shelf that is above the lockers…love it!!
I love those hooks, but I can’t find them anywhere. Do you recall where you got them?
How much did this cost to build?
i wish i could make this storage locker in a 3 cubby and only 46″ wide 🙁
What is the wall color there? I love the way it looks with the gray; so light and clean!
I love the look? What is the wall color? It goes so well with the gray!
I’m sorry! Typo. I DO love the look. Not a question!
Absolutely love this! But the DIY printable instructions keep coming up as error. Is there a way I can get them emailed to me?Thanks!
https://www.shanty-2-chic.com/wp-content/uploads/2017/06/Wall-Locker-Plans.pdf
Am i missing something? How did you drill the pocket holes from the bottom of the locker frame into the bench after the plywood backing was nailed in?
I mean pocket hole screws
Totally agree with Kristie….Love all your projects…..thanks for sharing all your project plans in such detail!
Ummm… not sure how anybody who EVER sees y’all and all that you do, would ever be able to say things like “LAZY” and “lack of planning,” in the same sentence with your names. Sheesh! Looks amazing..as always!!