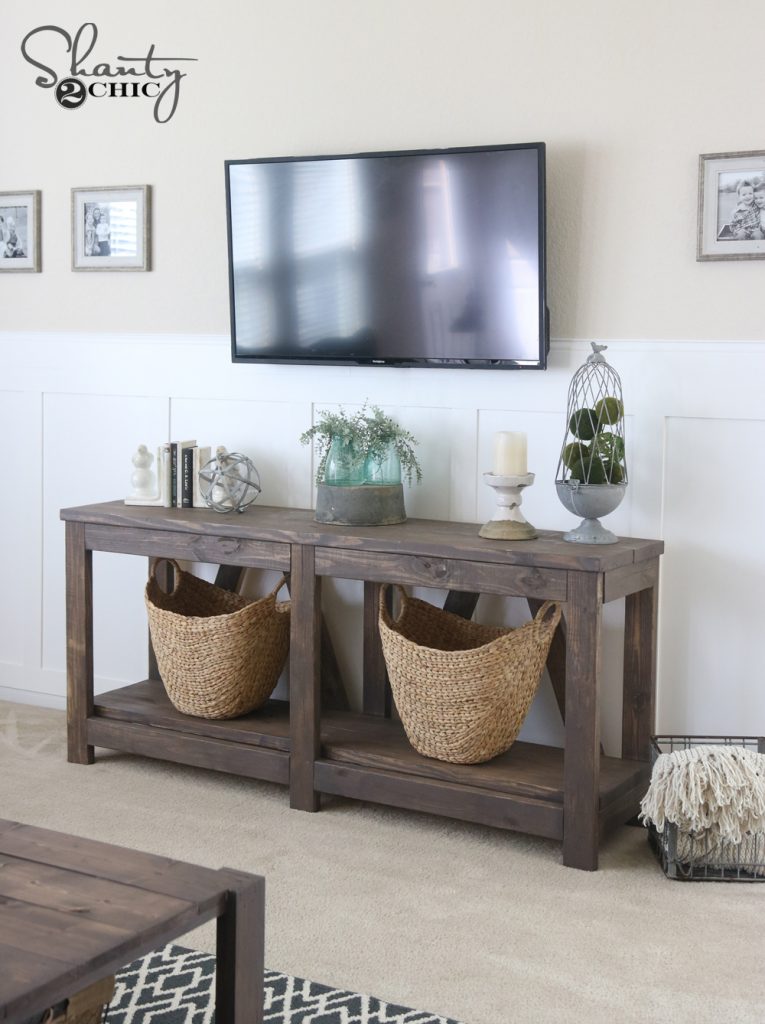
Oh hey guys! Happy Friday! As many of you may know, Ash and I took a little road trip to our sister’s house near Houston over the Summer and crashed her living room. We built her several new pieces and helped make her house feel more like a home…. It was so much fun. Today I am sharing a console table I built her for under her TV. This has great open shelving for baskets under to hide toys or blankets or whatever you like to throw into a basket… Check out her new Diagonal Base Farmhouse Console Table!
Isn’t she pretty? Don’t be fooled though! This thing is a beast in size! The entire thing is built with 2x framing lumber so Ash and I did a little weightlifting getting it into the house after I finish it.
I will walk you through the entire build below. You can also download and print the FREE PLANS by clicking HERE!
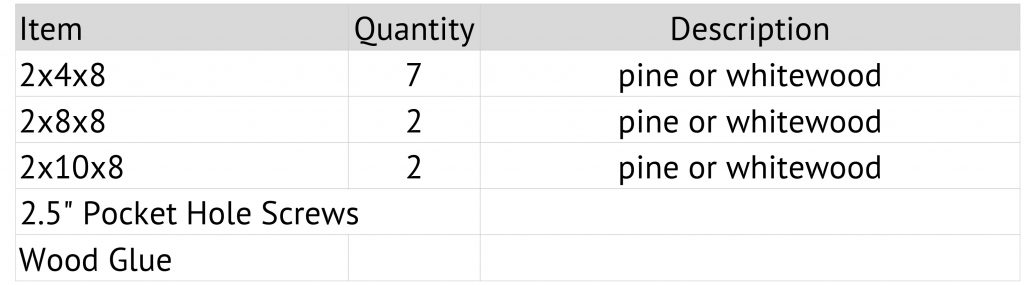
Here is the supply list for this table… 11 boards people! Lumber cost was around $50 people!
Diagonal Base Farmhouse Console Table
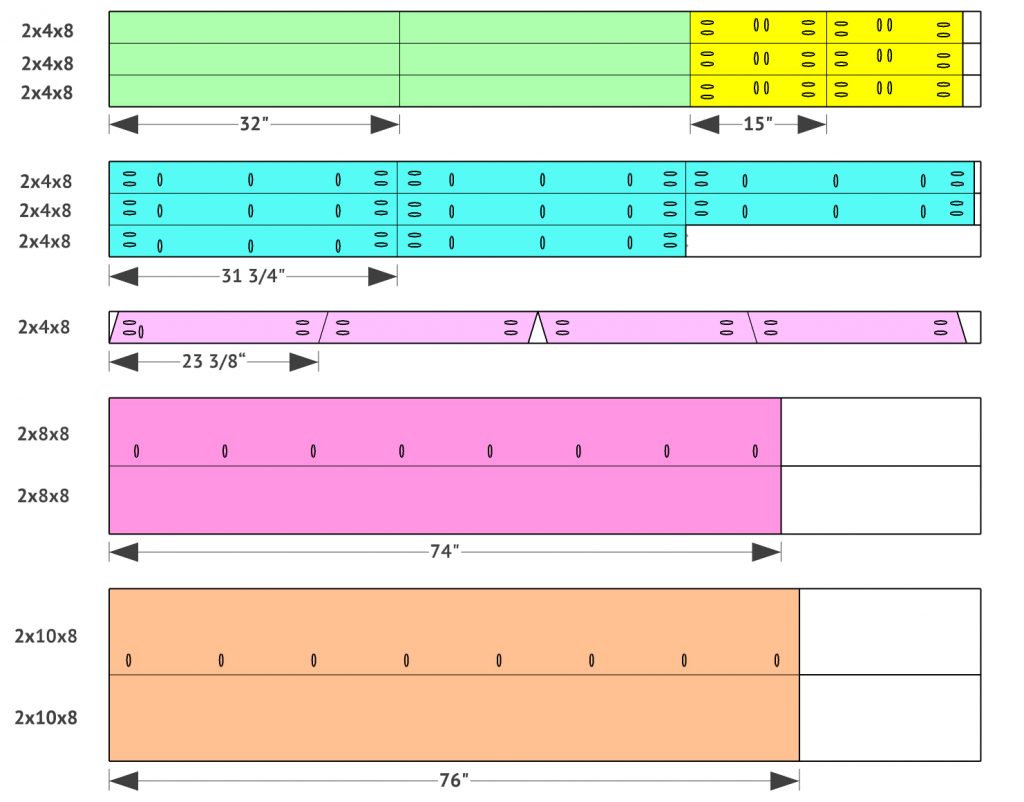
And here is a shot of the cut list… Remember! It’s best on lots of parts to cut as you go to get perfect measurements.
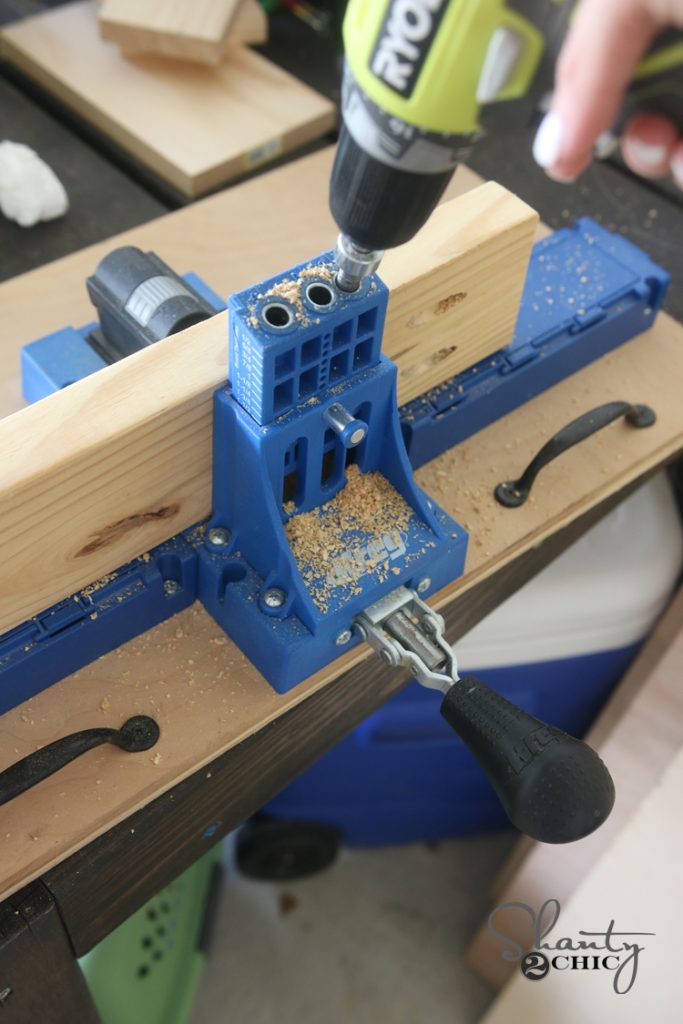
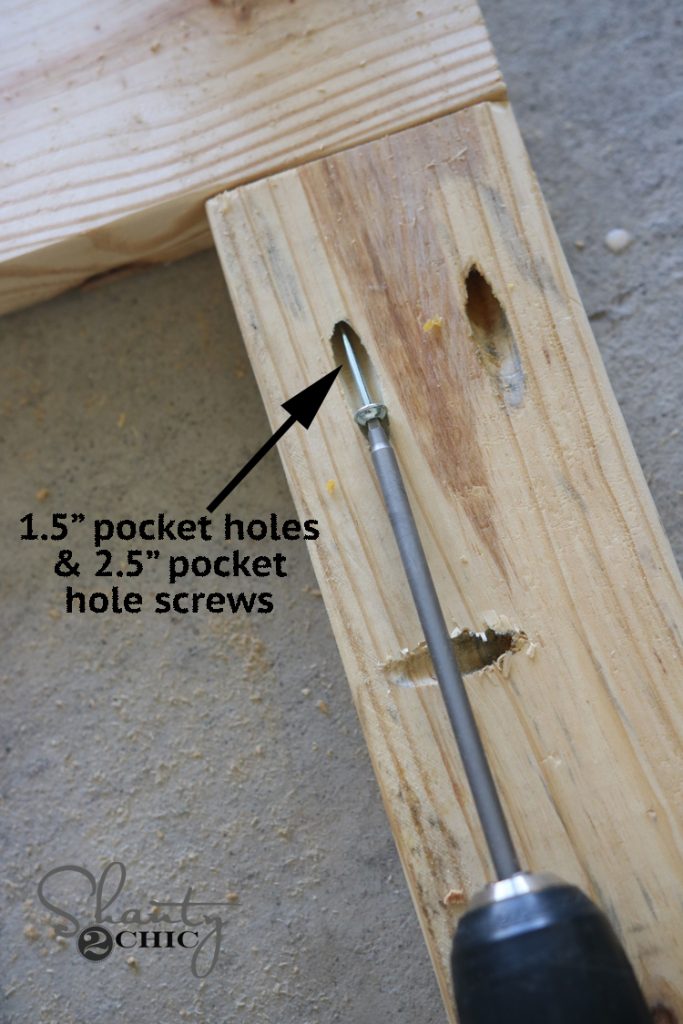
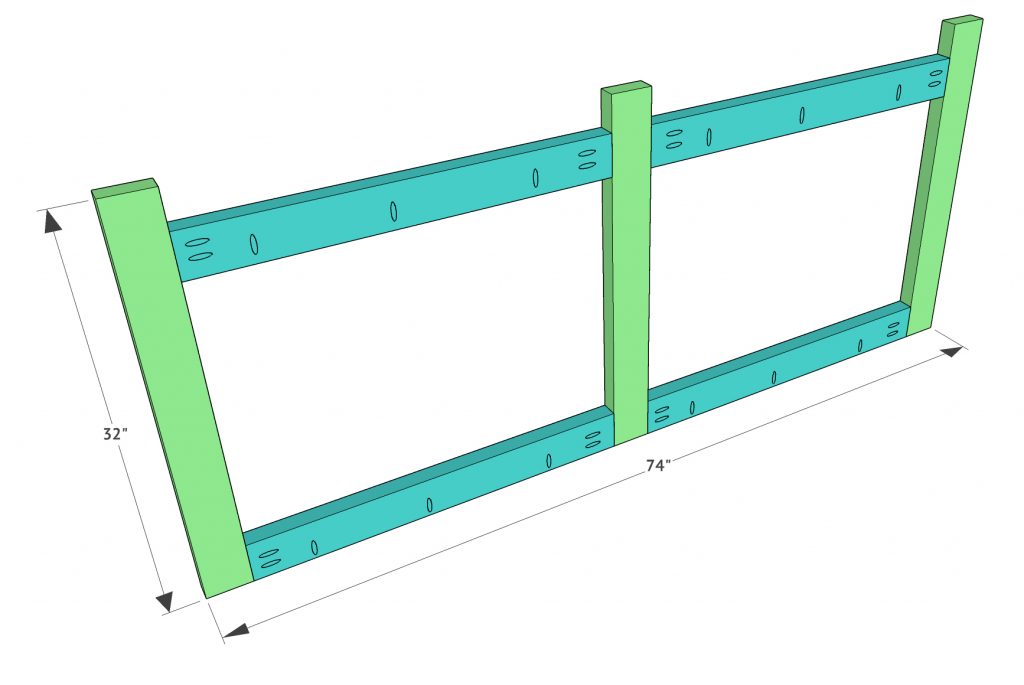
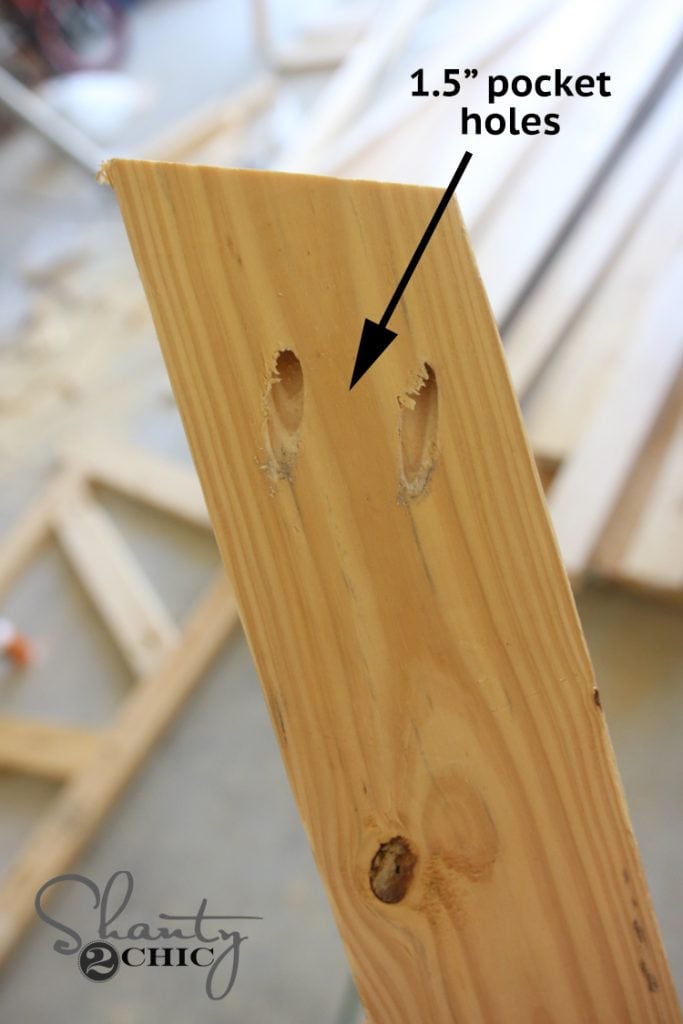
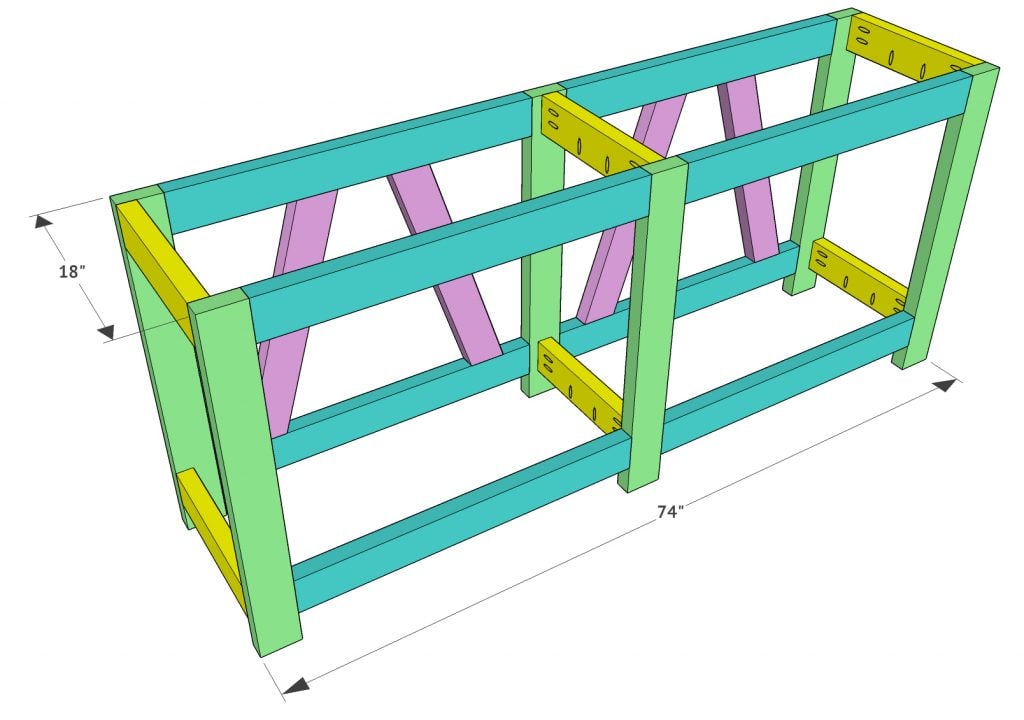
My first step was building the back of the console. This begins with a frame. This entire piece is built using my K5 Kreg Jig which made the road trip with us 😉 You will make 1.5″ pocket holes where I have marked in the cut list. I started by making those pocket holes for the boards that create the frame of the back of the console. You will create two of these frames…. One will be the back with the diagonal accents and the other will remain as is for the front of the table.
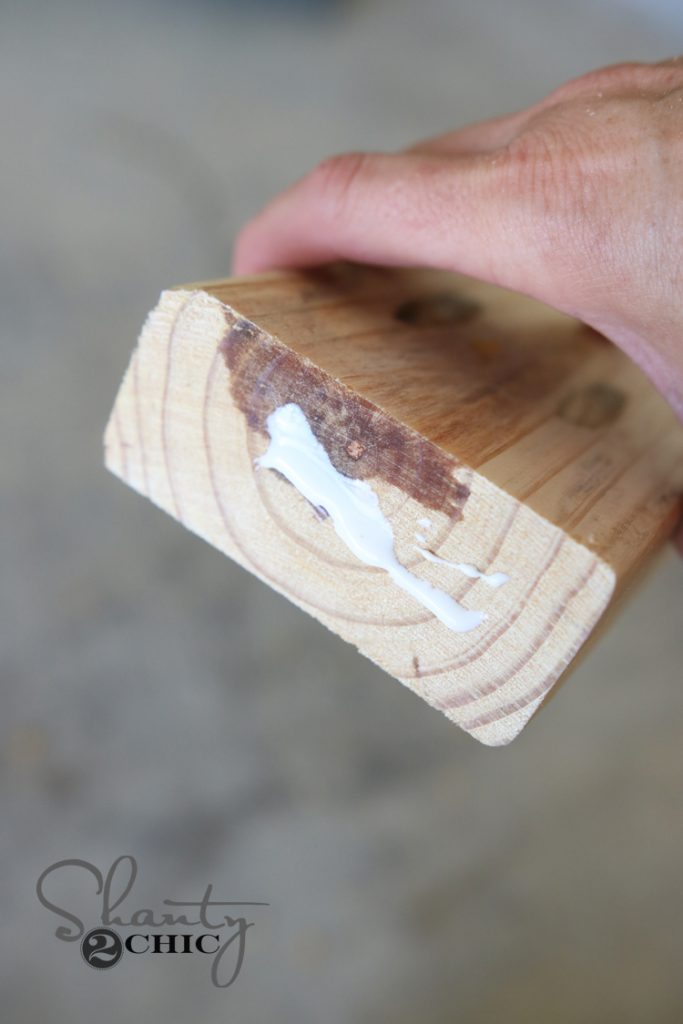
I used wood glue between each joint…
And, I used 2.5″ pocket hole screws through each of my pocket holes.
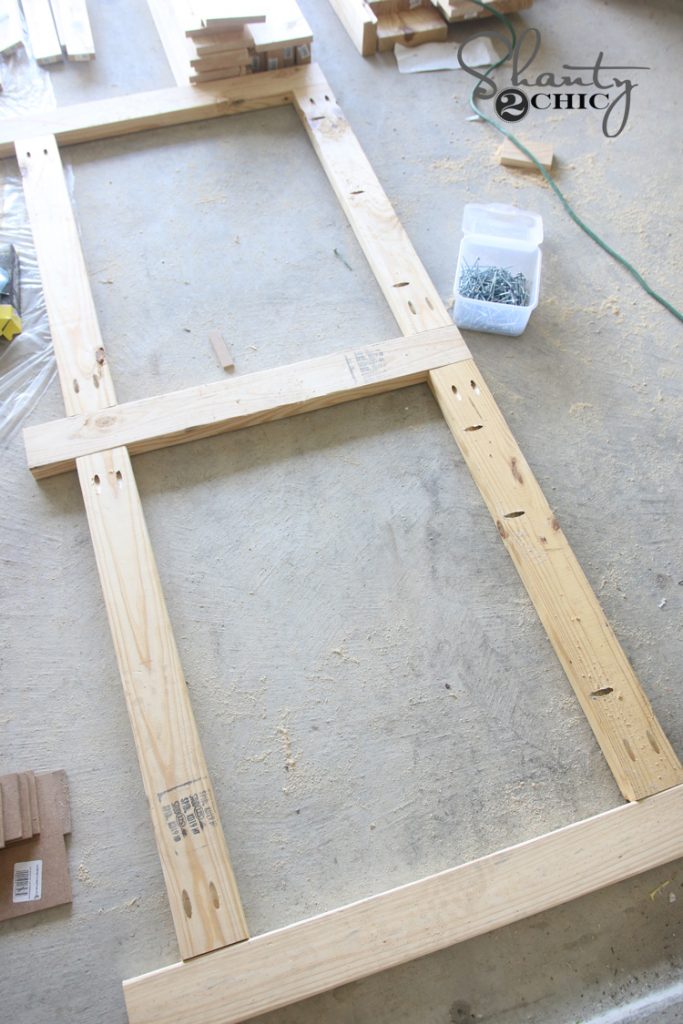
You should at this point have 2 frames that look a bit like this…
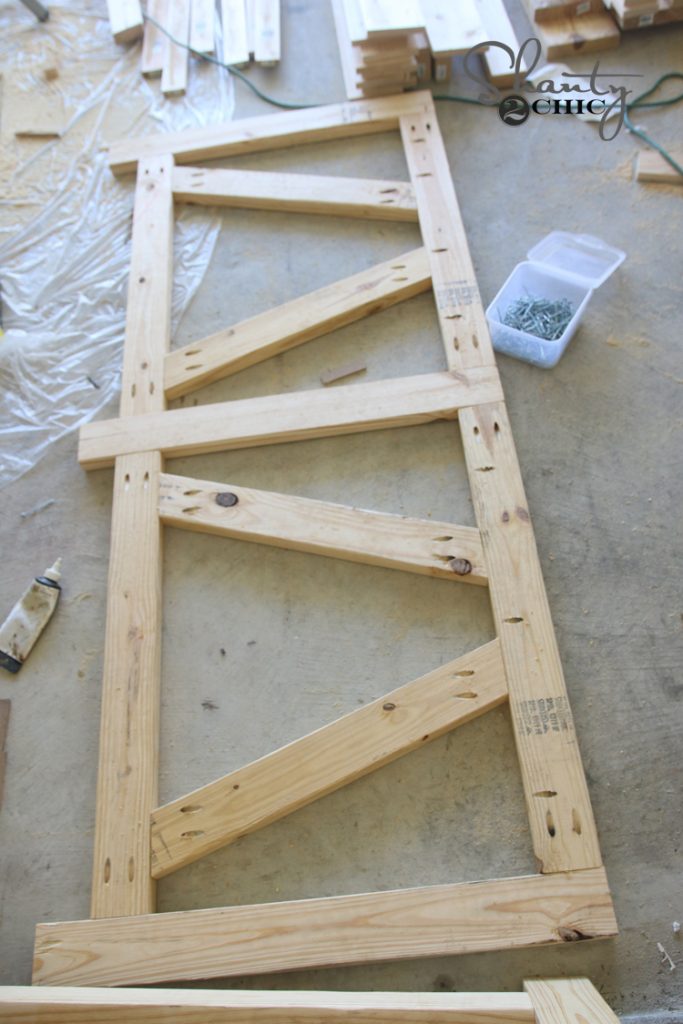
Now, I added the diagonal accents to the back frame. You want all your pocket holes facing the same way so that they remain hidden in the back when it’s all assembled.
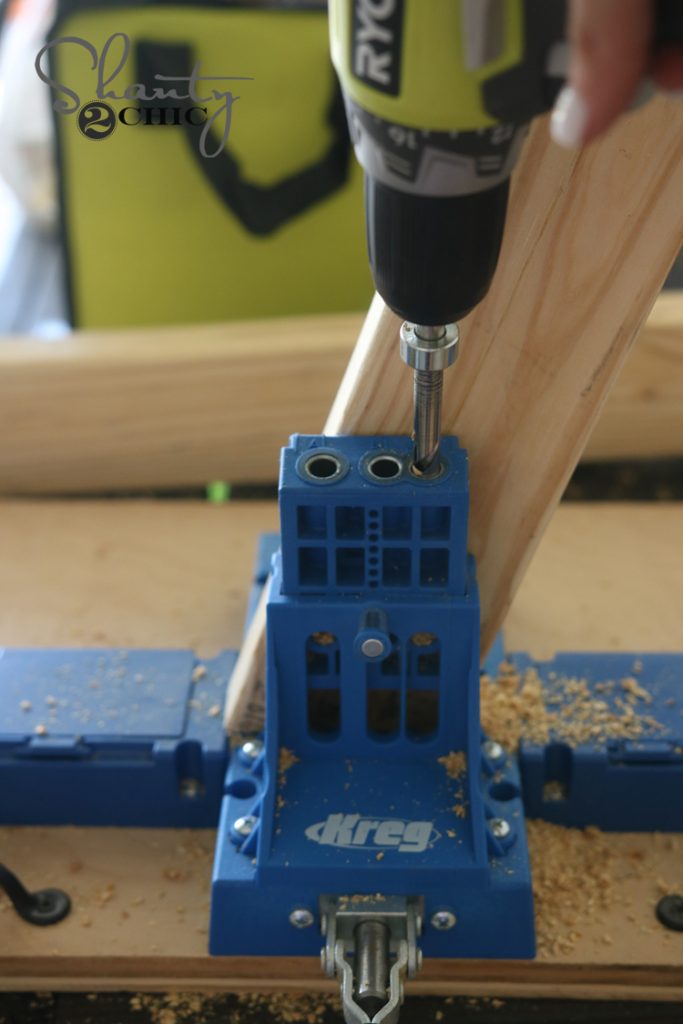
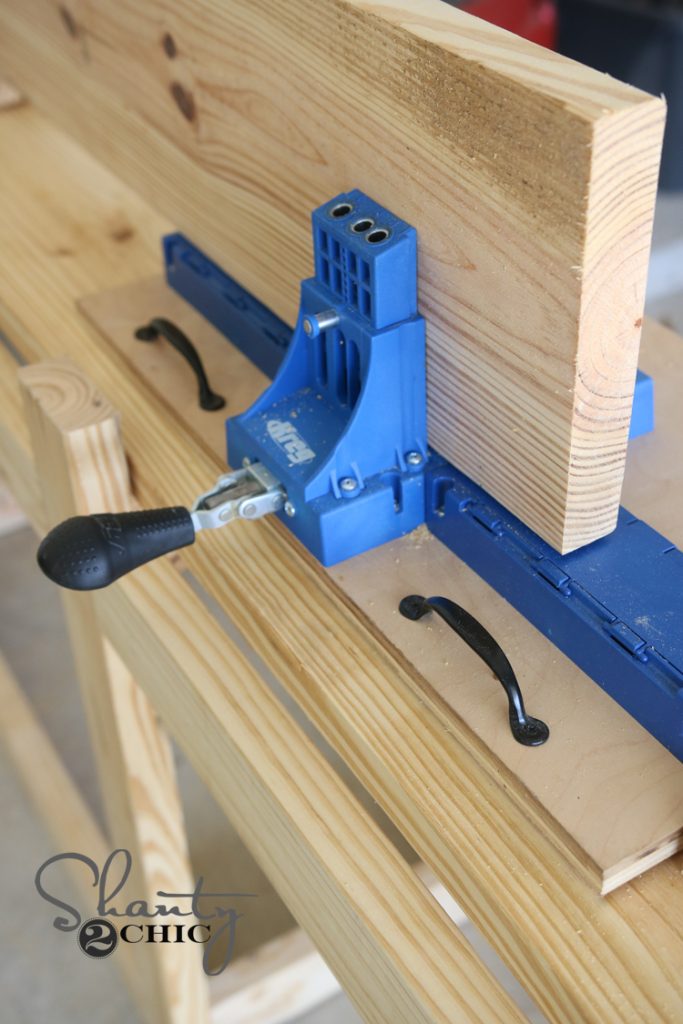
After making the angled cuts on the diagonal pieces, you will put them in the Kreg Jig like this to make the 1.5″ pocket holes.
They will look like this once the pocket holes are made.
I attached each piece to the back frame using wood glue and 2.5″ pocket hole screws.
Here is a shot of the spacing…

Next, I added my side pieces. These are also attached the same way with glue and PH screws.
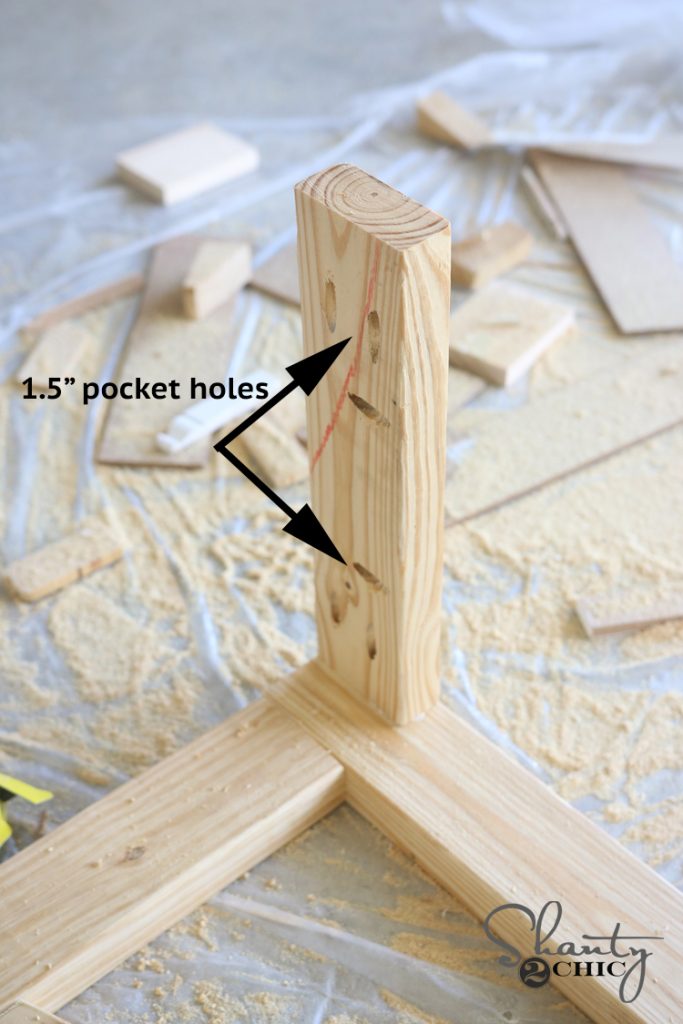
The bottom sides will look the same, and here is a shot of the spacing of these supports.
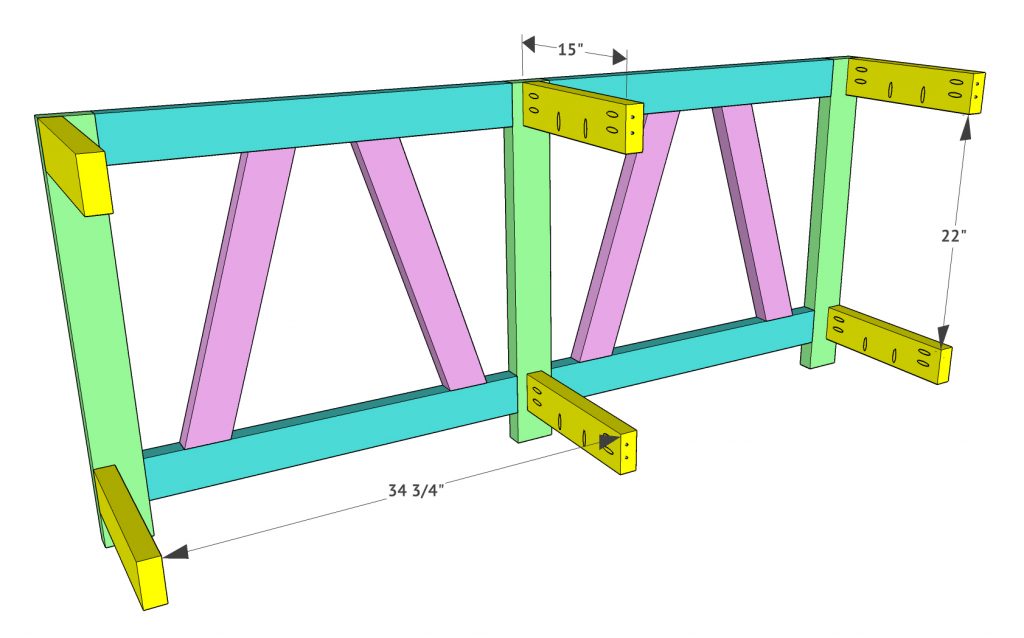
At this point, I attached the front base to the back base using 2.5″ pocket hole screws through the pocket holes in the short supports and into the back of the front frame.
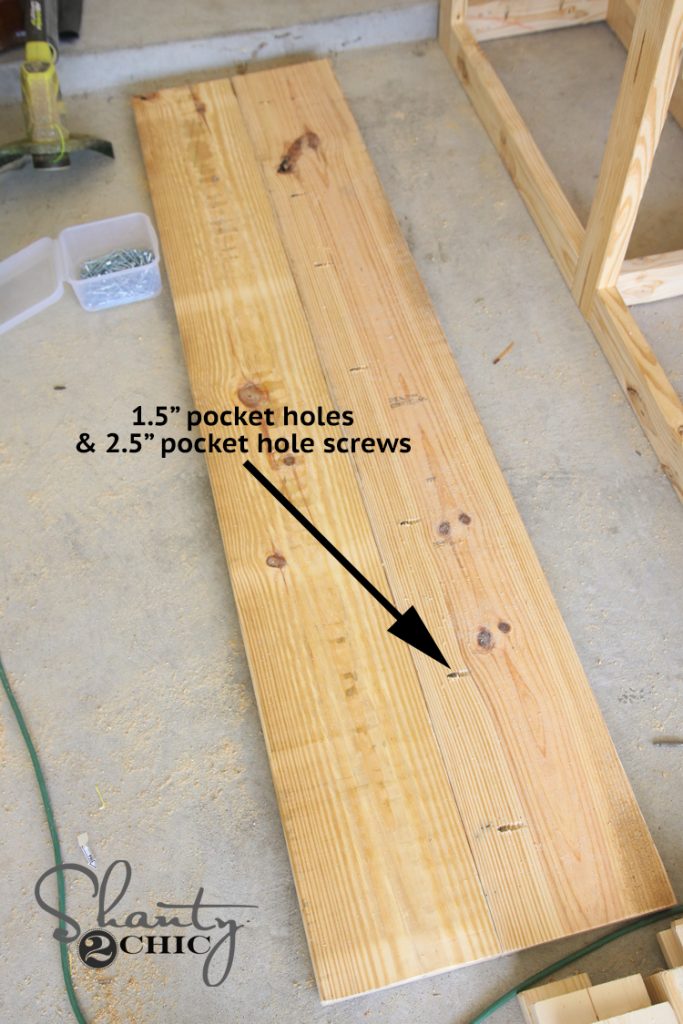
Final step is creating and attaching both shelves. These look the same but the top uses a wider board. I added pocket holes to both piece of each shelf first.
Next, I attached them together using 2.5″ pocket hole screws.
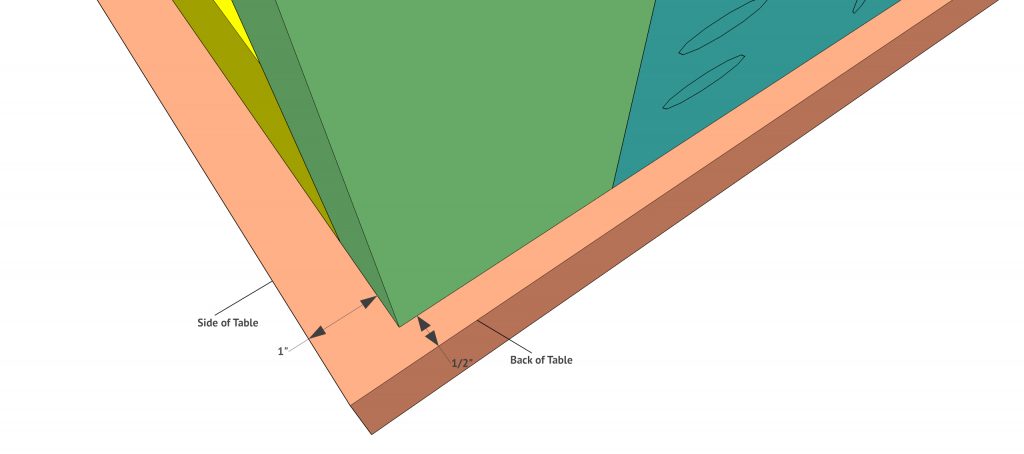
To attach the top shelf, I laid the entire base upside-down on the bottom of the top shelf and attached with 2.5″ pocket hole screws through the pocket holes I added on the aprons.
You can see spacing of this step here…
I attached the bottom shelf the same way, but laid the console on it’s side to do so, making it easier to access the pocket holes on the bottom supports.

Here is a shot of it all finished up and ready for stain!

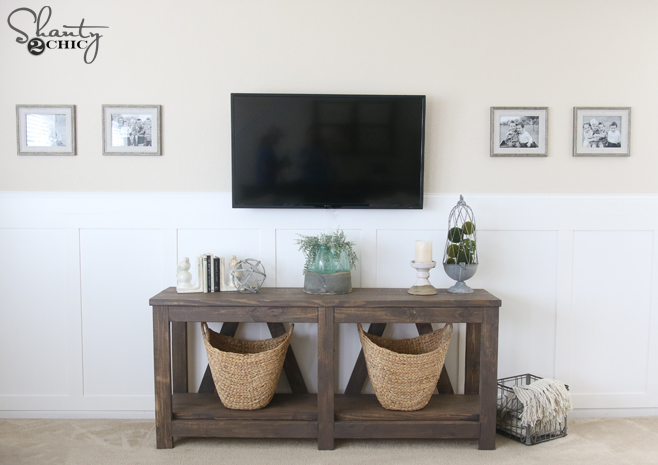
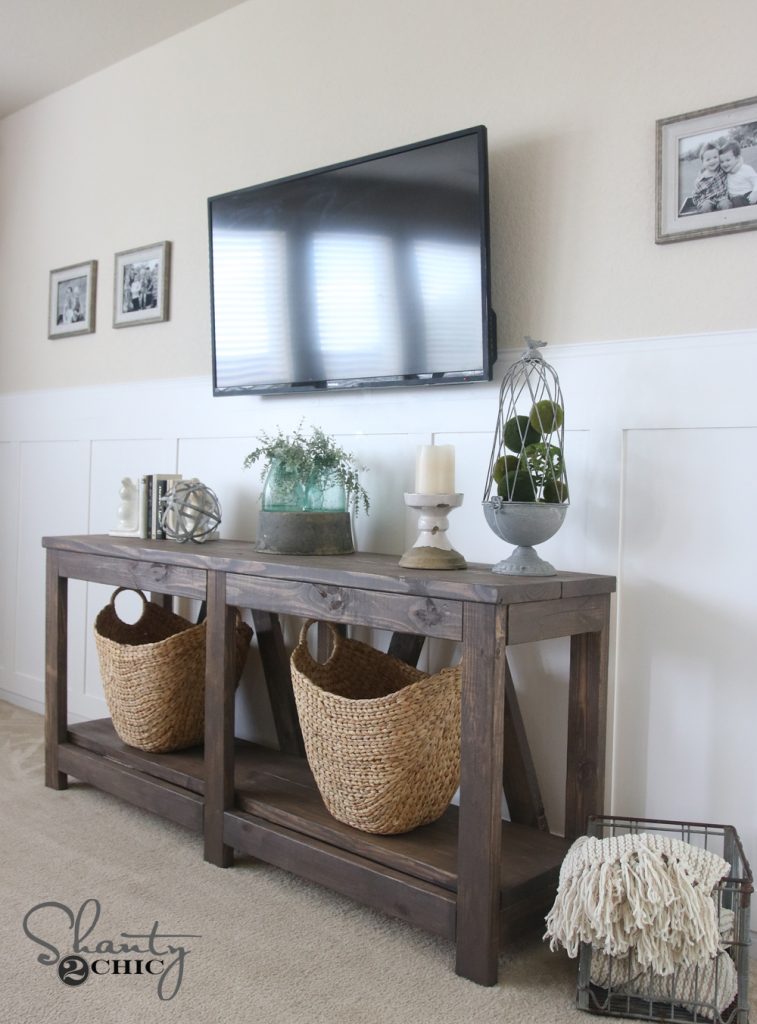
We originally planned on using Briarsmoke for this table, but I left it in Ft. Worth… Oops! Apparently, it’s difficult to find Varathane stain in Houston! So, we mixed Weathered Grey and Dark Walnut to get this finish… Which is just about the same! Here are a few more shots of her all finished up!
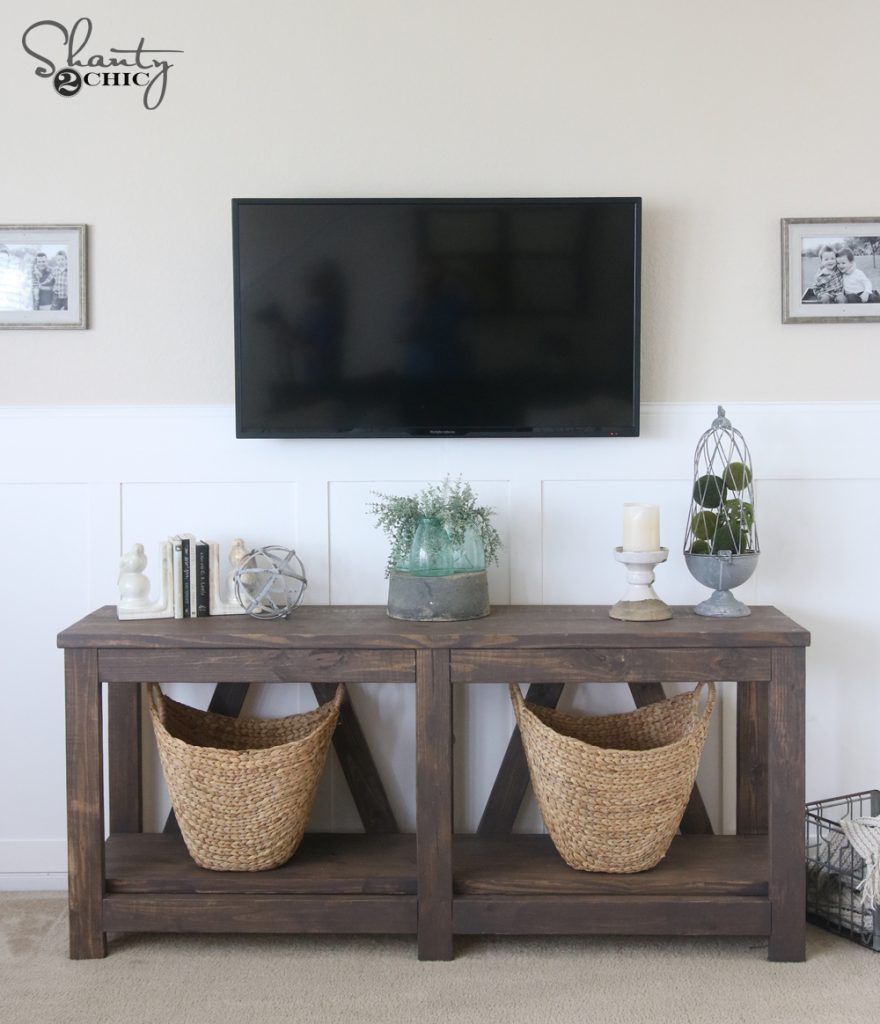
You can find ALL the cute baskets and accessories at At Home!
Make sure to check out the other projects we did in this #shantyhousecrash!


DIY Crate Coffee Table on Wheels
Thanks so much for stopping by guys! Let me know if you have any questions at all!
~Whitney


So question … I have everything cut, the front and back assembled, and everything sanded. As I’m getting ready to assemble the rest I’m concerned. The pieces the join the front and back are 15”. The bottom shelf is two joined 2x8s which makes it 16” wide. How is a 16” wide shelf supposed to sit within a 15” wide space?
2X8s are actually 7 1/2″ wide not 8″.
What are the final dimensions of this table?
What program do you use to create your plans??
This table came out fantastic!! Absolutely Love it! And I do agree with the comment that it is easier to stain before attaching the shelves. Thanks for sharing these plans!!
Did you gals straight edge the sides of the lumber? I can’t tell from the pics. Thank you so much.
Hi! Thank you so so much for the plans for this table! I just finished mine and I’m in awe of how it turned out! (I wish I could post a picture but I’m not sure how to do that?) Mine is painted white all over with a dark espresso finish on the two flat shelves. This was my first ever project and certainly not my last! The plans were super easy to follow and I learned a ton! Turned out gorgeous!!! Thank you again!
What are the dimensions of the finished table
Did you make they wall as well?
Am I blind? I don’t see the angle of the angle cuts listed anywhere… But nobody else who built this mentions that either. I’m guessing 22.5 degree’s?
Yes 22.5 degrees worked for me!
I’m curious if the bottom shelf will fit in between the leg frames, rather than looking like it’s sitting on top of it.
So basically, it’s one flat surface throughout. Has anybody tried this?
Look at my pictures and post above.
Thanks. I actually finished mine a while ago. Forgot to post pictures tho. Did you not do planks on the top shelf? You did a flat piece?
Looks good.
My mom and I finished this console in an evening and it is absolutely gorgeous. We even found your stain at our local Home Depot. Next time we make it tho, I will do some of the staining before we connect the piece together (mainly the 15″ boards in the middle that combine the front and back)…it was too hard to stain all those once we had it all together.
The plans were so easy to follow and we really loved that it was color coded-this was the first real furniture piece we’ve made…thanks so so much!! We love you girls!
I love this table!! We built one and was able to find the Briarsmoke Varathane stain for it. It looks amazing!! I have just one question, what type of sealer did you use? Thank you so much for such easy to follow directions.
Hey ladies! My husband and I just built this – but your plans are a little off. In your renderings, all the 31.75″ cuts have 7 Kreg Jig holes in them, when in actuality only the top 31.75″ cuts needs that many holes. The bottoms pieces don’t. next time we make this we will be using 1x’s… the 2x’s were a bit overkill.
That’s what is great about DIY! You can make anything how you like 🙂 we prefer the chunky look of the 2x’s and they are a lot cheaper than 1x ????
It’s much cheaper to build this table using 1x’s at my local orange big box! I don’t understand why 2x’s would be cheaper. Is that true in some locations?
2x framing lumber is a fraction of the cost of 1x commons boards
hey ladies. I love this !! I was wondering if you had any ideas on where to put Cable receiver box. Thanks !!!
Hi! I absolutely love this table and have been building it for the past few weeks. I recently came to the step where you attach the front base to the back base with the short supports using the pocket hole screws, and I came to find that my drill does not fit between the boards. I have the standard 18V Ryobi drill. If only the drill bit was shorter because if I had about an inch and a half, then it would fit. I dug through everything I have and could not find anything shorter that would fit the back of the screw so I’m stuck and not sure what to do! I was wondering if you had any ideas or if there was a shorter bit I could possibly use to tackle this. Thanks a bunch 🙂 ~Staci.
Could ask how much did of each stain you mixed to get that color?
I am curious about this stain question as well. Hoping you can provide us with an answer.
Did you ever figure out the stain mixer