Hey friends! Happy Wednesday!
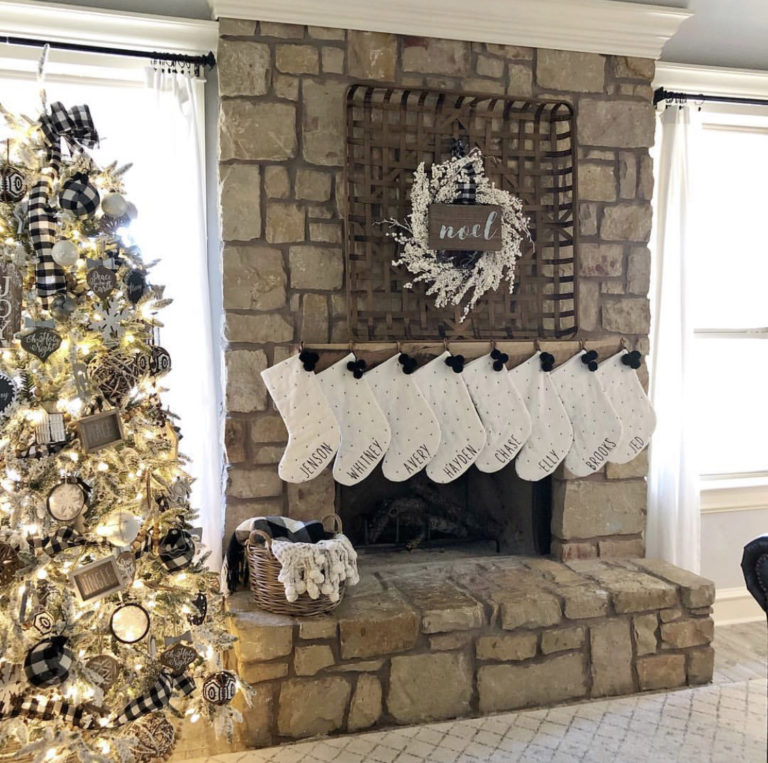
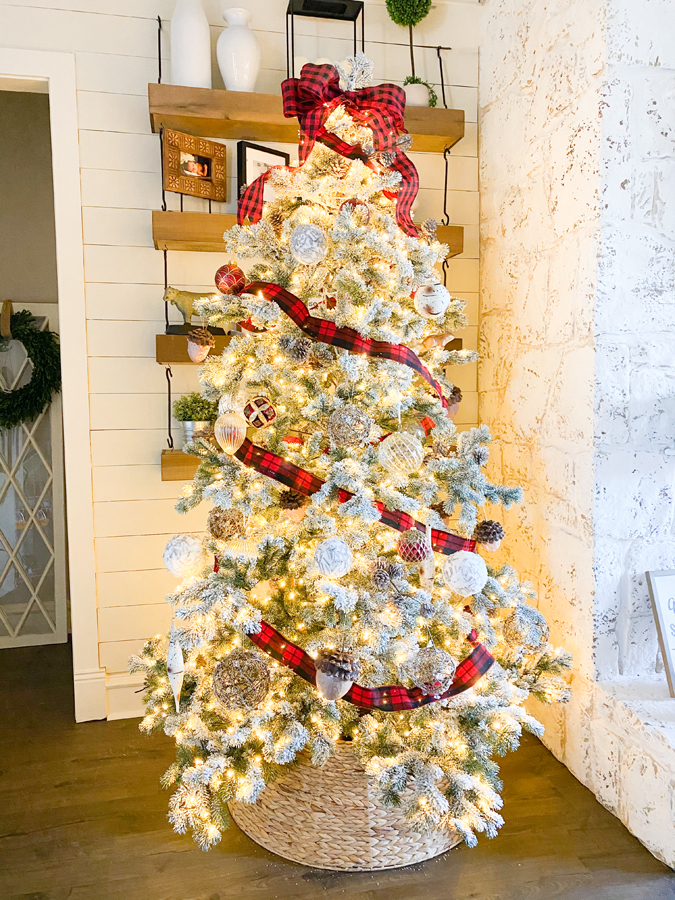
Today we are sharing some really cute shelves we built for my bedroom! I recently found the cutest metal brackets by Crates & Pallet, and I knew it was time for new DIY Chunky Industrial Shelves! Check out what we did with ours in this weeks YouTube video!
How fun are those?

One of the great things about these brackets is that they are designed for dimensional lumber.
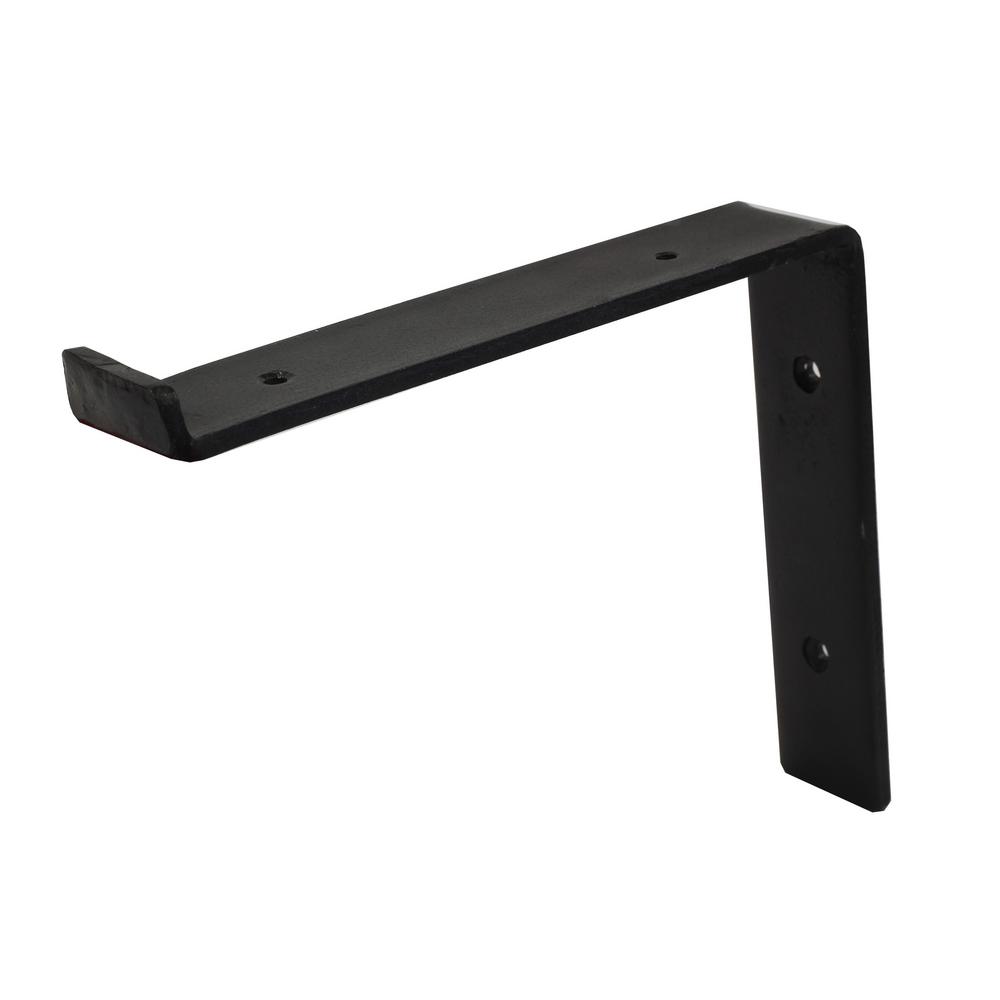
That means you can buy the brackets and buy a piece of wood and you are set to go. The brackets we used are made to hold a standard 1×8 or 2×8 board. That is really great for those of you that don’t have the tools to build your own shelves!
We wanted to take it a step further and create shelves that resembled a big thick piece of reclaimed wood. That’s where today’s project comes in! Before we get started, be sure to download and print the FREE PLANS!
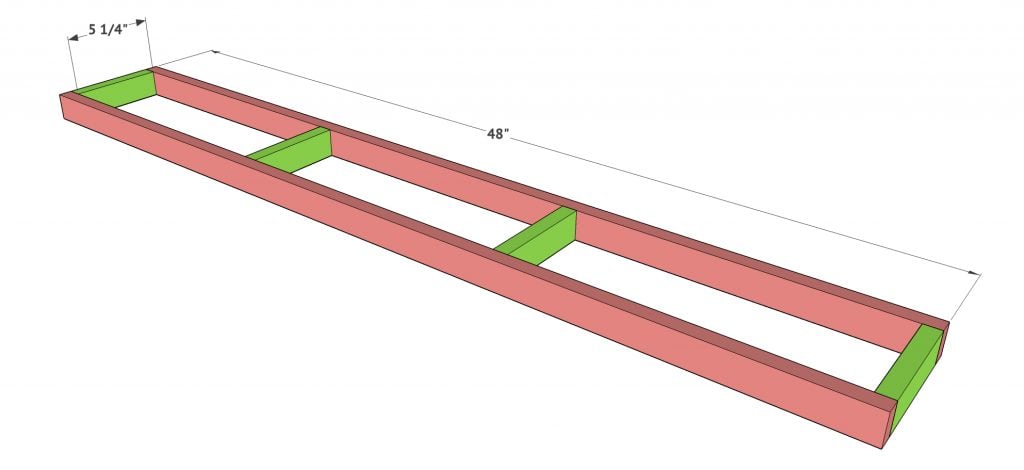
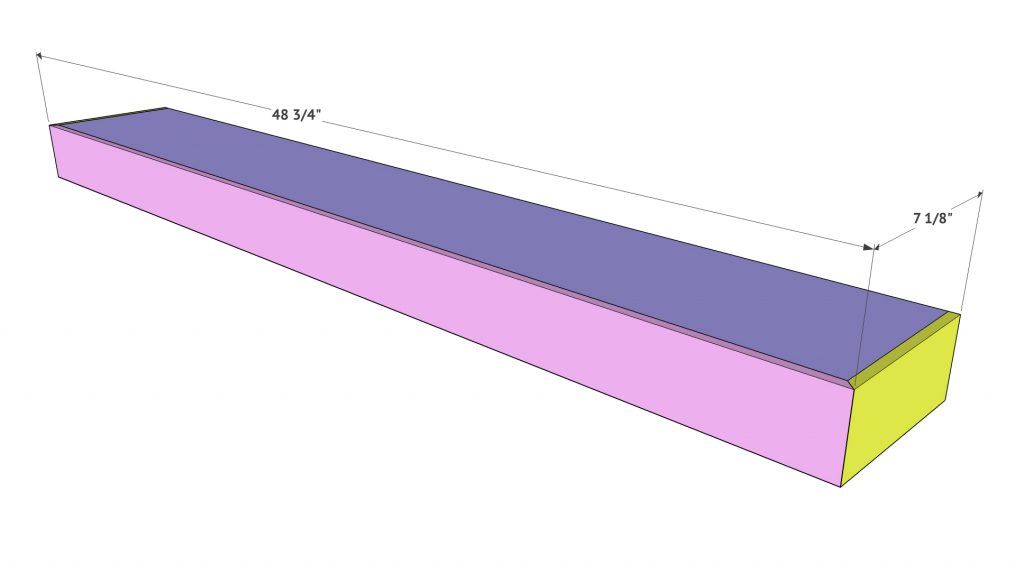
First step is figuring the width of your shelf to know what to rip your top and bottom boards to. Since these brackets are made to fit the width of a standard 8″ board which is 7 1/4″, you will need to rip down the 1×8 boards we are using for the top and bottom boards. The reclaimed wood trim boards I am using are 3/8″ thick, so I ripped 3/8″ off of both 1×8 board. If your trim is 3/4″ thick like a 1x board, you will rip 3/4″ off. The trim is also 3″ wide. The design of this is made to create a 3″ thick shelf, so make your cuts accordingly.
Now we are building the frame of the shelf. This is built using 1×2 boards. Once you make your cuts, you will attach everything using wood glue and 1.25″ brad nails.
Next step is attaching the first 1×8 board that we ripped to the correct thickness. Attach this board using wood glue and 1.25″ brad nails.
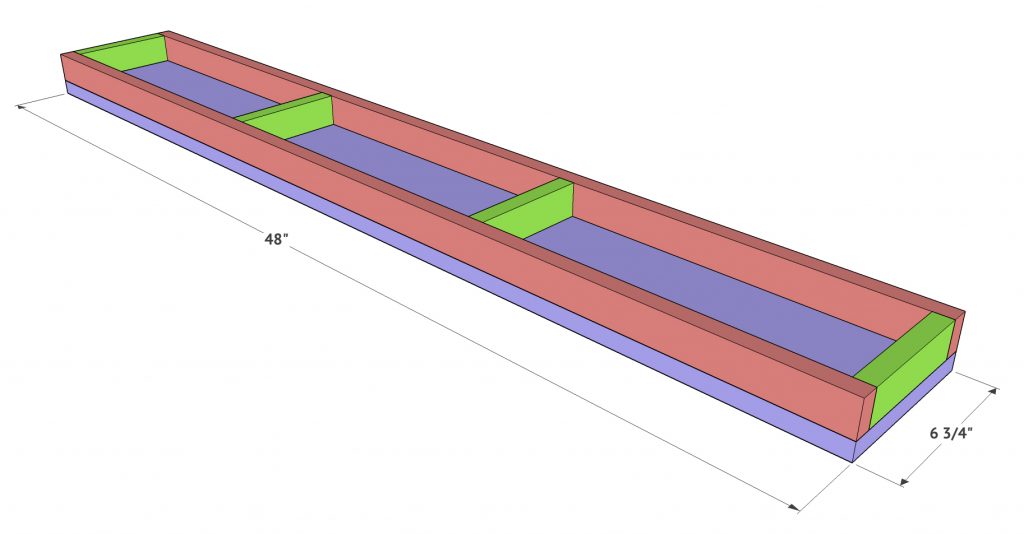
Flip that over and attach the other board the same way.
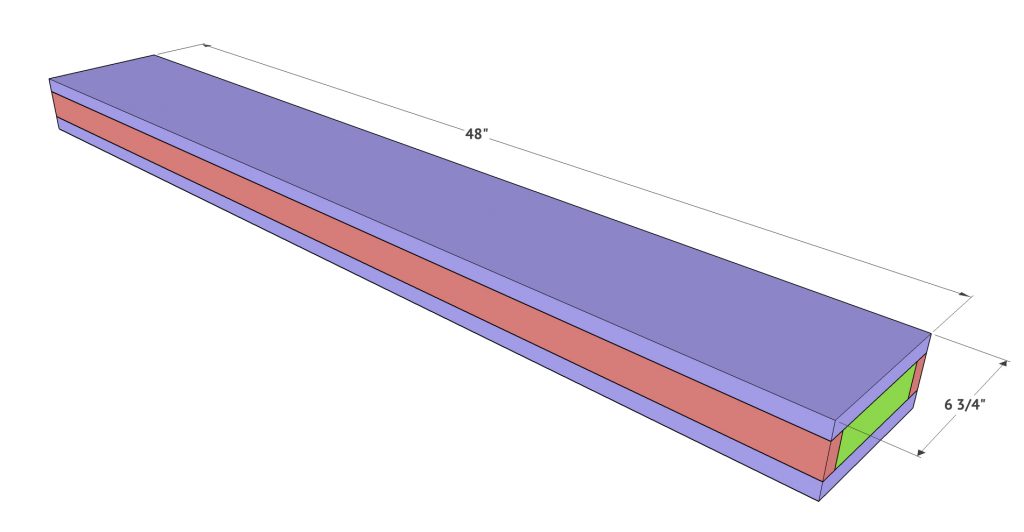
Now you’re ready for trim out! Easy! Start with the front piece. This piece will be cut 48″ long short point to short point with each end mitered at 45˚. Attach this board using wood glue and 1.25″ brad nails.
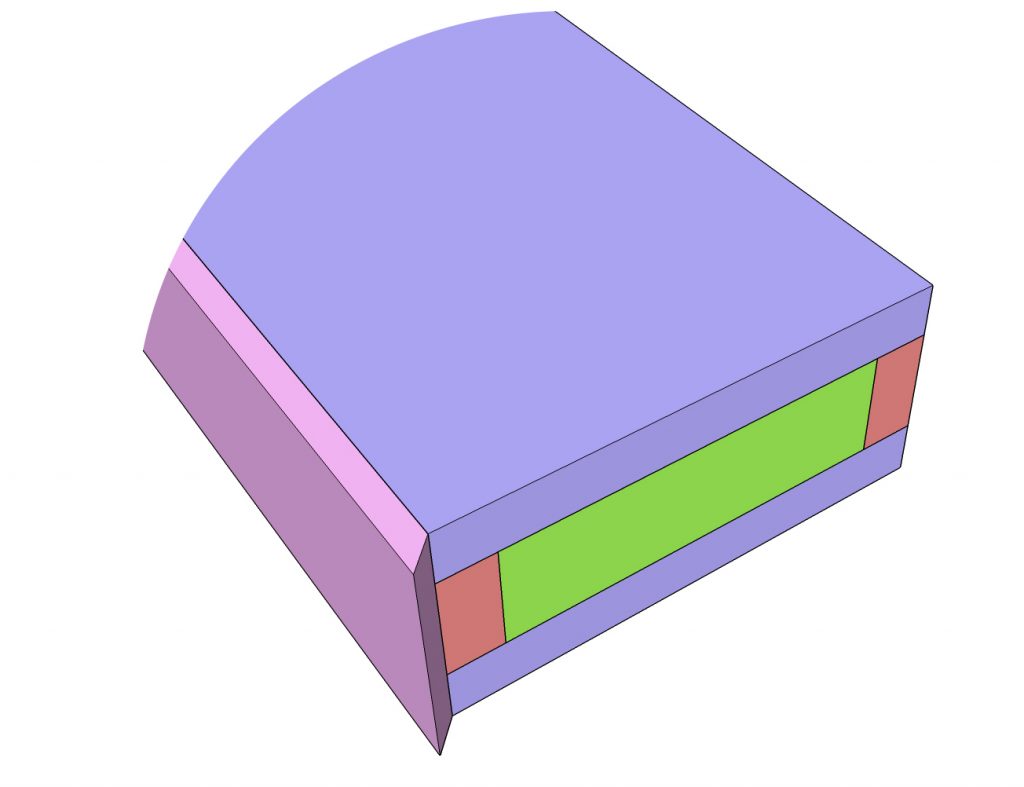
Finally, add the two side pieces. The front of these will also be cut at 45˚ to meet up with the front board, and the back of it will be flat since it will sit against the wall.
Now add your paint or stain! Since we are using reclaimed wood on the trim, we found a matching stain color to do the top and bottom of the shelves.
While that dried, we attached our brackets. I chose to attach mine to studs in the wall using 3″ wood screws, but you can also anchor them if you don’t have studs. Make sure to use anchors that are strong enough!
Once you set the new shelf box on top, you can attach it will smaller 1″ wood screws up through the brackets and into the box to hold everything in place!
Bam. Done.
We love the look of these and the added detail the Crates & Pallets brackets add to the design! You can find them online HERE!

Where did you get the reclaimed wood for trim?
AWESOME!
My husband and I have been working on the Ladder Shelves you made. I’ll send a picture when we are done.
Jackie
AWESOME!
My husband and I have been working on the Ladder Shelves you made. I’ll send a picture when we are done.
Jackie