Hey guys! I’m Jamielyn from I {heart} Nap Timeand I’m SO excited to be here today and share with you this magnetic chalk board I recently revamped.
I’m a mom to 2 chubbies just under two years apart. Addicted to chocolate, pinterest & my iphone. I love to blog about home projects on a budget, revamps. crafts, cooking, tips & lots more! Oh and I love nap time (that’s when I get all my work done)! So excited to be here today!

Let’s get started shall we?!

I started out with a Large Frame. Here’s the before…when I had it as a bulletin board. Any large frame will work!

If you know me I love black and white. It’s just so classy! My style has evolved and I STILL love black and white, but I have been trying to throw in a little more color over the past 2 years. My accent colors have been robin eggs blue and lime green. It compliments the red quite nicely. And you know what.. I really haven’t bought much besides SPRAY PAINT. Spray paint is such a quick, easy and CHEAP fix!

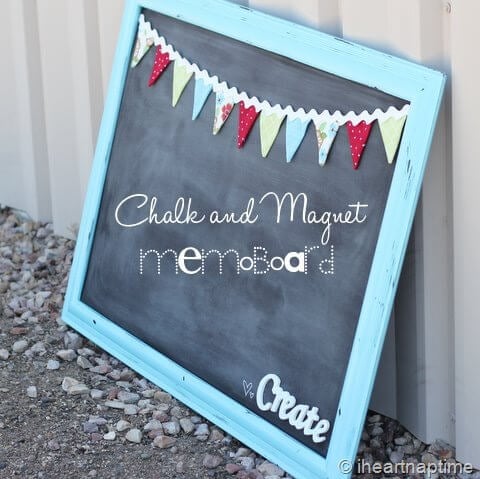
So the first thing I did was spray paint my frame blue!Then I decided it would be fun to make it a chalkboard AND magnet board.

I found some scrap wood in my garage ( you should see the “pile”) from our board and battenproject. I took it to Home Depot and they were kind enough to cut it down to the right size for me. They are great over there! If you don’t have any scraps just make sure to find the thinnest sheet of wood (1/4 in) so that it will fit in your frame nicely.

Once my I had my wood primed I painted 3 coats with the magnetic paint with a roller brush. Honestly I probably should of done 4 coats. It’s still not as strong as I’d like it to be. If I were to re-do this project I might just consider using galvanized metal instead of wood… but it’s not super cheap! Maybe I’ll just buy some “extra-strength” magnets.
Okay back to the tutorial, haha. After the magnet paint is dry you’ll want to lightly sand the board so it’s not coarse. Then give it 3 coats of chalkboard paint. I used the spray paint for this and it worked great!

Then for the magnets I used these cute buttons I found at Jo-Ann’s. I used my button shank to remove the shank and glued it to a small magnet.

That’s all! I think bunting is always cute so I added one of those as well. Bright colors make me happy! 🙂

I also added this create sign I painted white. I think it adds the perfect touch!

These boards are perfect for keeping organized! I love it!
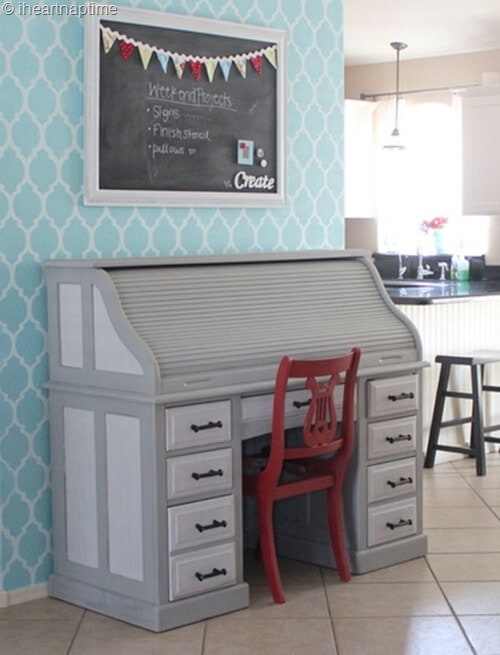
P.S. This board has recently been spray painted white. ![]() After I stenciled my wall… it had to be spray painted white. Gosh I love spray paint! Maybe a little too much… any one with me on this?! lol
After I stenciled my wall… it had to be spray painted white. Gosh I love spray paint! Maybe a little too much… any one with me on this?! lol
Anyways that’s it! It’s a pretty simple project, and a fun way to revamp one of your current frames!
Thanks for having me ladies! I’d love for you to come by anytime! xoxo –Jamielyn


oh wow! I LOVE this project!
I love this project! And I love that I learned something new: I had no idea there was such a thing as a button shank. Nice!