Learn how to build this DIY Blanket Ladder for $10 in lumber and with only three tools! This is an easy DIY and perfect for beginners!
We are back with another 3-Tool build and this DIY Blanket Ladder SO easy and oh-so CUTE! Make sure to check out our 3-tool ebook that includes this plan as well as four other, 3-tool builds. You can find our new eBook here. Just click here to purchase your copy for only $4.99!
No more throw blankets and quilts thrown around the house! This is such an easy build and it’s perfect for beginners! Come build it with us, in the video below, to see just how easy it is!
Simple right! You can download the free plans to build it HERE and you can follow along with us in the step-by-step tutorial below!
How to Build a Blanket Ladder!
Table of Contents
Step 1: Making the Cuts
We started with our first of 3 tools, the 18-Volt Miter Saw. We made all of the cuts first. If you don’t own a miter saw, you can also use a circular saw.

Step 2: Applying Wood Glue
The next step was to attach the rungs to the ladder. We dabbed a bit of wood glue under each end of the rungs.

Step 3: Assembling the Ladder
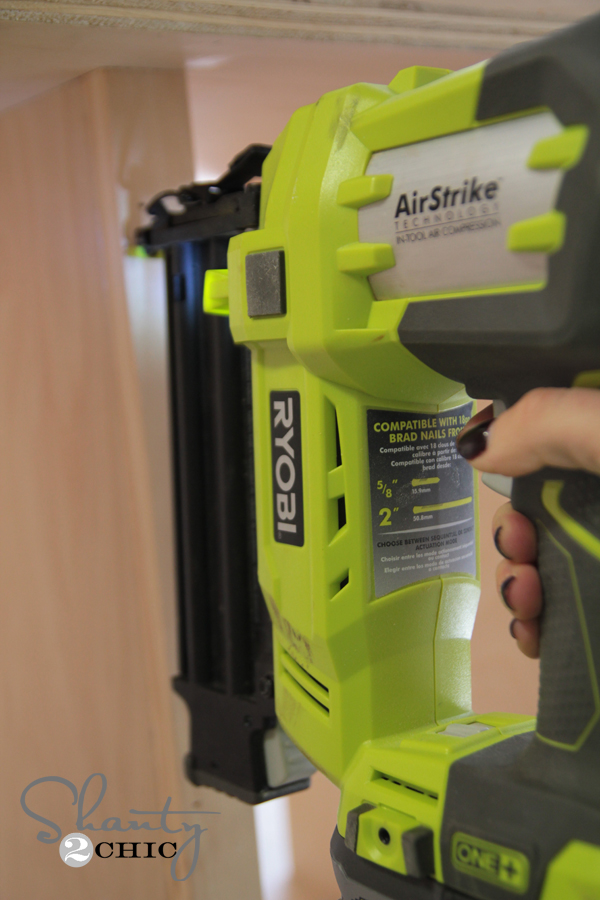
Then, we attached them with our second tool, the 18-Volt Brad Nailer. You can refer to the plans for the proper placement of each rung. Notice that there is a slight overhang on one the top edge of the rungs. This will make the ladder more narrow towards the top of the ladder, which gives it a modern look. Use 1 1/4″ brad nails. If you don’t own a brad nailer, you can also use a drill with wood screws for this part.

We decided to leave our ladder unfinished because we loved the look of the blue beetle pine boards. If you choose to stain or paint your ladder, now is a good time to do it!
Step 4: The Finish!
Now for the hardware! The hardware is optional but we love the added character and did it with very little extra cost.
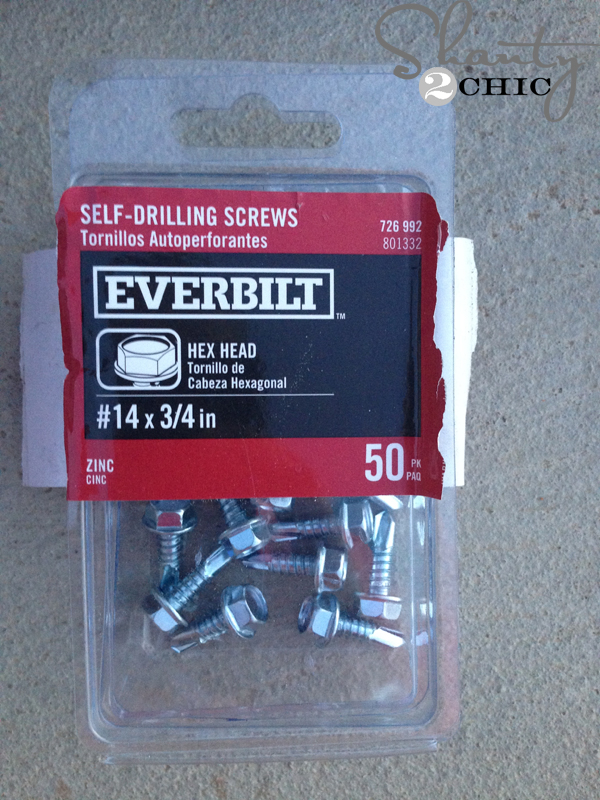
You will need 10 hex screws and a hex drill bit.
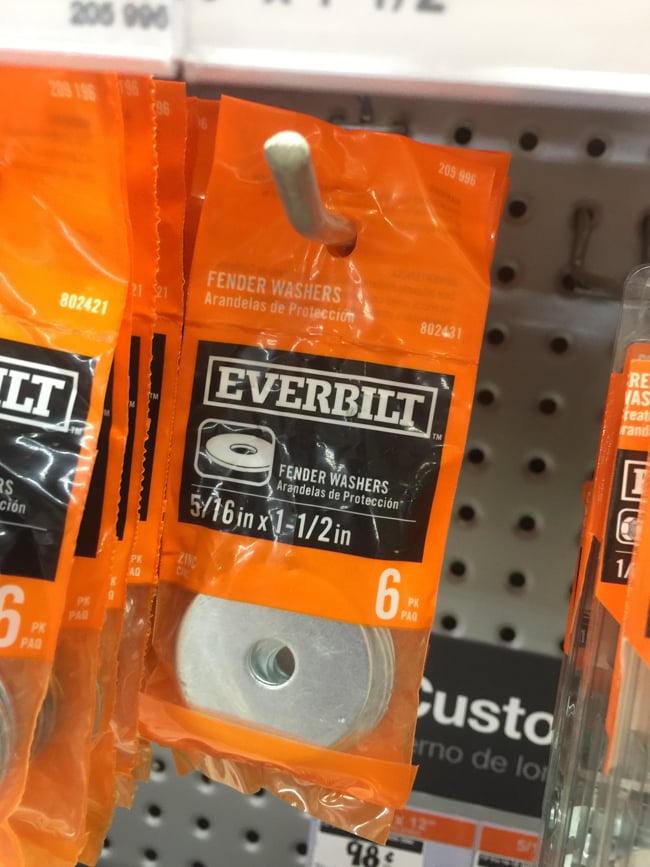
In addition, you will also need 10 washers. We found these at our local hardware store.
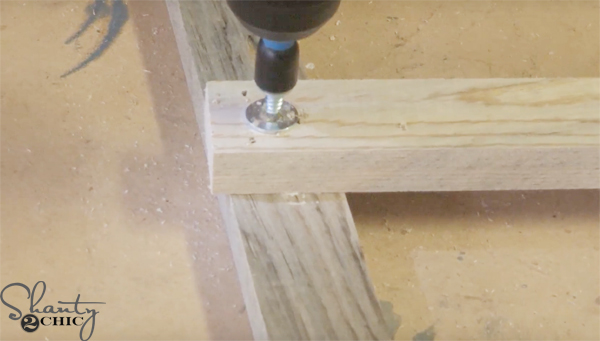
Our final step was to attach a washer and hex screw to the end of each rung, where they attach to the ladder sides. We used our third tool, the 18-Volt drill with a 3/4″ nut driver to drive the hex screws into place. Make sure to pre-drill holes for the hex screws.
We added a couple of cute blankets for decor and called it a day! We love blanket ladders because they are not only functional but they are a great way to add texture and warmth to any room! It’s also a great way to get those throws up, off the floor 🙂
Here is another version of the ladder without the hardware – cute either way 😉
You can find our very first DIY Blanket Ladder that we designed here!
Don’t forget to download our new 3-Tool eBook! It includes 5 complete plans that use only these 3 tools, printable shopping lists and step-by-step instructions. We’ve also included a bonus Christmas printable as a thank you for your purchase! You can get the eBook HERE!
Now for the giveaway! 5 lucky winners will receive a free copy of our new eBook and the three tools that we used to build this Blanket Ladder (and the other 4 builds in our eBook! The tools are:

The 18-Volt Miter Saw
The 18-Volt Brad Nailer
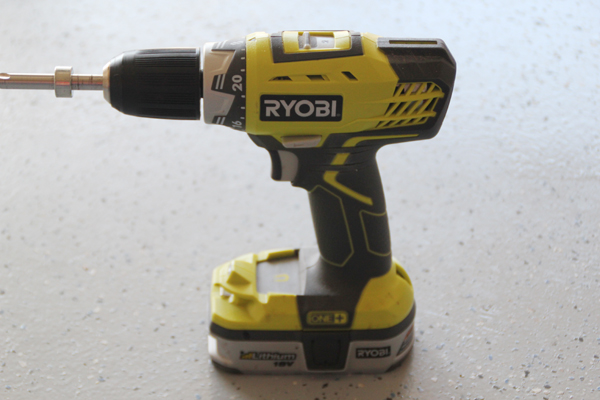
And the 18-Volt Drill!
With this tool collection you will be able to build all FIVE of our 3-Tool builds! To enter is simple, just follow the instructions in the box below. You can up your chances of winning by completely all of the entries! Good Luck! Winners will be announced next week at the top of this post 🙂


The link to the free plans list 5 washers/hex screws rather than the 10 you list in the post?
Were the winners contacted? I’m still holding onto hope!
Yes. The winners have been contacted and they should be listed on the giveaway widget 🙂
Who won this contest?
Thank you for the chance of winning. You two are such an inspiration and breath of fresh air.
Love your channel and blog so much
Wow! I would love to win this so bad. This could be the BEST Christmas Gift to me????
Love your posts and love Ryobi. Thanks ladies!
Such a cute build! I would be completely giddy to win this giveaway!
Yay!! I purchased the Ebook as soon as it came out, this ladder is my next project!