We get so many emails and messages asking us what are the basics to starting a workshop! One of the first pieces we suggest is a Workbench! This DIY workbench is the perfect build for beginners. You only need the 3 basic tools, that we suggest starting your workshop with, to build this. It’s easy to build, it’s great for storage, gives you a huge work space AND its affordable!
Come watch just how easy this beast is to build! Just click the Play button in the box below to watch!
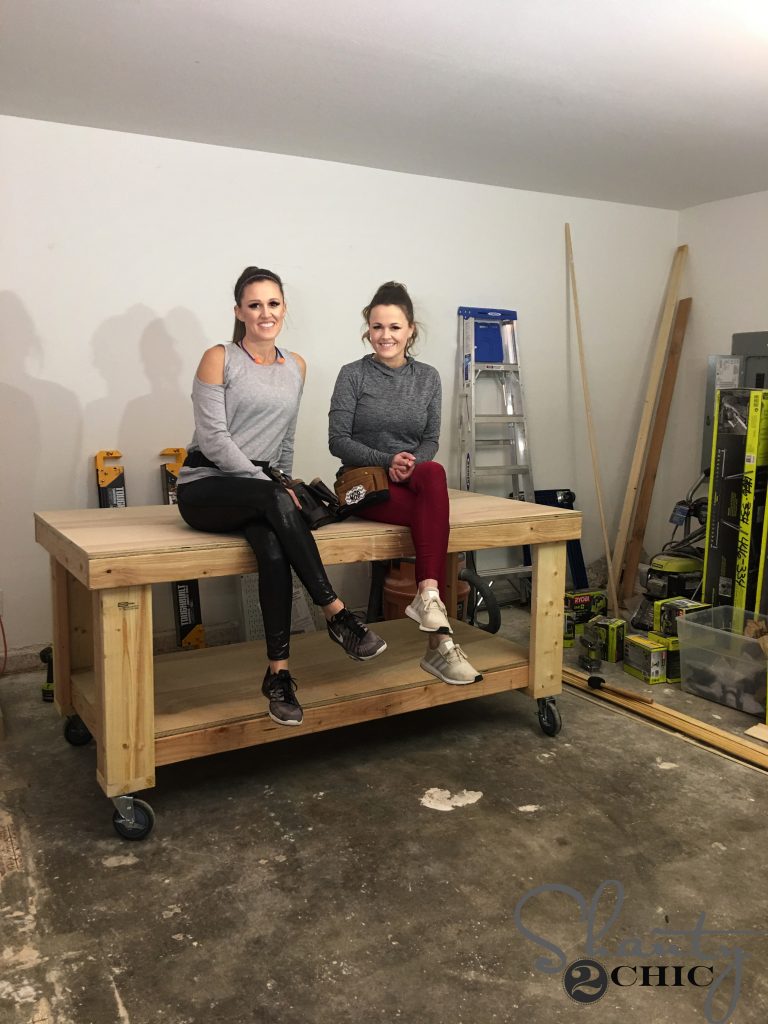
If this workbench looks familiar, you have probably seen it in our shops! Whitney has this full size version and Ashley built a more narrow version for her shop! You can see the narrow version HERE! We built this workbench for our friends garage! They just recently renovated a 70’s ranch house and we begged them to let us build them a functional workbench. We are building them tons of furniture for their new renovation and we needed a good work surface so, win-win!
You can find the FREE Printable Plans at the end of this post!
Table of Contents
Tools
Drill
Miter Saw
Kreg Jig – You can find our favorite model HERE!
DIY Workbench Supplies:
4 Casters – You can find them HERE!
Glue – You can find our favorite Glue Bot HERE!
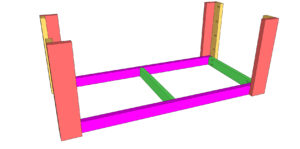
Step 1 – Building the Frames
Drilling Pocket Holes
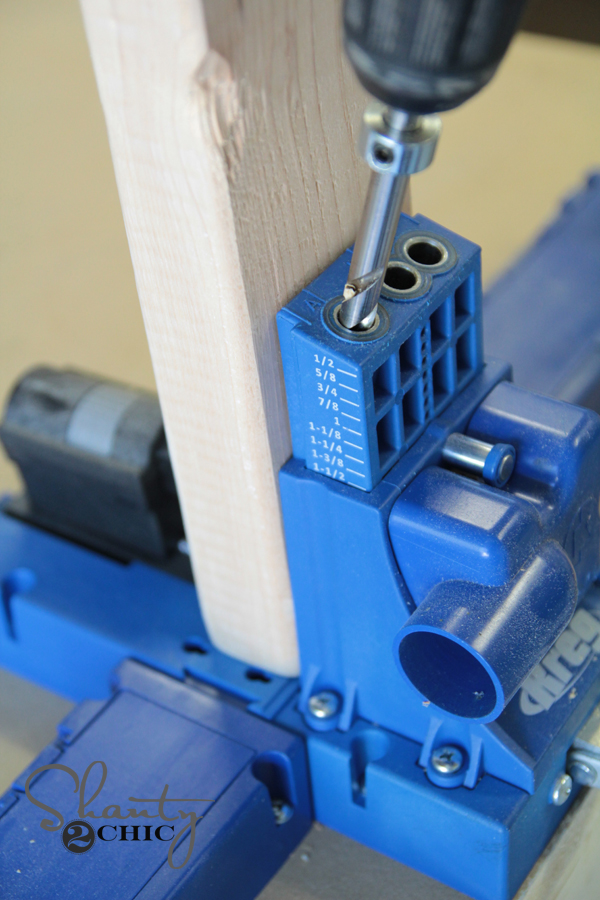
After making all of our cuts, we used our Kreg Jig to drill 1 1/2″ pocket holes into the short frame pieces. You can find our favorite Kreg Jig model HERE!
Attaching Frame
The first step in assembly is to build the top and bottom frames. The top frame is larger than the bottom frame but they are both assembled the same way. We attached the short frame pieces to the long frame pieces with 2 1/2″ pocket hole screws and wood glue.
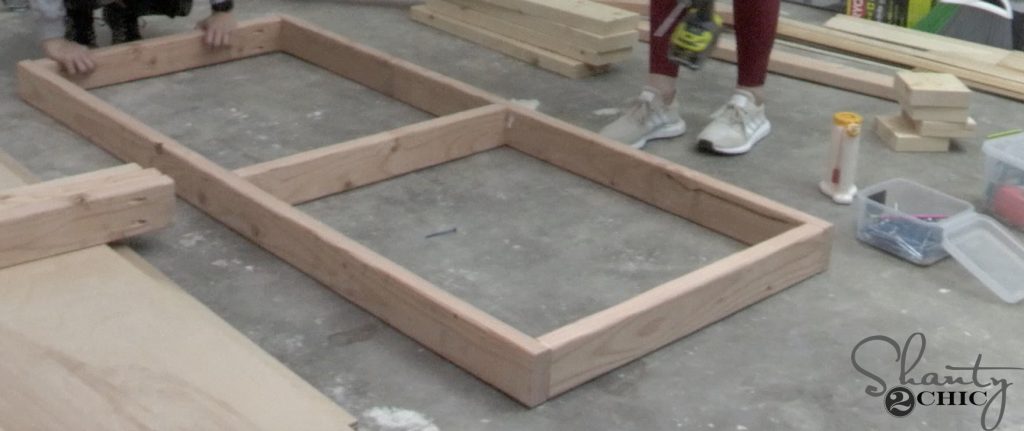
Here is one of the frames assembled.
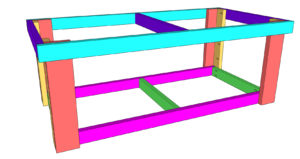
Step 2 – Legs
Assembling the Legs
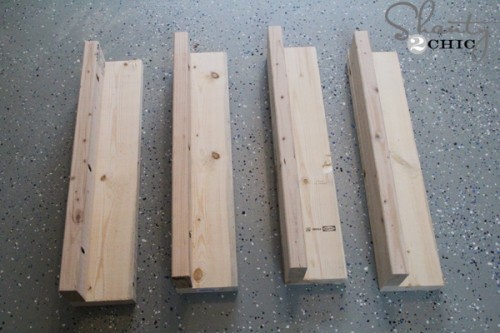
We drilled 1 1/2″ pocket holes into one side of the short leg pieces and attach them to the long leg pieces with 2 1/2″ pocket hole screws and wood glue.
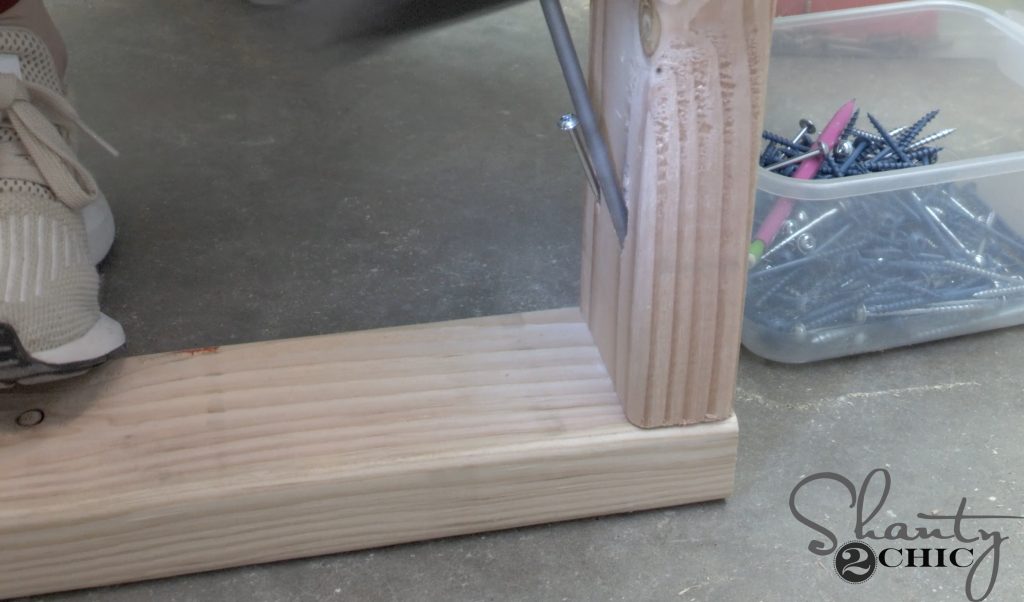
Attaching the Legs
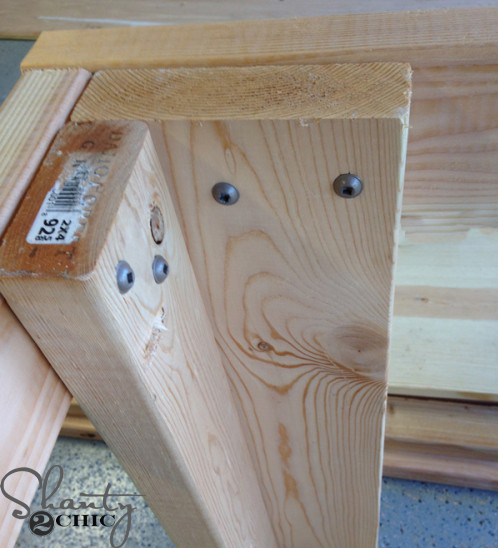
Next, we attached the legs to the frames with 2 1/2″ wood screws and wood glue.
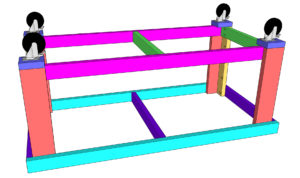
Step 3 – Foot Pads
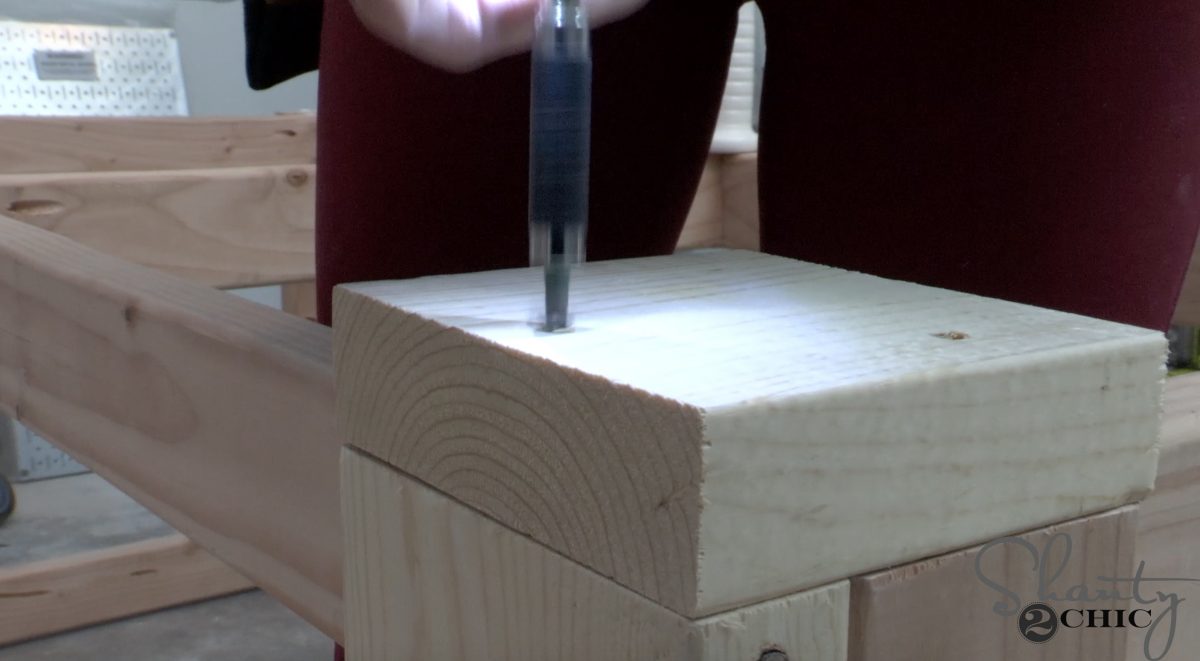
We flipped the bench upside down and cut the foot pads to size. Then, we attached them to the bottom of the workbench with 2 1/2″ wood screws and wood glue.
Step 4 – Casters
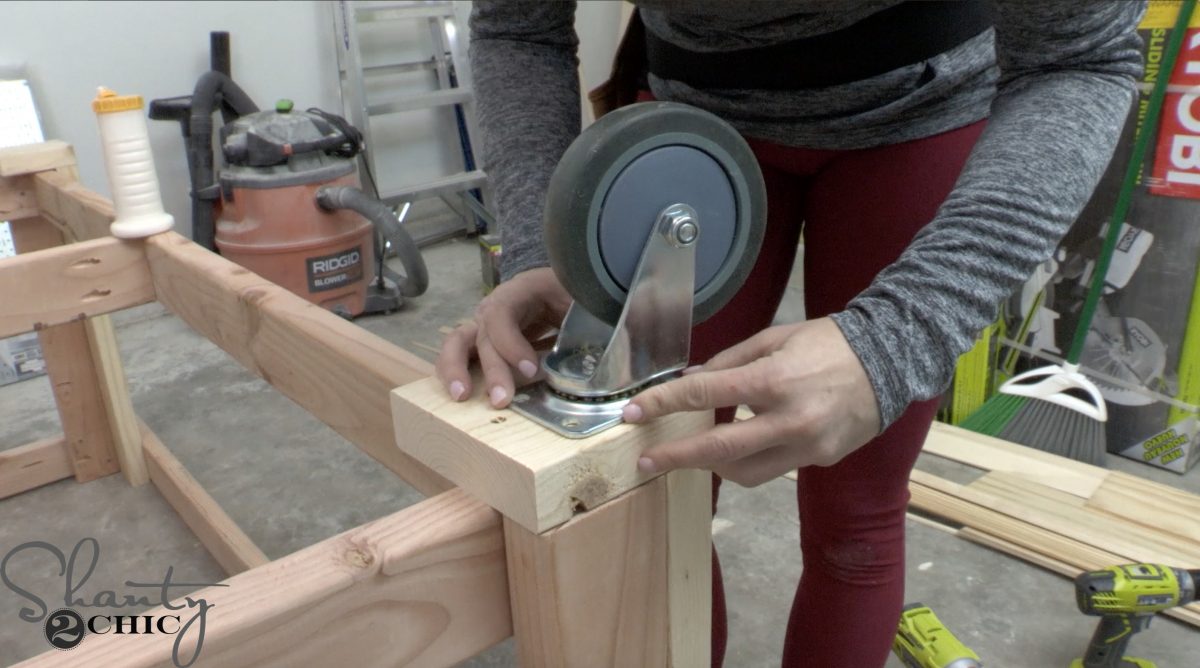
Once the foot pads were attached, we attached the casters with 2 1/2″ wood screws and washers.
Step 5 – Bottom Shelf
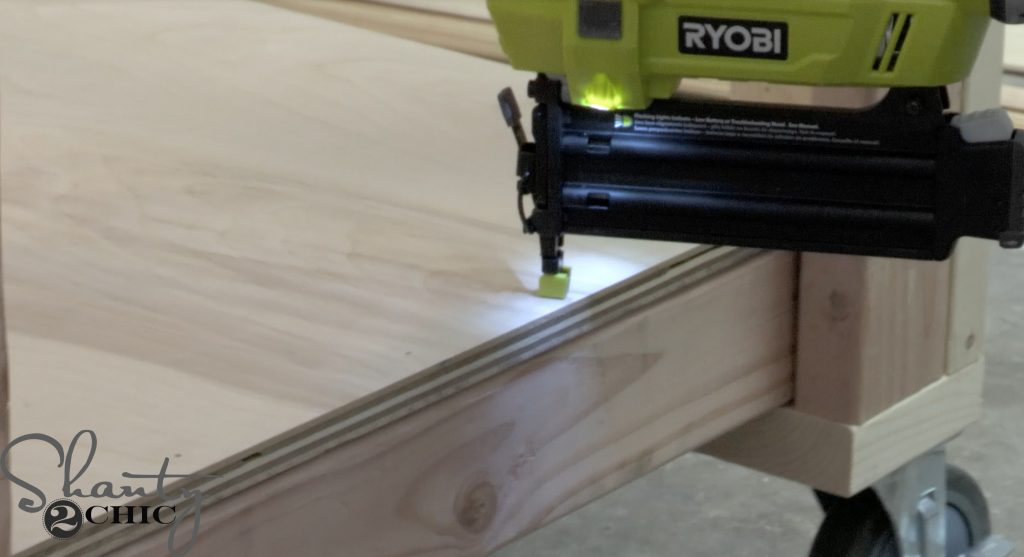
Flip the workbench back over and lay the bottom shelf in place. We used our Ryobi 18-volt Airstrike Nailer, with 1 1/4″ brad nails, and wood glue to attach the shelf to the bottom frame. You an use 1 1/4″ wood screws if you don’t have a nailer.
Step 6 – Attach Top
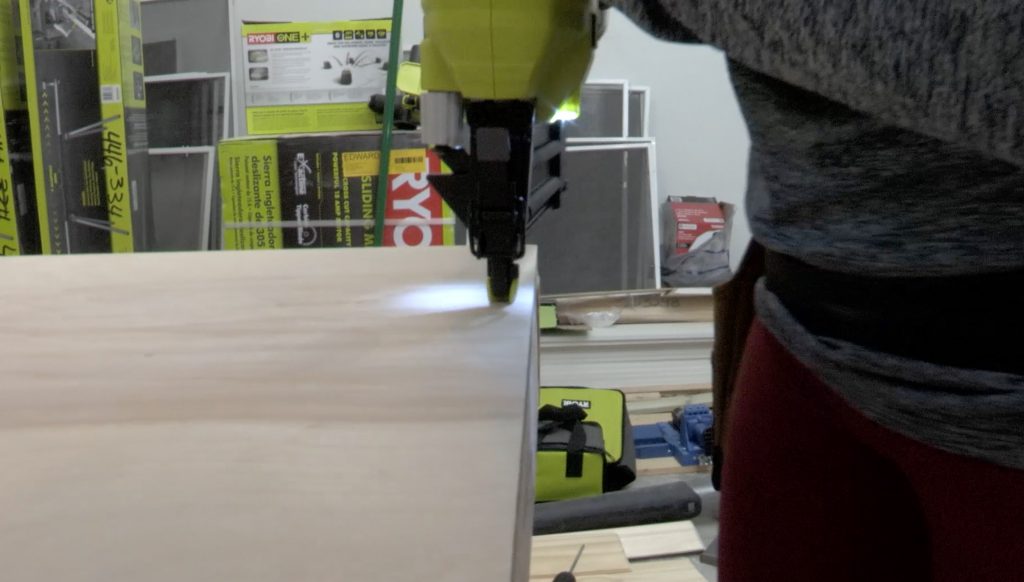
We attached the top plywood piece like we did the shelf!
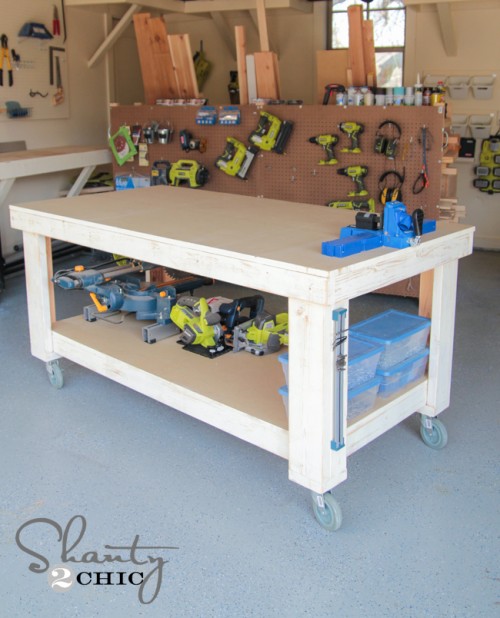
At this point, you can leave it as-is or add a finish! Either way it’s ready for building!!
Thanks so much for stopping by!
Happy Building!
DIY Workbench
Supply List
- 2 2x6x8 Pine or Framing Lumber
- 7 2x4x8 Pine or Framing Lumber
- 2 4’x8’x34″ MDF
- 4 5″ Locking Swivel Casters Link in Post
- 2″ Brad Nails
- 2 1/2″ Wood Screws
- 2 1/2″ Pocket Hole Screws
Instructions
- Cut List 1

- Cut List 2

- After making all of the cuts, drill 1 1/2″ pocket holes into the short pieces of the frames. Build the top and bottom frame by attaching the short pieces to the long pieces with 2 1/2″ pocket hole screws and wood glue.

- Drill 1 1/2″ pocket holes into the 2×4 leg pieces and attach them to the 2×6 pieces with 2 1/2″ pocket hole screws and wood glue. Do this for all 4 legs.

- Attach the legs to the outside corners of the bottom shelf with 2 1/2″ wood screws and wood glue, from the inside of the frame, into the legs. The bottom of the legs should be flush with the bottom of the frame.

- Flip the bench over and slide the top frame over the legs. Attach them with 2 1/2″ wood screws and wood glue, through the legs and into the frame. The top of the legs should be flush with the top of the frame.

- Attach the feet to the bottom of the frame with 2 1/2″ wood screws and wood glue.

- Attach the casters to the center of each foot.

- Attach the bottom and top shelves with wood glue and 2″ brad nails.All finished! At this point you can add a finish or leave it bare. Make it your own and be sure to share your builds with us on social media and use #shanty2chic so we can share them too! Happy Building!


I made this table with a butcher block 1-1/2 top. It is so nice. It is the right height to slide right under my stationary workbench. I added a vice and soon some magnets for accessories.
Thanks for the free plans. They were great.
I made this bench today, turned out great. I made mine a little bigger, 4×8. Thanks for the project!
Any chance you recall how much this project was? I love when the prices are listed because I can convince my wife to let me make it vs buy it.
I made a bench that is similar to this but a little larger and a little more complex. My total price was just under $100. It is much stronger than anything I could find to buy at that price point. Your price may vary depending on the cost of lumber in your area.
I watched the video and finally did it.
It came out great.
Thanks for the plans. I couldn’t make it work with fir 2x6s so used poplar instead, cutting the stock to dimensions with a circular saw and track guide and a table saw.
I was thinking about adding shelving to store tools and other stuff. How would you recommend doing so? Adding a vertical divider is proving difficult because the width of the top is different from the width on the bottom. What’s the best way to do this? Thanks
I watched the video a couple of weeks ago and I’m sure it was done correctly in the video, but I printed out the plans and now I probably have to buy more lumber. Step two in the plans says to drill 1 1/2″ pocket holes into the 2×6 legs pieces and attach them to the 2×4 pieces with the pocket hole screws. It should have read to drill the pocket holes into the 2×4’s. If you follow the instructions, you won’t be able to screw into the 2×4’s from inside the frame. The picture shows the correct procedure, it’s just the verbiage that’s incorrect. I might just go with it as is at this point and I apologize if this is a repeat of a previous comment.
So sorry about that! We have the correct pocket holes on the cut list but the verbiage is wrong. I will fix that now. Thanks for the heads-up!
The verbiage is still wrong on your plans. They still say to drill the pocket holes into the 2×6!
I printed off your plans for this workbench and could not come up with the 34″ height you have shown in your drawings. the legs are 26.5″ high and the foot pad is 1. ‘ plus the .75’ for a total of 28″. where is the other 6″ I’m missing or is the drawing miss labeled?
The Wheels
After the bench is built on your plans you show a measurement of 34″ tall. I understand that you would add an inch and a half for the feet pieces on the bottom and the thickness of the plywood top but where does the remainder come from? Help me out here. Thank you
Hey there! The 34″ is with the casters.
Hi
Sorry,, but reading your plan to build the workbench I dont understand the item reference 2x6x8 in the supply list, whats means?
2″x6″ board 8 foot long
Very easy to follow. Me and my 14 yr old built this in a couple hours this afternoon. Thanks for sharing !
G’morning. I realize this is a bit of an older post, but I am still hoping you pop in here for a second. We have just built a new garage and its a blank slate. I want to make a work bench and will be following your plans but am wondering why you chose this size and height for your bench. I know its generally a preference, but do you find a 3 x 6 is plenty roomy? and is the finished height include the wheels you have added.
Hello! Sorry for the delay! We don’t get notifications on comments anymore 🙁 The height was based on our height and we are around 5’3″. The wheels include the overall height 🙂
If all you need is a drill, miter saw, and kreg jig how are you supposed to cut the particle boards down to the correct sizes?
Get your lumber yard to do it for you?
(otherwise, yes you would also need a circular saw)
If you watched the video it flashed the words two pre-cut pieces of plywood So if you can’t get it pre-cut it goes without saying that you will need a saw.
Lowes or Home Depot will cut board when purchased.
Hello Ladies,
I love your videos and plans. Today my wife and I are going to attempt our first piece, and are using your plans for the entryway bench. Wish us luck!
I was wondering, since no bedroom is ever complete without a seat to sit on and put on your shoes and while getting ready in the morning if you guys had an anything for a bedroom bench that was different from previous builds?
My hubby and I made this workbench as our starter project and it turned out great! The color coded plans were my favorite part! Would love to attach a pic but wasn’t able to. Thanks!!
Hello Ladies,
I recently stumbled upon you two and have watching you guys like crazy. I subscribe to all your social media locations and have noticed that all of your pieces of furniture is more accommodating for bigger homes. I live in an apartment and was wondering if you have or are open to creating smaller plans for us girls in smaller living situations.
Thank you and keep doing all the great stuff you all do. You two are very inspiring.
Jennifer Smith
Sacramento, Ca
I built the workbench from from the plans offered here and want to thank you! You’re inspiring women to build and offering FREE plans and directions. What a lovely combination!
And shame on the person from the woodworking site, spamming your comments section with referrals to a site that requires one to pay for every piece of information.
Keep up the great work Shanty to Chic!
Mary
agree! rotten spammers!