We get so many emails and messages asking us what are the basics to starting a workshop! One of the first pieces we suggest is a Workbench! This DIY workbench is the perfect build for beginners. You only need the 3 basic tools, that we suggest starting your workshop with, to build this. It’s easy to build, it’s great for storage, gives you a huge work space AND its affordable!
Come watch just how easy this beast is to build! Just click the Play button in the box below to watch!
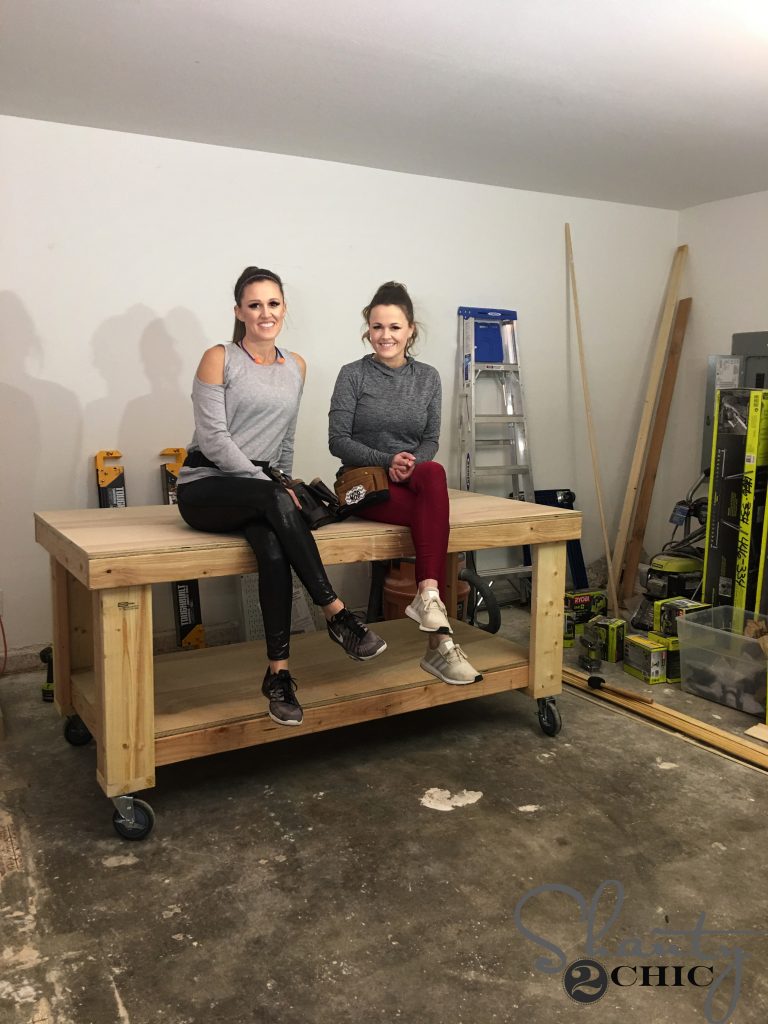
If this workbench looks familiar, you have probably seen it in our shops! Whitney has this full size version and Ashley built a more narrow version for her shop! You can see the narrow version HERE! We built this workbench for our friends garage! They just recently renovated a 70’s ranch house and we begged them to let us build them a functional workbench. We are building them tons of furniture for their new renovation and we needed a good work surface so, win-win!
You can find the FREE Printable Plans at the end of this post!
Table of Contents
Tools
Drill
Miter Saw
Kreg Jig – You can find our favorite model HERE!
DIY Workbench Supplies:
4 Casters – You can find them HERE!
Glue – You can find our favorite Glue Bot HERE!
Step 1 – Building the Frames
Drilling Pocket Holes
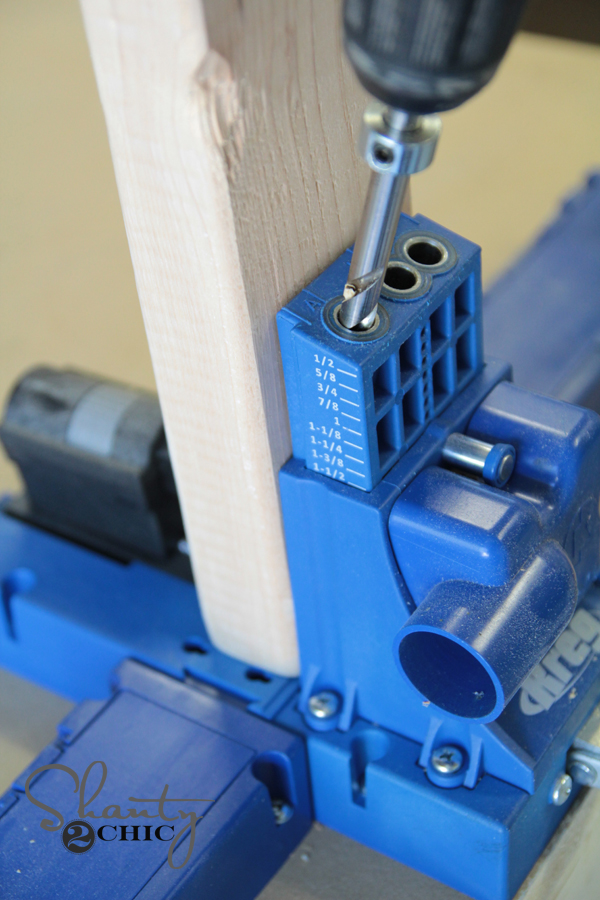
After making all of our cuts, we used our Kreg Jig to drill 1 1/2″ pocket holes into the short frame pieces. You can find our favorite Kreg Jig model HERE!
Attaching Frame
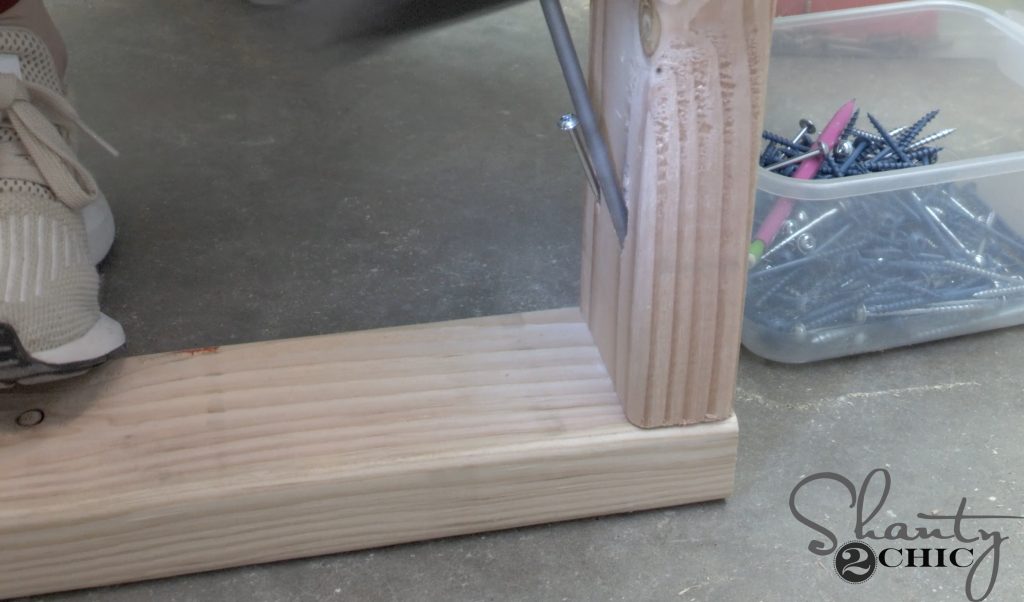
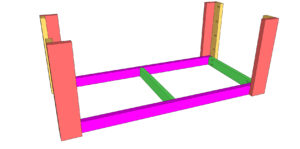
The first step in assembly is to build the top and bottom frames. The top frame is larger than the bottom frame but they are both assembled the same way. We attached the short frame pieces to the long frame pieces with 2 1/2″ pocket hole screws and wood glue.
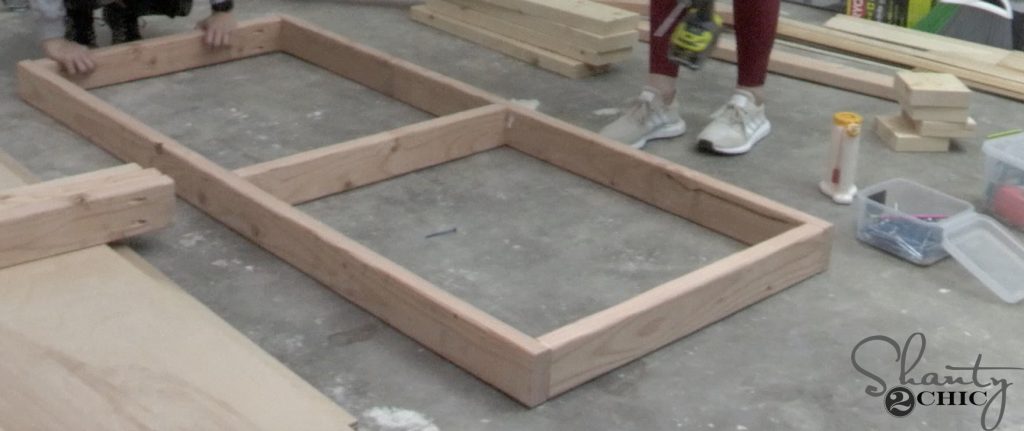
Here is one of the frames assembled.
Step 2 – Legs
Assembling the Legs
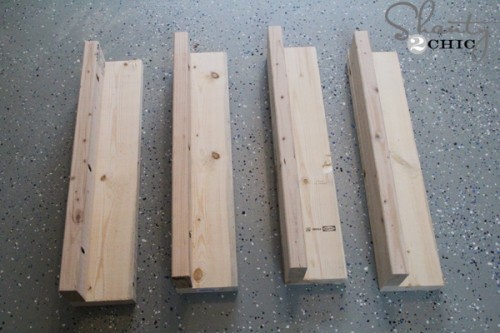
We drilled 1 1/2″ pocket holes into one side of the short leg pieces and attach them to the long leg pieces with 2 1/2″ pocket hole screws and wood glue.
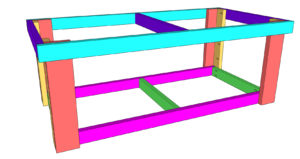
Attaching the Legs
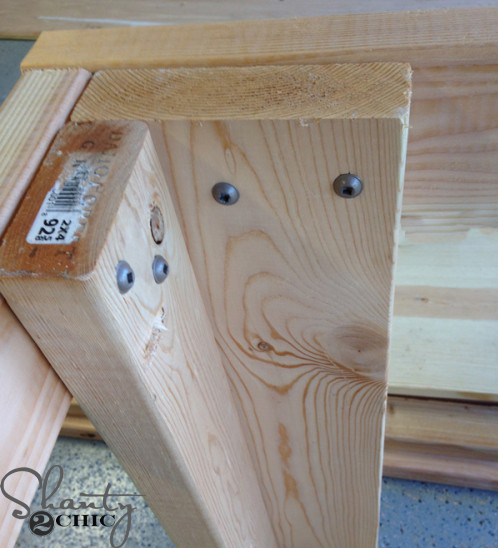
Next, we attached the legs to the frames with 2 1/2″ wood screws and wood glue.
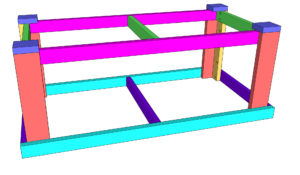
Step 3 – Foot Pads
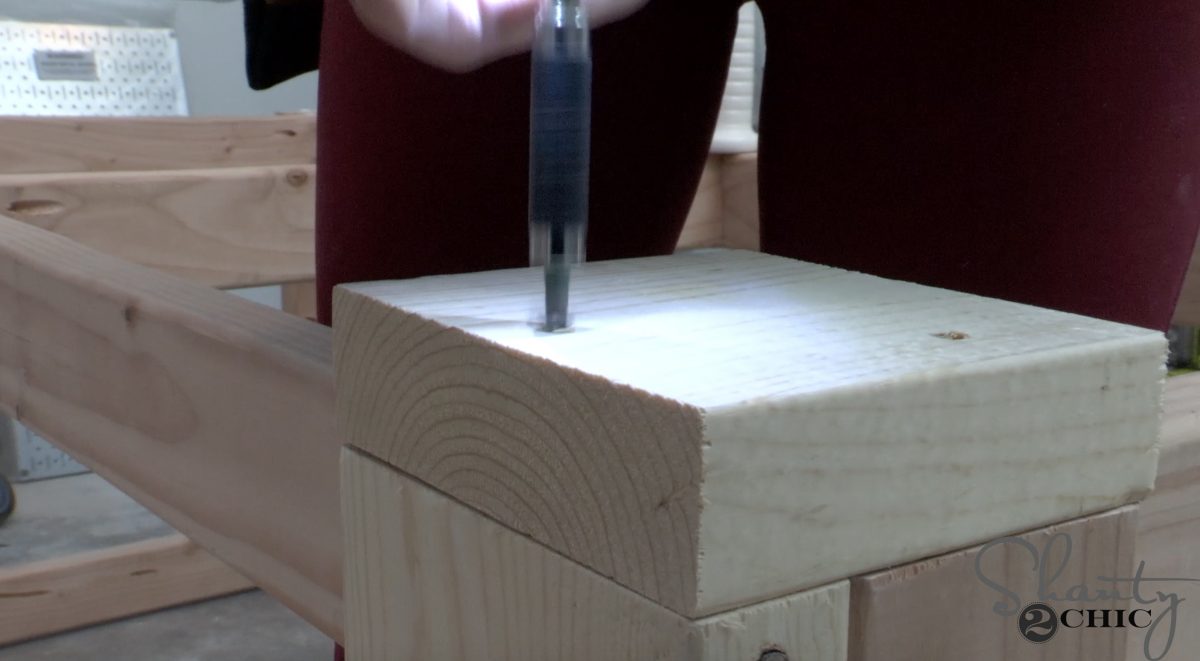
We flipped the bench upside down and cut the foot pads to size. Then, we attached them to the bottom of the workbench with 2 1/2″ wood screws and wood glue.
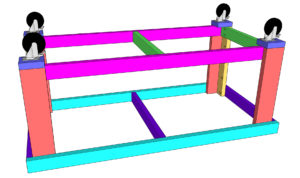
Step 4 – Casters
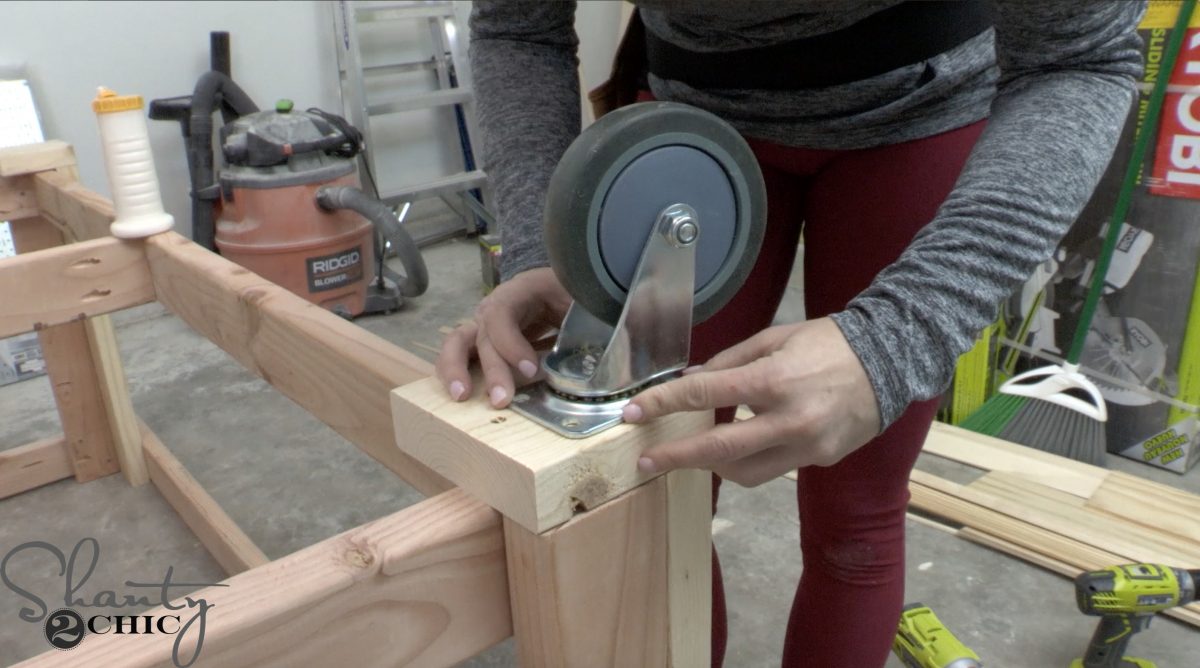
Once the foot pads were attached, we attached the casters with 2 1/2″ wood screws and washers.
Step 5 – Bottom Shelf
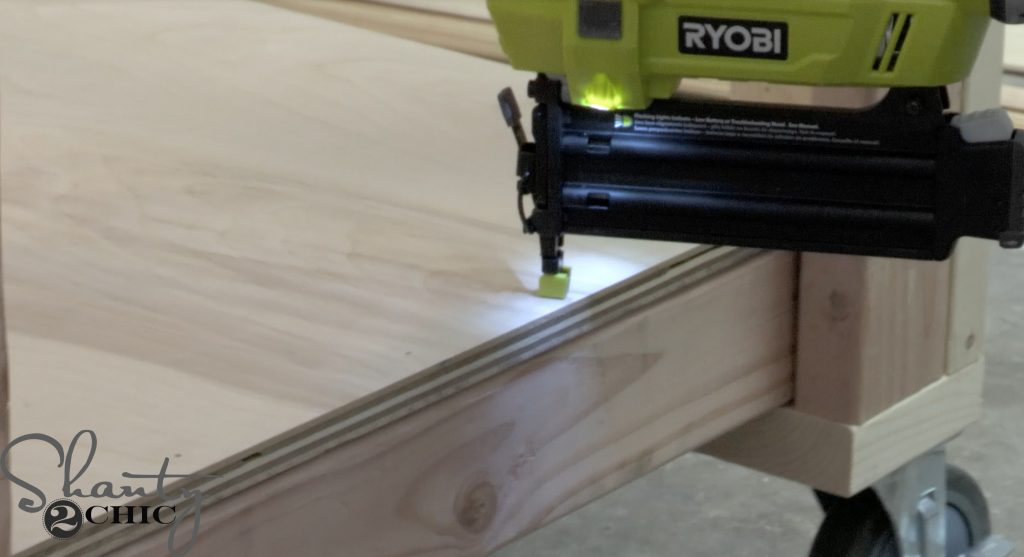
Flip the workbench back over and lay the bottom shelf in place. We used our Ryobi 18-volt Airstrike Nailer, with 1 1/4″ brad nails, and wood glue to attach the shelf to the bottom frame. You an use 1 1/4″ wood screws if you don’t have a nailer.
Step 6 – Attach Top
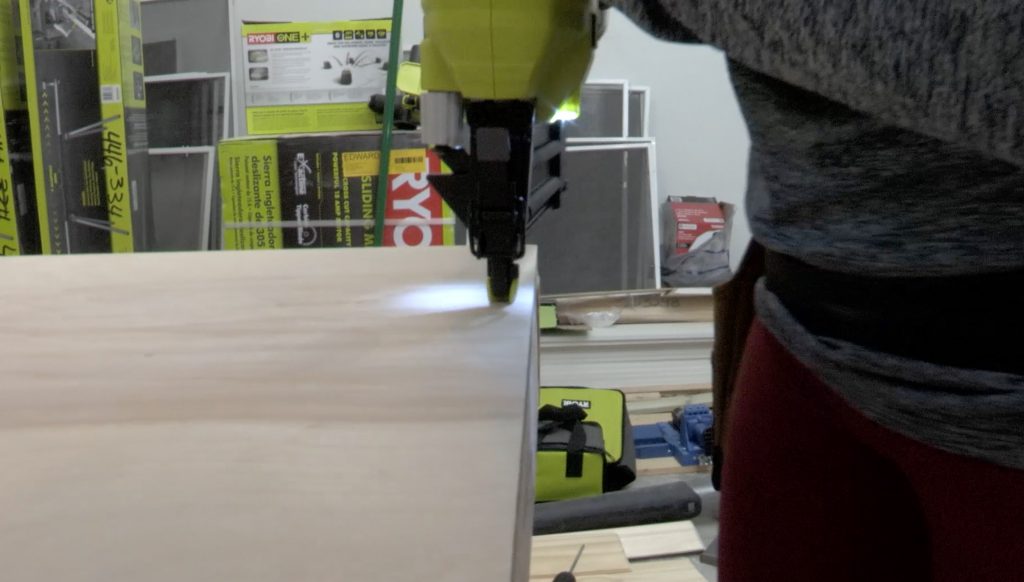
We attached the top plywood piece like we did the shelf!
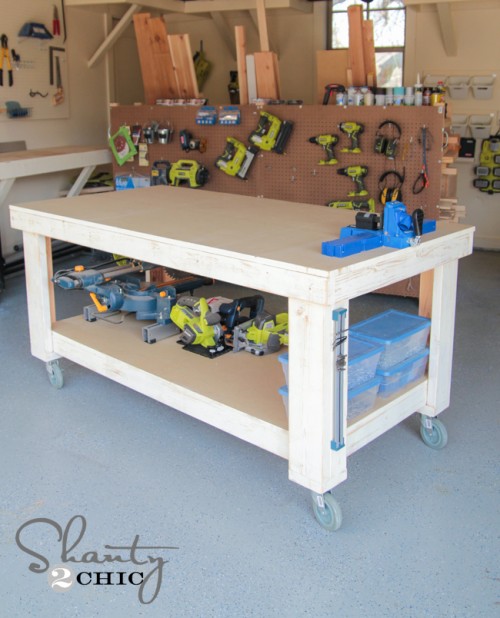
At this point, you can leave it as-is or add a finish! Either way it’s ready for building!!
Thanks so much for stopping by!
Happy Building!
DIY Workbench
Supply List
- 2 2x6x8 Pine or Framing Lumber
- 7 2x4x8 Pine or Framing Lumber
- 2 4’x8’x34″ MDF
- 4 5″ Locking Swivel Casters Link in Post
- 2″ Brad Nails
- 2 1/2″ Wood Screws
- 2 1/2″ Pocket Hole Screws
Instructions
- Cut List 1

- Cut List 2

- After making all of the cuts, drill 1 1/2″ pocket holes into the short pieces of the frames. Build the top and bottom frame by attaching the short pieces to the long pieces with 2 1/2″ pocket hole screws and wood glue.

- Drill 1 1/2″ pocket holes into the 2×4 leg pieces and attach them to the 2×6 pieces with 2 1/2″ pocket hole screws and wood glue. Do this for all 4 legs.

- Attach the legs to the outside corners of the bottom shelf with 2 1/2″ wood screws and wood glue, from the inside of the frame, into the legs. The bottom of the legs should be flush with the bottom of the frame.

- Flip the bench over and slide the top frame over the legs. Attach them with 2 1/2″ wood screws and wood glue, through the legs and into the frame. The top of the legs should be flush with the top of the frame.

- Attach the feet to the bottom of the frame with 2 1/2″ wood screws and wood glue.

- Attach the casters to the center of each foot.

- Attach the bottom and top shelves with wood glue and 2″ brad nails.All finished! At this point you can add a finish or leave it bare. Make it your own and be sure to share your builds with us on social media and use #shanty2chic so we can share them too! Happy Building!


You have to make legs 30 inches to get overall height of 36″ with caster. 26.5 legs will add up to a much lower table. Other than that, the directions are great. I have made one and now will make a second one based on this plan.
Hey ladies thanks and think I’m gonna modify these plans to start making Big Green Egg tables BC demand is thru the roof right now, very sturdy work table so a few extra braces & treated lumber. Nix the MDF & go w/treated 2×6 top & bottom few shelves & barn doors & “boom” should be great.
Awesome workbench. I made this last year and have since added things. I liked using the MDF a lot so that I wouldn’t worry too much about beating it up. Some plans I saw had bands of 2×4’s on their sides to make the surface. I’m sure that looks nice but too nice to mess up.
The reason I’m just now reviewing is that today I’m trying to reconfigure the dimensions to use the same plan for a Lego Table for my kids. It has to be more like 60”x40” MAX. It also has to be a bit lower. The MDF can probably be thinner since it’s only Legos and I’ll be gluing Lego tiles to the surface. I like the plan for the Lego table better than other “Lego Table” plans because I has the under storage as well as the casters. I can also feel free to add things to it. Anyway thanks for the plans. Very handy.
I just made the workbench and it turned out great. It was my first big project. Your instructions gave me confidence to do it, and I’m very proud. My daughter helped me, and we posed for a picture sitting on it like you did. She’s proud too. Love that you are women and are making the plans available for free. Thank you so much.
My first ever DIY project. I built some small end tables before that came out ok, but this these plans are legit! My work bench came out excellent. Even the non handiest beginner could follow these plans and figure this out.
I did a couple things different. I didn’t have a brad nailer, so I just drilled small holes and used 2 1/2” fastening screws to secure the top and bottom boards. I drilled dog bench holes along the front and right side, and I lightly burned and lacquered it. Such a beauty. Thanks chicks!
Only thing I would change, is I’d go with 30” legs as I’m 6’1, but it’s not uncomfortably short. Just a little shorter than it should be for someone my size lol. That’s my fault for not pre planning. All in all, this is a great plan and design.
Thanks for sharing your talents. I have a question regarding pocket screws. I realize they look.better. But, have you ever reseArched whether a screw …..installed straight in…..is structurally stronger?..
You all do awesome work! Your plans are so easy to follow! Was curious as to whether you used a software program for your mockups in the instructions? If so, what are you using?
Thanks!
how much would you charge for this workbench?
Great workbench.
Do you have the metric measurements?
Just finished this workbench today and I’m quite proud of it! Thank you for the plans and video! I made it about 40” tall to accommodate my height (I’m 7’1”), but that’s the only modification I made. I will say quickly that there is a slight typo in the printed plans though. In Step 2 you say to drill the pocket holes in the 2x6s and attach them to the 2x4s, and you’re supposed to do the opposite of that. Other than that this was a super easy plan that’s going to bring my projects to the next level! Thanks again!
I modified your plans a bit and built it!
Thank you.
Hi I watched your video and came away impressed. Your knowledge and execution of your plan was excellent.
I also liked the visual materials print you have on your site for this project.
I have to ask how you both came into doing this as a business? I ask because I am a creative artist and was looking for pointers on how to establish a business building furniture.
I am excited to tackle this project.
Thank you for your video.
Jeff
Cleveland, OH