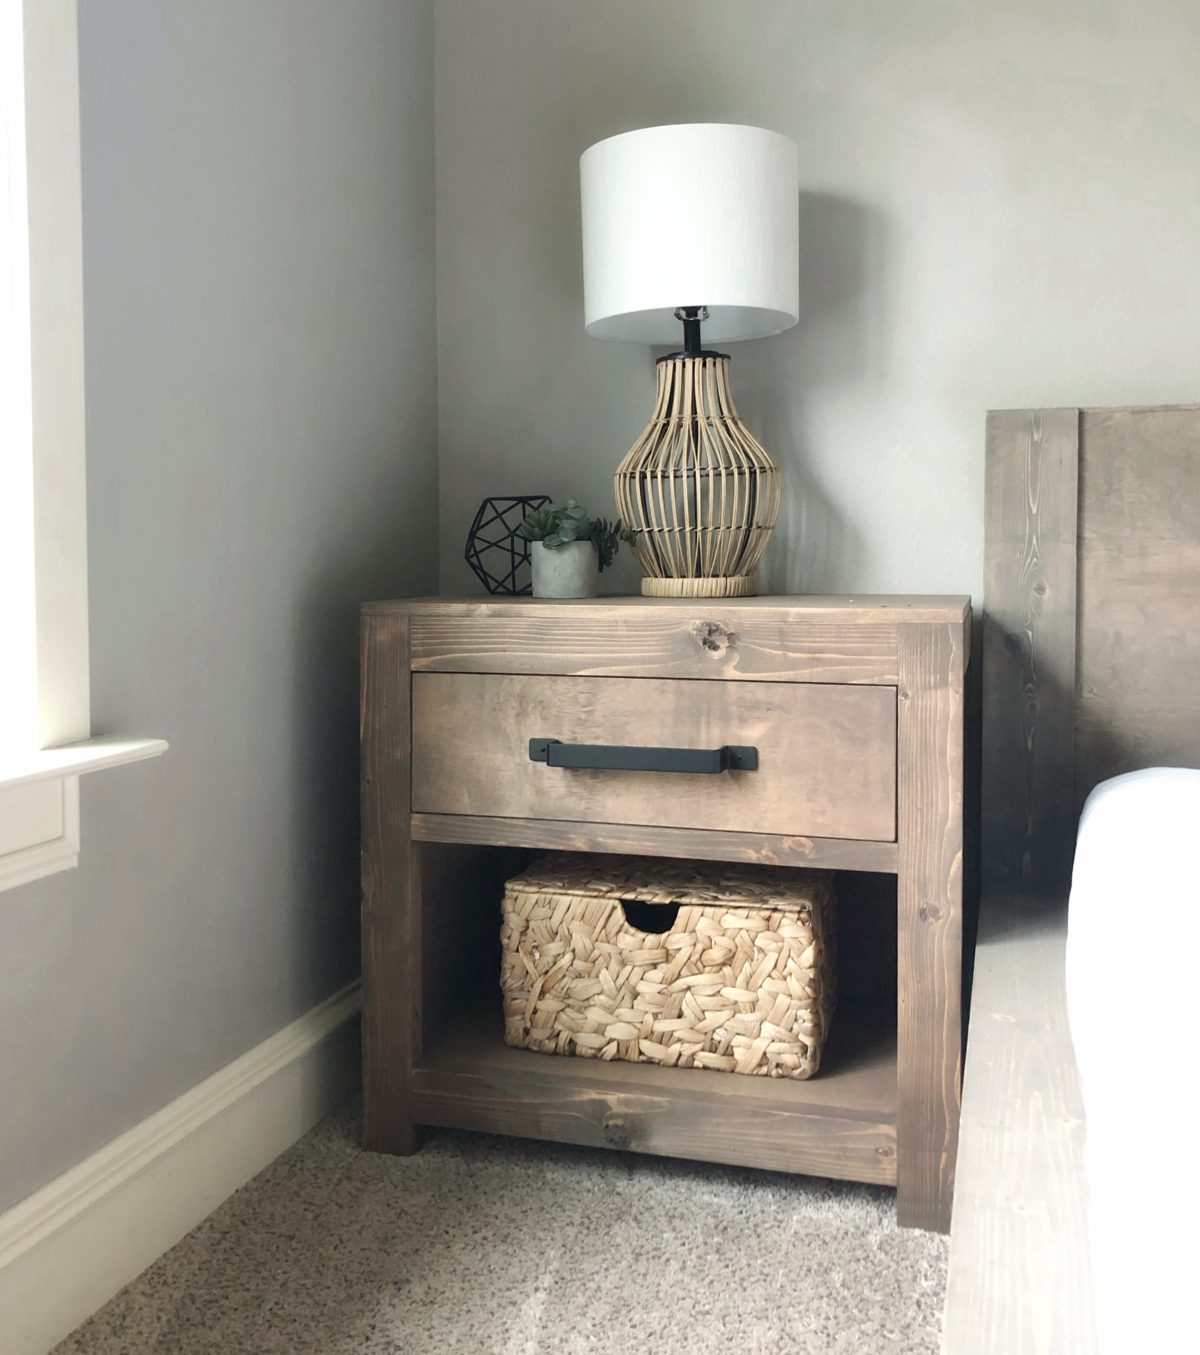
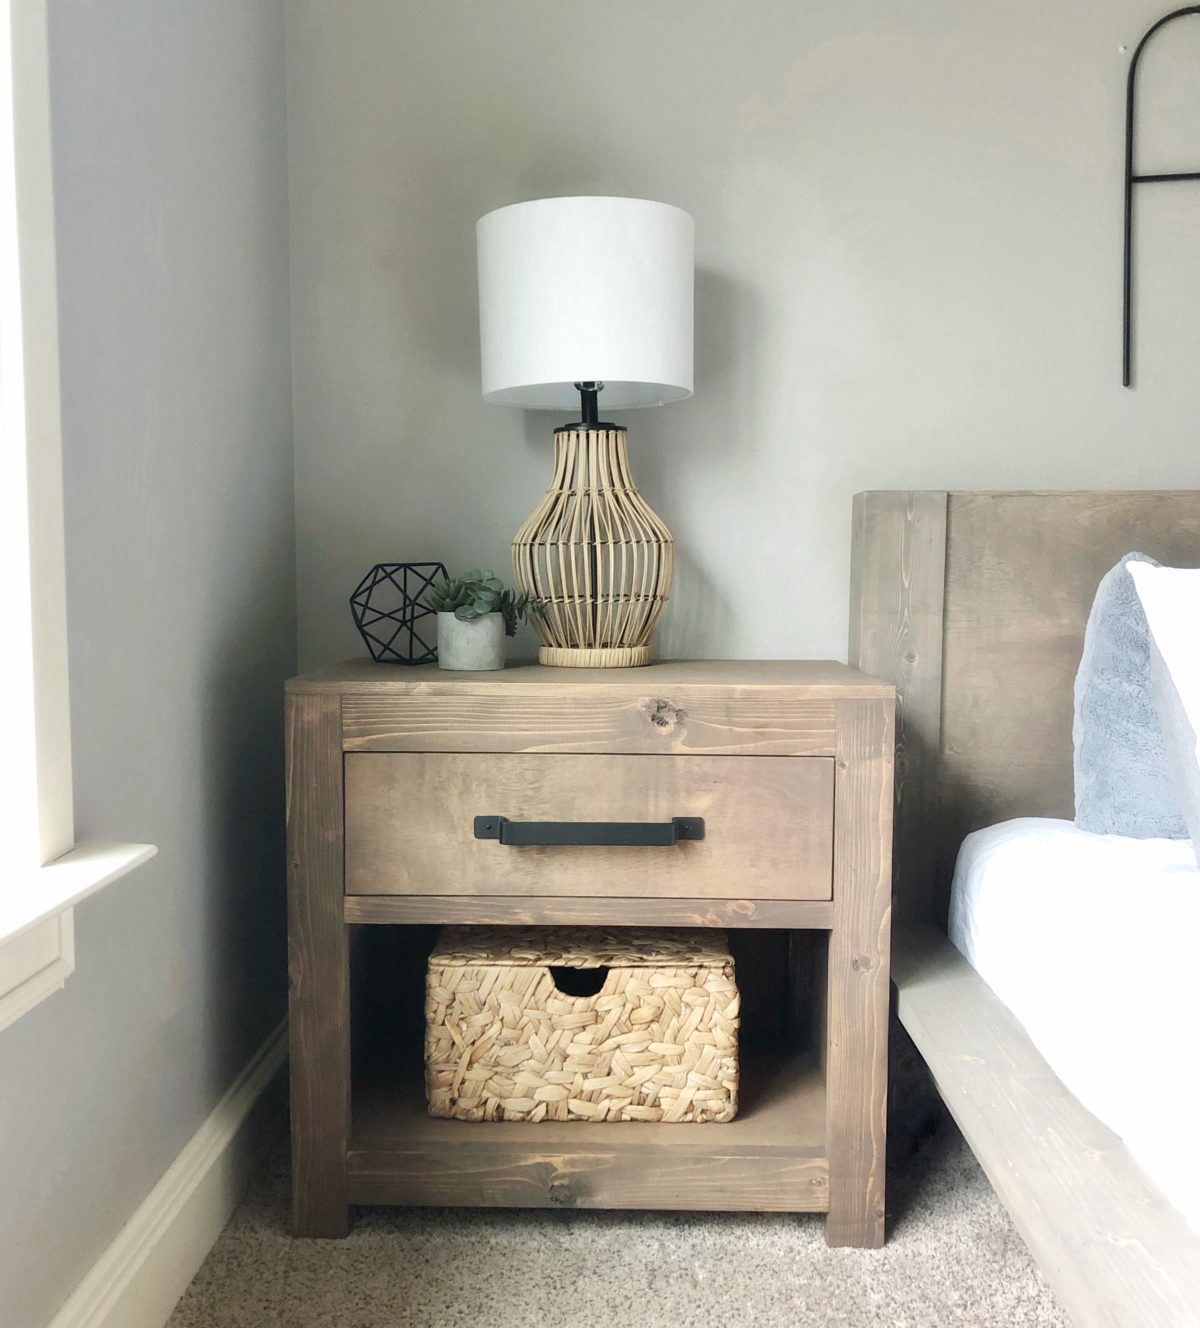
Most of y’all know I recently built a queen bed for my oldest princess, and she needed a nightstand to match! That’s exactly what we built her, and I am SO thrilled with how it turned out! Check out this DIY modern farmhouse nightstand!
Make
Isn’t it so fun?? Before we get started, be sure to download and print the FREE PLANS by clicking HERE!
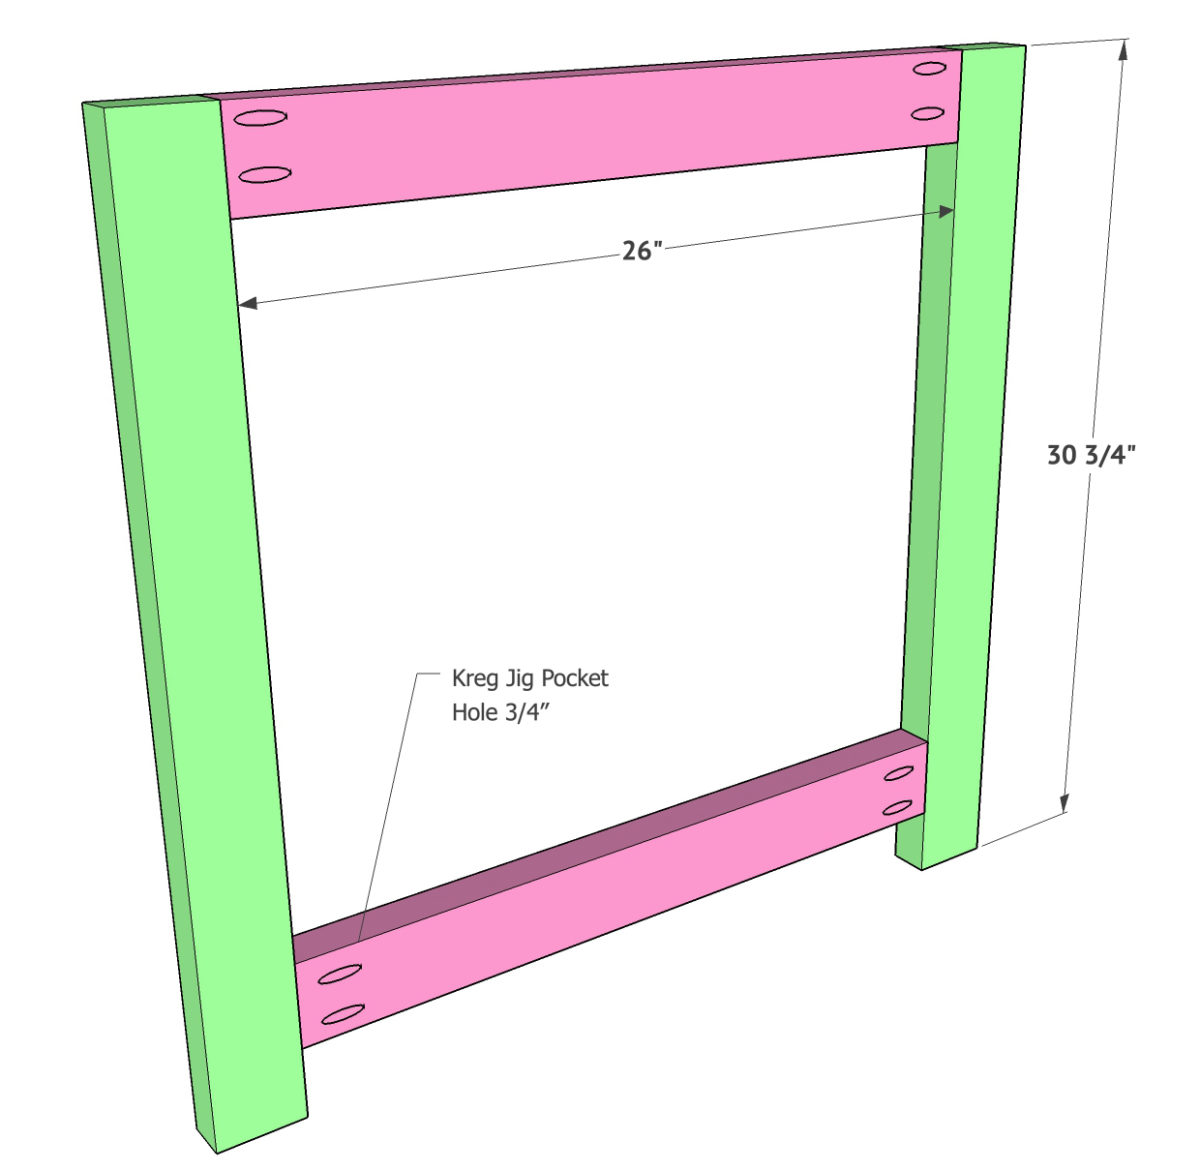
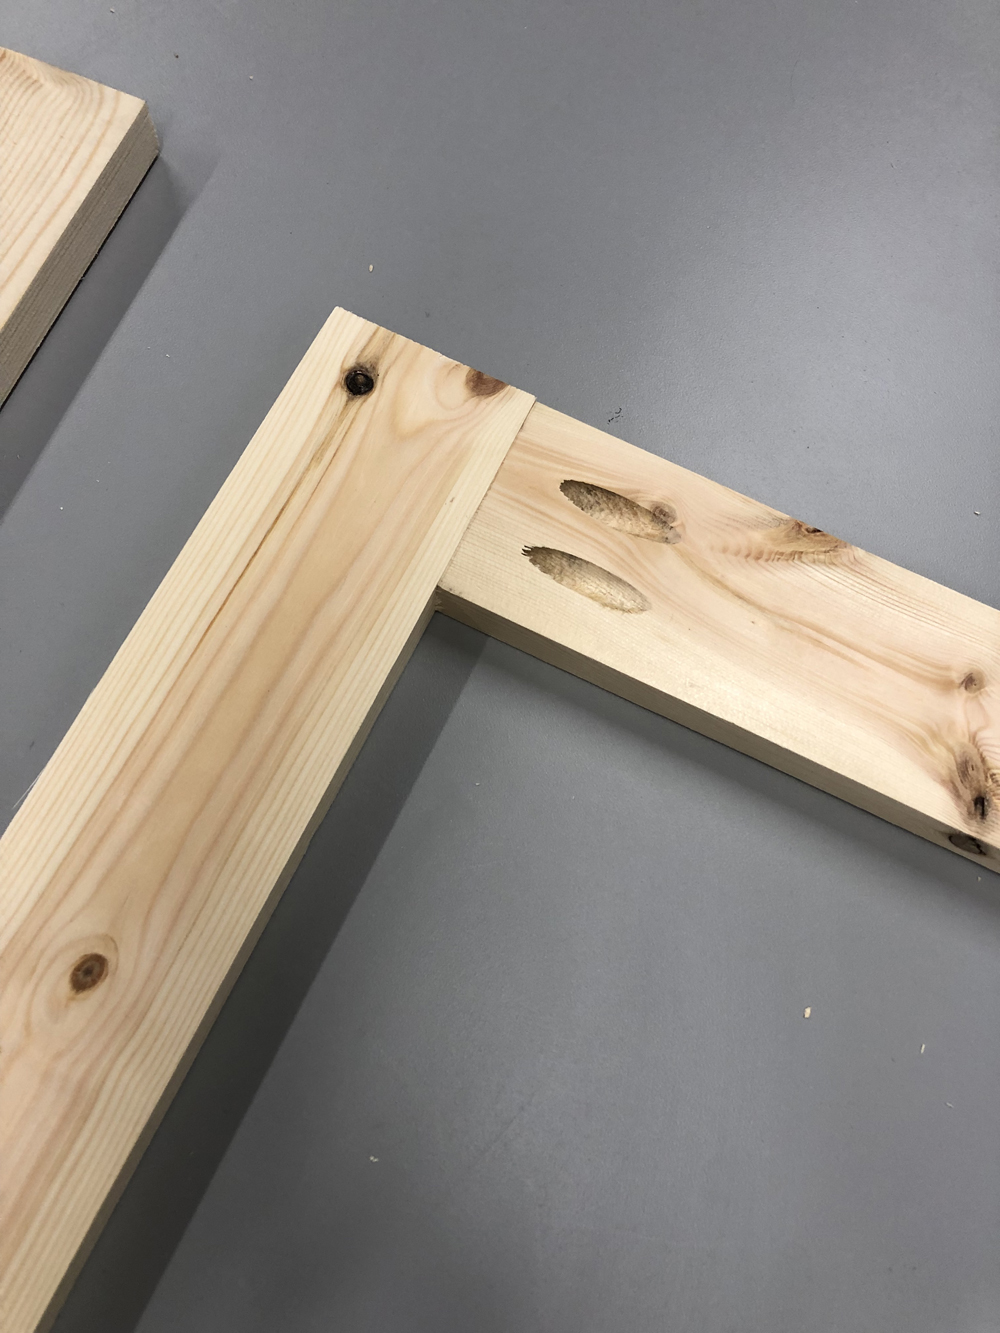
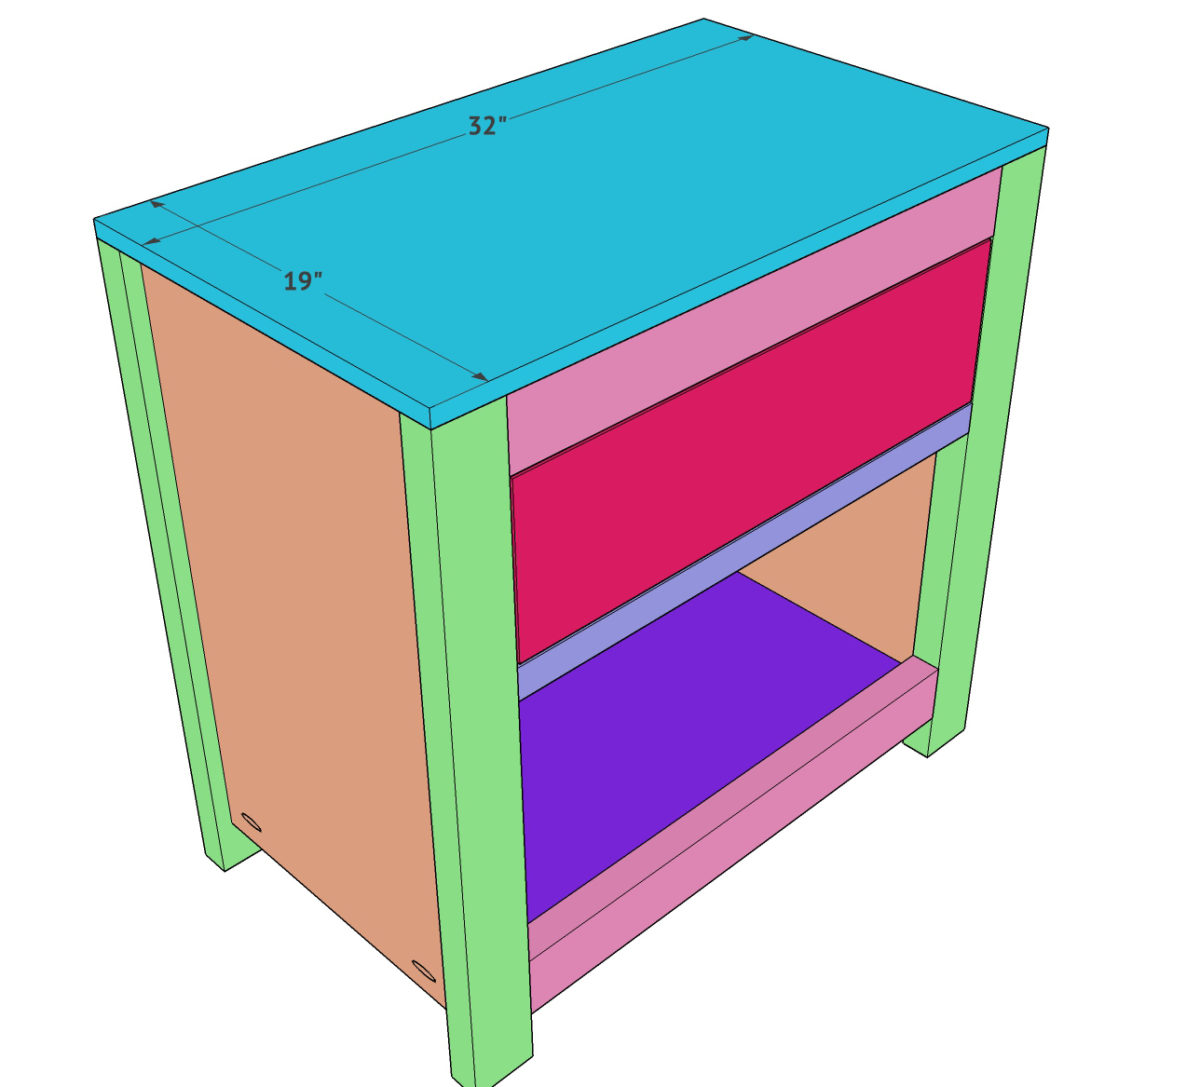
Build the back face frame first. These are 2×4 boards that are ripped to 3” wide each. Create 1.5” pocket holes on the horizontal boards and attach them to the vertical boards using wood glue and 2.5” pocket hole screws.
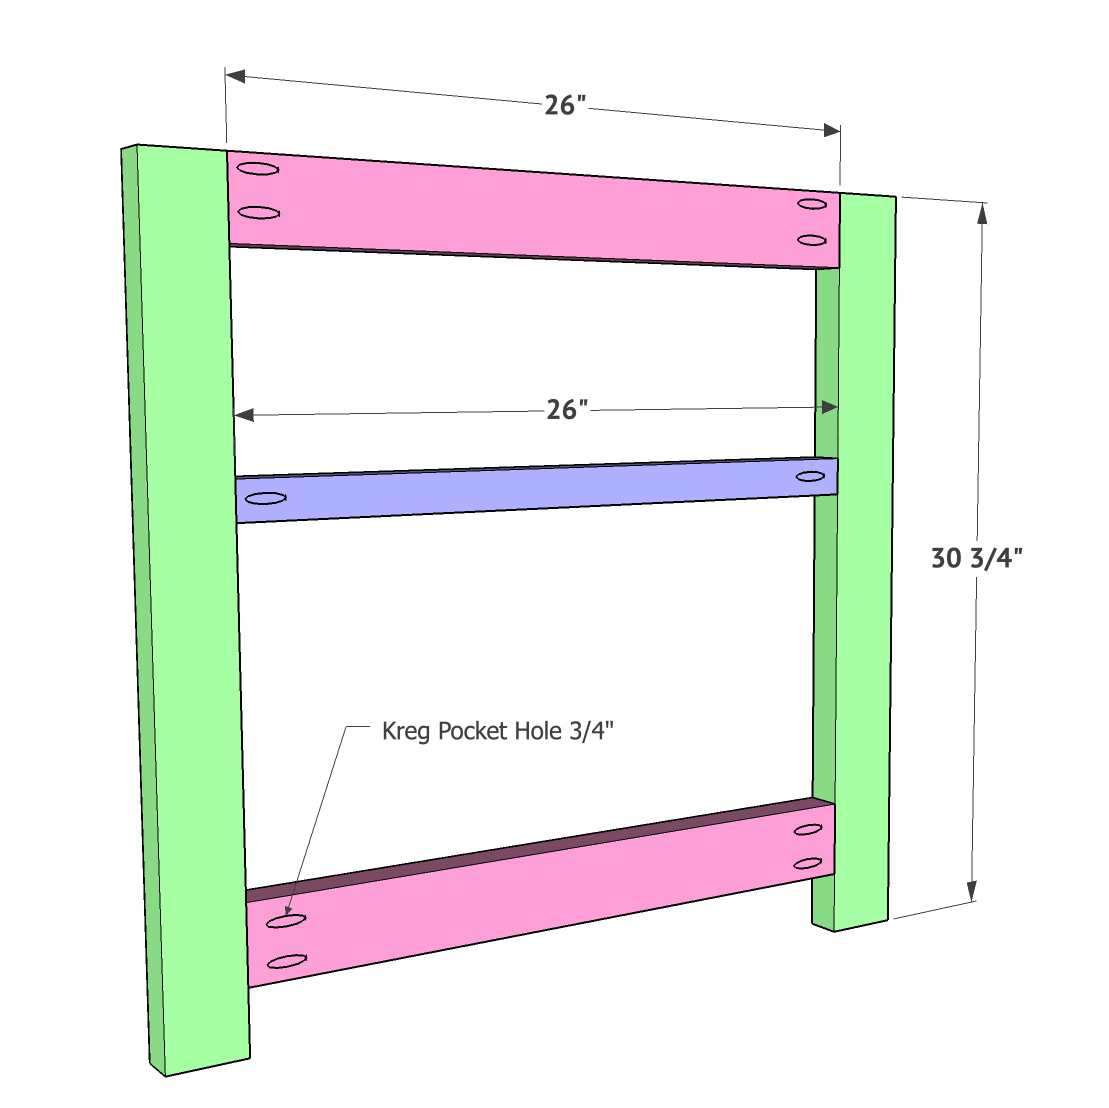
Build the front face frame next. This is identical to the back face frame, but you will also add a 2×2 board which will create the face frame for the drawer. Attach the horizontal boards to the vertical boards using wood glue and 2.5” pocket hole screws through 1.5” pocket holes.

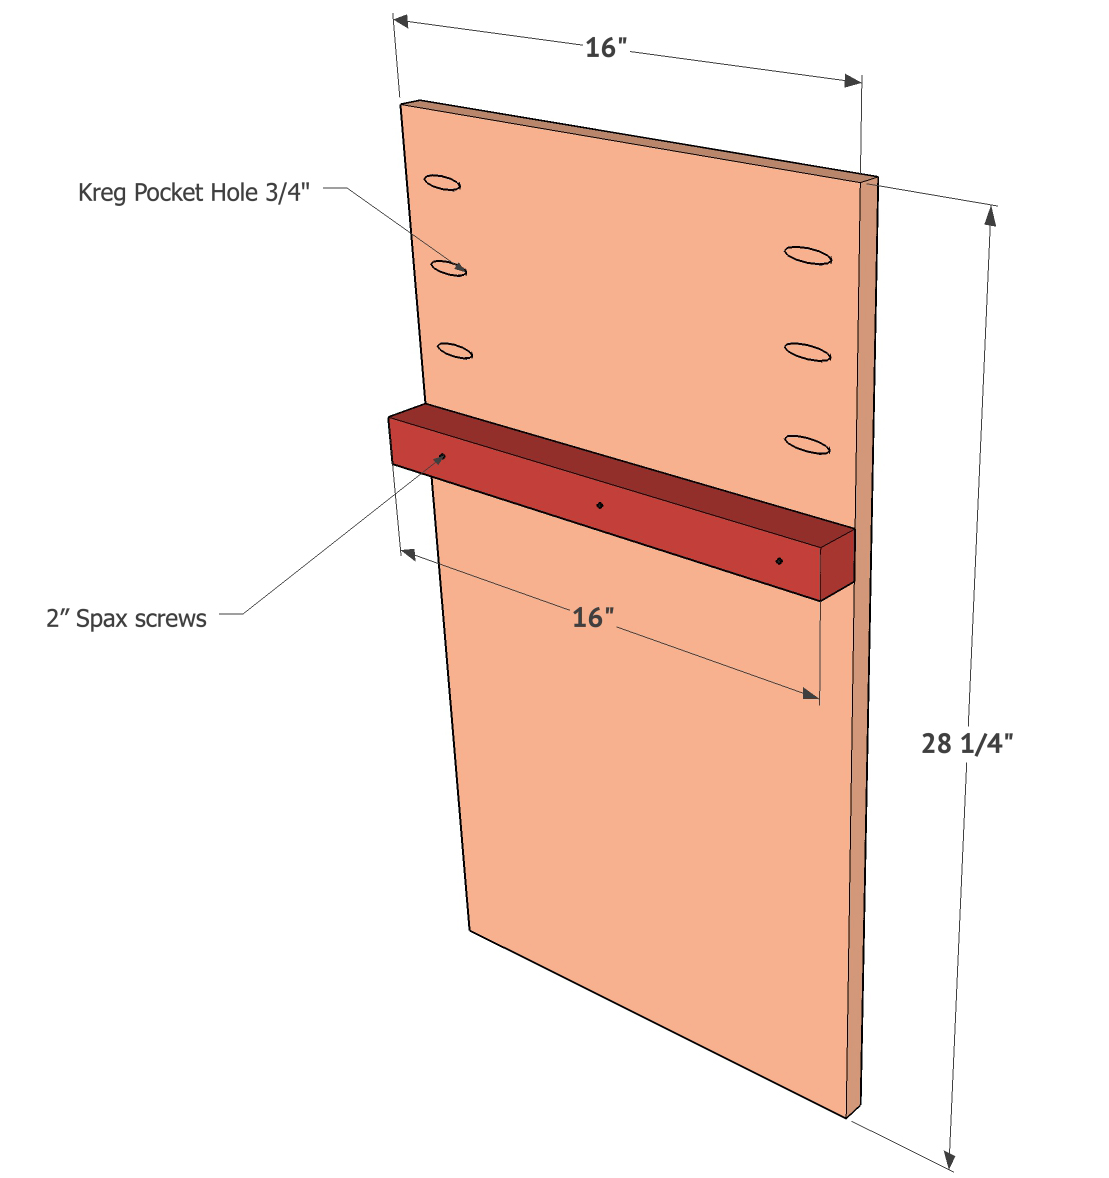
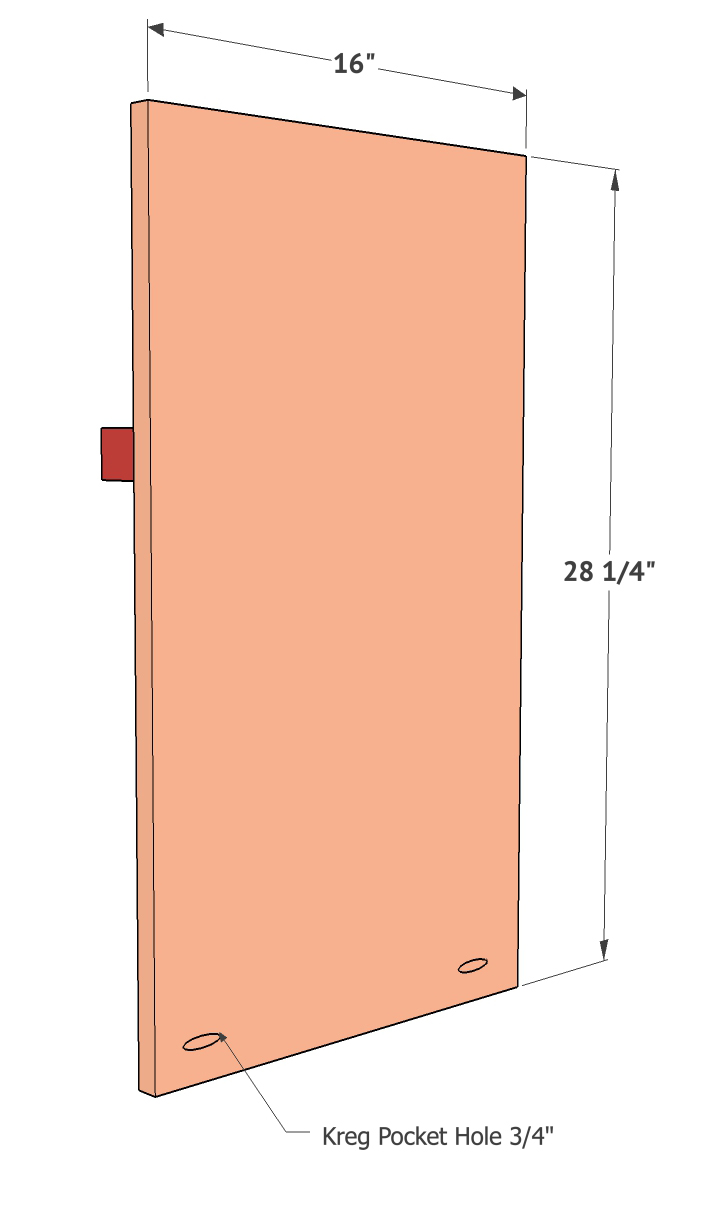
Now build the sides of the nightstand. This is 3/4” hardwood plywood. Add 3/4” pocket holes on both sides of each piece. Note the placement of the pocket holes so that they will be covered in a later step. Attach the 2×2 board to each piece using wood glue and 2” Spax screws.

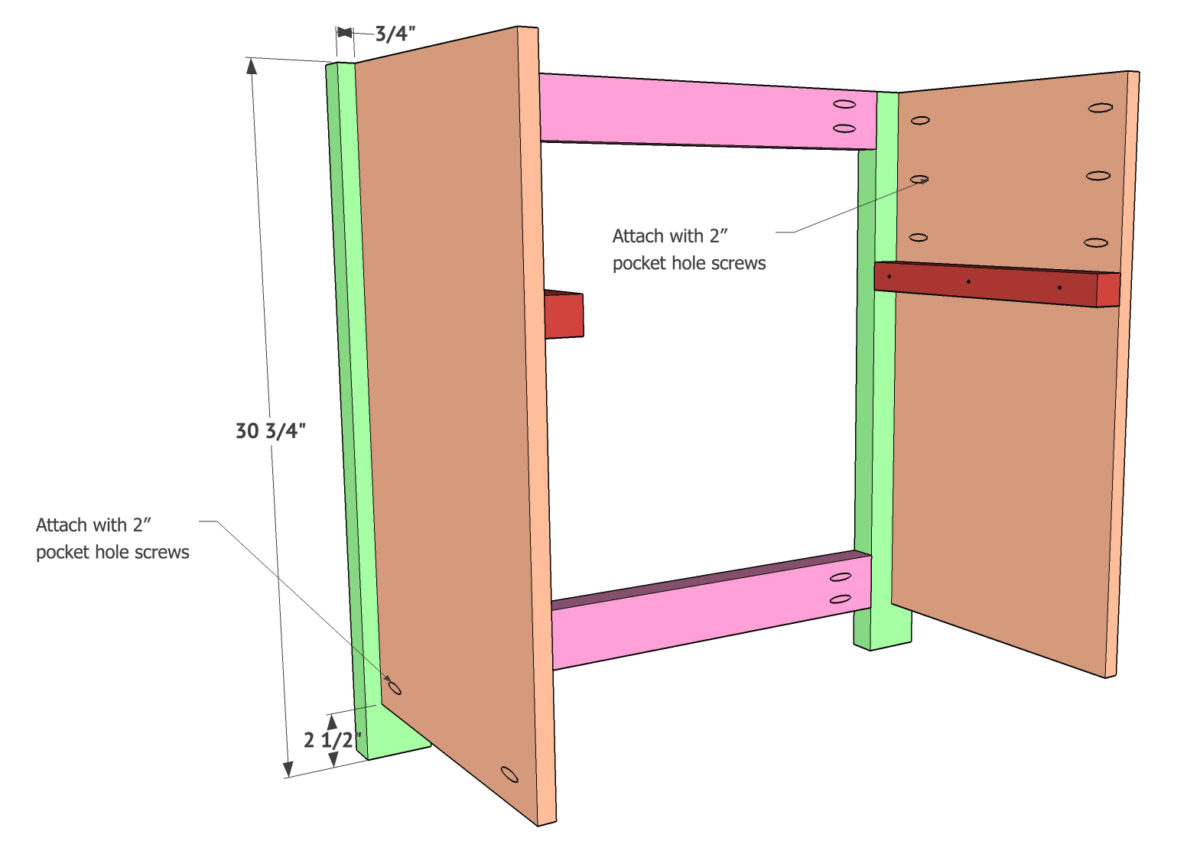
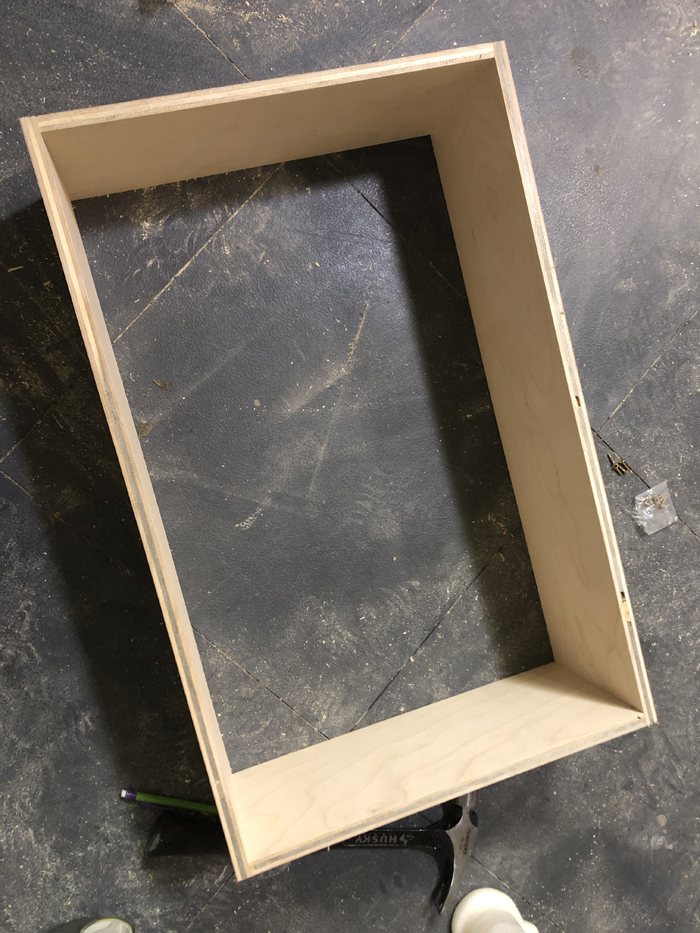
Attach the sides to the back face frame using wood glue and 2” pocket hole screws through the pocket holes on both sides of each side and into the face frame. The top of the sides will be flush with the top of the face frame.
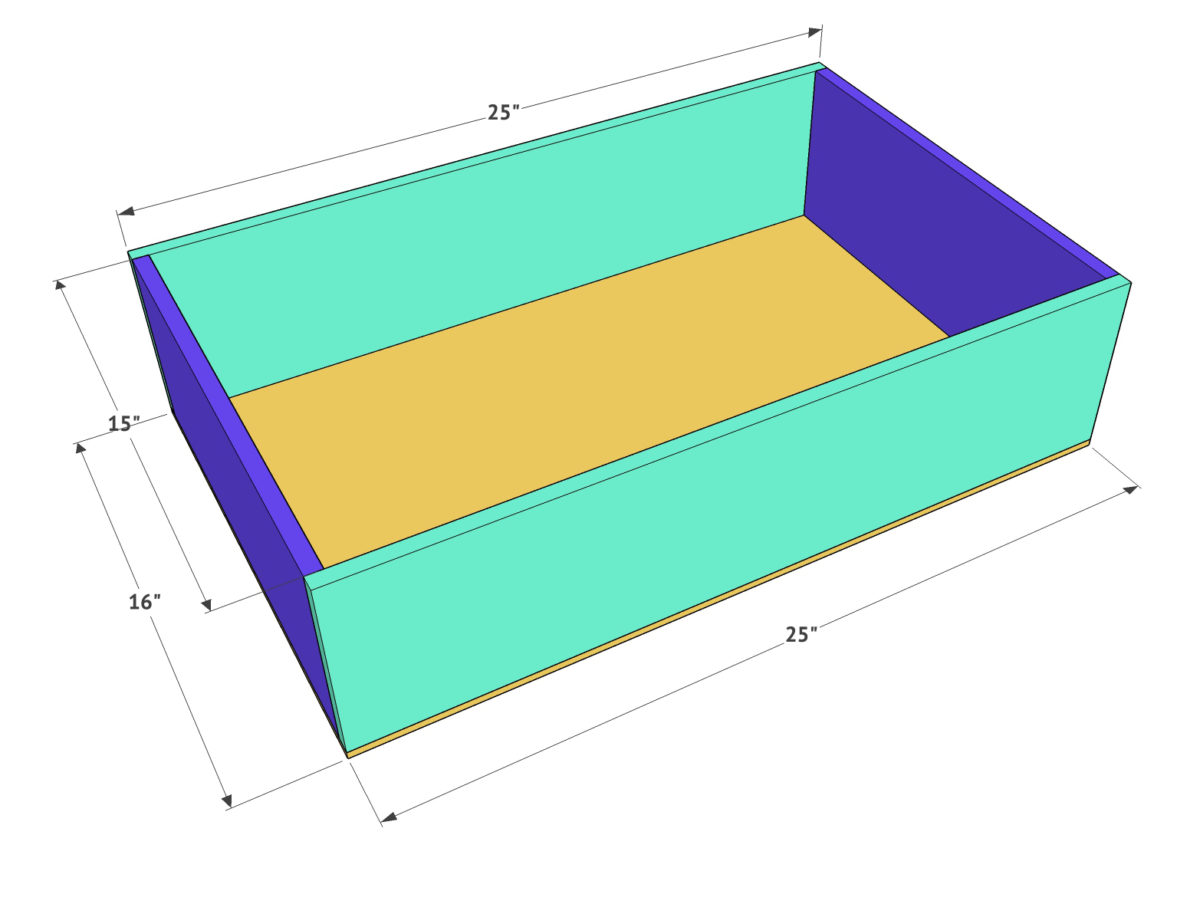
Next attach the base of the nightstand. This is also 3/4” hardwood plywood. Add 3/4” pocket hole around all edges of the bottom of this board. Attach it to the sides and face frame using 2” pocket hole screws into the face frame and 1.25” pocket hole screws into the sides. Make sure these holes face down, and this board should line up flush with the base of the sides and frame.

Attach the front face frame the same way you attached the back. This will attach through the sides as well as on the base of the nightstand.

Build the drawer next. This is 1/2” hardwood plywood that is ripped down to create the drawer sides. Attach each side to each other using wood glue and 1.25” nails. Then, attach the base of the drawer using wood glue and 3/4” staples or nails. The base of the drawer is 1/4” hardwood plywood.

For help attaching the drawer slides and installing the drawer, you can watch the video or check out this post where I walk you through it.
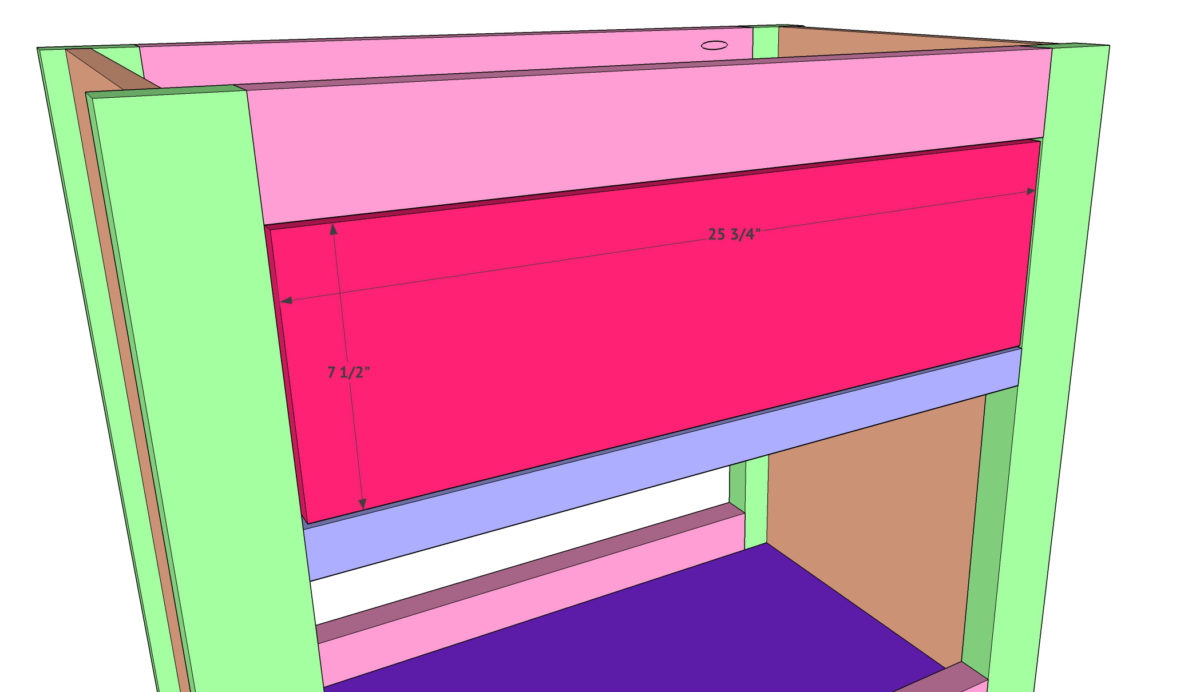
Once that is done, attach the drawer face. This is also 3/4” hardwood plywood cut to size and attached with glue and nails through the inside of the drawer and into the face.
Attach the side trim pieces using wood glue and 1.25” brad nails through the trim and into the top and bottom of both sides.
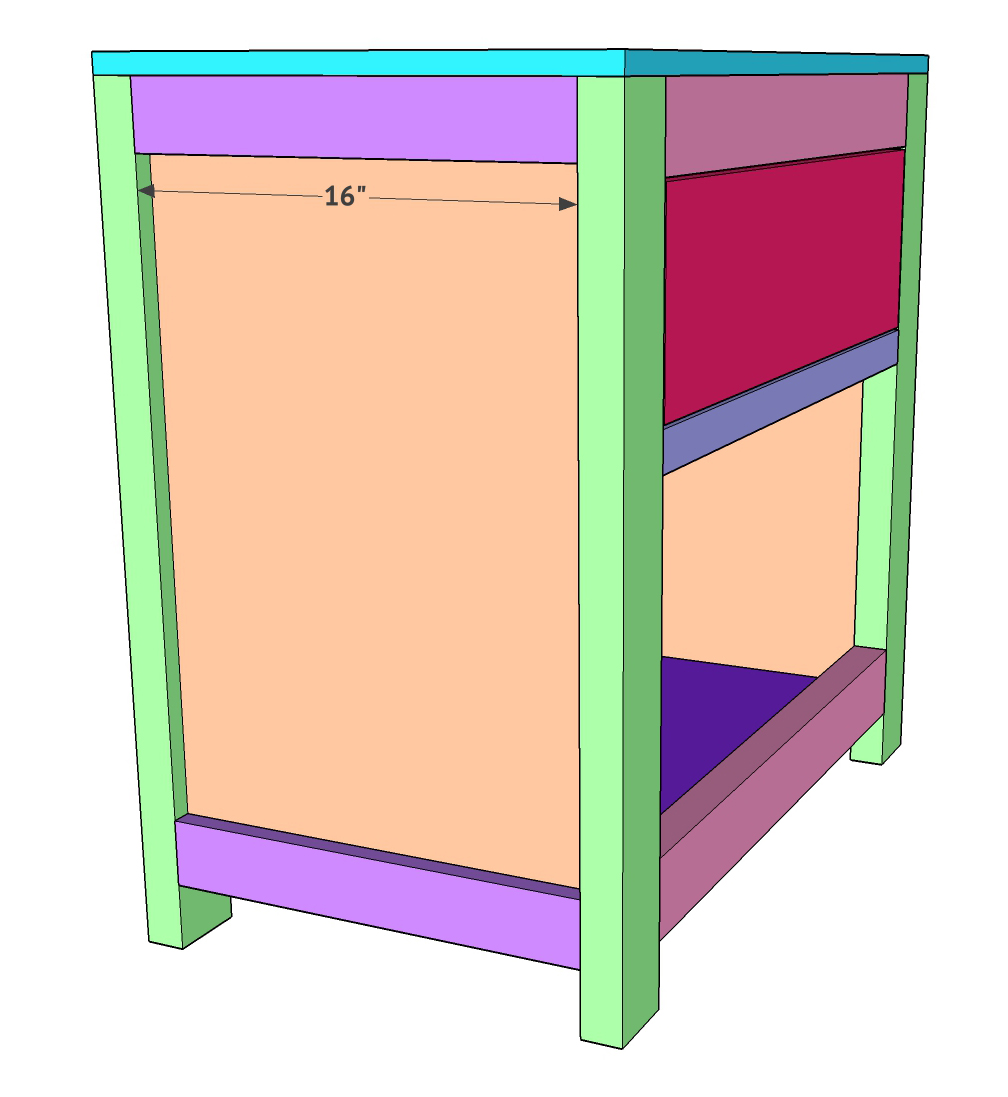
The top of this nightstand is a laminated pine project panel. These can be found at the hardware store on the same aisle as pine boards, and come in several different sizes. I used a 24” x 36” panel and used the table saw to cut it to exact size. Attach the panel using wood glue and 1.25” brad nails through the panel and into the base of the nightstand.
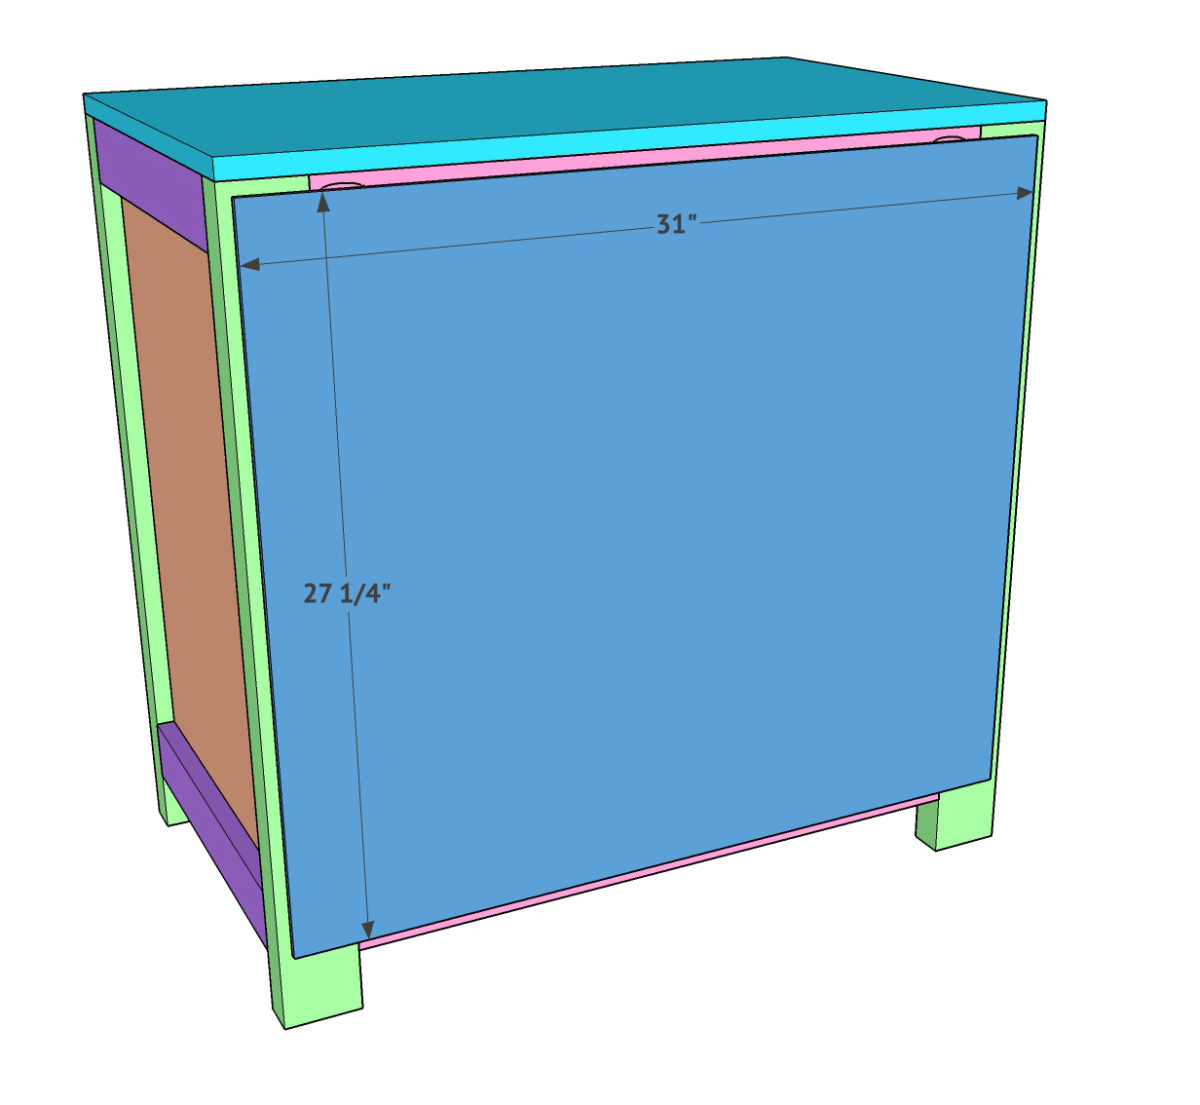
The final step of building the nightstand is attaching the back. This is 1/4” hardwood plywood. Attach it to the back of the nightstand using wood glue and 3/4” staples or nails.
I used Briarsmoke finish on this nightstand. You can see it HERE!
The drawer pull is my FAV and I found it super inexpensive HERE!
The drawer slides I used are found HERE!
Make sure to share yours with us on social media! Use #shanty2chic so that we can see it and share it!
Happy Building!


I would like to make the complete bedroom set (dresser, nightstand and bed). I found the dresser and nightstand but I do not see that plans for the bed frame/headboard. Can you advise if they exist and I am just overlooking it? Thank you
What is the drawer height?
I would like to know how far down you attach the 2×2 board to each 3/4” hardwood plywood piece when using wood glue and 2” Spax screws?
7 3/4”. I found the measurement when I downloaded the plans.
Only the 26in 2×2 is 7 3/4” down, on the front face frame. It does not align with the 2×2 cleats that are attached to the side 3/4 boards.
The downloaded plans show 9 inches down from the top of the 3/4 board.
I’m super excited to start this project, but will be making it with slightly smaller dimensions. I noticed a few missing points when going through the plan.
I think the laminated panel that makes the top was left off of both the cut list and the supply list.
It was also slightly confusing on the drawer because the colors don’t match up to what is pictured on the cut list.
Looking forward to starting this project!
The link for the drawer pulls and drawer slides are not working. Could you please repost?
The drawer pulls now link to a barn door. Is there a new link to find the pulls?
On the youtube video, it links to barn door handles, which is correct. That is what they used at the drawer pulls. They just turned them to run left to right, instead of top to bottom.
I love the stain. What is it?
Briarsmoke
What is the drawer height?
Do you happen to know what the total cost of making this was?! So cute!
I know this is several months old, but I made one last week with oak and the cost for me with all materials was about 65 bucks.
Nice, cool will try it one of these days. First I need the wood sawed and seasoned
Did you use wood conditioner before staining? Or did you not use it on purpose to get that roa rustic look?
Do we have to do poly after the stain ?
I also have the question how low from the top are the 2×2 cleats on the inside of the two sides? I don’t see that anywhere on the printable plans or the above instructions. I can see, however, on another photo that there is a 26″ 2×2 on the front face frame that is 7 3/4″ below the 26″ 2×3 (ripped)… so I assume that’s 12.25″ down from the top? (3″ for the 2×3 , 7.75″ for the space between the two boards, and 1.5″ for the 2×2)?
I love this nightstand and plan to make the six-drawer dresser that looks like this, too!! Thanks in advance!!
At what height do u put the 2 by 2 on the inner part (cleat))
Could you tell me what, if any, clear coat you used on the side table and bed? Love the work you guys do. You’ve inspired my wife and I to start building. 🙂
What kind of hardwood did you use for
the frame & plywood? Thanks!
Its beautiful!! Thank you for the plans!