Hey friends!
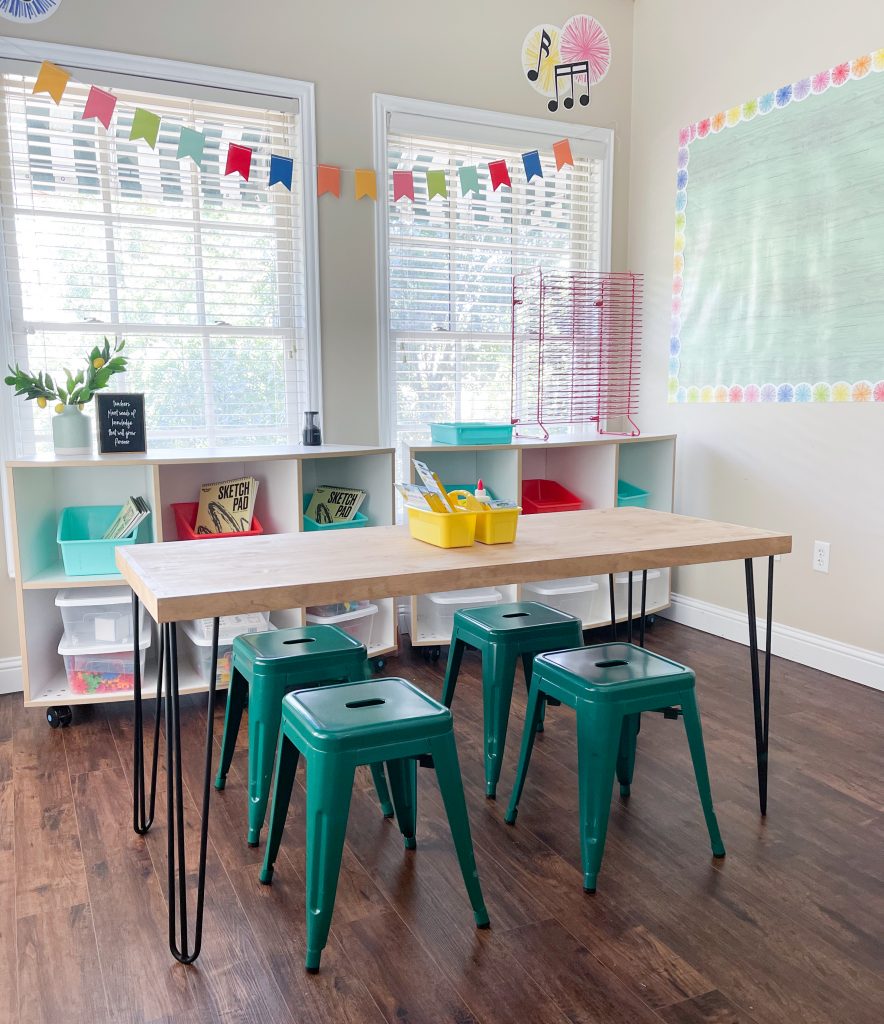
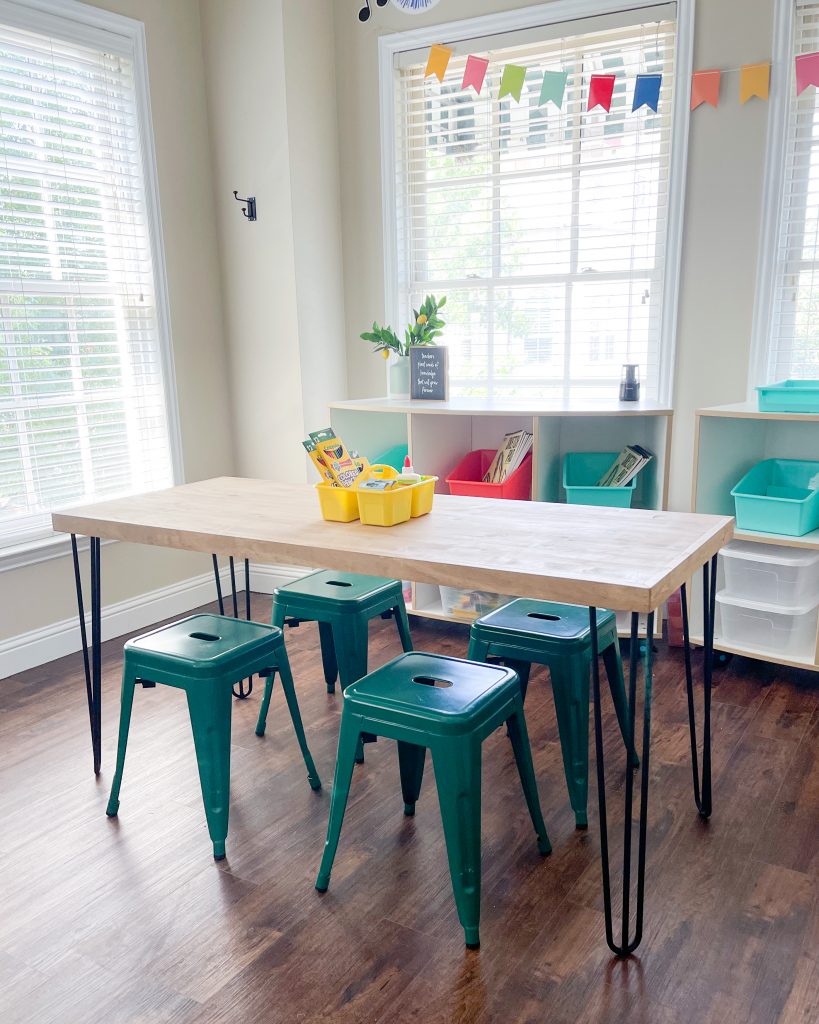
I’m sure many of y’all are like me getting everything ready for back to school. I am so thankful my kids will be allowed to attend in person this year! One of my daughters was diagnosed with dyslexia a few years back. We ran into some roadblocks when she was in public school, so we ended up placing her at a small private school that specializes in learning differences. We LOVE this school! It has been a blessing for her and our family. One of the teachers at the school was in need of some new tables. I offered to build them tables to save money and time! I love how these turned out! You can also buy different height legs to meet your needs. This makes a great desk too, and is super easy to modify the tabletop size. Look how cute it is in her room!
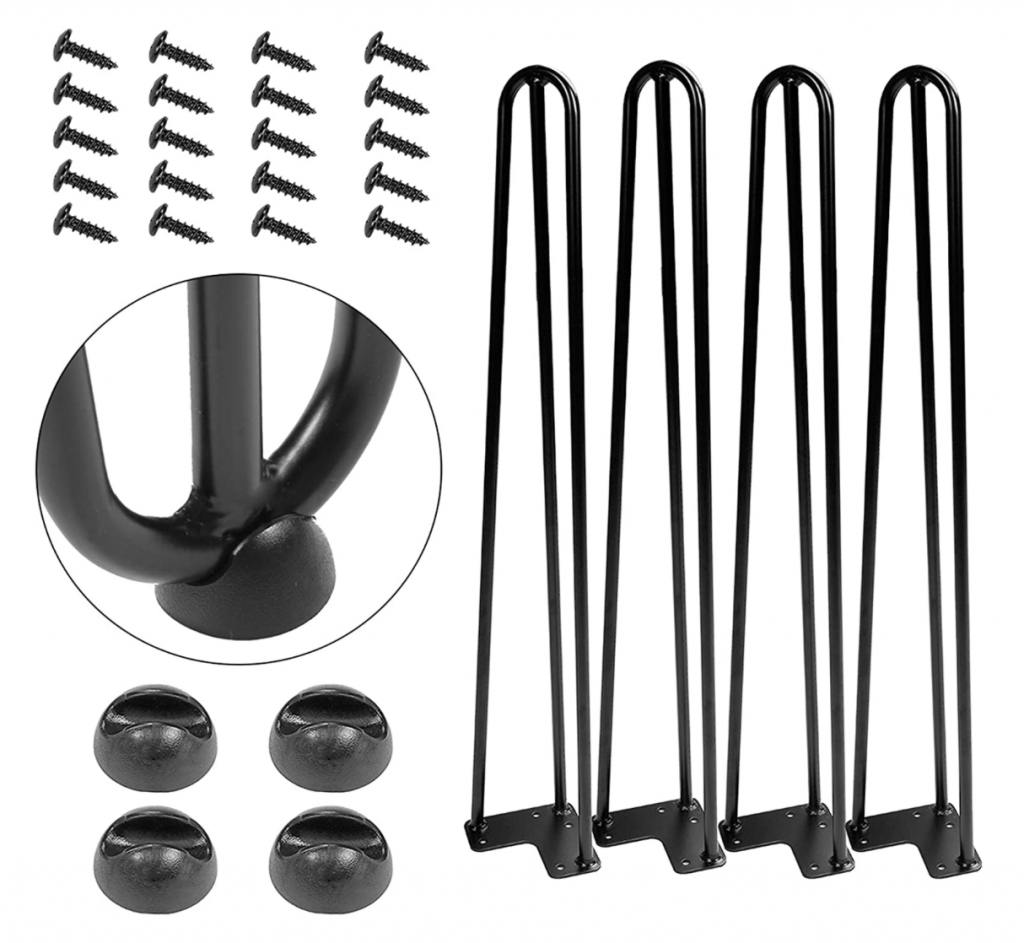
You can download and print the FREE PLANS by clicking HERE!! First, I’ll start with the legs. I found them on Amazon HERE. They are great! They feel heavy duty for hairpin legs, and they are only $10 a leg… Yes, please! I bought the 28″ size, but they offer multiple heights.
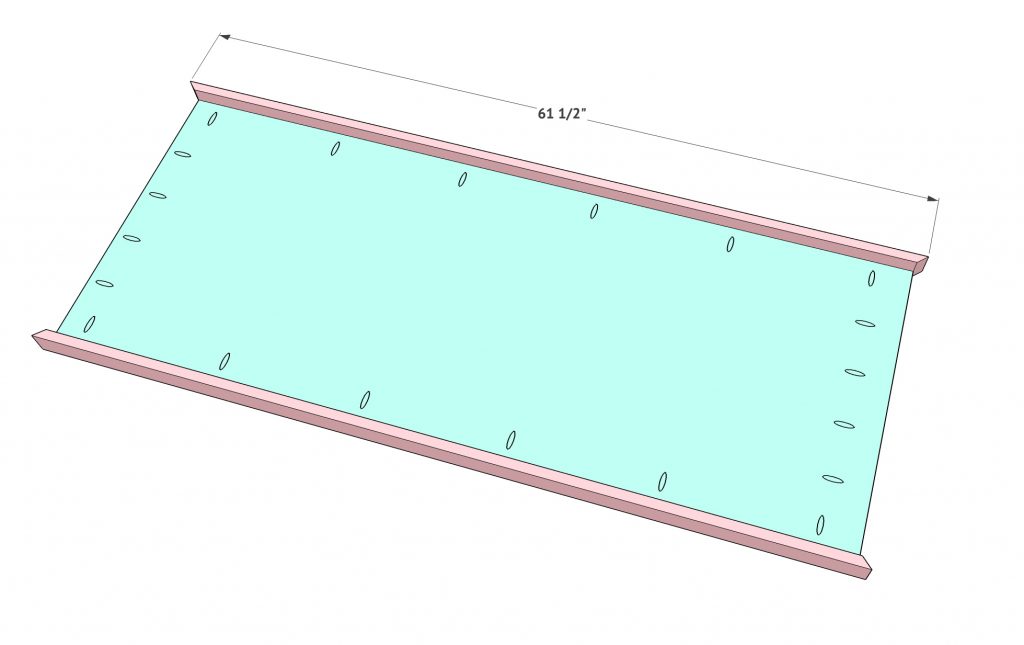
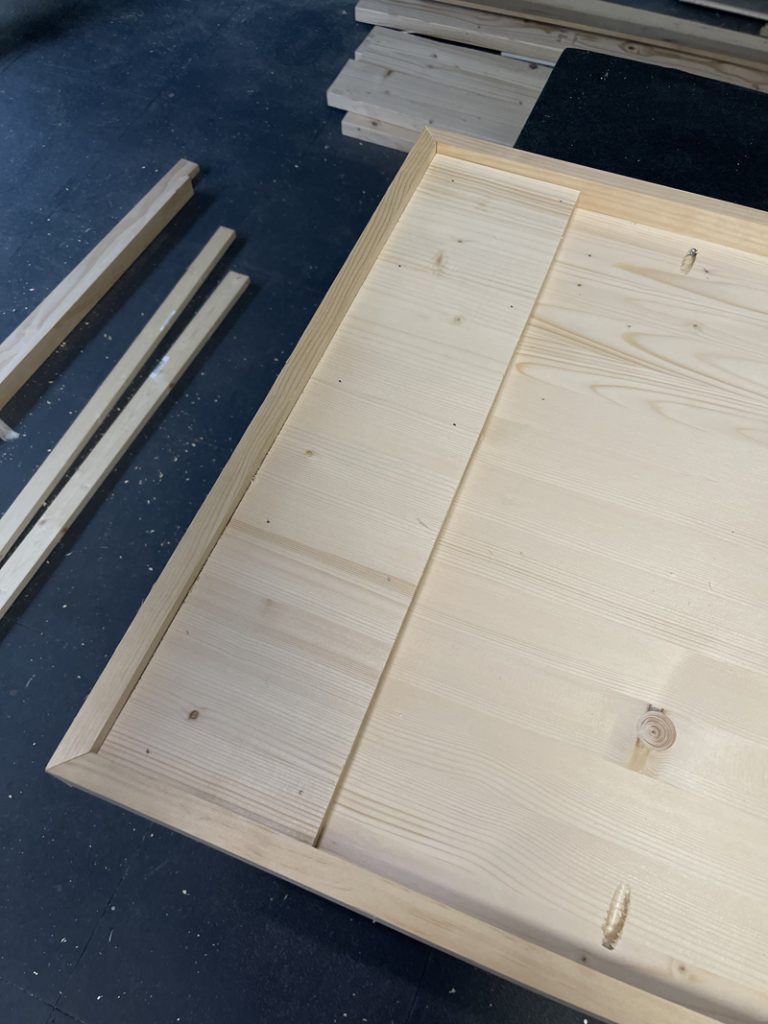
With wood prices still high, I wanted to design these the most affordable way possible. I decided to use a laminated pine project board to start with. Most hardware stores sell these in different sizes. They are typically on the same aisle as pine dimensional boards. I bought the 24″ x 72″ panel and it was $40.
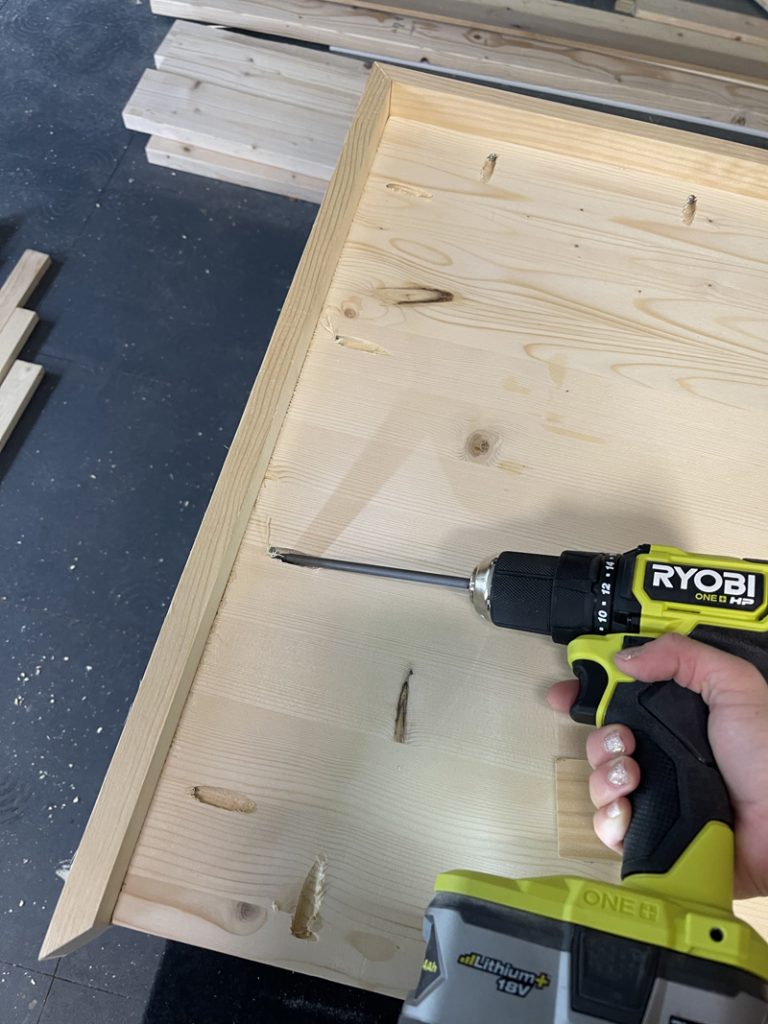
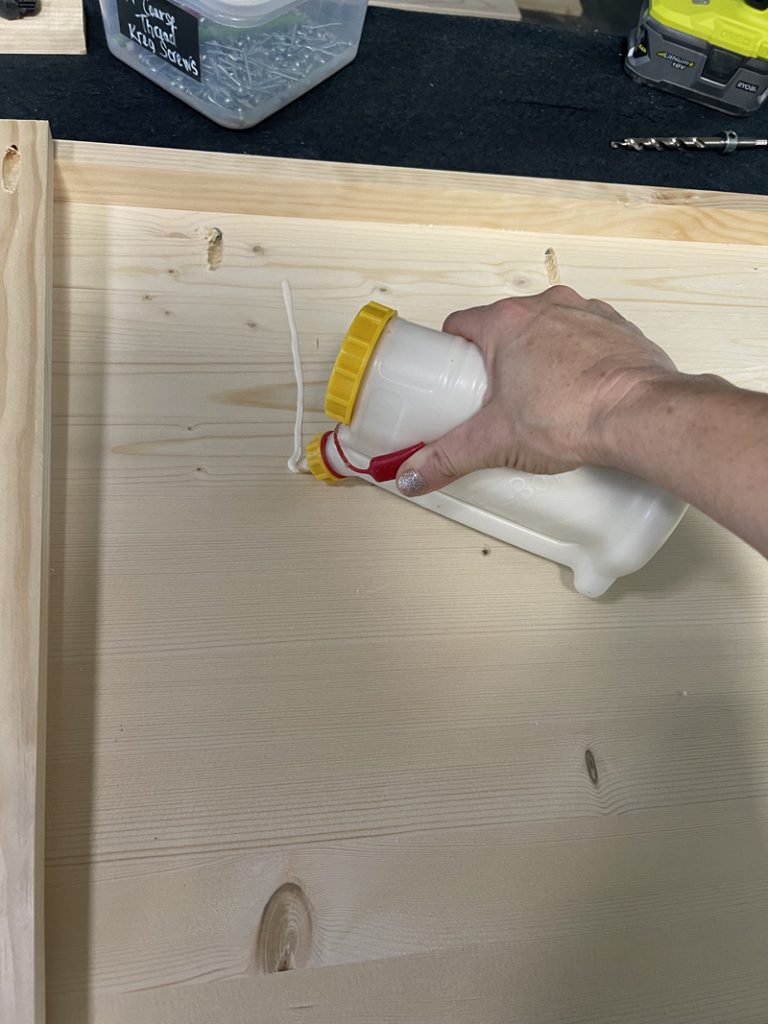
I cut mine down to 5′ using my table saw to fit the size tables she needed for her room. Then, I started adding my pocket holes. The panels are 3/4″ thick, so I set my Kreg drill bit to 3/4″ and started making pocket holes all the way around. I used my new Kreg 720 PRO for this! LOVE this Kreg jig! It’s my favorite Kreg tool to date…. and that list is long! You can find it HERE on Amazon!

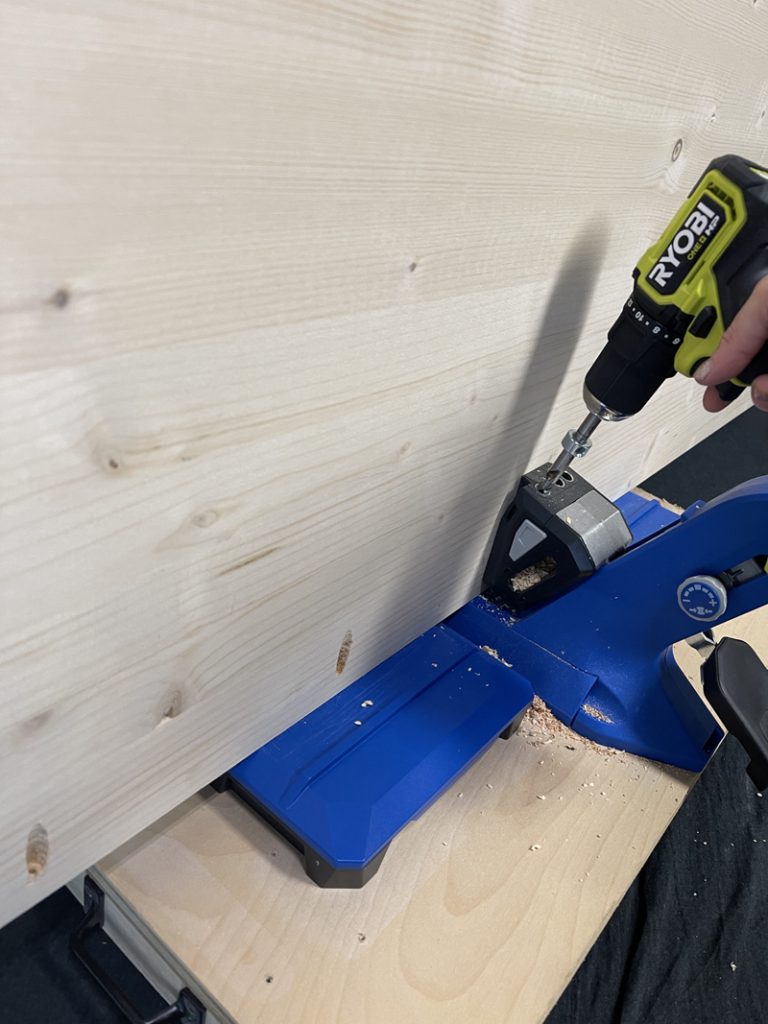
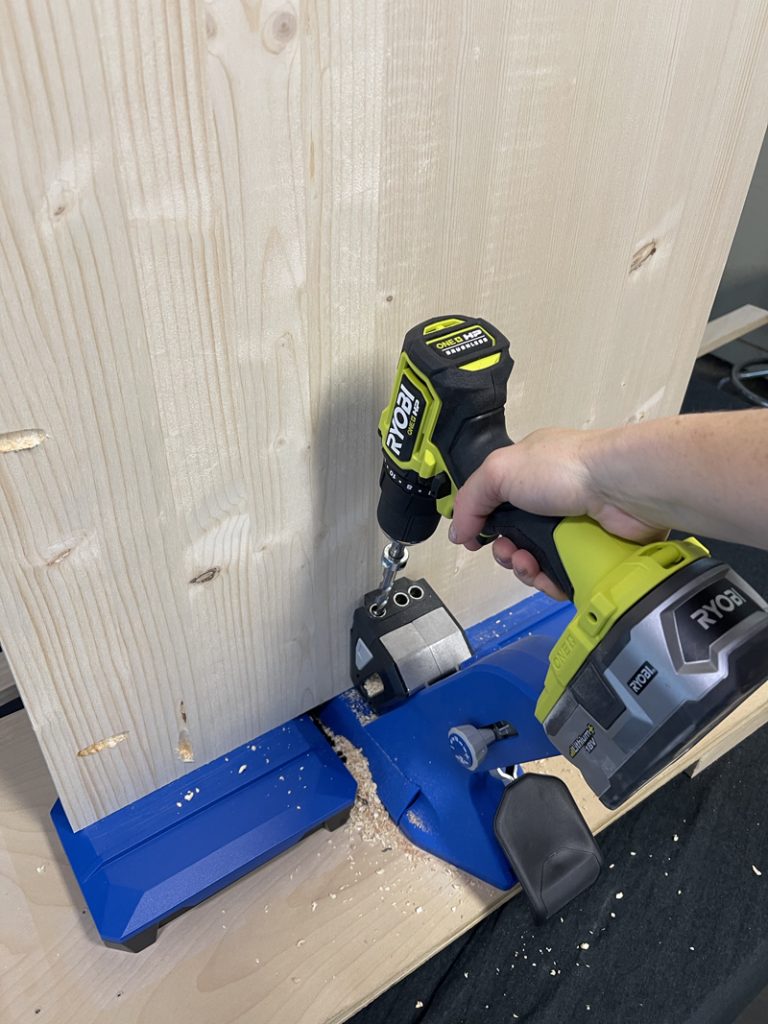
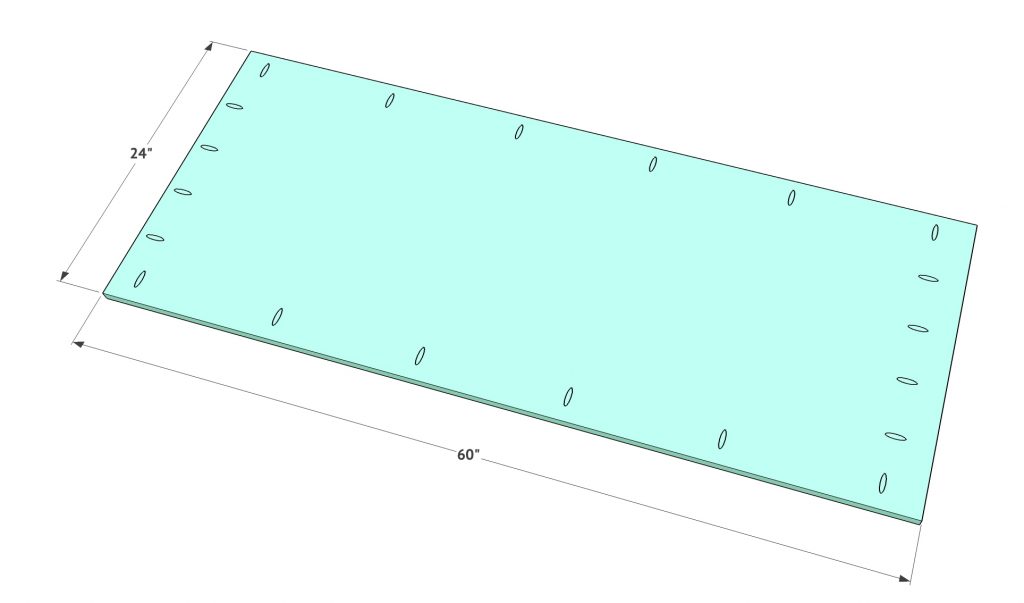
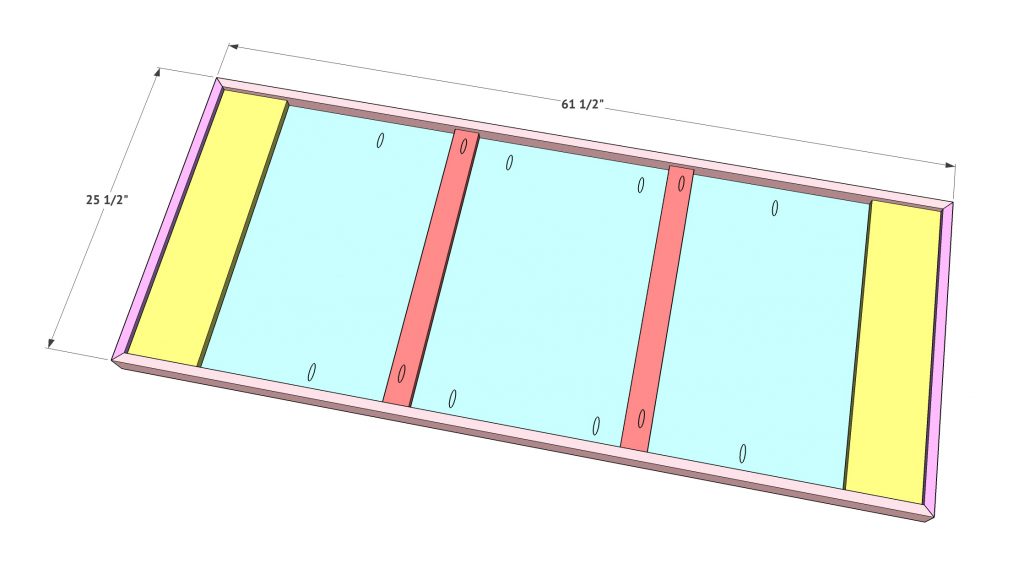
length and width. Add 3/4” pocket
holes around all sides of the project
panel.
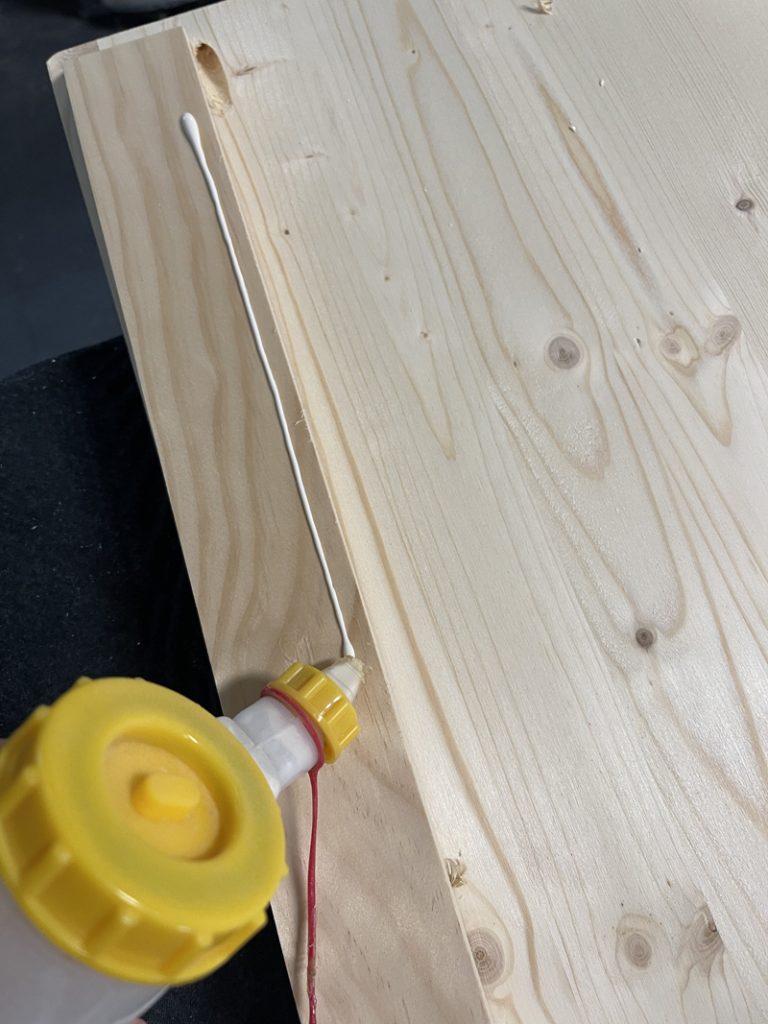
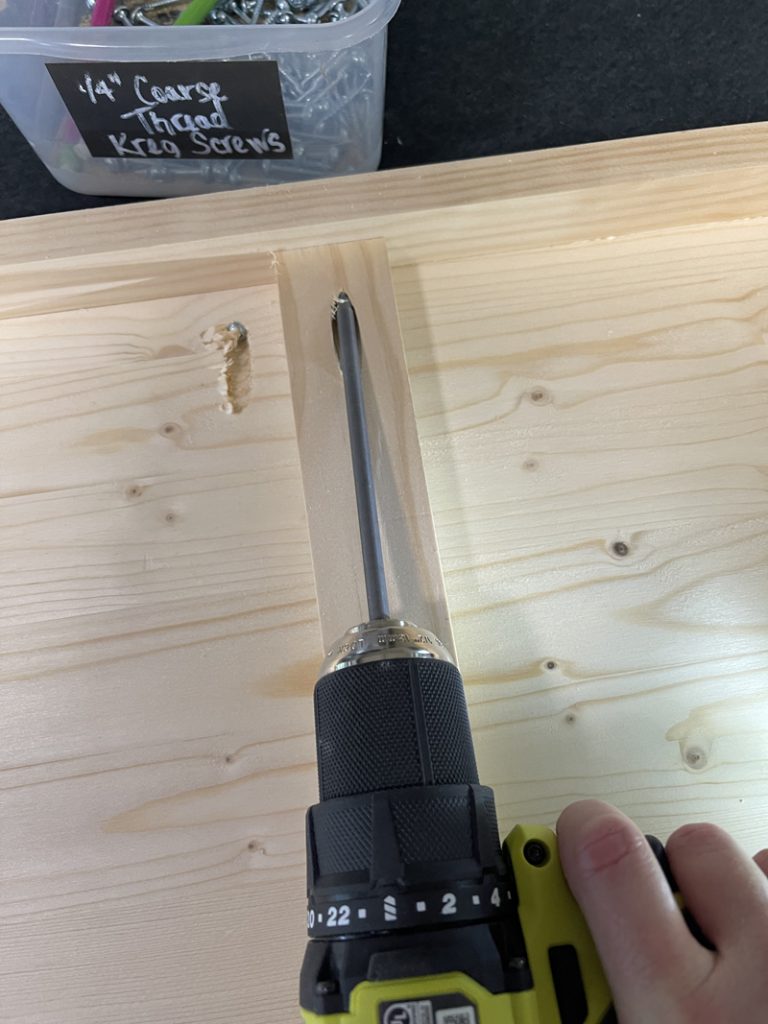
I wanted to give the tabletops a beefier appearance without adding a ton of weight (or cost?), so I ripped a 1x6x8 board down into two 2″ boards to create the trim. I measured and cut the long trim boards first. Each angle comes to a 45˚ angle. Attach the trim boards using a line of wood glue and 1.25″ Kreg pocket hole screws. You can see our favorite Glubot tool HERE on Amazon. It makes applying wood glue so much easier!

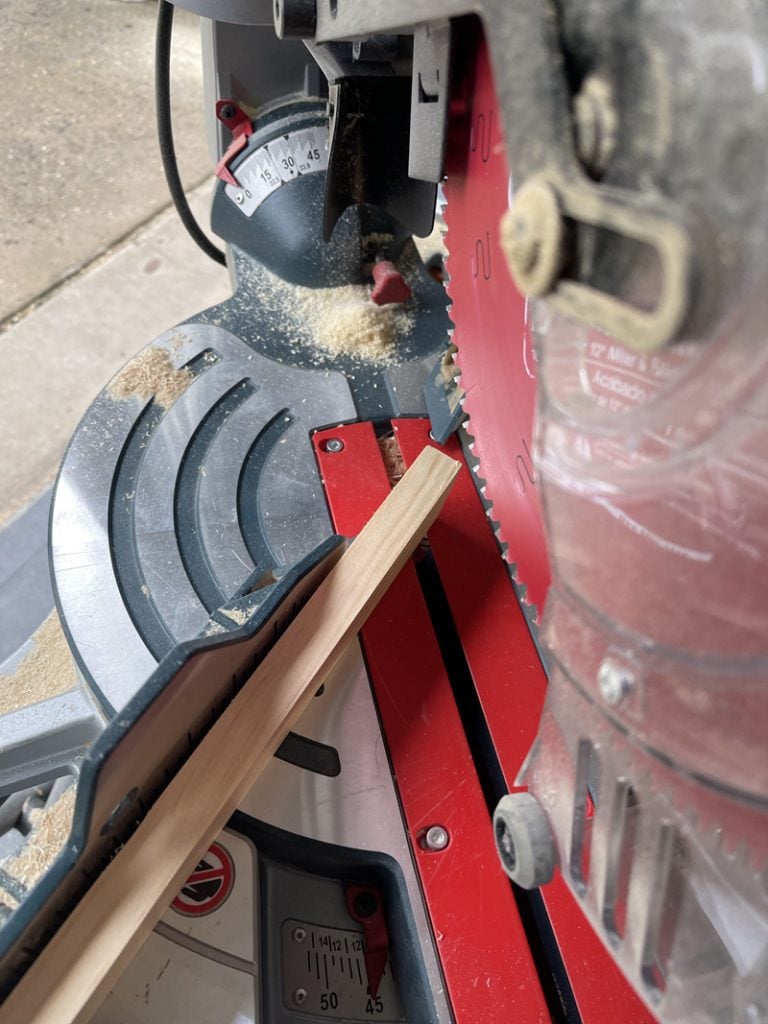

running a 1x6x8 board through
the table saw to get two 2” wide
boards. Measure and cut the long
trim pieces first. These are cut at
a 45˚ angle on each end. Attach
both trim boards using wood glue
and 1.25” pocket hole screws.
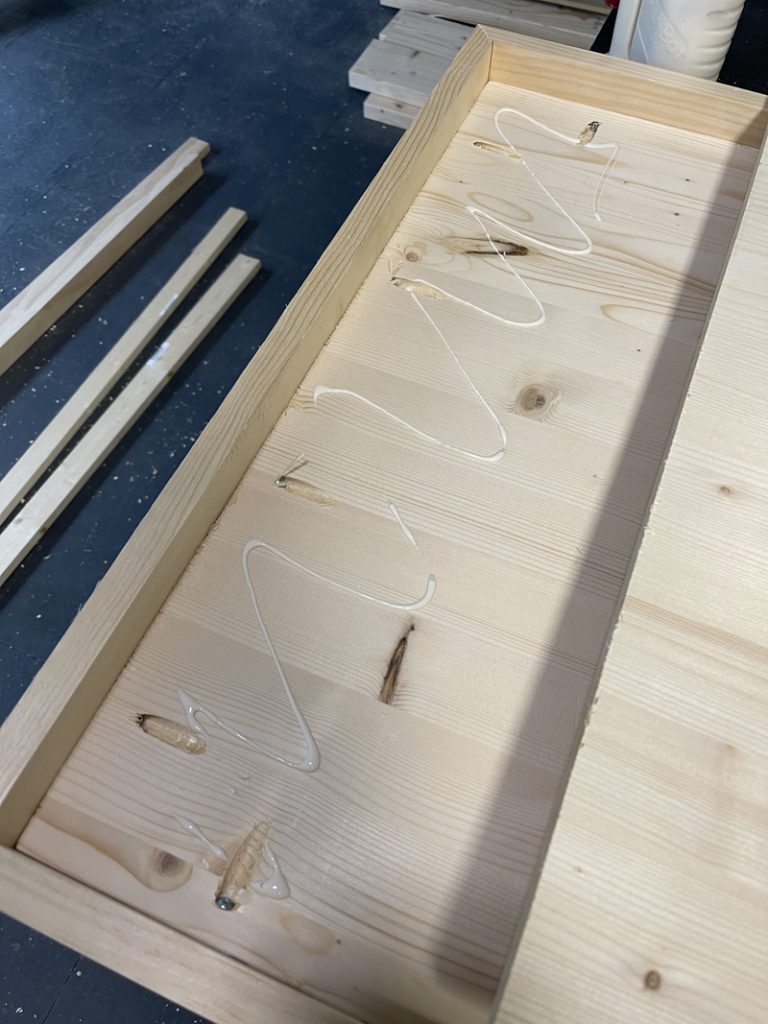
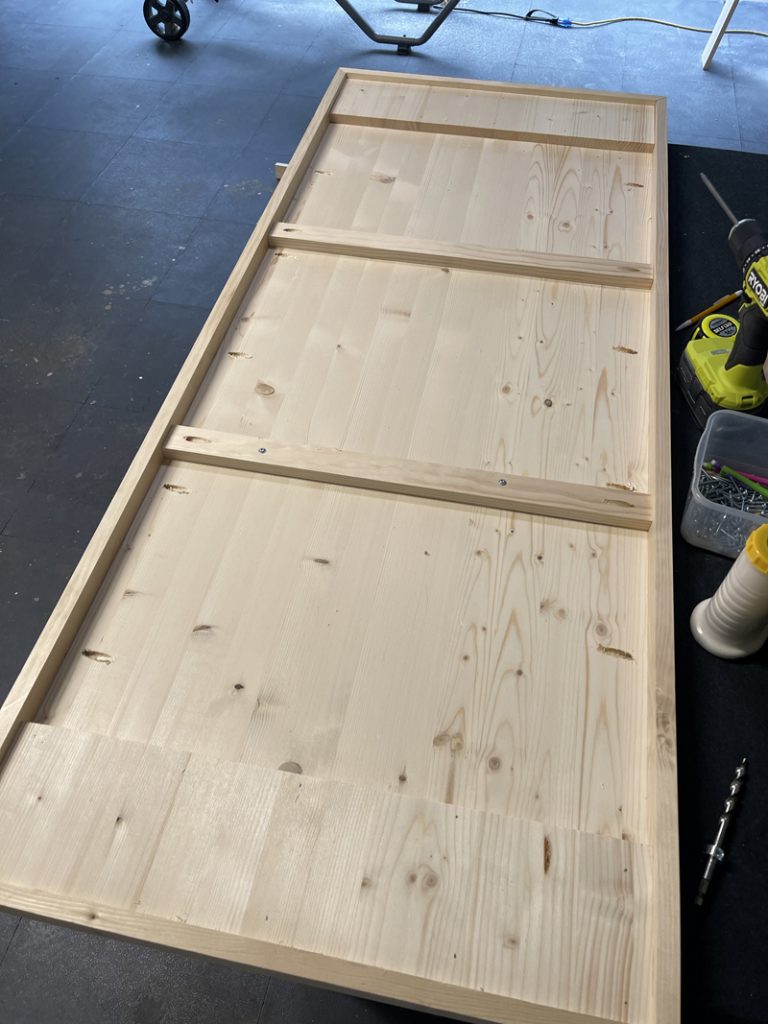
I measured and cut the shorter trim boards the same way. These are also cut at a 45˚ angle on each end. I attached them using wood glue and 1.25″ Kreg pocket hole screws.
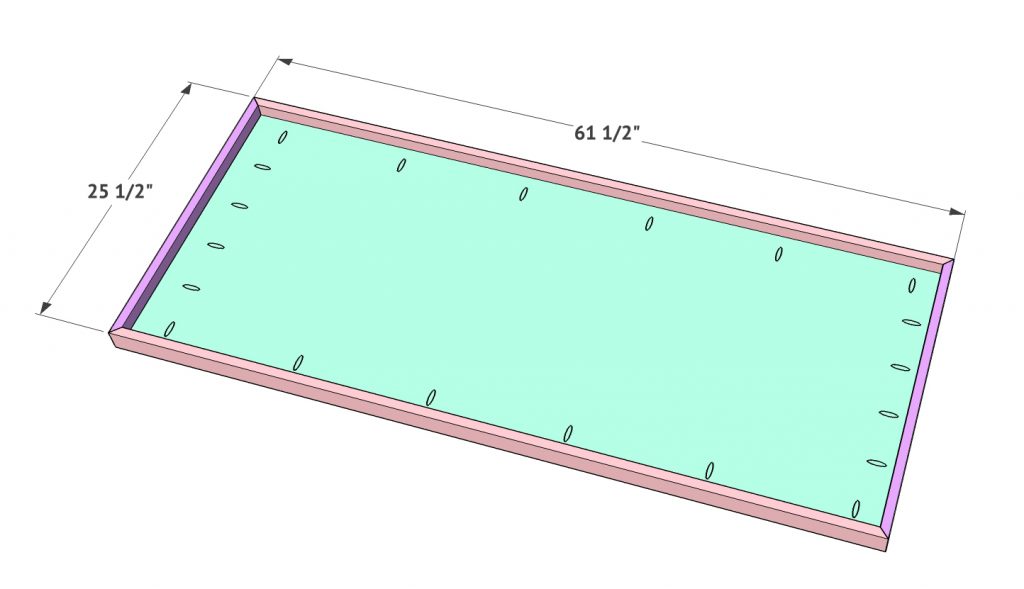
trim pieces next. Attach them
using wood glue and 1.25” Kreg
pocket hole screws.
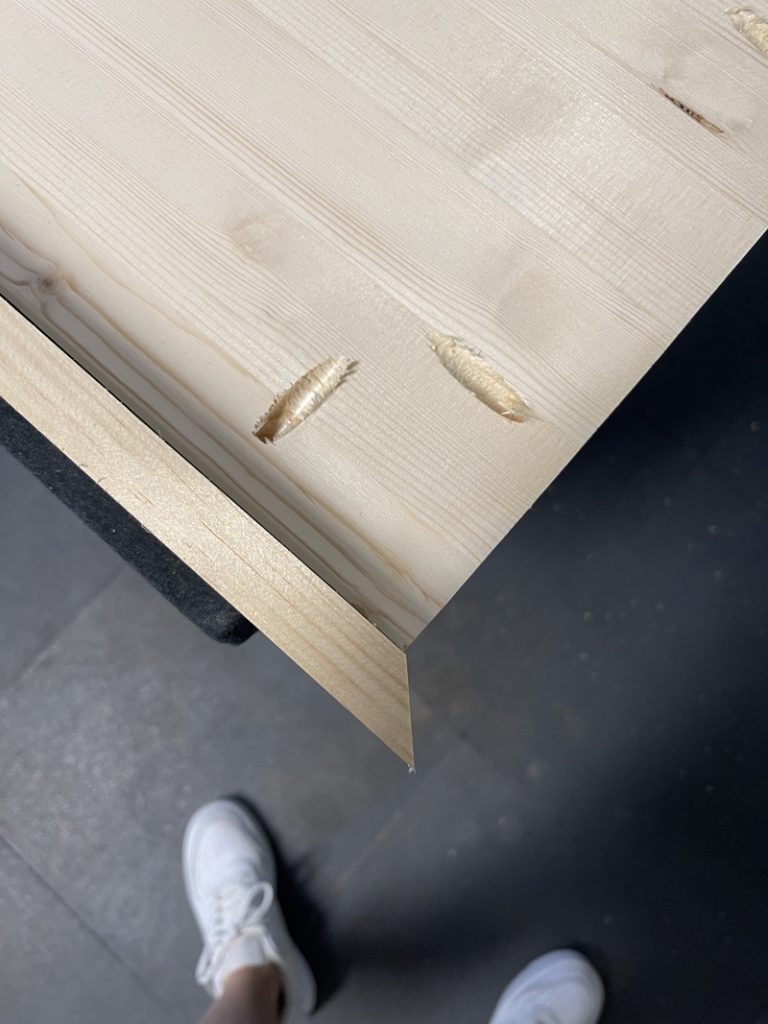
At this point, the tabletop looked like this with my trim boards cut and attached.
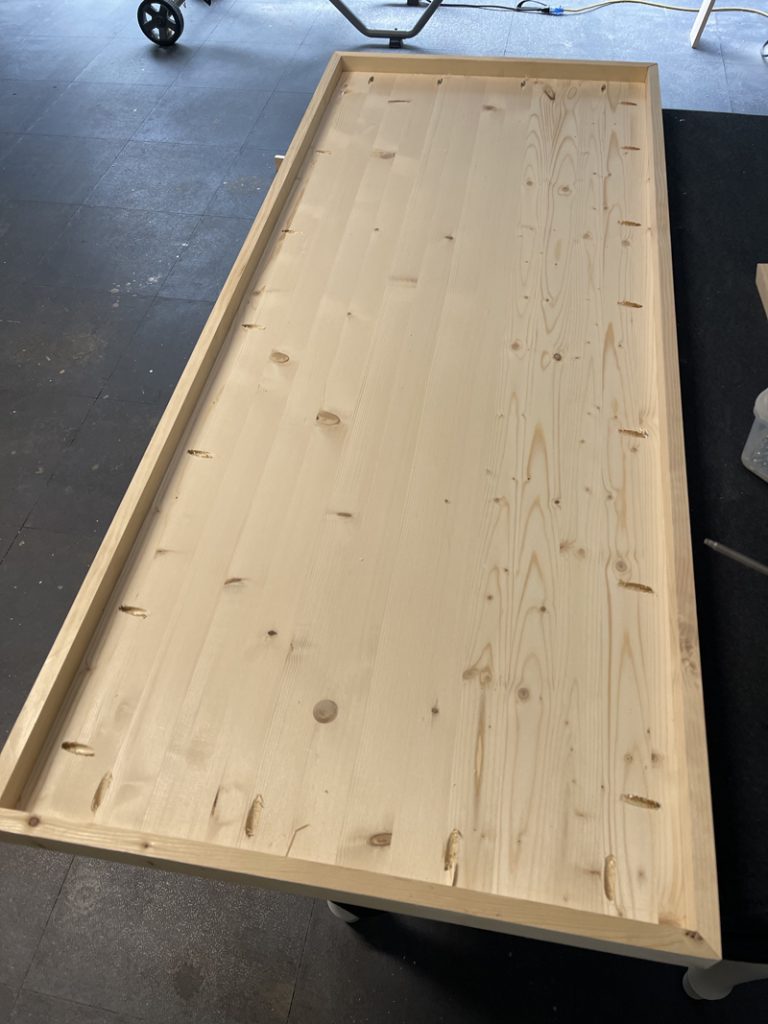
To support the table in the center, I measured and cut a 1x3x6 board into 2 pieces. These are each cut down to 24″ to match the width of the table, and I used my Kreg 720 PRO to add 3/4″ pocket holes on each end of these boards.

I added a line of wood glue on the table top and attached each support board 20″ from each side using 1.25″ Kreg pocket hole screws into each pocket hole. I then also added 2 pocket hole screws through the top of the support board and into the tabletop to help hold everything in place.


1×3 boards. Cut these to 24”
each. Add a 3/4” pocket
hole to both ends
of each board.
Attach them to the tabletop
using wood glue and 1.25” pocket hole
screws through the
boards and into the
trim of the table. Then, add screws
through the top of the support
boards and into the tabletop.
My final step was adding support boards for the legs. This will give the legs more support and allow me to use longer screws to attach them to the table top. I cut 5.5″ scraps from the tabletop project panel to create my boards, but you can also use scraps of 1×6 boards for yours. I cut them to size and attached them using wood glue and 1.25″ brad nails with my Ryobi 18g brad nailer.
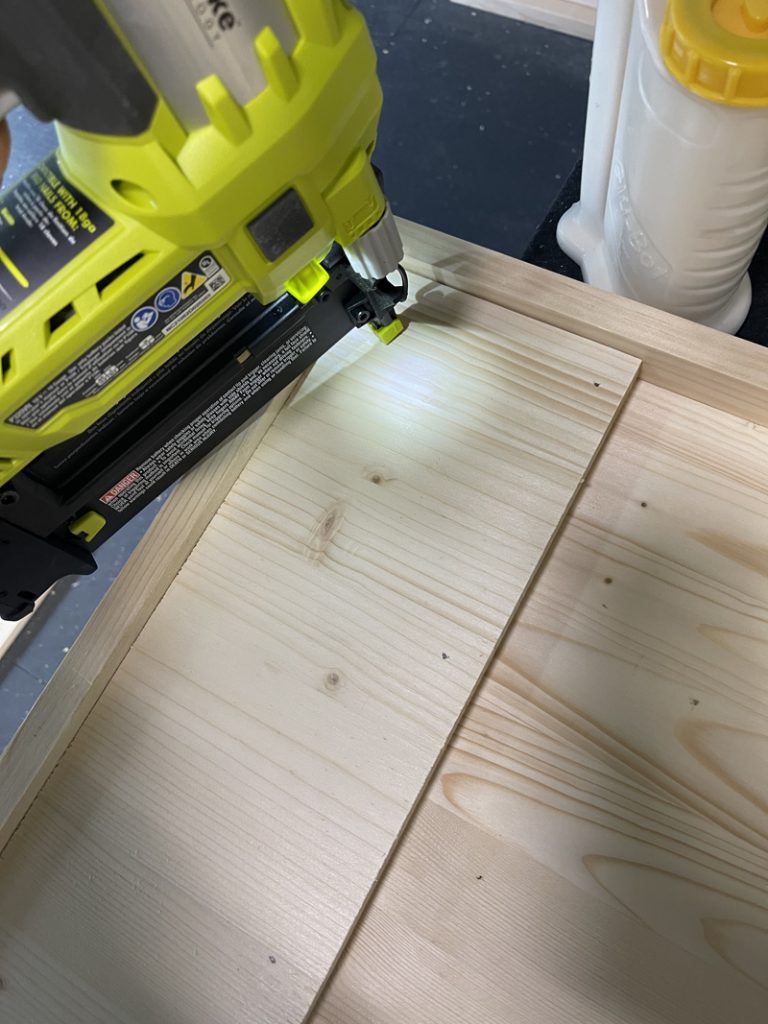
from the scrap of your project panel,
or from 1×6 scraps. These will be 24”
wide each just like the tabletop.
Attach the boards using wood glue
and 1.25” brad nails through the support boards
and into the tabletop.
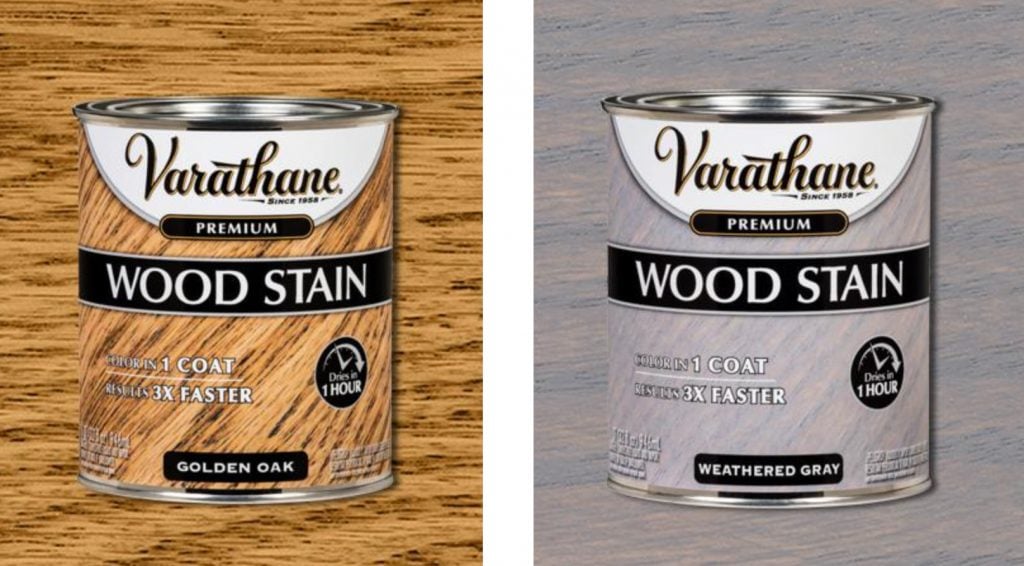
I flipped the tabletop over and added my stain and finish next. To achieve the color of the table, I mixed two different Varathane stains. I use an equal ratio of each and mix them together before applying to the table. These are the two stain colors I mixed! You can find them HERE! I love this stuff. It dries very quickly and goes on really smoothly.
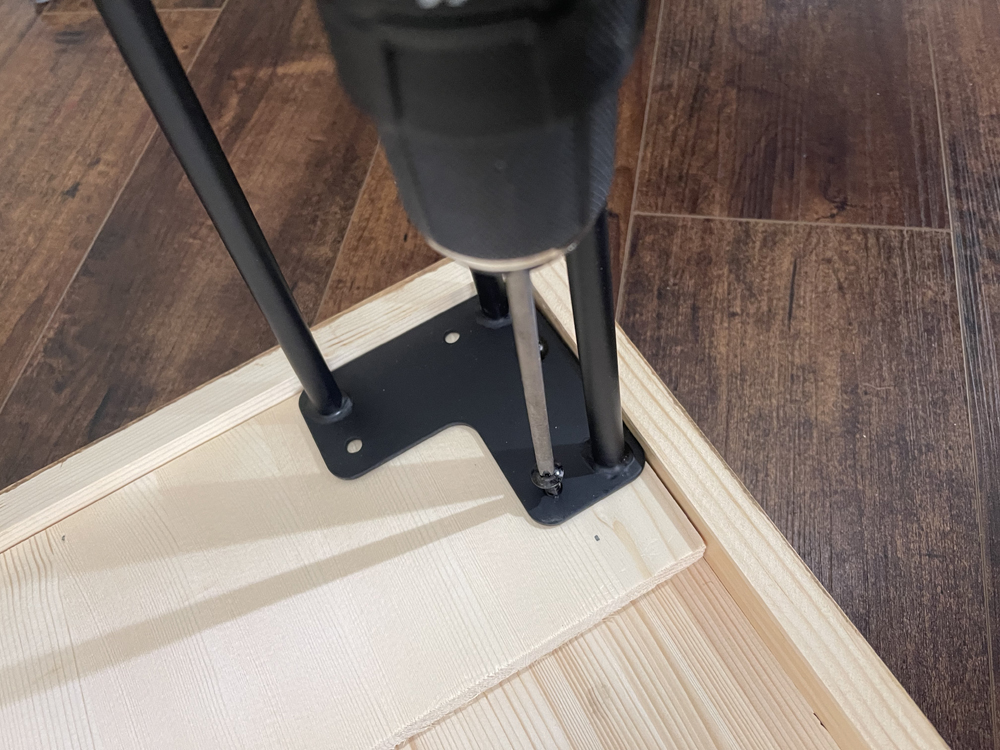
I attached the legs once I had the tabletops in the room. These come with all the hardware you need to attach.
I love how they turned out in the space! I think the kiddos and teachers will love them too! The best part… Even with crazy lumber costs, I was still able to build each of these for under $100 a piece! They would be perfect for home too, not just a school! Look how cute!
Check out our complete collection of DIY Dining Table Plans! We have something for everyone regardless of style, skill level or space!


One question I have is, what do you use to protect your stain? My table still has a rough feel about it, to be honest.
Love this table! Are the barstools the 24” ones?
My husband built me this table as a desk and I AM IN LOVE! One question I have is, what do you use to seal your stain? I feel like my table is still rough feeling!
THANKS LADIES!
Love them! My little grands just might be getting a new craft table, thanks to you.